-
Posts
994 -
Joined
-
Last visited
-
Days Won
5
rayaapp2 last won the day on September 6 2015
rayaapp2 had the most liked content!
About rayaapp2
- Birthday 01/03/1984
Profile Information
-
Gender
Male
-
Location
Roseville Ca 95661
Recent Profile Visitors
13742 profile views
rayaapp2's Achievements
-
-
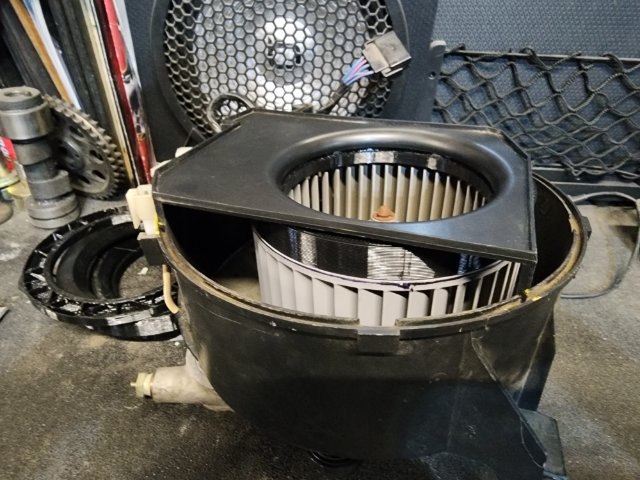
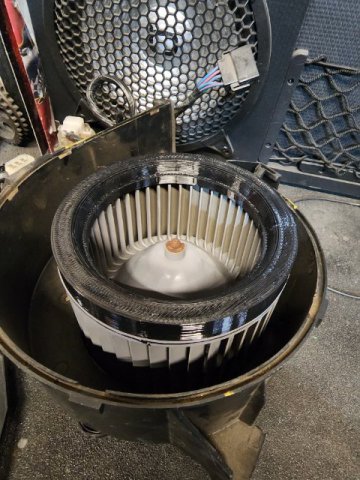
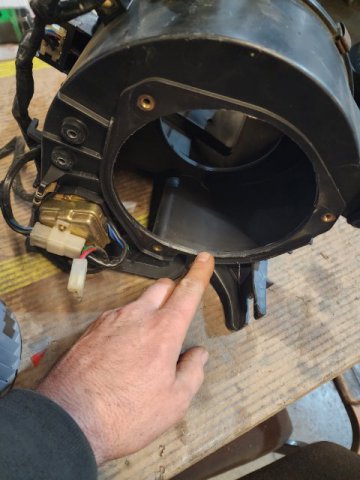
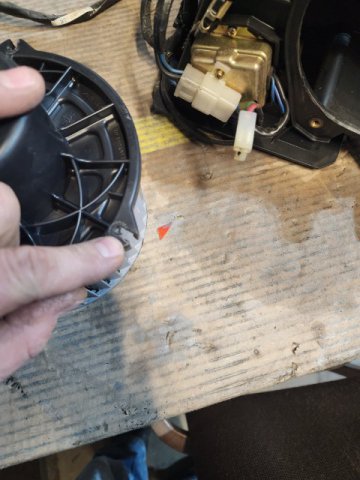
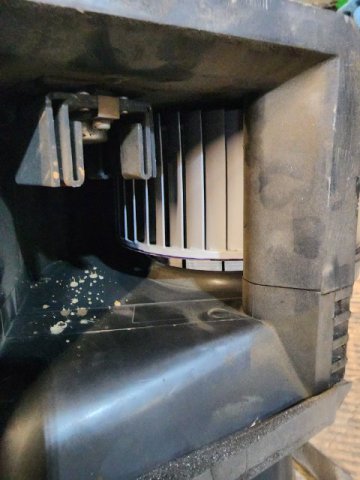
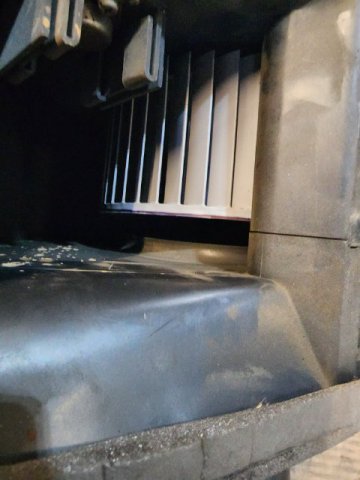
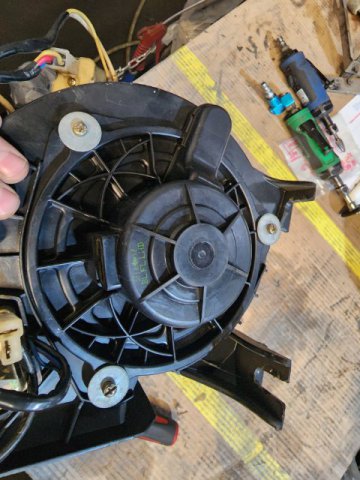
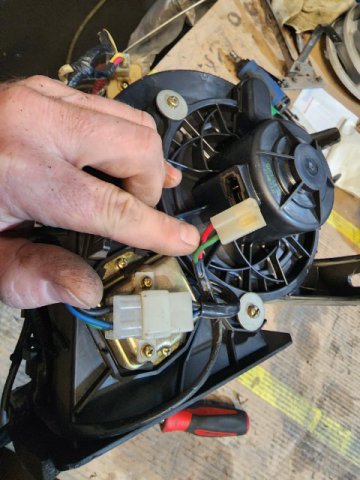
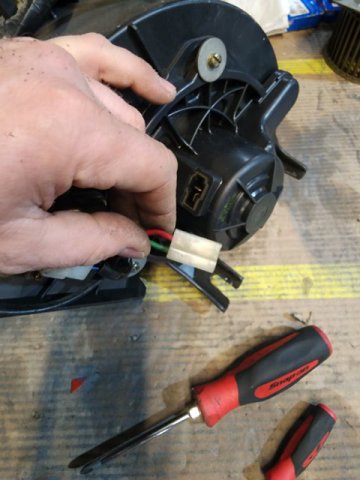
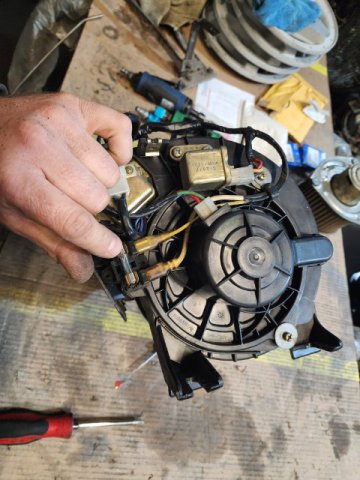
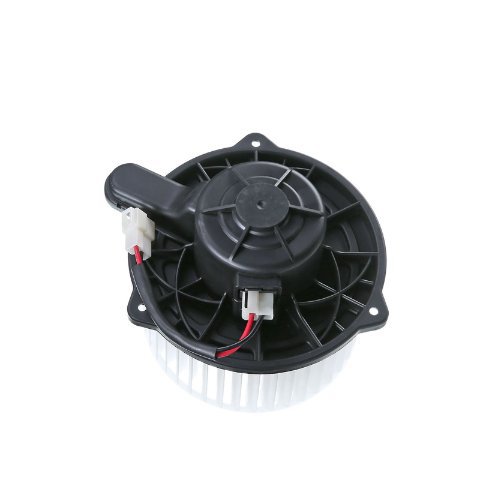
S130 install Dremel the housing Make sure the blower fan ledge seats into the blower box. Next you are going to want to slot the blower fan mounting holes to match the s130 box pattern. You will see a gap between the fan and the top of the fan seat. It will work this way, but it will be more efficient if you take this gap up. You will see the original fan has a much smaller gap. I made a temporary funnel for it for my car, but Im working on a 3d printed insert that will be available eventually. If you want maximum efficiency you will want to take steps to close that gap. reinstall your original screws with washers. Retain the wire tie strap. next you need to swap polarity as the connector is wired backwards. A T pin or the correct pin tool is needed here. Dont destroy your pins. Replace pins that are heat damaged! Here is stock above. Here is swapped below so the fan will turn the correct direction. There is no retainer for the fan blower fuse any longer. You can choose to strap it, zip tie it, or drill a couple holes to remount it to the box itself. I left it underneath tucked away like so. Reinstall your box with fresh seals and enjoy!
-
rayaapp2 started following S30 & S130 LHD Blower Fan upgrades
-
Long time no post for me, but here goes. The old 90s civic blower fan upgrade is quickly becoming obsolete. The motors are available, but usually without fan and lets face it, many of the yards dont stock 80s and 90s cars so much anymore. So I went on the hunt, after once again reading the social media and internets myths regarding what will work. It turns out KIA was a usable option with easy mods. I spent 2 days hunting through the wrecking yards in the Sacramento area searching for suitable blower motors. I hope this is helpful to you guys here. S130, 280zx 07-09 Kia Sorento 6"(not the 5-7/8"). You will need to dremel the plastic housing for it to fit your box opening Approx 1/8". The plug will line up, however the polarity is reversed at the plug. The fan is the correct direction, so just swap your stock pins in the connector and plug in. One major note, the fan is about 1/4 shorter than the original, and you will want to make shift a spacer or 3d print a spacer and glue it in. I used double stick tape for now. The fan mount holes are not the same diameter, so you will have to slot those out to the end to reuse the fasteners from your car. The second major note, the case also has the fan motor cooling port orientated so that it will bolt into the s130 blower box without the need to remove the fan duct! S30 03-06 KIA Sorento, Similar install to the 90s civic, dremel the opening for fitment. Fan fits nearly perfect. No need to slot the holes, it lines up really close. A couple of housings I have done required me to file the holes slightly. Get VDO brand aftermarket, itll be the right one. Its the correct depth and rotation. Grab the pigtail for early s30 models. Its been some time since I messed with late model S30(i.e. 280z), but the plug may or may not be the same, and itll be up to the installer to determine polarity at the connector so it spins the correct direction. I did have to dremel one of the housing nuts near the fan on almost all fo the housings. I tried 280z and 240z, same gig. Just knocked the edge of the nut back to clear the fan blade, since the fan is so much larger than the originals.
-
Here is my Jig work Im still working on these parts. Mostly I need to box them in, but they will line up with the new position of the front box frame I removed behind the seats.
-
Also found some seats
-
Yeah, Im knocking that floor back a couple of inches. I spent a few hours cutting up mounts and stuff on the mockup floor. Now I have a good idea where to cut, once I get it squared on the floor pan, Ill jig up some alignment mounts to transfer to my car. What was interesting is the stock S13 brackets that go over the front mount bolts to the floor pan, are nearly identical to what I need if mounted to the outside holes on the ZX floor... But the old box frame isnt needed to mount the sub frame. Ill be cutting it up and moving it back just far enough to mount the interior compartment floor that holds the speakers and stowage bins. Its needed for rigidity between the rockers and floor pan so it cannot just be removed completely. I have plenty of room for the stock tank, and Ill be leaving in the center of the rear box frame that has the tank strap mounting holes. The one hangup I dont know about yet, is how I will run the exhaust. Retaining the heat shields is my goal, but Ill play that game when I get mounted up. The pictures are hosted on my facebook page. Its public, so anyone should be able to veiw them. Interesting that the links arent working, but Id suspect its a connection issue with as big as these pictures are. Datsunmotorsports
-
Playing around with geometry on the spare pan and subframe So I dont know about you all, but putting a nice seat in this car and having adequate leg room is an issue. So Im removing the old sub frame box frame, since Ill be installing a new box frame further back... What a pain to get all those spots out, I gave up on the spot weld drill bits and just started going at it with the plasma cutter...
-
No kit. You'd have to make one yourself. There are a few guys that make custom manifolds out there that incorporate a wastegate flange.
-
It looks like I need to modify the floor pan for the front diff mount hoop to clear, and both upper control arm mounts. I need to do some measuring to see if the floor pan is the same heights at the mounts for the S13 frame, and modify the new mounts to make the difference up. I did take some pictures from the front view and the frame is currently about 2" from seated to the chassis floor pan, and it appears the frame is clear of the ground(will not hang lower than the frame rails, which is what I was worried about after reading this 260DET? Im not sure how low you would have to be, to be concerned with sub frame height if the rails have the same or less ground clearance? Really wish you guys had some pictures... would go a long way!
-
Finally got both subframes in. Spare Floor pan Out with the old Mock up Subframe on Mockup Floor pan.
-
Do you have any pictures of your work? Ive been working on the motor lately and havent got back on the rear suspension yet. My main goals at the moment are to get the wastegate plumbed up as Im running an external. But Id love to see another version of how the rear sub frame was swapped. Thanks
-
I hadnt considered how far it would drop from the frame rails(seeing as the stock sub frame hangs no lower than the rails). Thats good to know. Ill have to take some measurements. Im still waiting to get my sub frames shipped up from down south. I have no interest in paying the money that kit wants. Its not that I cant fab up a mount, I totally can, but the to do so vs just buying something thats is well built sometimes wins. I ended up plasma cutting out the whole rear deck box frame with studs from a donor car for mockup purposes. I might chop it up and pull the pins and mounts from that as they are super clean. I also salvaged a nice cowl area for my car from that donor.
-
I took some measurements Turns out those mounts are not going to be the best solution. The sub frame is approx 23" center to center on the rear mounts. After getting the tape measure up there it appears the box frame that incorporates to the the floor frame rails up to the rear box frame structure where mounts are needed is the same width apart and 3-3/8" wide. So these C channel mounts would require that an ear be cut off, and without knowing that the C channel is precisely the same ID of 3-3/8" it seems like a tremendous waste of nearly $200 and that starting from scratch is a much better idea. I know several guys cutting up S130 chassis right now, and Ive ask 2 of them to remove the front sub frame pins, and cut the mounting box for those pins with plenty of meat for me. So with any luck Ill be re-using the stock parts from the donors, but Ive also contacted a local fastener company that says they an get me a M20 bolt in fine thread if needed. As I understand it the fronts should be 5" long and the rears should be 6.5" long, but I have yet to get the sub frame in my hands. My buddy is still packaging it for shipping.



.jpg.3258733cd53c18555f7901c796b1d88d.jpg)