Atozone Tonine
-
Posts
110 -
Joined
-
Last visited
-
Days Won
1
Content Type
Profiles
Forums
Blogs
Events
Gallery
Downloads
Store
Everything posted by Atozone Tonine
-
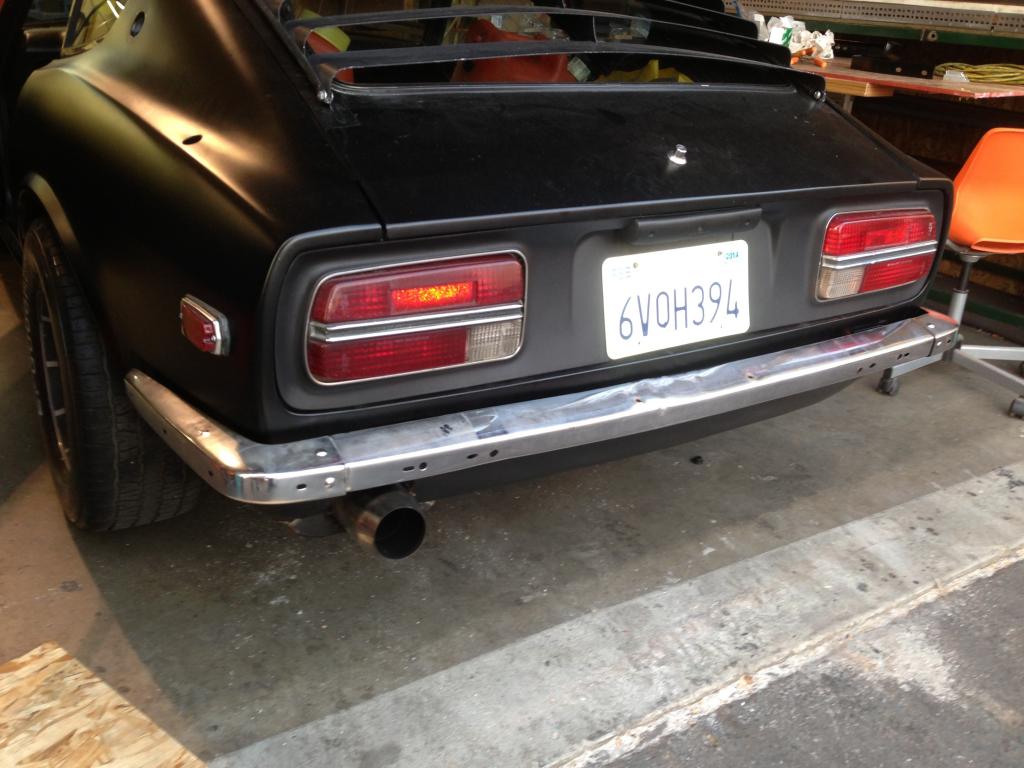
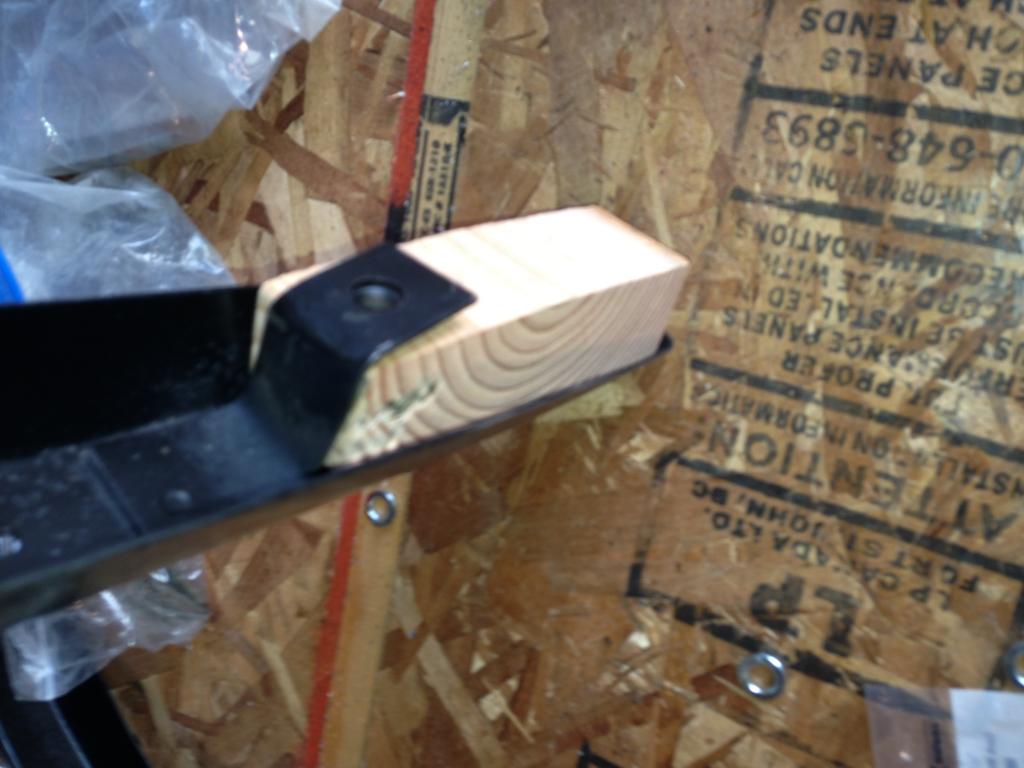
I learned a few tricks when installing my bumpers. ( as requested by California Highway Patrol) I bought some used ones and the rear must have been in a slight accident because the bolt flanges were bent and did not align with the body holes. Tip #1 Hammering then prying the side flanges on the rear bumper back into shape does not work we'll. cut a piece of wood about 1.5" x 1.5" and jam it under the flange. Stand it on its end the hammer it down. Works great. Tip #2 To attach the rear bumper, fasten the straight part to the body first, then attach the side flanges to the body next, then screw the sides to the straight part. Reason - if there is any irregularities, the holes will not align if you try to install the whole thing at once. Tip #3 Use some 1/2" (inside hole dimension) rubber bearings between the body and side flanges of the rear bumper. Gives good spacing.

-

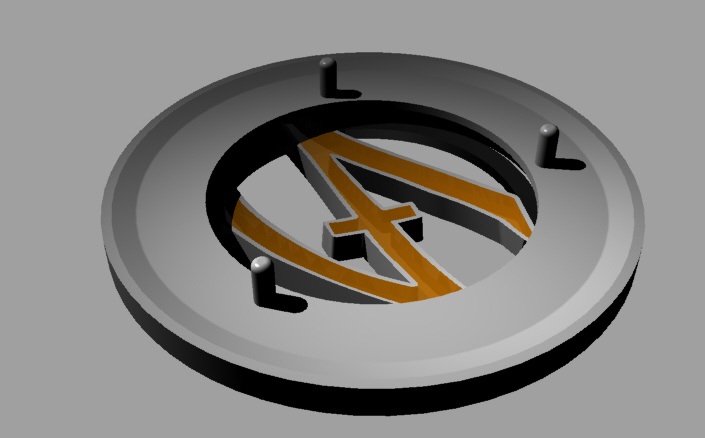
3D printing custom emblems
Atozone Tonine replied to Atozone Tonine's topic in Fabrication / Welding
I will be printing this prototype this weekend. Honestly, it would be about 4-6 hours of modeling plus printing and finishing for a custom emblem, so it might get expensive to pay a 3D modeler to make something custom.... But it would be very cool. I made a universal base and will be making several different styles of faces to try out for myself. If it turns out well, I would be a contributing member and could have a few styles for sale.
-
3D printing custom emblems
Atozone Tonine replied to Atozone Tonine's topic in Fabrication / Welding
This material is called PLA. I will make mine from ABS, possibly with inset acrylic pieces, or painted. I think you can chrome ABS... Black nickel would be cool. -
I'm working on creating a custom emblem. Just trying to get the process right - the design will changed. Just wanted to share the progress. Would other people be more interested in straight reproductions? Or custom creations? Thanks for the feedback.
-
custom strut bars
Atozone Tonine replied to philiow313's topic in Brakes, Wheels, Suspension and Chassis
Come on, don't be a one-upper. Haha -
custom strut bars
Atozone Tonine replied to philiow313's topic in Brakes, Wheels, Suspension and Chassis
Done.
-
thanks... All I need is something to drive about 5 miles.
-
I need a 240Z seat to use temporarily while I recover my seats. It doesn't matter how bad it is. local pickup preferred - Los Angeles, SFV, Orange county Thanks.
-
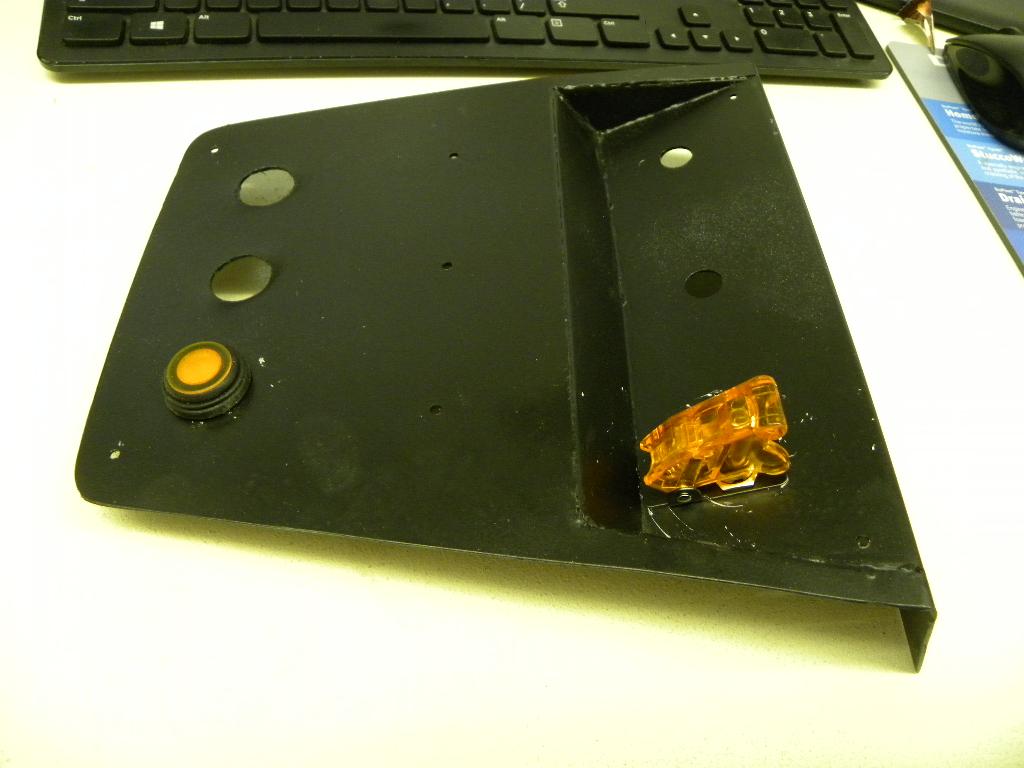
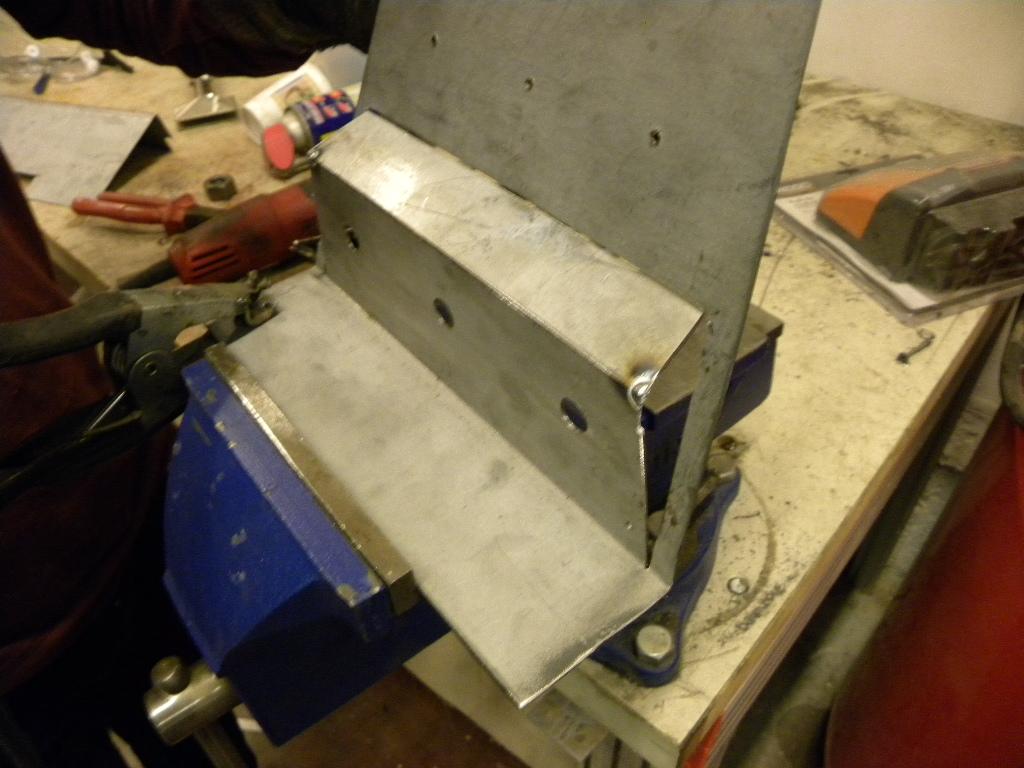
Can somebody please do me a favor and trace their bumper support brackets for a 71 240z? ( both front and rear) Just place on a piece of paper and draw around it to show the angle of the two bends, then trace each end flat on its side to show the hole spacing. Thanks for your help. If someone can do this, I will post the fabrication plans so everyone can use.
-
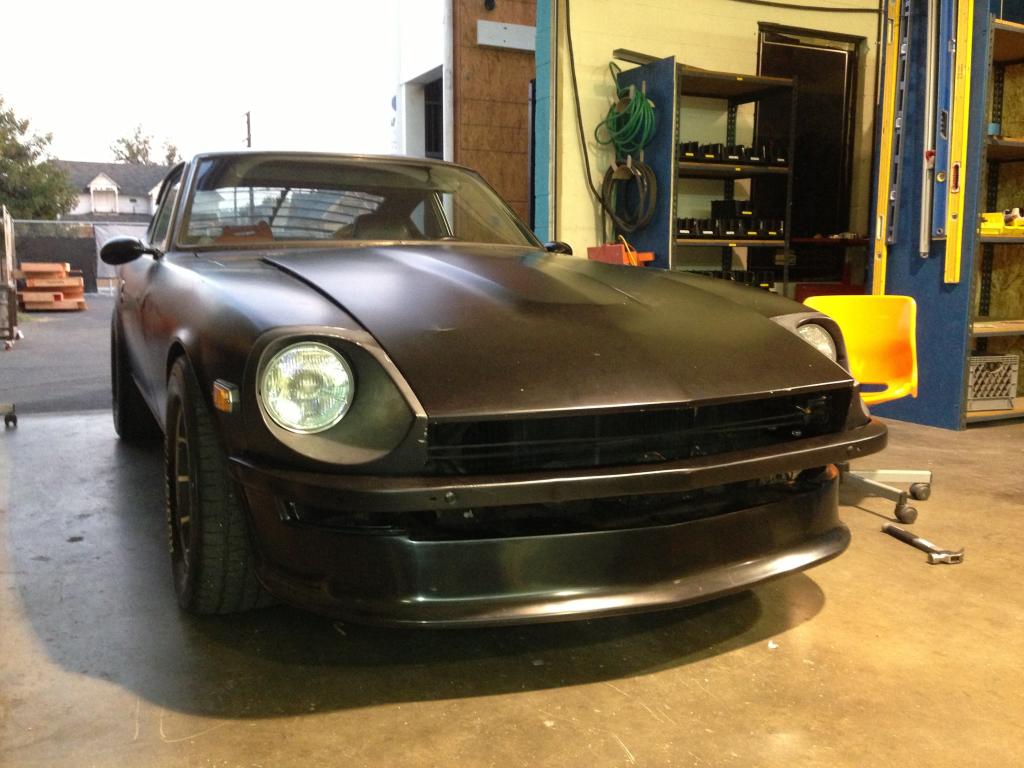
Looking for front and rear bumper mounting brackets for 71 240Z Also, looking for : Tokico HP struts, Refinished stock seats, or new seat covers, and foam Font turn signal bulb sockets 15-16 gal fuel cell
-
Bumper Support for MSA Type 2 Kit
Atozone Tonine replied to Erins.ZCar's topic in Fabrication / Welding
I just got a ticket for no front bumper ($200) and no rear bumper ( $200) and no front license plate ($200). I tried to explain that the bumpers were custom and INSIDE the body panels, but the cop did not see it my way. Now I have to go to the Sheriff's station and see what counts as a 'bumper'. Hope you have better luck in Arkansas. -

From the album: 240Z
-
-
-
Sorry for the late reply... I am getting back into the switch panel this week and will post some pics.
-
I was thinking the same thing, but the cap looks bad and is broken anyways... Im not sure if it is possible to have 2 failures at the same time, but I need to get a new cap anyways. I was holding the center plug near the block and the intake manifold.. I thought this should be a good ground with bare metal.. but no, I did not see any spark. I will try again with another spot and see what happens. Here is a pic of my coil.. It is a Mallory Promaster. I need to check the part number to be able to tell you what kind it is. Is an HEI distributor better in any way?
-
ok, i did that... and had no spark when i held it near the block Here is a pic of inside the distributor cap.. I'm pretty sure its not supposed to look like this. It looks broken in the middle and i think i can see the little copper button down inside the distributor. What is the best distributor i can get from summit for a 72 Chevy small block v8?
-
Has anyone had this happen before? - Cruising along at a steady 2000 rpm, not doing anything unusual and the engine just stopped firing and I coasted to a stop. The details: The battery seems to be fine - I have power. The starter is cranking fine. I have fuel, and its going into the carb fine. I cant see any loose wires. How can I test to see if it is the distributor or coil or spark plugs? FYI - I have a 71 240Z with a SBC 350 my distributor cap shows some signs of melting on the outside, but I thought it was just cosmetic, and was that way before it was installed.
-
Keep in mind I have never done this before. My original door panels were approx 1/8" fiber board covered in vinyl, so it was definitely less than 1/4" I found pushpins that fit perfectly and are rated for thicknesses 1/8" - 1/4" - http://forums.hybridz.org/topic/111891-free-door-panel-pushpins/
-
I will update with more of the fastener holes and double check the dimensions soon.
-
The PDFs are full size on 24" x 48" paper. You can take them to a print shop and have them printed to use as a template. The "bump" is actually a cutout in the original cardboard, which allows about a 1/4" more space for the mechanism behind the upholstery. In my panels, I will just bump this area out a 1/4" To make a mold from my drawing: -Trace onto a sheet of MDF -Cut along the lines to make an outer ring and an inner pate, flip upside down, and raise the inner plate you can get the slope correct. -Make the level difference 3cm towards the front of the door, 4cm towards the rear, and flush at the top. Does that make sense? Just look at your door, and you will understand. I am deciding whether to make from a sheet of 1/8" PVC and a heat gun (not sure if that will work) or fiberglass
-
I found these great plastic pushpins that are easily removable. They fit perfectly in the holes in the doors where the original plastic cups go. I have tested them myself. So, they will not work with the stock door panels, which have an off-center hole for clipping the metal pushpin. However, If you are making your own door panels, these could be great. They will secure a panel 1/8" to 1/4" thick. Just make a 3/8" hole in your door panels, aligned with the hole in the door. http://www.itw-fastex.com/catalog/index.php/dw/op/a/6/c/16/p/4?m=no Item # 30080016 You can get a free sample of 15 of them, which should be enough to do 2 doors. Hope this helps someone.
-
I have a lot of clean up to do.. but here is a preview.
-
Ok, Here are PDFs. The uploader says I cannot upload DWG files. I still have to verify the overall dimensions, and I think Im missing some clip holes. I did not include the larger holes that the clips fit onto.. just the holes that the plastic 'cups' sit inside, because I will be using a different method for securing my door panels. Door Panel - Left Door.pdf Door Panel - Right Door.pdf
-
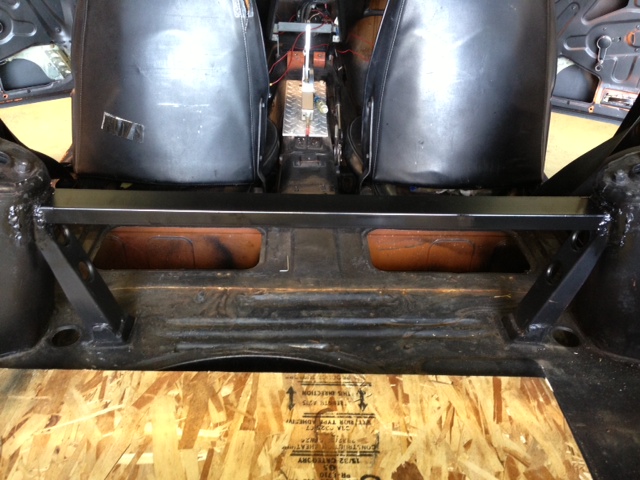
Here are some pics from today. My friend is helping me weld it together. A bit more progress.. should be finished soon.
-
yeah, well I have so many rattles going on, I wanted to have one less thing making noise. Of course, now whenever I go over a bump, the center part of the louvers smack the hatch glass, so I will have to put a strip of rubber there.