ukcats07
-
Posts
265 -
Joined
-
Last visited
-
Days Won
1


ukcats07's Achievements
")


-
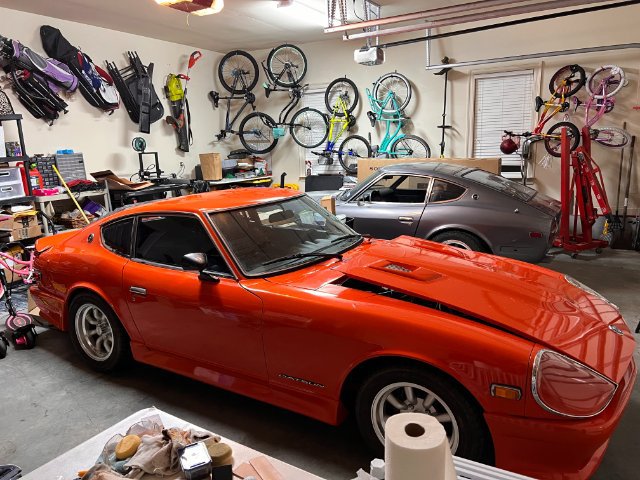
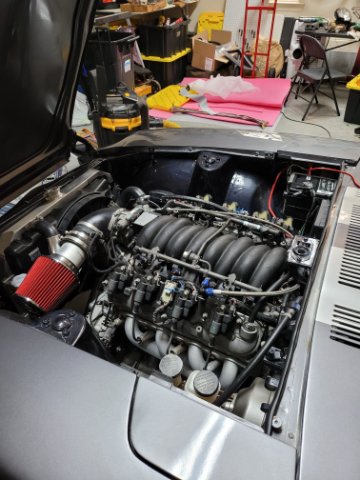
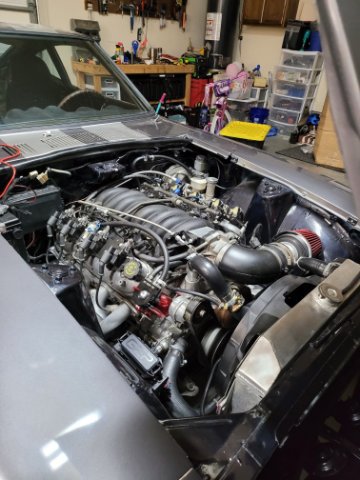
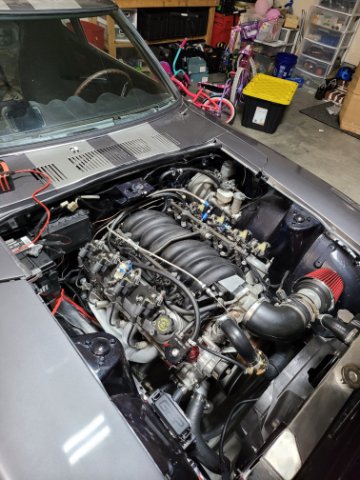
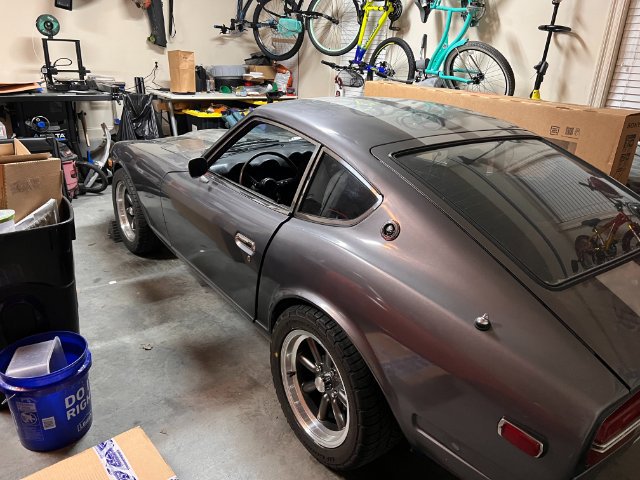
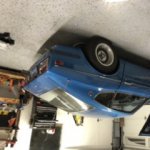
 The 240 is pretty much done. The orange one is my dad's 73'--was actually my first car when I was 15. I'm doing the swap for him now with an LS1 and T56. It's crazy having two 240's in my garage!
-
My problem was definitely the cheapo ebay knock sensors. I remember buying genuine AC Delco sensors and the knock problem went away immediately. I had some other compounding problems, but the knock issue was definitely a sensor problem. Do you have the codes you are throwing?
-
Just now seeing this apologies. Let me look through my notes and see if I can remember what happened and how I fixed it. Without looking at anything, I believe it was being fuel starved with the original 240 gas tank setup. I'll dig a little deeper and get you the full answer.
-
Looking for a wideband that can be used with a Gen 3 PCM (EGR/AC PCM input). Thanks.
-
Thanks! I had an 87' RX7 in high school that caught fire twice. First time I put it out with an extinguisher, the second time I didn't have an extinguisher and had to watch it burn to the ground. After that lovely event, I always make sure I have one handy.
-
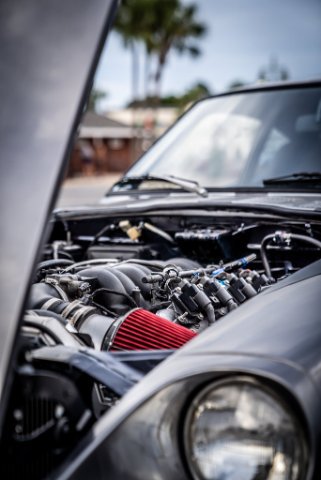
Started the 5.3 after 5 years of not having the car yesterday. Everything went fairly smooth with no leaks or weird noises. Lifters were a little loud, but settled down on the second start. My fan didn't come on, but after some research I determined that the PCM grounds pin 42 instead of sending 12v. My pin 85 and 86 in the fan relay were both set to ground so the relay was never going to get energized. Pin 86 will be given 12v and now it should come on. Nice to have the first start monkey off the back and get to finishing the car. LS 240z start.mp4
-
Ignition wire (BW) shows 12v in "LOCK"
ukcats07 replied to ukcats07's topic in Ignition and Electrical
Thanks for all the input. My ignition switch checks good when disconnected from the lock assembly. I'm going to focus on the battery hot circuits and see if a wire is mixed up somewhere giving power to the BW wire somehow. I can deal without the wiper and flasher circuit for the time being until I find the problem. -
Ignition wire (BW) shows 12v in "LOCK"
ukcats07 replied to ukcats07's topic in Ignition and Electrical
The other thing that's not very clear is the 2 wires on the lock assembly with male spades. I believe they are for the door buzzer and door closed switch, but not sure how they work with respect to key position and whether they can somehow be tied into the other parts of the cars wiring unintentionally. -
Ignition wire (BW) shows 12v in "LOCK"
ukcats07 replied to ukcats07's topic in Ignition and Electrical
I measured the B/W wire at the ignition switch, in the plug. What I don't understand is how I was getting 0v in OFF, but suddenly receiving 12v when turned all the way to LOCK. The wiring diagram is unclear, but I assume that none of the contacts (with the exception of the W/R wire contact) should be hot in LOCK. I removed the key assembly as a culprit by testing another known good key with my 5 pin ignition switch and I only received continuity on the appropriate pins when it was turned their respective positions--i.e. only the ACC pin had continuity when the key was in ACC, etc. I'm leaning towards a weird wire thing with my ignition wire circuit and the air conditioning, wiper, or flasher circuit. I'm really just trying to make sure I'm on the right track before I start hunting and pecking. -
Ignition wire (BW) shows 12v in "LOCK"
ukcats07 replied to ukcats07's topic in Ignition and Electrical
Also, to be clear, my B/Y wire now does not spike when the key is turned slowly like it did before I pulled the fuses. -
Ignition wire (BW) shows 12v in "LOCK"
ukcats07 replied to ukcats07's topic in Ignition and Electrical
I have a 5 point ignition switch in my Z. My Dad gave me a spare switch and lock combo that I tested and it checked out good as well. To be clear, my plug that goes into the ignition on the steering wheel has five wires-- W/R power, L/R accessory, B/W ignition, B/Y start, G/W tach-resistor. I tested for continuity at each spade and it all checked good--is that sufficient testing for an ignition switch? Also, I'm still unclear as to why it operates normally now that the fuses are removed. -
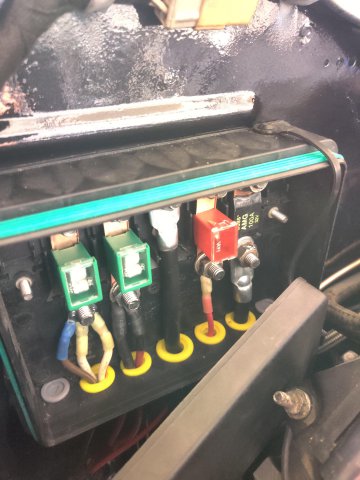
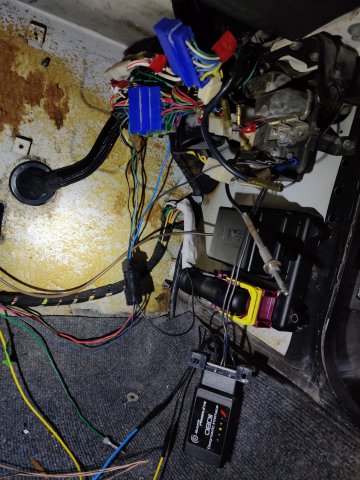
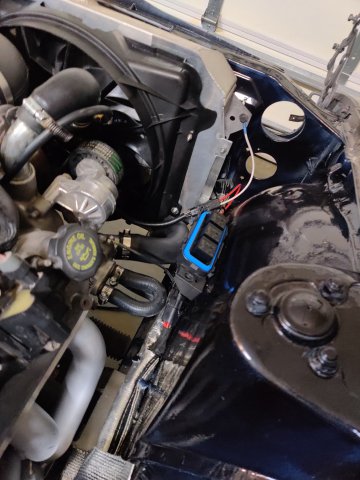
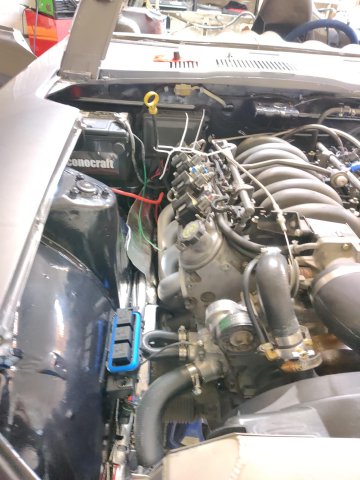
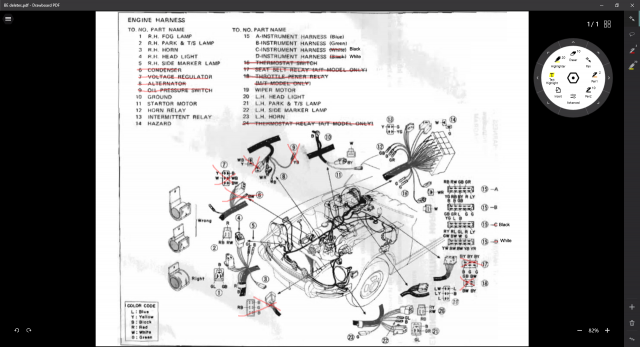
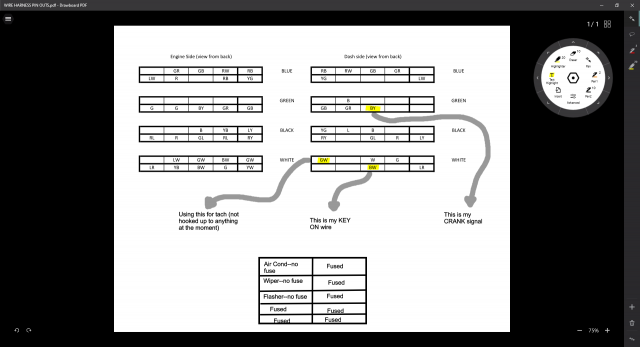
I'll start off by saying I solved my problem, but I'm unclear of why it worked. Bottom line is that I was receiving 12v on the Black/White keyed wire while the key was in the “LOCK” position, 0v in “OFF” and “ACC” then 12v in “RUN” and “START”. All of this is normal with the exception of the “LOCK” position. Measurements were made at the ignition switch. I was also getting ground indications from this wire (one side of the multi-meter on the B/W and the other would have continuity when touched to any ground on the car). My Black/Yellow crank wire was also spiking around 6v if I turned the key slowly from “LOCK” to “OFF” (which resulted in a WTF moment when the starter kicked over), but otherwise only showed 12v in “START” and also didn’t spike if I turned the key rapidly from “LOCK” to “OFF”. I’ve “solved” the problem by removing the Air Cond (factory option, but none installed for this swap), Wiper motor, and Flasher fuses which resulted in normal behavior of the ignition switch wires when turned to the appropriate location. I’ve attached my BLUE, GREEN, WHITE, BLACK dash to engine harness plug pin-outs, marked-up body electrical page from FSM and pictures of my power distribution to the harness. I’ve stared at the wiring diagram and cannot figure out why removing those fuses result in normal behavior. Even worse, I have no idea how this wire is getting 12v when the key is in the “LOCK” position. Any help or insight would be beneficial. I suspect something with the Flasher circuit considering it is battery hot at all times and is the logical choice for why a wire that shouldn’t be hot was showing 12v. Background 1973 240z, been the owner for the past 13 years. PO didn't hack anything up, I received it with no engine/transmission in preparation for a 302/T5 swap. My current setup is a 5.3L/T56 using a re-worked truck harness and PCM (did it myself and very familiar with most every wire) and EZLSX Power Distribution Module for power delivery from the PCM. My power distribution for the engine harness and rest of the car is through a Littelfuse 07981003ZXS LTX MEGA & MIDI Fuse Block Kit. I have a brand-new battery and have verified LS and Z harness grounds are good. My Z fuse block, and wire harness in general, are in excellent condition. I removed my Z engine harness and modified it wire-by-wire to remove wires that were not needed for this swap. I have attached my pin-outs for the 4 colored connectors under the passenger side of the dash. Generally speaking, only lights, power, wiper motor and horn wires remain. The Black/White, Black/Yellow and Green/White are snaked into the car to connect to the EZLSX PDM through a weather-pack connector. My large gauge White and White/Red wires are running the littlefuse fuse block kit on the same 40A fuse. My 12v source for the PDM is also on this fuse. My headlights are on a different fuse through a relay block as well as the taurus fan.
-
99-02 LS plastic fuel tank install
ukcats07 replied to ukcats07's topic in Gen III & IV Chevy V8Z Tech Board
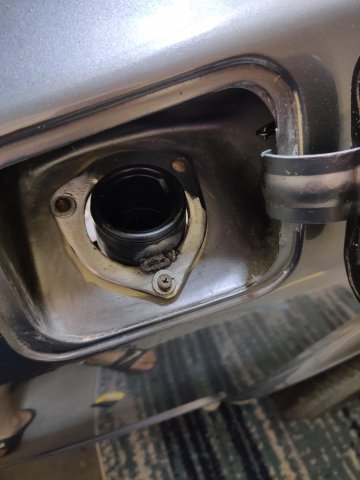
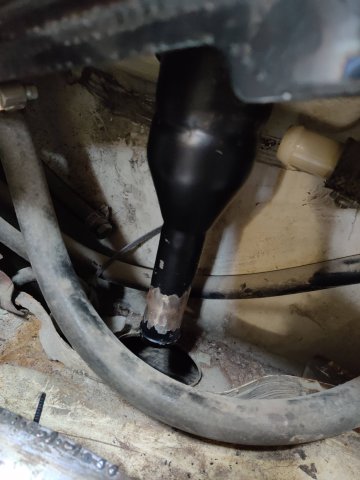
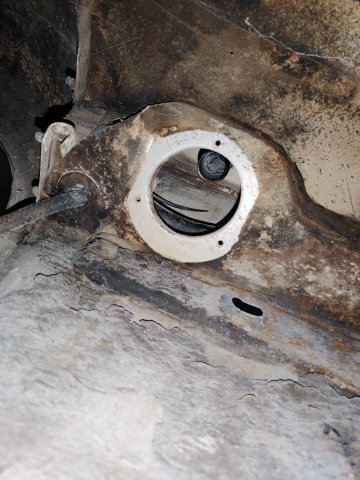
Don't mind the disgusting tack weld, that will be ground down before paint. Pics hopefully show what I'm working with. I lose the vent-tee on the filler neck, but something can be fab'd I believe.
-
99-02 LS plastic fuel tank install
ukcats07 replied to ukcats07's topic in Gen III & IV Chevy V8Z Tech Board
I was able to make the camaro filler neck work. I cut the 60ish degree bend off, and re-welded the nipple to the straight end of the pipe. I removed the datsun filler neck completely and used an exhaust flange to tack the camaro filler neck in place. The bolt hole arrangement of the exhaust flange was the exact same as the original datsun hole placement. I'll take some pics and upload when able, but it looks like it's going to work out nicely. Just need a 1x1" 90 degree hose barb coupler and some 1" and 1.25" fuel hose to finish it off. -
Great source thanks. I have a lot of books and manuals but haven't seen this one. I actually found this site shortly after posting. I'm in contact with him and it sounds like he might have one available.