

Xnke
-
Posts
1985 -
Joined
-
Last visited
-
Days Won
9
Content Type
Profiles
Forums
Blogs
Events
Gallery
Downloads
Store
Posts posted by Xnke
-
-
PMC is in Australia, so his options are a little different than what we have here. They have some awesome suppliers for datto parts down there!
-
If you aren't going turbo, I would not go with a turbo cam. Call Isky and have a chat, or send me a pm and ill give him a ring...I know he has a grind for a similar setup!
Minimal overlap is not always a good thing, turbo or not. I would take a closer lobe center and more overlap in a n/a, high compression engine, vs. a wide lobe lobe center, low overlap cam.
-
the port in the cylinder head is M12x1.5. Stock LS1 temperature sensor threads right in, makes it easy to monitor that port for head temp in megasquirt!
-
Port work has commenced, one exhaust port is near-finished, the others are in various stages of finished. I work them round-robin till I get all six to the state I want them to end in...five more exhausts to go.
-
Cost. It is actually cheaper to buy a 14lb chrome-moly forged steel flywheel, than it is to get the purpose-built aluminum L-series flywheel. I don't care for aluminum flywheels, I'd rather have steel, so that's the route I went.
Also, the RB25DET flywheels are drilled for the 240mm clutch cover, but many don't have the groove machined in the face where the disk fits, so the 250mm heavier pressure plate 350Z clutch will fit.
The larger disk diameter is not ideal, but the much increased torque (400ft-lbs+) for the *very* minimal (barely noticable) increase in pedal effort is nice in a daily-driven car that is expected to make 325+ft-lbs, and at times may have a slim-legged driver.
Fidanza 11lb aluminum flywheel + 400ft-lb clutch = around 650$
14lb forged steel RB flywheel + LuK stock replacement 350Z clutch = 294$ + an hour to machine a shim.
-
Make sure you have the correct clutch to match the fidanza flywheel...as I said before, the two available patterns do not interchange.
What clutch diameter did you purchase, and have you verified with fidanza that you have the flywheel for that clutch diameter? I thought they were double drilled, but I don't recall for certain.
-
I guess the RB25det flywheel on my car doesn't fit either...
I didn't have to do anything at all regarding the starter, but I had to machine a shim ring to take up the 1mm difference in crank diameter.
-
Please realize that if you do not correct the cam location, it won't matter what cam you use...the cam-to-crank distance needs to be correct or you need to do the math to figure out just how far off your cam timing will end up. My comment of the bigger cam relies on a very large camshaft profile....much bigger than you will want to street drive.
Regardless of the cam profile, you will still have to correct the cam location in order to keep your engine from self-destructing.
-
The stock pistons will work fine. the head came off an l24, it will go back on an l24 just fine.
-
You need a bigger cam! (smaller base circle)
Babalouie has a few posts here...mostly on AusZcar or Performanceforums, but he had the same kind of deal.
What head casting code is it?
In all honesty, "I would buy the largest and just wind the rocker arms up to fill the gap but not so much to kill the wiggle room" is probably the worst idea you could have.
It doesn't quite work that way.
The cam rubs on the rocker arm across the inserted piece. If the wipe pattern is not centered up by using the correct lash pads, correct valve lash, and the correct valve stem heights, the valvetrain will destroy itself quite quickly...and fill your engine full of metal shavings while it does so.
To do this correctly, you need to measure the thickness of the cylinder head, and check not only the deck surface for flatness, but also the cam tower surface. Most shops don't think to skim cut both faces of the head...which is needed if it was ever warped.
Once you know the thickness of the cylinder head, add shims to bring the thickness up to ~108MM. The distance from the bottom of the cam towers (where they stack on top the cylinder head) to the top side of the headgasket, should be very close to 108mm.
Once you have the camshaft in the proper position, you can measure for lash pads to fit your camshaft.
-
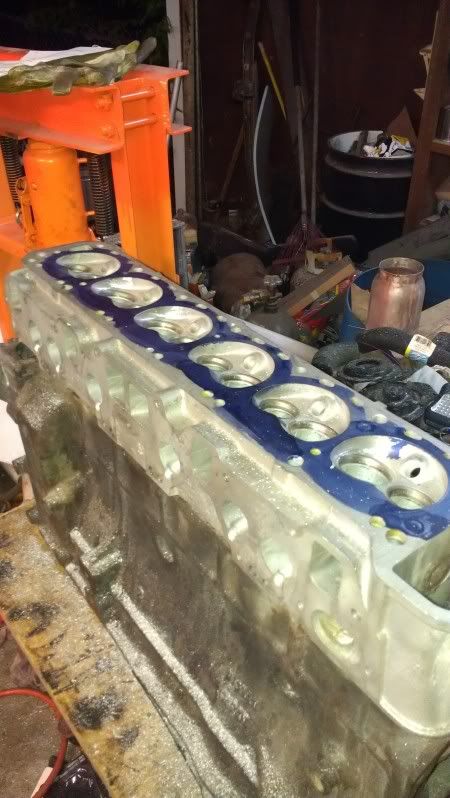
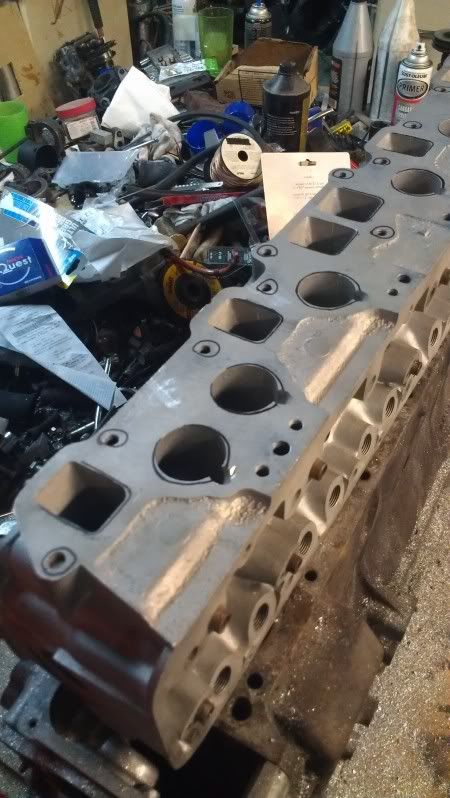
Since my lightly worked N42 cylinder head developed a crack in the deck, which I found out last friday, I have been working on getting the P90 head casting I picked up cheap ready to go.
This is the beginning of what I would consider a full effort street port, since working the chambers much harder than this results in limited life. I have not started on the ports yet, just worked on the chambers and the water jackets.
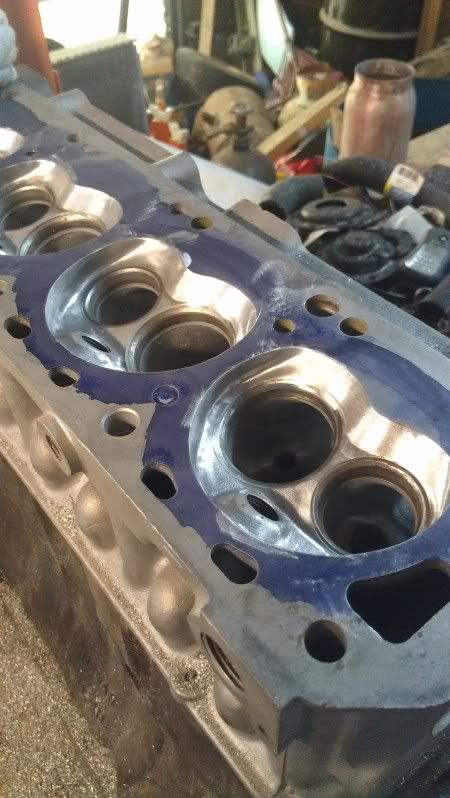
Valve unshrouding:
Water jacket modifications...AKA "Why the hell are you drilling holes in that cylinder head?!?"
Because down inside here, the exhaust port and intake port are connected with a web of casting flash. It shouldn't be there...I got in with a small drill bit and drilled and chipped out all the casting flash between the ports.
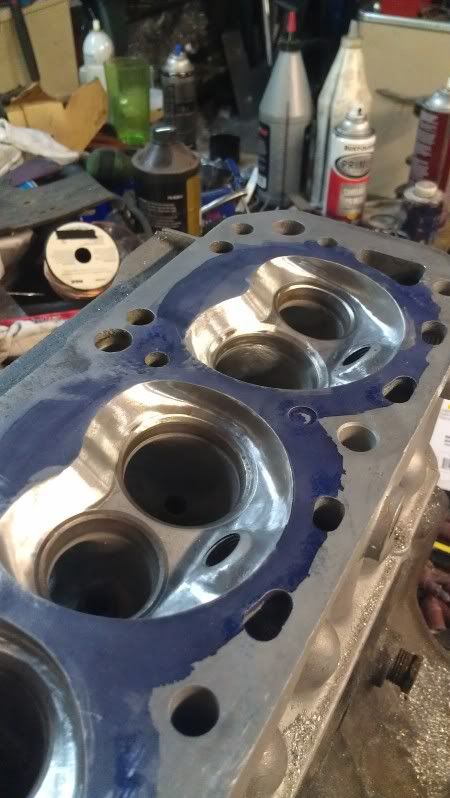
Marking out for the port sizing.
Intake valves will remain 44mm diameter, and exhaust valves will be cut down from LS1 exhaust valves, to 36mm diameter. The LS1 valves need to have the diameter reduced, margin thinned, 25* back-cut applied, the stems cut down by 8.3mm, and the keeper groove re-cut lower on the stem. Even with all that work, it's cheaper to buy a set of Manley LS1 exhaust valves, cut them down and re-groove, than it is for a set of Ferrea standard alloy +1mm L28 valves.
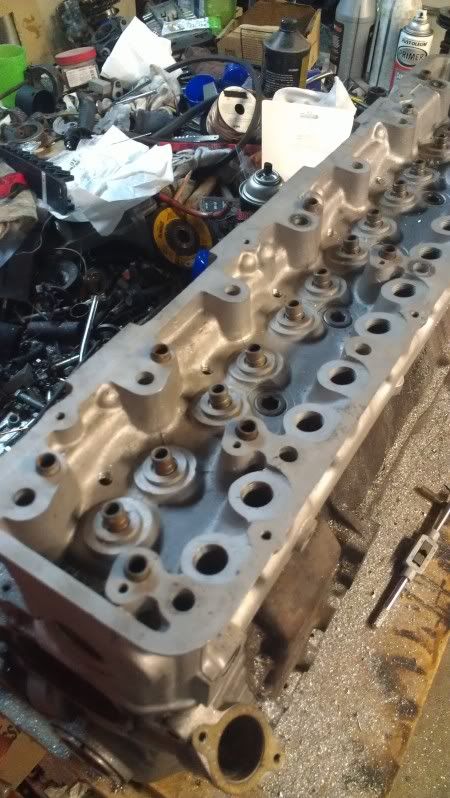
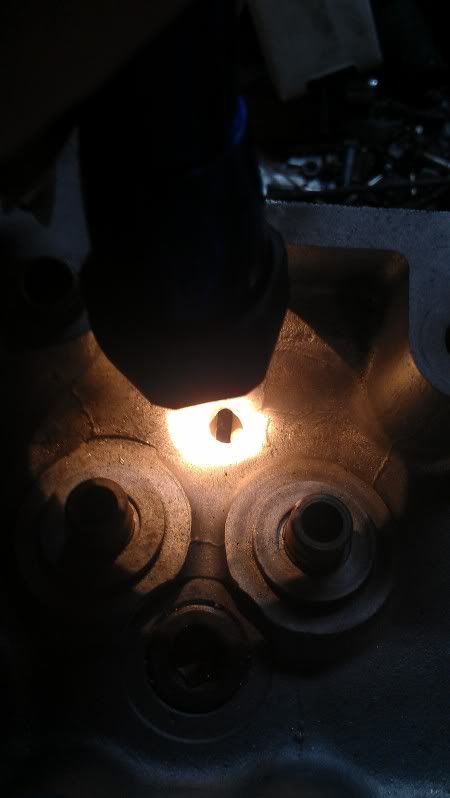
The circled bolt holes will get drilled and helicoiled, as they often pull out in normal service and the threads gall up occasionally too. I use 2D series helicoils for this as they are twice as long as the normal ones. -
Might want to post in the correct section for this. Try the EMS section.
-
Intake valves unshrouded this evening; hands started giving up so I called it a night. Exhaust valves get unshrouded in the morning. This casting is shifted just slightly in the favor of the exhaust valve. Intakes will remain 44mm, but the exhaust valves may go up to 36mm...I'll know when I get the chamber finished up. Better to have a slightly smaller valve than to have a big shrouded valve. Still have to pull a broken stud out of the head; but that's not a big deal. This head will have all 11 exhaust bolt holes helicoiled.
After I get this cylinder head fixed and on the car, I'll get the N42 casting checked out, then I will repair the crack and it'll go back on the shelf.
-
FULL STOP.
Pulled the head again, since a headgasket swap didn't fix the pressureized water jacket.
Cylinder head is cracked between 2 and 3. Crack is so small I missed it the first time.
Compression ratio will drop from 9.72:1 to 8.3:1...I have a P90 solid lifter head casting here on the bench.
Other options include a Maxima N47 for 9.75:1 compression. I have both heads available, but I have a squareport header. The P90 is the clear choice here.
The bottom end still is in perfect shape; but I built with 9cc dished pistons. Later I'll swap to flat top forgings for a 9.0:1 compression ratio, so the cylinder head will be skimmed to produce that compression ratio in that configuration. That will also allow me to recover a little compression in the mean time.
-
Stainless bolts in aluminum threads are a no-no. Use anti-sieze if you insist upon them.
Zinc-plated bolts for aluminum threads are my preference.
Stainless bolts in mild steel threads will rust, eventually. Takes longer, but it will still happen. Stainless also work-hardens much faster, so anywhere you have vibrating loads will take a careful touch to remove the bolts later...they may snap off right under the head.
-
You probably need to reset the brake safety switch. If you only have line pressure on the rears, or only on the fronts, then you've probably tripped it and it's locked off one side or the other.
-
Happens sometimes. Tomarrow the cooling issue gets worked out, and hopefully the car goes up on stands to have the transmission exchange done.
-
The stock radiator kept the car quite cool, it's actually a copper 240Z-core-height 3-row unit. The two electric fans are only 2.20" thick from mounting face to the tit on the back of the fan motor; they're the slimmest fans I've found.
I currently have 0.5" between the belt tensioner stud and the 10" electric auxiliary fan, and about 1" between the A/C compressor clutch and the 12" main fan. Nothing hits, even on a hard decel, and the 12/10" combo worked fine with the stock radiator.
Stocker is 2.5" from core support to the fan shroud mounts, and I didn't run a shroud with the stocker, just had the fans pulled tight to the core. Core size is 24"x14"x2" thick.
MkIII Supra aluminum unit is 1.875" from the core support to the fan shroud mounts; and the radiator has a flat aluminum shroud sealed to the back face, standing off the core 0.375". The fans are mounted to the shroud. Core is 25.25"x16.2"x1.25" thick.
According to all the literature I can find...the supra radiator should handle this. I am wary of it still, but the BHG plus less than optimal airflow of having the A/C core and intercooler stacked in front of it, plus the gap between air dam and core support.
The A/C core is ducted to the radiator; and the IC stands off the A/C core by 1.25". The core support is sealed up, but the seal plate between the air dam and core support is not finished...working on it tomorrow after making sure the BHG is really fixed.
This radiator cooled the car fine with the IC and condenser core in place all the way up to the likely BHG event. I'm jumpy because of my timeframe...getting short! Had to take a step back and cool my jets so I didn't just rip it all apart and start over...
Money is starting to get tight too. Need to be saving up to make the gas money to get there, but the car just keeps sucking it down. Still need gear lube, argon for the TIG, fuel for tuning, ect...
-
I would gladly run the stock radiator...but I will need to shove the engine back at least 1 5/8" to do so.
Belt clearance, fan clearance, ect.
More testing yielded a cylinder-to-water jacket leak. The radiator builds up to 20+PSI in under a minute from a cold start.
-
Yep, that car has had little to no reinforcement done...
"needs rear end gears/subframe connectors/...."
Sounds like he did all the prettying up and skimped on the reinforcements.
-
Take a look at the Saturn Sky Redline. It feels similar to a Z on the road; the interior is quite a bit different, but the shift quality is decent and the engine is *very* responsive. Also, 10K is not a hard price to find on a Sky, since they aren't made anylonger.
-
Have you rotated the pressure plate to try all three positions of the dowels? It will only fit one way...
Also, I believe the Fidanza flywheel is a dual-pattern 225/240mm clutch; you will need to know which bolt pattern you are using. They do not interchange.
-
160F thermostat didn't cut it. It got up to 85F today; the engine was borderline too hot.
Now I'm kicking myself for installing a radiator from a car with a similar displacement engine known for overheating...
I am going to run a test with no thermostat or restrictor at all and see if I still overheat.
-
Cam swap complete; engine has been run in at 2000RPM for 20 minutes; although a cooling deficiency has arisen. Starting from cold, the engine was brought up to 2000RPM and the idle stop was set to hold the engine there. After 15 minutes, coolant temp was 210F degrees, and slowly climbing...by the end of the 20 minute run-in, coolant temp was 216F. I am running a 185* thermostat; from back when the engine would just barely come up to temperature with the 3-row copper radiator and a 160F thermostat. Now, with a thinner 2 row aluminum, I will move back to the 160F thermostat.
Camshaft Spacers = problem solved?
in Nissan L6 Forum
Posted
I would pick up the two books every datsun enthusiast that is working on a modified engine should have. they are NOT exhaustive texts, but there is a LOT of info in them.
How To Modify Nissan/Datsun L-Series Engines, Frank Honsowetz
How To Rebuild Nissan/Datsun L-Series Engines, Tom Monroe
Both are available on amazon, both have a LOT of information in them.