

Xnke
-
Posts
1985 -
Joined
-
Last visited
-
Days Won
9
Content Type
Profiles
Forums
Blogs
Events
Gallery
Downloads
Store
Posts posted by Xnke
-
-
My Delta cam has two different lobe sizes...one for intake and one for exhaust. I used two different size lash pads, one size intakes, the other exhausts. I have three Delta regrinds this way, the intake and exhaust lobes aren't the same. They're real close, but not exactly the same lobe profile on the intake and exhaust.
Same deal with my Isky custom grind, the intake and exhaust lobes are slightly different, and the cam lobes are phased about a degree and a half from the #1 exhaust lobe to the #6 exhaust lobe.
-
I had an idle misfire that was random, didn't follow any plug, cylinder, or wire, and never went away. I switched to sidegapping and indexing the plugs and it all but dissapeared, and I was able to lean the idle out considerably and the misfire vanished.
-
GP7133 is the single-platinum plug, I use these sometimes however I get a better idle from sidegapping the plugs, so I've been using BPR6ES-11.
-
That's a 4-cylinder bushing, and it's a little shorter but as long as you line up the oiling hole, it's no big deal. That's what I used.
The 6-cylinder FS5W71C has a slightly longer bushing, apparently, but I haven't found a place to get them other than Nissan. They are available, but I don't have the part number off the top of my head.
-
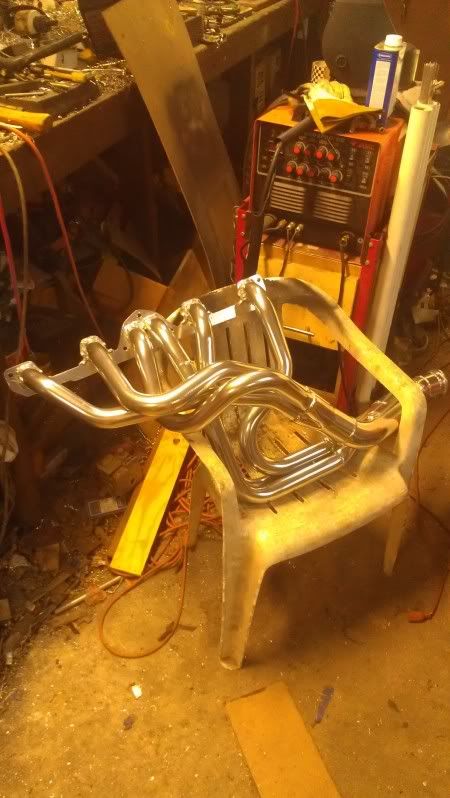
Finally got the head back on the car, and the manifolds and new water line installed. Took a vacation, went to Montana and had my header ceramic coated while I was gone.
Built some new shelves, collected a few new parts, built some new parts for the supercharger, did a little studying on throttling and MAF sensors. Also started painting a bike for my little brother...All while the Z sits, neglected, in the driveway.
I've had about enough of that, so it's time to get back on the game and get this thing rollin'.
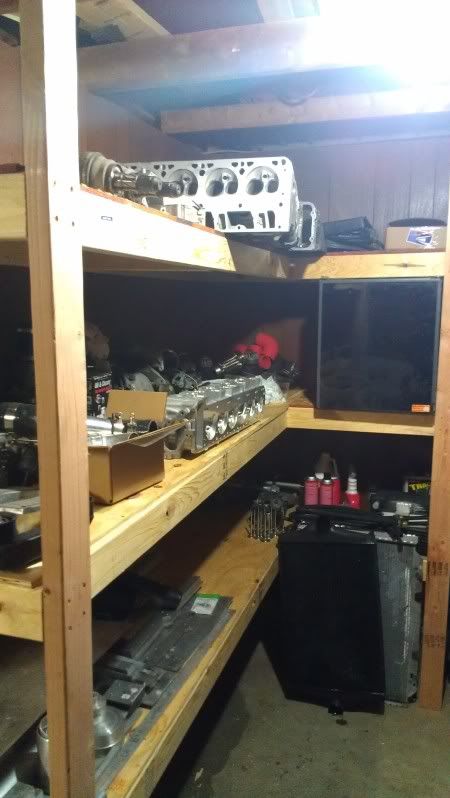
New shelves...this area was previously unusable space, full of garbage and accumulated crap.

Still full of accumulated crap...and a good fridge!
Header was coated at Nitroplate in Nashville, TN. Cost me 200$, flat, and it's the first inline-six header they've done. They do big V8 drag headers, mostly...and almost all the ceramic coating for Ford exhaust parts. Been around a long time, but only been doing custom coatings for a few years.
-
Heh, the RB30 crank can be used to push the stroke way out, if you're up for a 10-15 thousand dollar engine build. The diesel block can't be bored very large, but it's got an extra 19mm of deck height. Combine these with wet liners, a modified gas head, four-banger front cover, and a decent hay-bale sized brick of cash, and 3.6L+ of displacement is obtainable.
If you use wet liners (And there are forklift diesel blocks with DRY liners already in them!) you can push the bore to about 90MM, however it's going to be a limited life engine between rebuilds. Unless you have the liners welded in place, wet liners WILL leak at some point in time, so it'll have to be checked often.
So, 90MM bores, and a highly modified RB30E crankshaft, small journal connecting rods, and you could run a 90mmx90mm engine...
PMC has built 3.6L L28 strokers down in the Southlands, that push close to 400HP flywheel, if not a little over! He uses L28 engine blocks mostly, and has a few photos here in the archives.
-
Yep, that's the one. They do have cutouts in them for the oil; and are fed via the aquaduct in the tailshaft housing that is in turn fed by the oil funnel that catches the slingoff from the 1st gearset.
-
mmmm....V07 block with 90mm wet liners...machined RB30 crank with 90mm stroke...Awwww Yisss...
-
They can be had from transmission shops, I got a few of them from Cobra Transmission in Florida. They are available, and are a soft sleeve bushing that can and should be replaced when worn out.
-
Now that's what I'm talkin' about. If you're just stuck on the L24 stroke, at least get the biggest bore you can run, leaving yourself some rebuild room, and make it breath! Forged pistons...so you can enjoy the "high revving" L24 crank. (Not that it actually revs any better, lots of people have turned the L28 cranks to 8000RPM or better...some higher than that!)
-
How did you go about obtaining the Estas cam blank? Are they readily available?
-
You are about to start working in circles. Do not go down this road, unless you simply want to spend a lot of money to get nothing.
Start with an L28, and save yourself thousands of dollars.
The "Purist" engine is flywheel horsepower, not RWHP.
250HP in a daily driven car is not an easy or cheap thing to get from an L28, and to do so will require a very good cylinder head, and a very well chosen cam, header, and exhaust. The induction could be either fuel injection with a good intake manifold, or carburation with a nicely matched, correct-runner-length set of triple sidedrafts.
Do not bother with a stock cam grind if you are looking to achieve that level of power. The L20A cam is the largest L6 cam that Nissan installed in stock engines, however it is still very small. Same goes for the L26 "C" stamp cam. It's not big enough to bother hunting one down...just send your JAPAN core in and get a larger cam profile cut.
You have a target. The cheapest way to get there, is a stroked L28 displacing 3,098cc's, with flat-top pistons, a well-ported P90 head, a moderate-to-lumpy cam, a good exhaust header, and a set of large triple sidedrafts. This setup, when tuned properly, can produce 250HP and be liveable on the street, and can be very, very fun at an autocross.
Your proposed 2.7L stroked L24 would cost exactly the same amount, if not a little more, and will not return the performance that the larger displacement engine can.
I started down this same road, and now I run a 2.9L bored L28, currently being reassembled into a supercharged, fuel injected, custom manifolded, engine. My target goal is 250-270RWHP, and I will likely end up between 230 and 250RWHP. It has not been an inexpensive path.
To expand upon why the 2.7L engine won't make the power that a stock L28 bottom end can make; look at the bore diameter. The larger bore diameter REALLY can make a difference in the intake and exhaust breathing...less valve shrouding, bigger valves, more room to work to correct the airflow in and out of the chamber. The smaller 83mm bore will not allow the maximum airflow possible from the larger valves and portwork you would need to produce the 250RWHP you desire.
Keep in mind that you will need to make 300 flywheel horsepower to measure 250HP at the rear wheels, and building a 300FWHP L28 is NOT a simple, easy, or even difficult task...it's a MAJOR EFFORT.
To distill this post down; Large bore, large displacement, large cam, big airflow (but not necessarily large ports!) large power.
-
Hit the junkyards. I have bought complete runners for 350$, complete with triple sidedrafts that I turned around and sold for 1500$.
I like the way TonyD thinks.
-
You can bore the L24 block to 85mm in most cases. The F54 block can usually take an 88mm bore, and so far I haven't found an N42 block that can't take an 88, and many will handle an 89mm bore acceptably. NOT ALL L28 blocks can handle the 89mm bore!
-
Interestingly enough, it appears that the S12W (vented caliper with 43/34mm pistons) and the 240SX (38mm piston) using the 300ZX front and rear rotors (vented front rotor and solid 290mm rear rotor) has VERY SIMILAR brake bias to the Silvermine Motors kit...actually slightly more!
This all neglects pad area, which is a big contributor to overall braking...For a given piston diameter, the larger friction surface of the pad makes for not only more drag on the rotor, but also more heat absorption area. You can't convince me, nor will the mechanics show, that a 38mm piston with a 38mm circular pad area can apply just as much friction to the rotor as a 38mm piston with a pad with double the surface area, but the same top and bottom heights, such as an elongated kidney shape. Pad size does make a difference in braking capability of a given caliper, even if the piston sizes are the same.
-
With only 50 miles on it, you may not even have the rings seated yet. You don't advance the cam gear to pick up compression...that is to correct cam timing from a stretched timing chain. If you just rebuilt the engine, then you should not have a stretched chain!
Set the valve lash cold, then run the engine up to temperature, and set it hot. Then do your compression test. A freshly rebuilt head will need the valve lash checked several times over several thousand miles before it will "break in". Some valve/seat/cam/rocker combinations will take longer than others. Most people say I'm full of shit and they set lash once and never check it again...I usually ask them to pull the valve cover and check it, and it's normally very wrong.
-
Compression numbers mean little to nothing, as far as 140 vs 180, ect.
All a compression test is really good for is finding a bad cylinder in the group. The engine should be at operating temperature, all the plugs out, throttles wide open, when you do the test. The lowest compression cylinder should be within 10% of the highest cylinder. If it isn't, then dose it with a little oil and do it again...that picks out bad rings vs, bad valve lash or poorly sealing valves.
Valve lash, pin bore clearances, little differences in stock vs. aftermarket pistons and rings, ect will all vary compression numbers a little.
-
Call Garret or a turbo rebuilder. Usually it's between 12 and 28 in-lbs. Some are different.
-
The VE analyze live is NOT for tuning until you have a good map first! You can't just turn it on and drive away, or you will have idle problems and probably big holes in your tune. You will need to actually do some hand-tuning to get the car driving nicely, then you can use the VEAL to close up the gaps and smooth things out.
-
They're hard as hell to find around here. Everyone wants a bill or better, and they all look a little rough.
I did find a few mercedes W124's with nice Behr oil coolers though. Too bad they have quirky M22x1.5 compression fittings on them. They're a little big for the location on the car; but I have it all worked out with the 24 row Long cooler.
I ducted from the front air dam brake-duct cutout to the wheel well with cardboard; and I'll be fiberglassing over the cardboard to make the finished duct. The low-ish neutral pressure zone in the wheel well and the high pressure air through the brake duct hole should direct air through the cooler at any speed over about 10MPH, and the hose routing is simple and direct.
-
The stock 280ZXT's came with A/C too, why not use a ZX compressor and mount? It cleared the turbo in those cars.
-
I measured three heads that I suspected to be uncut when I got them, and they were 108.0mm, 107.9mm, and 107.9mm. There are both 0.015" and 0.020" thick shims out there, although Silver Seal still sells the 0.020" thick shims.
-
Delta has had problems with that, my 0.480" lift cam was 0.455". They were working with a 1.6 rocker ratio instead of the real 1.48 ratio of Nissan rockers.
-
I found that the wheel wells were a slight negative pressure area in front of the wheels, and basically ambient pressure behind the wheels, relative to the cabin. The base of the windshield, down to about 12" in front of the windshield, showed a high pressure area relative to the cabin, at all speeds. This effect got washy for about 8" from each A-pillar, but was pretty steady in the middle. Once the car is running again and I have a few good calm days I'll finish the grid across the whole car.
I figure Dwyer knows what their gauges are made to do, and since the instructions for use clearly show how to use both ports to measure difference in pressure, I figure it's meant to be used that way. If my numbers don't mean anything to you, Rsicard, that's fine...but they work fine for me and thousands of other people who install them this way every day in HVAC ductwork. (where they're used to measure pressure drop across a filter element, to know when to change the filter.) The magnehelic gauge is really nice for indirectly measuring flow through a heat exchanger, too...provided that all the air must go through it, and cannot go around it. Simply measure pressure before on the high port, and pressure after on the low...you get the pressure drop through the core and can work out the flow rate based on the pressure drop and the area of the exchanger. I just use it to measure if the difference in pressures increases or decreases based on what I did.

Biggest bore L24 Block??
in Nissan L6 Forum
Posted
It's a LOT of machine work, comparatively, to get the RB crank into the L block. Several dimensions along the length of the crank, plus addressing the thrust bearing, rods, clearancing the block, ect.
I have looked into having liners installed in a V07 block, and it was a LOT less than 6K locally. I was quoted 1250$ to have the block magnafluxed, sleeved, mains align-honed, block decked, and block pressure tested, by a diesel machine shop. Linered blocks are their bread and butter, and they had some sleeves on the shelf they said they could make work. The liners weren't welded, but instead installed with O-rings.