Boben
Members-
Posts
401 -
Joined
-
Last visited
Content Type
Profiles
Forums
Blogs
Events
Gallery
Downloads
Store
Everything posted by Boben
-
A musician's therapist (The $300 Z)
Boben replied to Zetsaz's topic in S30 Series - 240z, 260z, 280z
At least from this angle, not ratty at all. Very nice looking car. Congratulations! 👌 -
Jboogsthethug's 1971 240z build
Boben replied to Jboogsthethug's topic in S30 Series - 240z, 260z, 280z
Well, as many times is the case with these kind of classic restomod project cars, they don't see a whole lot of miles. So I cannot say whether it is bullet proof, but it is the right stuff for the particular environment and designed to endure oil on the surface.- 168 replies
-
- rb25det swap
- 1971 240z build
- (and 4 more)
-
Jboogsthethug's 1971 240z build
Boben replied to Jboogsthethug's topic in S30 Series - 240z, 260z, 280z
This tip does not help If you have leaks on the gasket seam due to warping, but otherwise, If you have a leak on a welding seam, you can apply Glyptal engine internal red enamel. It is intented to close any porous on the internal walls of an engine block. Also works on the oilpan internal surface since it can endure oil and temperature upto 130 degC. I once sealed my modified steel oil pan with that stuff, when it was leaking from a welding seam.- 168 replies
-
- rb25det swap
- 1971 240z build
- (and 4 more)
-
Jboogsthethug's 1971 240z build
Boben replied to Jboogsthethug's topic in S30 Series - 240z, 260z, 280z
That is a nice pan. Was there any warping of the gasket surface area due to the welds? I need to do something similar on my build, but the BMW OEM pan is aluminum and I'll probably use more than just the gasket plate. I did some minor modification on an aluminum pan in my previous build and the gasket area warped to the extend that I needed to machine it straight. And this happened even though I had the pan firmly bolted on a metal table while welding.- 168 replies
-
- rb25det swap
- 1971 240z build
- (and 4 more)
-
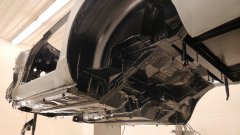
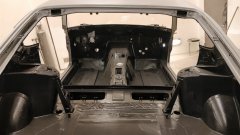
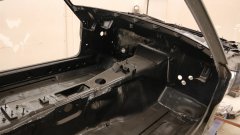
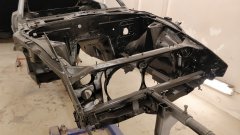
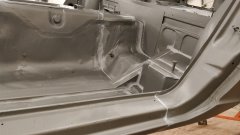
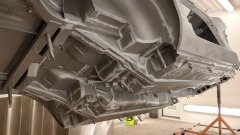
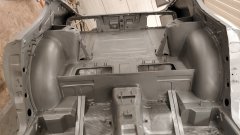
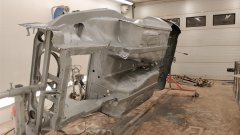
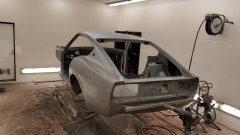
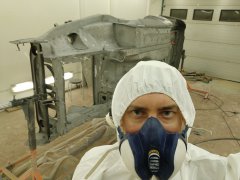
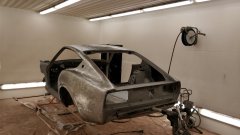
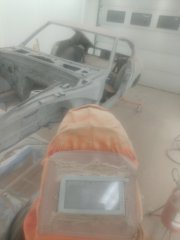
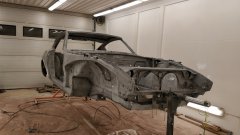
It's been waaay too long. It is over two years since I've worked on the car, but I finally found some time after finishing our new house and garage (to the point that we were able to move in anyway...) Actually, I needed to make some shelves for my garage and got some rusty old industrial shelves for free. They needed sand blasting and painting so I decided to do the 240Z "on the side". Of course the work on the 240Z ended up being the more time consuming task, and the Wife also expressed herself on the long hours at the garage. Anyway, the very tedious process of sand blasting the shell to remove all the surface rust from all the welds, spraying the first layer of epoxy, seam sealing everything and finally spraying the second layer of epoxy (in black) to the bottom, to the interior and to the engine bay is finally done! May the pictures speak for themselves:
-
From the album: 240Z EgoBoost
-
From the album: 240Z EgoBoost
-
From the album: 240Z EgoBoost
-
From the album: 240Z EgoBoost
-
From the album: 240Z EgoBoost
-
From the album: 240Z EgoBoost
-
From the album: 240Z EgoBoost
-
From the album: 240Z EgoBoost
-
From the album: 240Z EgoBoost
-
From the album: 240Z EgoBoost
-
From the album: 240Z EgoBoost
-
From the album: 240Z EgoBoost
-
From the album: 240Z EgoBoost
-
What I've come to understand from work dealing with filtered air cooling systems for electrical cabinets is that a fan has a hard time sucking air through a filter, which is basically the same thing as pulling air through a radiator. Also, while axial fans are capable of producing the same amount of air flow as radial fans without restrictions, the situation changes quite dramatically when a restrictive element such as a filter is introduced in front. In this confuration, the radial fan is the winner in terms of air flow.
-
Now that I look at the picture of the fan I posted assembled in front of the condenser, I realize that the geometry is definitely meant for a pull application and not optimal for a push aplication. Too bad... I guess I'll just need to wait and see when the day comes when I finally get the car running, weather or not I run into heat issues.
-
You are right. This is how most of the fans are mounted. The bracket was already removed from the Alfa when I got my hands on it so I am not entirely sure of the OEM installation. Based on a quick google search, might have been assembled in the back and meant to pull air through the radiator. Quite many after market fans have the blade geometry symmetrical (straight) so that the direction of the rotation can be changed by switching the supply polarity, hence enabling the use of the fan both in a push and pull configuration. The Alfa fan geometry looks also suitable for both applications so I think it is going to work. Also, a fan can produce a much bigger volumetric air flow in a push configuration compared to a pull configuration.
-
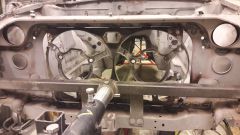
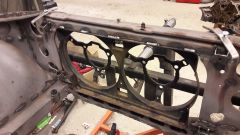
With the condenser and radiator mounts finished, it was time to modify the opening in the front to accept the Alfa Romeo 156 V6 dual fan bracket / shroud. I removed the original fixing flanges from the bracket by drilling through the spot welds and finishing off with an angle grinder. Then I cut the opening. around 2mm from the top all the way and cutting into the corners of the opening on the bottom did the job and the bracket slipped right in place. I applied some weather stripping around the shroud edge and mounted the shroud firmly agains the condenser. Should work quite nicely. After a light sand blast along with the rest of the body and some epoxy primer, the bracket should blend right in.
