Orangetang
-
Posts
30 -
Joined
-
Last visited
Content Type
Profiles
Forums
Blogs
Events
Gallery
Downloads
Store
Everything posted by Orangetang
-
So the issue at least with my 70 and 72 dashes is the holes are not round, but oblong or oval even. I've used some pieces of plastic pipe, caps, oilfield tubing, etc to find a way to get these 4.5" gauges to sit further ahead than the 4"/stock locations people use. I've concluded for now that the best option may be to use 4.5" gauges in the STOCK location but with a remote button for the odometer/tach reset buttons. Having the buttons on the gauges means removing the plastic lens from the stock housings, which leaves a disappointing gap between the front and rear trim bezels. Not to mention a awkwardly deep hole to stick ones hand into to operate the gauges. Yes, deeper than stock. The 2 5/8 gauges will work well sitting inside a price of 2" abs or possibly pipe, secured by the stock screw location. You'll need some fuzzy trim such as the soft side of some velcro tape to wrap the gauge in so there isn't a gap in between the speedhut bezel and dash cutout. Either way, the 4 and 4.5 gauges fit in the same location in the same way. You get more gauge face with a 4.5", but it won't sit any further ahead unless you fabricate a ring for it to sit on. An oval ring. May not be worth it. I'll caution that a >5" gauge will likely exhibit the same problem and would possibly be worse if it wants to sit on the outside of the cutout. That cutout faces downward, with the overhang from 10-2. Must sit inside. Likely also not a circle at the forefront of the dash. Potential Eyesore. The car is gutted to a chassis at this time. I was working on the dash seperately but will post photos when I eventually decide on a compromise.
-
I'm out working in the field again, but I'll look into it. For what'll be over $100 CAD, I can probably source something that will work better for me. I picked up some 5" OD couplers for 4" ABS pipe and the 4.5" gauges sit PERFECTLY inside of them, but they are also too large to fit inside of the dash openings. Those rings are showing a 5.20" OD, so they're too large for the hole. The link I posted of the fella who used them must have used a custom ring or smaller ring that Speedhut hasn't listed. I'll get the ID/OD calipers out next time I'm home over xmas-ish. If I can find a similar PVC coupler, I may try that, painted black. The wall thickness should be a little smaller so it may deform easier, or I could put a relief cut on one side to help it conform. This ABS plastic is pretty burly. I should probably start a built thread for this once I get it figured out to stop flooding this thread... Though any 4.5" guys may be interested. IMO, the 50 mm platic pipe mod and 2 5/8" gauges are a solid WIN for a speedhut conversion. That said, the 'speedhut series' can be found in 2 -1/16" and are WAY less expensive. Like half the price.
-
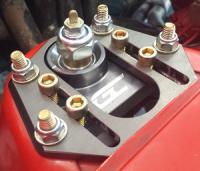
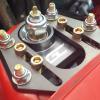
Took a look at the gauges today. They're put together pretty nicely. My only complaint is probably that the logos I gave them could have been smaller. It may be their printing process and limitations to resolution but edges of the logos are 'jaggy' for lack of a better explanation. I think once they're in the car I wouldn't ever notice, honestly. I spent a few minutes shortly after opening the box mocking/fitting the gauges in a spare dash I have in the basement. The 2-5/8" gauges WILL sit on/in the factory gauge pods if that's what a person wants to do. The threaded ring that comes on these gauges will hold them in place, and other than taking the stock pods apart, removing the 'glass' and guts and putting them back together, there isn't really any required work here. You COULD alternatively mount them in 50 mm PVC/ABS pipe if you didn't want to use the stock pods. When I say 'stock pods', you'll need three clocks, or some skill with a dremel to knock out the tabbed face on the split gauges. I'd say a wrap or two of some felt ribbon or similar fabric to fill in any void between the speedhut bezel and the dash cut-out would hide any gaps if using just pipe, like I think I will. That said... the tach and speedo may be a bit more of a challenge. I see why some people go with the 4" gauges for the sake of just mounting them inside the factory pods. IMO, removing the 'glass' again would leave a gap between the plastic piece that holds it in place, and the main bezel/trim. I was under the impression that the 4.5" gauges would sit further ahead and would make it easier to push the buttons on the gauges, and avoid that gap I'm speaking of. With all of that in mind, that stock housing i'm playing with right now (from a '70 Z speedo), is too small to fit the bezel of this gauge inside of it, without sitting in the rear portion. I cannot press the speedhut tach into the bezel very far, and there is about a 1/8" gap on the sides, while the top and bottom fit TIGHT. How people are fitting these 'in front' of the stock location is beyond me unless they have built their own bezels. I may try a larger diameter ABS/PC pipe to see if I can work something out that still looks stock-ish. So far, it's looking like a person needs to mill off the back of the stock steel housings, and mount the gauges in them as they do with the 4" gauges, OR, not use the steel gauge pod, and just press fit the new gauges into the old bezel with some double sided tape. Hopefully I figure something out or come across what someone else has done to avoid this. Speedhut sells a 4.5" gauge to 5" hole adapter ring for $30 USD a piece that looks like this once installed. I'll try some 4" PVC/ABS caps/couplers/pipe before commiting to that. ID of those should be around 4.25-4.50" and ~5.00 OD. It's -20C here, the car is kinda tucked away and was damaged a couple of weeks ago so I won't be taking it out anytime soon. If anything it's just begging me to fix it and paint it now. Luckily with 4 dashes and a couple of wiring harnesses I should be able to get this figure out - out of car before then. I may not be able to provide an illuminated view for a while. Here are a couple of links i've come across. I'm currently looking for the thread where someone explains in detail the bushings/fittings required to adapt the Speedhut pressure and temp sensors over. Anyone? 2-5/8" in stock pods 2-5/8" in 50 mm pipe
-
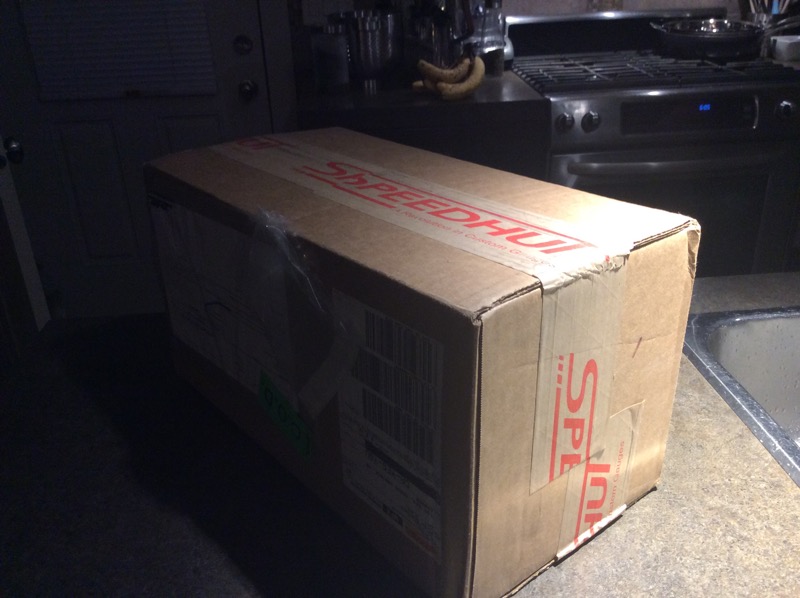
Something has arrived since I've been away....

-
Not surprising.
-
Did eztex place an order?
-
I bet sometimes the $20 bucks isn't worth responding to some of these messages. You have a lot more patience than me, ihiryu.
-
Triple 45 mm OER SK, 44 mm Mikuni PHH or 45 mm DCOE Weber for a 3L L28 build, with manifold and linkage(s). Located in Canada where new Webers are suddenly way to expensive to bother with.
-
Easy to do, hard to decide to do.
-
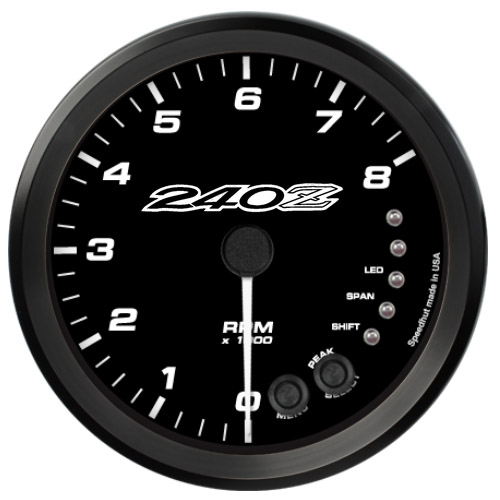
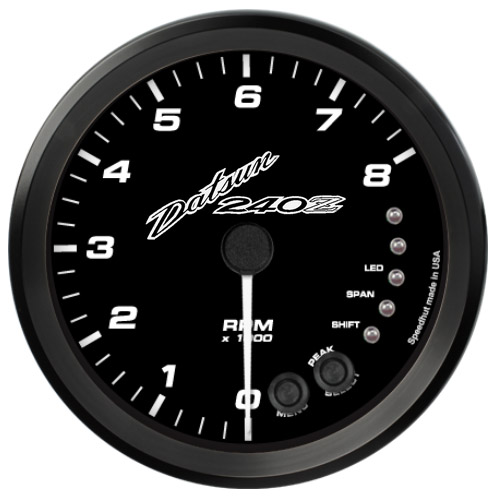
I've been playing with graphics today for a gauge order. For AFR, I have an innovate DLG-1 with a dual AFR display (for each header bank) in the clock location right now, the rest remain stock. Of the 5 aux gauges, I'm OK with abandoning the volts and clock, leaving a Fuel, Oil Press and Coolant Temp, in the tri-cluster. That said I'm on the fence about the dual fuel/speedometer option, letting me gain something like oil temp. I'll probably mount the AFR gauge under dash, pillar or mid console by the receiver. Probably going with white on black with either white or red illumination and white needle, red illumination. Dave doesn't really have a decent logo on his website that I can find, so I made up a modern looking Rebello Racing logo I kind of want to have on the Tach, since it's the soul of the car. The other designs are just stock emblems from my car. The Datsun and 240Z emblem. Any thoughts? There is a sexy as f*** Austin Healey set I found on google, but can't find the image now. Illuminated emblem looked really good.
-
Looking good, what is in the 3 gauge cluster?
-
Yeah guys, where are all the pics? I'd like to see some 4 1/2" and 2 5/8" installations before placing an order. Especially at a MINUS 34% CAD discount. How are the fuel gauges working for everyone? Do they self program and work well with the Nissan sender?
-
After finding a break in my speedo cable about 9" from speedometer, I ordered up a new cable. Just crawled under the car and buttoned everything up, yet the needle wouldn't move. I unscrewed the speedometer side of the cable and rotated the rear axle to confirm the cable was seated correctly in the pinion assembly. Nothing... Crawled under car and removed speed cable, rotated rear axle and pinion was not turning, infact it is destroyed. Pulled assembly and the nylon pinion gear is chewed up and squished on one side, looks like the shaft it sits on may be bent, as I cannot actually turn it, and the gear is sitting off centre to the pinion housing. The ring gear inside the transmission is also damaged... Searching around online it looks like the part I'm after is a 32701-66005 OR 32701-E9800. I believe the E9800 is either an updated part or an updated part number from what I've found online. I happen to have an F4W71B and F4W71A hanging out in the garage. Is there any chance this might speedo ring drive gear could be the same part? I havn't been able to find a part number for either of those transmissions. Also, since I've never pulled a trans apart before, is it possible to pull out pull just the rear housing off this one to pull a retaining spring, old gear and slide in the new one?
-
I need a set of subi side axles for an R180 27 spline LSD, or potentially your complete R180 LSD WITH side axles installed. Grande Prairie, AB T8X 0E3
-
For anyone readint through this at a later date, I threw in a shorter bearing collar from my A-type 4 speed and everything works fine. Tires spin and shifts are firmer. Firm enough that I snapped the moustache bar.
-
240Z heater/vent/fan control "buttons / knobs"
Orangetang replied to FrankieD's topic in Parts Wanted
Or glue them on with hot glue / silicone or something that isn't permanent. The screws are not a deal breaker if the price is right. -
It'll be at least a couple days before I can check any of that. The heating up doesn't seem to be relevant. The clutch operates at the same pedal throw and pedal height after being parked or while driving. Backing the adjustment at the slave back as far as possibly maintains pressure against the fork, but the slave piston may have some force against it already... I'll try some stuff when I'm able and check back.
-
240Z heater/vent/fan control "buttons / knobs"
Orangetang replied to FrankieD's topic in Parts Wanted
http://www.240zrubberparts.com/apps/webstore/products/show/4484439 Cheaper yet... they are not burrons or buttons but I think they're what you want. -
240Z heater/vent/fan control "buttons / knobs"
Orangetang replied to FrankieD's topic in Parts Wanted
A 3 second Google search found at least 3 sources. http://www.thezstore.com/page/TZS/PROD/40-2954 http://www.zcarsource.com/heater-control-slider-knob-240z-260z-280z_8_56545.html http://www.new-datsun-parts.com/datsun-240Z-parts-interior1.html -
Old thread I know, but it's most relevant to the issue I'm having with my clutch at this time. I'd appreciate any help, though after reading this and other threads I'm fairly confident I have the correct (or close enough) TOB collar and my master cylinder may just need adjusting. I'd feel better hearing some advice before I make my next move though, since I'm learning as I go and have no prior clutch adjustment knowledge. I recently put a 79 280ZX type B 5 speed in my 240Z. I used the bearing collar and fork that came with this 280ZX transmission. I'll post some pics shortly to compare between the B type 4 speed TOB collar/fork I swapped out. The 280zx fork had an indentation where the clutch slave rod would sit against, vs the 4 speed with an indentation and and hole. I used the clutch slave that was already in the car, (a generic 240Z replacement, size I'm uncertain). This slave has a threaded rod, with adjustable nut on it. In order to use with the new fork, I drilled a hole the same diameter as the piston threaded rod in the fork indentation, allowing the rod to slide through and sit happily. Currently, I believe the TOB to have a slight pre-load against the clutch. I get complete disengagement in the first 1/4 of pedal travel. If I were to dump clutch at 6000 RPM, it would slip rather than spin tires. If I shift aggressively, you can feel it slip a small amount. Engagement under throttle is soft, not firm. Clutch is a cheap eBay KUPP Racing Stage 4 - 6 puck rated at ~400 HP... Flywheel is a 143281 Fidanza aluminum Engine is 3L L28 producing 282HP/272TQ at flywheel. Because it seemed the slave was releasing the clutch far too soon, I crawled under the car and backed off the adjustment nut on the slave cylinder rod to see if the clutch would take up the slack. There was no play and I couldn't move the fork by hand, at all. I backed it off about 3/4" where there was still significant pressure behind held between the fork and slave cylinder. I hoped in the car and pressed the clutch to the floor and released it. The clutch now engaged roughly 1/4 stroke off the floor and felt totally normal. I went for a quick boot and the clutch grabbed VERY hard, and held well in all gears allowing wheel spin in 1st and 2nd. Though after a few clutch depressions the pedal/slave began to release again in the original spot, just barely depressed, and the clutch would again begin to slip. SO.... I believe the TOB collar may actually be the correct length, but instead perhaps the clutch pedal to master needs to be adjusted. I don't know, but it sounds from my reading that the master plunger may not be releasing far enough to allow fluid to return to the reservoir, so a preload is being held against the slave, which may explain how the "slack" i created has been taken up. Am I on the right track? It seems this cheap clutch is holding up fine even after some slipping abuse, as it seems under full release it sticks like glue to that flywheel.
-
Only getting an hour or two per day to play this last couple of weeks... Today, installed some 5.25" JL coax in new kickpanels, and mocked up the 6x9 JL triax pair in the rear and did some tuning / listening... Sexual! I'm kind of regretting ordering a 5ch amp last night, as these clearly run fine on this particular headunit. I suppose I need to commit to a sub(s) now in the spare tire recess. Also got the float levels gauged to ~26mm from top and found my rear choke as 'stuck', instantly solving a lot of my mixture control issue. Recalibrated the widebands and played for a bit before bed.
-
Wheel Show! Post your pics of you wheels
Orangetang replied to k3werra's topic in Brakes, Wheels, Suspension and Chassis
I think they'd grow on me, but I kinda feel they're a little overly saturated. A duller bronze would work better more me. That said, they're not bad, and I havnt ever seen wheels in a shade like that. Pretty original. That Z is a sick color, I wouldn't change it just to suit the wheels IMO. -
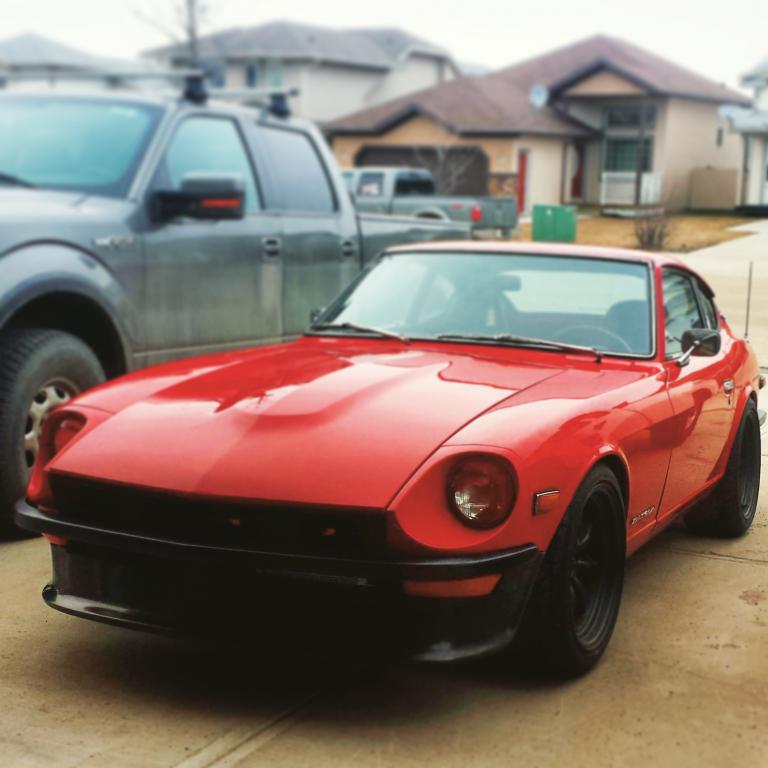
Got them brake lights turning on and off The Datsun played it's first tunes through Pandora, leaving me very excited about this summer of driving. Didn't put the blower motor assembly OR duct box back in. I can literally sit backwards on the passenger seat, put my head on the floor and comfortably slide myself up onto the firewall with two arms and a set of eyes behind my gauges.... deadly! Everything seems to be super happy except the gauge illumination which is as terrible as ever.
-
Re-installed dash, and sorting out the all the electrical connections. Currently trying to figure out what wires connect(ed) to the brake pedal switch, as nothing seems to be lining up. I have tail lights, hazard lights, signals, all working, but no brake lights (switch isn't plugged to anything), and no green/yellow wires anywhere that I can find.... Anyone got a picture of which harness chunk those leads hang out of?
-
Wheel Show! Post your pics of you wheels
Orangetang replied to k3werra's topic in Brakes, Wheels, Suspension and Chassis
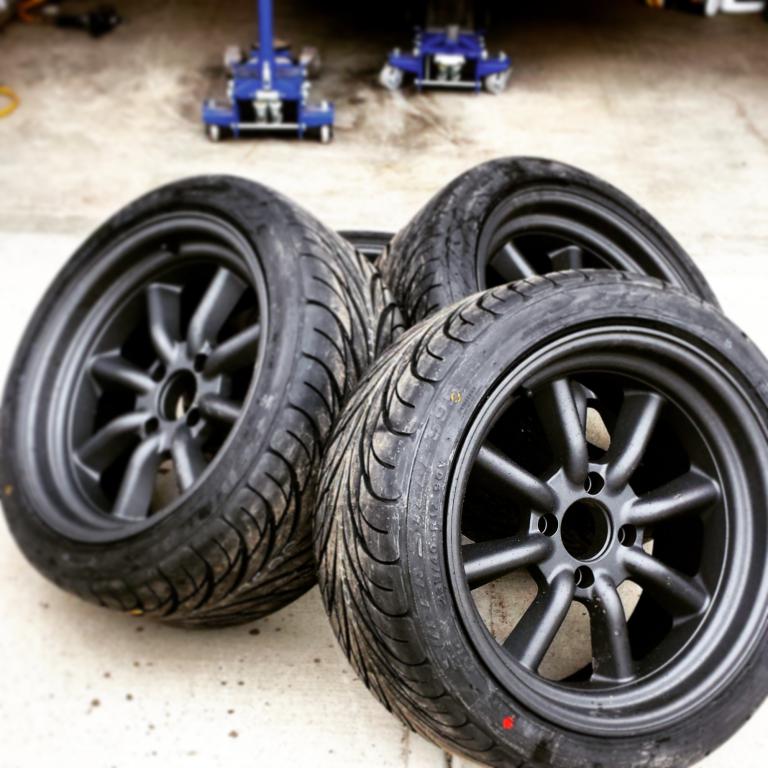
New shoes this afternoon. Federal SS595 235/40R17 Rota RKR-F 17x8.5-0 On GC coils, with lots of rear camber Fenders NOT rolled, no rub. That said, I can bump the front tires into the frame rails before full lock... To trim/fold/cut or not to... I already miss the Shakotans, but the 17s are clearing brakes and suspension components like a boss.