

Jesse OBrien
-
Posts
664 -
Joined
-
Last visited
-
Days Won
1
Content Type
Profiles
Forums
Blogs
Events
Gallery
Downloads
Store
Posts posted by Jesse OBrien
-
-
Rust and access. I'm in an 8ft wide workspace. It's more like 45 minutes to get it up on stands, and getting to those bolts was a challenge when it got dark and I was trying to feel which socket fit on the bolt-shaped lumps of rust.
I'll refer to them properly now as Chapman struts. You learn something new every day.
How on EARTH did you manage to take 4hours dropping the rear suspension???
15 drop wheels jack up and on stands
15 exhaust drop
10 pull e-brake
5 Disconnect Hydraulics
15 14 bolts
Drop with the jack, pull it out from the back....
Air tools can make this incrementally faster.
Access everything else clear on the ground.
And they're properly referred to as "Chapman Struts" in the back. MacPherson's are different and reside up front. -
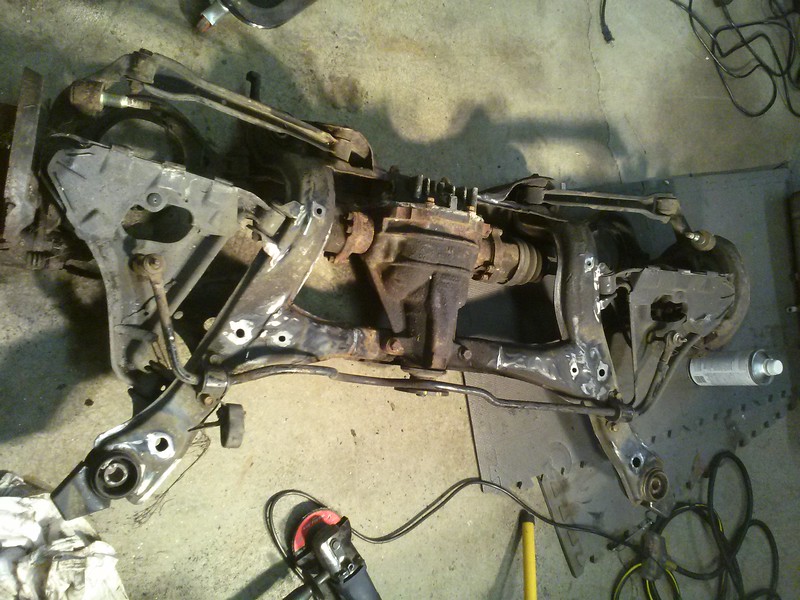
It's slow going since I got the car back home, but I managed to get the old subframe out.

I have several problems with the OEM subframe.- u-joint axles, which bind easily with minor suspension geometry changes
- Long-nose r200 differential, which has difficulty accepting a modern LSD. I've had my fill of open diffs with the Miata.
- The differential is held in place with a rubber strap - little more than a bungee cord. Does not inspire confidence.
- It's not a dealbreaker, but I'm not a huge fan of macpherson rear suspension.
- The drum brakes that come on the s30 leave much to be desired, and these are nearing the end of their life. I don't like rebuilding drum brakes, and would prefer to just swap to disks while I'm in there.
- Working on that subframe is more difficult than it should be, removing it took almost 4 hours (with all the right tools).
- Outfitting basic coilovers requires a fair amount of fabrication and $500 per corner (good dampers/springs/bushings increase this significantly).
In its place, I'm working on fitting an s13 (240sx) rear subframe. This solves all of the problems I have with the s30 rear differential.
Despite solving all my problems with the s30 rear end, it introduces a few new problems.- I need to fabricate mounting points (I'd like to tie these in to the roll cage structure, unless there's a reason not to).
- It'll require coarse suspension tuning to get the handling consistent and predictable.
- The oem driveshaft isn't long enough to reach this diff, and has a different bolt pattern. This would be a perfect time to throw a rotary in the engine bay, but I'm not sure I'm ready to commit to that much work all at once.
-
I won't know if I need it until I start test fitting, but I'm fairly certain that I'll have to have this one modified/replaced. I'll be in the garage almost all weekend (I have a meeting with the other makerspace people on Saturday, but otherwise I'll be messing with this).
I'll also need to have it modified when I swap the l28et out for a new powertrain, so this is a temporary one-season solution while I sort out the rear suspension.
Exhaust routing is mostly laid out (I need to weld on a second vband, and I'll have to add a Ypipe to the existing exhaust), I just need to figure out how I'm going to mount the fuel cell, and how low I can get it without ruining the potential for a good diffuser. The way things look right now, I'm not even going to want a rear anti-roll bar.
-
I finally hitched the trailer to the miata and picked up the 'fun stuff' I've been meaning to put into the Datsun. I've always been a little unhappy with the u-joint axles, the diff mounting situation, and to a lesser extent, the rear suspension geometry of the s30. I wanted something a little more burly and tune-able, so I picked up the rear end from a 240sx (s13). It's better than the s30 in virtually every way (but is a bit heavier, admittedly).
I'm doing some light cleaning to it now, to make sure the rust isn't too bad. Once I weld some mounting studs into the s30, I'll measure the driveshaft difference, order a new driveshaft (or maybe get the stock one elongated), and start tearing this apart for new bushings and a fresh coat of por15.
Getting everything aligned initially is a daunting challenge. I need to make sure the diff is pretty damn close to perfectly inline with the transmission output shaft. I also need to make sure the hub centers are where they were originally (I believe the track width will be a little wider, which is perfectly acceptable).
After that's all done, I need to decide exactly what I want to do for springs and dampers. I have a few ideas in that regard, but am not completely sold on any one course of action or another yet.
More to come soon!
-
Things are still moving along nicely, but tonight i was tearing down a spare head i have, and a black widow crawled out of one of the coolant passages on my hand. It took some effort, but i didn't scream like a little girl and try to chop my hand off. That's where I draw the line, I'm calling it quits for the night.
BTW; Acetone kills them.
... then hammers kill them a lot more.
-
All is not lost. I recently pulled it in to the shop to thrash it together.
Ditching unnecessary weight.
Rough cut to make way for more interesting things.
Checking to ensure that I have space for those more interesting things.
Everything looks good so far, but I'm waiting 'till Monday for more parts.
-
I couldn't get these injectors to sit inside the nylon spacer, so I ditched them. I don't imagine they're absolutely necessary anyway.
-
Looks great so far. I'd love it if you could bring this out for the next hillclimb event. I won't be racing my Datsun there, but it'd be good to have an s30 one way or another.
-
Moving ate up too much time to finish the s30, but I wasn't going to miss the first hillclimb event ... but I wasn't looking forward to driving the Yaris in an event. I was left with a tough question of what to do? As we all know, the answer is always Miata, so I bought a humble little NA, threw a roll bar together, put some sticky tires on it, aligned it, and spent the weekend thrashing it. Now I think I have my replacement for the Yaris.
Now I need to get ready for the next event, which is in Okemo - a high-power hill. I'd LOVE to wrap up the Datsun for that, but may be funds-limited for it. We'll see which car gets up there, it may depend on selling the Yaris in a timely manner.
-
Finally moved into the new apartment. A little cleaning goes a long, long way.
-
You're just going to have to settle with what is out there. What will the Z be used for mainly?
Mainly for hillclimb racing, but I'm sure I'll take it to work now and again. I only have 3 weeks before the first event, and I'm moving this weekend, so I really don't have time to put together a sleeved coilover setup. I wanted something reasonably decent that I could just bolt on in a few hours after I'm somewhat settled into the new garage. Recommendations?
-
Any updates from anyone? I'd REALLY like to get some decent springs/dampers in the next few weeks, but there aren't a ton of alternatives to Illuminas for quality.
-
If I wanted to rust-proof the engine bay, I'd have to get it sandblasted, weld up the current rust holes, then por15 it. I have 3 weekends to prep for the first hillclimb event, and anything that doesn't help me to reach that goal is just getting in the way. I mean no offense when I say this, but paint couldn't possibly be lower on my priority list right now.
Update
I'm on "the list". Unfortunately, the only other person who's registered in my class at this point is Steve, who consistently puts down some of the fastest times on the hill. I don't stand any kind of chance of competing with him (and if I did, I'd get kicked off the hill for not having a roll cage). I'm coming up to crunch time to decide on coilovers or not. I just don't know if I'm going to have time to assemble them and deal with all the little fiddly bits that I KNOW I'm going to end up needing. 3 weekends isn't a lot of time, especially considering the fact that I have to move.
-
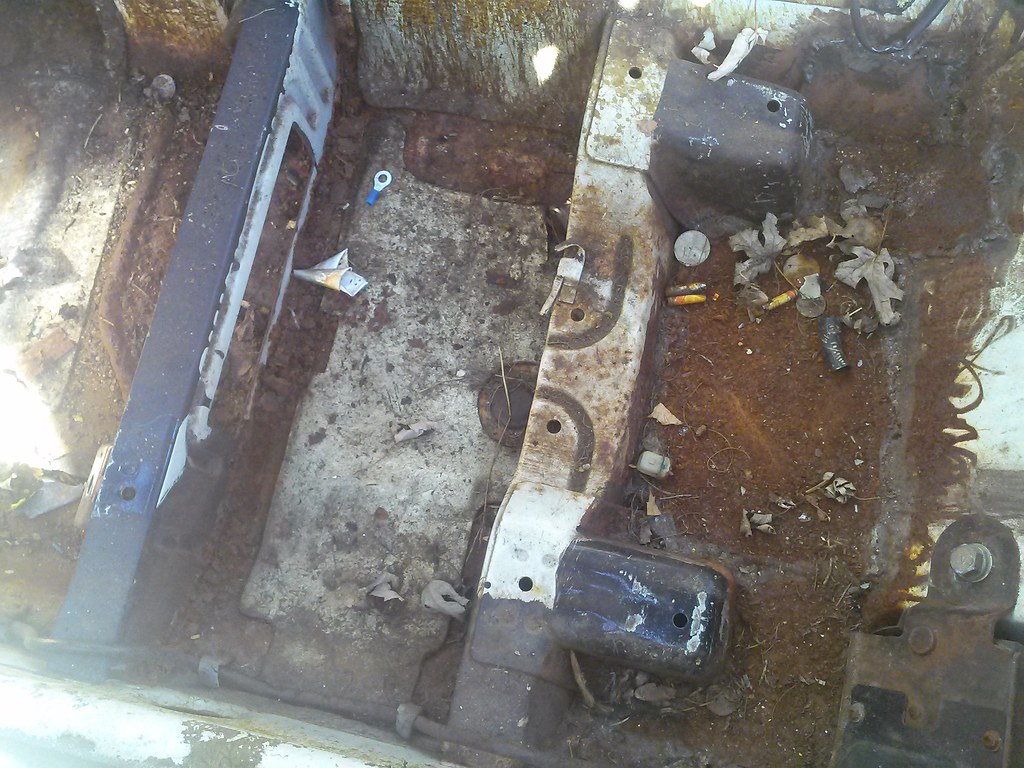
Getting to the bottom bolts was a huge pain, enough that it prompted me to leave fhe heat shield off. I found a few more of those rusty, crusty razor blades. Its kind of amusing and kind of terrifying.
-
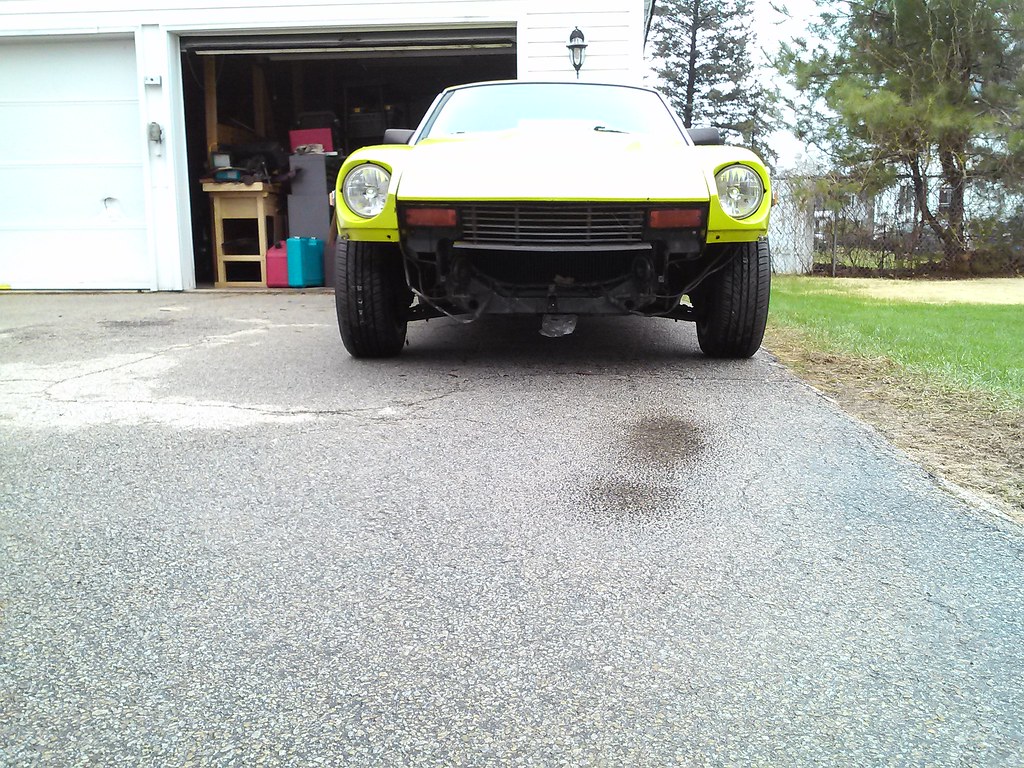
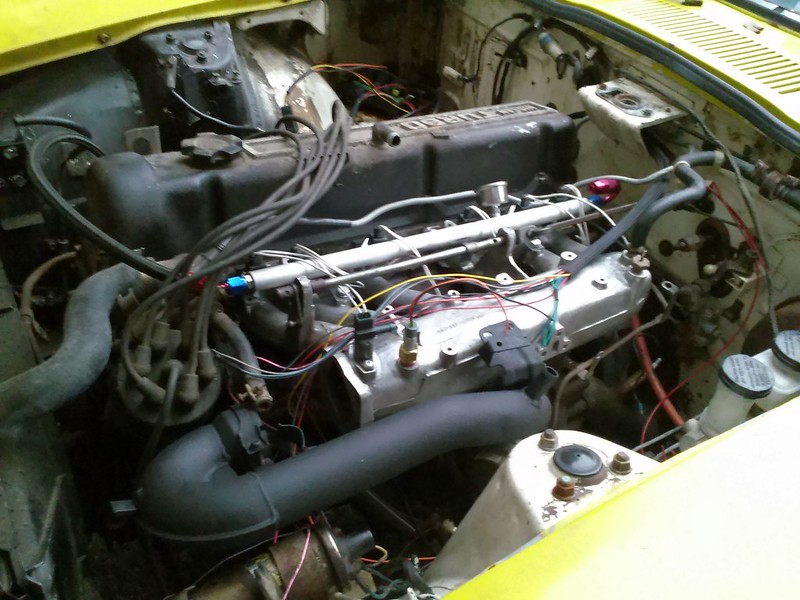
UPDATE
This shouldn't be as exciting as it is, but I feel like this is the first time I've installed a part with the intention of keeping it there. For once, I'm done removing components and get to add stuff! Excuse the crappy cellphone pic (the sun was just about to set, and it started to rain, so I just wanted to snap some progress) and the lack of a throttle body (it's in the garage, ready for install).
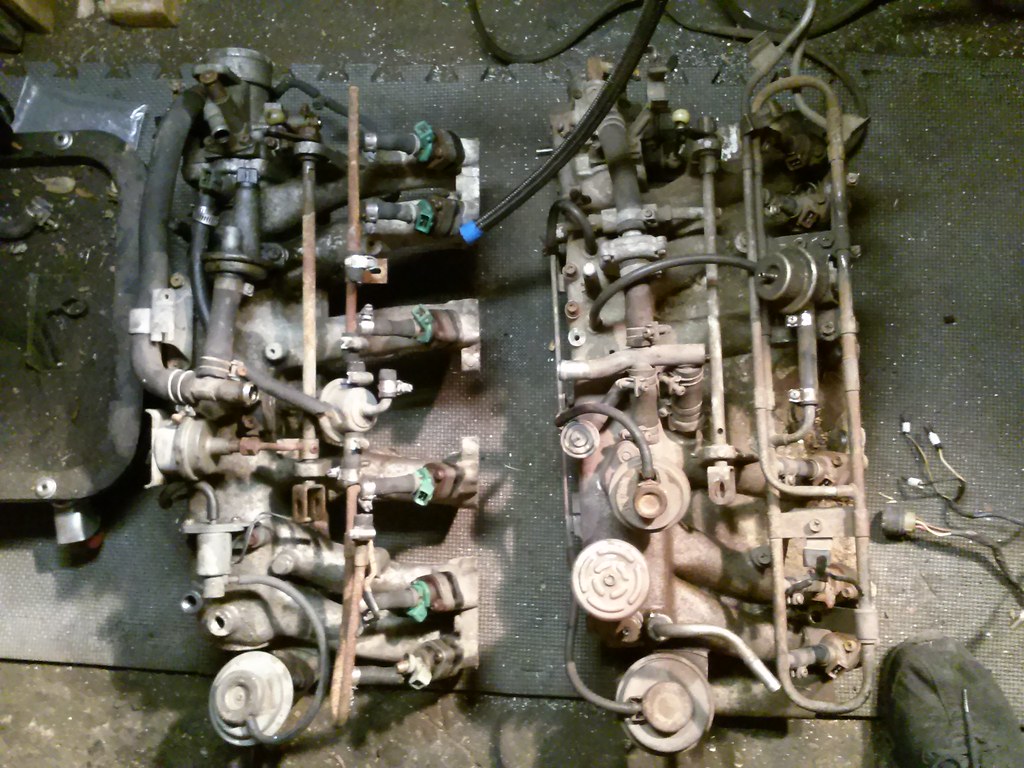
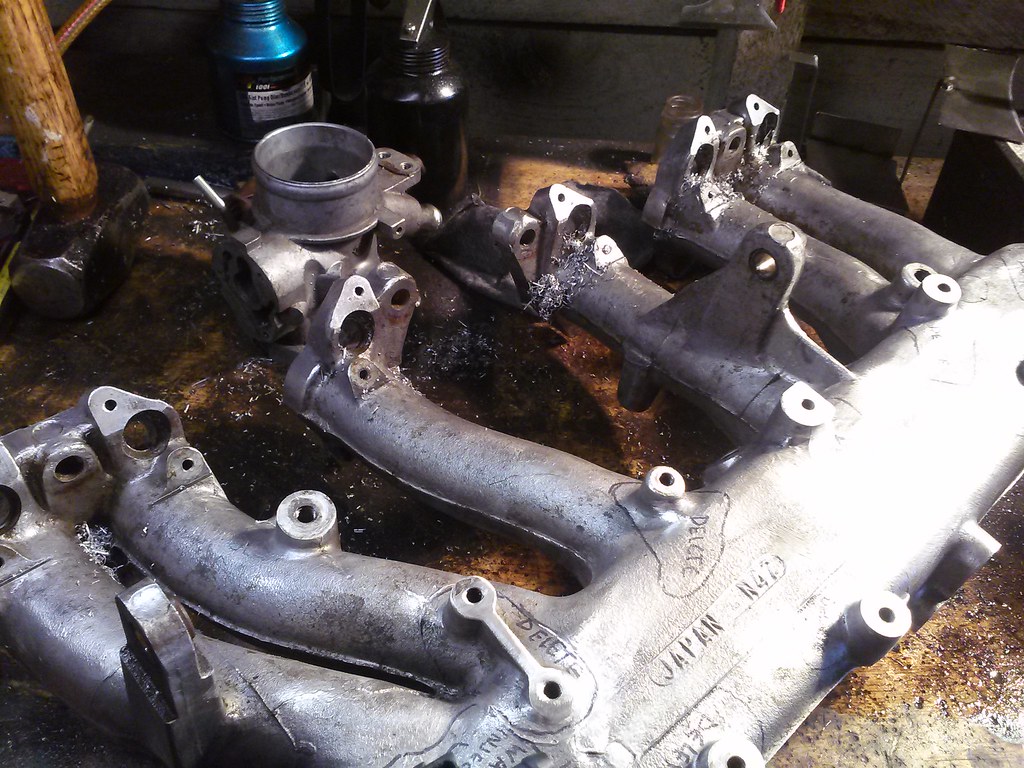
The other intake manifolds that will either be sold or hacked into:
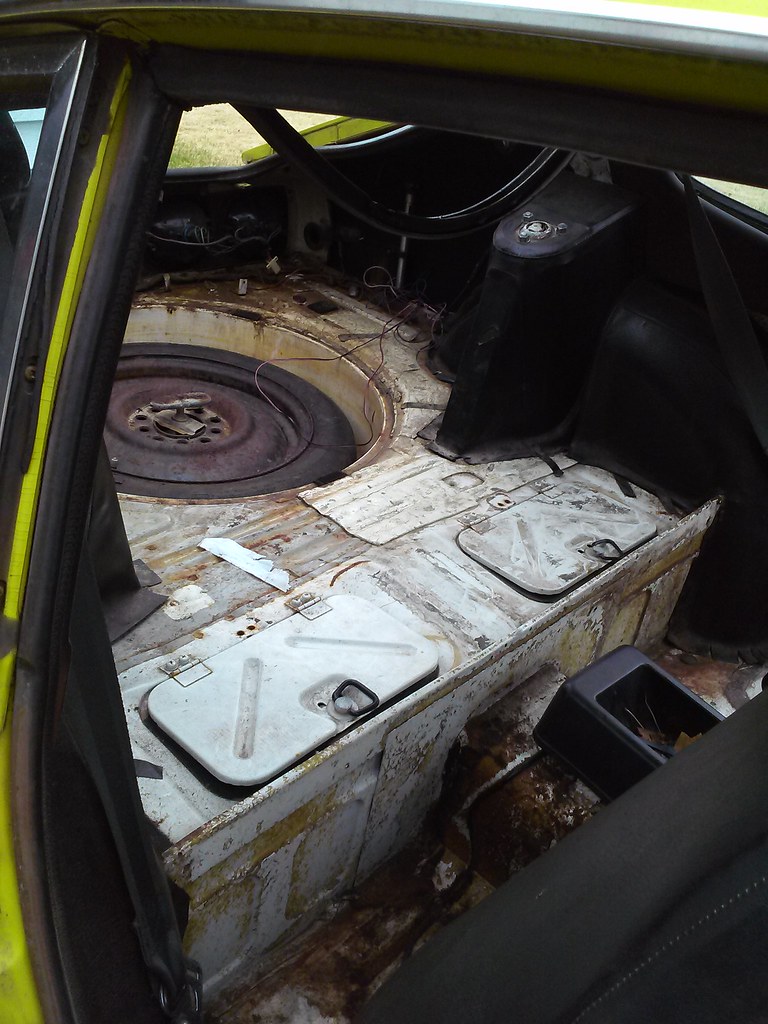
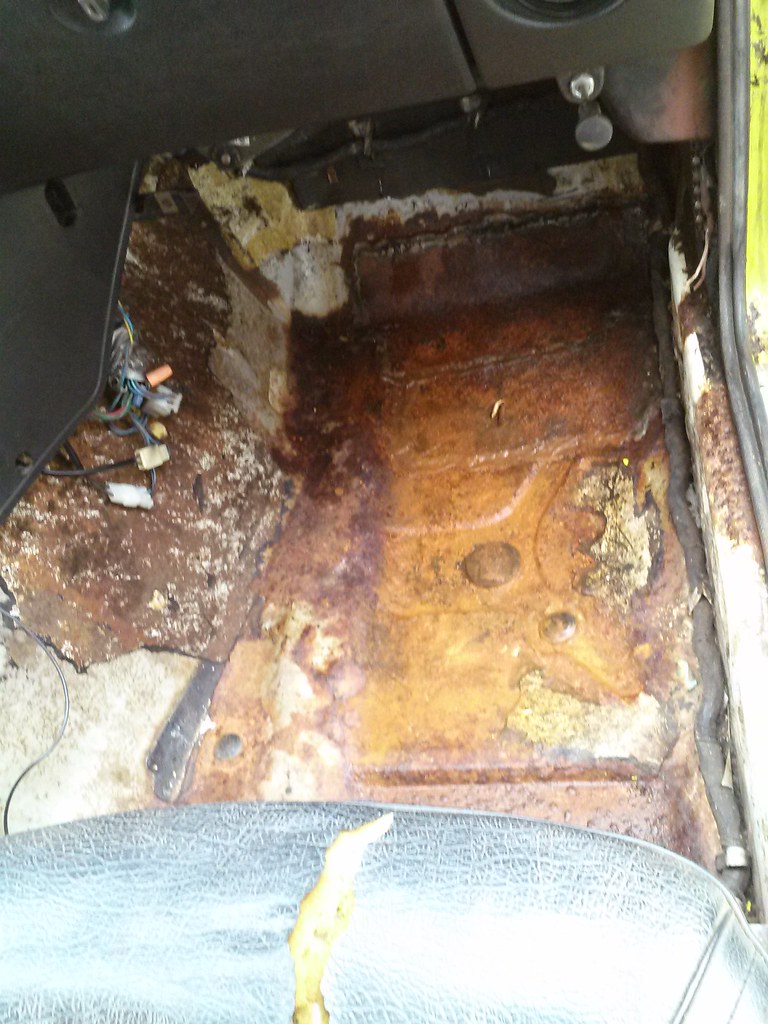
I'd like to start cleaning the interior; Does anyone have any experience with the small Harbor Freight shop vac? I've been putting off buying a shop vac for awhile, and now that I'm more-or-less ready to take the plunge, craigslist is failing me pretty hard. It'd be nice to know what's under all the sediment and grime and be able to actually paint my floors before they rot through. -
I am an idiot.
I gave both manifold gaskets that I had to the new owner of the 240z, but he didn't need either. I needed one though, and totally forgot that one was supposed to go with the l28et.
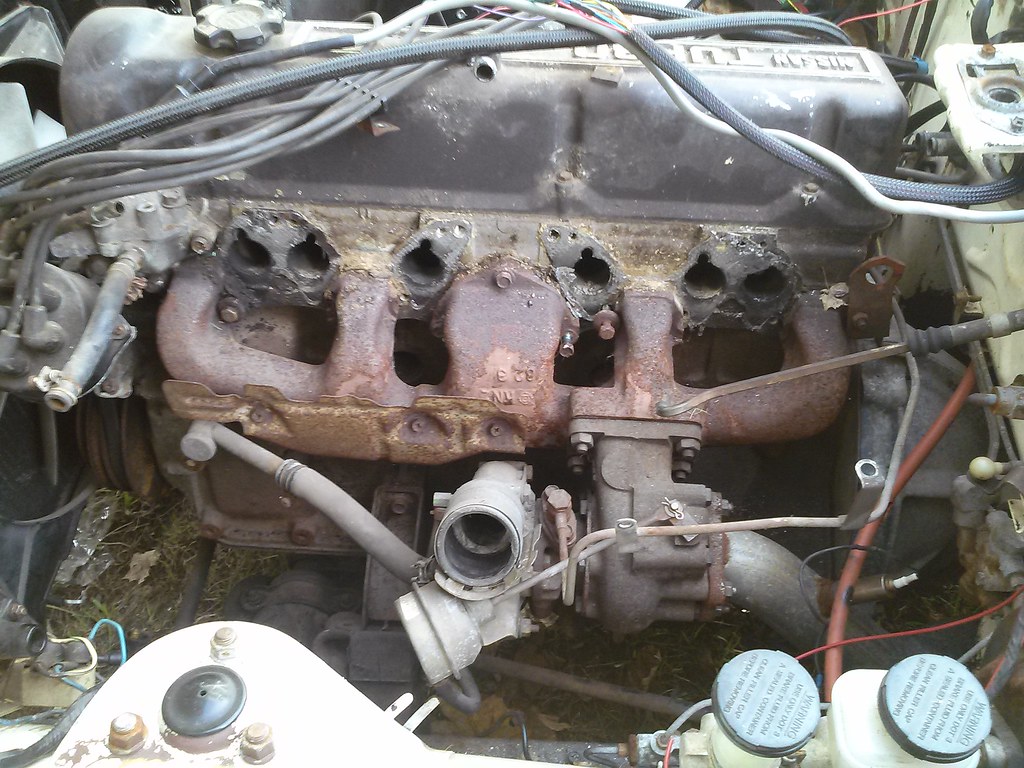
It took awhile, but I finally got the intake manifold off.
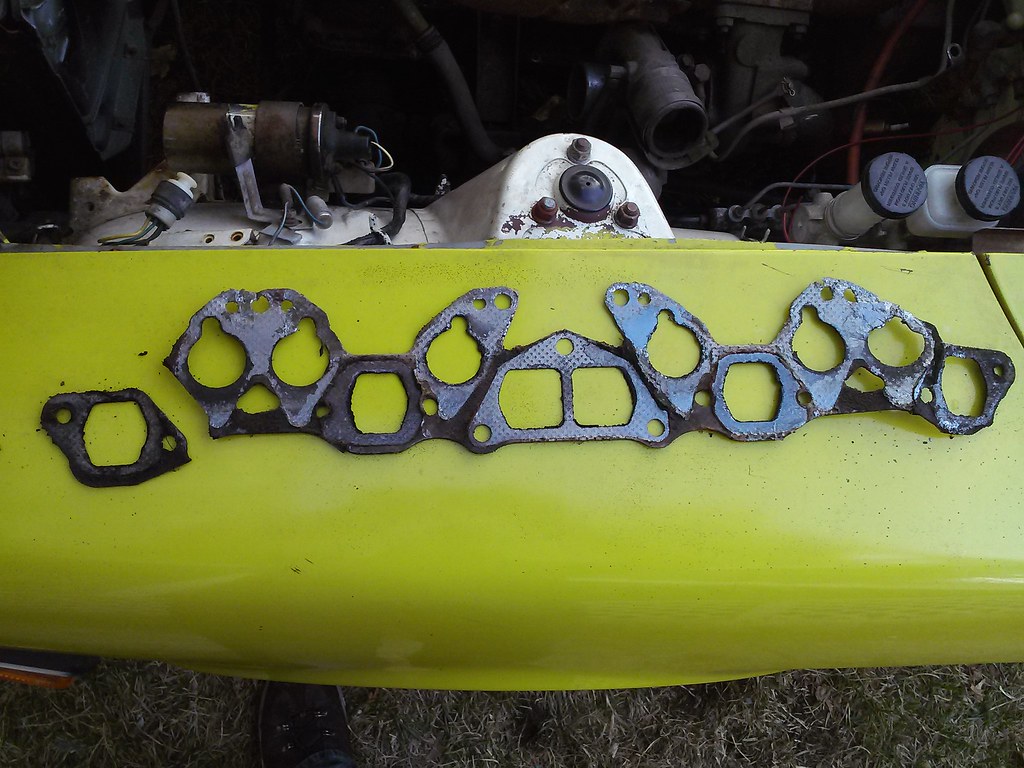
... then I saw the manifold gasket's condition (for some reason, I thought I might be able to salvage/reuse it - which you should never do even if you can) and decided it was time to pull the exhaust manifold off as well, so I could replace that gasket. The oil lines are a bit difficult to remove, and I don't want to make this more of a mess than I already have, so I'm just leaving it here for now.
The manifold gasket was just crap. All crap. Made of crap, with crap smeared on top of it.
Speaking of crap, I'm really really happy to have the stock manifold off this thing.
Once the new gasket comes in, I can slap this guy in there. I'm going to order new manifold fasteners while I'm at it, my old collection of fasteners appears to have disappeared.
It would be NICE to install my new water cooled saab t3, and to clean up the block, paint the exhaust, and lots of other 'while im in there' things, but I'm going to leave this as crusty as I think I can get away with ... but all those things push back the 'running date' and I won't allow that. Once it's running and driving, I have no problem pulling things back apart, but I have no tolerance for stuff that prevents me from getting to that initial running-driving condition. I need a starting point before I start making improvements. -
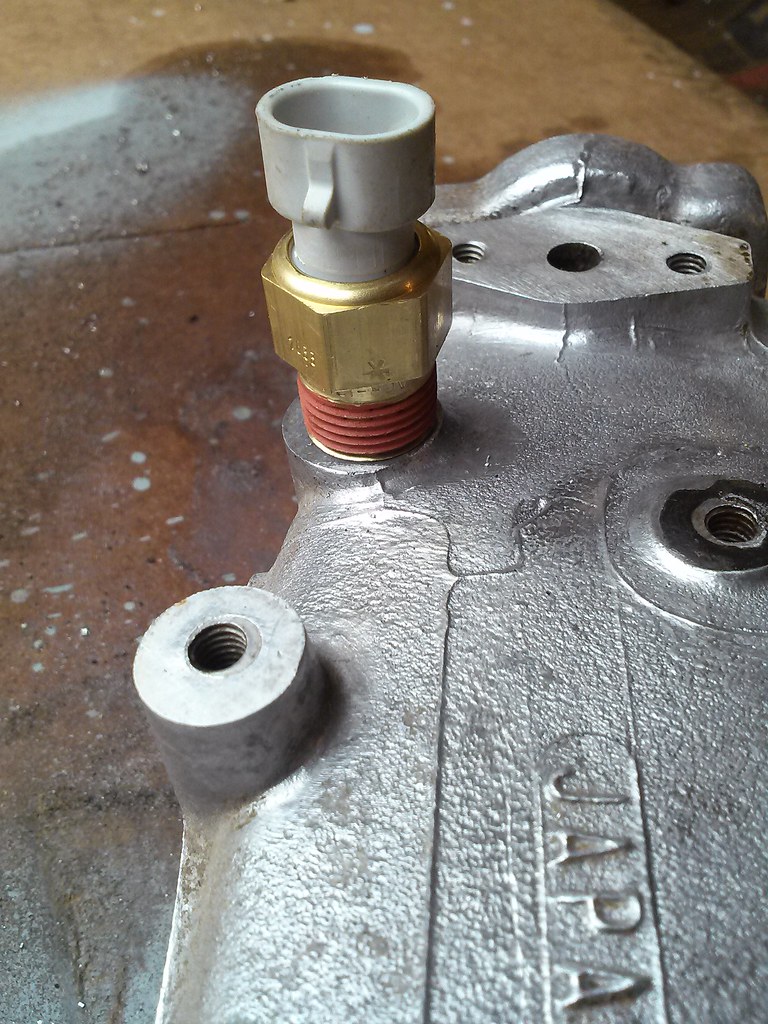
I still haven't done my research - can I just use the cold start injector for ethanol or water injection? I'm just leaving the cold start injector as a placeholder for now, but I'd like it to be actuated based on IAT output (especially since I can't run an intercooler to stay in my race class).
-
Where did you source the rod ends? Everywhere I've seen them, they're pretty expensive.
Based on what I've read (and the condition of my rear strut bar ends) I don't think rod ends are the way to go. It shouldn't really be an adjustable component, it should fit snugly and flex as little as possible.
-
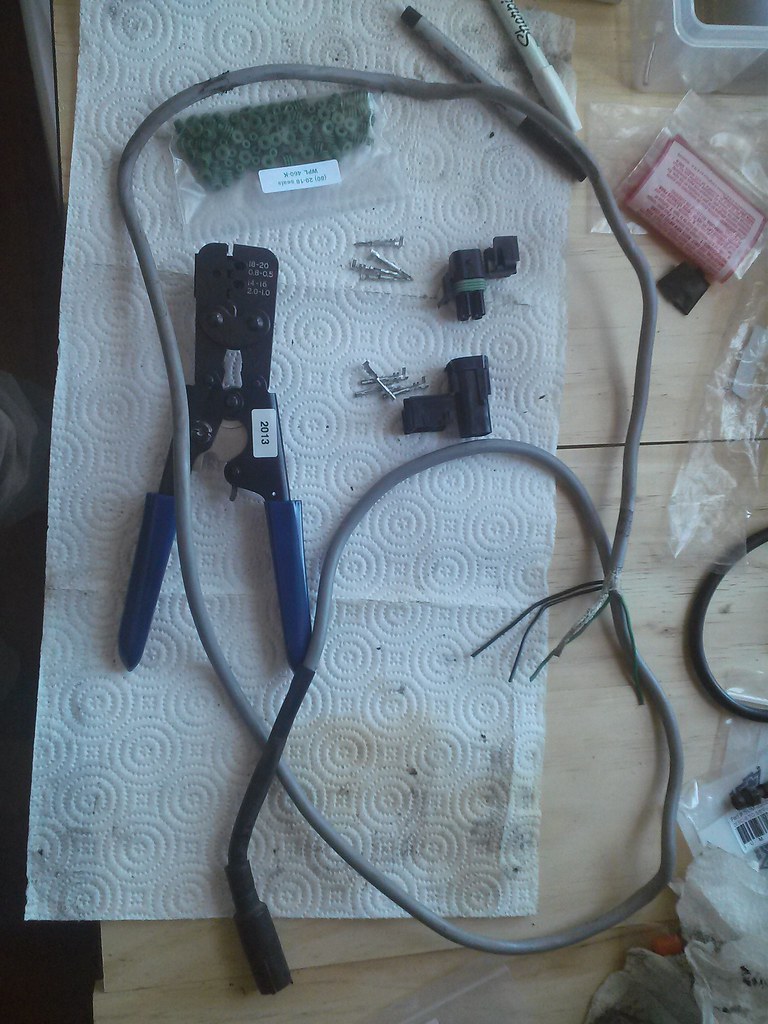
If you think weather pack connectors are good, look at Deutsch connectors, they are 10x better. They also do cost a little more, especially the crimpers, don't even consider the cheap terminals, they are not worth it, go with the high end real deal. When I get to the point of re-wiring my car I will use Deutsche connectors everywhere I can.
That's exactly what I was looking at as a middle-of-the-road solution between Mil-Spec (metal threaded weatherproof round connectors is a big win) and Weatherpack (inexpensive molded ABS is better than stock connectors, generally speaking). I think the nylon looming and PROPER self-adhesive tape is what made the difference.
If I could do it again, I'd go with more compact connectors than weatherpack. As it stands, I have both the supplies and a ratcheting crimper, so I'm just going to keep using these. There are better solutions out there, but I can't justify the price difference between weatherpack and anything else, for the limited gains I'd see. It's just not worth sinking the $250 I have into weatherpack.
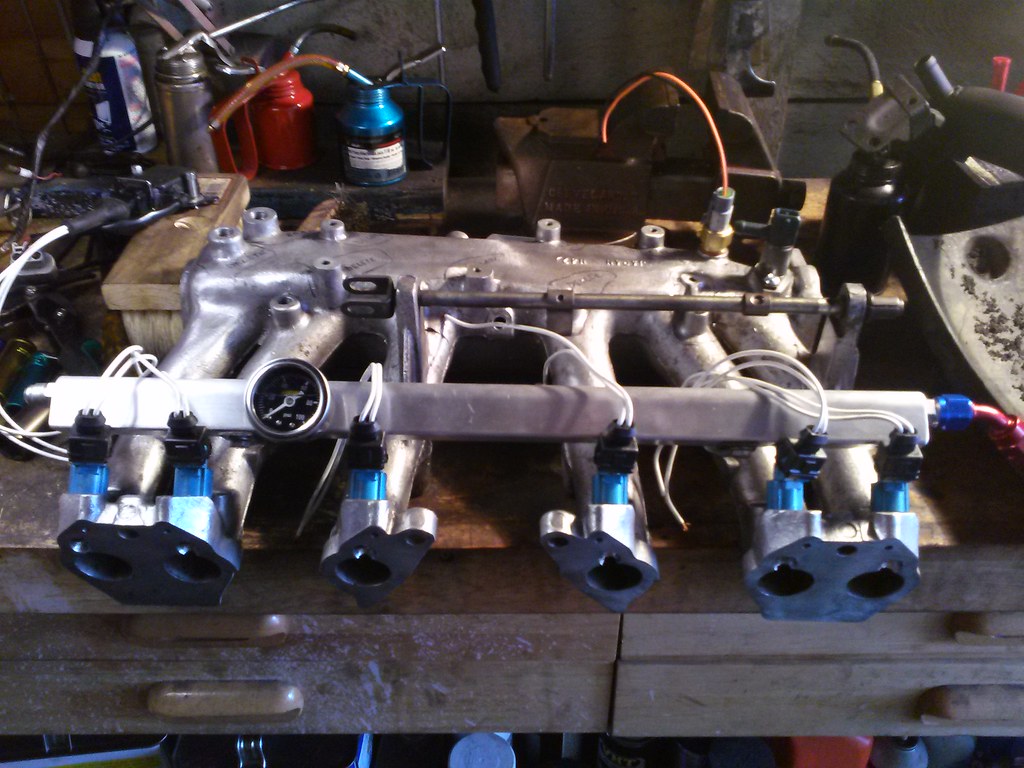
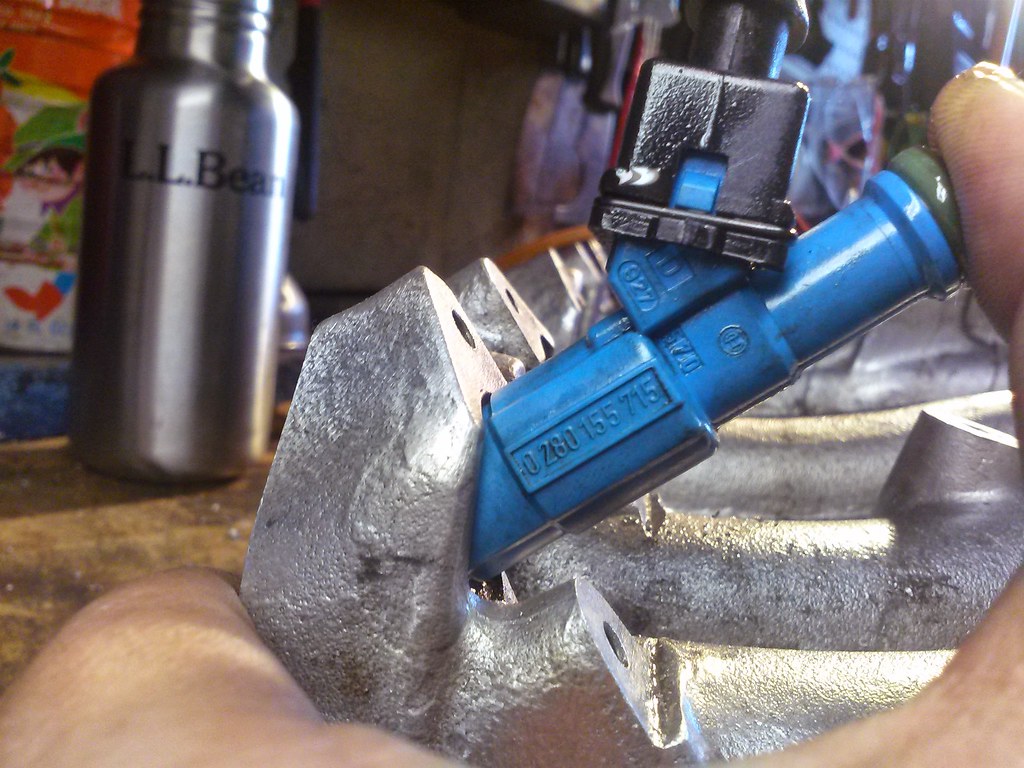
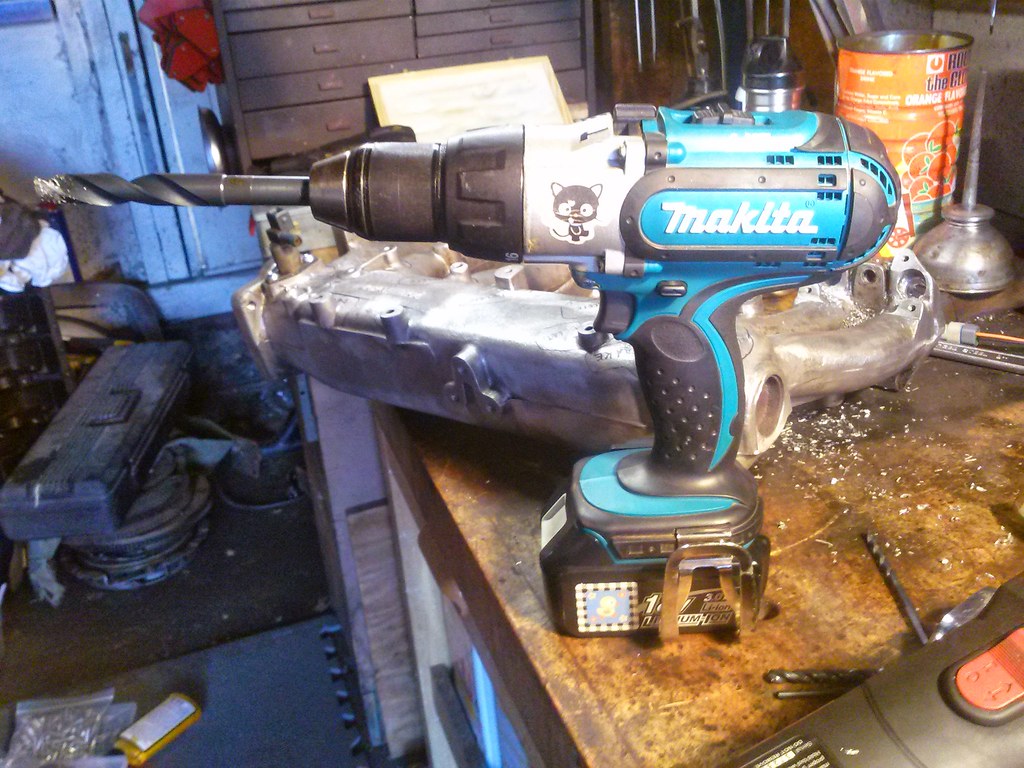
In other news, the injectors are all fitted. It took a bit of machining, which I did ALL wrong (due to lack of sufficient tooling) but they fit in pretty nicely now. I may have seated them a bit too deep, but I'll see when I try mounting the manifold. It looks like I'll have just enough clearance to fit them and have a good spray pattern against the back of the valves.
Most of the 'machining' was done with a borrowed quality drill, since my cheap little Harbor Freight one was not up to the task in several different ways. Unfortnately, it's tough to keep tight tolerances by hand, so I picked up a spare n42 manifold in case I screwed it up too badly.
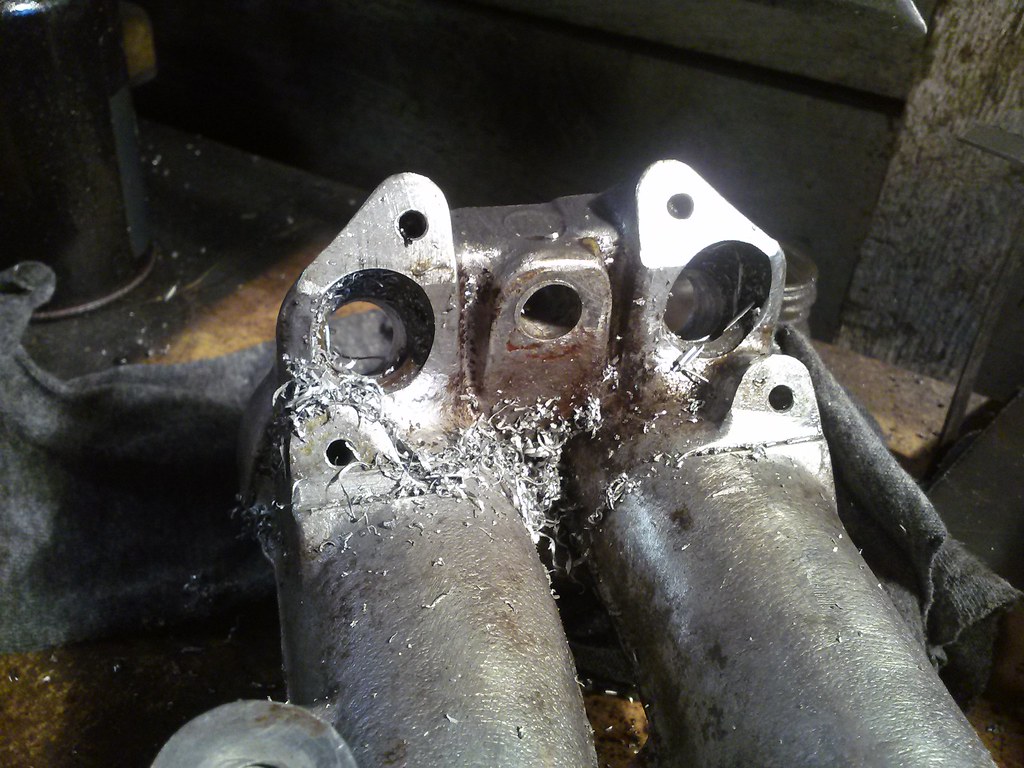
The biggest problem I ran into was the throttle towers. They're directly in line with two of the injector ports, which meant that I really couldn't reach in there with this drill and tooling.
I ended up borrowing another tool, which made it a snap to get those holes drilled. Again, machining by hand is a challenge, but I think I got it close enough that the injector orings will soak up any generous tolerances I ended up with. Although I had the dedicated 9/16 bit, I really think the step bit would work fine for this. It gives the oring enough material to seal against, and doesn't require a 1/2" shank tool to drive it.
I also had to make some fuel rail brackets, because the injector location change completely modified where the fuel rail sits. I only had steel onhand, so I mocked them up and handed them off to my friend (she's pretty awesome, she loaned both tools to me and has been helping out pretty much every step of the way).
I'm still fighting with the GM IAT sensor, which requires a 3/8 NPT tap (which I have) but that requires a 37/64" bit to drill the hole - 9/16" isn't close enough. I tried. Really hard. Once again, lack of tooling is going to cost me a few days of shipping, as I couldn't find that in any local hardware stores.
I also started the removal process of the current intake manifold, but it's pretty well stuck to the head. It's going to take some dedicated time and effort to make that happen, expect an update sometime this week.
-
The last car I had rewired for me was $500 (roughly 10 hours of work, all told). I wouldn't expect providing your own hardware to save much, so expect between $300 and $400 and get it back within 2-3 days, as a rough estimate. I hope it helps.
-
It's completely dependent upon your area/situation. I wouldn't trust someone I don't know to install wiring for me, and if you're asking us for prices (instead of the person you know) it doesn't sound like having someone else install it is the way to go. I've seen a few car audio shops try 'simple automotive wiring' like that, but I don't think I'd own any of those cars without rewiring them myself.
The idea behind the ez wiring harness is that it makes diy wiring a lot easier - If you're going to take it to a shop, just let the shop use whatever they have the best tools for (it could be GM weatherpack, or mil-spec, or whatever they specialize in).
I'm intentionally not answering this question directly, and I'm sorry for that but I really think you need to revisit how you want to reach the solution to this problem.
-
It does look a little glossy, more pics would help explain what's going on. I've been considering plastidip for my racecar, as it's a relatively easy-to-replace solution that doesn't necessarily require a lot of taping or component removal.
-
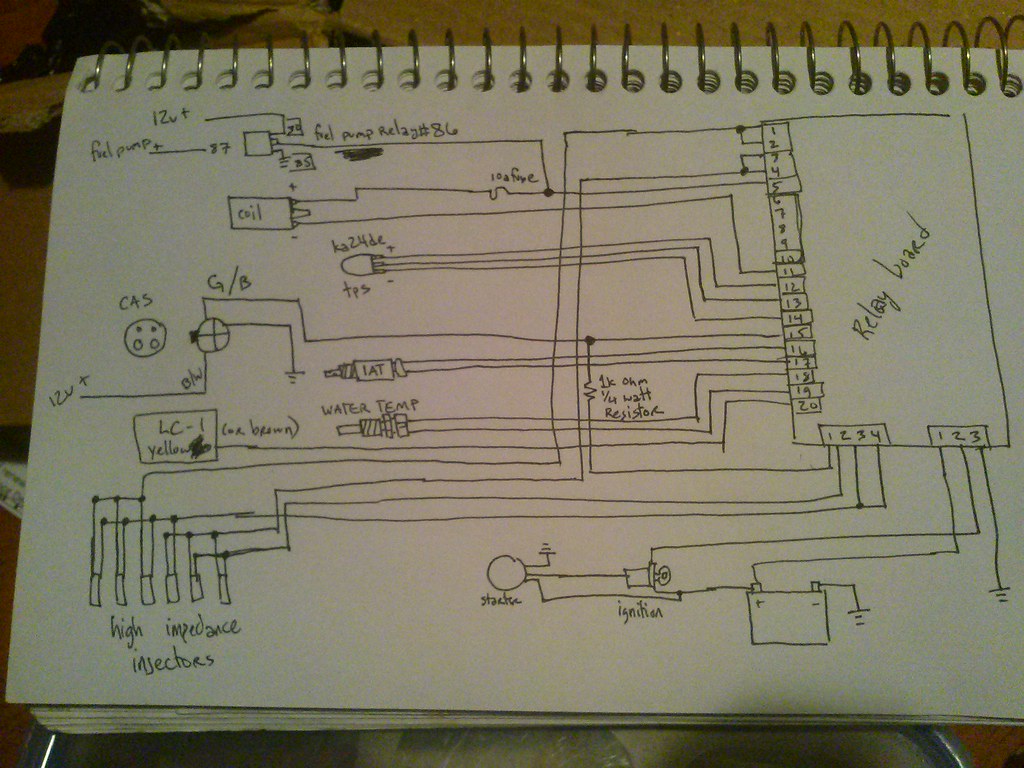
Most of it is wired up now, but I still have to start the car. I wanted to forego wiring in the injector resistor pack, because I'm so close to replacing the intake manifold completely (along with the low-impedance injectors with high-impedance injectors), so I put together a final wiring diagram for it. I tried 4 different software suites to put together a GOOD diagram, but they all failed miserably ... so you get a photo of a paper sketch instead. Hopefully it's mostly legible, I plan to put together a more final version soon, once I've verified that this all makes sense and I'm not missing something critical.
As for the injectors, I've been using an n42 intake manifold as a test mule, and found that the EV1 injectors have a much larger diameter than the stock injectors. I managed to hog out most of the bosses to ~14mm with my 9/16" bit (it's actually a stepper bit, which should work fine for this application), but the bit isn't nearly long enough to get around the throttle linkage towers.
I also don't happen to have a 3/8" tap (it's HUGE) for the GM IAT sensor, so I'm sending this manifold off to get some loving from someone else.
I also found that the factory Nissan CAS signal connector and wiring appears to be of MUCH higher quality than the DIYAutoTune wires, and ended up tossing weatherpack connectors on the far end of that instead of using the wires that came with the wiring kit.
Based on those results, I think I'm going to rewire my motorcycles with weatherpack connectors: They're a pretty solid way to solve the 'wiring connector' problem.
-
I'd love to see more of this build, now that spring is starting to emerge.


(another) l28et 280z
in S30 Series - 240z, 260z, 280z
Posted
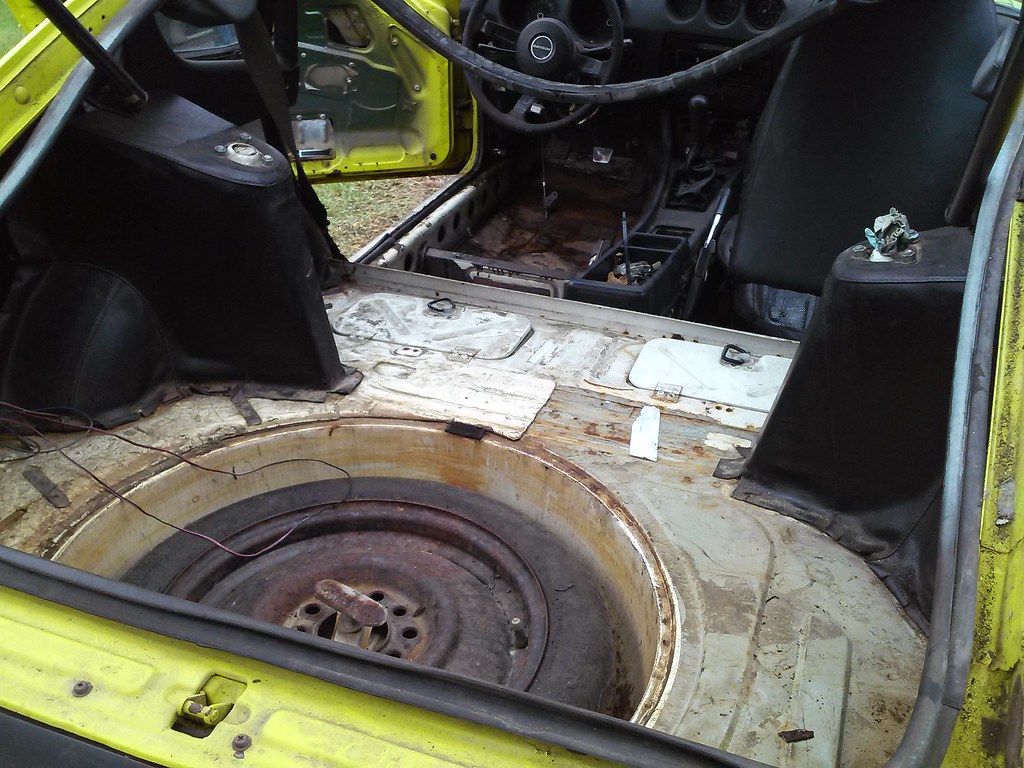
After sitting for the majority of winter (the Maita and RX-7 received most of my time, and the Datsun was crammed into the garage bay with the motorcycles so there was nowhere to work on it), I've finally circled back. There was car in the way of the rear suspension, so that had to go. I'm effectively turning the 'rear storage bins' into 'access panels' and have no regrets on that score. When the plan is to straighten and cage a car, all bets are off. "Frame" doesn't count for anything any more.