

jacob80
-
Posts
1035 -
Joined
-
Last visited
-
Days Won
1
Content Type
Profiles
Forums
Blogs
Events
Gallery
Downloads
Store
Posts posted by jacob80
-
-
Sweet baby jesus this is the things I've been losing sleep over at night and I'm so glad I came across this! I'm going to be running 800hp in my car and NEED this size tire! I refuse to cut my factory wheel wells. I will take this exact same route except probably different wheels.
Woohoo!!
-
On 10/13/2017 at 1:43 AM, 260DET said:
No matter how good the chassis presently is 800hp requires more strength. Like heavy section full length chassis rails for a start.
-
 1
1
-
-
Hey guys,
I haven't posted on this forum in awhile but would like to get back to relaying updates here rather than Facebook as documentation for work on these cars are readily available here whereas not so much on Facebook groups.
Over the last couple weeks, my fabricator Ross at Rebellion Forge has taken on the task of fabricating some bars for my 240z including a 4 point roll bar, radius rod reinforcement, seat brackets, subframe connectors and front strut tower braces.
For those of you that don't know, I have an ongoing YouTube series (2J-Z) that I have been documenting my work through videos on this car. Check out the latest episode on the build as we dive into the chassis fabrication in order to reinforce the car to ultimately prepare it for 600-800hp as a street monster!
-
Wow looks awesome!
I just had a quote come back from JustDashes...$1750!! Far more expensive than I was expecting.
Is this the go-to method for restoring these S30 dashes? I have the typical 3 cracks on the gauges in the center. I'd love to restore mine, but if it isn't going to last if I do it myself...I'd rather have it re-covered by a professional.
-
17 minutes ago, Nelsonian said:
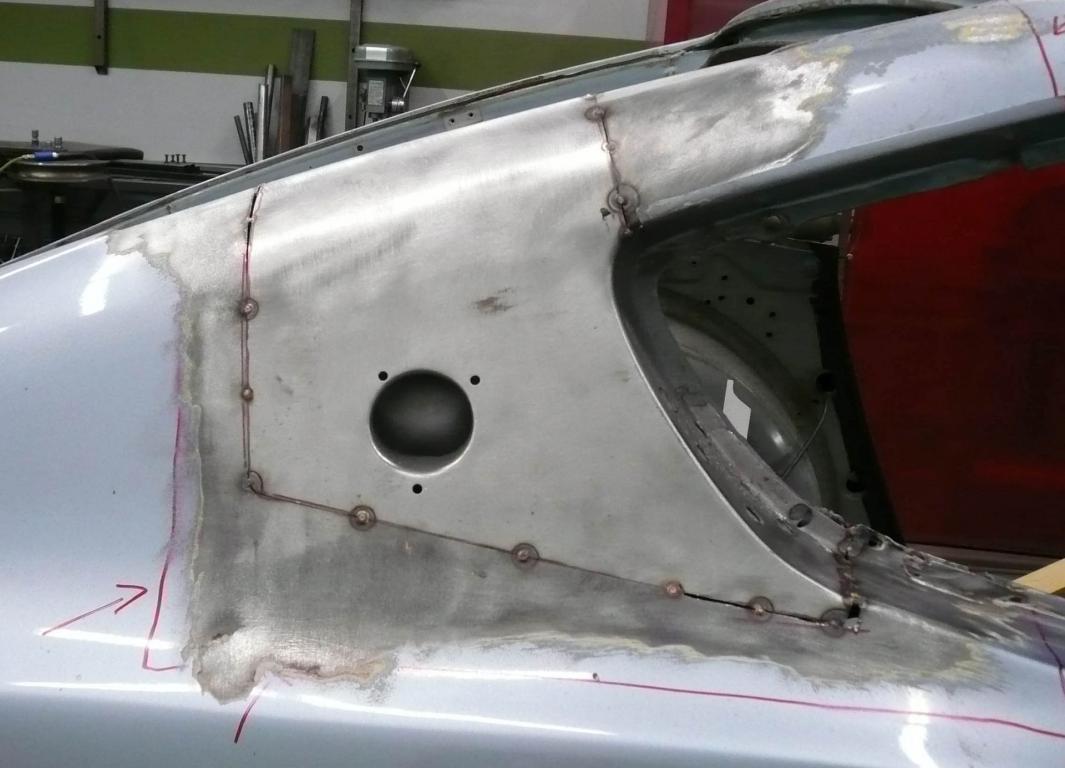
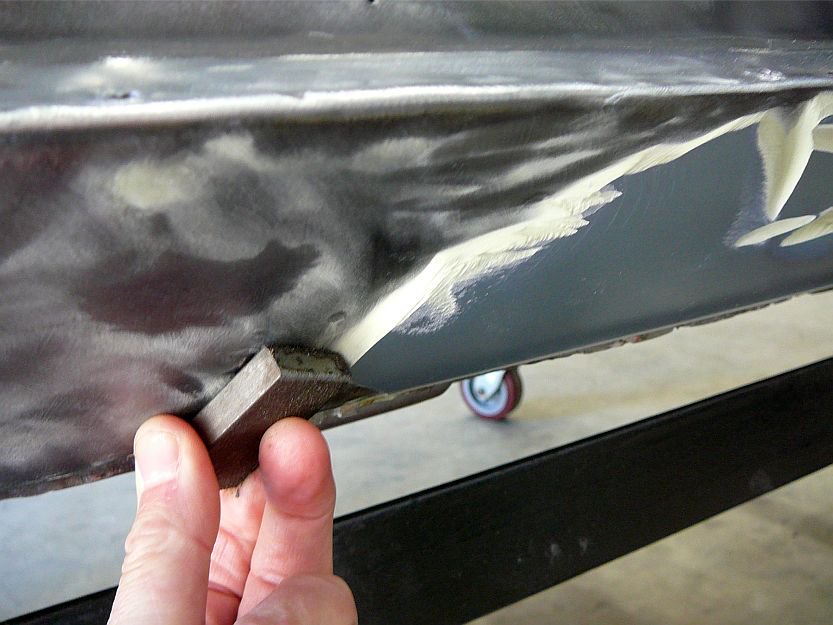
I chose the complete strip down and build up approach for my project and am glad that I did. I discovered how shotty the previous owners repair work was and found unexpected rusty panels in most all the known areas after the old under coating, BONDO etc was removed. I am a bit of an obsessive type and have approached this car with the plan to build it to my liking/standards/approval and never sell it. I wish I could have hauled it up to Los Angeles and had it dipped then epoxy primered, but going the route I went (professional sand blasting) allowed me to meet my current body/paint guy as well as start the body work on the blasters property. There was some signs of minor panel warpage on a few areas where as the dipping process would not have been an issue. All in all for my first old car as well as doing what I can so far to rebuilding it, I am happy that I went this method and exposed all problem areas and gave me a new canvas to strengthen for my intended 500ish whp goals.
I will add that I rode in a friends L28et 280Z that at the time was only making mid 200ish hp and ended up cracking the new paint in the C pillars where the lead lines are. I had mine removed and welded solid as a result. I still plan on more stitch welding in the rear area as well as finishing the firewall to complete the front. I think you are forming the right plan to combat that amount of torque and power that you have planned. Just a few pics showing the passenger side requiring a new cut piece to properly line up as well as how thick the bondo was in some places.
The first page of my build shows what I discovered under a pretty, new, blue paint job and the very beginning of the snowball rolling down the hill of no return.

Good information @Nelsonian, I think regardless of what you do with a car this old, at some point it needs to be stripped and refreshed (unless you're into the whole all-original/matching numbers concept). I think the big question in my head is solved...modify the chassis and drivetrain to a point where it is running and driving and all fabrication is done and once you're happy with the results - strip it, dip it and put it back together.
-
2 minutes ago, Zetsaz said:
I will suggest using a professional sandblasting service and just stripping down your car yourself if you decide to go that route. I had multiple paint jobs on my Z and the clear was extremely thick on the most recent one. Lots of rust that I've already fixed, but where there was paint left it was really hard and chemical strippers would barely go through the paint. I spent a few hundred between sand, a compressor rental, diesel fuel, and random odds and ends to cover stuff that I didn't want to spend the time completely removing. It was a huge hassle, and sand gets everywhere, and many many bags of sand later it was still only mostly stripped down and had some spots left. A professional using soda blasting or dustless blasting, or really anything, that can come to your house and do it all is worth the extra money.
If I were to do this again, I would build up all the stuff I wanted, then tear it all apart for sandblasting, body work, and paint all at once at the end. Basically one giant Lego teardown and rebuild so I know I already have everything and paint and body work is the last step. Maybe not the professional way to do it, but often they've purchased all the parts anyway and put them all together at the end. Currently the body work is holding me back and you get burned out. I wish I'd just built it up and driven it ratty until I was satisfied with everything else.
I'm on board with this. It seems to make the most sense to iron out all the fine details on a "rough" draft of the car and then tear it down, make it pretty, and put it all back together and have a pretty car when it's all said and done.
-
9 hours ago, unterbergamotten3 said:
Stripping the chassis down and remove all coatings is the more professional way to start your build, You will not have any bad surprises down the road. Expect the journey to be a few years by yourself
I'd have to disagree there - I've been watching Dominic Le go through an entire teardown and rebuild in one year's time (dnicle on Instagram). The timeline is highly dependent on the kind of time someone plans to commit to the project on a daily basis and experience level.
Another build I admire is John's Raw Brokerage build (here). I believe they have a solid approach by building the car and doing all fabrication, cutting, etc. to the point where the car is "done" and once they have everything wrapped up, they break the entire car down to the bare frame, repaint and put it all back together. I think this may be the best approach, in my opinion.
What are your guys' thoughts?
-
Hello!
I am in the process of building an 800hp 2JZ powered 1973 Datsun 240z. This car has zero structural rust issues but does have some dings and a couple minor paint issues that need addressed, but nothing major. Being a 44 year old car, I keep asking myself how far does one go when it comes to refreshing these cars?+
Part of me keeps wanting to strip the entire chassis down to nothing, blast it, repaint it and build it up from there. Another part of me sees the existing chassis and wants to simply re-undercoat the car and buff the paint and modify from there.
My question for you HybridZ is...what is the right way to go about doing this? Are there disadvantages other than time and money to stripping the chassis down and totally overhaul the car? Could I potentially weaken the chassis in some way shape or form?
The bones are good, I know that, but I want to ensure that if I didn't decide to strip the chassis down to nothing that I don't regret it.
I'd love to hear your guys' opinion. Like I said, this will feature an 800+hp 2JZ and I plan to have a 4-point roll bar, subframe connectors, triangulated strut tower bars and perhaps some other structural additions to support the power. This will primarily be a weekend warrior street car with some drag racing and lots of roll racing.
Thanks!
-
Bumping this thread - great information here!
I've only skimmed, but could OP assemble a parts list of everything needed (thus far) to complete this retrofit?
Can't wait to jump into mine!
-
Bumping this thread...
Austin did you or anyone else in here that mounted your engines to the frame rails have issues?
I'm about to mount tabs to my frame rail for my 2JZ build in my '73.
-
Did you get it all mounted up??
Not yet - working on it!
Check out my YouTube channel to follow updates on the build here: https://goo.gl/i9ewu4
-
Can you talk more about the diff mount design? I just picked up the T3 R230 kit and they provide their version of a mount. What does T3's design lack?
-
Putting a CD009 behind my 2J in my '73 - would love to hear about how you guys are mounting it in the car!
-
Bump - anyone know what the beta motorsports mounts look like? Getting ready to fab my own at this point.
-
Seam welding the car on a rotissire would be iffy n my book. You may warp some of the unibody, especially when the car is on its side. Most people stitch weld the chassis while its resting on the suspension points, staggering the welds to avoid warping. I stitch welded mine and would say its a waste of time. Most of your reinforcments should be tubular as the 240z is made of such thin metal. It may help, but probably not worth your time.
Main thing I would focus on are full length frame rails and a well built cage that ties into the suspension points. Let the tubes do the work. Reinforcing the TC rod area will give you piece of mind when slamming on the brakes. The front diff mount is always problematic, I tied mine into the rear subframe by building a cradle after tearing the welds off the original mounts.
All the other things you have planned are good. If I were to take on a project like that I'd be definetley stripping the car down to the shell.
Tearing the car down to a shell is a pretty intimidating thought to be honest, considering I'm doing all the work myself. I'm not opposed to it, but at that stage it starts to get *really* intense and it starts to sound like a 2-3 year project. I'd be a lot more open to something like this if it were a battered old example that needed work anyway, but this is a pretty clean example of the 240z that I'd like to preserve as much as possible.
At this point, it sounds like I should probably tone down the HP goal I want to something a little more reasonable (3-500hp, which is still a lot in this chassis but much less than 800hp) to take stress off the chassis since I won't be seam welding or tearing it down to a shell. I will do all the bracing John C. recommends, but I need to preserve the exterior paint, glass, and body on this particular car to complete the project in a reasonable time frame and keep labor/cost down.
-
Car is going to be a 6 speed stick shift car. When you say "more"...are you suggesting a fully tubular front and back half?
-
Hello!
I have a 1973 Datsun 240z that I plan on putting an 800hp 2JZ in but obviously need to work on some chassis strengthening before I rip the thing apart with that much power.
Here is a short list of items I found posted by the late John Coffey himself for a streetable car:
1. Seam Weld (every sheet metal seam overlap.)
2. Bad Dog Subframe Connectors
3. Weld-In Roll Bar.
4. Welded In Rear STB.
5. Triangulated Front STB.
6. Radiator Core Support Reinforcement.
7. Transverse Link Bracing Reinforcement.
8. RT Diff Mount.
9. Tubular Seat Mounts.
10. Box Upper Frame Horns to Firewall/Cowl.
11. Reinforce Pedal Box/Brake MC Mount.
12. Reinforce Front ARB Mount.
13. Reinforce Front Strut Tower to Frame Rail Junction.I plan on doing some competitive drag racing, roll racing, track days, and driving the car around just about everywhere!
I have a very clean paint job on the car and the body is nearly perfect, so repainting the car/pulling out glass isn't really something I'd like to do. However, I think pulling everything else off the car and putting it on a rotisserie would make the seam welding much easier as well as the frame rails and such and I can live with that. I would LOVE to hear from you guys that have done this and if you were able to preserve the paint and glass on the car. This is a pretty big undertaking so I'd like to prepare myself as much as possible before jumping into this huge project.
-
Got to go with Spork on this one, a Forged stock-specification L28 piston will be roughly the same cost as a 'custom' one where you specify different ring land configuration, different oil wiper, maybe different pin height or diameter.
Forged is Forged. Now, you order Small Block Chevy Pistons and you get 8 for what half a set of Datsun pistons cost.
Volume and turnover is your friend. Chances are just about every reputable forged piston manufacturer will have BLANKS 'on the shelf' suitable to be turned into an L28 Piston, so knowing that, the costs are minimal to do any real custom changes in basic setup.
Like Spokr said, if you specify a 3/4" thick uncut dome, or some special combustion chamber matching dome the price will likely be higher. Maybe not, some places charge $50 a set wholesale to do a 'special'.
But 'stock forged pistons' to me would mean forged, and not cast. And in that frame of reference, they will all be about the same cost.
Forged is Forged.
That being said, looking around for things like Vega pistons, or old Corvair TRW Forged Slugs can net you a forged piece at 'cast' prices (once upon a time...)
The engine doesn't care 'where' the piston was supposed to go into, and if you're boring match the block to whatcha got! Big thing is pin diameter, Pin Height, Ring Configuration, and Overall Diameter. Searching catalogs can net interesting discounts if you don't mind having a coupla few pistons left over as spares...
Bringing this thread back to life. Getting ready to order a set of forged pistons, and I like your input about the small block Chevy pistons, Tony. Can you give more details about how to go about this?
Basically, I want to end up with a set identical to that in the link below, without the $850.00 price tag!
Link: http://www.thezstore.com/page/TZS/PROD/classic12d08/10-4081
-
Crap, forgot I posted this. Not sure how the clutch fluid would keep the transmission in neutral? The motor idles, but the transmission won't go into gear. I've never had this issue with this car up until now. It may or may not be important to note that it was pretty cold when this happened. First time since last Fall it had been on the street, too.
The shifter is stuck in the neutral position - not sure how else to describe it. I can't even move it side-to-side, front to back, anything like that. I mean, it moves a LITTLE bit with some force, but I'm definitely forcing things if I do try to move the shifter.
-
Hey guys,
I have my '74 4 speed mated to my L28ET currently.
A couple weeks ago, I was heading up a hill and went to shift to second. I was locked out. I couldn't get the car into gear and slowed to almost a complete stop. Right before I stopped, I was able to shove it into gear, but then it wouldn't go back in when I tried to shift, again.
I pulled the center console and checked everything out, and it looks good. I will say the MSA short shifter mounting brackets were very loose, but after tightening them and trying again, I'm still stuck in neutral!
I base my claim that I'm in neutral on the fact that the motor will run without lurching, and I was towed all the way back home with the motor running. My clutch has a very short throw, but it feels just as it has.
Any help is greatly appreciated. Thank you, everyone!
-
Yep, actually LY's were making 325+ as L24's... Bigger engines make more!
Tony, what do you know about these heads? Who produced them? Are these just straight L24 bottom ends from the factory with this "LY" head bolted up to it?
-
Came across this on RA64Freddy's blog. I need more information on this engine!
-
Turns out I didn't have all ports closed on the bottom half of the diaphragm, which meant all the boost that was trying to push the valve up was simply dumping out the open port. I closed up the port and now the boost is under control completely.
Thank for your help guys!
-
I recently tinkered with my MS2 Extra start up on my L28ET. I am running 15 degrees of advance while cranking. I had to mess with the cranking pulses quite a bit before it would start up with having to pump the gas pedal.
Try both adding and pulling fuel from your cranking pulse widths. In my case, I kept adding and adding until I was up 400% and realized the potential I could just be flooding the thing, and that's exactly what I was doing.


Speed Forme Kit
in Body Kits & Paint
Posted
Bump - any update on this kit? I really like their G nose and Aero? front ends.