GroveZ
-
Posts
6 -
Joined
-
Last visited
GroveZ's Achievements
")
Newbie (1/14)
0
Reputation
-
i may have mispoke about the 3M product, i think it was 76 high tac not 77, check the back of the can, i went with the one that could tolerate 200+ degrees. the dash will never get that hot but im sure it will aproach 150 degrees or so on a very hot day. also forgot to add that i put speekers in behind the a/c vents on each side, modified the old a/c vents to hold a speeker grill and some minor notching of the bracket for the old vent as well. fits well with no movment and its best place i can figure to put front speekers if you dont use the a/c.
-
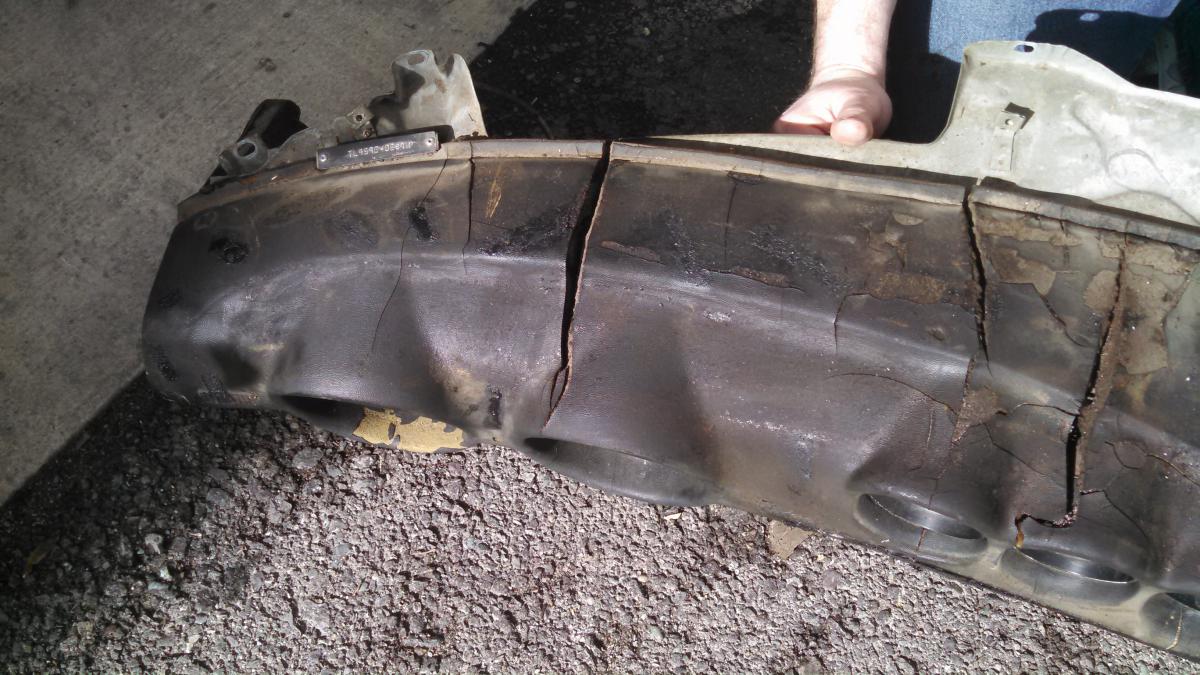
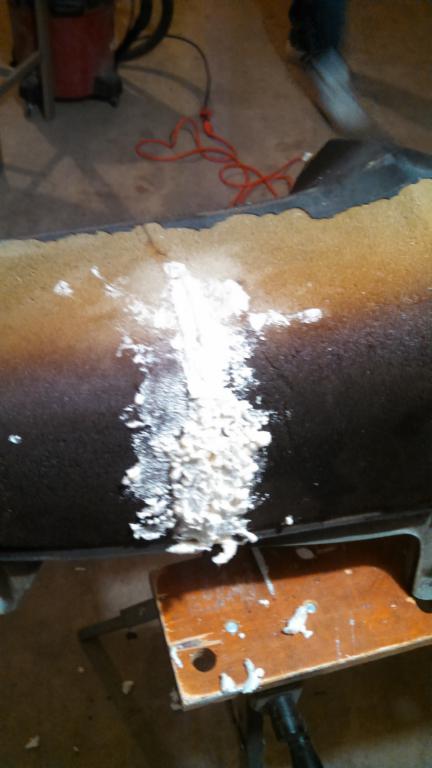
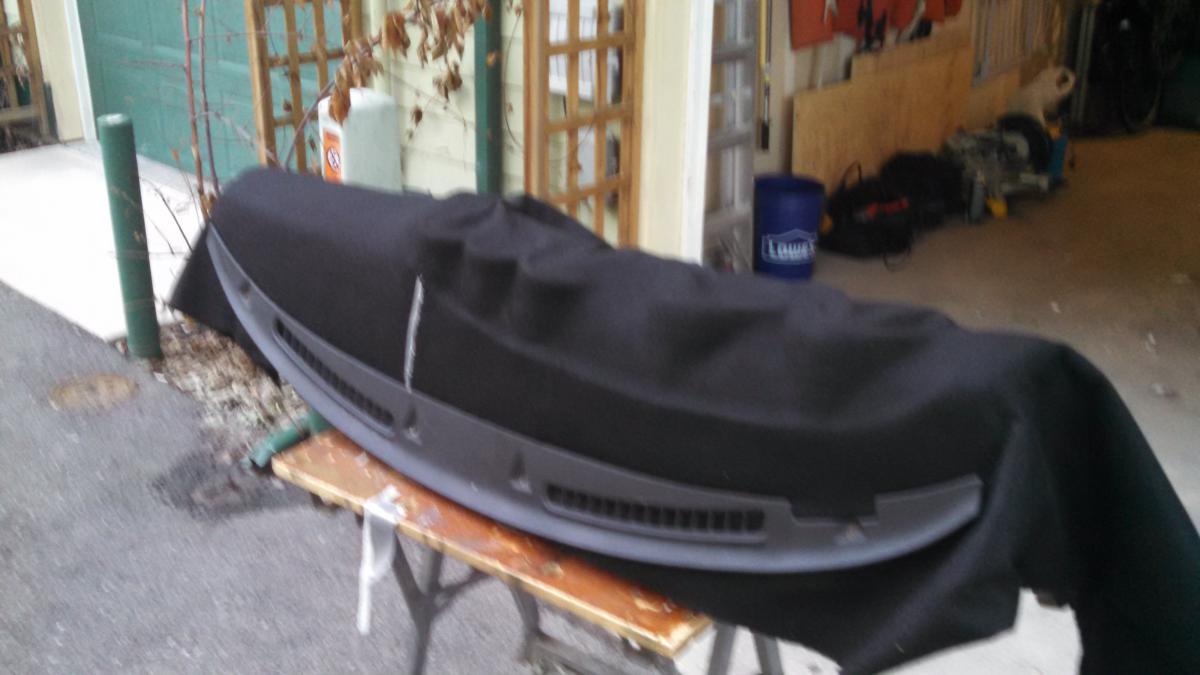
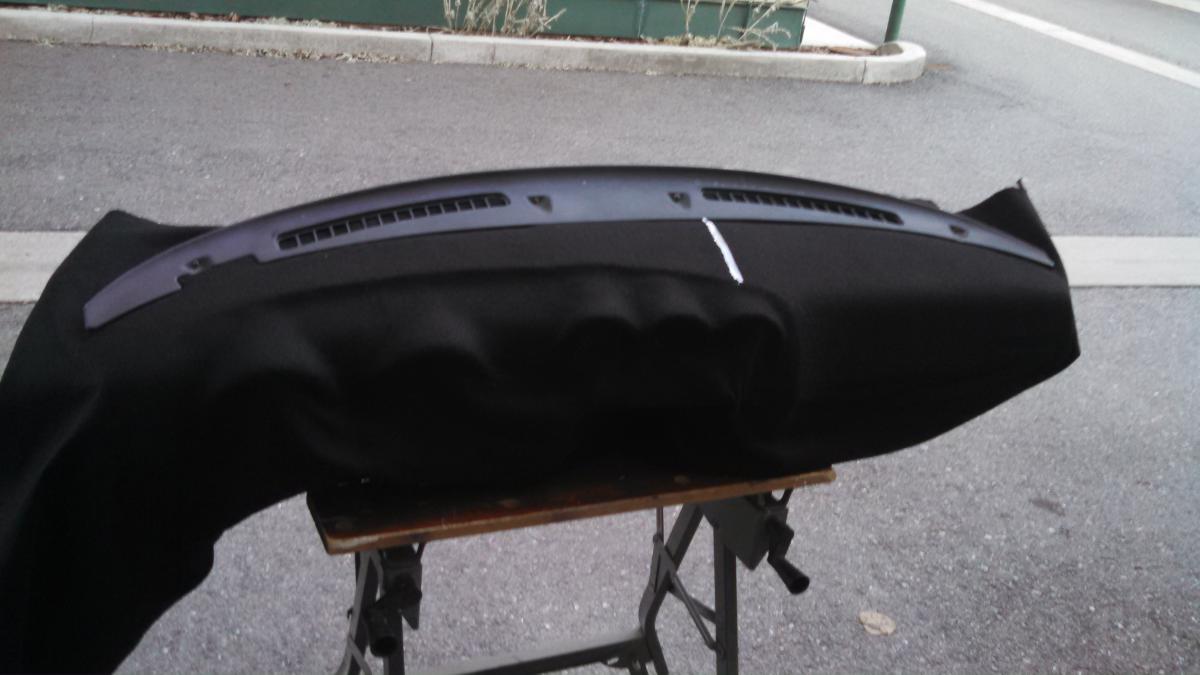
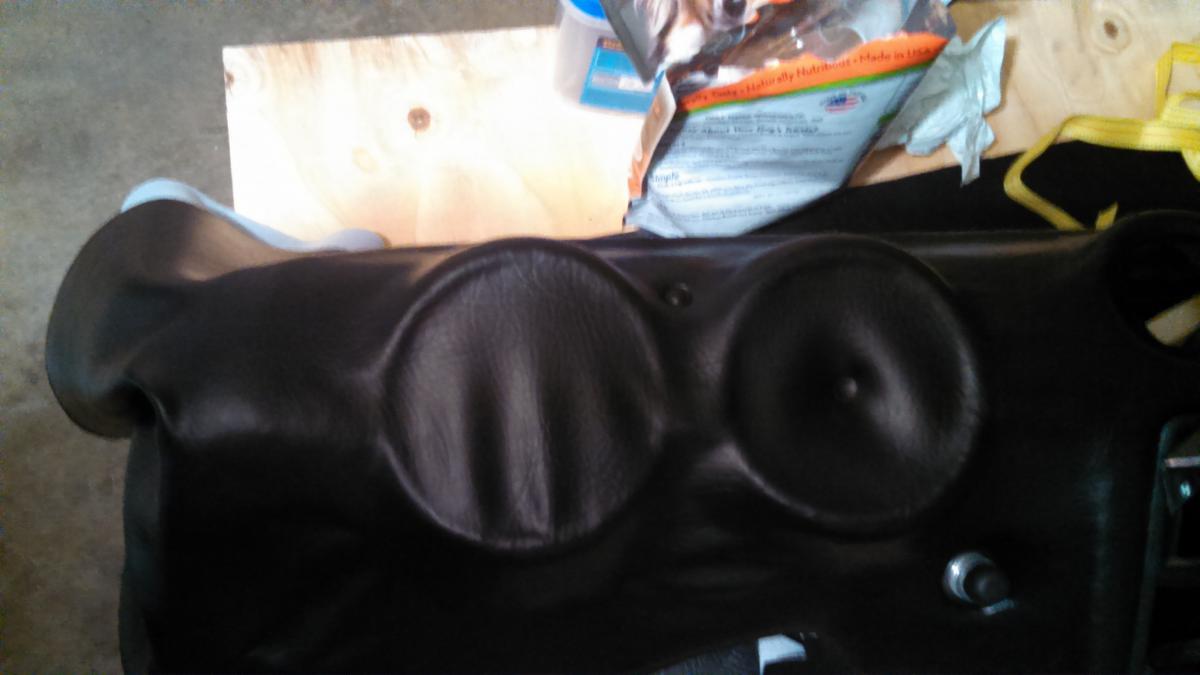
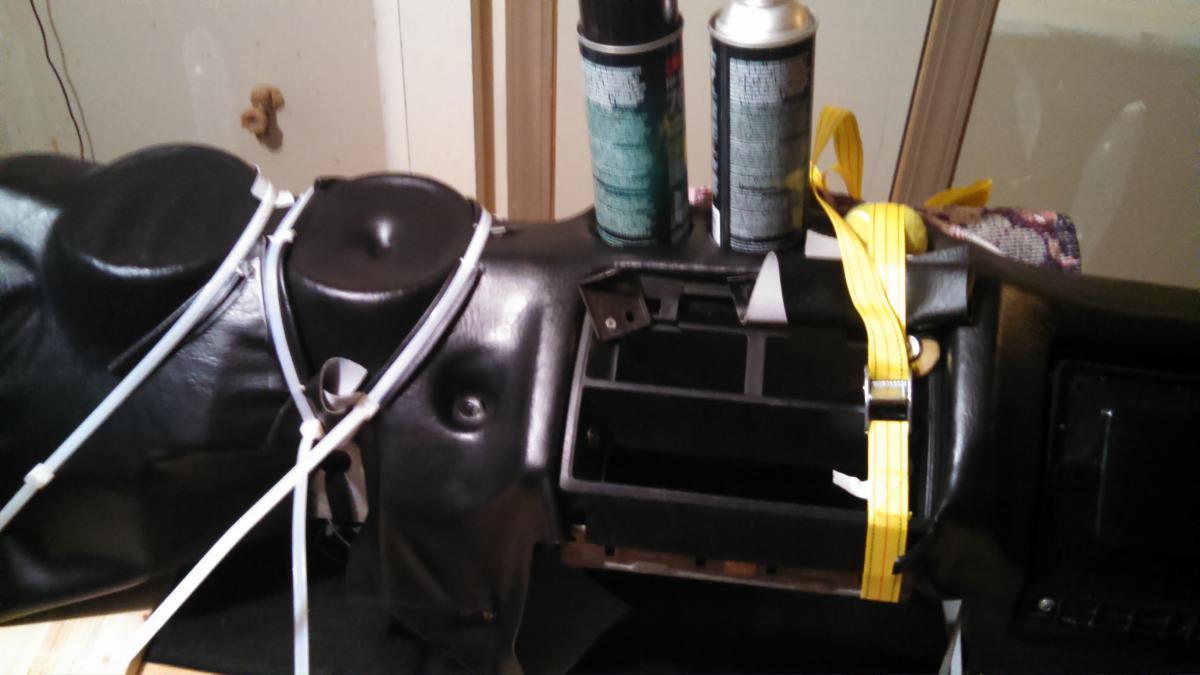
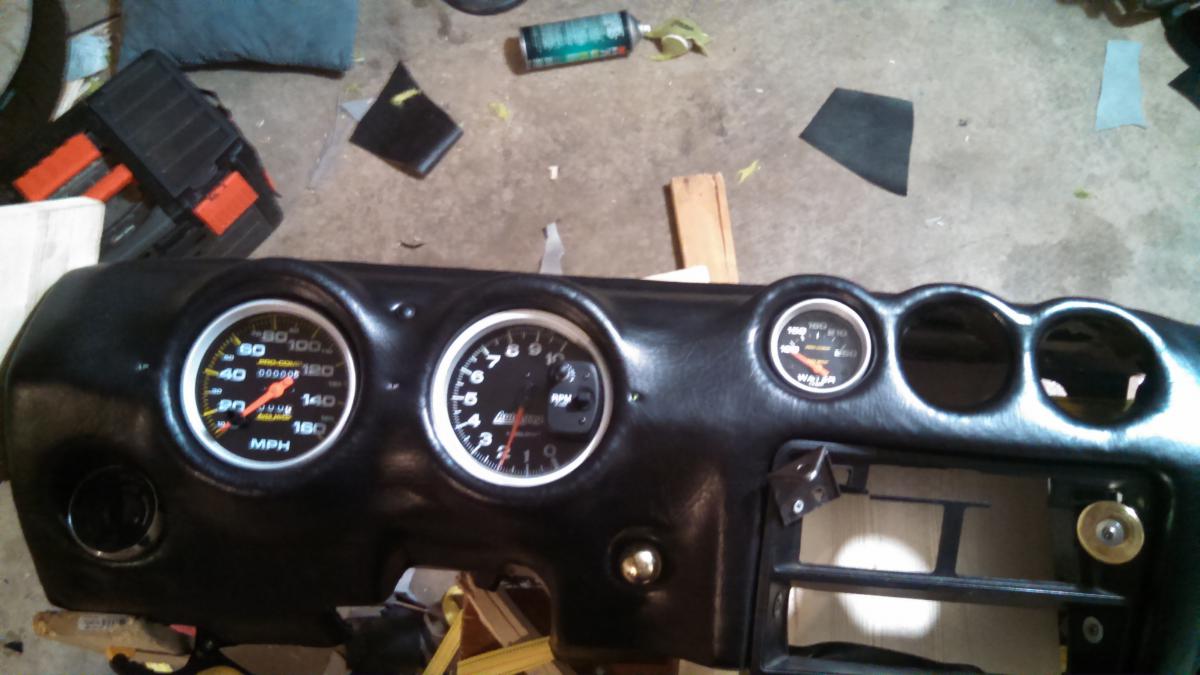
I needed to remove my dash to get to my heater and this is what i found under the half dash cap. So i proceed to folow some other dash repair advice i had read on here. i broke loose all cracked plastic on the dash and proceeded to use a small hammer to LIGHTLY tap loose any plastic that had came loose from the old foam, Using Great stuff brand expand a foam to fill gaps. use a razor to start just cut close but be carfull not to cut to deep or ya have to start over witht the foam, then a great many hours sanding, I wish i would have spent more time sanding..... when you finishs this step it is up to you on how you finish the dash, i have read many good reviews of people used bumper epoxy to give it a solid sandalble and paintable surface, if you do this the sanding and shaping of the foam will not be as critical. I personaly decided on Arctic Vinyl for my finish, i just though it would be a more finished look than a painted on texture. altho i have to say its personal i do think the painted texure is closer to factory looking, but i still prefer the real vinyl. Because i chose to wrap it in vinyll i pre wraped it in felt to help cover any imperfect surfaces adn give some paddding. i used 3M high tac 77 adhesive. this also gave me a practice run before the vinyl just to see how much work it was going to be. the grey stripe is a low spot that formed because i was to impatient with the expanda foam and did n not let it set up long enough so it sunk in a bit, i could not see the low spot till the felt was on. so to late. after many hours stretching the felt into all the gauges i was ready for vynal. this is a very time consuming process that was a huge learning experience, vynal will stretch, with heat it will stretch a little easier, but i recomend two people for the vynal stage of this. This is on day 2 of vynal work about 8 hrs a day, mind you we do alot of talking things out before we actual set glue. we worked from top (windshield) to bottom leaving the sides for last. let it set over night with some tricky zip ties and strapping to keep the vynal in between the gauges pod. i also used soft balls for the large gagues pods and tenis balls for the small pods. heating the vinyl and straping them into the holes to strech the vinyl as much as possible before cutting any holes out. i left the balls in the gauge pods anytime i left it over night to help stretch as much as possible. here is almost finished product with my new auto meter pro comp gauges, the oil pressure gauges has not showed up yet in this photo, i stayed with the stock fuel and volts gauge because i did not want to deal the the accuracy issues on the fuel after market fuel gauge, not to mention the mounting delema.. if ya look to each side of the tac and speedo ii added th blinkers with LED and a high beam indicator in the middle just below the handsfree mic. if yo want to try this it is worth the time imho. but be ready to spend alot of time on it. the more time you spend the better the end product will be. i had never done anything like this and same goes for the friend who helped me. altho there are imperfections mostly from my mistakes (i am not patient) that is why i had my friend there to slow me down and take the time. Total Material cost 3yrds Arctic vinyl $27.00 i got a huge deal, should have been $60 used 2.25 ish yrds 3yrds Felt $14.00 got 70% that one i think expect $45 2.25 ish yrds 3m spray adhesive High tac 77 $25 a can used 1.25 cans get the 77 it is rated for the high temps of car interior, it is that pricy tho! Great stuff pray foam $6 a can 1 can was to much plus any tools you may not have to get it all done i purchased some good scissors from a craft store and was worth the $10 total cost to me was about $100 not including gauges or time. my friend did not take any patment for is time. figure on $200 if you need tools and dont get lucky with sales on the materials as i did. also expect a few weeks of work that is worth all of it. i will post a pic of it in the car soon.

-
What do you use in place of your fusible links?
GroveZ replied to ISPKI's topic in Ignition and Electrical
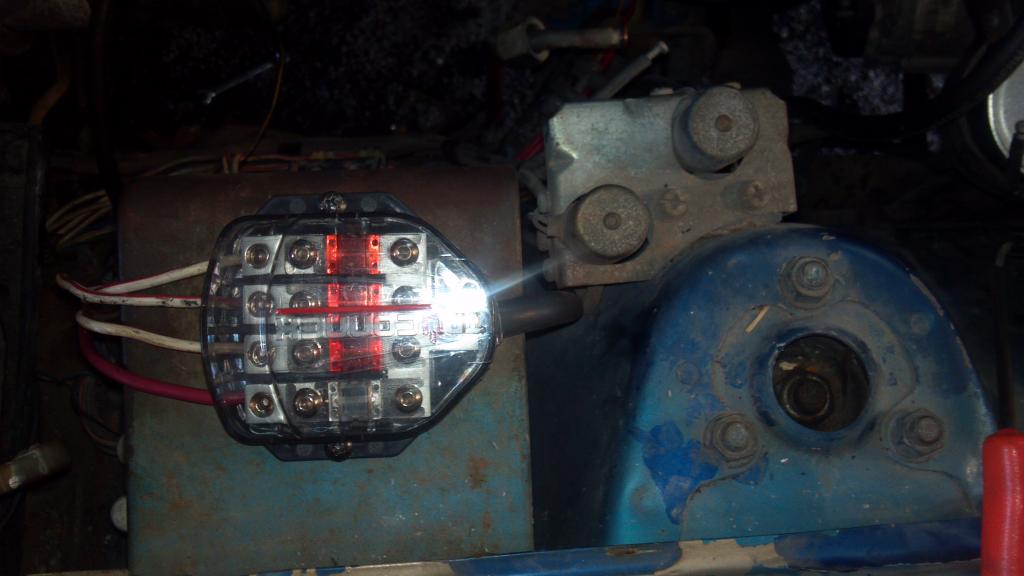
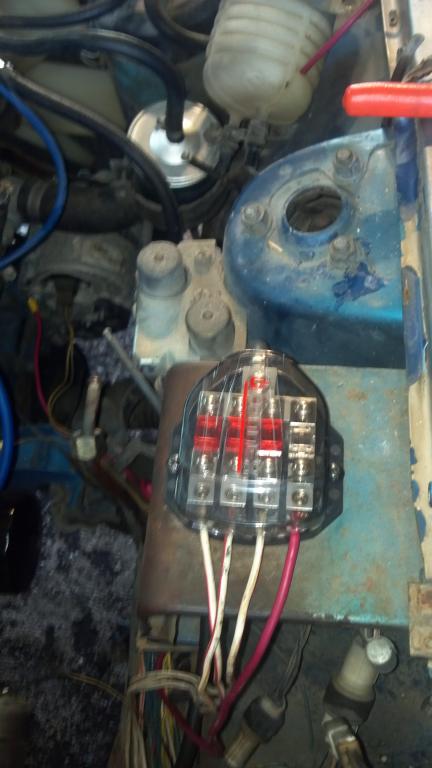
I got this set up from my local stereo shop, I hate walmart and the auto parts stores did not have the amps i needed. this fuse block is perfect imo it will be moved after i ditch that voltage regulator its mounted to. I payed about $50 with about 8 extra fuses, always haggle lol.
-
I used standard heater hose from the block to the heater core. no problems unless your a purist, then you can order preformed hose from many z parts supliers. I forget where i saw them but i know it was more than one seller.
-
Anyone seen this paint job on any other Z's?
GroveZ replied to Sawyeraero's topic in S130 Series - 280ZX
also rattle canned, only first stage before the weather stoped me tho. I was in desprate need of paint, bare meatal in a few comon rust spot and needed sealed up.
-
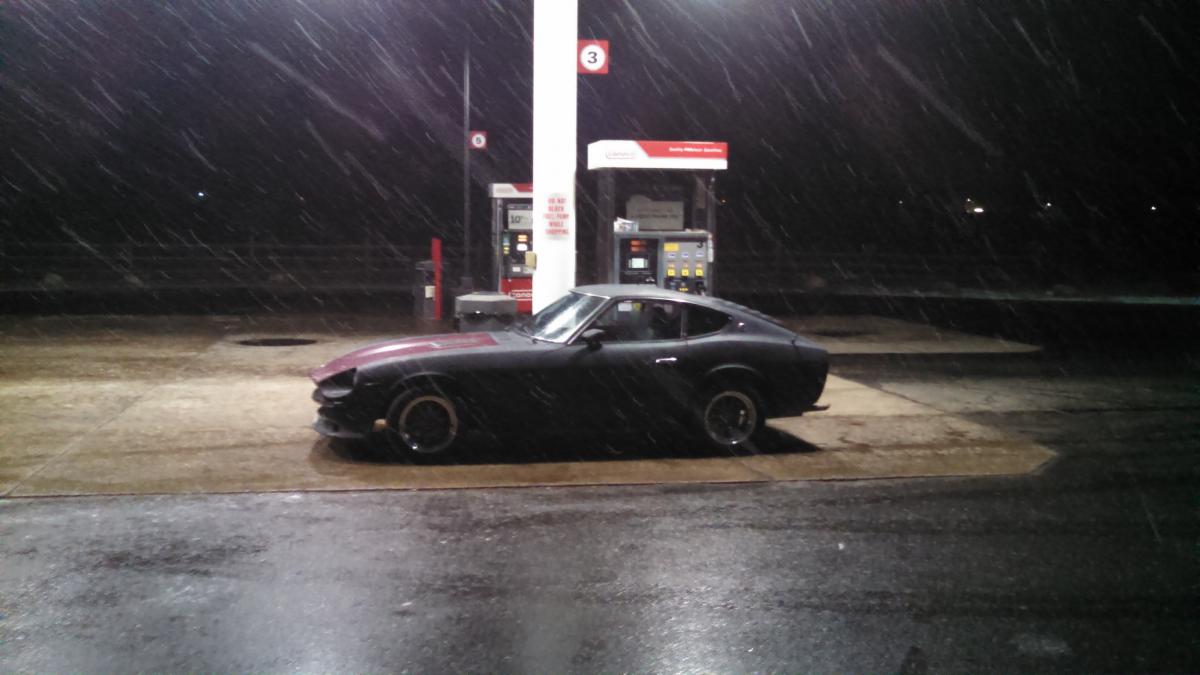
I needed the ducting hose that goes to the defrost vents, I bough my car with the interior in boxes apparently these peices were not included. So i went to my local parts house and got a 2 inch x 18 inch heat exchanger hose. (normaly used on older carburated cars, it feeds exauset heat to the air intake duting warmup.) I payed $6.00 for each side, and fitted them in the parking lot in about 5 minutes. I did not use clamps yet, the fit is so good you realy dont need to but i will tomorrow. Drove 30 miles home with defoster working perfectly, from what i could tell driving down the road it had very little leakage. Anyway just wanted to give a heads up to anyone who may have missing peices. I dont know if ones from nissan are cheaper(altho i realy doubt it) for $12 and ease of instal worth it. Also be carefull they bend easy. ps Got the Z stuck in the snow today..... my fault to. Overall with good (snow only) tires this car is amazing in the snow 77 280z