
scott19
-
Posts
95 -
Joined
-
Last visited
Content Type
Profiles
Forums
Blogs
Events
Gallery
Downloads
Store
Everything posted by scott19
-
Oh great! Now I've got a bruise on the bottom of my jaw where it dropped and hit the floor! And my mind is now offically boggled. Great job!
-
Thanks guys, I knew y'all would come through. I'll stop by a couple of places tonight to see if I can locate a better buffer. I don't mind the labor of the colorsanding, just the cost! Those two bottles of 3M stuff I referred to above are $35 a quart! Ouch! This paint job is nickel and diming me to death!
-
RacerX, I'm at the colorsanding point now. I did a search on the subject, and found a post that you wrote. In it, you recommended using 3M Perfect-It II rubbing compound with a wool pad to start the polishing, and then follow up with a polishing compound on a foam polishing pad. After visiting the paint store this morning, I ended up with: 1.)3M Perfect-It 3000 (part #06060) Extra Cut Rubbing Compound and 2.)3M Perfect-It 3000 (part #06064) Swirl Mark Remover. I got these on the recommendation of the store guys. Will these do the job, or have I made a mistake? the #6064 is supposed to be real good for black paint... Also, I don't have access to the type of buffer that uses the pad with the screw in the middle. All I have is a Black & Decker 8" electric buffer that uses the tie-on type pads. If I cannot find tie-on wool and foam pads, can I get by using the terry cloth type? Thanks once again for all your help!
-
Thanks for the update, Metallicar. I think I started the thread in August that Ferd mentioned. Obviously from my other recent thread, I went the "normal" route, but I'm still interested in this Auto-Air stuff. Let us know about any further developments.
-
NZeder, The wheels are Panasport replicas made by (I think) Western Wheels back in the '70's. I've seen them every once in awhile on ebay, but never as large as mine, which are 15x8.5", with 245/35/15 Dunlop SP9000's on them. Tires were REALLY hard to find that wide and low in 15". I found the wheels in a junkyard for, drum roll please, $100! They kind of dictated the course the car would follow ( I didn't originally plan on ZG flares and lowering the car so much).
-
Hypertek: It's an early 260Z. It's not a bad philosophy to find the most solid (i.e. least rusted) Z you can find, regardless if it's a 24, a 26, or a 28 ounce!
-
Thanks everyone! Your words mean a lot, seriously! Here's a few more pics: Here's the run I was referring to (you can see the orange peel, too): I did some nib filing and some 1000 grit colorsanding tonight, and I feel confident that the paint's gonna look pretty good here soon. Stay tuned! Gollum: I did know that black was tough, but to me, it's the best color for an S30, even with some imperfections. Mike:The paint is PPG Deltron 2000 (code 9300) with DCU2021 clearcoat. On the advice of the paint salesman, I skimped a bit by using Omni primer. A no-no mixing lines, I know, but everything seems alright. time will tell. Total cost in paint, once I bought some extra cleaner and reducer ( just in case) was about $600.
-
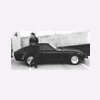
4 years ago, when I first got my current Z, it looked like this: 2 years ago, like this: A month ago, she's in a million pieces and colors: 2 weeks ago, mostly back together, in her primer outfit, ready for wetsanding: This weekend, my buddy and I built a makeshift booth: And here is the (almost) finished result: I say almost, because I've got enough orange peel for a Tropicana factory, and there's a major run on the passenger door that needs addressing (next stop:nib file and colorsanding). But besides that, I'm pretty happy with it. It's not perfect, but getting there! Thanks to all who've answered my paint questions here in the last few weeks!
-
My thought is that once you get the car painted, whether now or later, you're not gonna want to put the heavy tarp on your new paint, so you might as well get the garage now. That way it's one less NE winter the car has to endure with a tarp AND snow covering it.
-
After paint, how long before I can cover it?
scott19 replied to scott19's topic in Body Kits & Paint
I'm talking about an actual cloth car cover. Paint will be bc/cc, unheated PPG Deltron 2000. -
I'm within days of painting the car, and a question occured to me. After the car is back together, it's going to be living in a carport, not a garage. How long after painting should one wait before putting a car cover on?
-
The Xenon type that Mat73 has is the way to go, either in the 280 configuration, or in the 240 style like ON3GO is talking about. They look great ( and match the car period wise) They're functional They are practically indestructible ( flexible urethane). One curb hit with a fiberglass spoiler, and that's all she wrote.
-
single stage vs. 2 stage? (Triple Black question too)
scott19 replied to scott19's topic in Body Kits & Paint
Take the tip cover off and there is ring with holes all the way around. He says it has a tear in that piece, which will cause it to spray heavier if the gun is angled a certain way. Anyway, we're gonna dismantle it and give it a good cleaning. It'll probably be regulated to primer duty from now on. The Finishline gun should be here by Monday. -
single stage vs. 2 stage? (Triple Black question too)
scott19 replied to scott19's topic in Body Kits & Paint
He said it was "spraying heavier on one side". It's a pretty old gun (gravity feed, part #SGG605) . We used it last year to paint my Kawasaki, and it did well, save for the above mentioned problem. I called Devilbiss and they barely had any parts listings for it, and it would cost $60 for the rebuild parts, so I went ahead and ordered the Finishline kit (34566)for $110 from Eastwood instead. I figured it was sturdy enough for 1 paint job. I think RacerX had something good to say about import guns in another post somewhere. -
single stage vs. 2 stage? (Triple Black question too)
scott19 replied to scott19's topic in Body Kits & Paint
Alright guys, get a room! A little update: I've bought the paint (PPG Deltron 2000 system bc/cc). I'm Just finishing ups a few odds and ends with the bodywork, then It'll be ready to shoot. My buddy's (who is doing the spraying) Devilbiss gun died on him, so I ordered one of the Finishline Gun kits from Eastwood. RacerX and Mom'sZ, do you have any opinions on these guns? I know it's cheap, but I've heard good things about them. I'm not needing it to last past this job. -
single stage vs. 2 stage? (Triple Black question too)
scott19 replied to scott19's topic in Body Kits & Paint
Thanks to everyone for your replies, each one of you had valuable info for me. Special thanks to you, Racer X. It seems there is no bottom to your well of knowledge. I believe I'm going to go with the bc/cc system. Mom'sZ, you made a good point concerning the swirl issue with black. I have a dark green Mustang that looks awful if hit with full on sunlight, due to the swirl marks it's acquired over 15 years. I'd like to keep the maintenance down as much as possible, and the idea of having to polish single stage to be equal to the gloss of bc/cc is not overly appealing, so having a smooth as possible finish is more important than whether it's a deeper black than the next guy. And oh yes, I know the bodywork has to be spot on. I'm spending a week's worth of vacation time this week doing nothing but working on the body of this car, playing "find the flaw". Feels like there's a 1000 square feet of body panels on this thing! -
Ok, I'm at the point where it's time to choose my paint. I was going to go with a 2 stage system, but now I'm wondering if single stage might be a better choice. I'm going with PPG, and I wanted Triple Black, but the local dealer was unfamiliar with the term. After doing some searches online, I was under the understanding that 9300 was the code for Triple Black, which is PPG's Concept single stage line. Is that correct? As far as the dealer knows, it's just black. What are the advantages to single stage, and how different is it to shoot than a base coat/clear coat? I would think it'd be easier, just a question of adding more coats of the color, with no clearing at the end. I'm looking for "new car" quality, not "show car" quality. I've read that single stage is easier to repair, and can theoretically be "blacker". Any comments would be greatly appreciated!
-
Thanks for your post, Metallicar! Please do post some pics when you can. The Aquathane sounds promising. Are you going to try the Aquathane Clear, or go for the Aquathane UV Absorber? The UV Absorber sounds like it's just like the clear, but with more UV inhibitors. Let us know...
-
I call that Kawasaki Racing Green! I just painted my 85 GPz900R that color. Love it! If green is bad luck, somebody needs to let England know (British Racing Green)!
-
Things to remember: Black (or any near-black) will show up any body imperfections, and gets dirty really quick. Silver tends to blend in on the roadways, acting as a sort of camouflage. Drivers of silver cars tend to have people pull out in front of them more often. I had some friends rent a silver Chrysler Pacifica, and I drove them to pick it up. On the way back, we hit a thunderstorm, and I had a real hard time keeping sight of it in heavy rain. Of course, Ferrari red is also known as "Arrest Me Red". I'm not trying to be pessimistic, just trying to let you know some disadvantages. I'd relax, and soon you'll come across a color you know is right.
-
From the Auto-Air Colors website: "Auto Air Colors can be cured in a spray booth with air movement, by infrared heat lamps, or a heat gun Curing in Spray Booth- A spray booth is the preferred environment for painting vehicles with the Auto Air Colors. Bake paint at 120-150ºF for 15-20 minutes or until colors are completely dried. For quicker drying times, increase airflow rate and booth temperature. Curing in Open Conditions- Recommended minimum temperature 70ºF and low humidity. Curing Auto Air Colors in humid or cold damp conditions may require extended exposure to heat. Use airflow to speed up drying time. Cure when colors are wet or dry. Auto Air Colors are cured with heat. Use heat gun or infra-red lamp to cure colors. If not curing with heat, allow colors ample time to dry prior to taping or clear coat application. Drying time will vary depending upon environment. In Infra-red lamp (IR) – allow lamp to cure colors at a safe distance generally over 12 inches to prevent blistering paint. Duration may vary from 5 – 30 mins. coat buil-up, wetness and conditions. Cure colors dry to the touch without tack. A heat gun is effective when curing smaller areas such as body panels, tanks, fenders, helmets, etc. Generally colors cure 1-2 minutes per square foot. Keep heat gun moving and at a safe distance of 6” or more to avoid blistering. Cure colors dry to touch without tack. " It does sound like that you would need at least a heat gun. One of the possible pluses of using this paint to me is that, in the 90 degree heat here in Georgia, I was thinking it could cure itself without an IR lamp or heat gun. Perhaps not. Since I'm not gonna have access to a real paint booth, I wonder if I could leave the car outside ( after a night of being inside) to let the sun cure it, or, for some of the body panels, store them in an attic for a day. 120-150 degrees wouldn't be too hard to achieve here. I definitely see the attraction for y'all in California. This paint does boast low toxic levels. But then again, you still have to go over it with a standard clearcoat.
-
Thanks for replying RacerX, I was hoping to have your opinion. Like I said, I haven't seen any non-biased opinions yet. I've looked at their website at length, but of course, their opinion is biased. All I've been able to find otherwise is in a chopper forum, and the opinions there didn't seem to spring from any actual experience, just a "fear of the unknown", which I'm sure was not unlike what urethane and clearcoat systems faced when they first appeared on the market. As far as repairability goes, it seems that Auto-Air states that the paint can be applied over ANY primer, and that it can be applied over existing paintjobs, as long as the surface is sufficently scuffed prior to application, which I would think would include the urethane clearcoat you apply over the Auto-Air color base. There's a little slideshow on their website of a Mustang, and it appears the shop just scuffed up the original paintjob on most of the body. Sooo, I would think repairability would be fairly easy, just involving reshooting, which is made somewhat easier by the fact that the Auto-Air stuff doesn't require mixing, just pour and shoot. Now if you're talking about repairing a paint run or other defect before clearcoating, I don't know the answer to that. I would think that since they recommend a total of 3 coats, that you'd be able to approach it like any other basecoat, but since it's waterbased and adheres via evaporation ( I think) vs. a chemical process, perhaps there would be adhesion issues. I don't know, hence my posting here.
-
Anyone had any experience with the waterbased paints put out by Auto-Air Colors? Sounds appealing, but I haven't found any real non-biased opinions online yet.
-
Jeremy: For your application, I don't think you'll need to cut your rear arches, UNLESS you're planning to lower the car a good bit. Put the flares up where they're supposed to be and see how it looks. You could probably get lower, an inch or so, if you wanted, and still be alright ( as long as your springs aren't too worn out/soft). I'm in the process of doing the same thing you've done. I've recently mounted 15x8.5 wheels on my Z, with 245/35 Dunlops mounted on them. I've got WAY too much clearance right now ( that wheel tire combo is actually a good bit shorter than the 195/60/14's that were on it). ZG flares are on the way. Hopefully, it's stance will be similar to that champagne colored Z that jmortenson posted when I'm done.
-
they're mounted a bit low, should probably be mounted right there even with the stock flare/arch.