

Oddmanout84
-
Posts
658 -
Joined
-
Last visited
Content Type
Profiles
Forums
Blogs
Events
Gallery
Downloads
Store
Posts posted by Oddmanout84
-
-
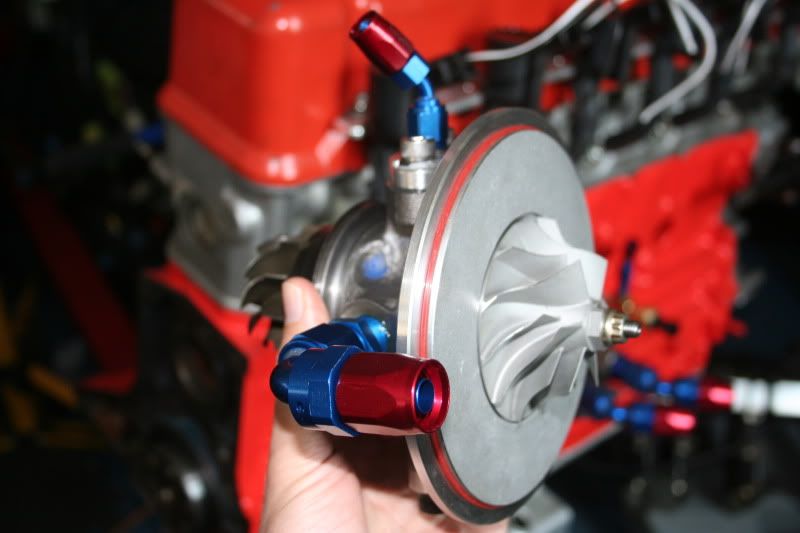
Does your turbo have the stock oil fittings on it or a restrictor?
-
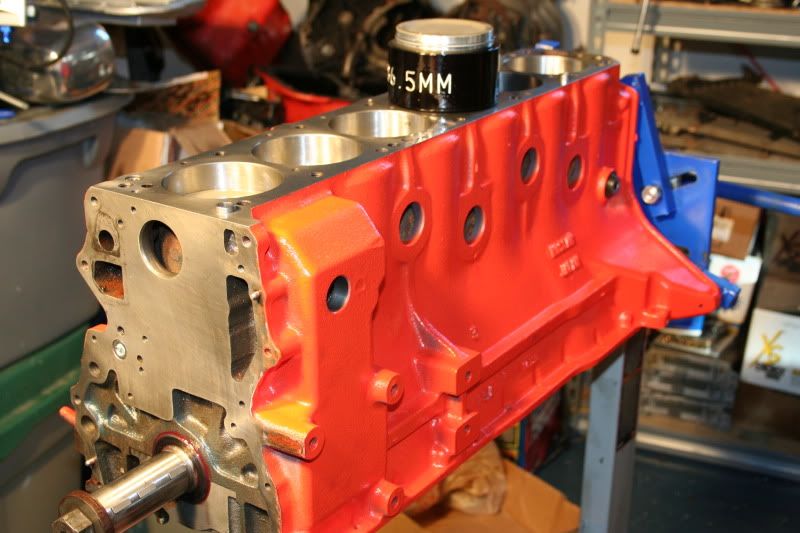
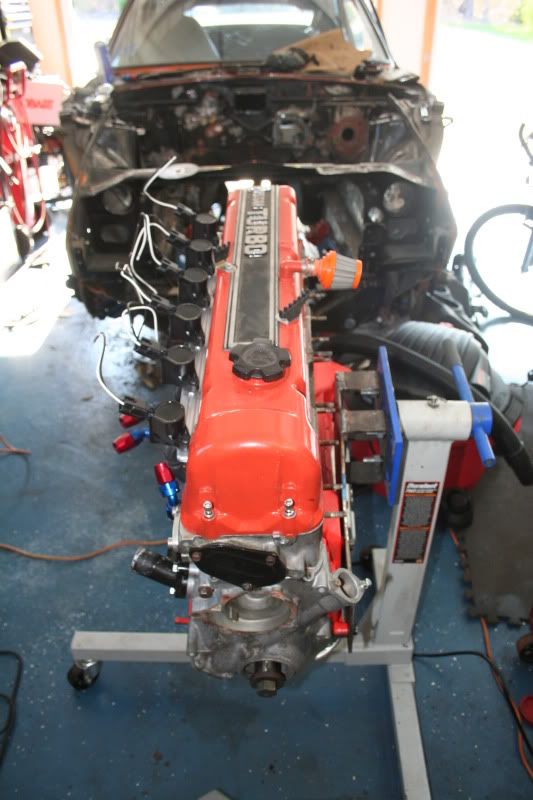
And here's another massive hemorrhage of progress:

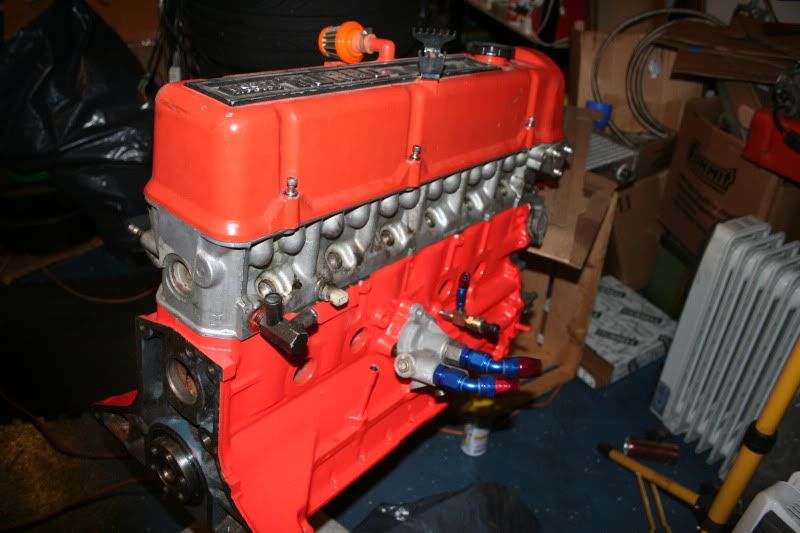
All the Pistons and rods are in and torqued to spec. The assembly rotates "freely" but the red assembly goop offers some resistance. I plastigauged all the bearings so... fingers crossed...
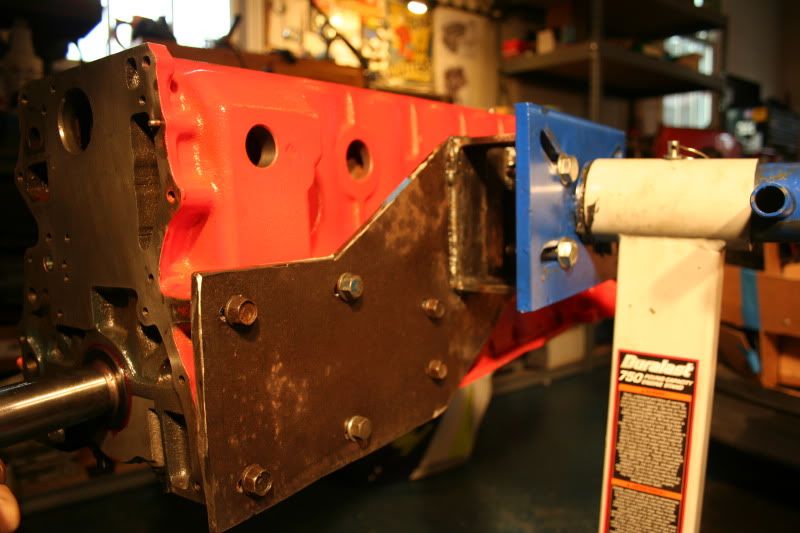
Used some scrap 1/4" steel to make myself a side engine mount for better access.
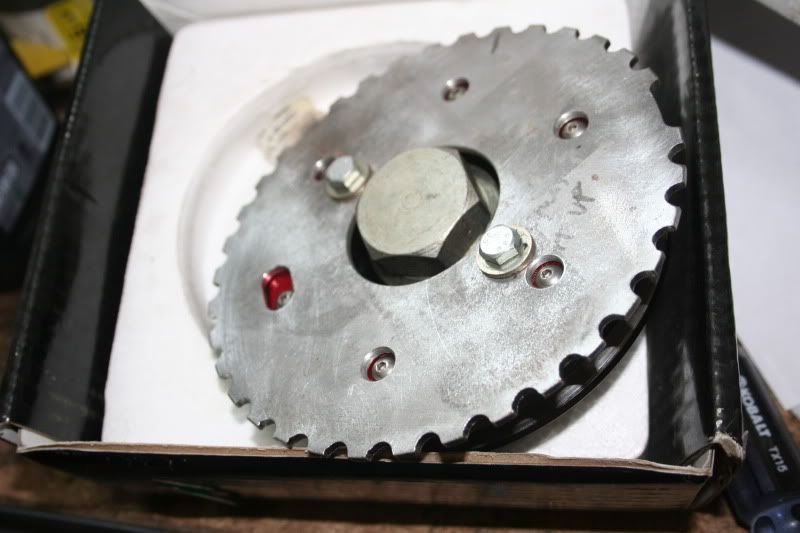
Finally have a 36-1 crank trigger wheel mounted on my MSA comp damper. Hopefully its thick enough and will be able to trigger the coil on plug system for Haltech.
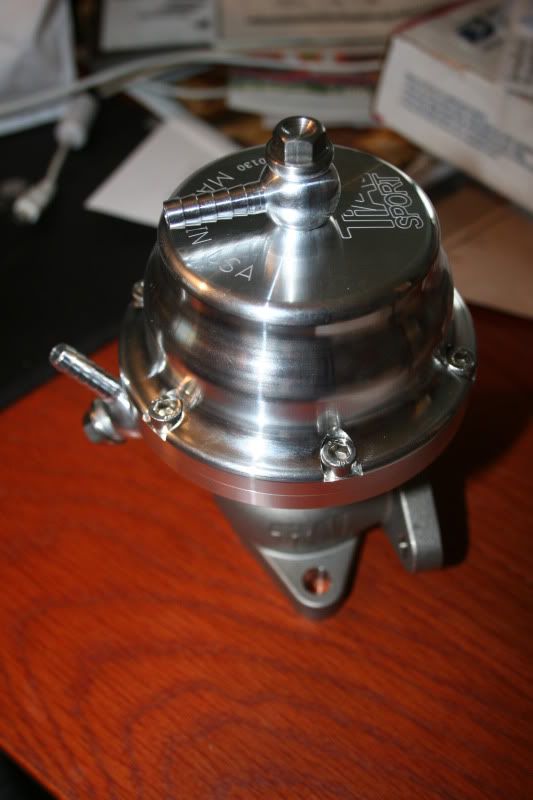
Tial 38mm wastegate. I also have a 90 degree weld el and flanges to mate it to the exhaust manifold like Noddle's setup.
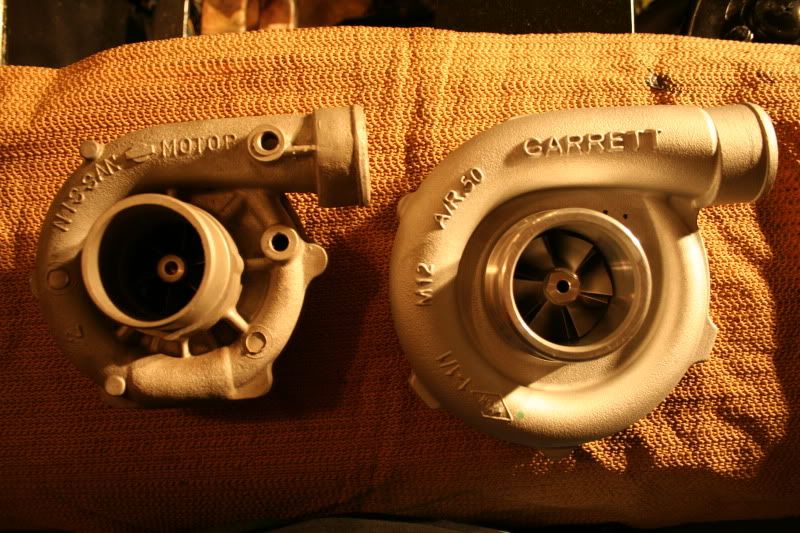
I bought a .50ar compressor housing and 50 trim wheel off ebay according to looking at the compressor maps on the forums. Supposedly this is the best setup for the engine from my understanding. Also got a brand new water cooled center section and plumbed everything accordingly.
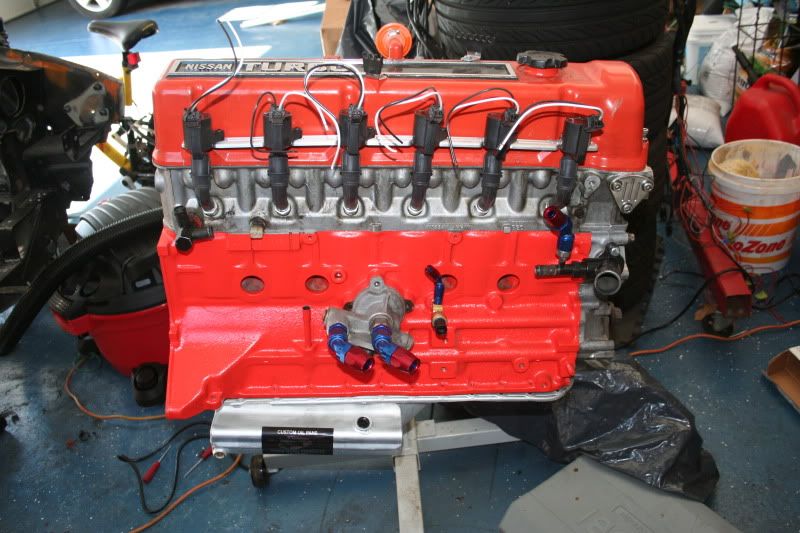
This is all just mockup. Making sure everything fits the way its supposed to, but nothing is really bolted on. The oil pan has a large space I'm looking though to check clearances between the counterweights and the windage tray. The rear of the pan still needs to be bumped out to clear the rear two ARP main studs. Coil on plug setup is thanks to 1 fast z's excellent mounting bracket. Also not shown is the Haltech triple channel igniter module that I'll be using to run waste spark (not using the EDIS module).
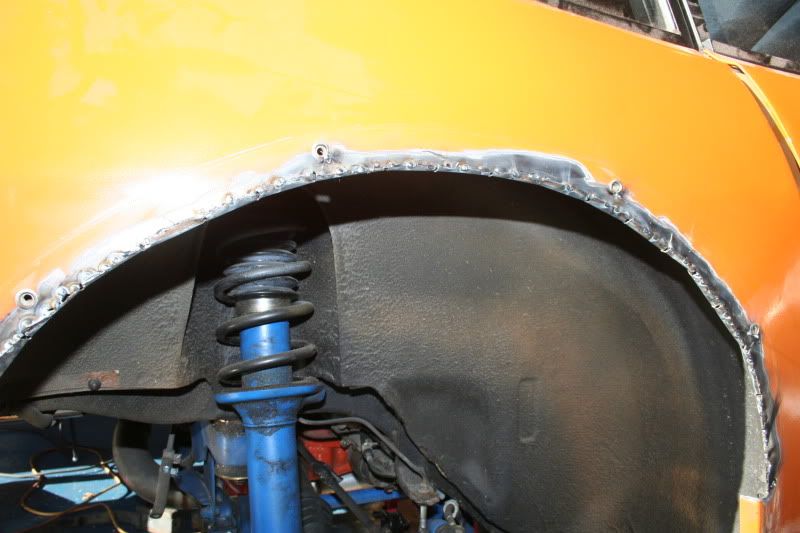
Fenders are finally cut and welded up to clear the tires.
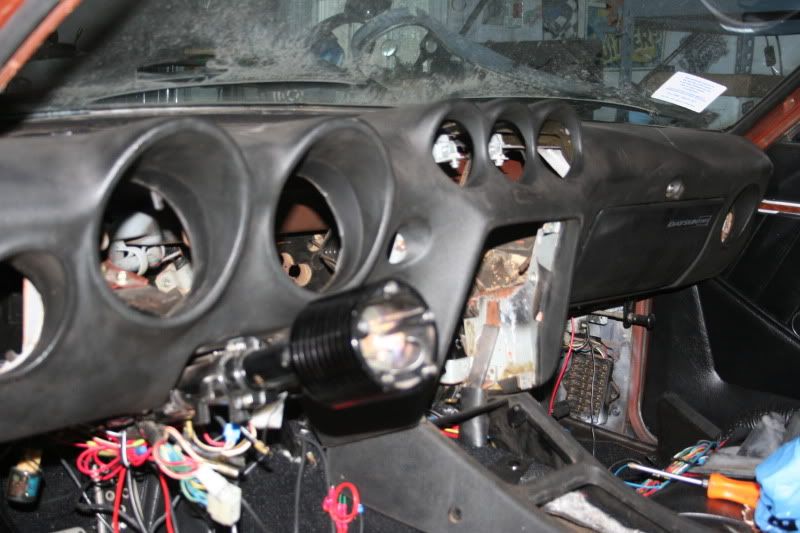
Test fitting the 240z dash.
Using a dimple die to make holes out to the inner fender, with hopes to vent engine bay air and reduce pressures. At some point I'd like to duct these into a fender vent just aft of the front ZG flares, but at this point I really need to stop so many while I'm at it projects and just get the damn car running again.
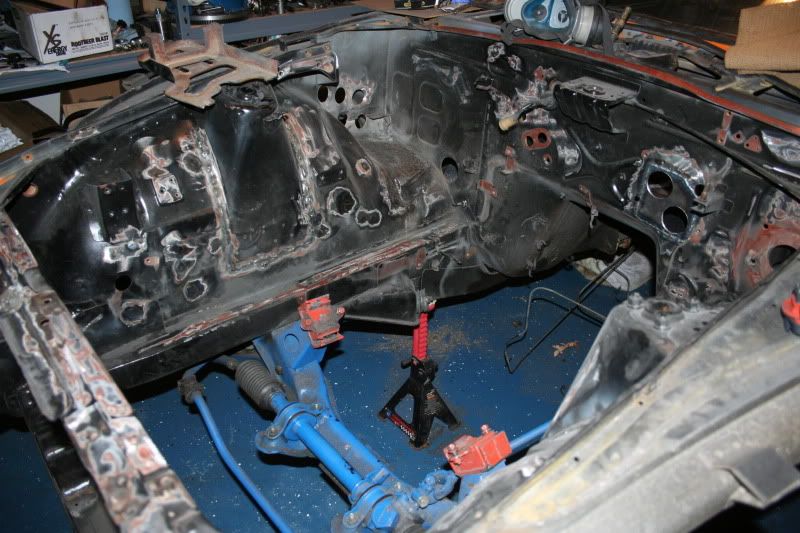
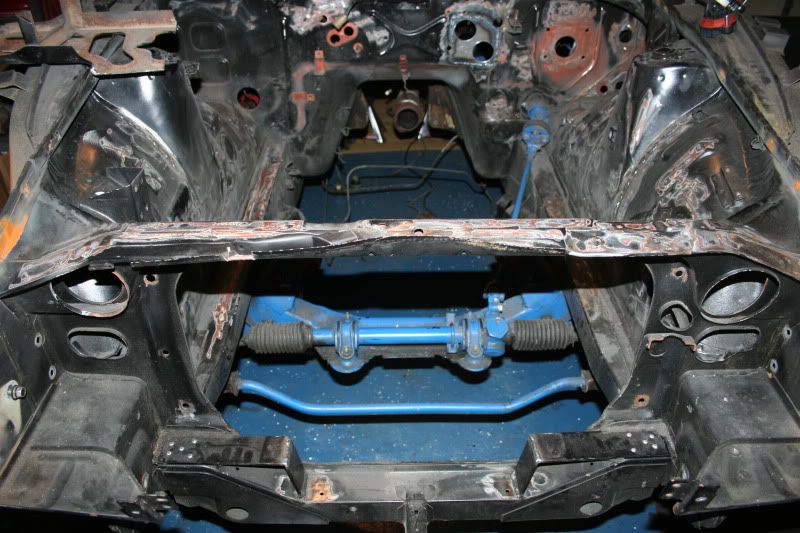
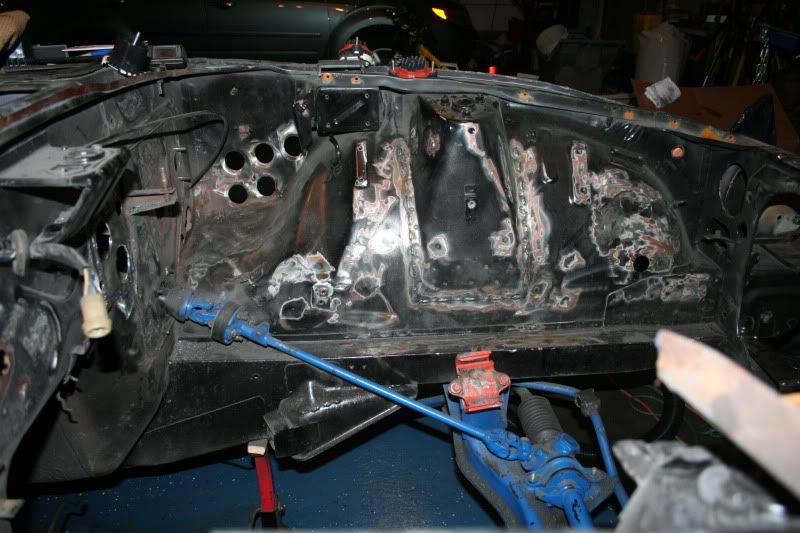
Prepping the engine bay for paint and then engine installation. Did some seam welding with short stitches. The battery tray is currently removed, as well as the pitted metal below it. I'm tacking in new sheet metal, but not a new battery tray. I'm going to relocate it to the trunk and possibly use a small profile unit from Braille. That will leave room for something like a methanol tank if it comes down to it. I also have about 50ft of brake line to replace EVERYTHING, and a 79-81 15/16th master cylinder and large brake booster ready to go in. Not enough money currently to drop on the 4x4 Toyota brakes, but at least its somewhat of an improvement for now.
So much time and so little to do...
-
-
I must not be getting the full effect of the sound from listening to the video, because it sounds wonderful to me!
-
Thanks Ron.
I do like the S52 you swapped in, but I was considering one of the M50's myself since it looks like they can be purchased for considerably less... and by a large margin to the RB series motors I had been considering before. Though I suppose the initial cost savings of purchasing the motor itself would be offset by the items needed to install it and build it for boost.
Do you know off the top of your head if the motors all share the same profile and engine mount locations?
-
I was really interested in doing this, since I love BMW engines and Ron Tyler's "M"Z is pretty sweet... but after a day I'm seeing that performance parts for these are prohibitively expensive...
Gotta be the badge tax...
Edit: Maybe I'm giving up too soon though. My goal would be under 500hp, so maybe I wouldn't need that much engine "bling" anyway...
-
Thanks Ron!
-
I'm using -8 for mine, and trying to send #6-to-#5-to-thermostat housing via a T-fitting. I'd like to do #3 and #4 as well, but I have to figure out the situation with the previous two before I try to tackle that. The size of the -8 fittings and hose makes it really difficult to cram everything in there together. The hose end fittings from #6 to #5 are almost touching each other, with no hose installed!
-
This transaction is closed. Thanks logan1!
-
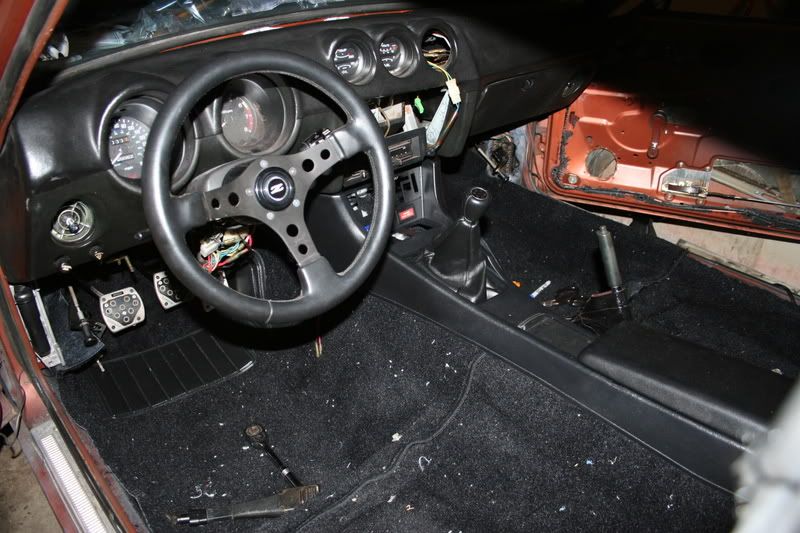
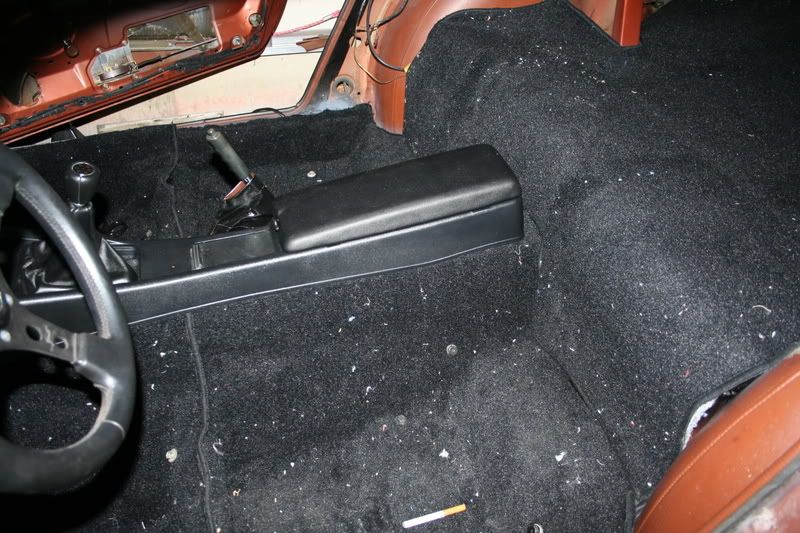
I installed the MSA molded carpet kit in my '78. It was annoying and it fits alright I guess, but it was also my first time doing this sort of thing. Figuring out where to cut all the holes for various fasteners and brackets was a sort of trial and error process, so I have some areas that could have been done better.
These are some pictures from a few years back when I was going through the process.
-
I'd just like to add that it's really annoying that I can no longer view the photos in this thread due to the latest restructuring.
-
The stock turbo has a strange offset four bolt pattern, remember. I have not found one yet. The only way to get around this that I know of is to remove the wastegate assembly and buy the SPECIAL Nissan 7 bolt block off flange made by OBX. Normal T3's have 5 bolt flanges but Nissan wanted to be different. Of course with that setup you'd need an external wastegate as well.
-
Wish I had a torque plate... My block was rebored without one...
-
You guys are bringing back memories and a dosage of envy.
I can only imagine what it would be like to pull up to Coco Ichibanya in my 280z...
-
Just as the title says, I'm looking for a 240z (70-73) defroster grille. Its the elongated crescent-shaped piece of metal that sits on top of the dashboard and covers the windshield defroster vents. It mounts with 5 bolts/screws, as opposed to the later 260z/280z styles that mount with four.
I'm not picky about the condition at all, as long as its not bent like a pretzel. If its workable and able to be cleaned up and painted, I'm interested.
Thanks.
-
Wow, Oddmanout, that's pretty cool. I'm glad you're getting it all back together. you didn't say how it was running since the rebuild. I hope it goes well. What did you ever end up doing about your floorpans? I remember you were going to glass them at one point, but now you've got the welder... Pretty cool job in anycase. Oh, I also missed on if you put in the 2nd layer of sound deadening?
Phar
Never put a second layer of soundmat down, and the passenger side still has a tiny patch of fiberglass. About it running... its not. I still have yet to complete the shortblock, since the Nissan Comp oil pan dictates that I make a custom oil pickup (all the stock pieces I try are too short). So in the meantime I've been getting these little projects done. Rerouting a new fuel system, replacing most of the plumbing with AN lines, cleaning up the engine bay, creating intercooler ducting, fabricating a custom intake, installing the 240sx transmission... that's just scratching the surface. I hope I get it on the road this summer...
-
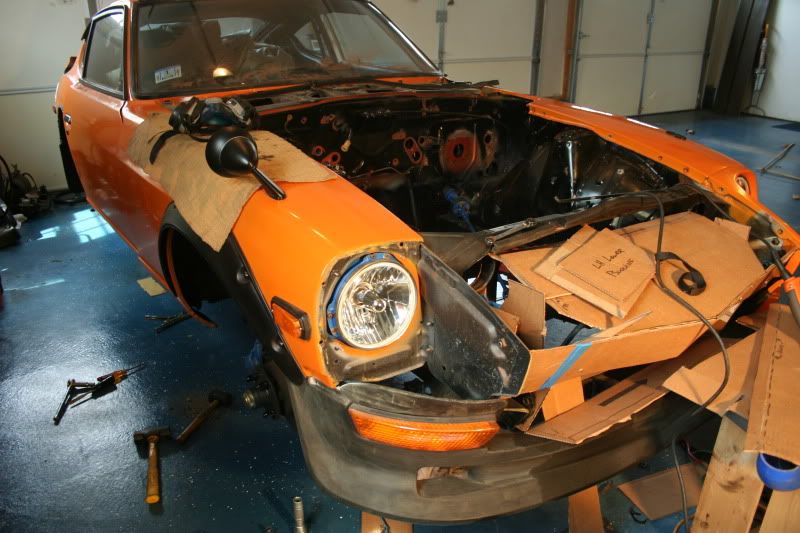
I thought people usually picked cars a bit more beat up than that for donors.
-
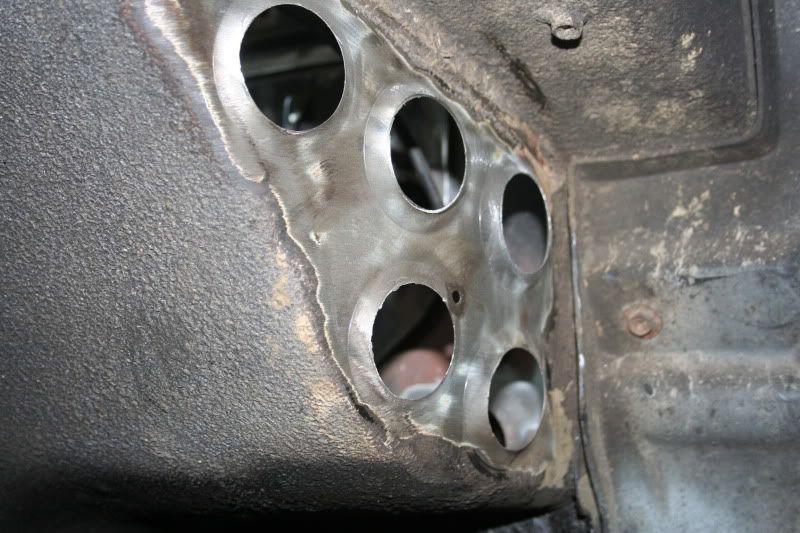
Any pics of the panel after you used the eastwood flanging tool on it?
Definitely something I would have liked to do when I patched mine! Make sure you stitch the panel in completely solid around to seal it. Take it slow with a copper backing bar and you shouldn't warp.
Looking good so far!
I've been taking it painfully slow, lol. I don't know how many times I had to swap sides with my welder and ladder (car is as high as it goes on the stands, wanted a better angle). One of the main reasons I got the flanging tool was to avoid having to purchase a copper backing plate, and I figured it would be difficult to support the plug inside the hole while tacking. Also, I didn't have to be ultra precise when cutting the plug to fit. Well, and I was curious. I'll probably need a copper backer anyway at some point. Lot of small unwanted holes to fill in the engine bay...
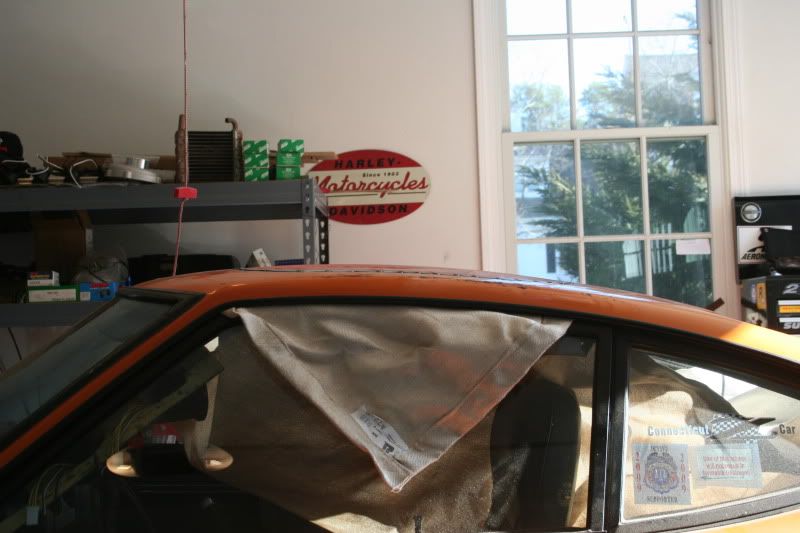
I didn't take any pictures of the flanging in progress (doh!), but I'll see if I can make a demo flange on the donor roof to give you a visual. The flange is much milder in appearance than advertised, but it works great!
-
nice job. now get that pillar pod done
Lol, working on it. Already swamping myself with a buttload of projects. The other day I was contemplating replacing all the brake line.
-
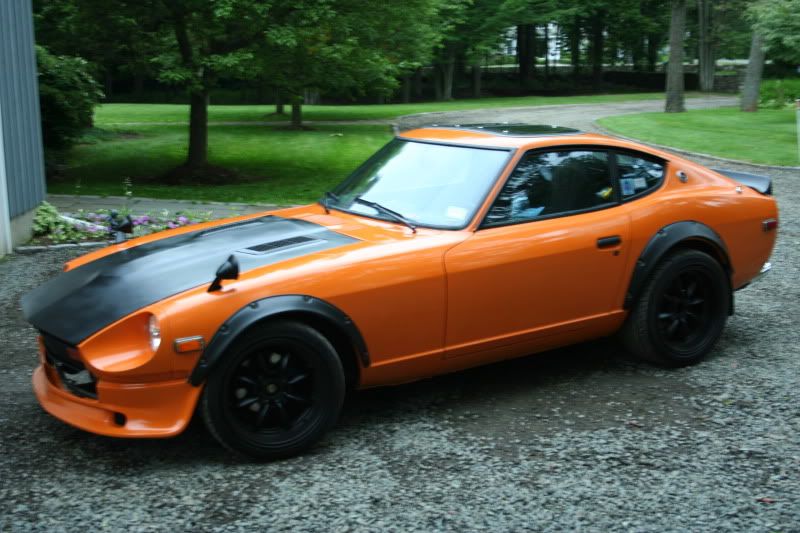
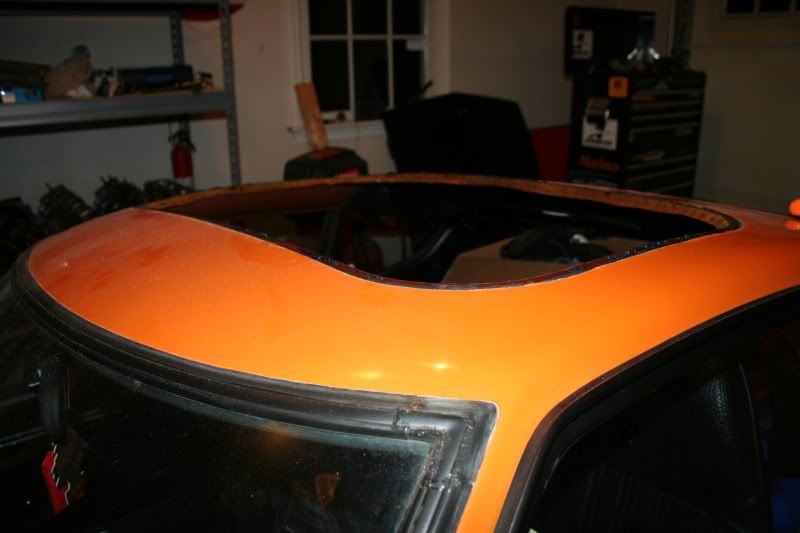
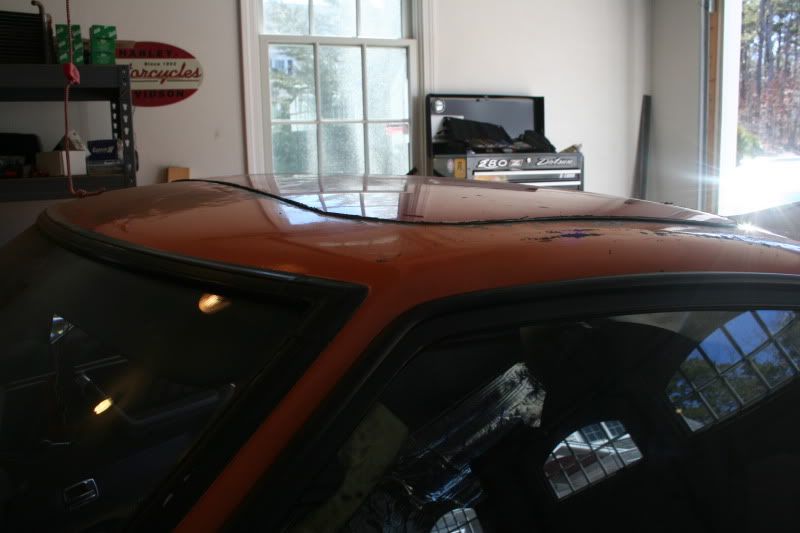
Some of you may remember this woeful 70's dealer modification on my car. Some of you may have the same. Hint: its on my roof.
Well...
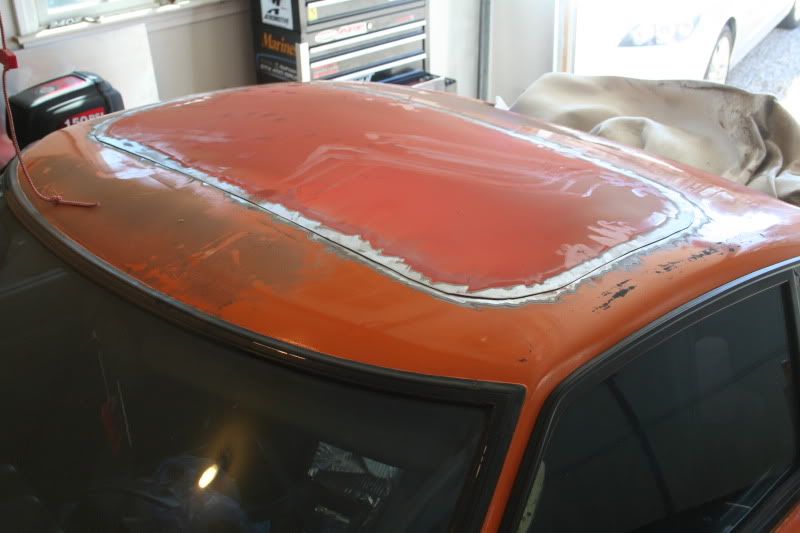
Pop.
Cut.
Fit.
Paste.
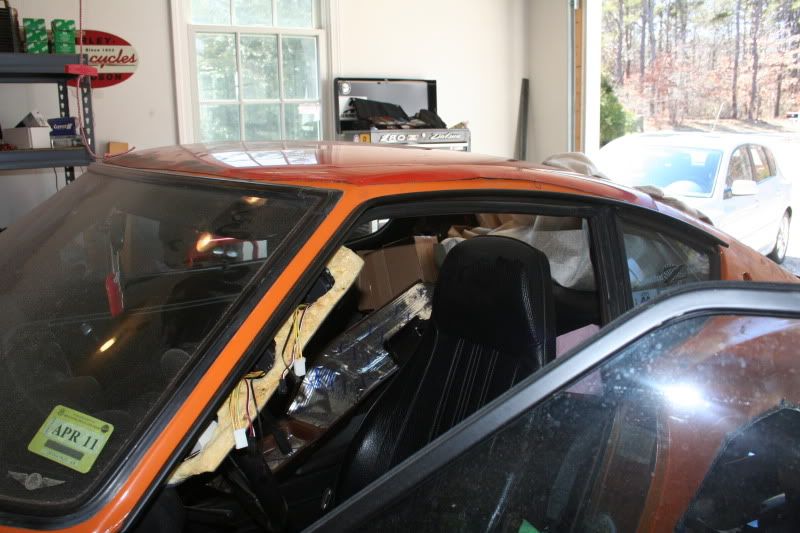
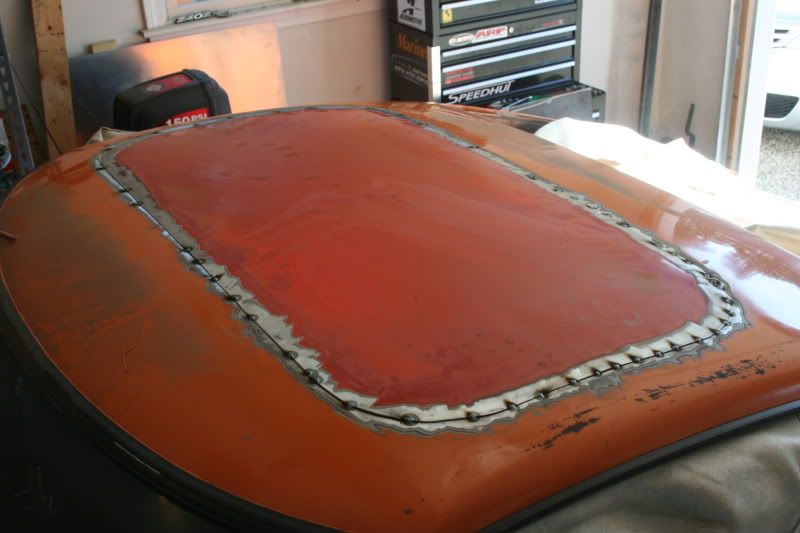
Besides the bumps from the tack welds, the panel is perfectly flush with the rest of the roofline. Those will be ground down and smoothed once I make some more.
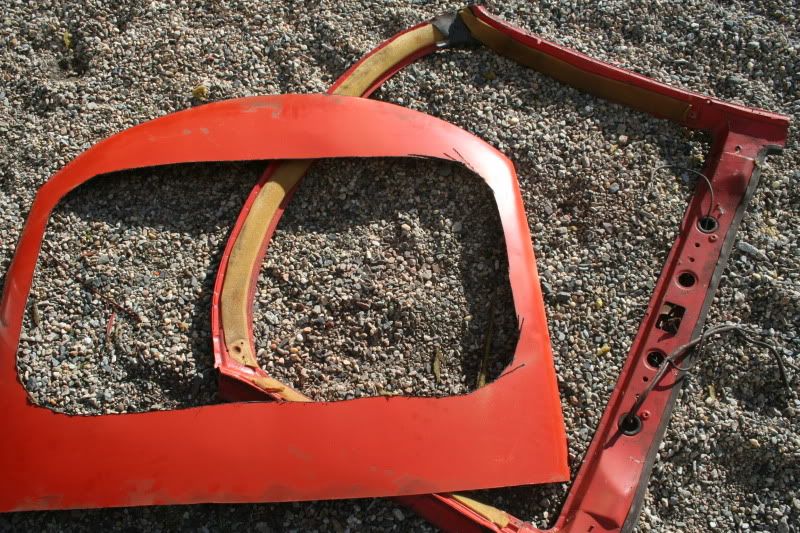
Thank you Hobart, thank you Eastwood flanging tool, and most of all thank you donor '73.
-
I'd go to eastwood .com and buy a flanging tool, cut out the hole, flange the perimeter to stiffen the roof and weld in my patch. The flange will let you overlap all the way around without changing the roof line and keep your welds away from the edge so there is much less chance of burning thru.
Thanks for the tip! A couple weeks ago I grabbed one and I'm in the process of cutting/flanging/welding today. I'll try to remember to post progress and snapshots of the process later.
-
As the title states, I'm curious as to the application of UV dye to my engine oil. It shouldn't be too long before I'm ready to get the motor assembled and ready for breaking it in. Lately I've been contemplating the idea of adding UV leak detection dye to the first batch of oil I use to break in the engine, for the first 500 miles. I've made a few changes to the lubrication system, so this seemed like a good idea to make sure everything was running leak free from the get go. My question of course is that I was wondering if there is any reason I should NOT do this, like the dye changing the chemical makeup or weight of the oil in a way that would be detrimental to proper break in.
If anyone has any insight, I'm curious...
-
Here's an article someone sent to me. Truly amazing stuff here.
-
Very nice. I had almost given up on that sump, since I measured and found out the sump was way too long. For some reason, I had never thought about modifying the sump itself that way...
Biggest worry now is that I lined the tank with POR-15 a year ago, now its probably all going to have to come off...


Fix a Flat hazards (untended aerosol cans)
in Interior
Posted
I had a can of green gas (airsoft) do this in my Z while I was at an event in SoCal. Luckily it rammed into my dome light and destroyed that and the plastic embellishment instead.