dmoralesbello
-
Posts
254 -
Joined
-
Last visited
-
Days Won
3
Content Type
Profiles
Forums
Blogs
Events
Gallery
Downloads
Store
Everything posted by dmoralesbello
-

280Z Restomod Progress
dmoralesbello replied to dmoralesbello's topic in S30 Series - 240z, 260z, 280z
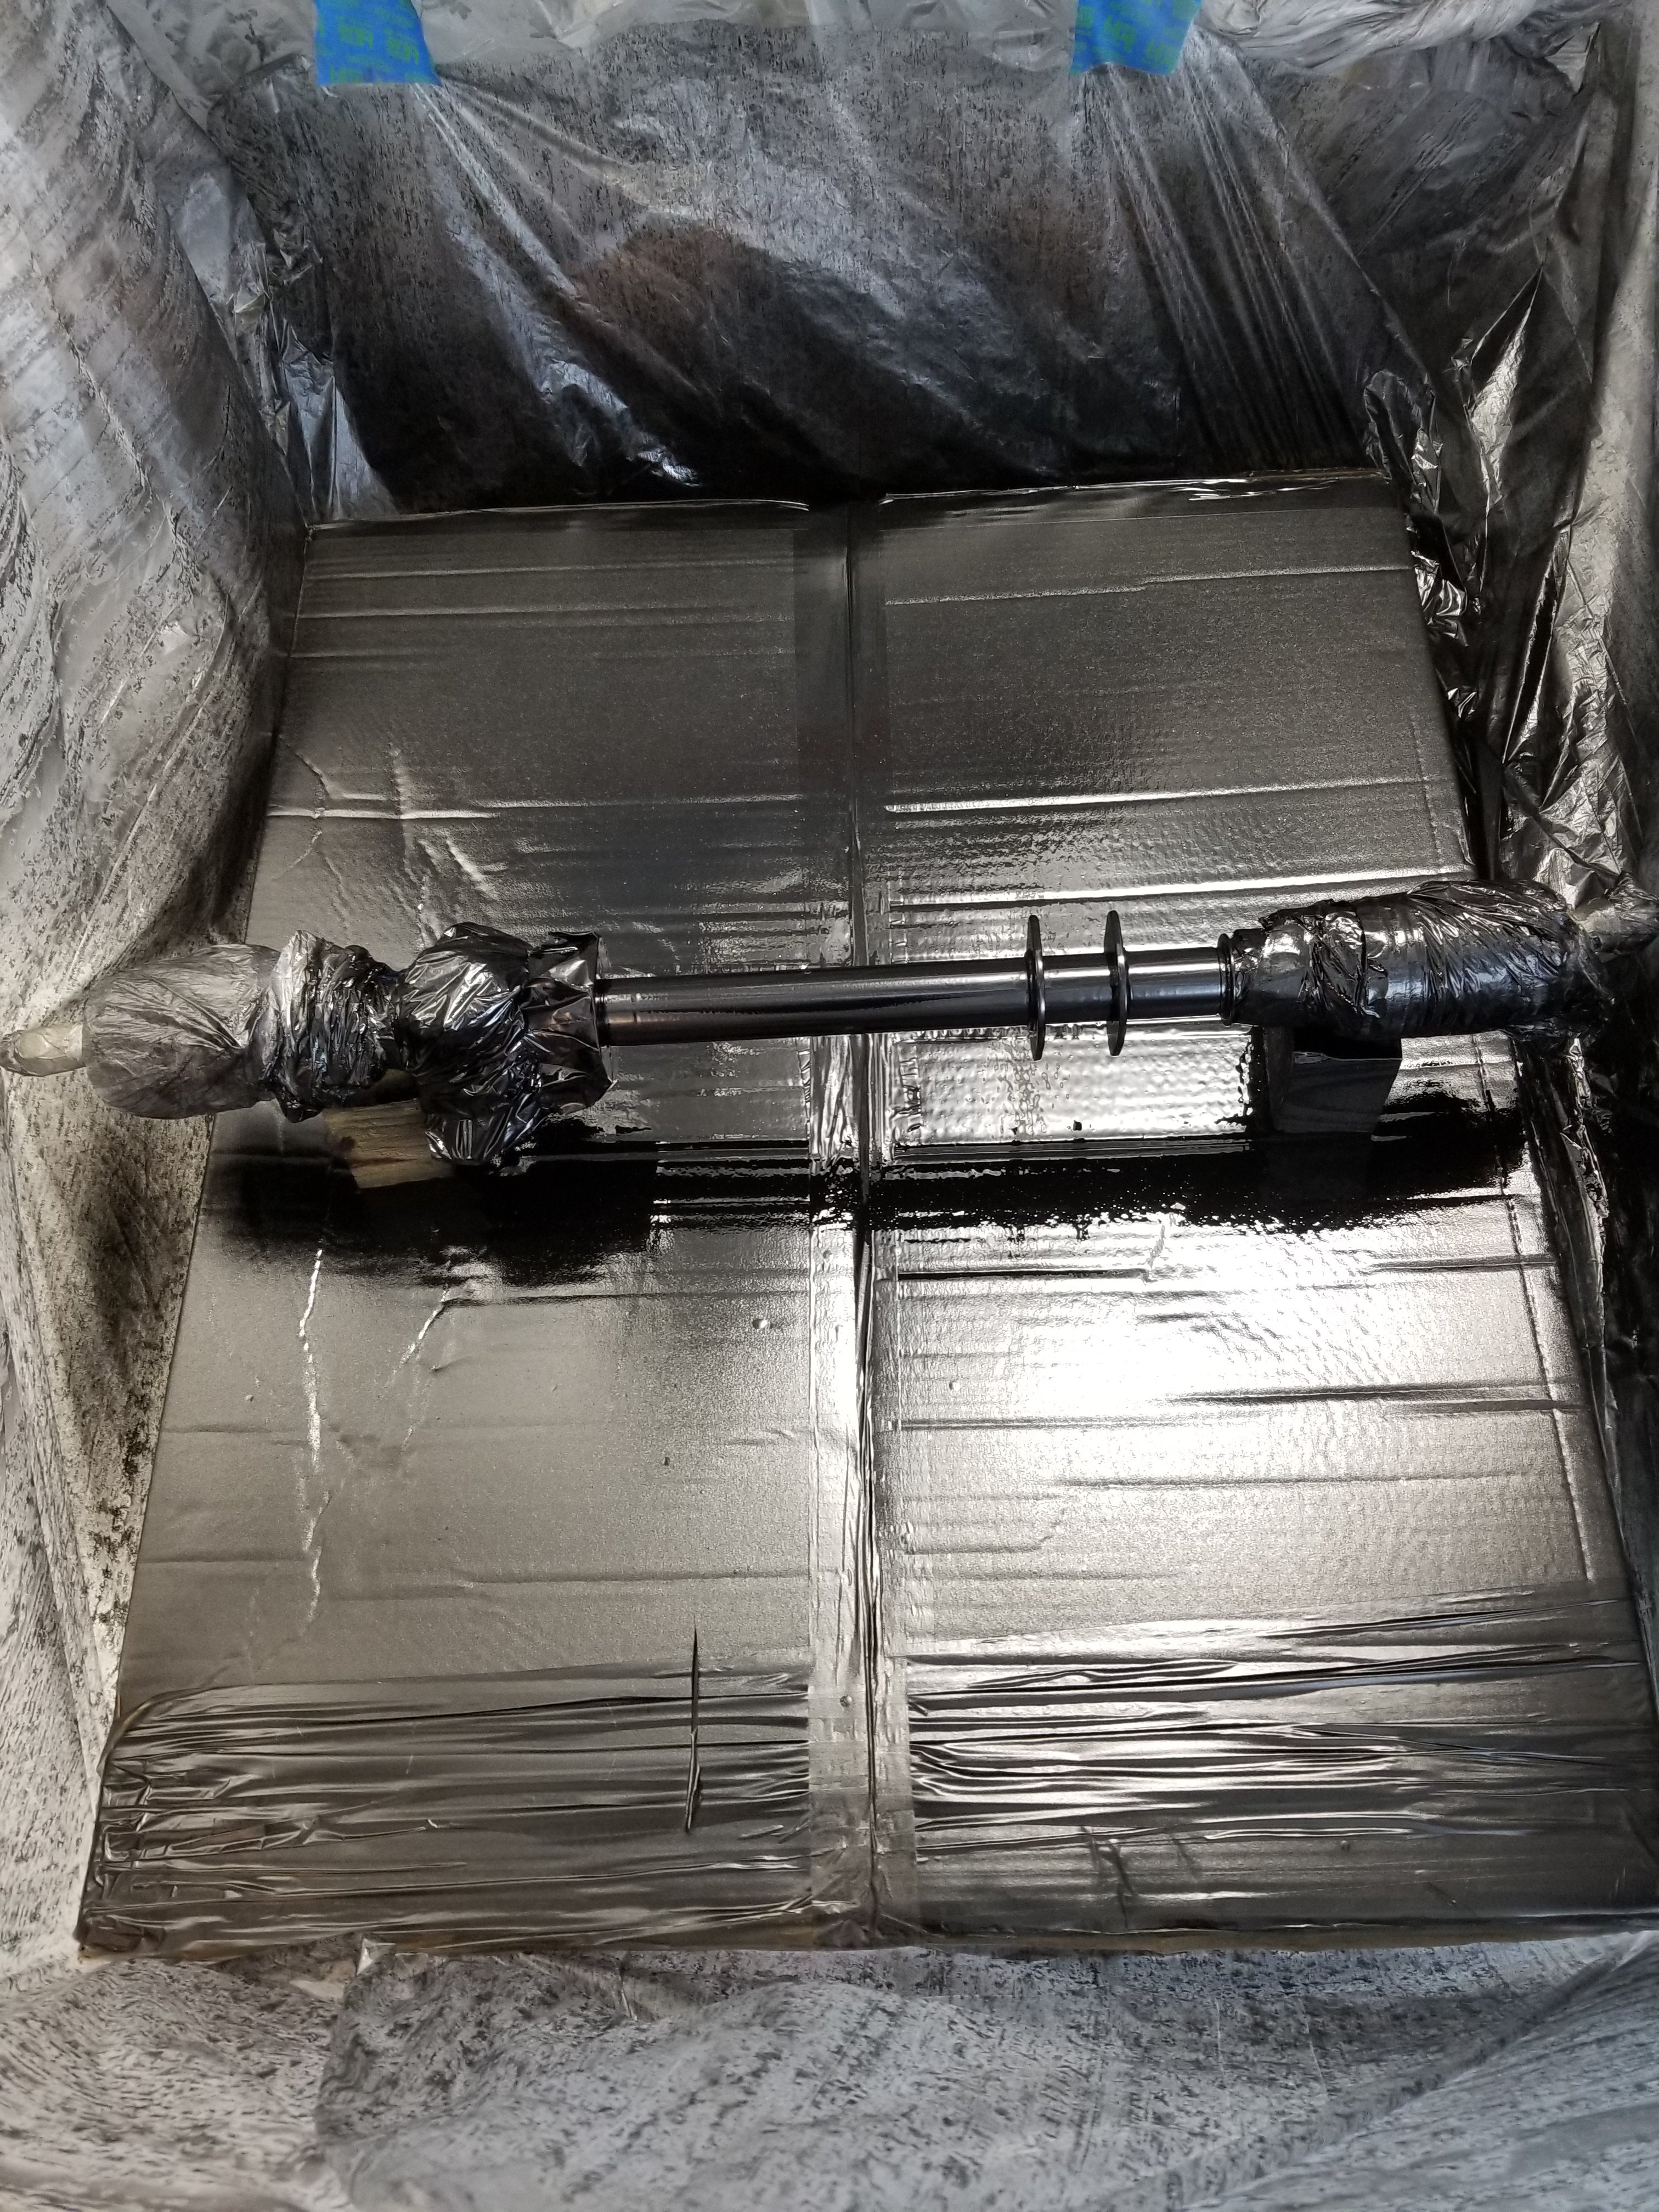
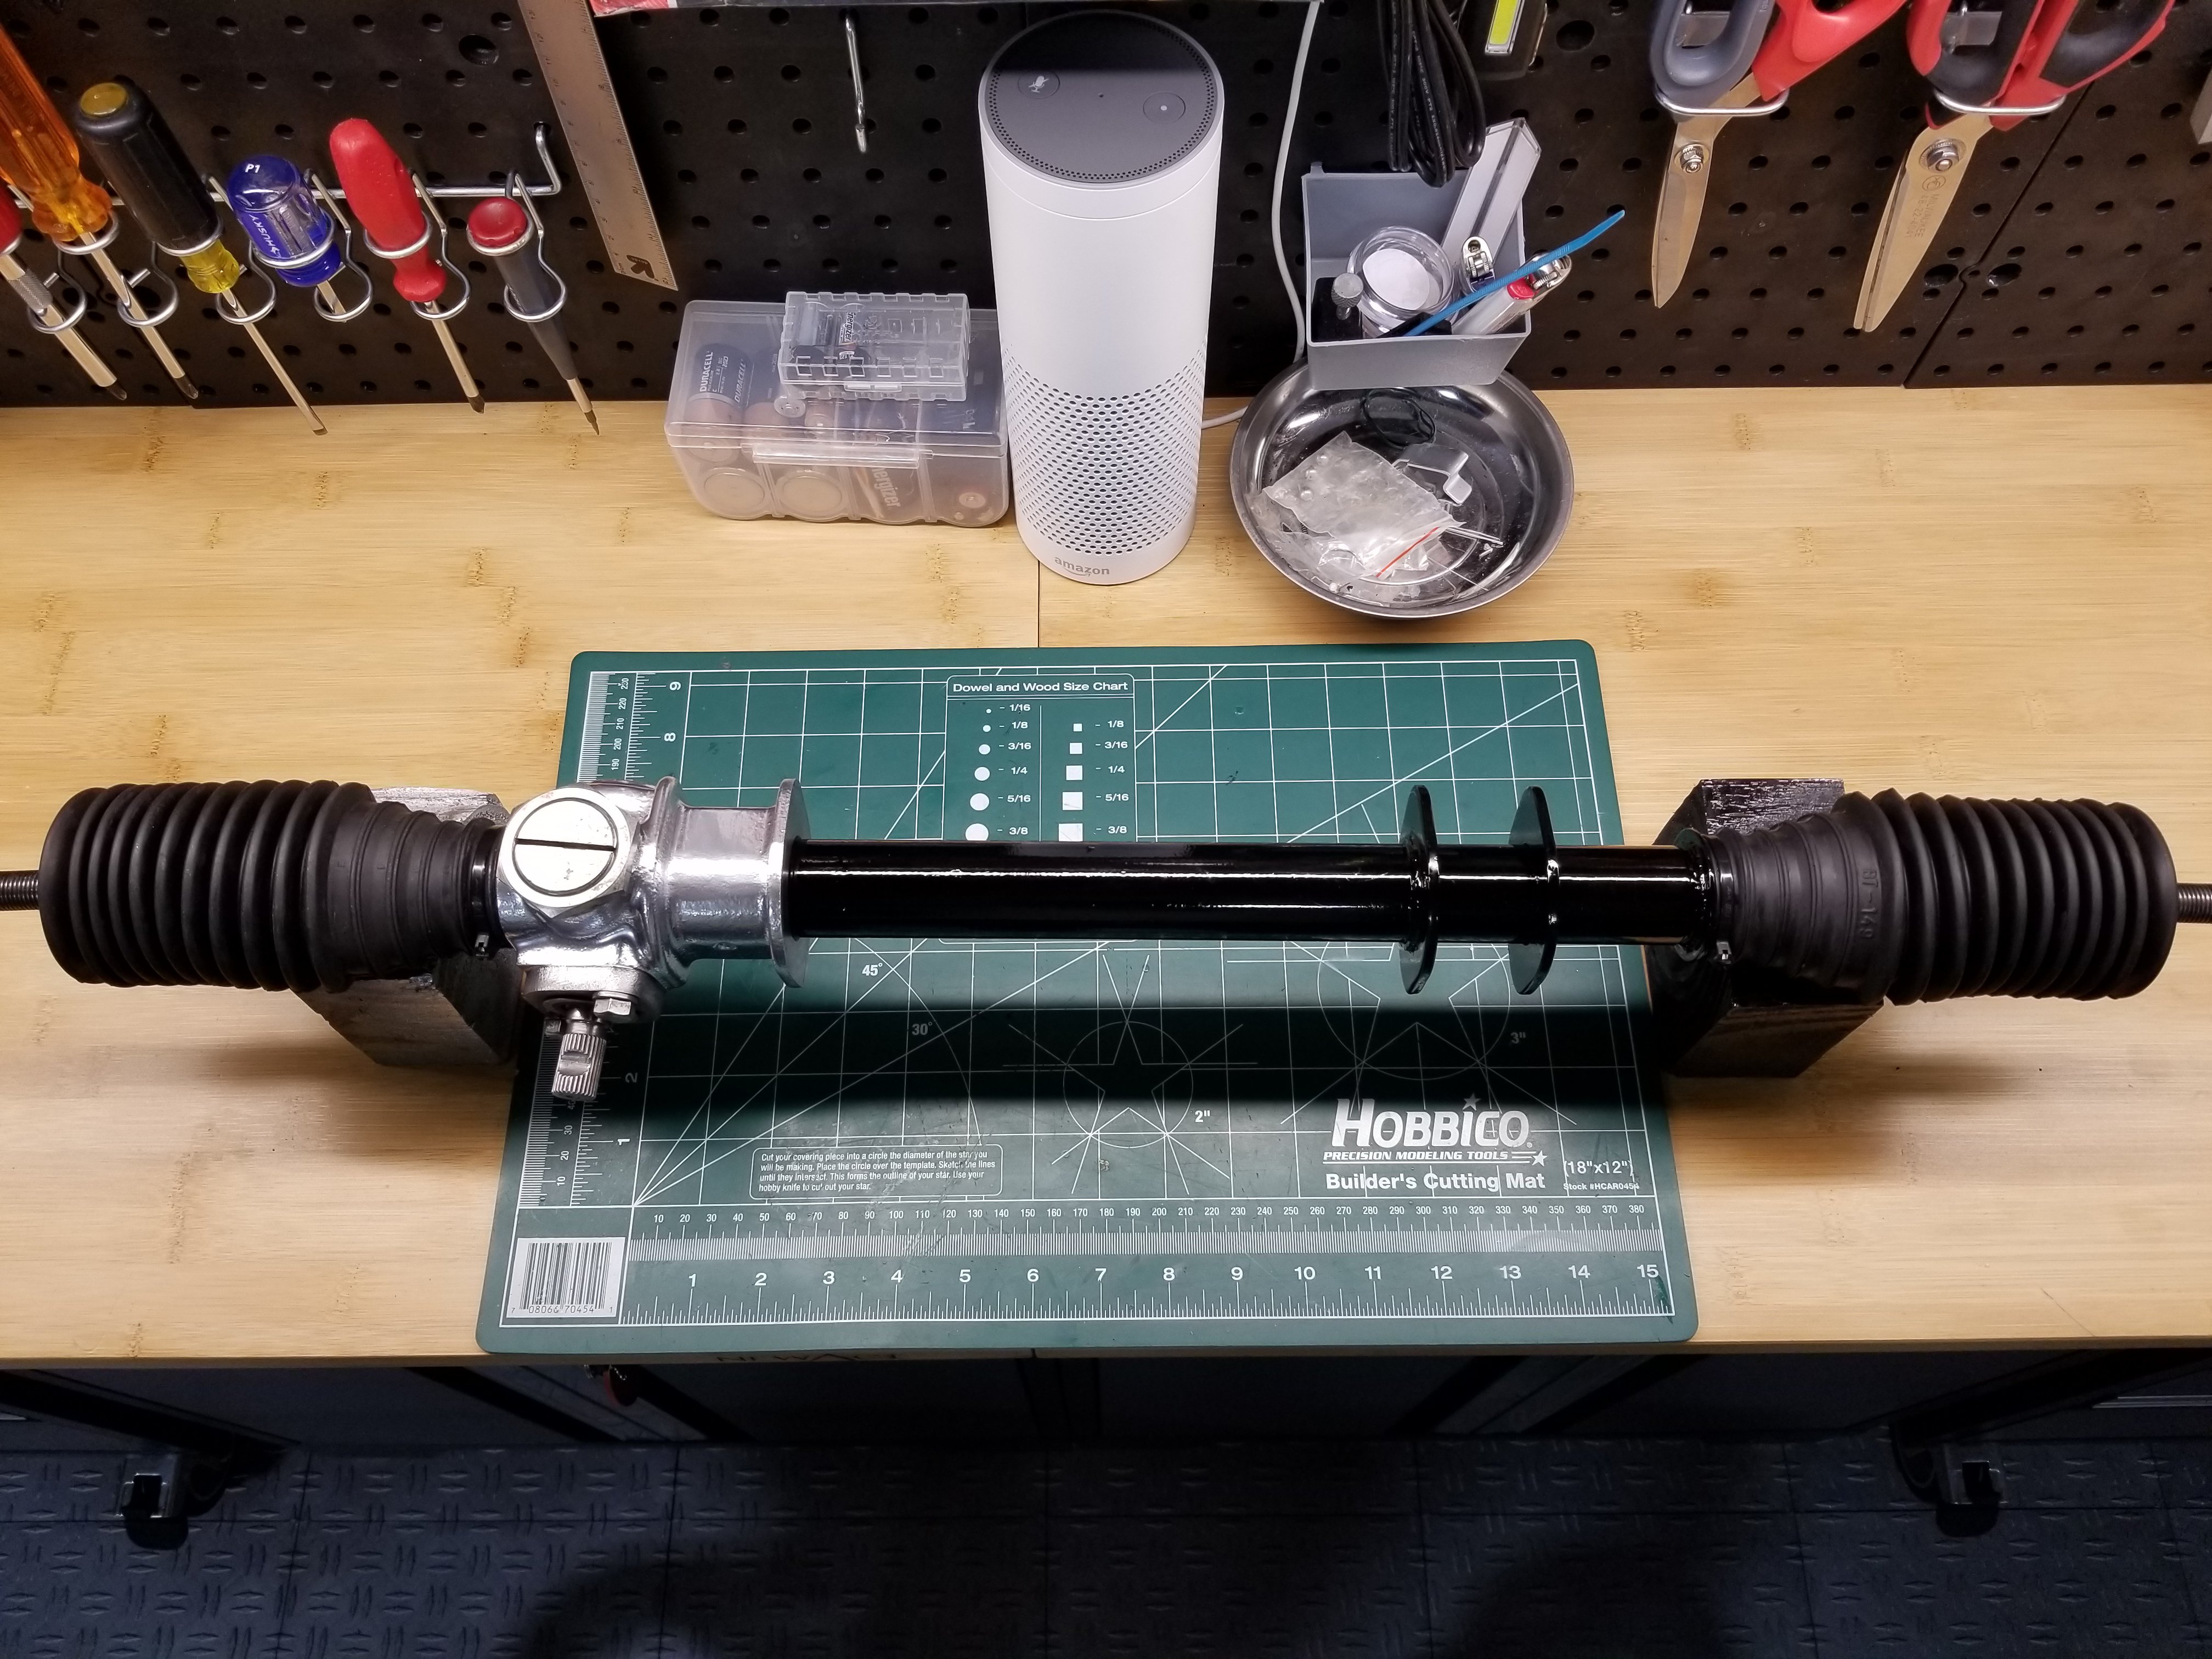
Steering rack serviced and painted. Ready for re-installation:
-
280Z Restomod Progress
dmoralesbello replied to dmoralesbello's topic in S30 Series - 240z, 260z, 280z
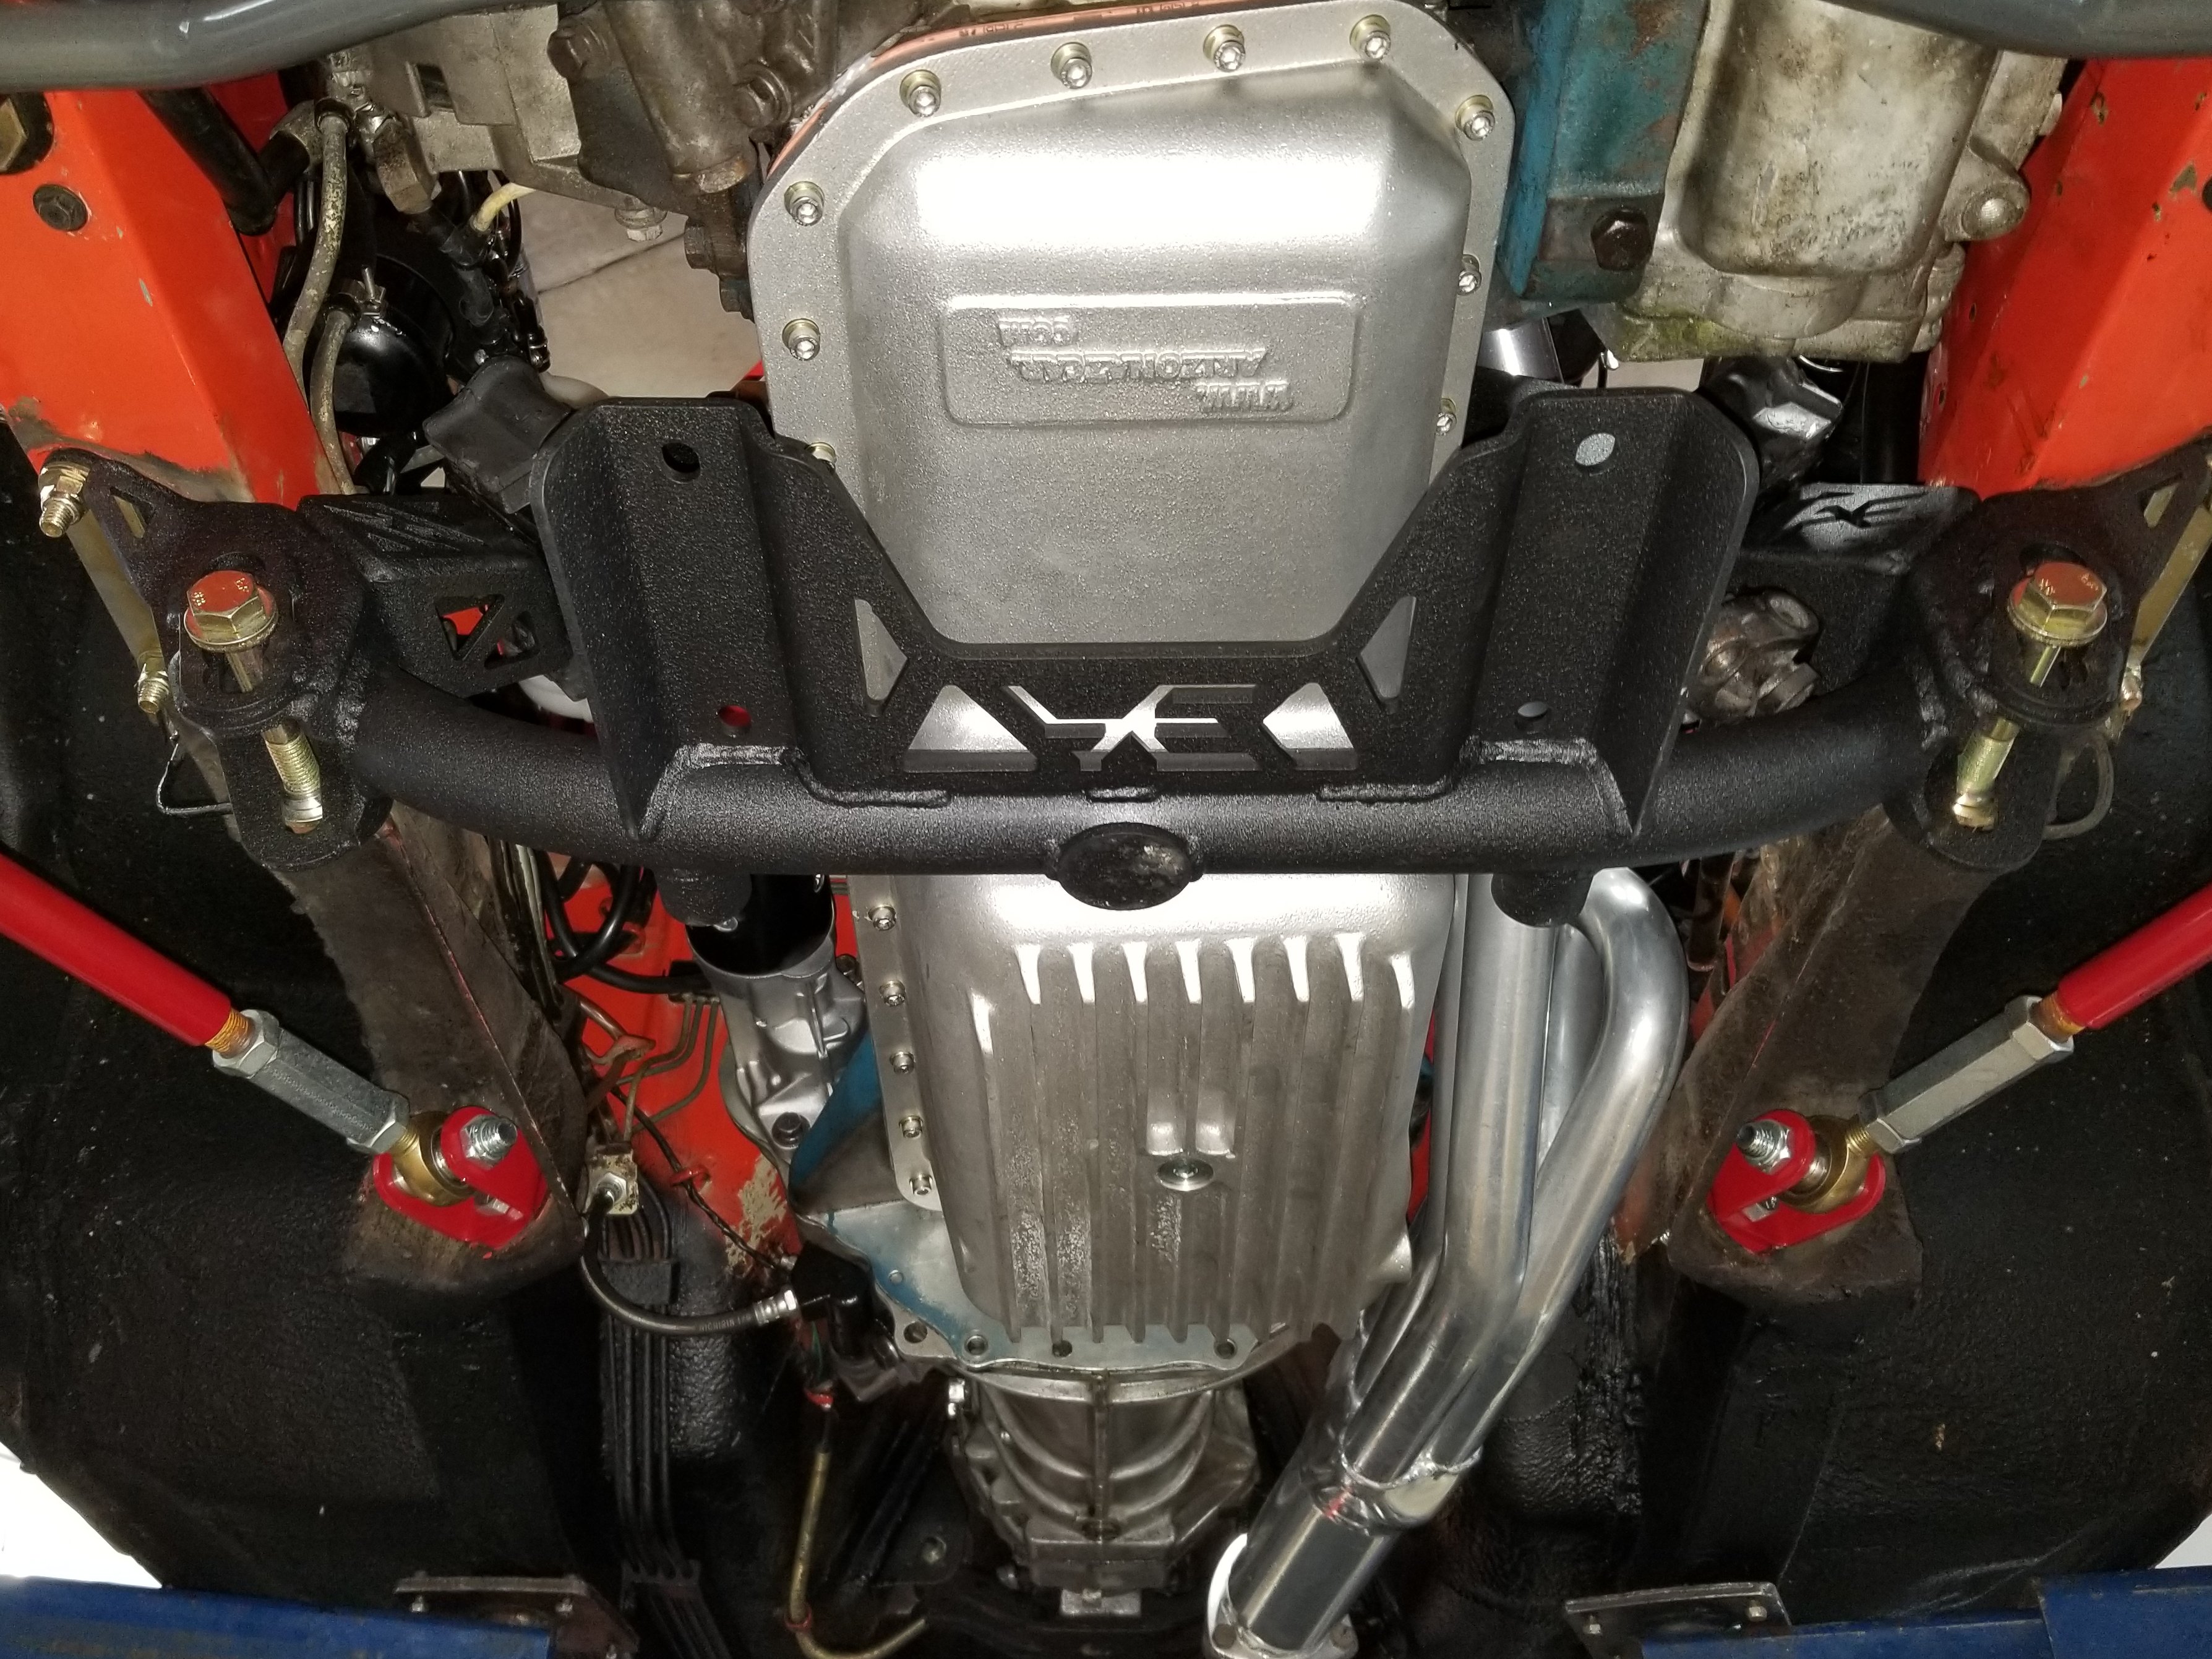
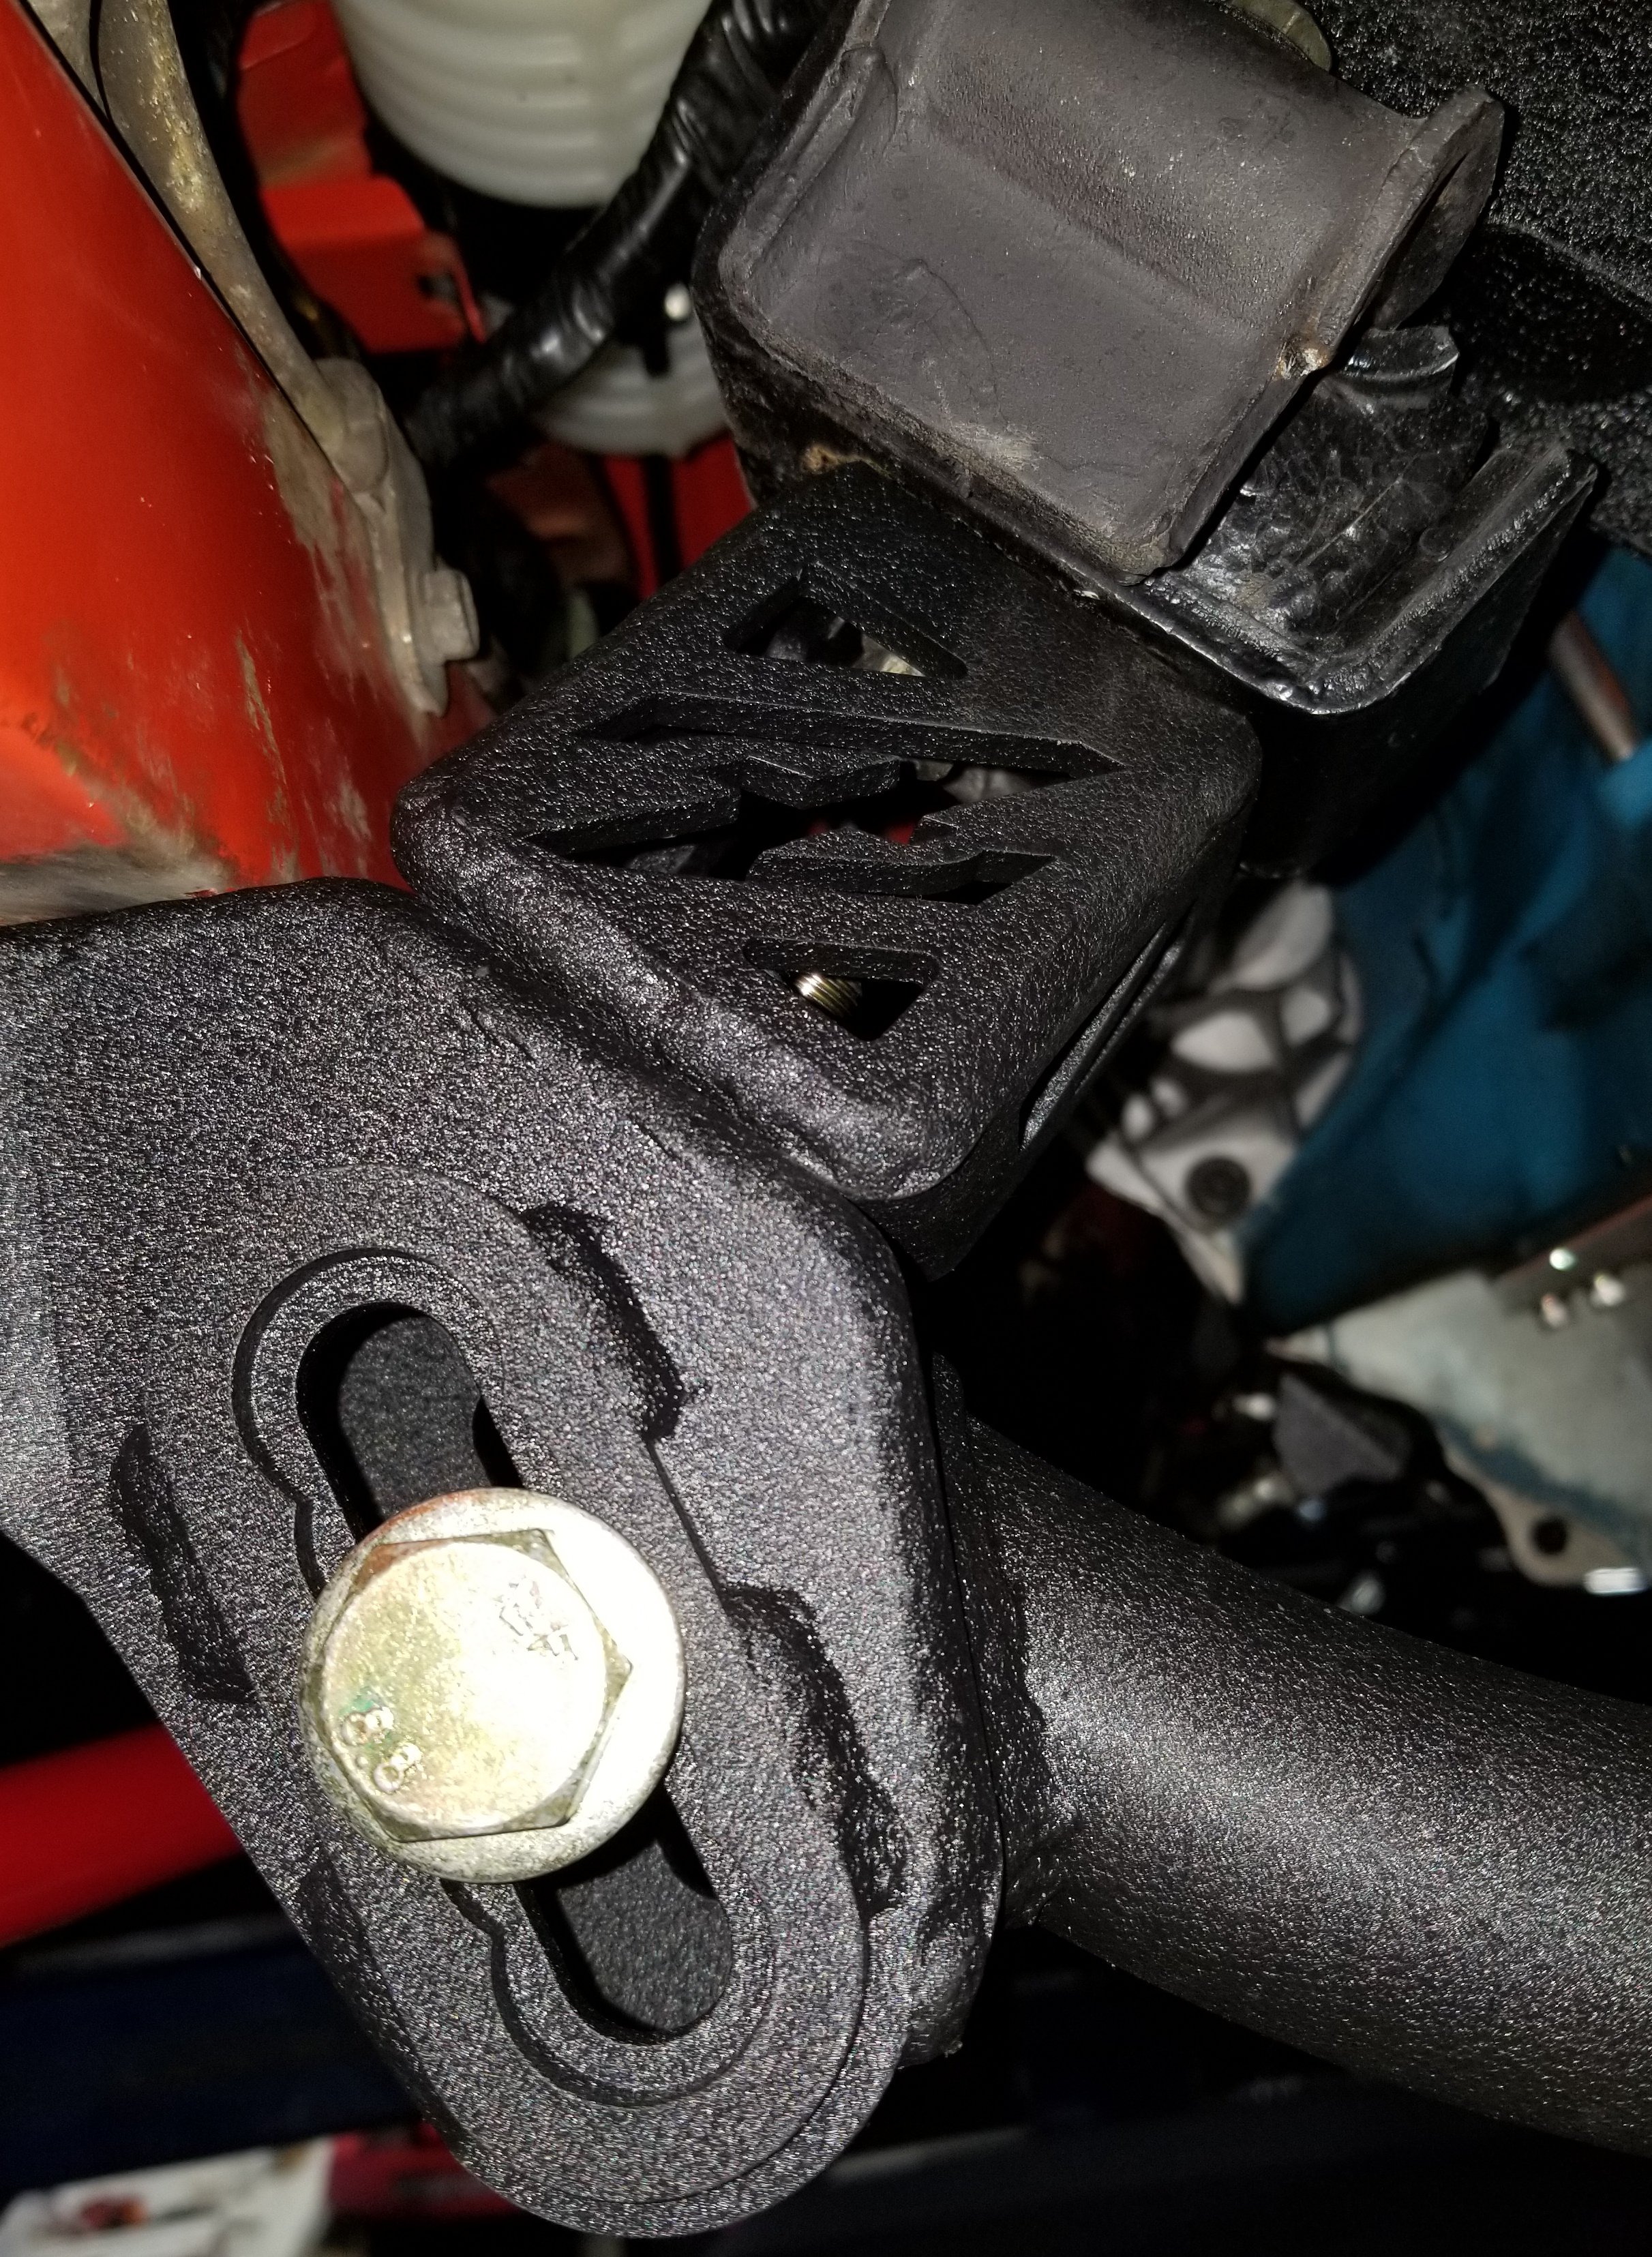
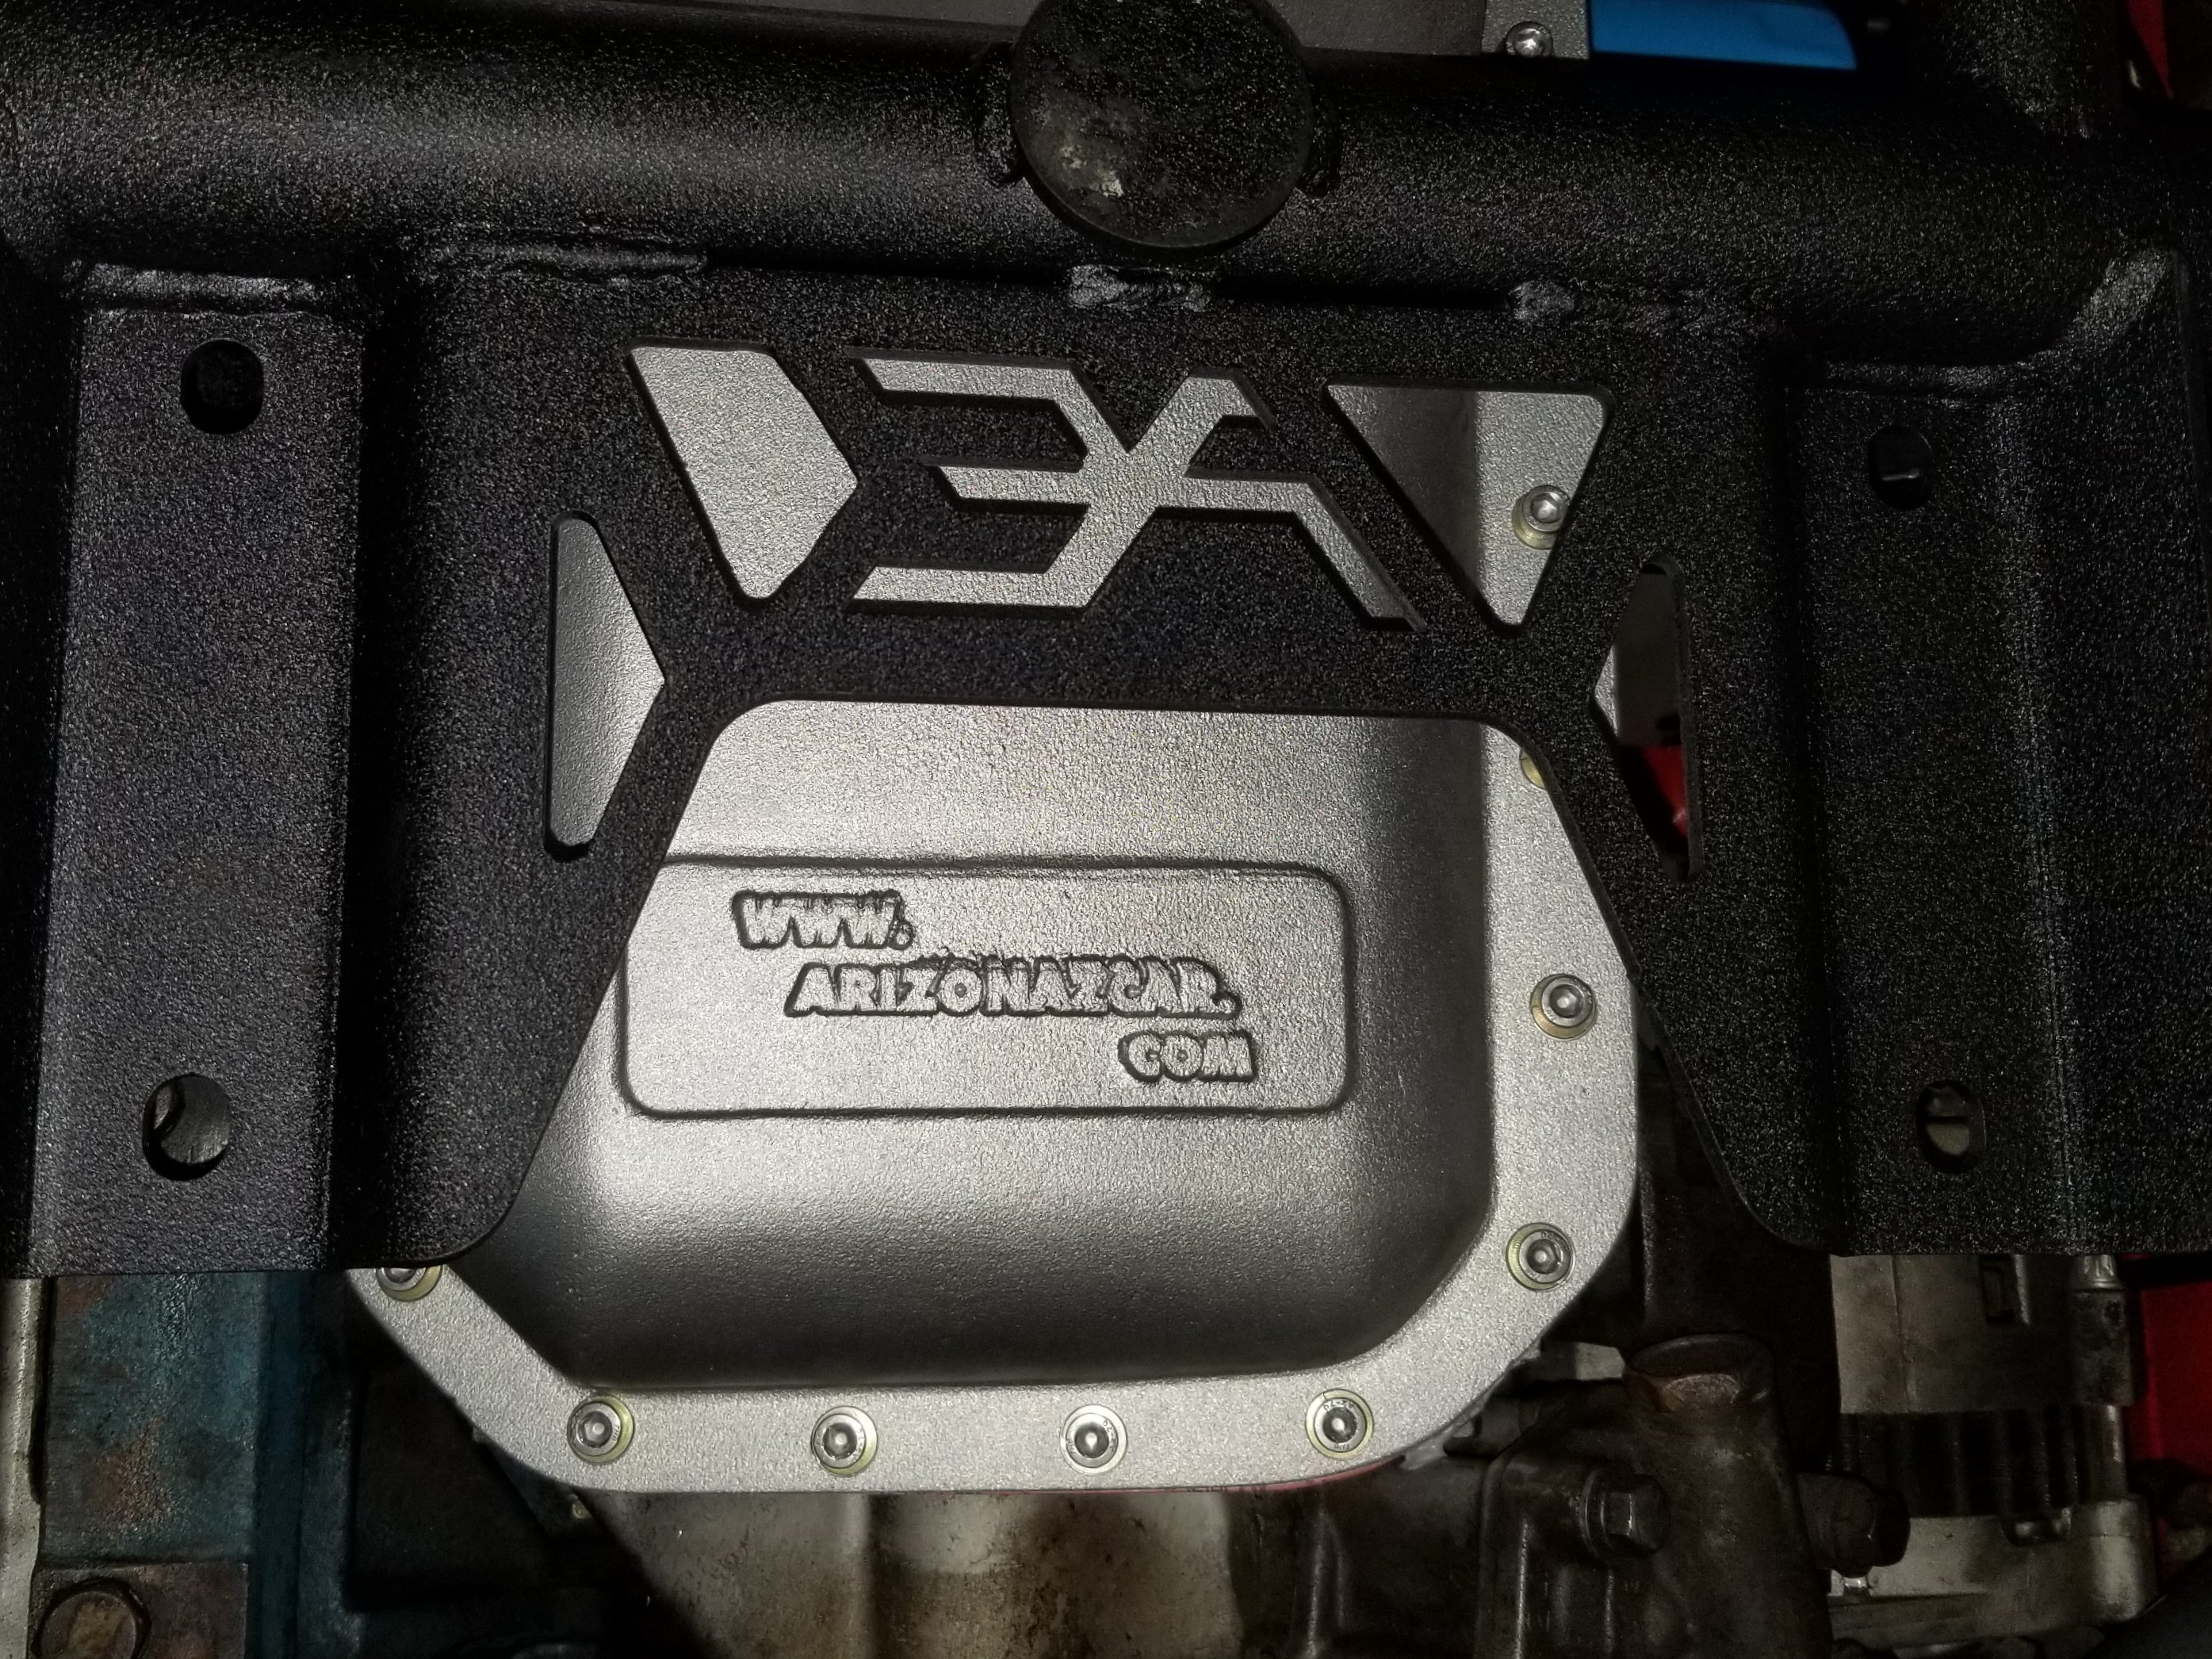
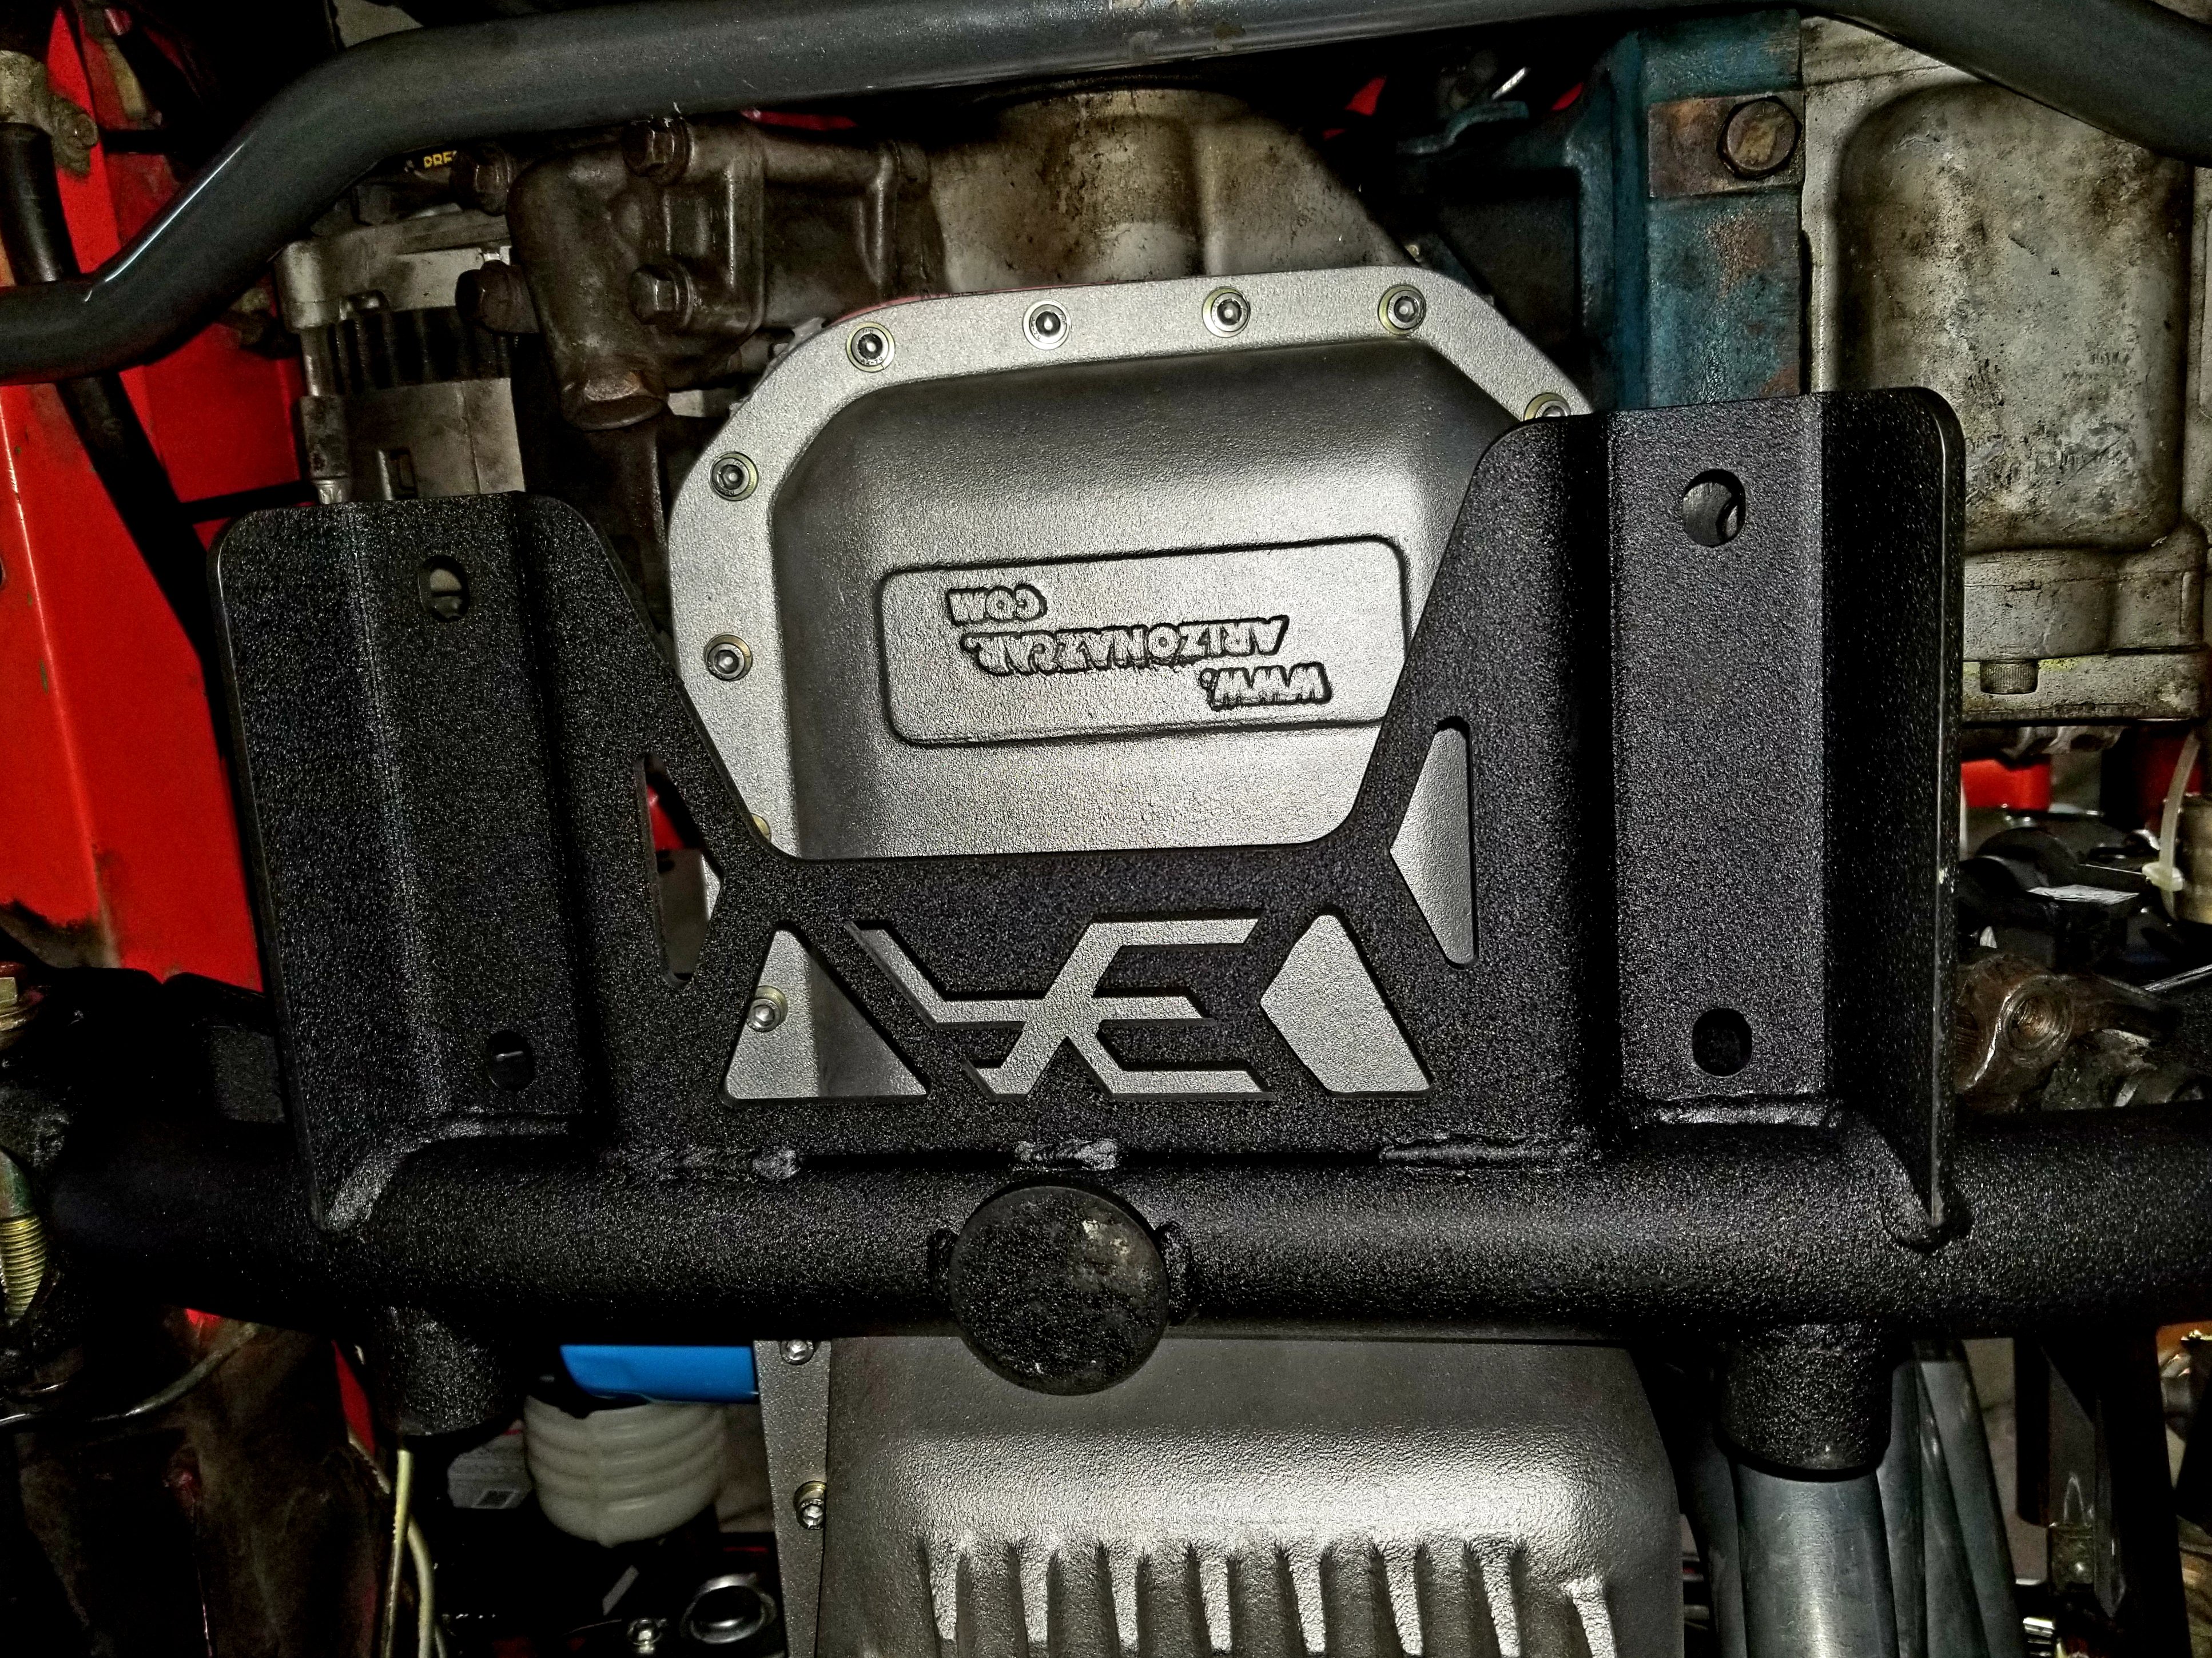
I'm in the middle of a major upgrade to the front end: changing the stock front cross member to a beautifully designed tubular unit from Apex Engineered and a cast aluminum oil pan from Arizona Zcar. Still to come are refreshed (media blasted and powder coated) control arms and strut housings, rebuilt steering rack and a new SS powder coated splash pan. In a couple of weeks I should also be getting new steering knuckles form Apex. Here are some pics of the job so far.
-
280Z Restomod Progress
dmoralesbello replied to dmoralesbello's topic in S30 Series - 240z, 260z, 280z
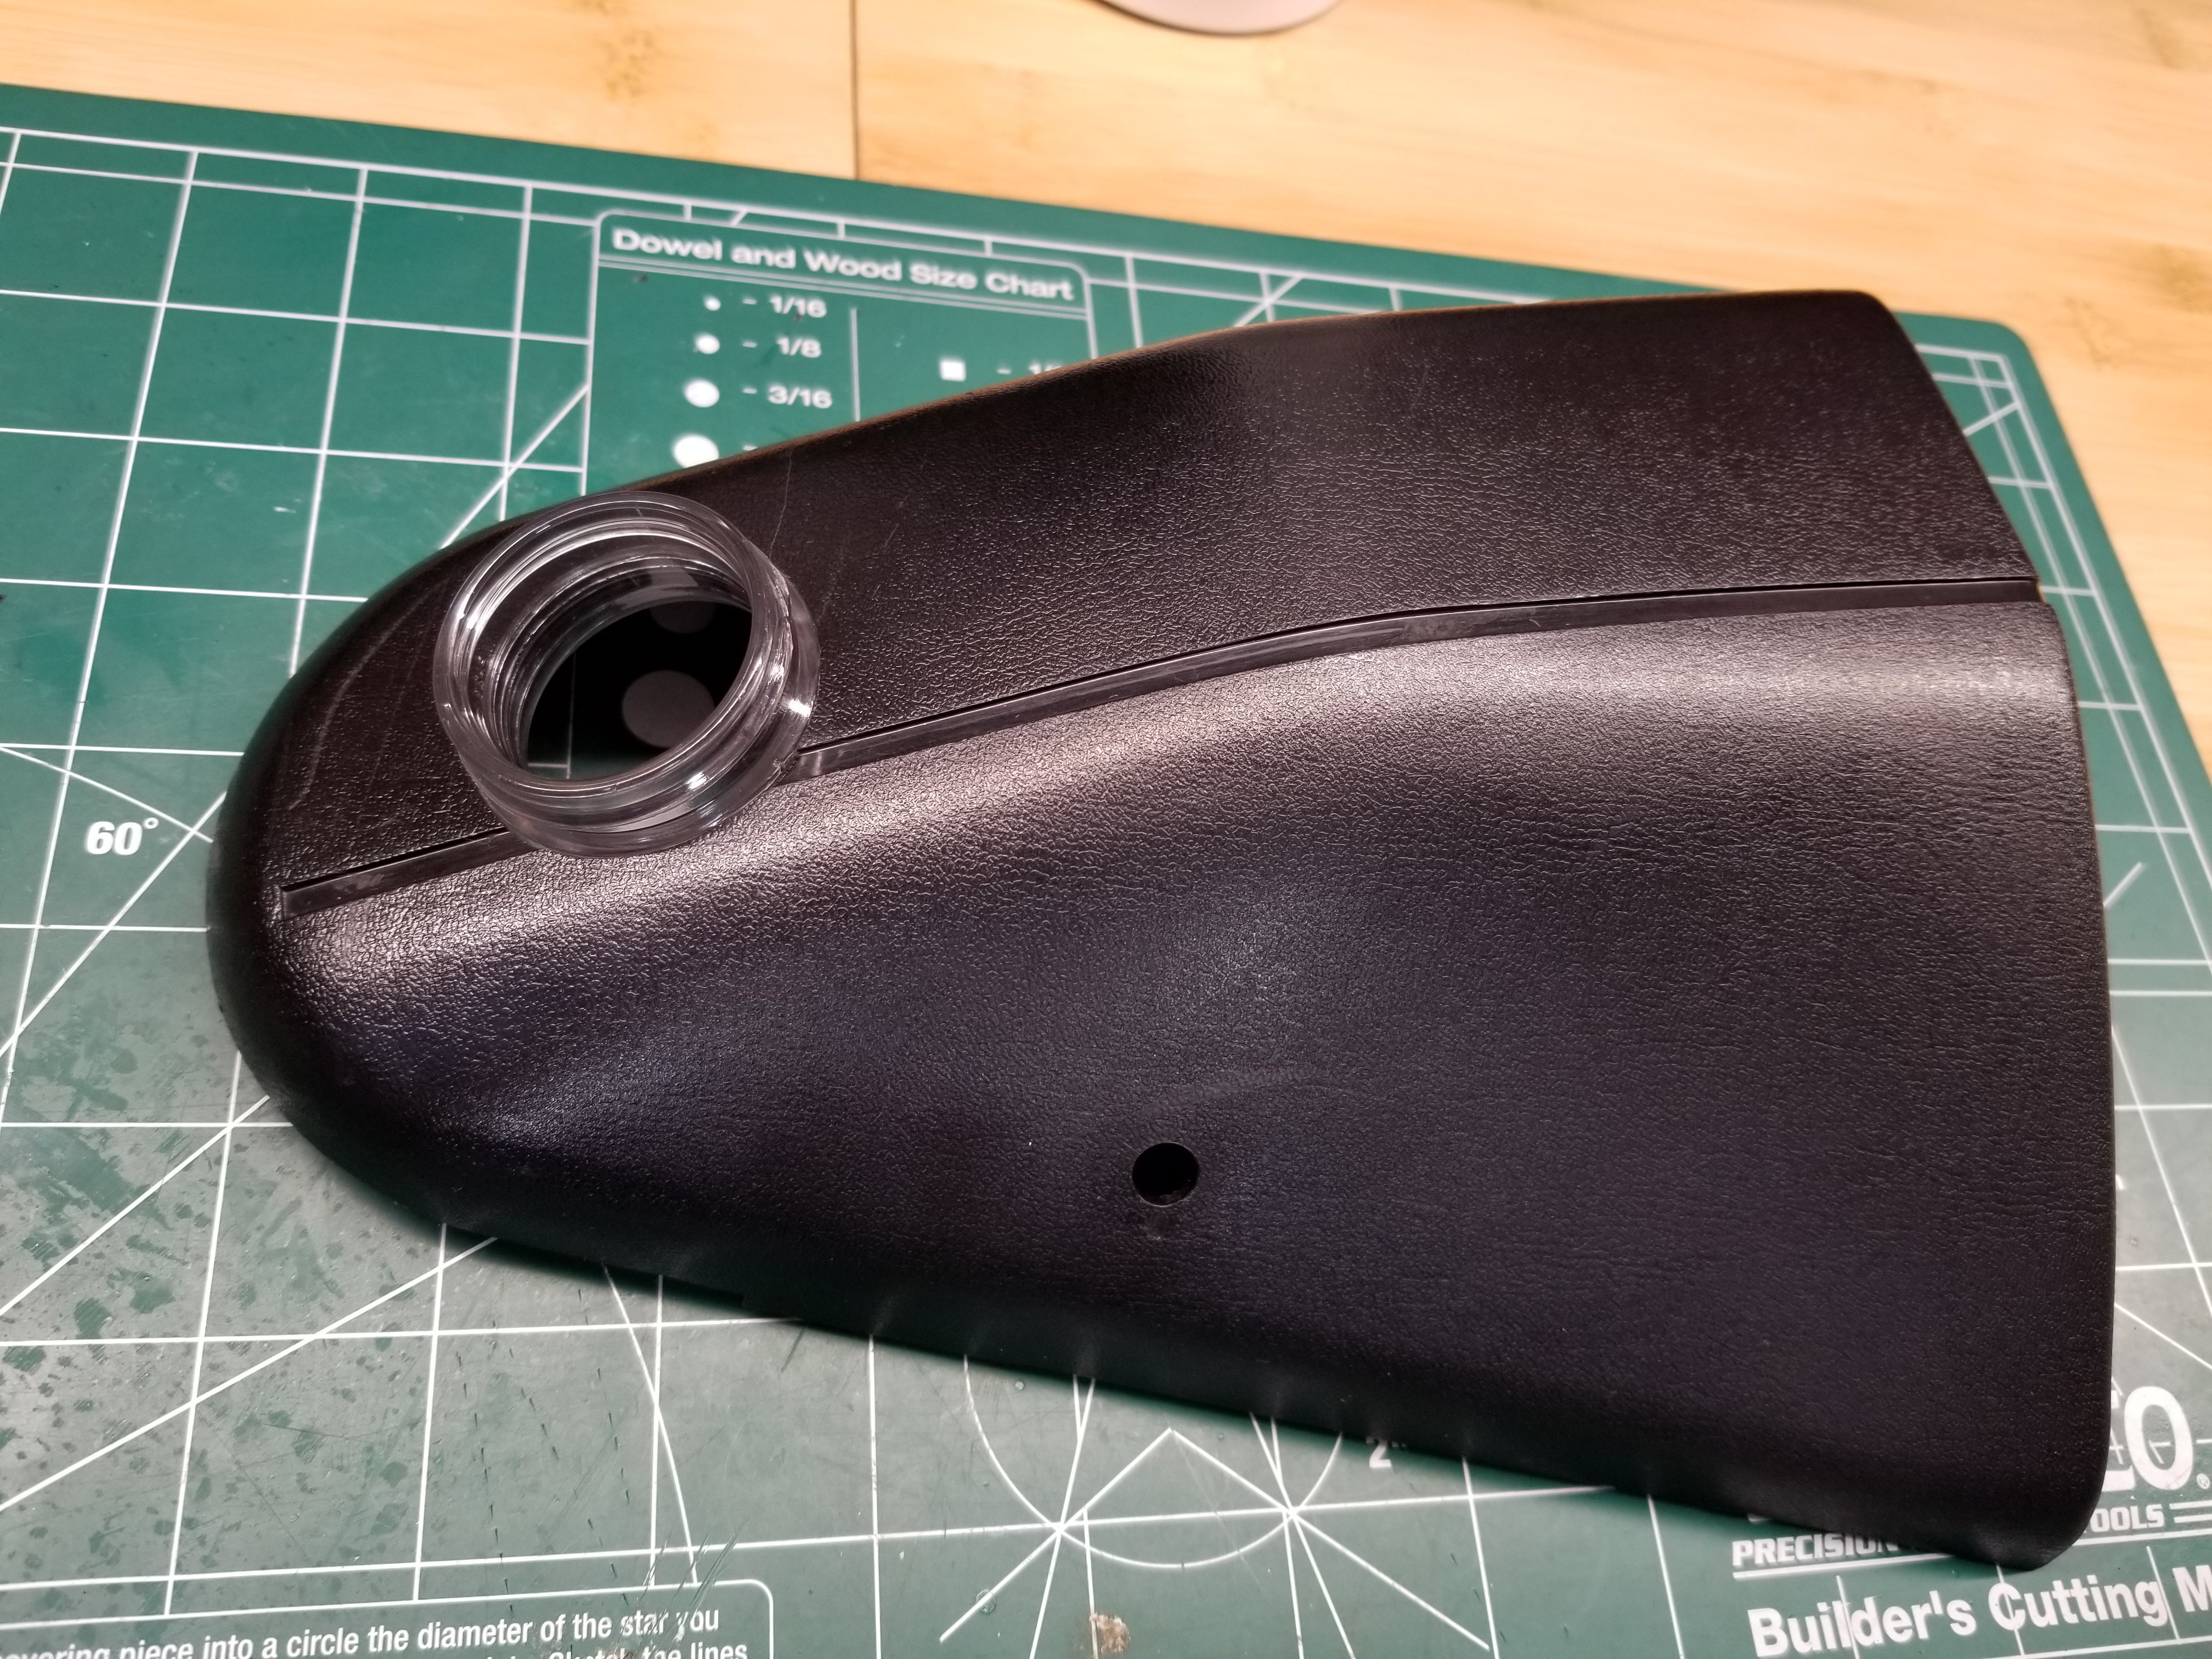
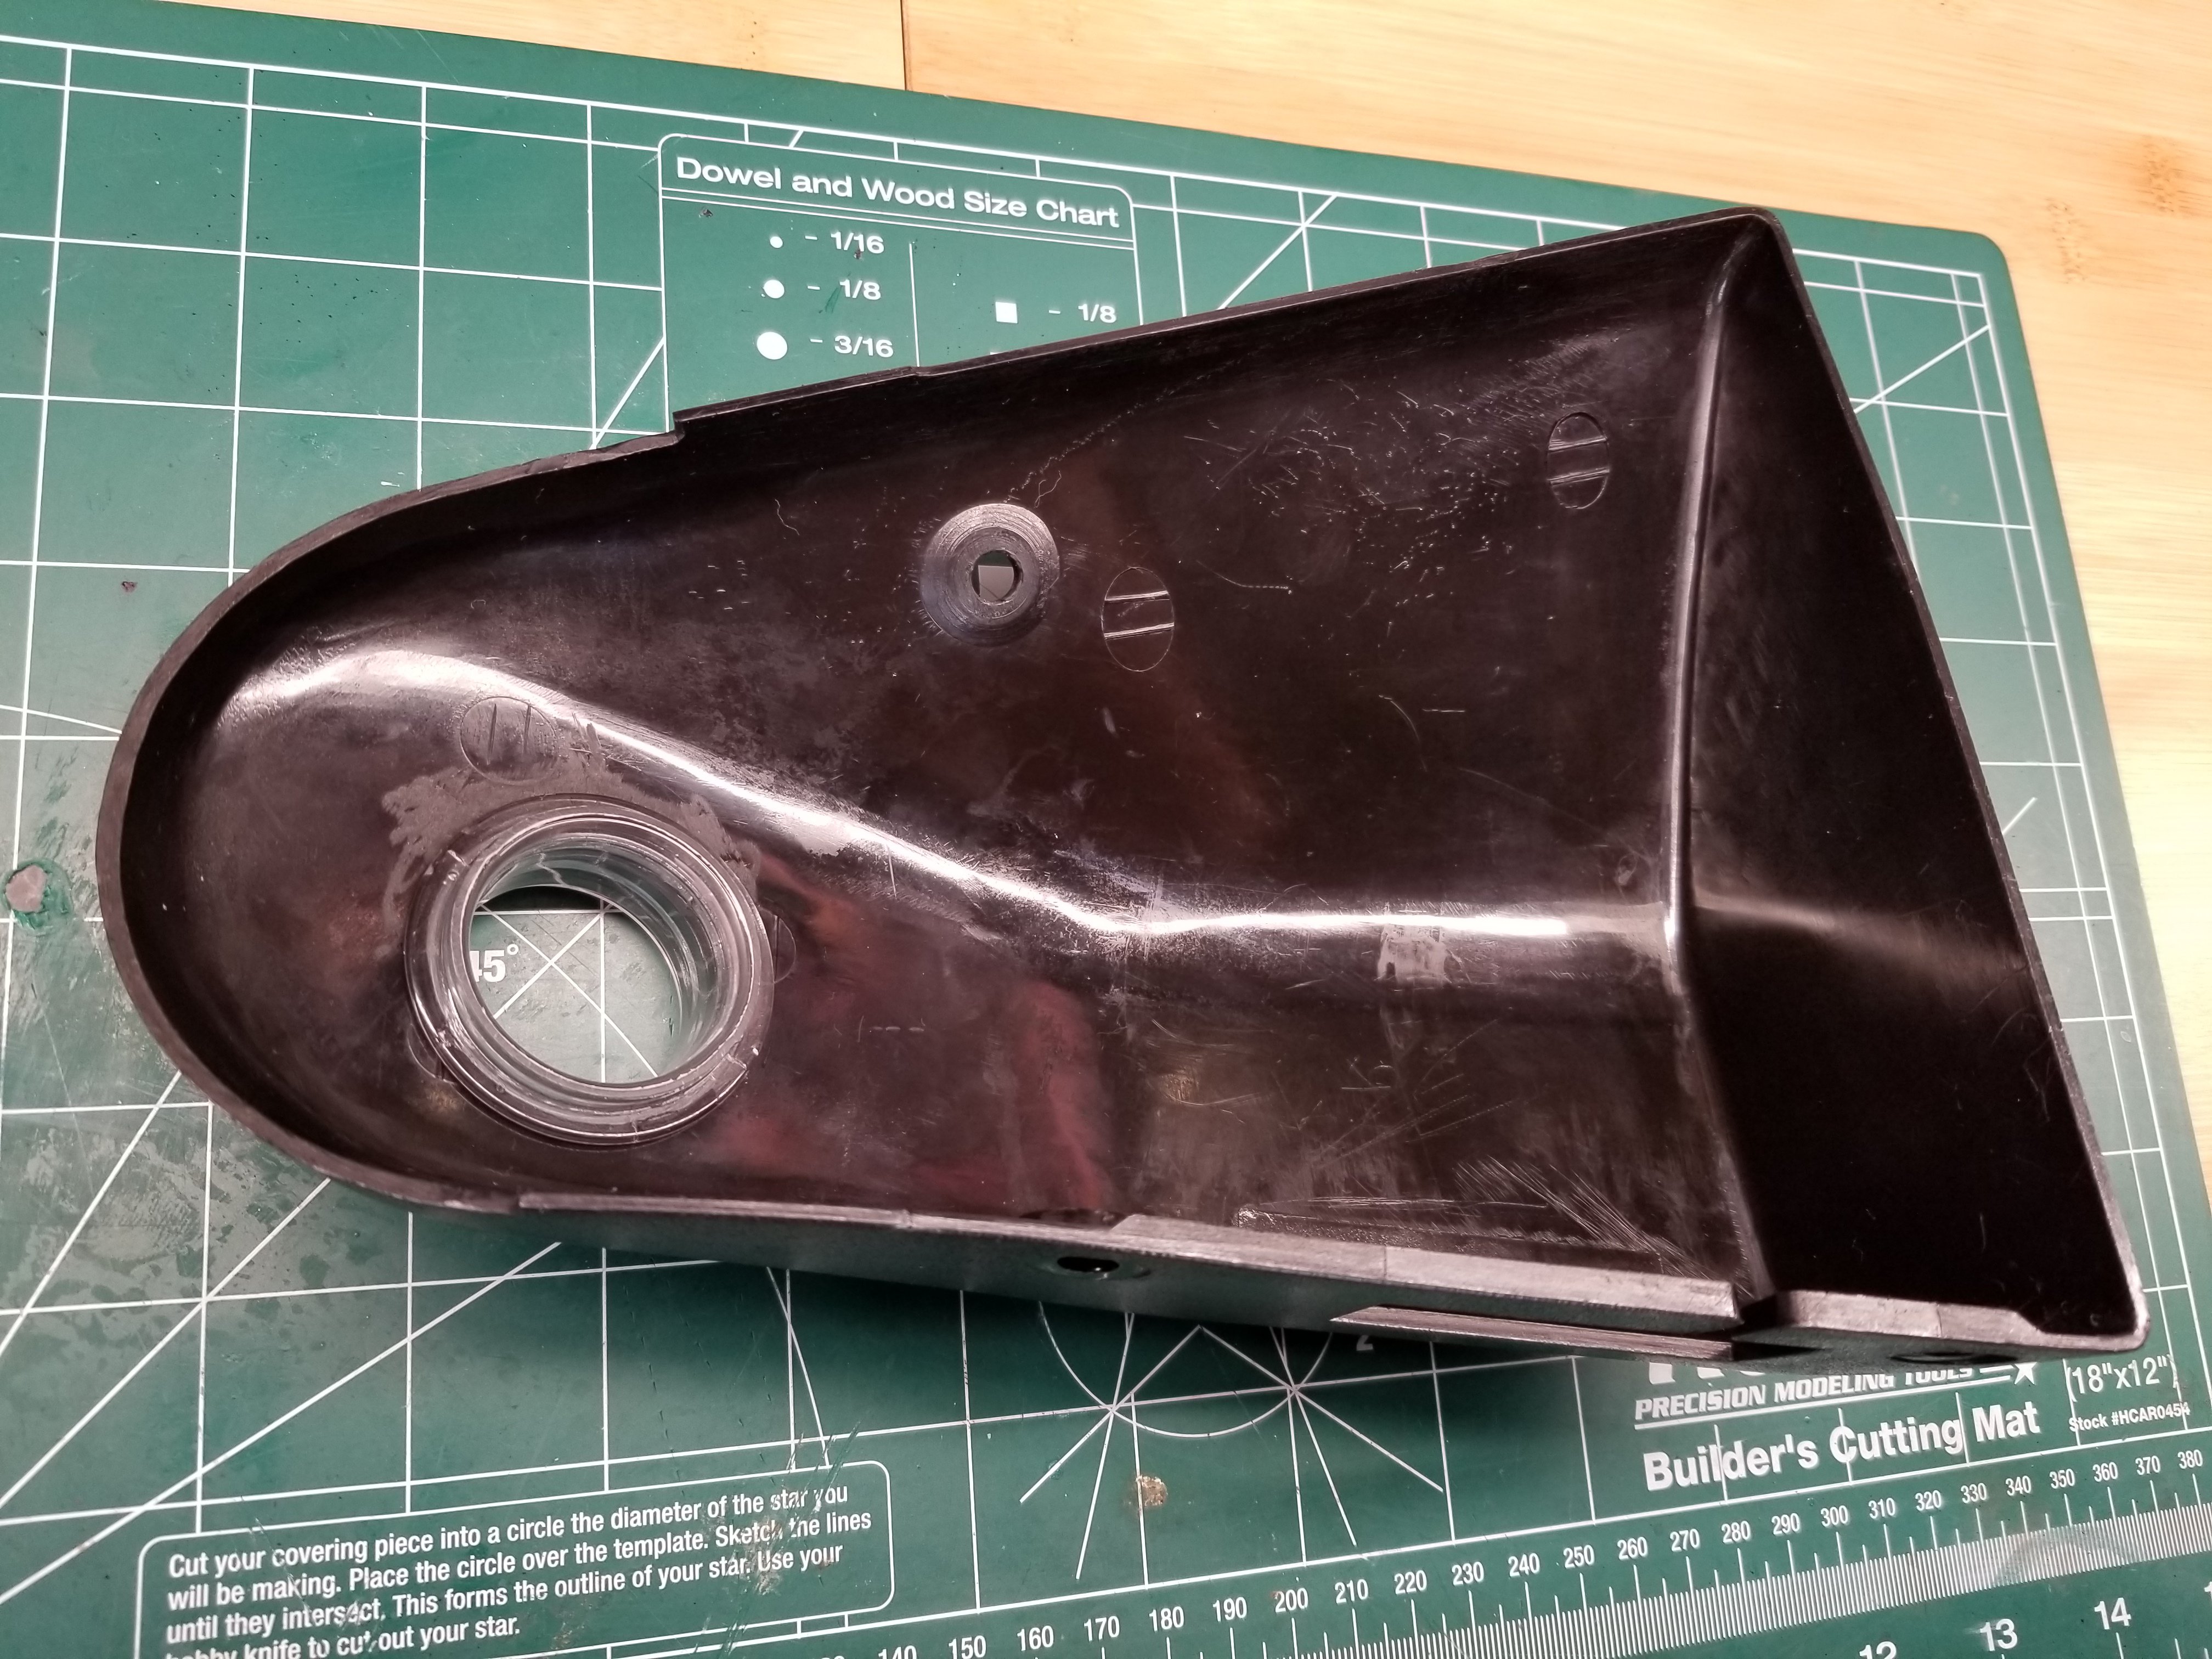
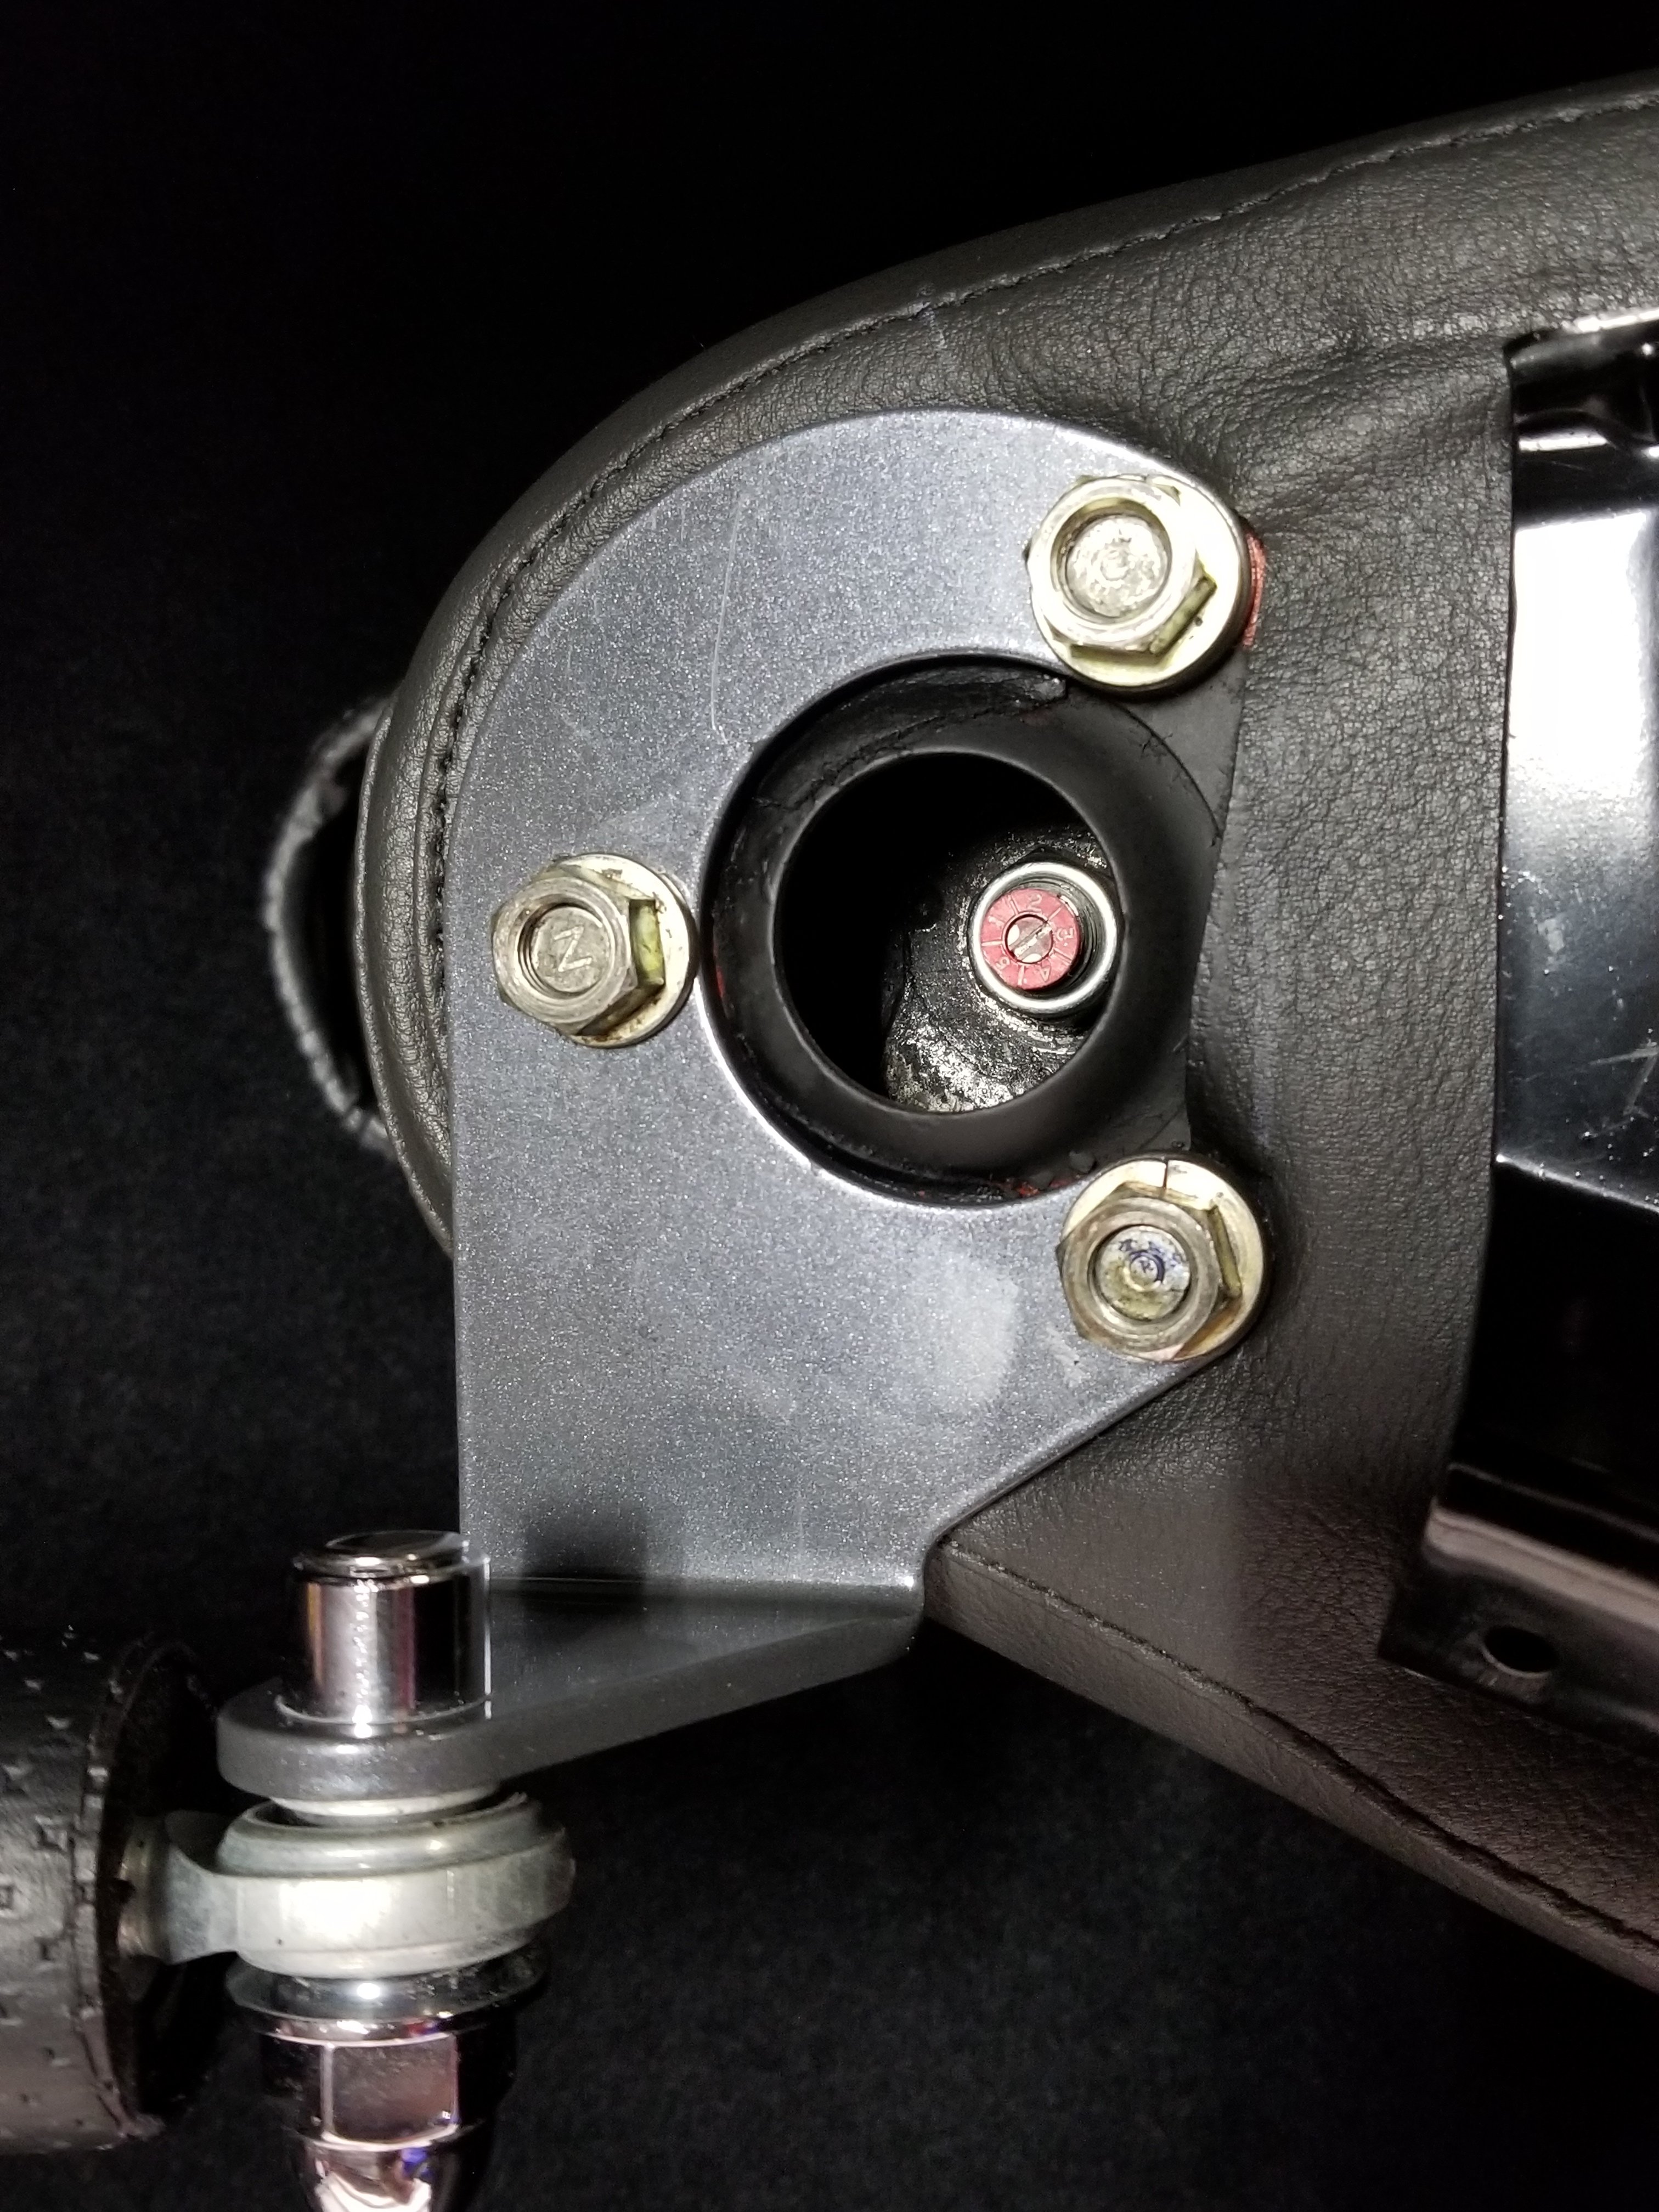
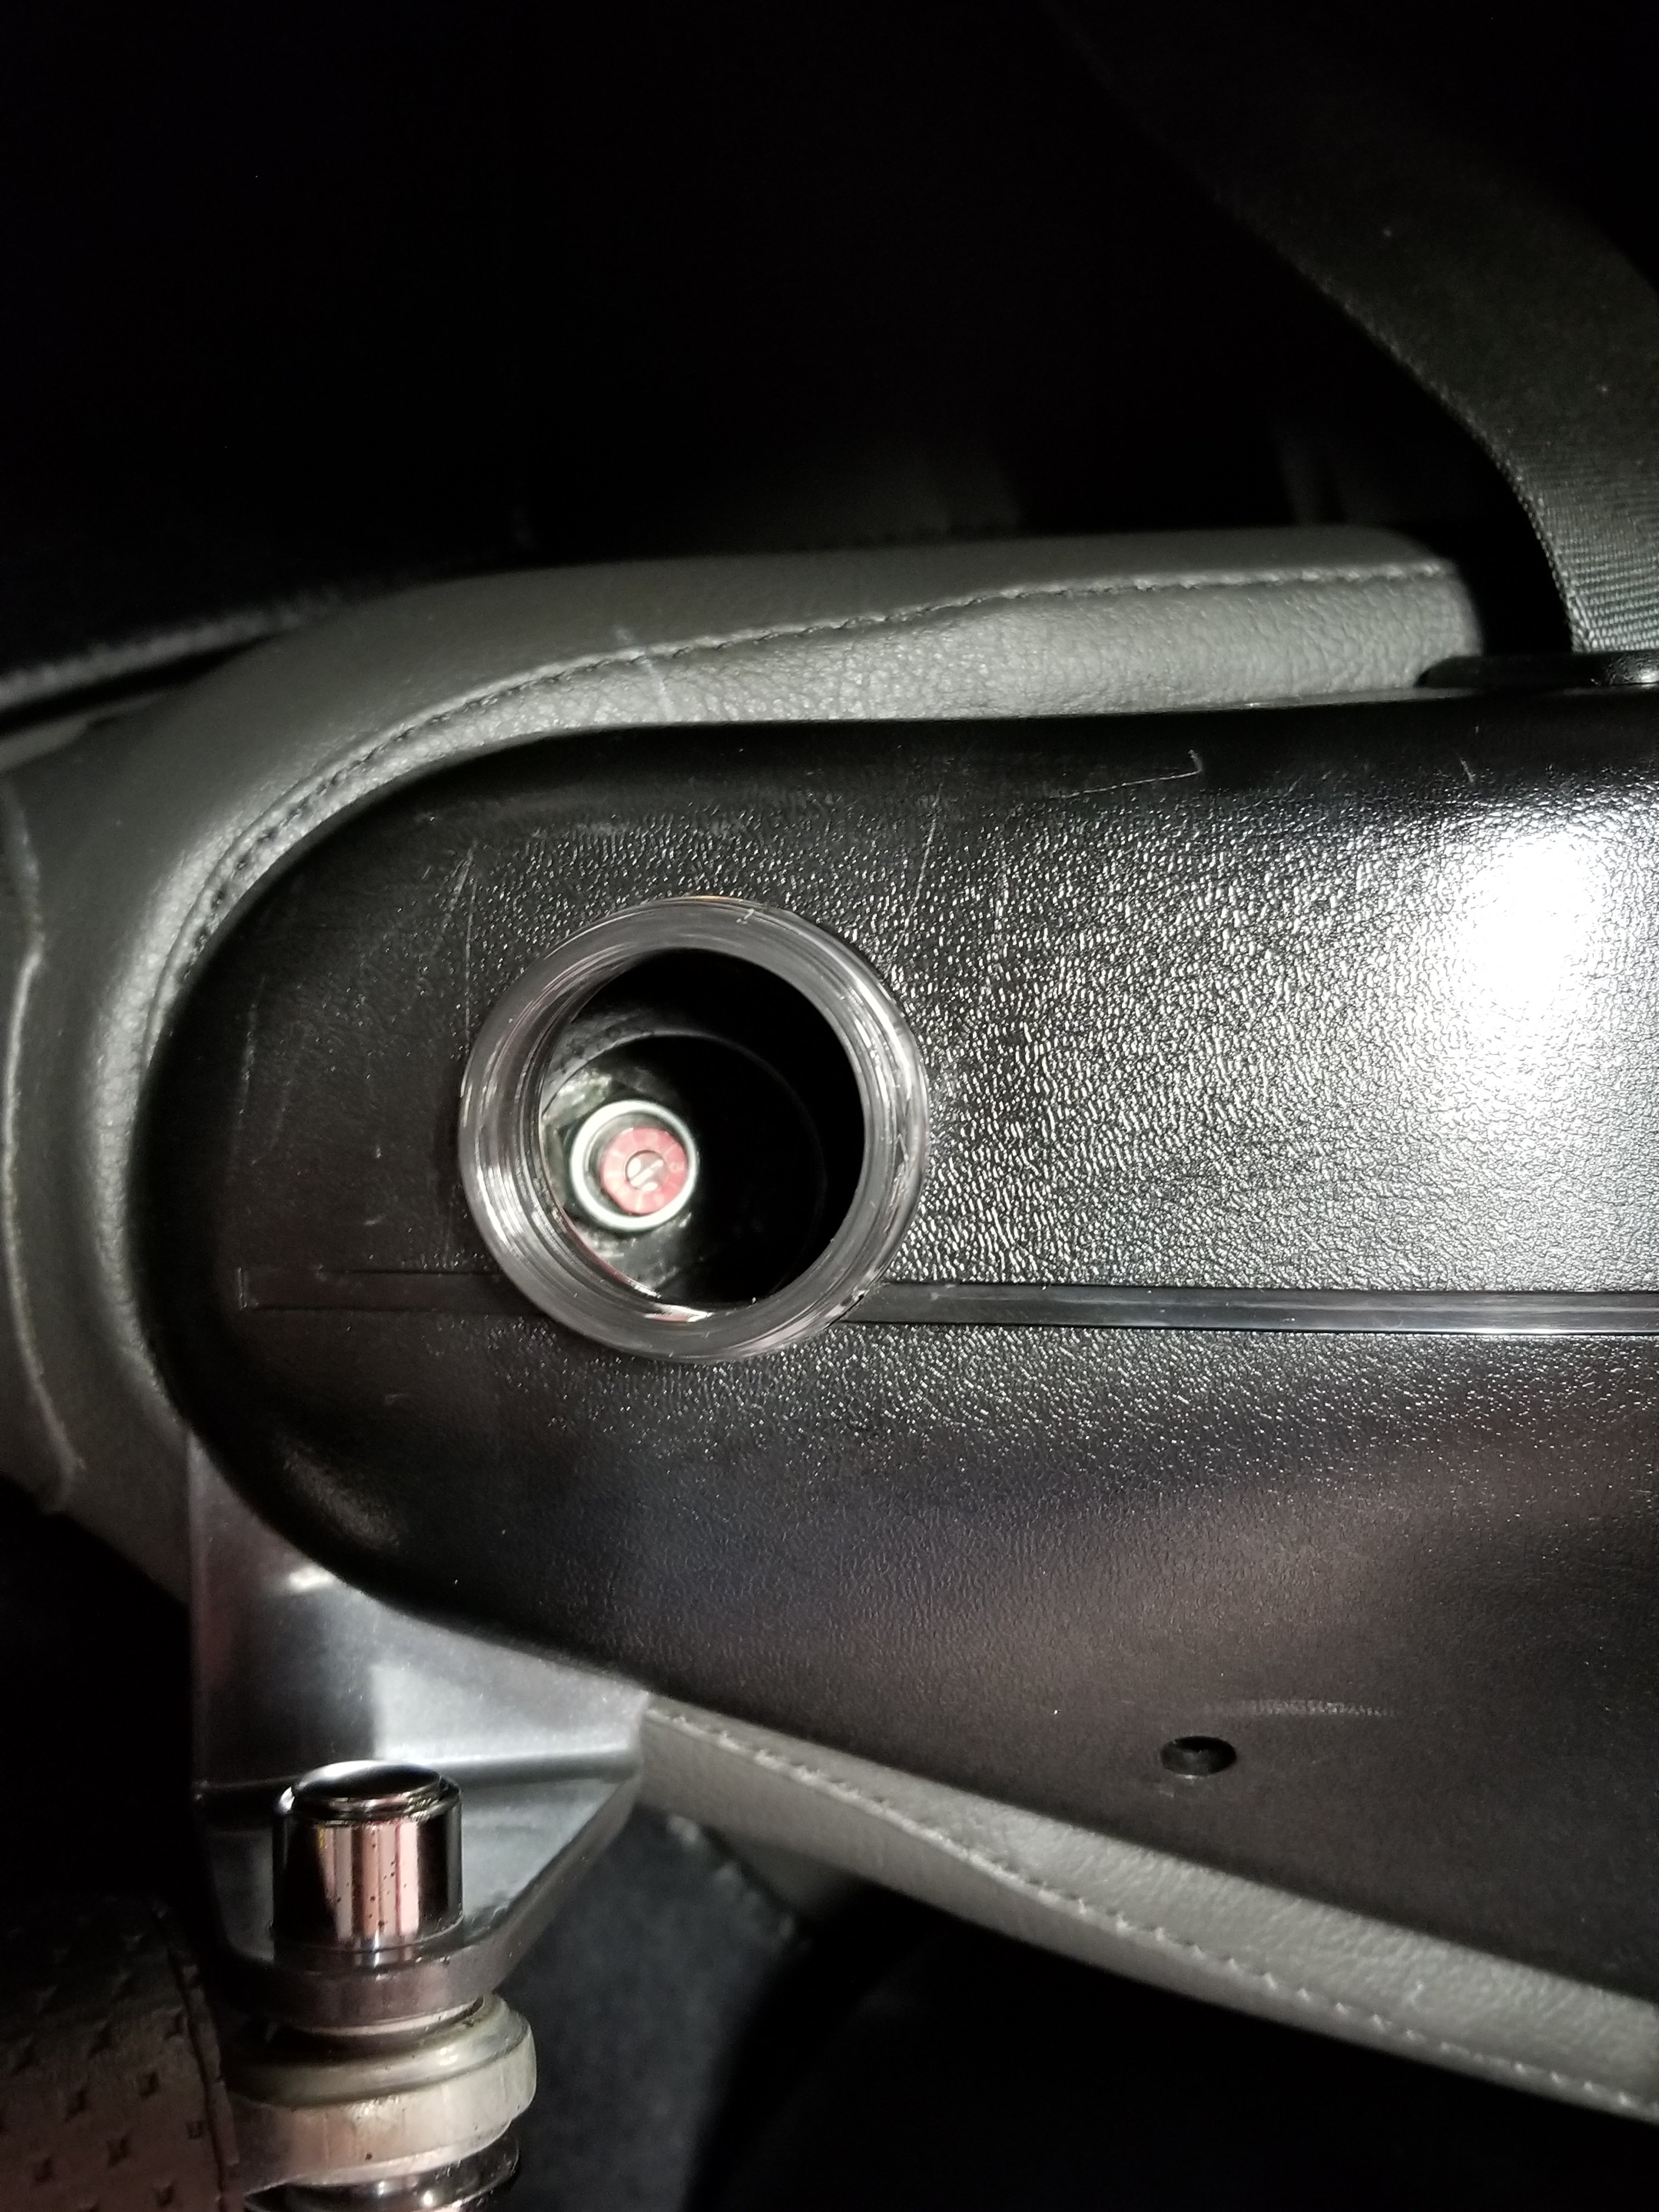
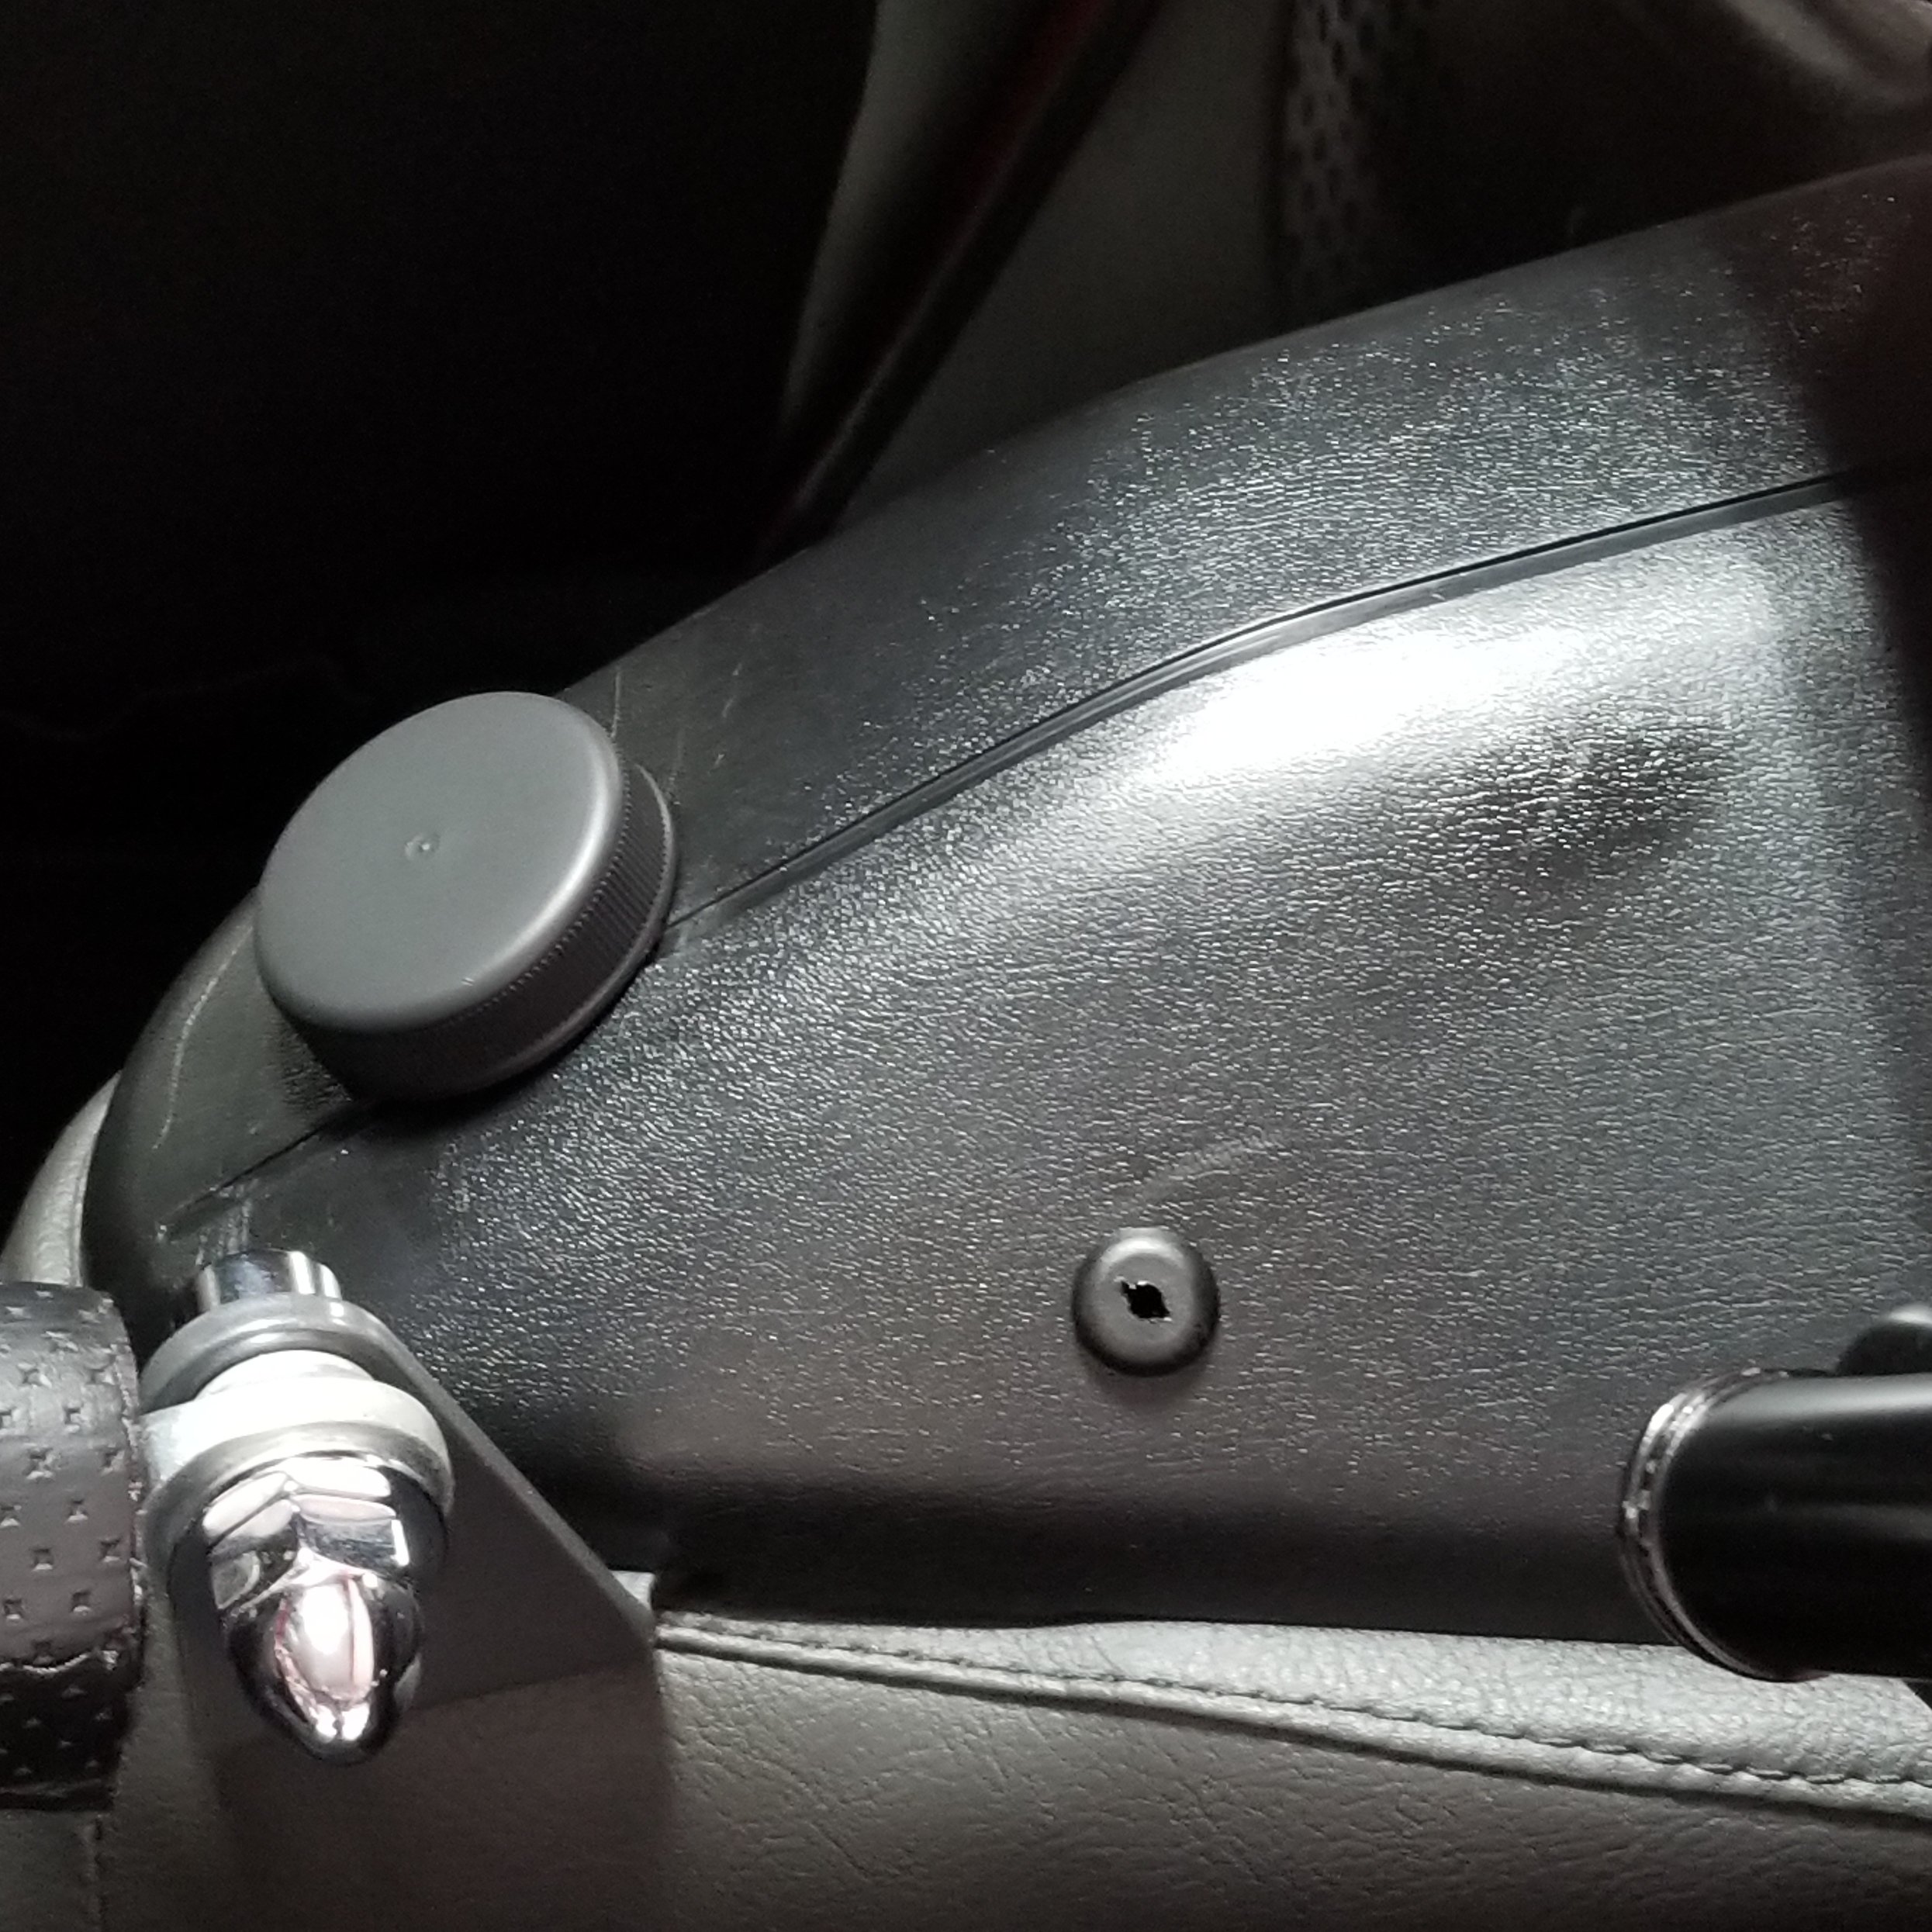
After playing around with my suspension setup and changing my mind a few times as to setting the dial on my adjustable Tokico Illumina struts, I got tired of broken and lost retaining pins for the strut tower covers and decided to fabricate an easy access port for the dial on the top of the rear strut. I used a 2.5" diameter screw cap and "neck" from a juice bottle (hard clear plastic) and adapted it to the strut tower cover. Took about an hour total time (and drinking tons of cranberry juice) but I can tune in my rear struts as easily as my fronts now.
-
280Z Restomod Progress
dmoralesbello replied to dmoralesbello's topic in S30 Series - 240z, 260z, 280z
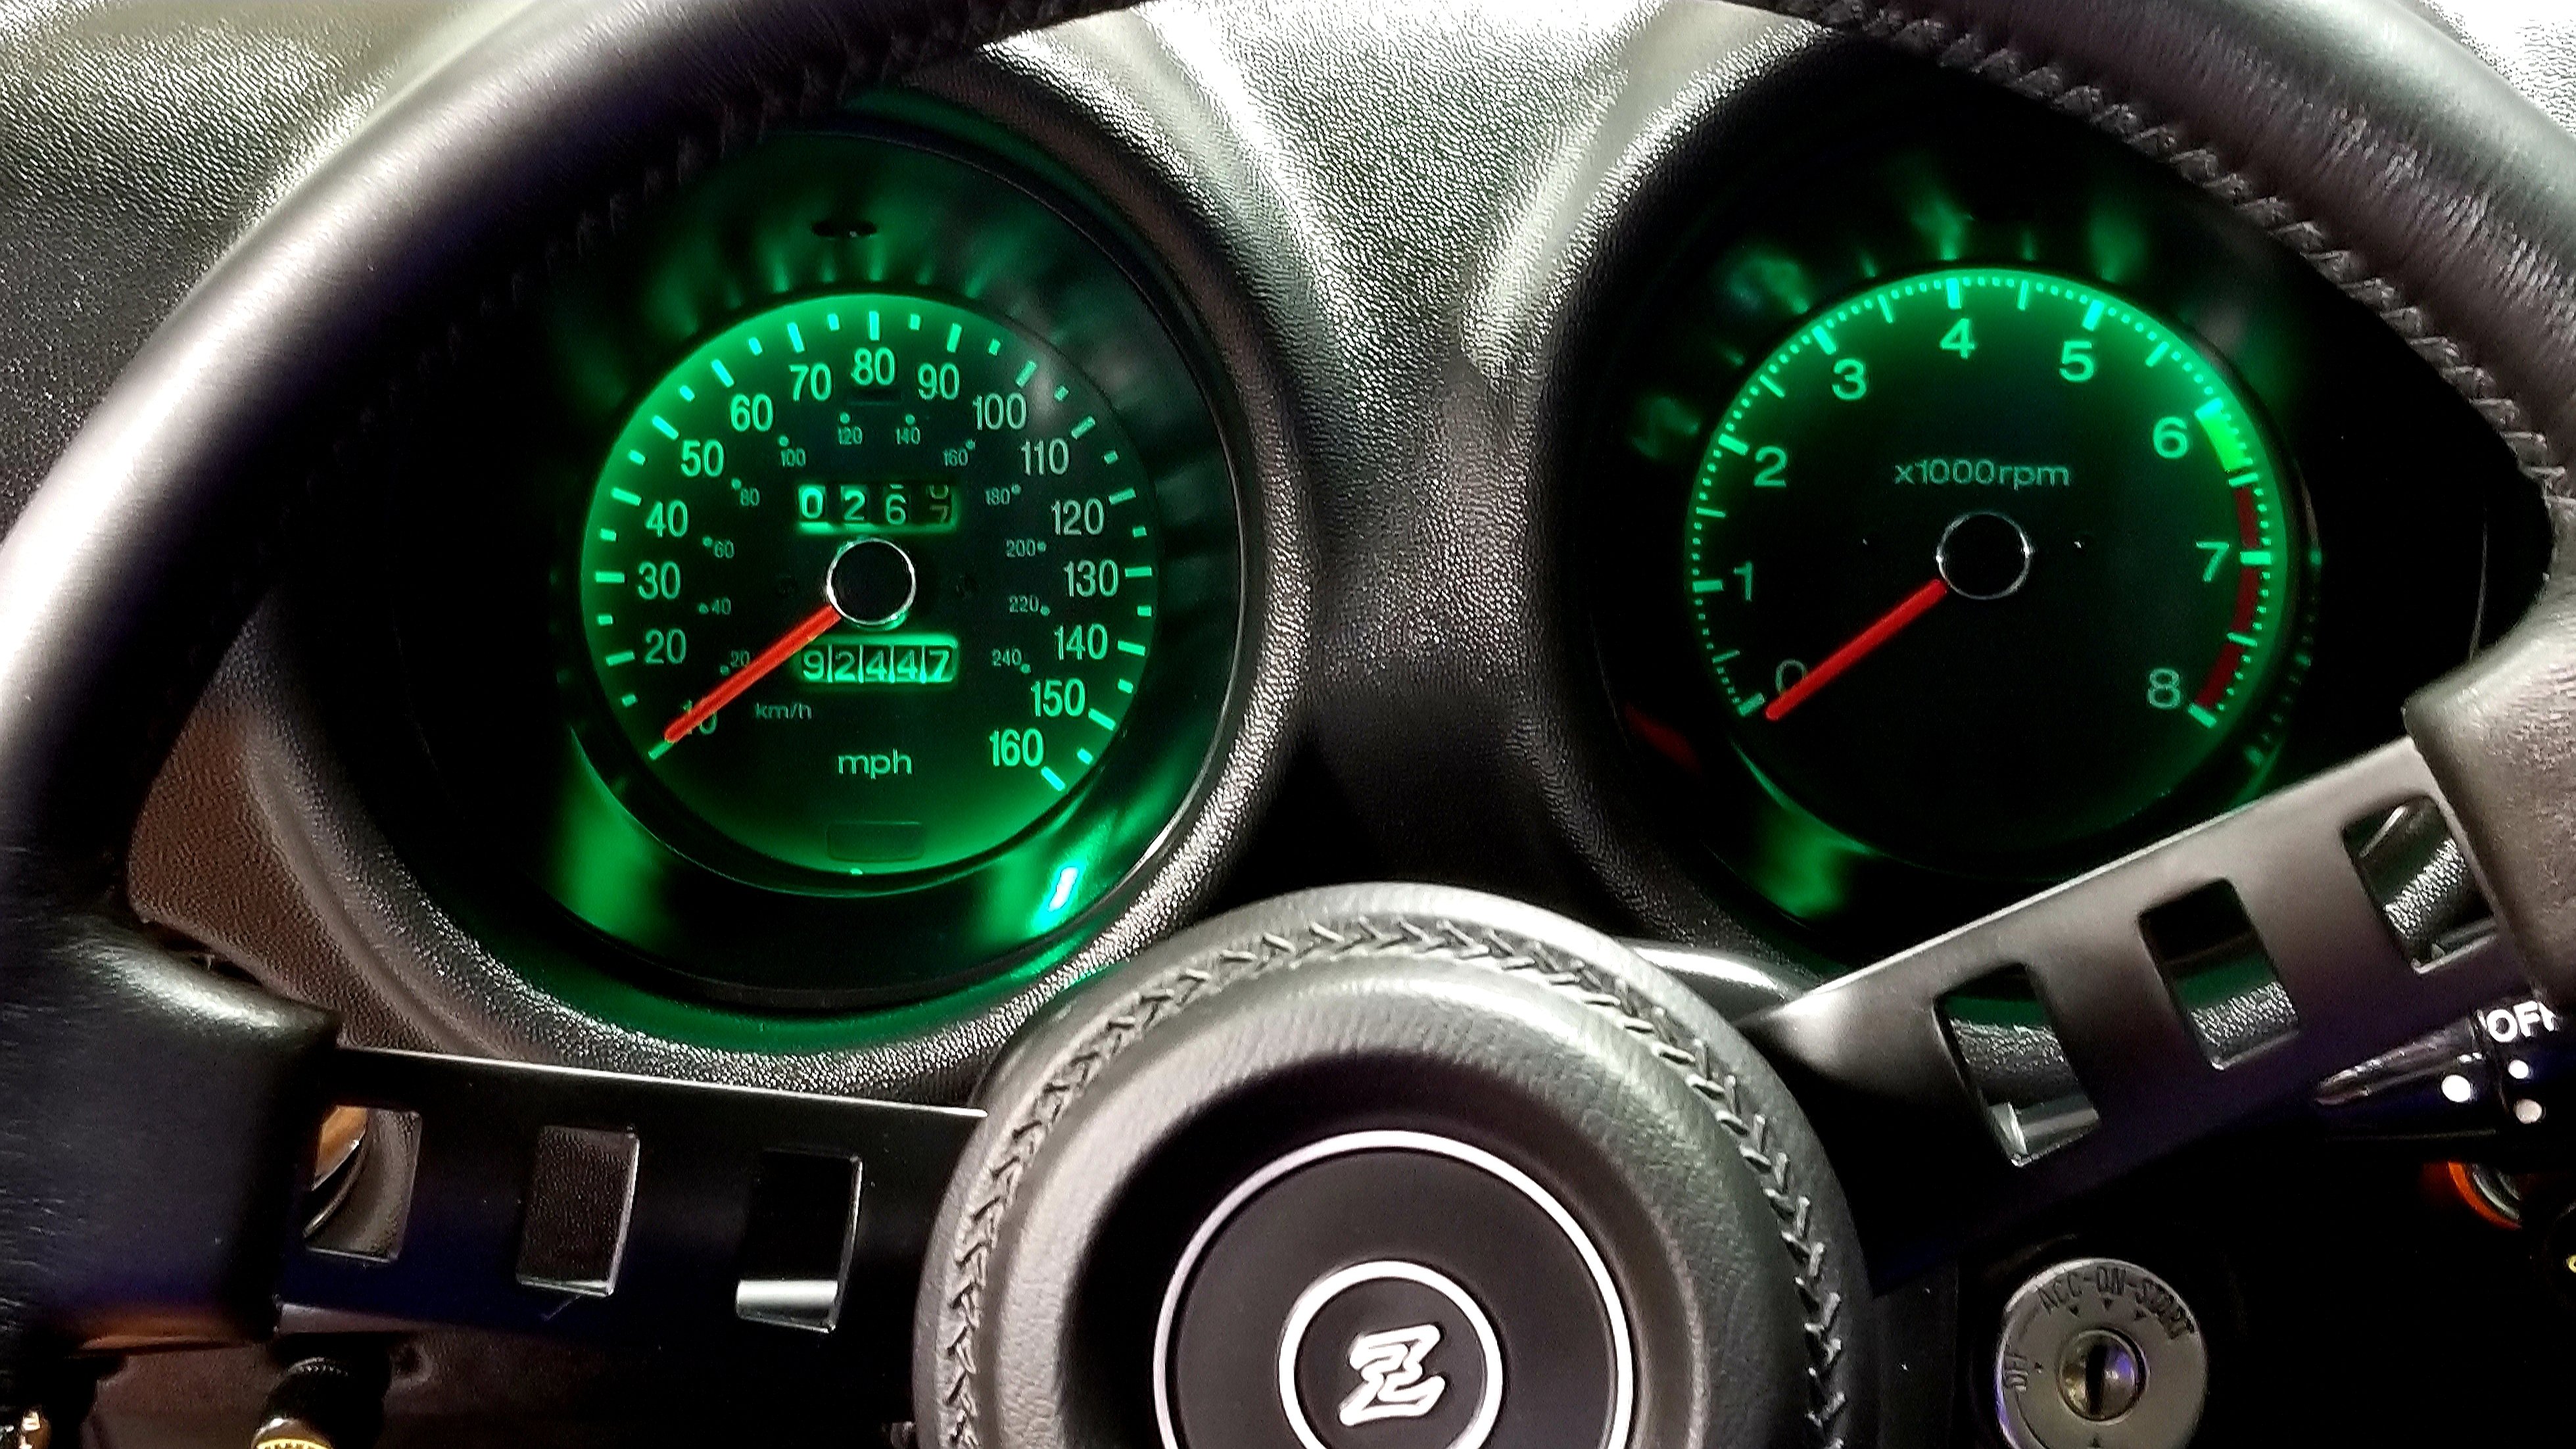
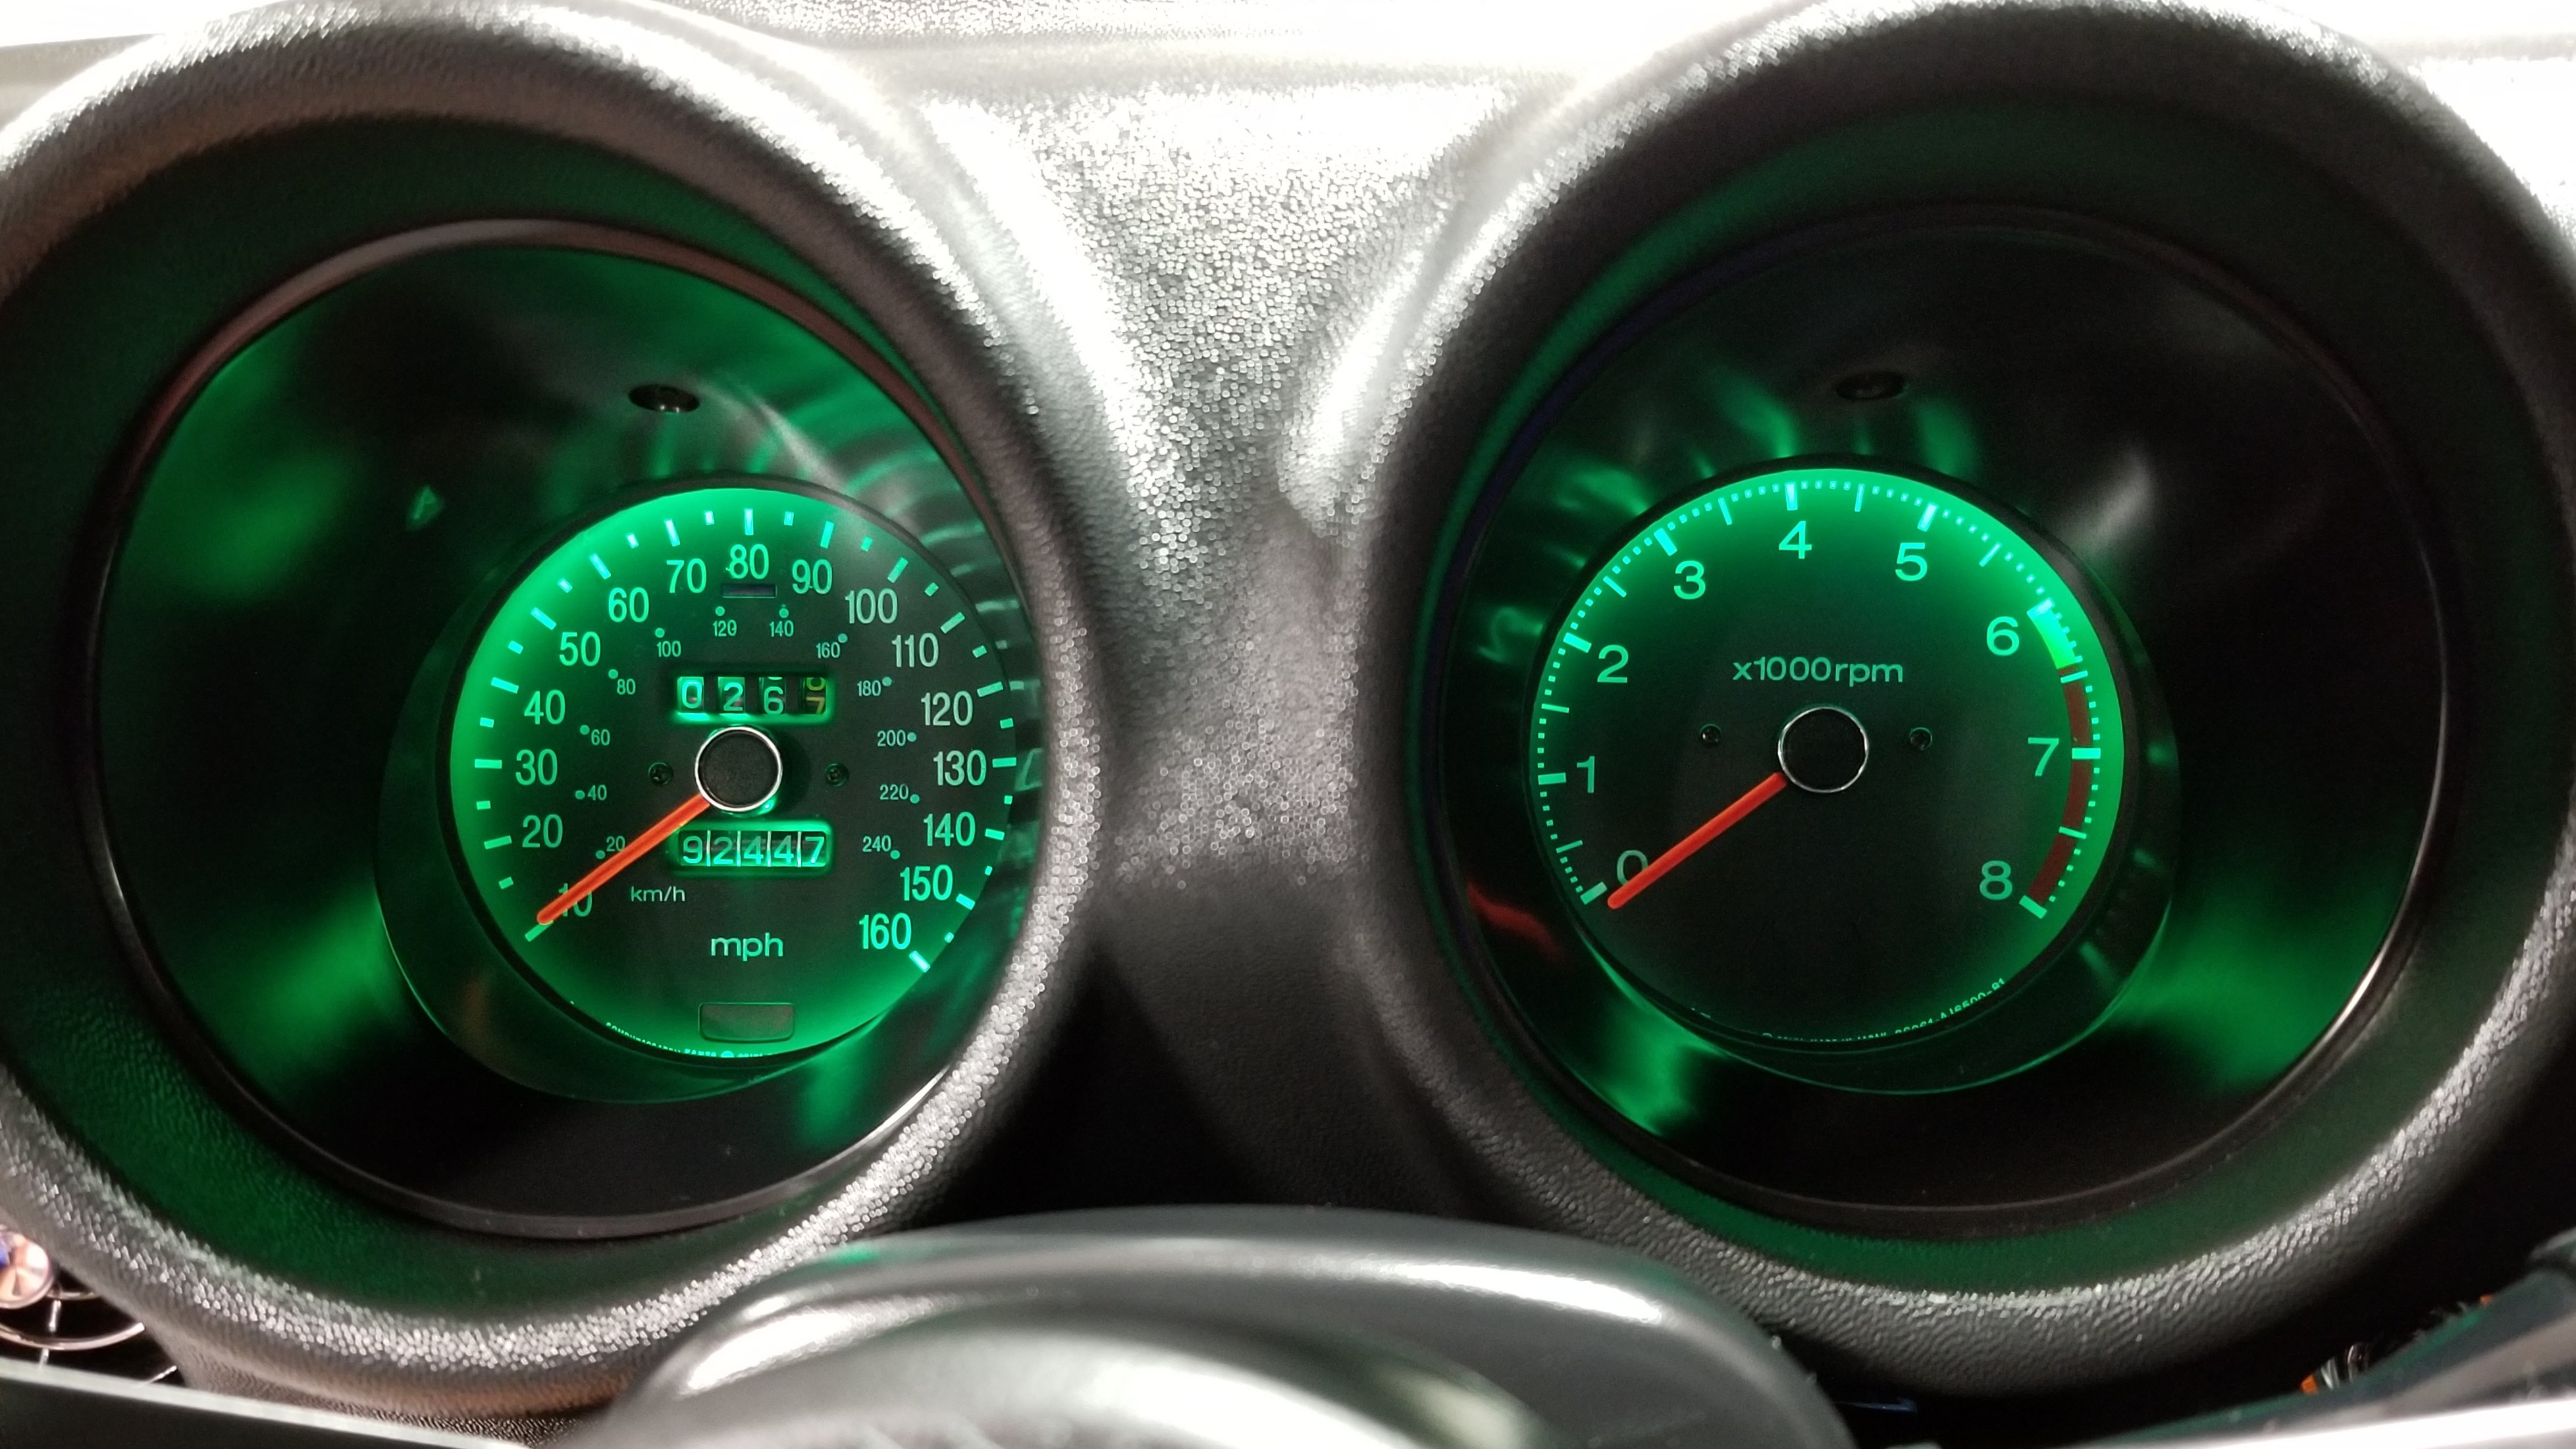
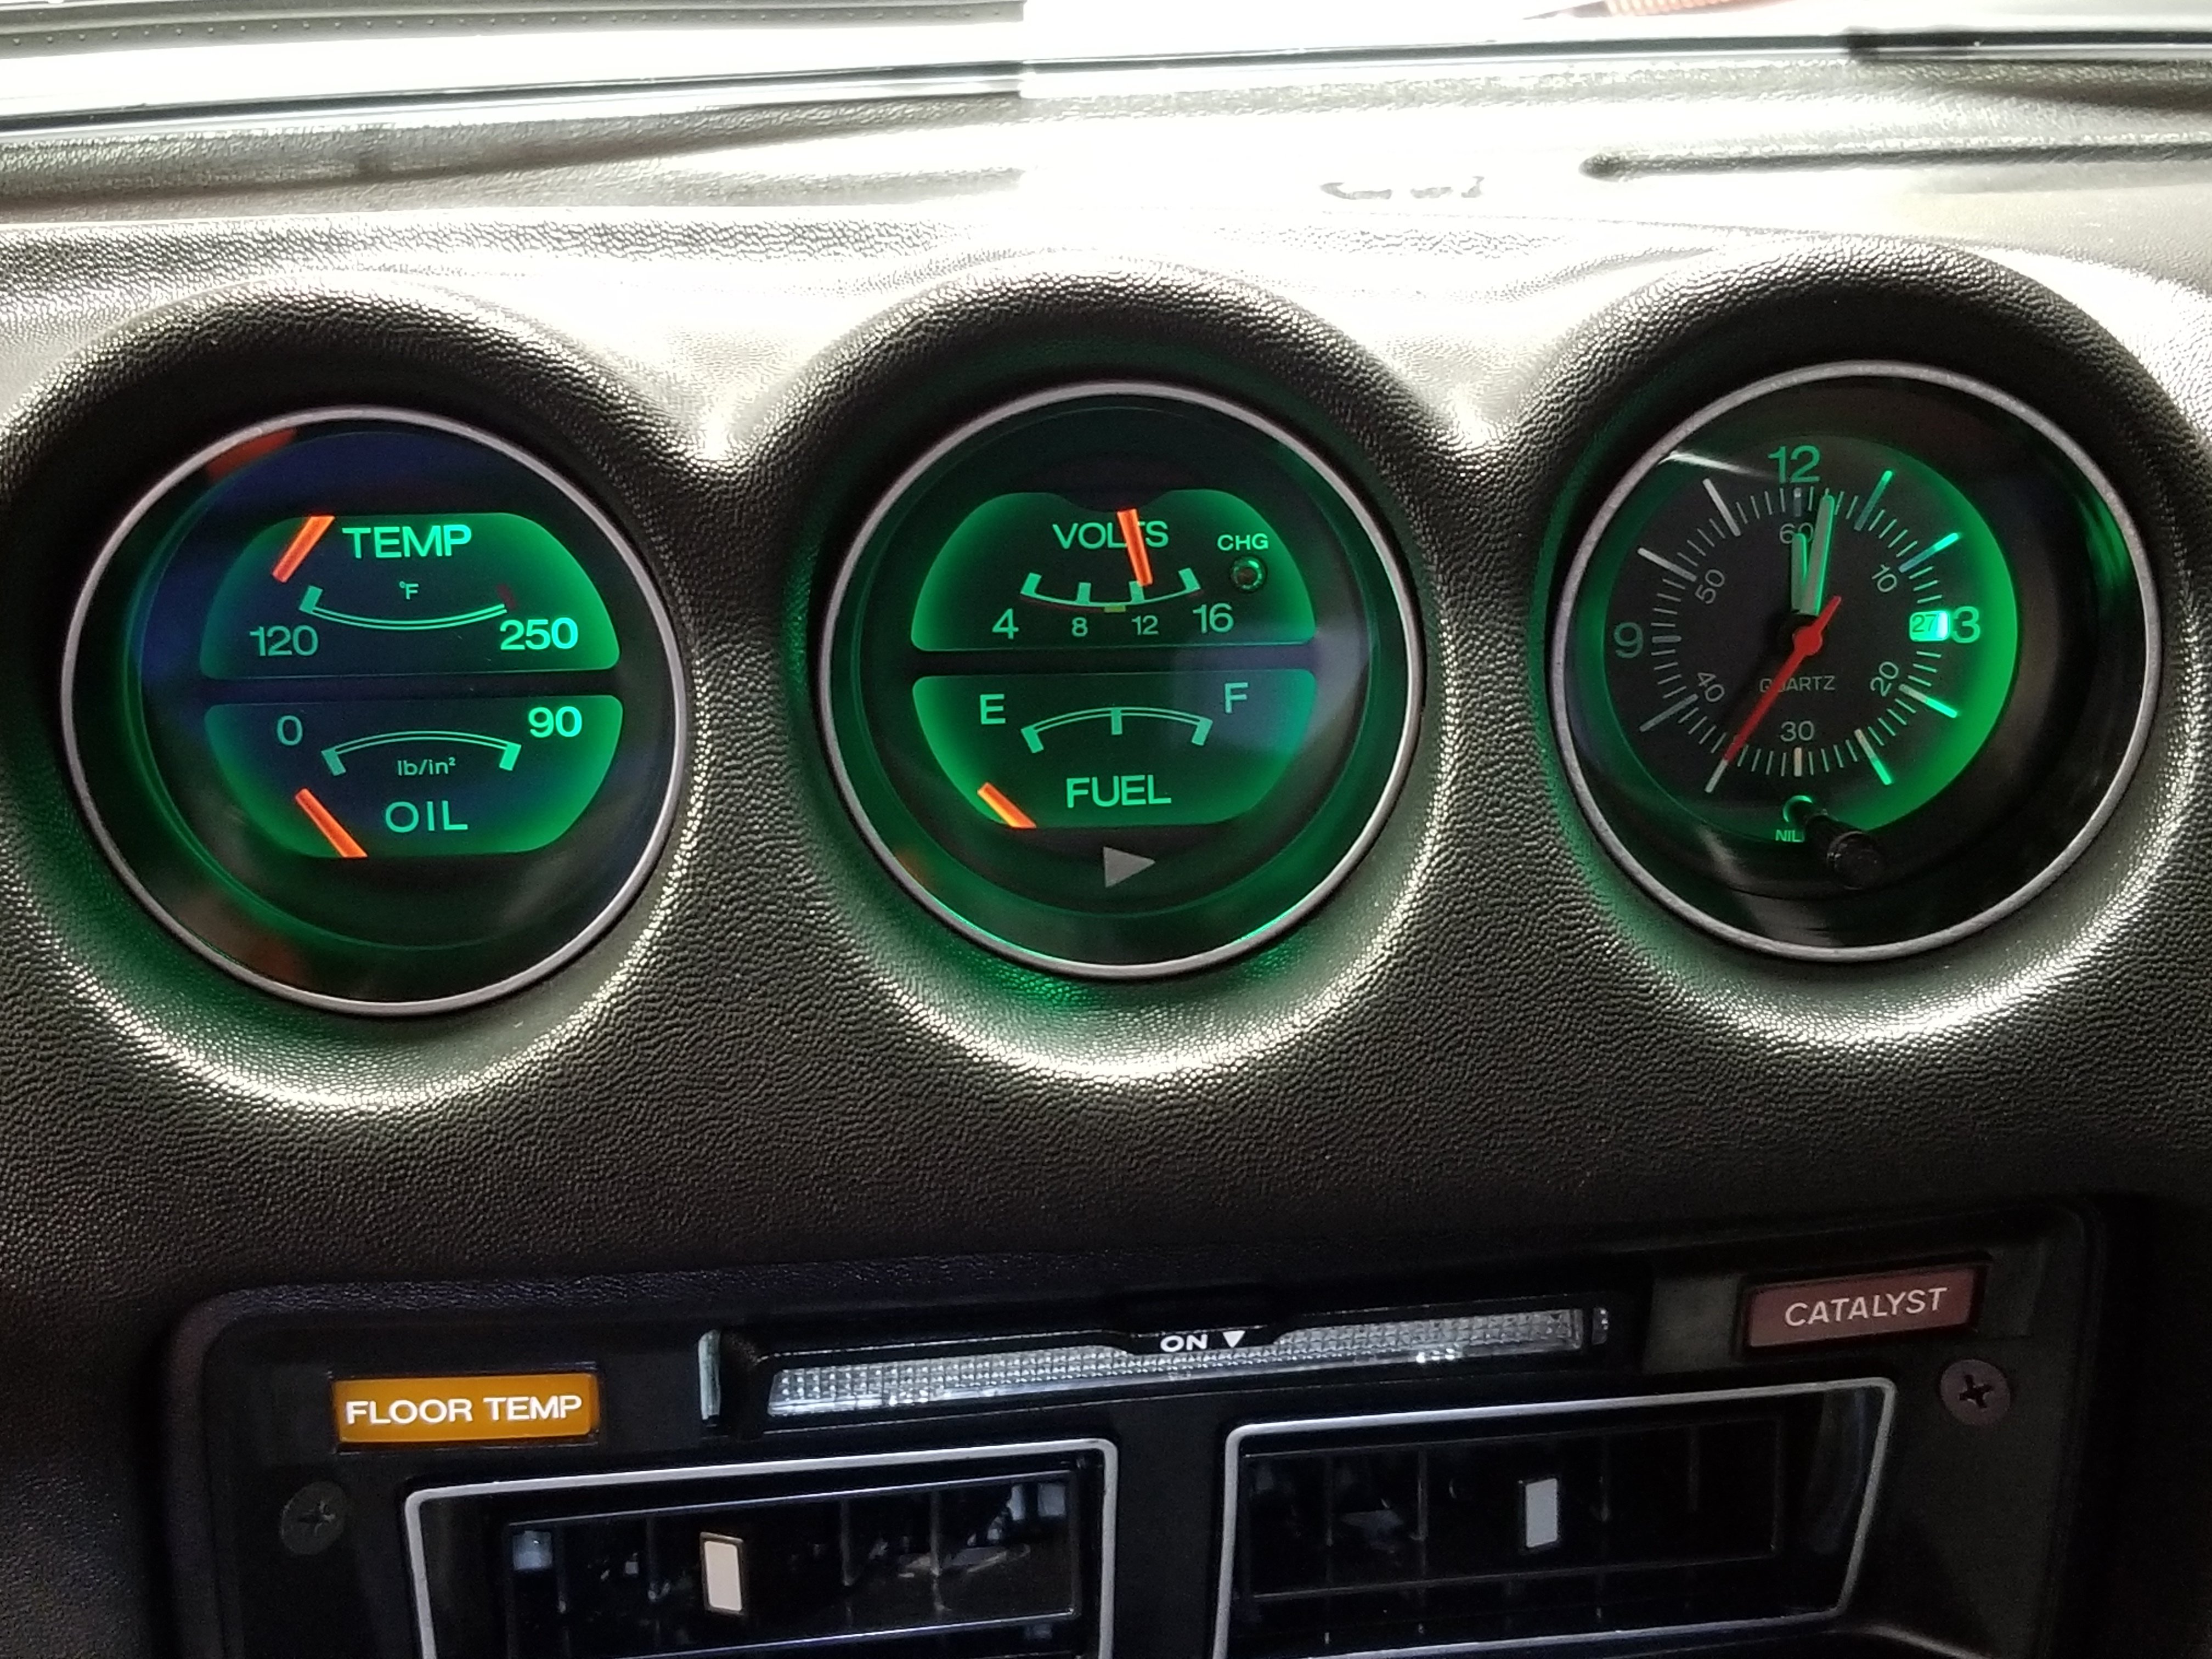
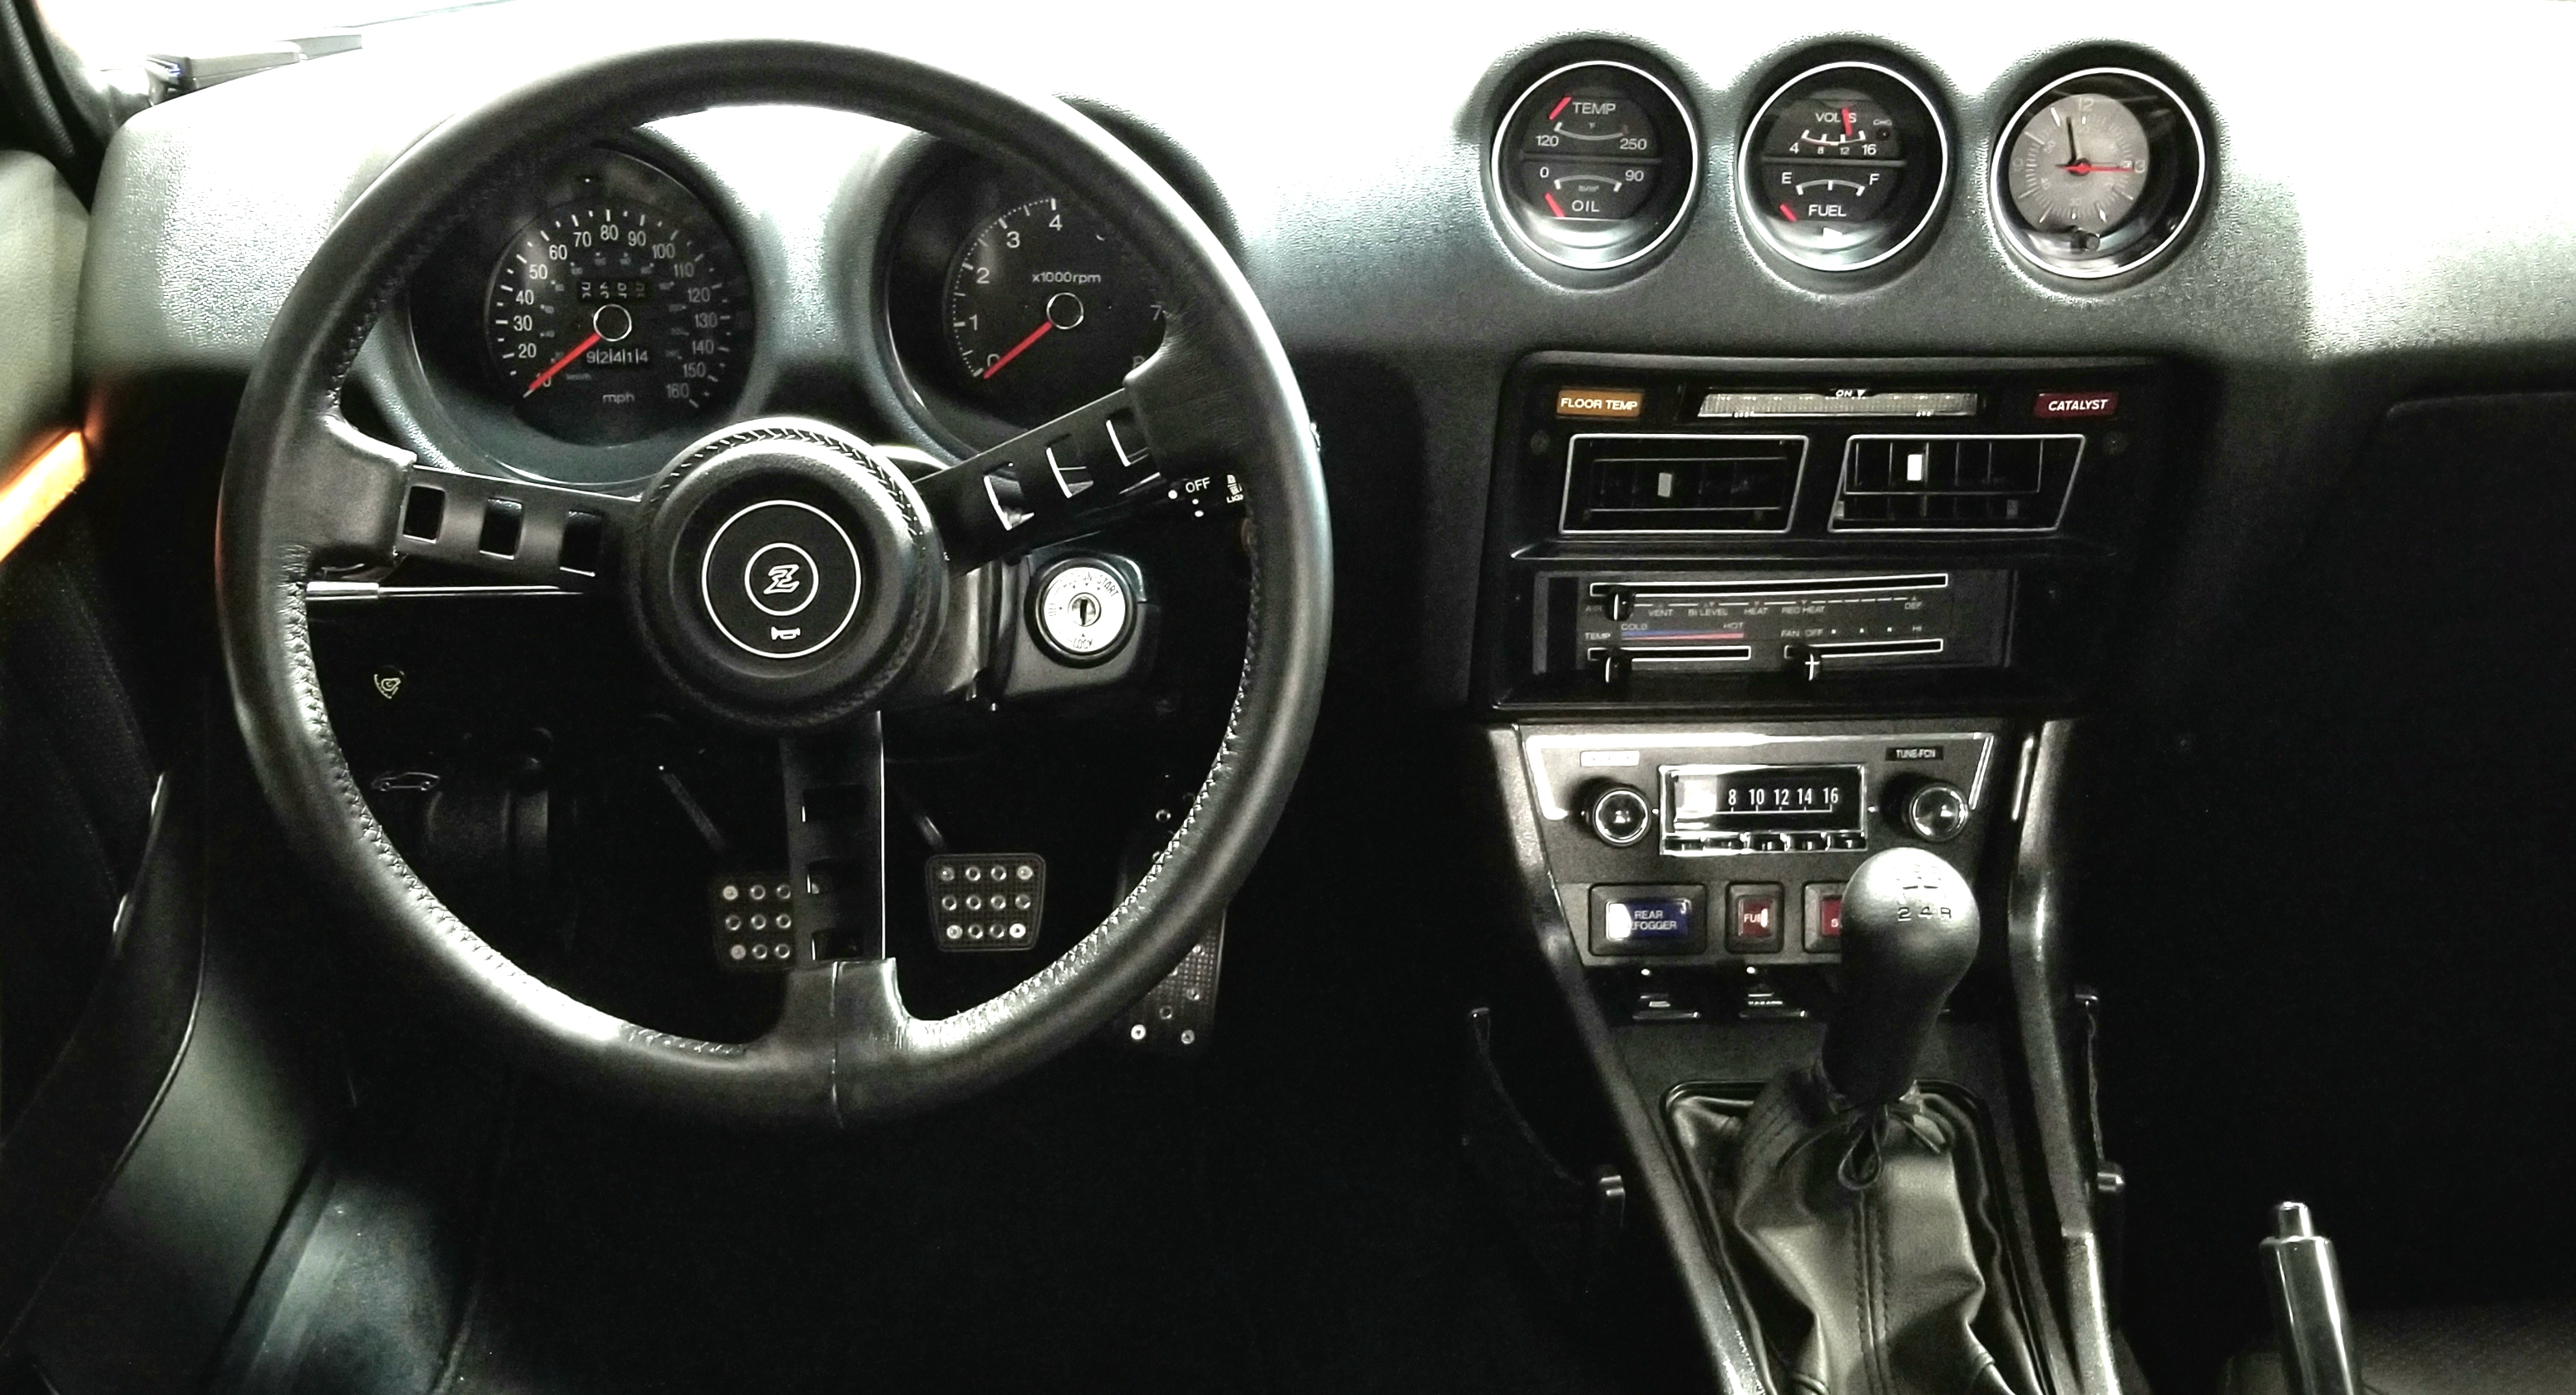
In an effort to dial back the "mod" in "resto mod" in the cabin and bring back a bit more of the vintage look I went back to green illumination on my dials (still LED, of course), and threaded my original shift knob to fit the slightly thicker short-shifter shaft. Along with the Datsun Comp steering wheel I had already changed a few weeks back I think everything comes together nicely now and looks more like a stock '78 280Z.
-
280Z Restomod Progress
dmoralesbello replied to dmoralesbello's topic in S30 Series - 240z, 260z, 280z
Thank you so much for appreciating all the thought and work that have gone into my Z. Put a similar amount of work into your build and I'm sure it'll turn out just as good or better than mine. I'll be following your posts so keep 'em coming fast and furious. Great luck! -
280Z Restomod Progress
dmoralesbello replied to dmoralesbello's topic in S30 Series - 240z, 260z, 280z
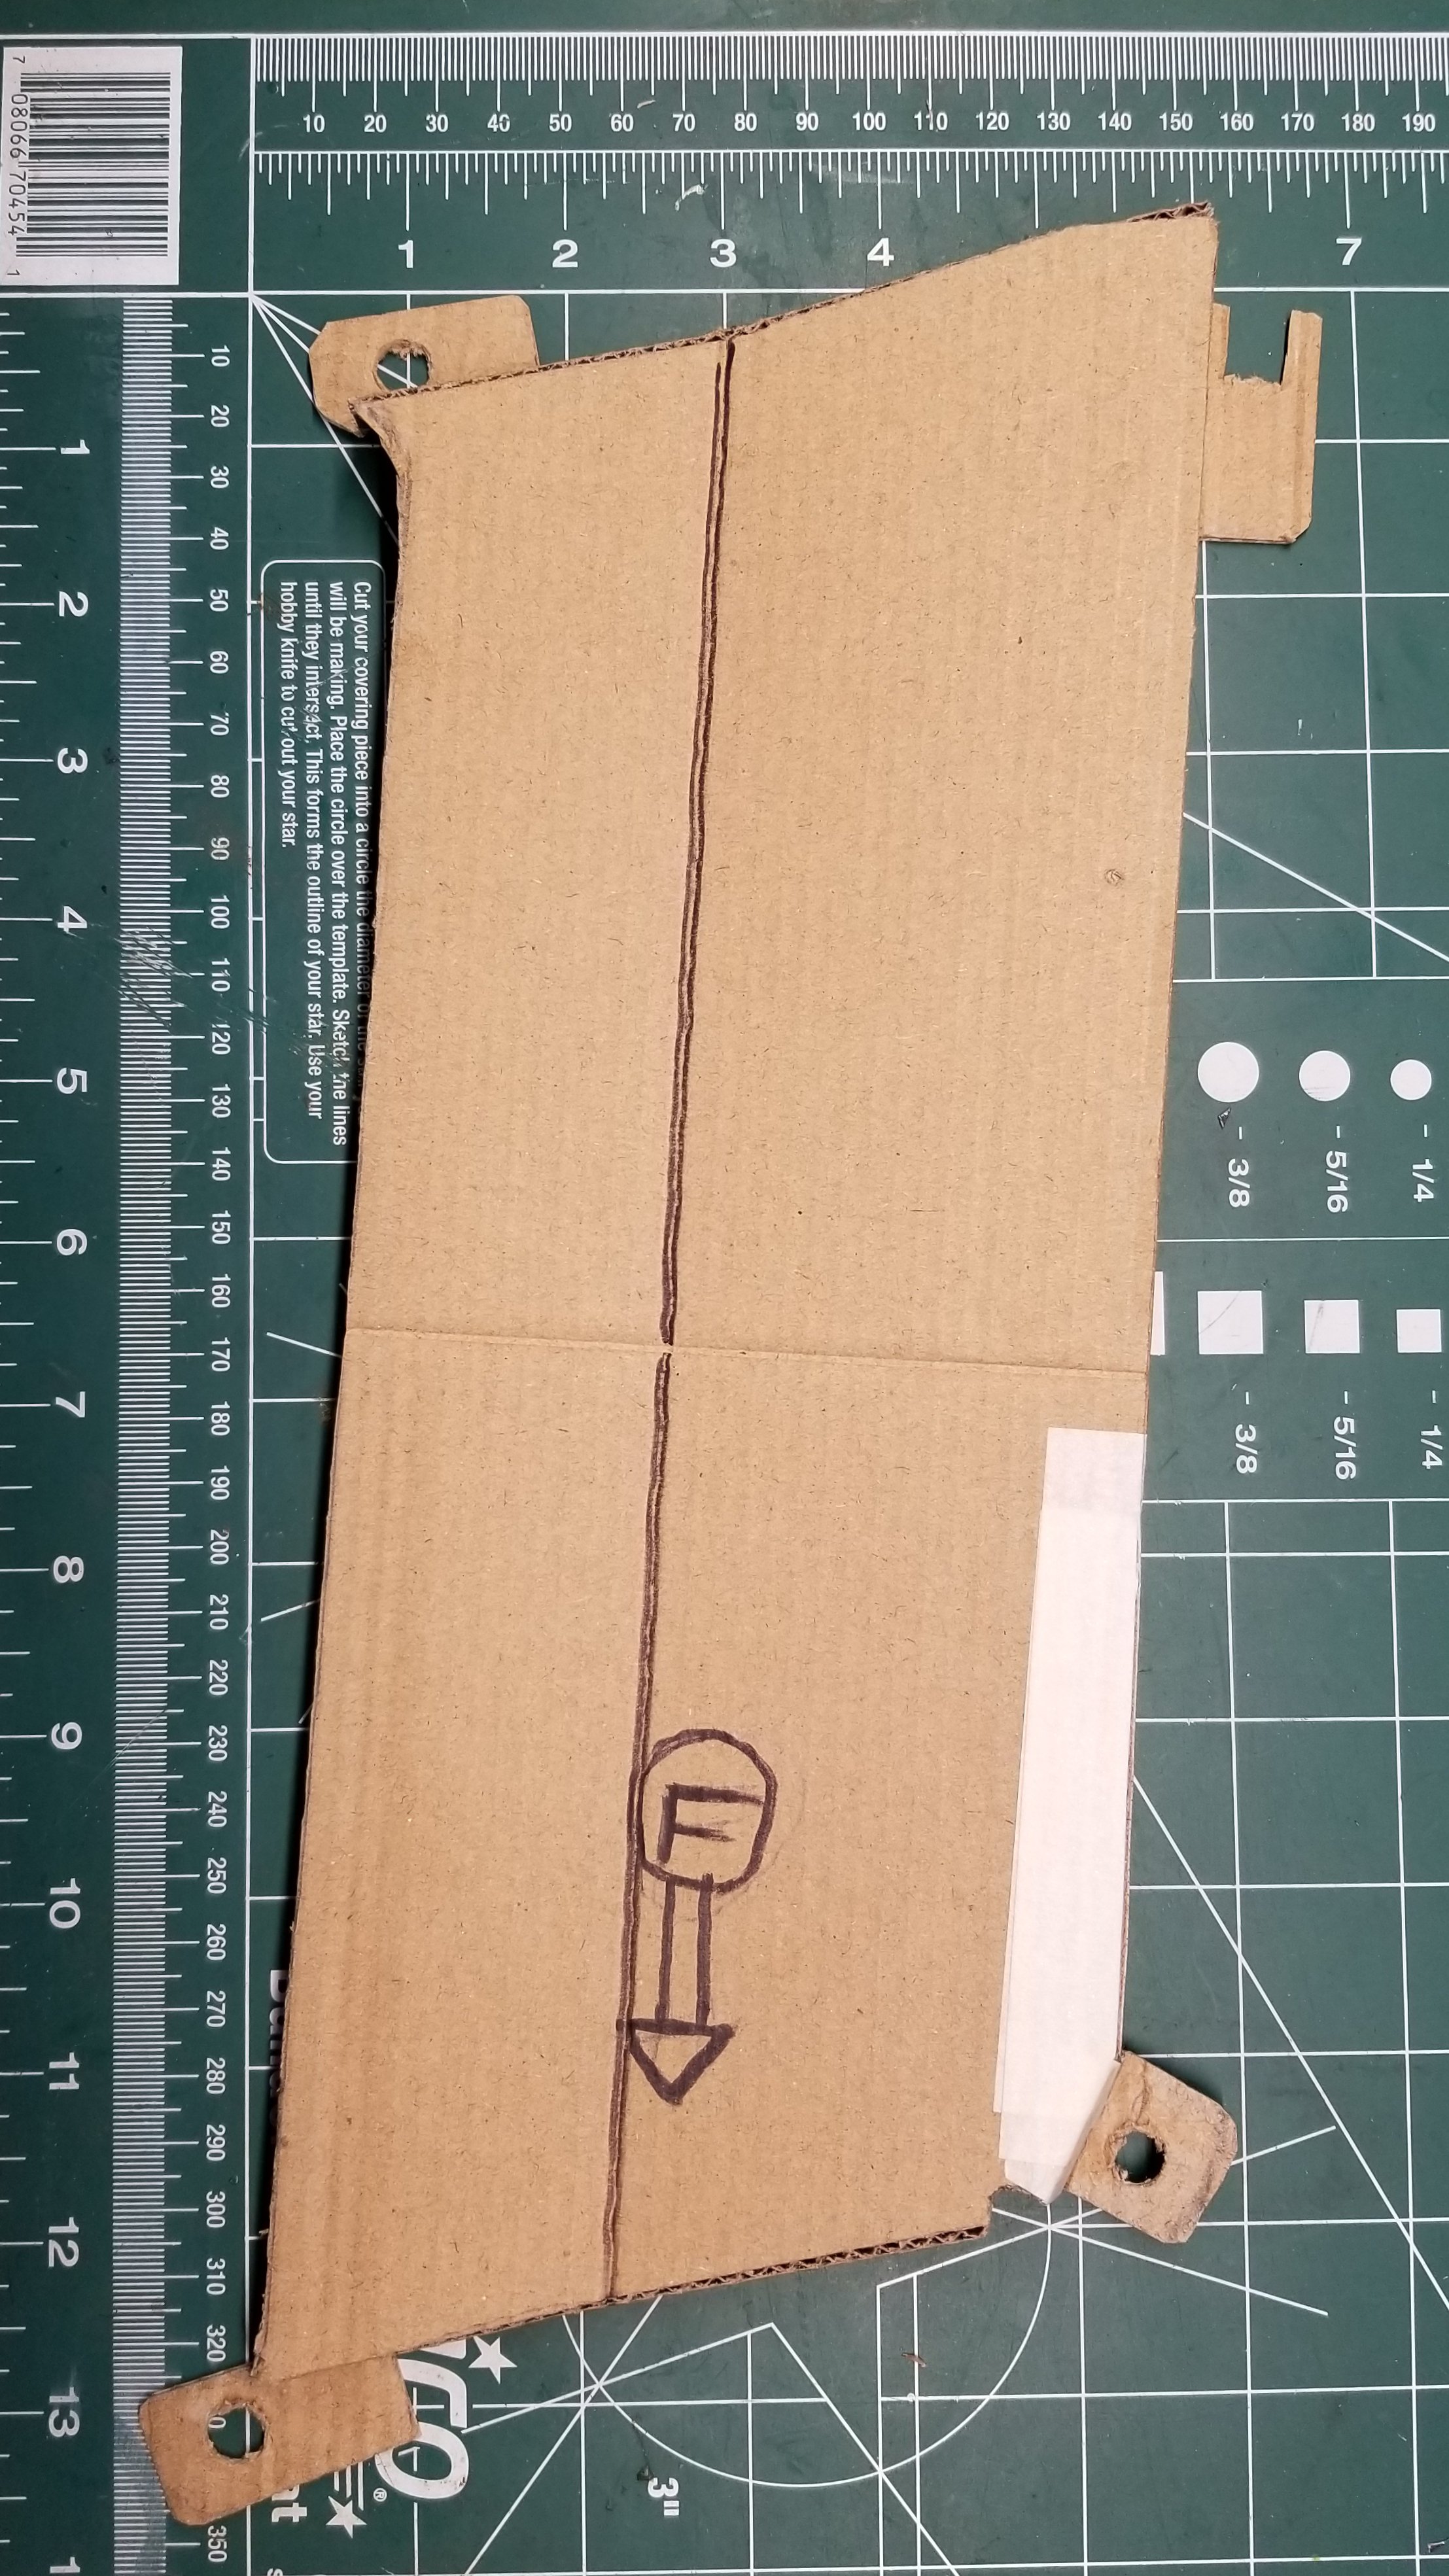
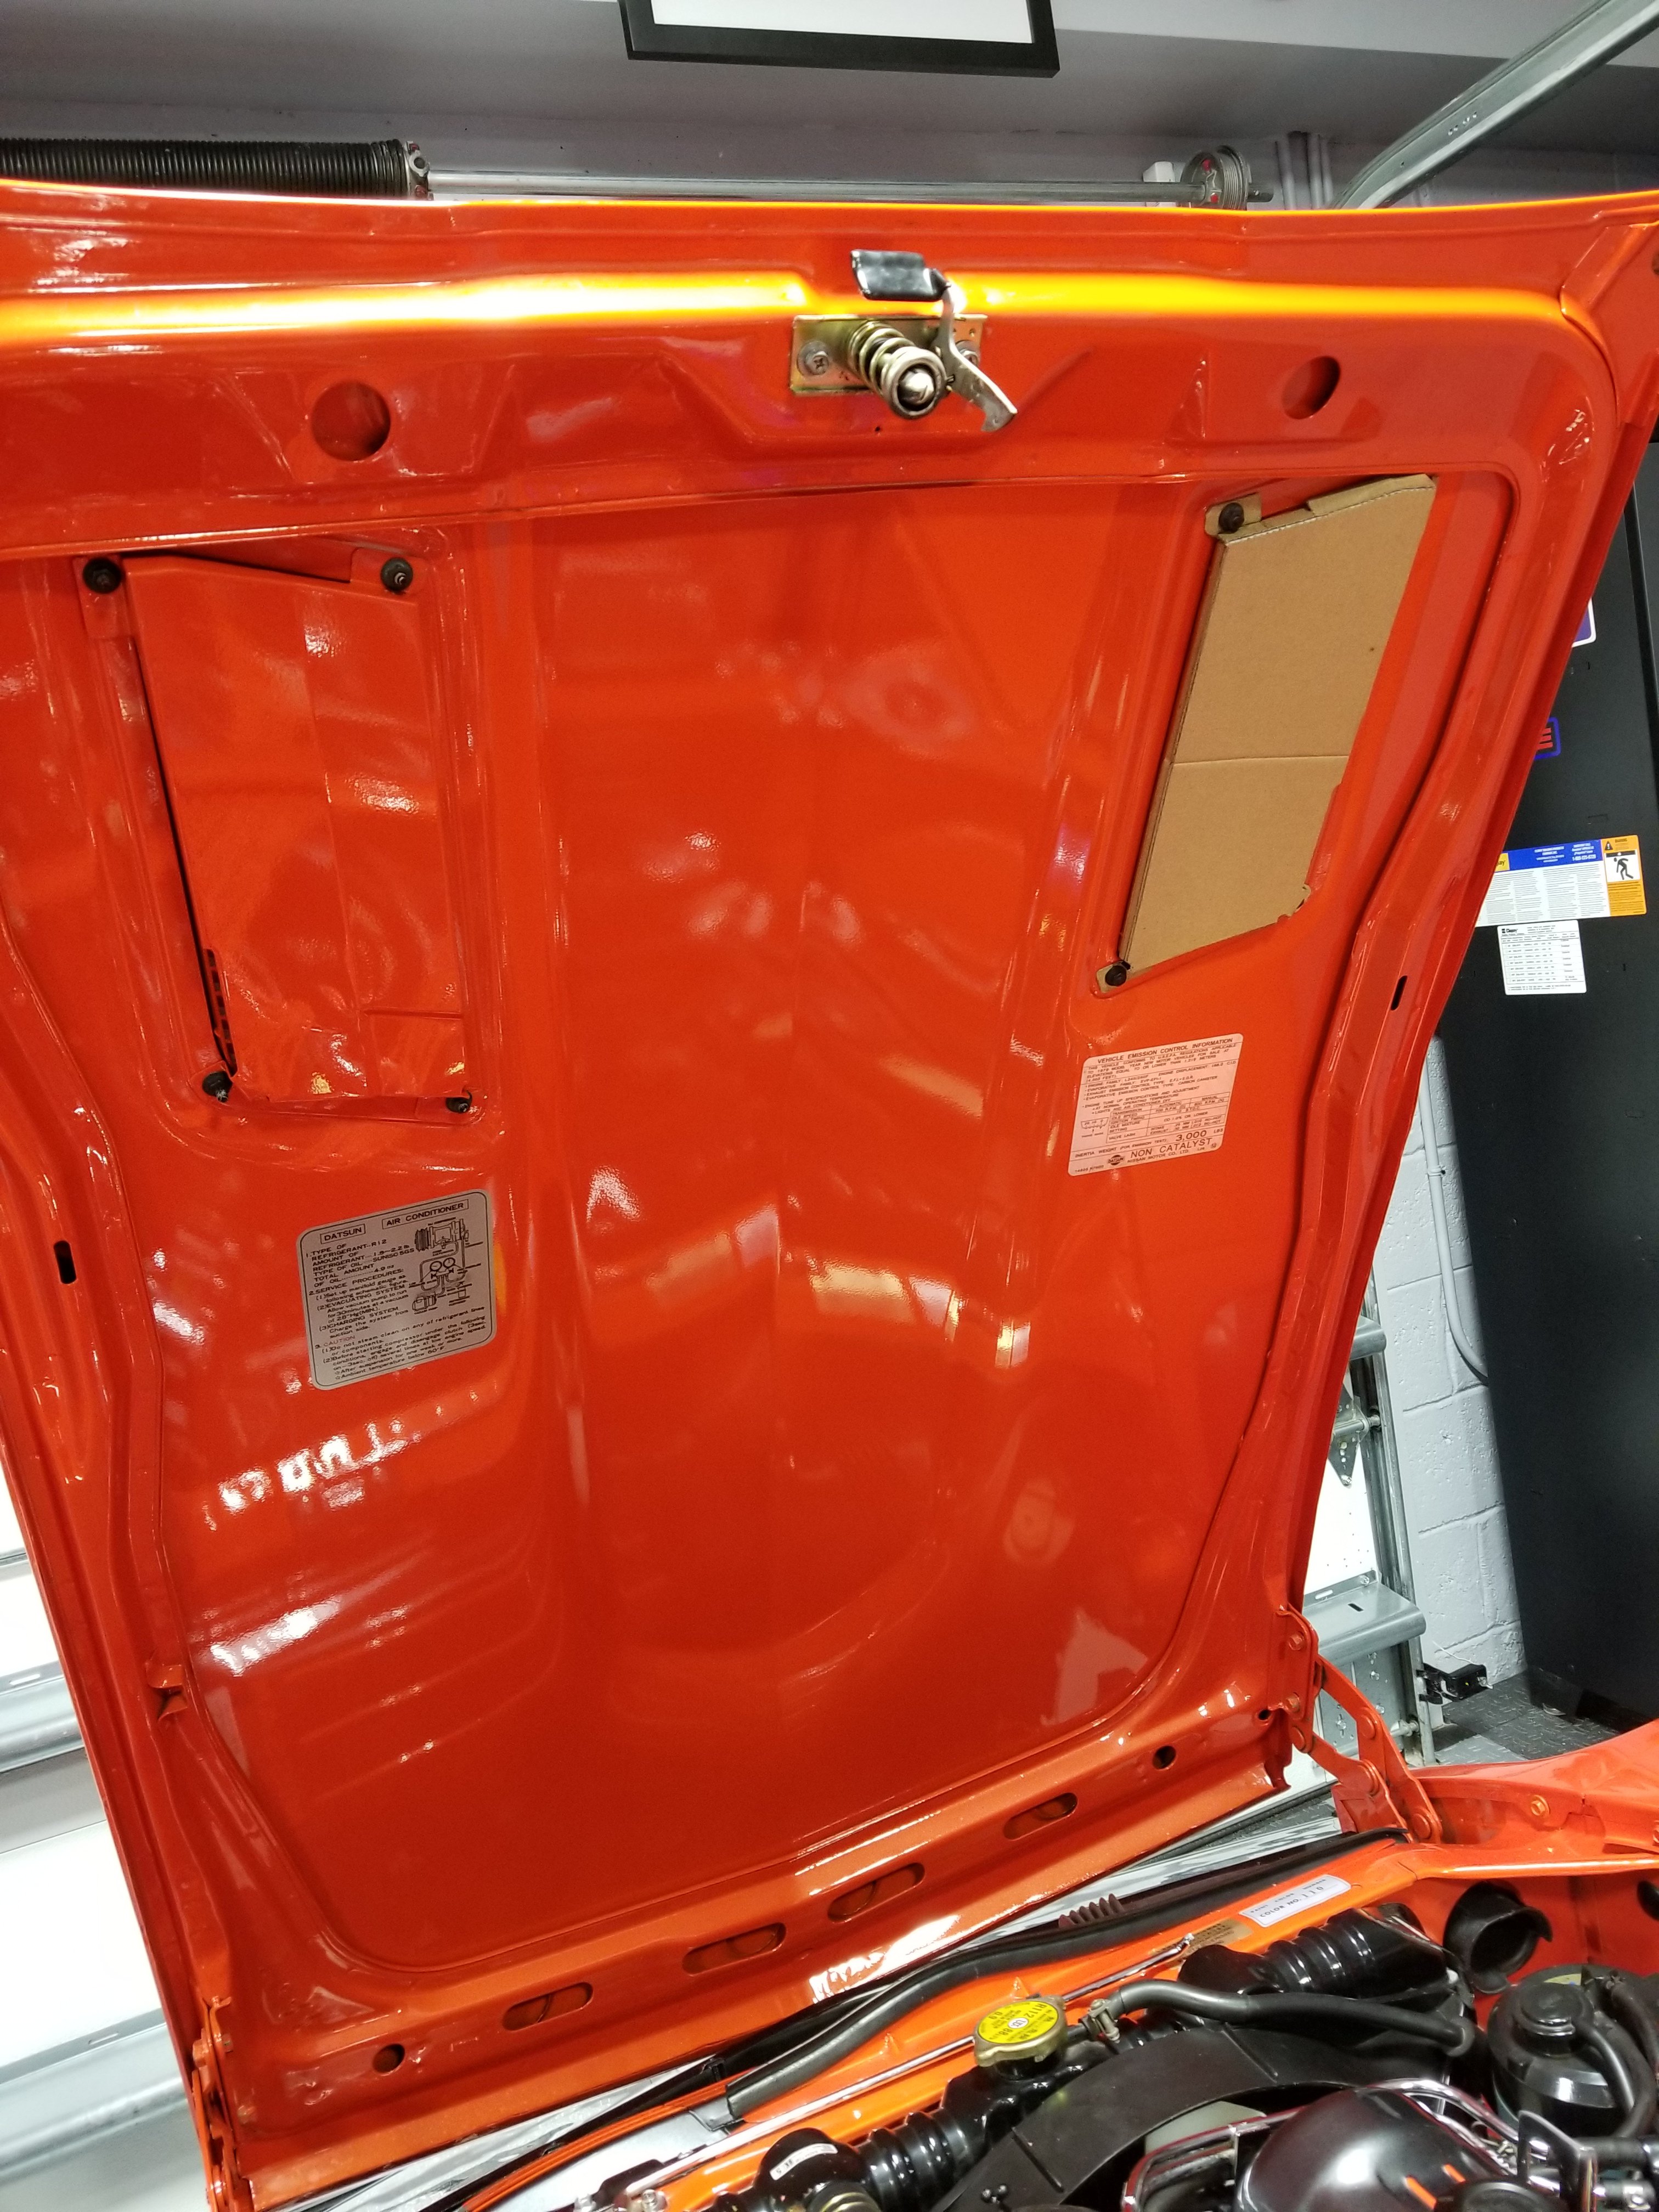
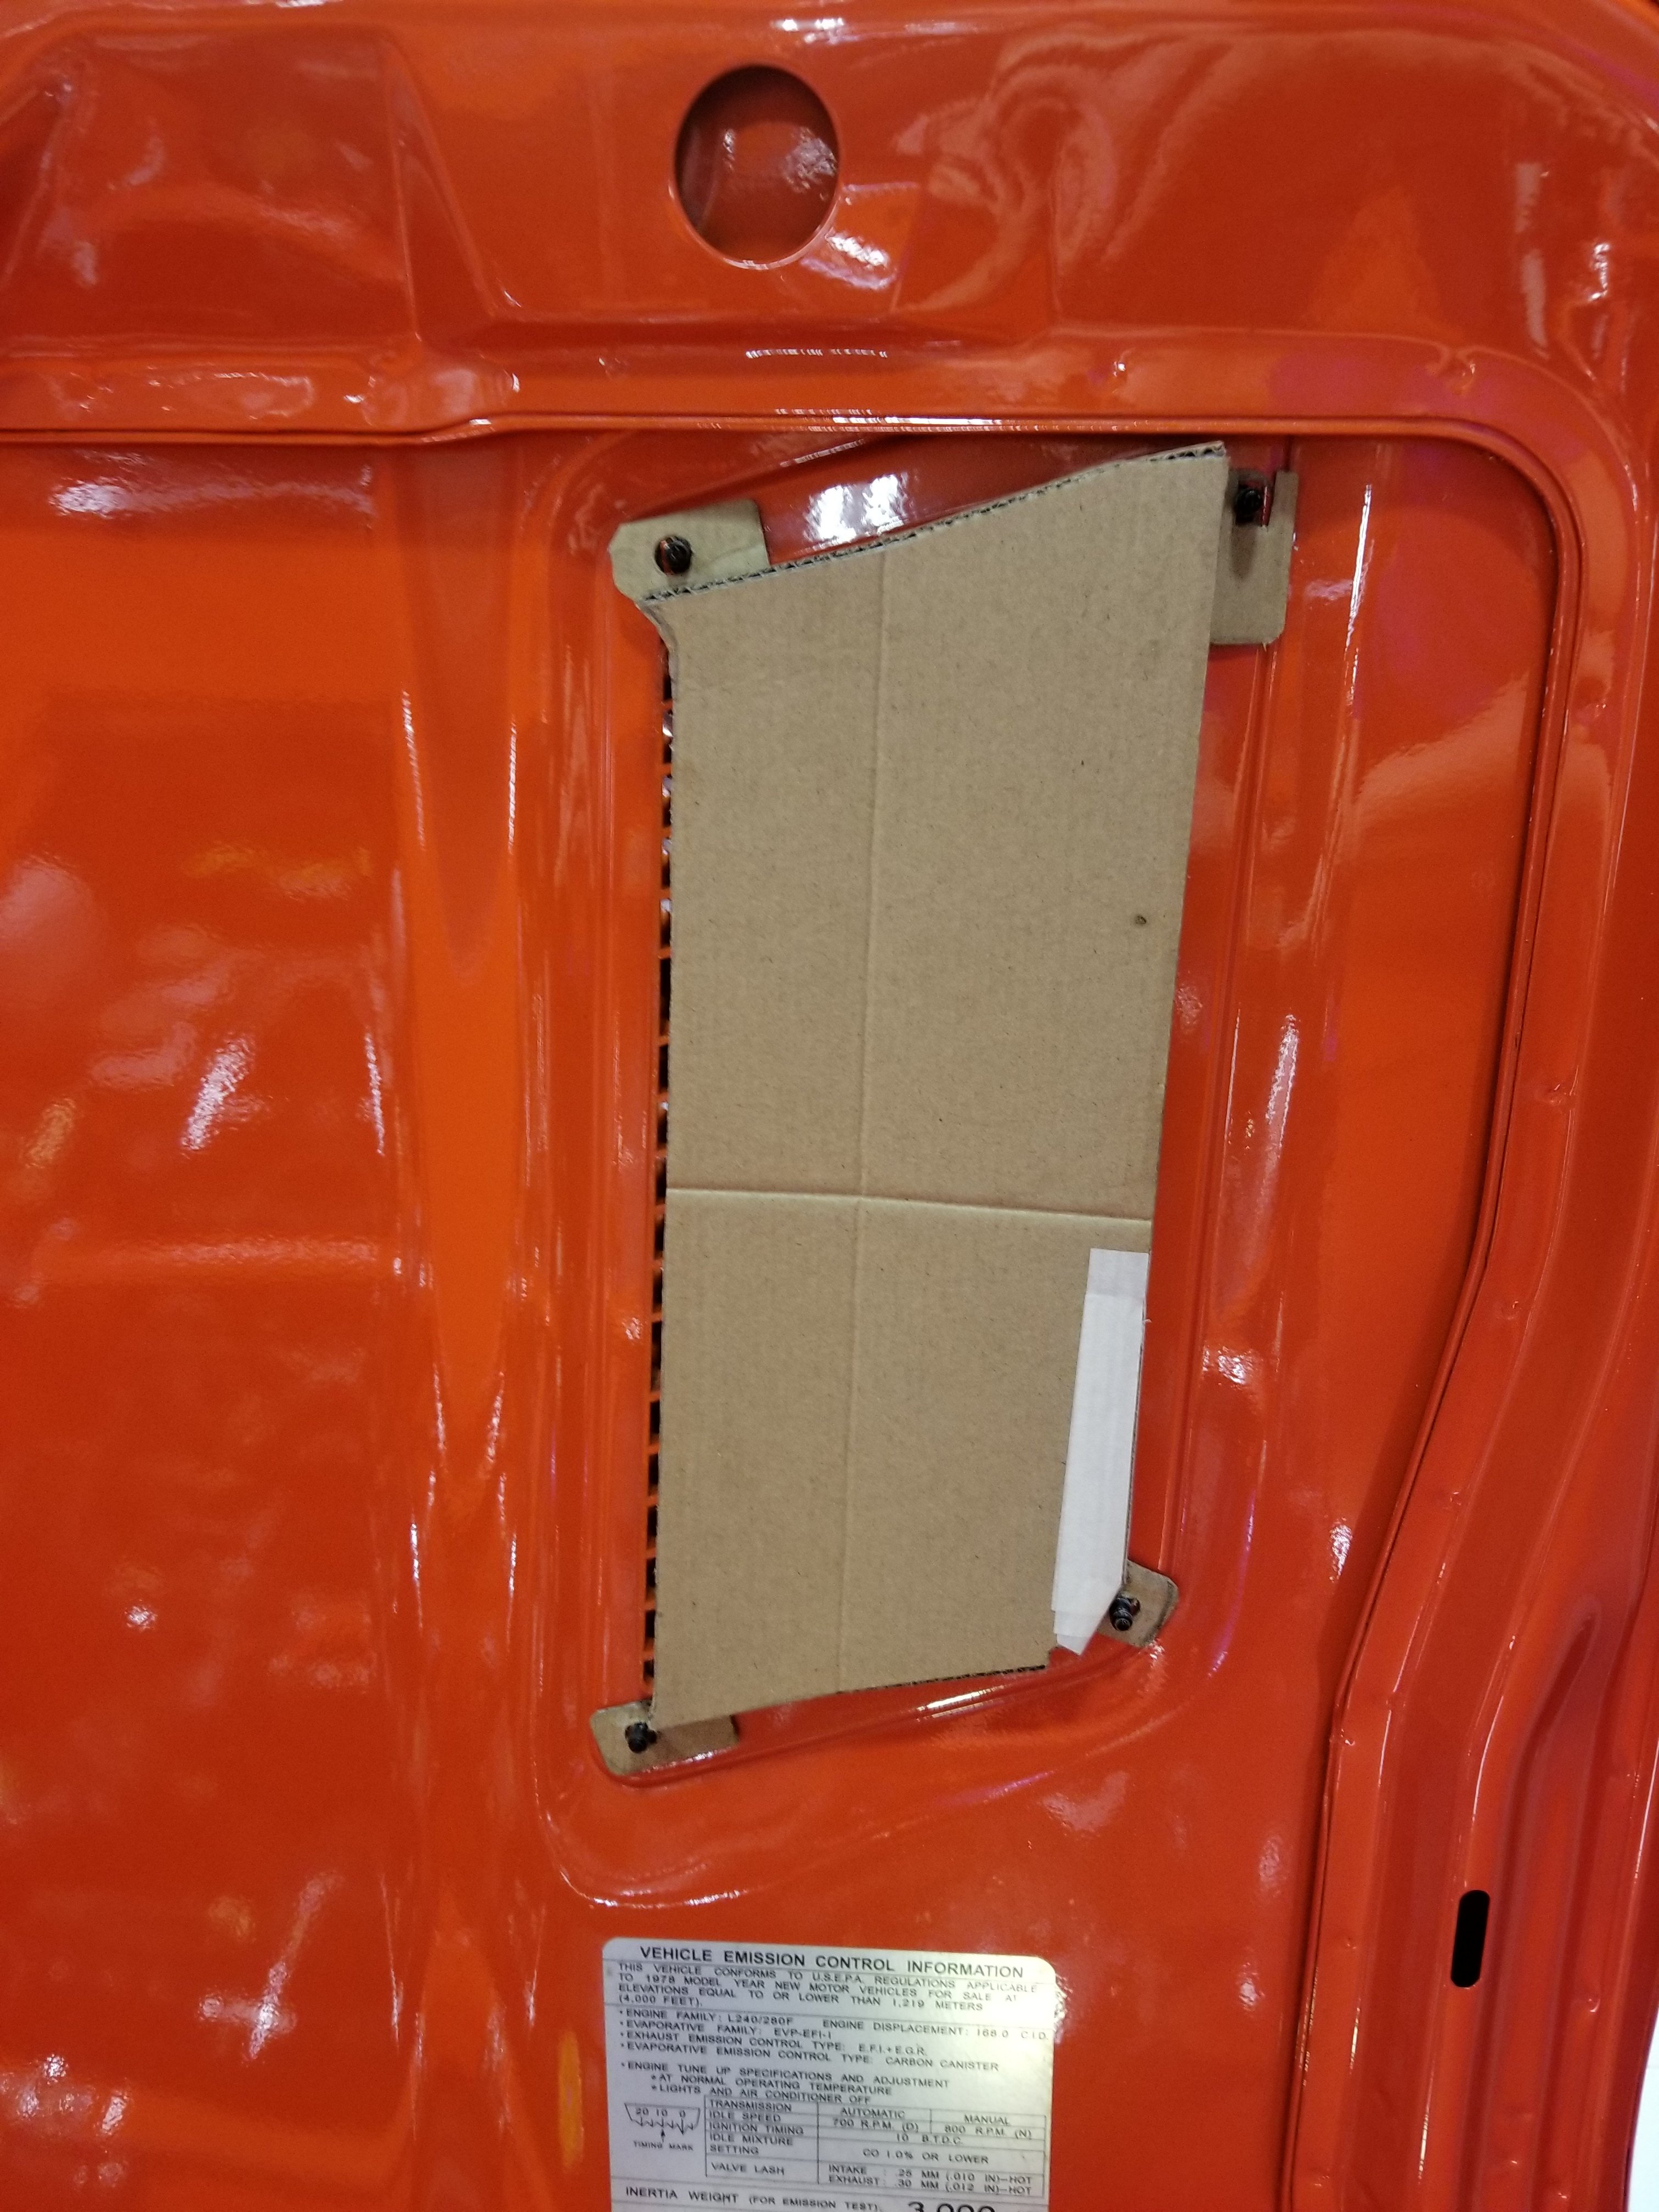
Realized that with the new fuse block setup the hood vent right above it will allow water (rain or otherwise) to come into contact with the electricals which are not as water resistant as the old fusible link arrangement. I decided to mirror the shape of the driver side hood vent liner to place under the passenger side vent. I modified it somewhat so that hot air outflow isn't restricted too much but will still prevent water from dripping directly onto the fuse block. So far I've completed the cardboard template. I will transfer that onto sheet metal soon and then paint.
-
280Z Restomod Progress
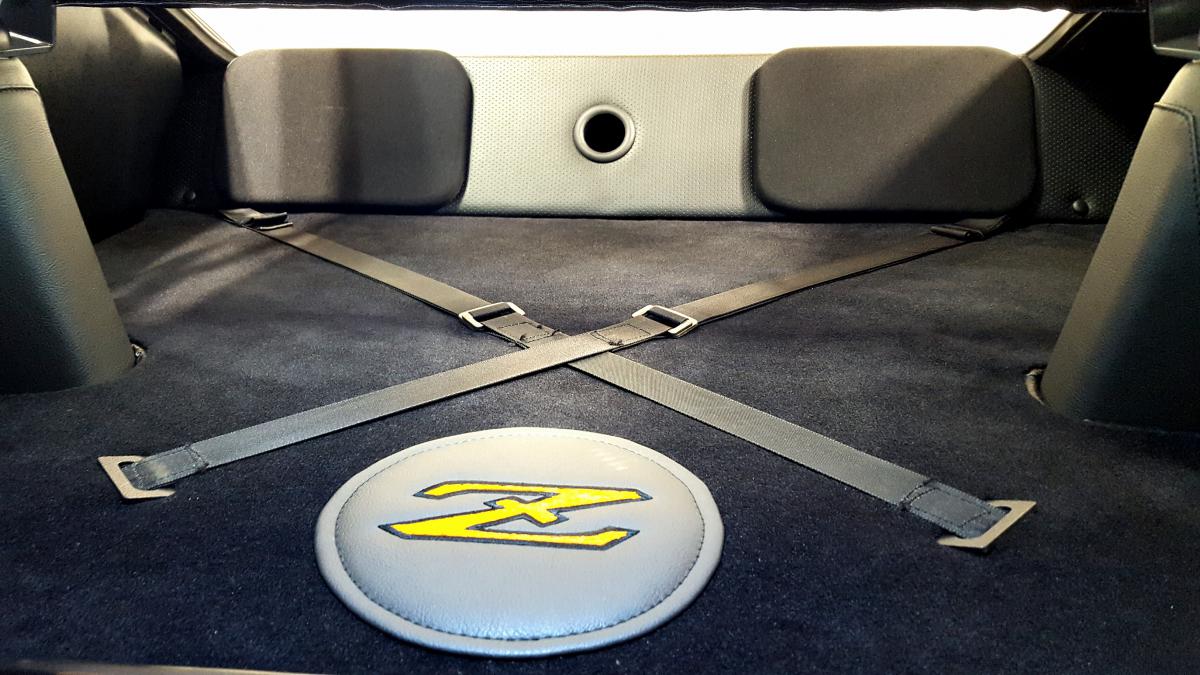
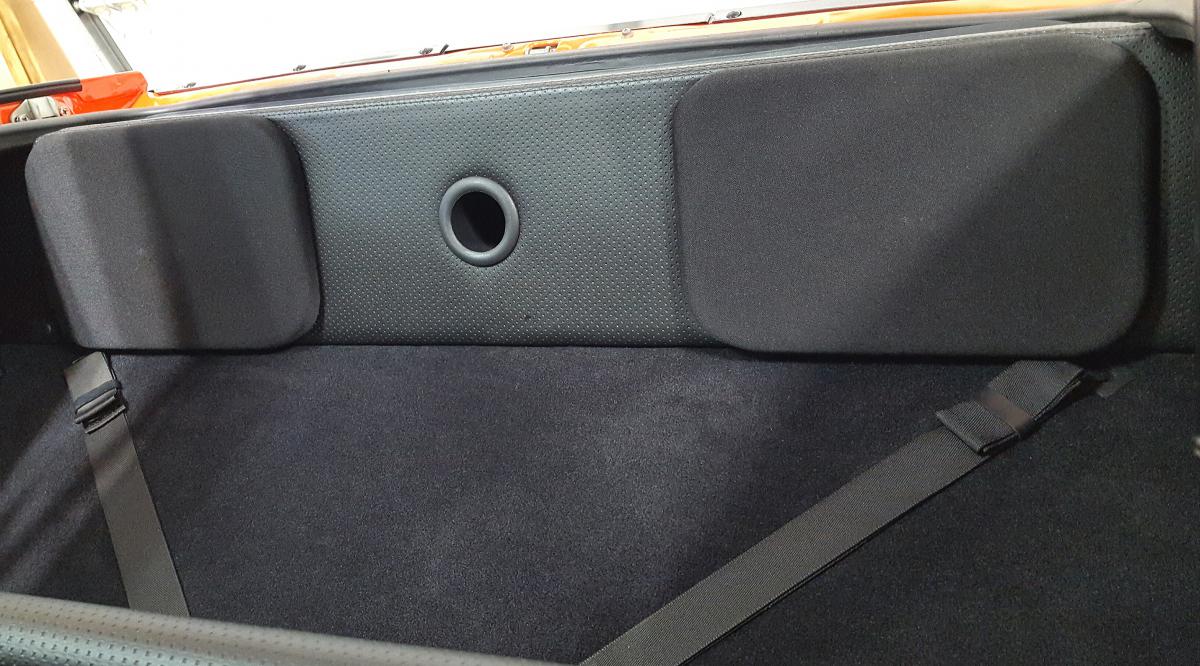
dmoralesbello replied to dmoralesbello's topic in S30 Series - 240z, 260z, 280z
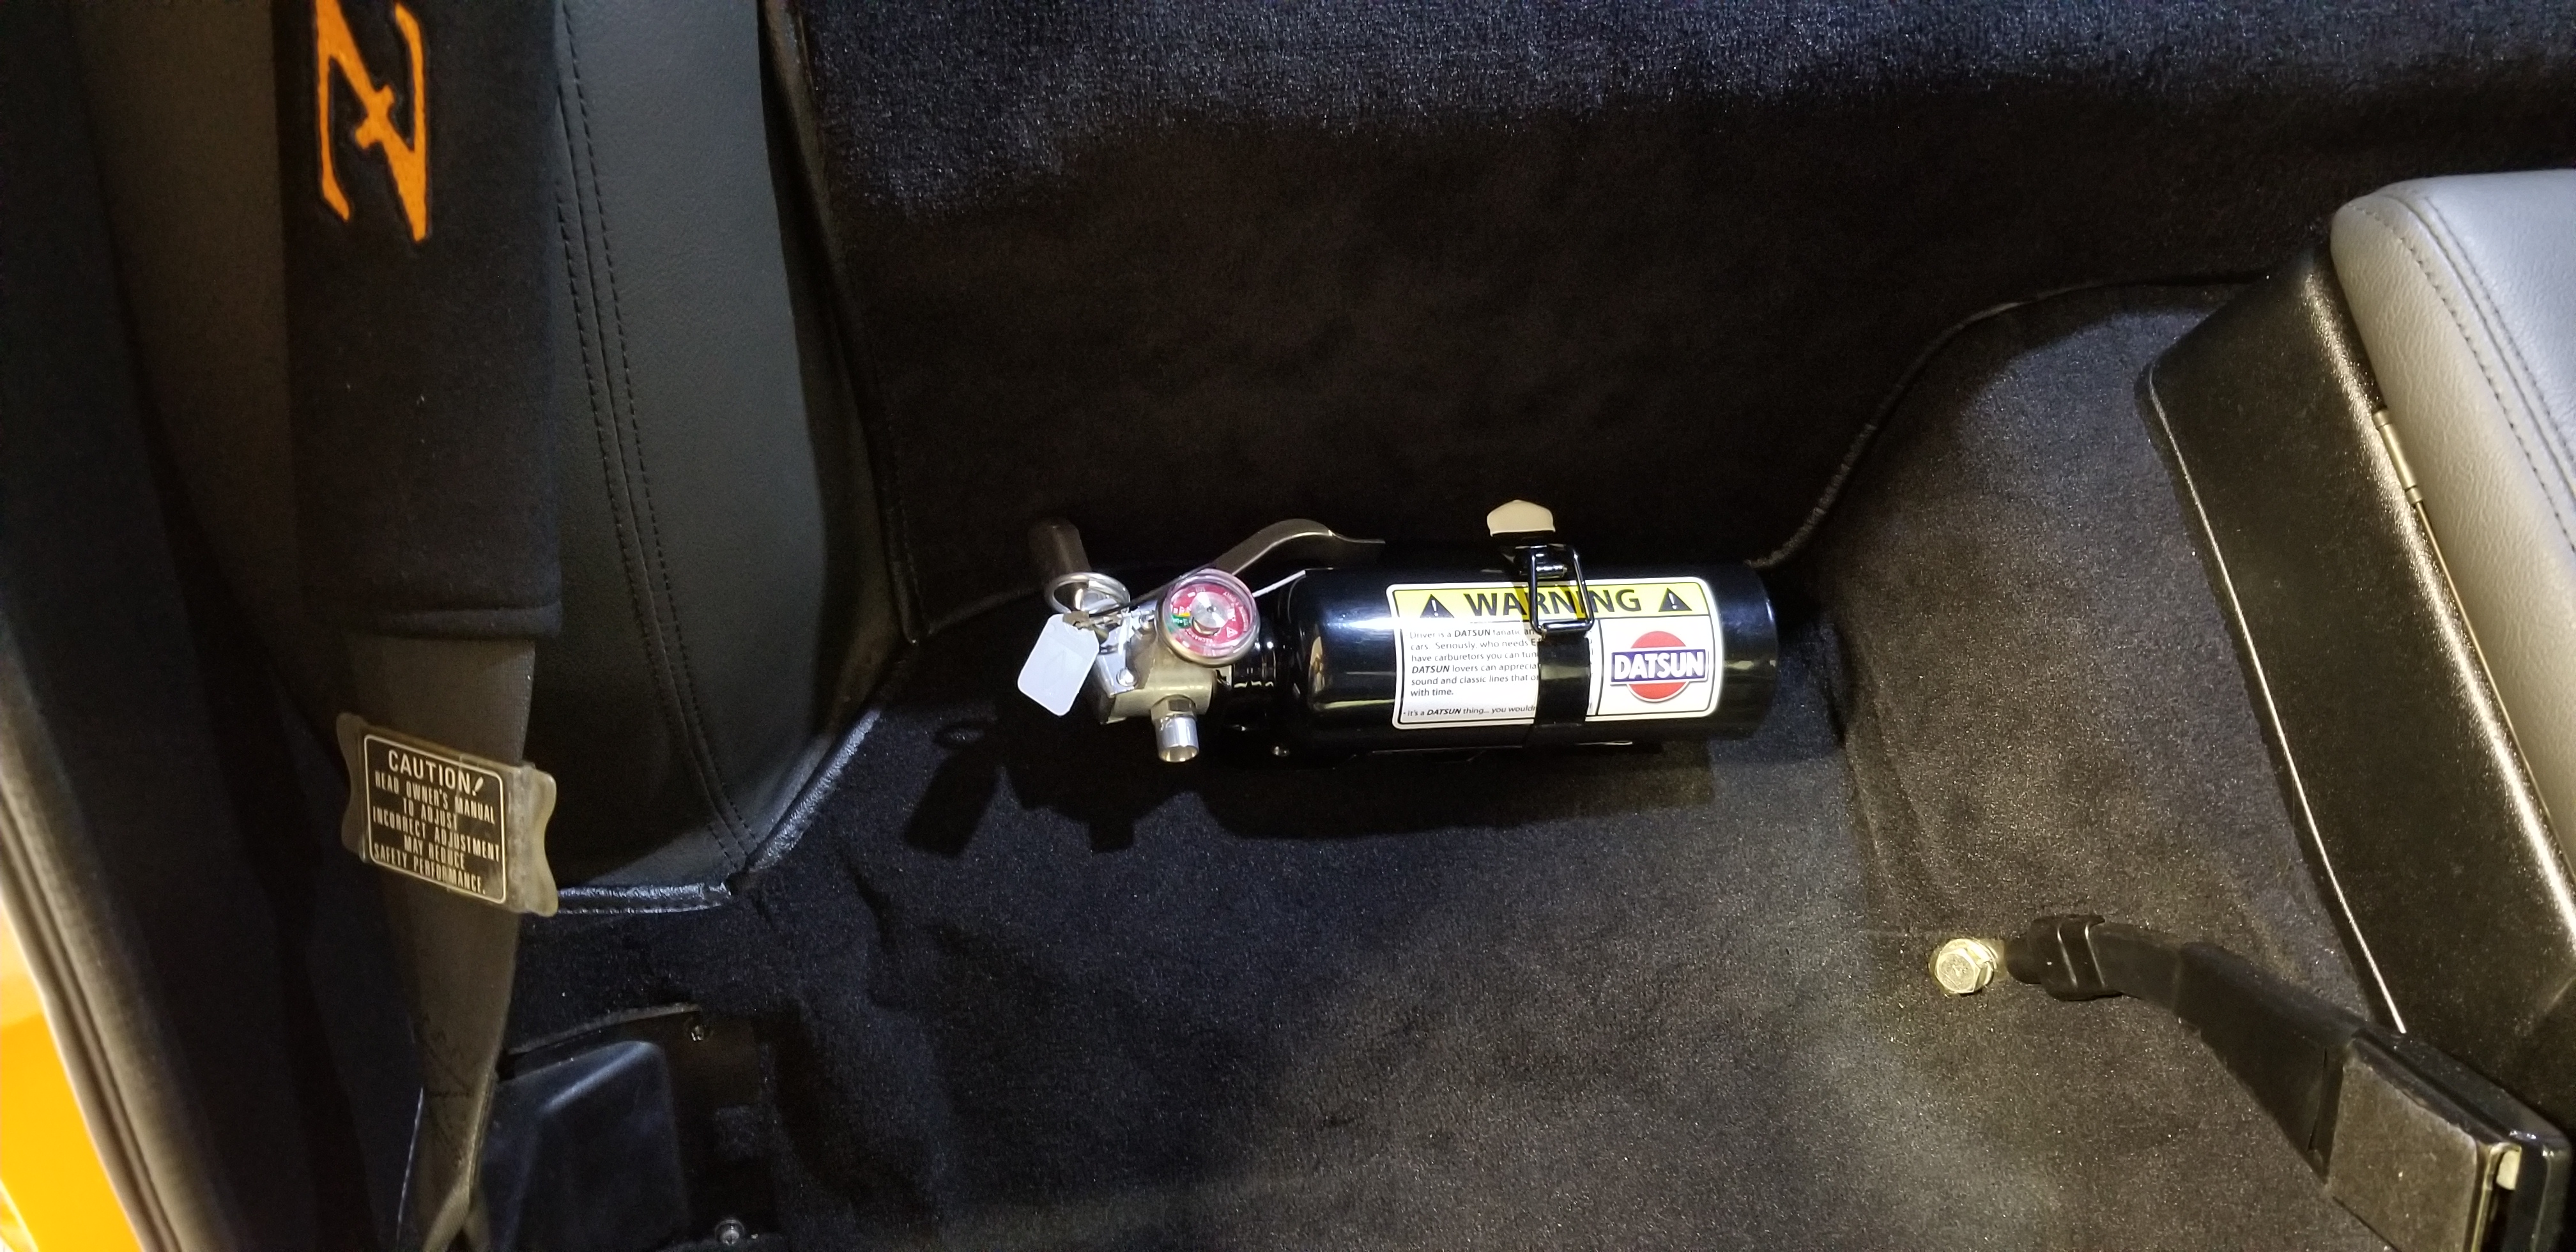
Nice to touch base with you once again buddy! The cool thing about the extinguisher is the base to which it attaches. I wasn't about to drill holes in the floors and wanted the extinguisher right behind the passenger seat where I could really reach it if necessary. I used a 4" x 12" piece of 3mm black ABS plastic and marked the 3 spots where the supplied extinguisher bracket would attach to. I placed 3 rivnuts in those spots on the ABS plate. I then covered the back of the ABS with heavy duty 3M double stick tape, lifted a bit of the carpet behind the passenger seat and stuck the base exactly where I wanted it. I replaced the carpet over the base and marked the positions of the rivnuts on the base with a pick through the carpet, placed the metal bracket that came with the extinguisher over the carpet covering the fabricated ABS plate and fixed it with 3 properly sized screws that would not extend past the rivnuts so as not to damage the car floor. I finally placed the extinguisher into it's bracket. The set up holds the extinguisher solidly in place and "no floors were drilled during the making of this film", 😉😂. -
280Z Restomod Progress
dmoralesbello replied to dmoralesbello's topic in S30 Series - 240z, 260z, 280z
Great information SleeperZ. I will certainly keep that in mind as well and it would seem to coincide with the circuits and the fuse selection so far. Thank you for the input. -
280Z Restomod Progress
dmoralesbello replied to dmoralesbello's topic in S30 Series - 240z, 260z, 280z
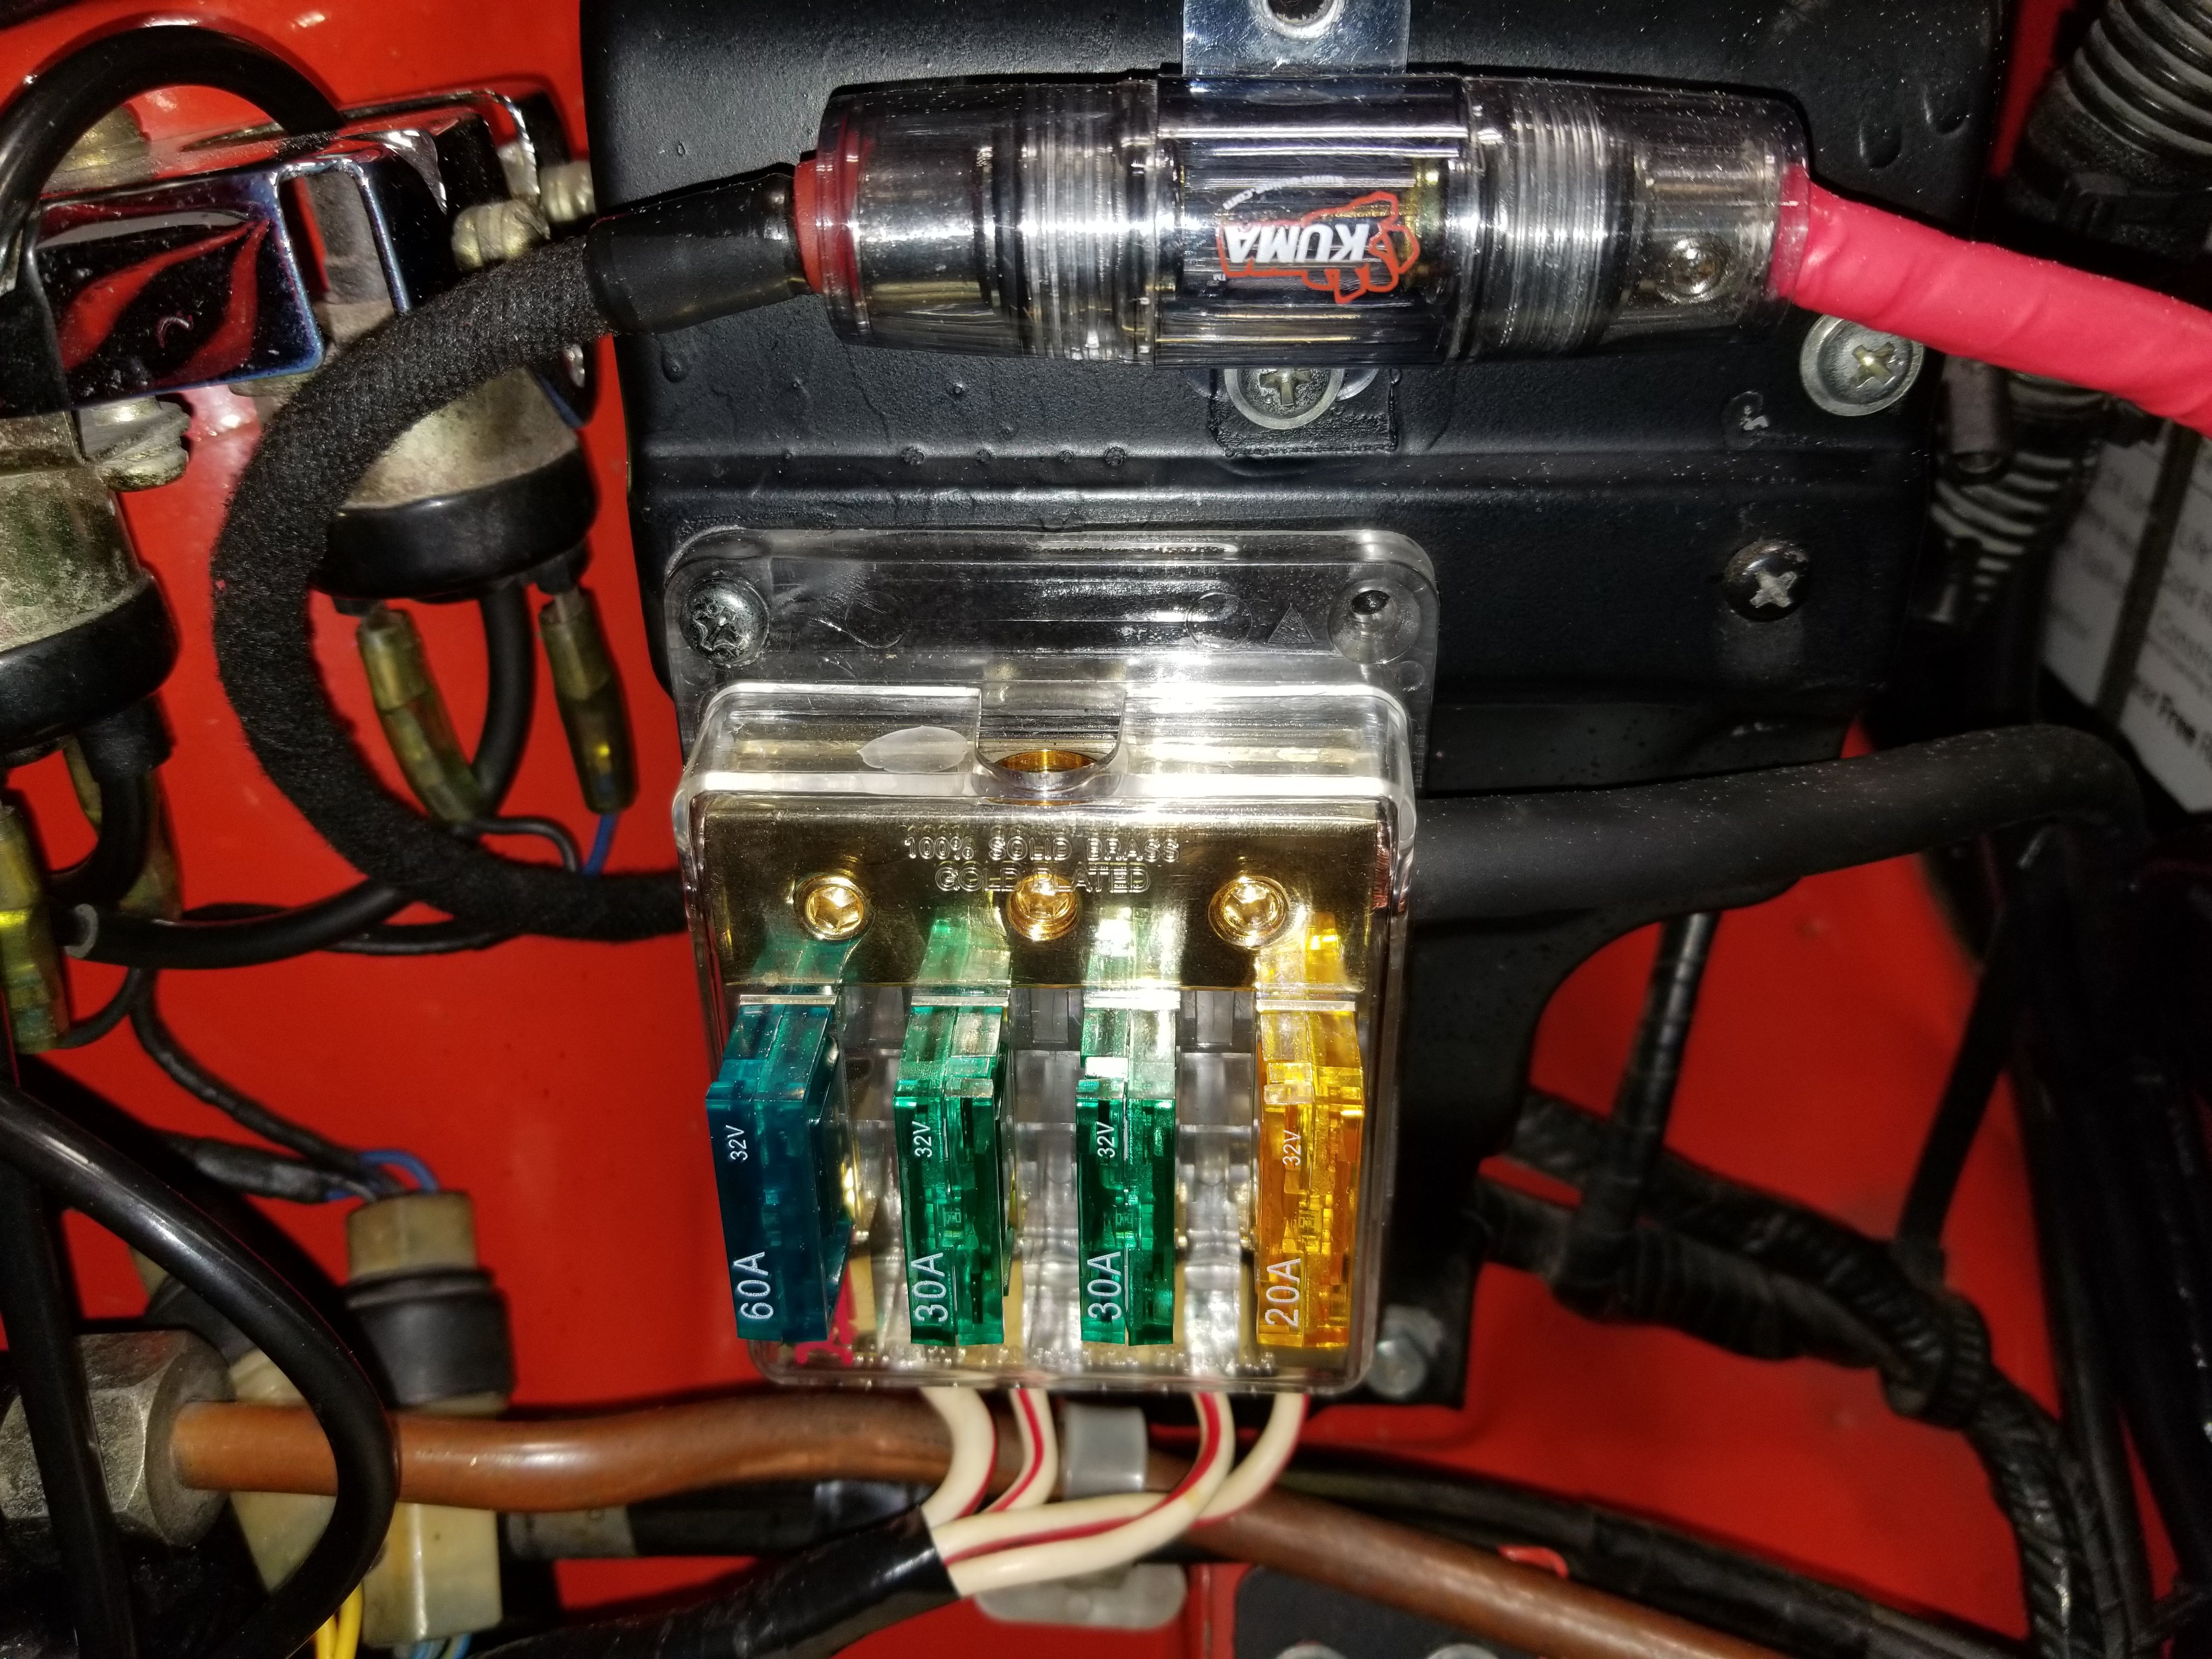
Following the logic that I'm best protected with the lowest amp rating fuse that will allow the circuit to work under max load, I did a little experimentation. I started with the recommended 80 amp fuse in the 1 position which worked fine. I then tried a 60 amp fuse which is still holding steady. In the other 3 positions I had started with 50 amp fuses (as I'm sure you remember) and went down to 30 amp fuses which have held steady also. I was hoping to go down to 25 amp fuses and give those a try but I haven't found any at the parts stores around me. I did however come upon a single 20 amp fuse I so I placed it in the 4 position (that powers my interior lights which are all LEDs) and that has held as well. If I come upon 25 amp Maxifuses I will give those a try in positions 2 and 3 and see how that goes but here's a pic of the current setup which seems to be working well.
-
Fuel pump primes constantly? HELP??
dmoralesbello replied to jersey280's topic in S30 Series - 240z, 260z, 280z
On my "78 with stock pump and wiring, the pump runs constantly as soon as the key goes to ON or START. I don't think you have a problem at all. -
280Z Restomod Progress
dmoralesbello replied to dmoralesbello's topic in S30 Series - 240z, 260z, 280z
I suppose I could also measure amps load across each fuse terminal but my multimeter only allows a max of 10 amps before blowing it's fuse. -
280Z Restomod Progress
dmoralesbello replied to dmoralesbello's topic in S30 Series - 240z, 260z, 280z
Within that logic then I will look for 25 amp fuses and install them. I would think the worst that can happen is that they will blow under normal load and if that's the case I would increase to 30 amp fuses. Would you agree? -
280Z Restomod Progress
dmoralesbello replied to dmoralesbello's topic in S30 Series - 240z, 260z, 280z
I think you hit the nail on the head. The fusible links I had before were put there by the previous owner and I assumed them to be correct. I seem to be making a similar mistake now with the Maxifuses as you point out. Should I be using 30 amp fuses to replace the three 50 amp ones and a 50amp instead of the 80 amp fuse? I'm very thankful for your input and correcting my error. Dave -
280Z Restomod Progress
dmoralesbello replied to dmoralesbello's topic in S30 Series - 240z, 260z, 280z
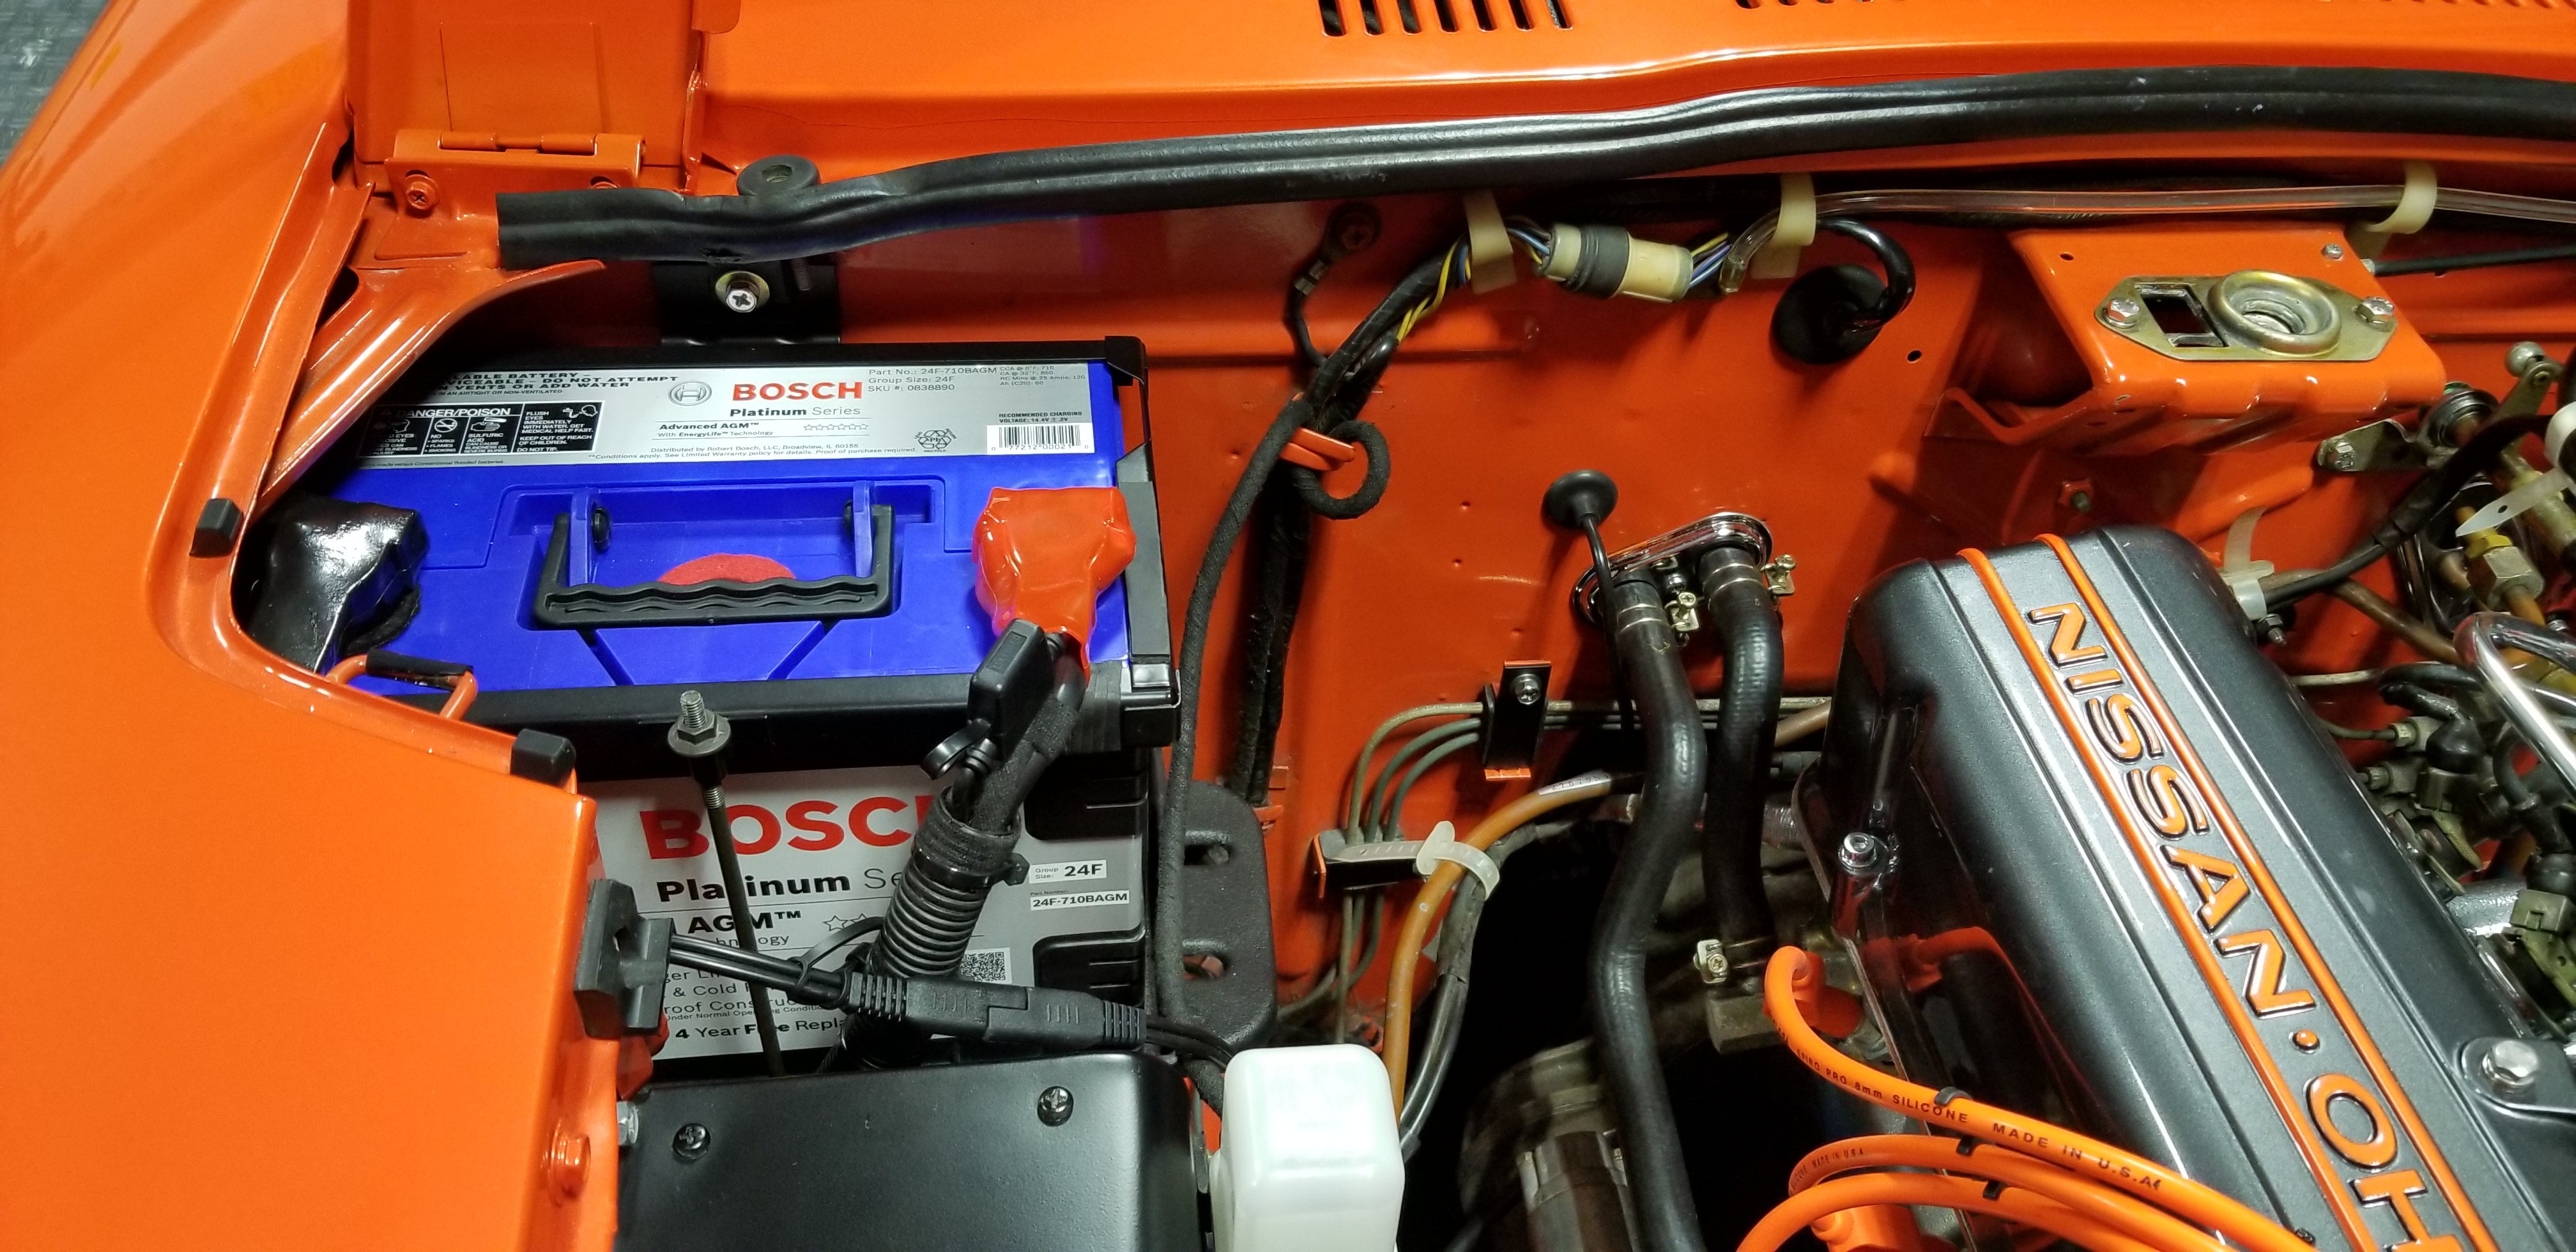
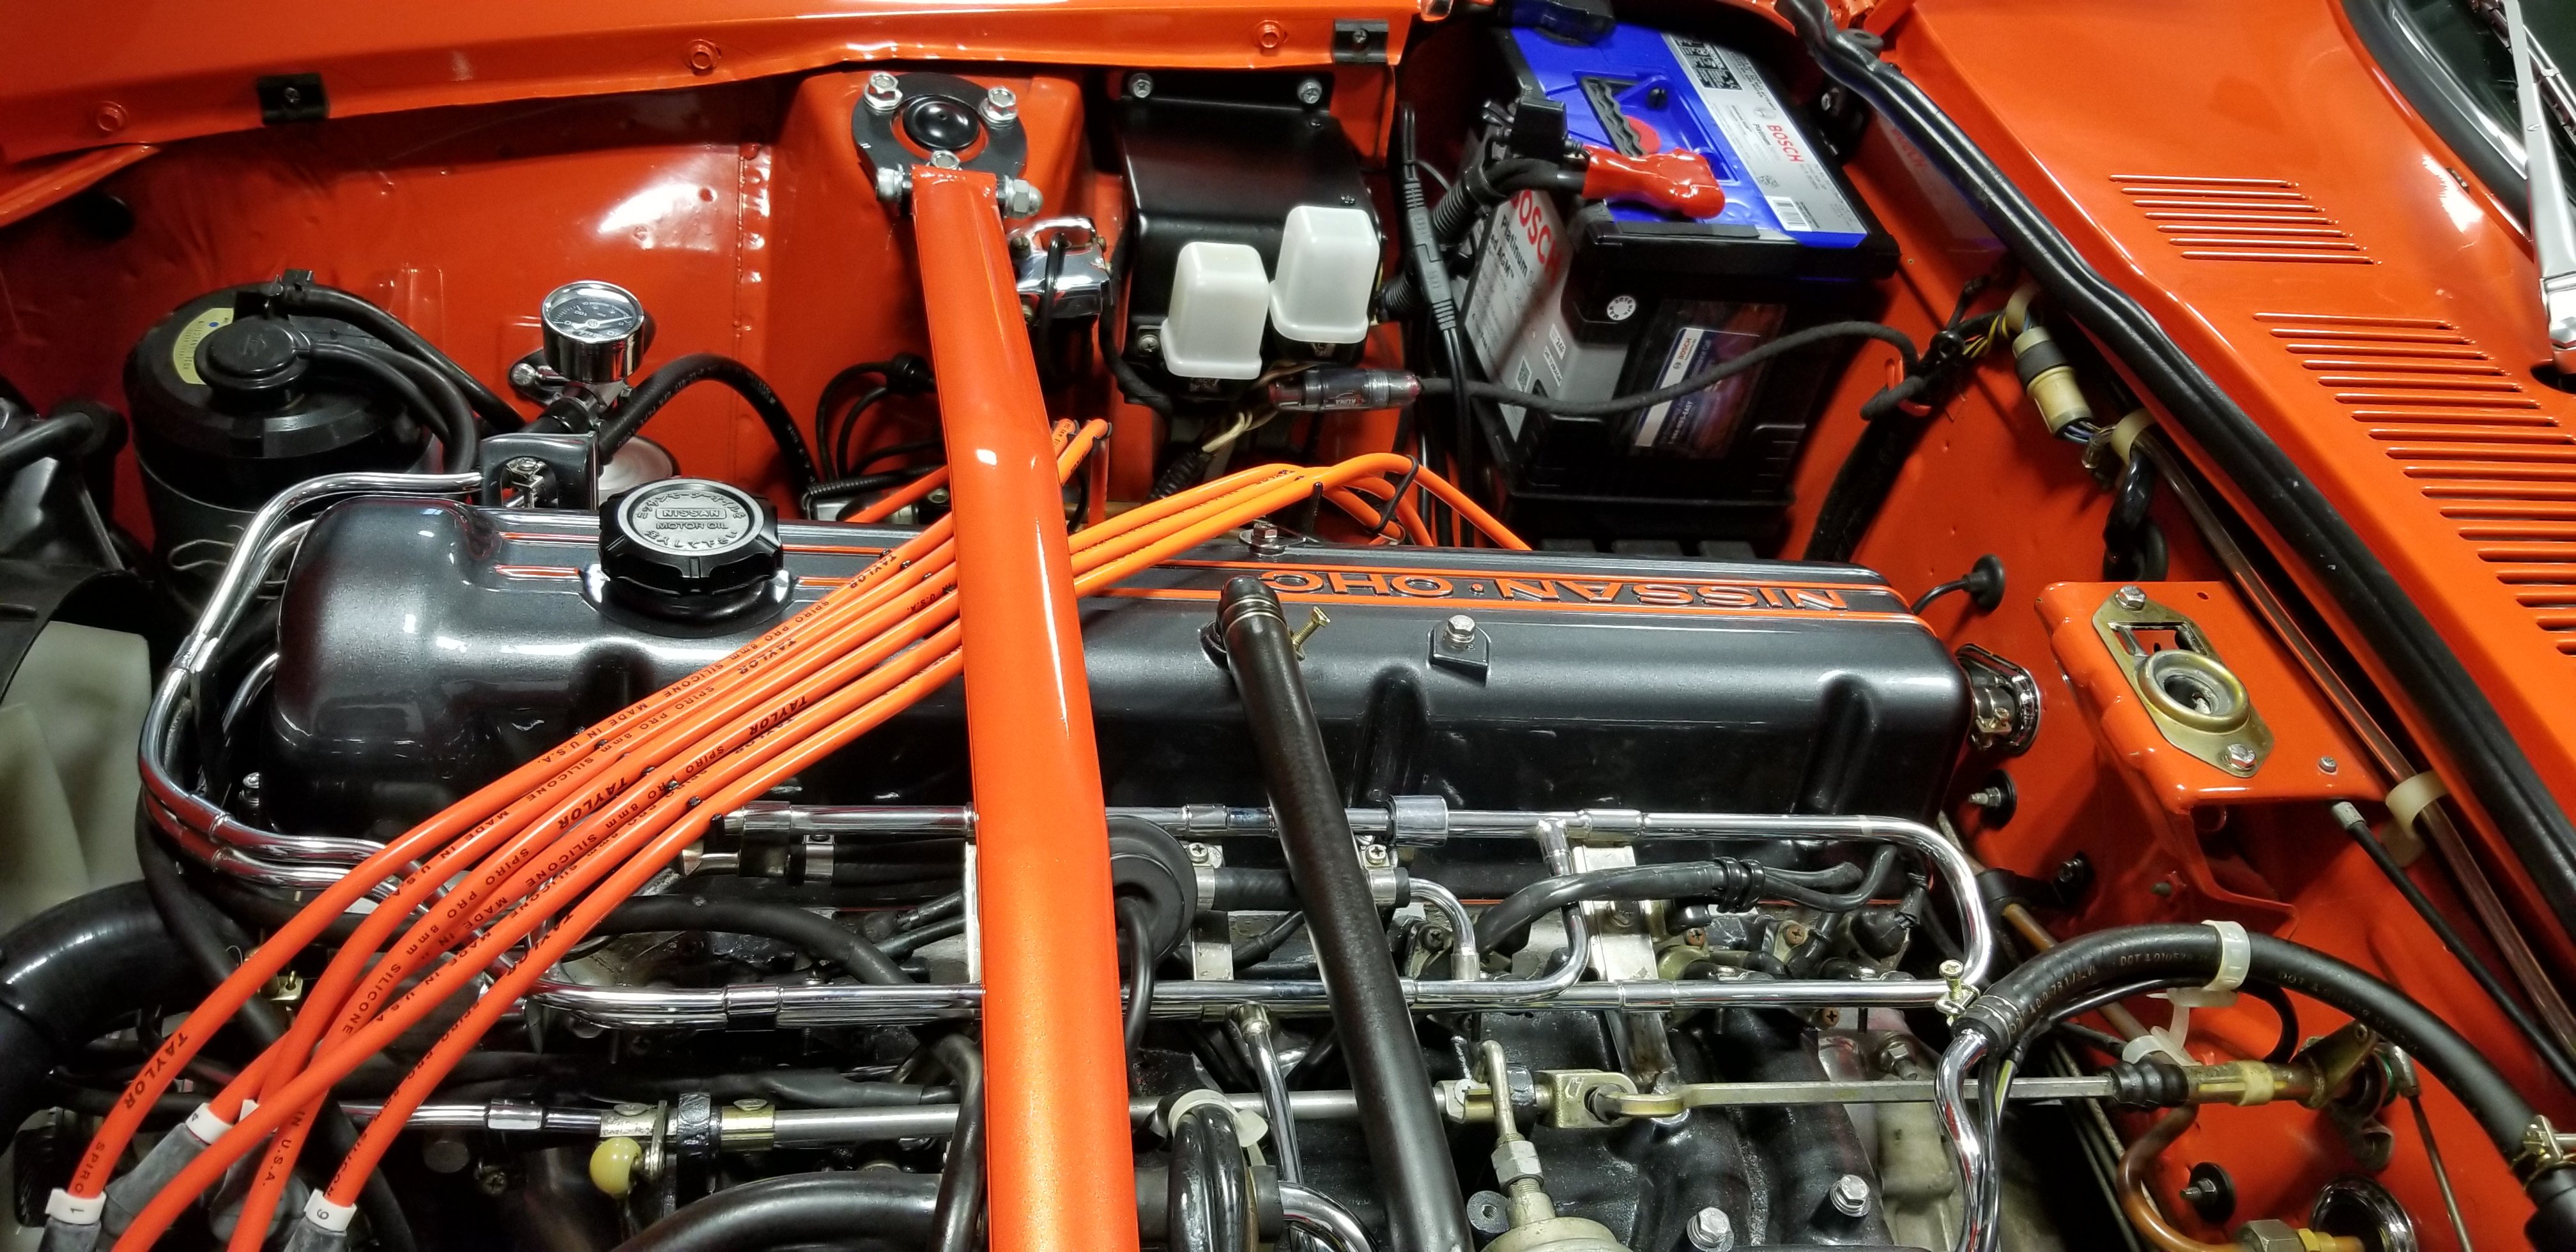
I had an electrical mishap after "finishing" my engine bay. I inadvertently pinched a cable (in front and below the windshield cowl) while tightening one of the brackets that I powder coated on the firewall. I caused a short circuit which toasted a dozen or so wires in the harness. It took me a couple of months to figure out the cause of the damage and then replace all the scorched cables with ones form a donor harness I was lucky enough to find on Ebay. Definitely not a fun job. The thing is that although the fusible links heated up and melted the insulation during the short circuit, they never broke! Electricity continued to flow and burn stuff until I was able to yank the positive terminal from the battery. It was about 30 seconds of pure panic and smoke. Thankfully no fire! After repairing the wire loom and testing everything I decided to get rid of the fusible links and replace them with a modern fuse block and Maxi fuses (as discussed in other posts). Hopefully this setup will grant me better protection in the future. Here's a pic. PS: The fuse holder above the fuse block is for my stereo equipment.
-
280Z Restomod Progress
dmoralesbello replied to dmoralesbello's topic in S30 Series - 240z, 260z, 280z
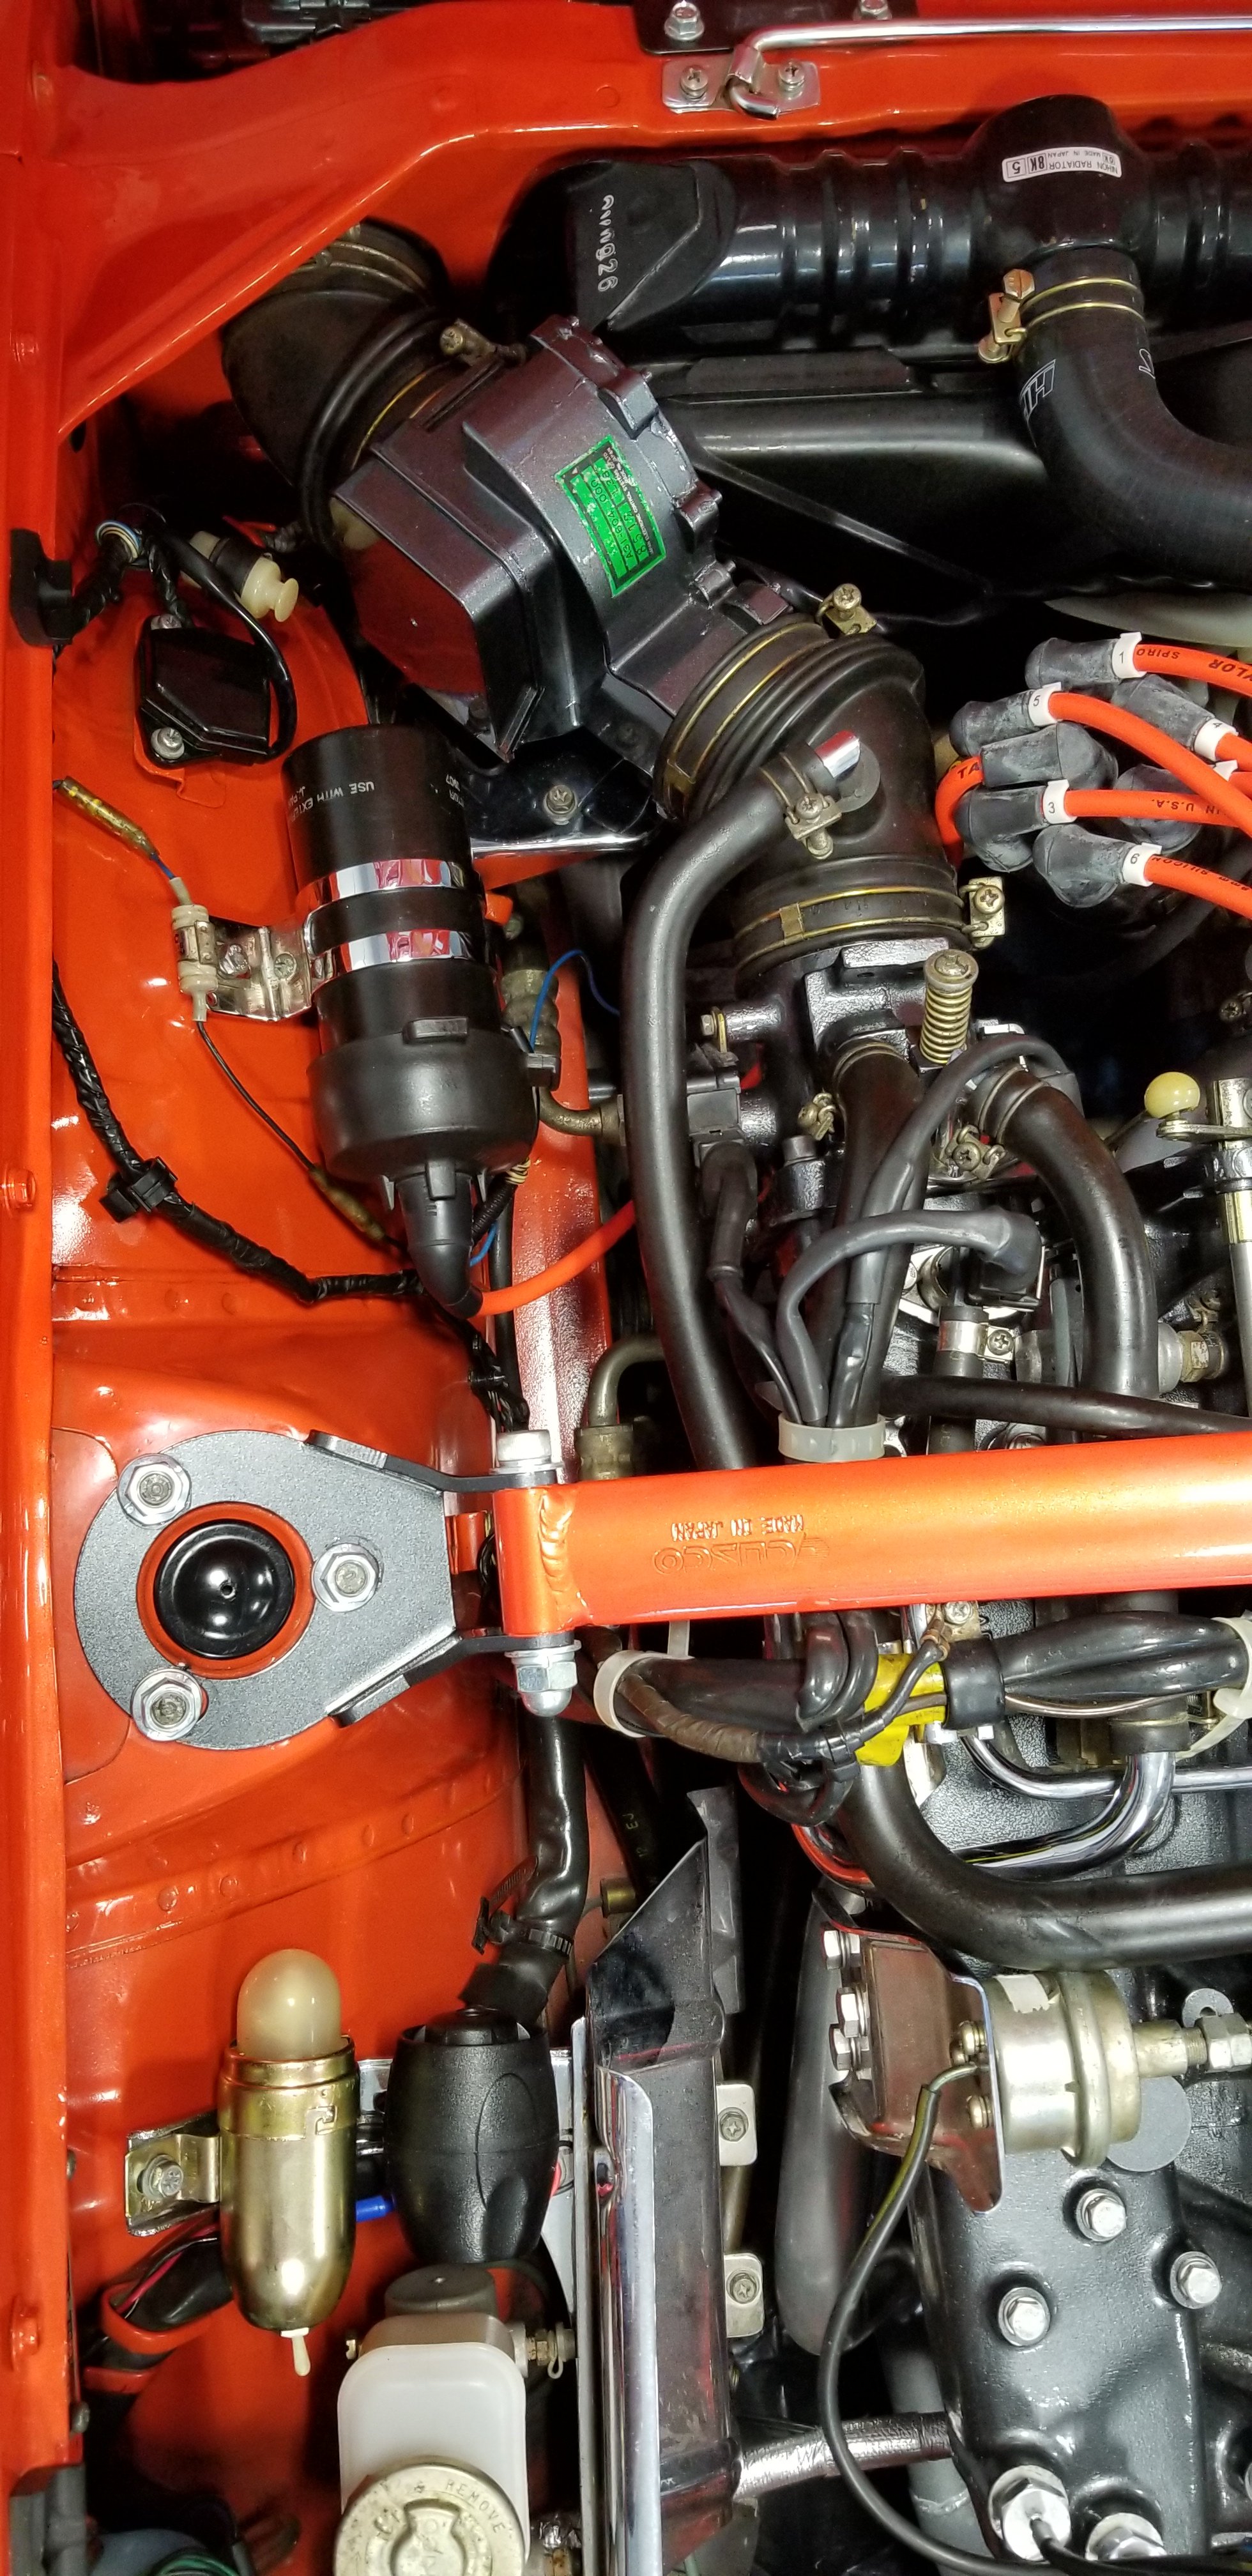
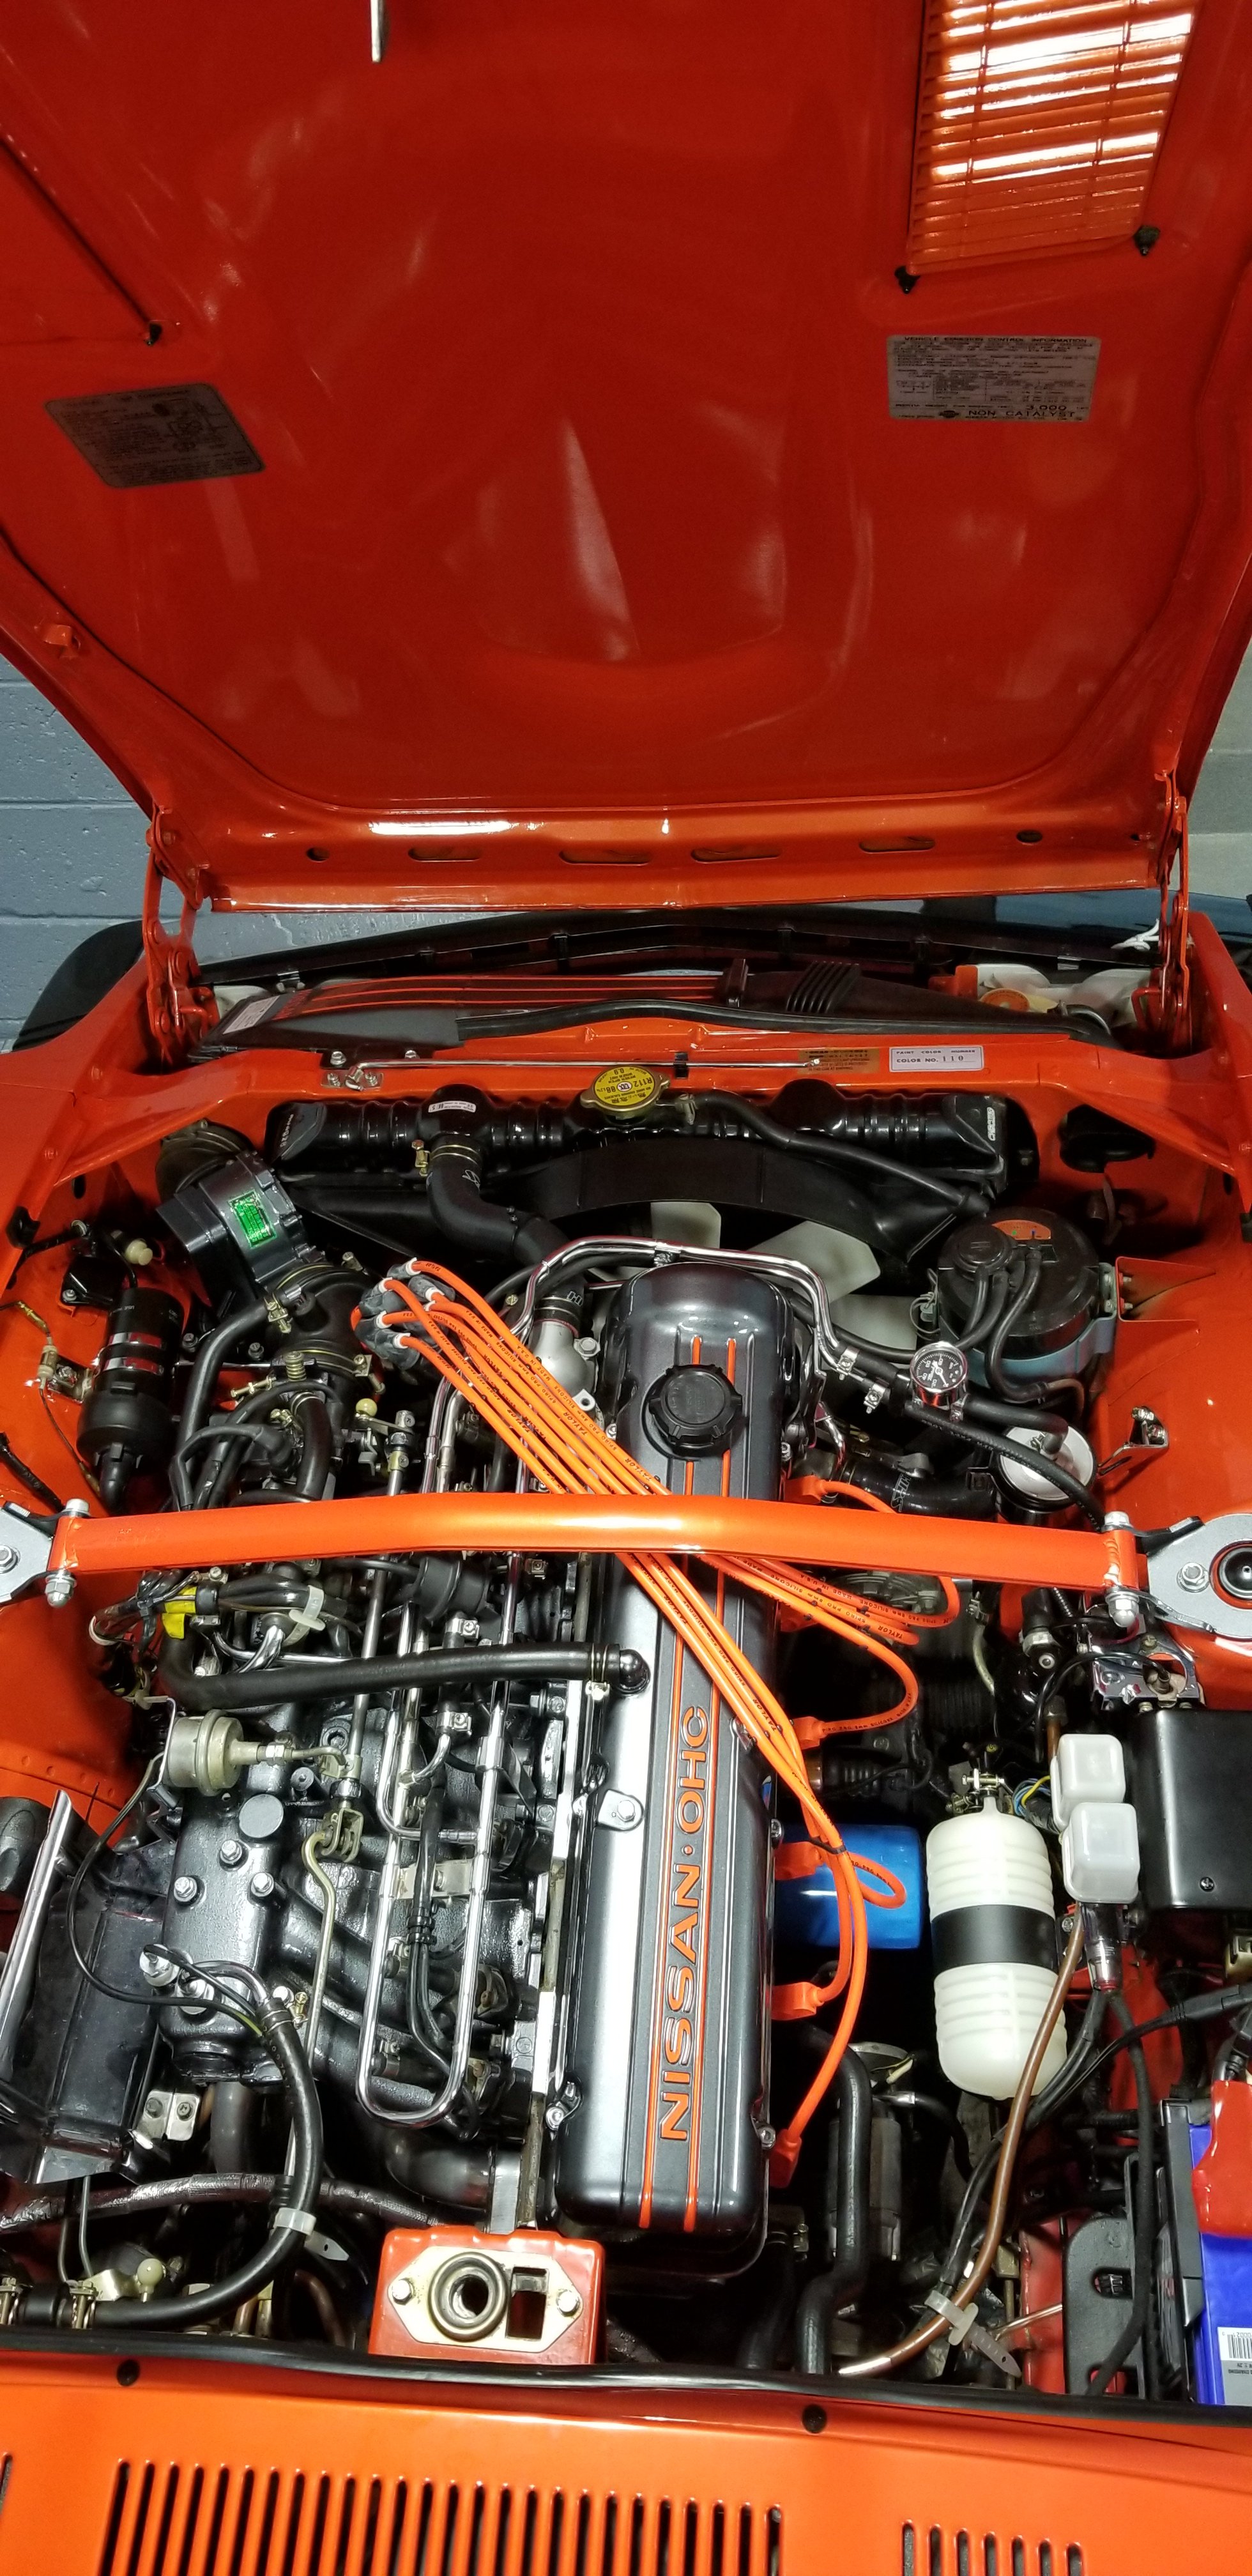
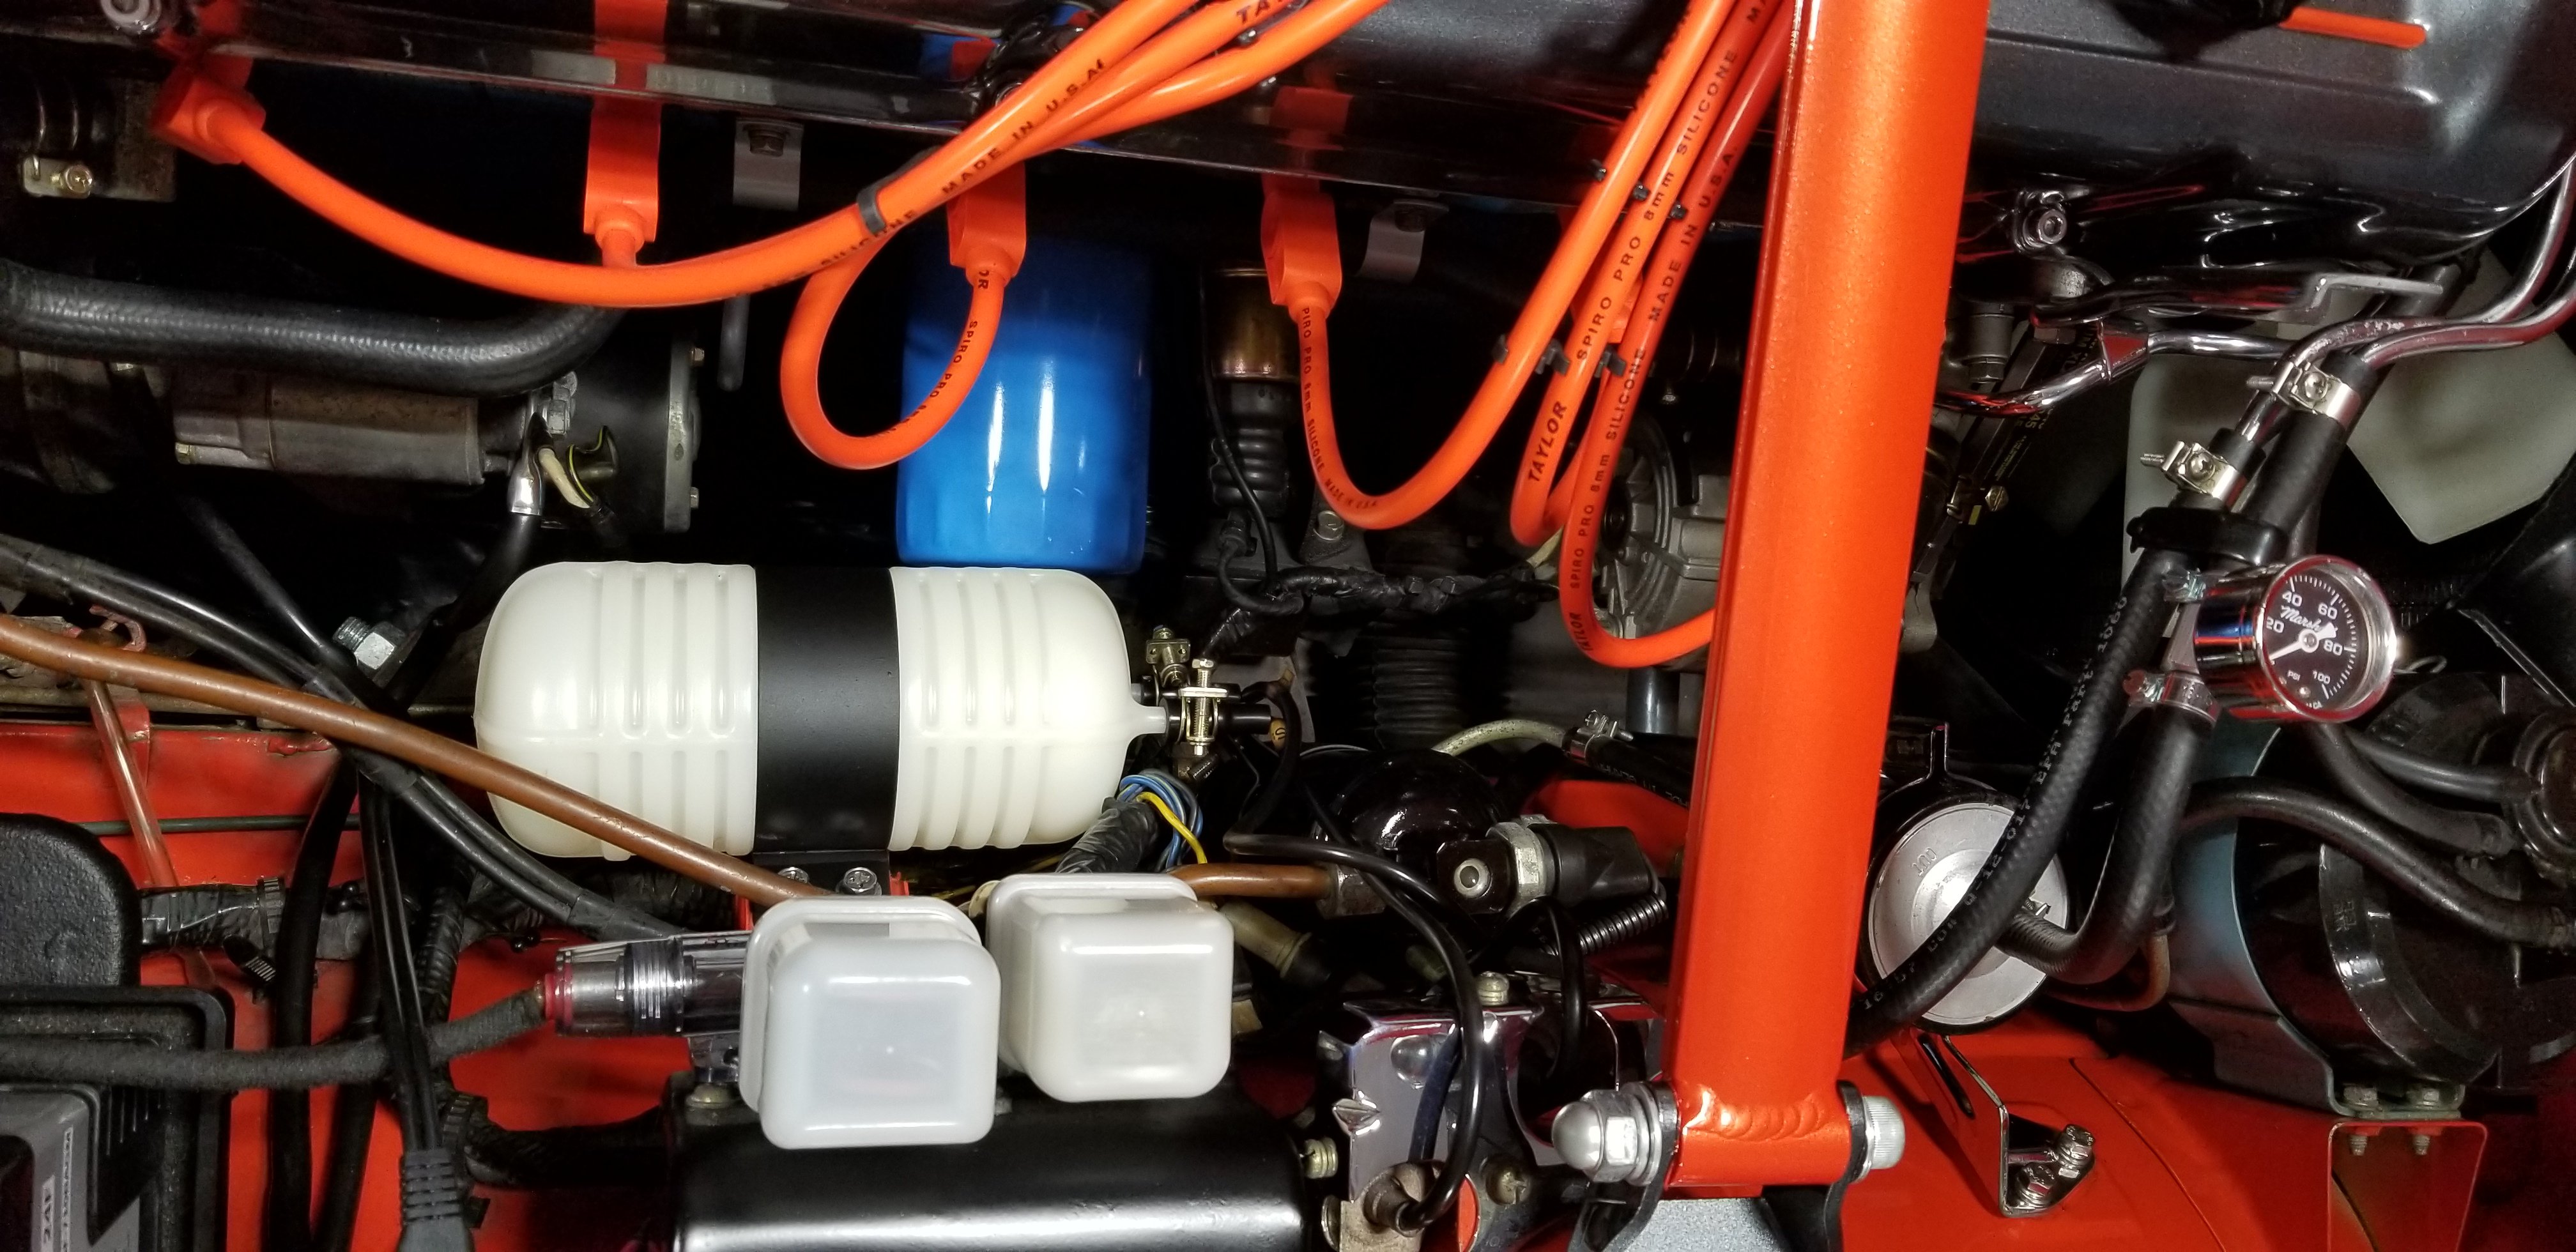
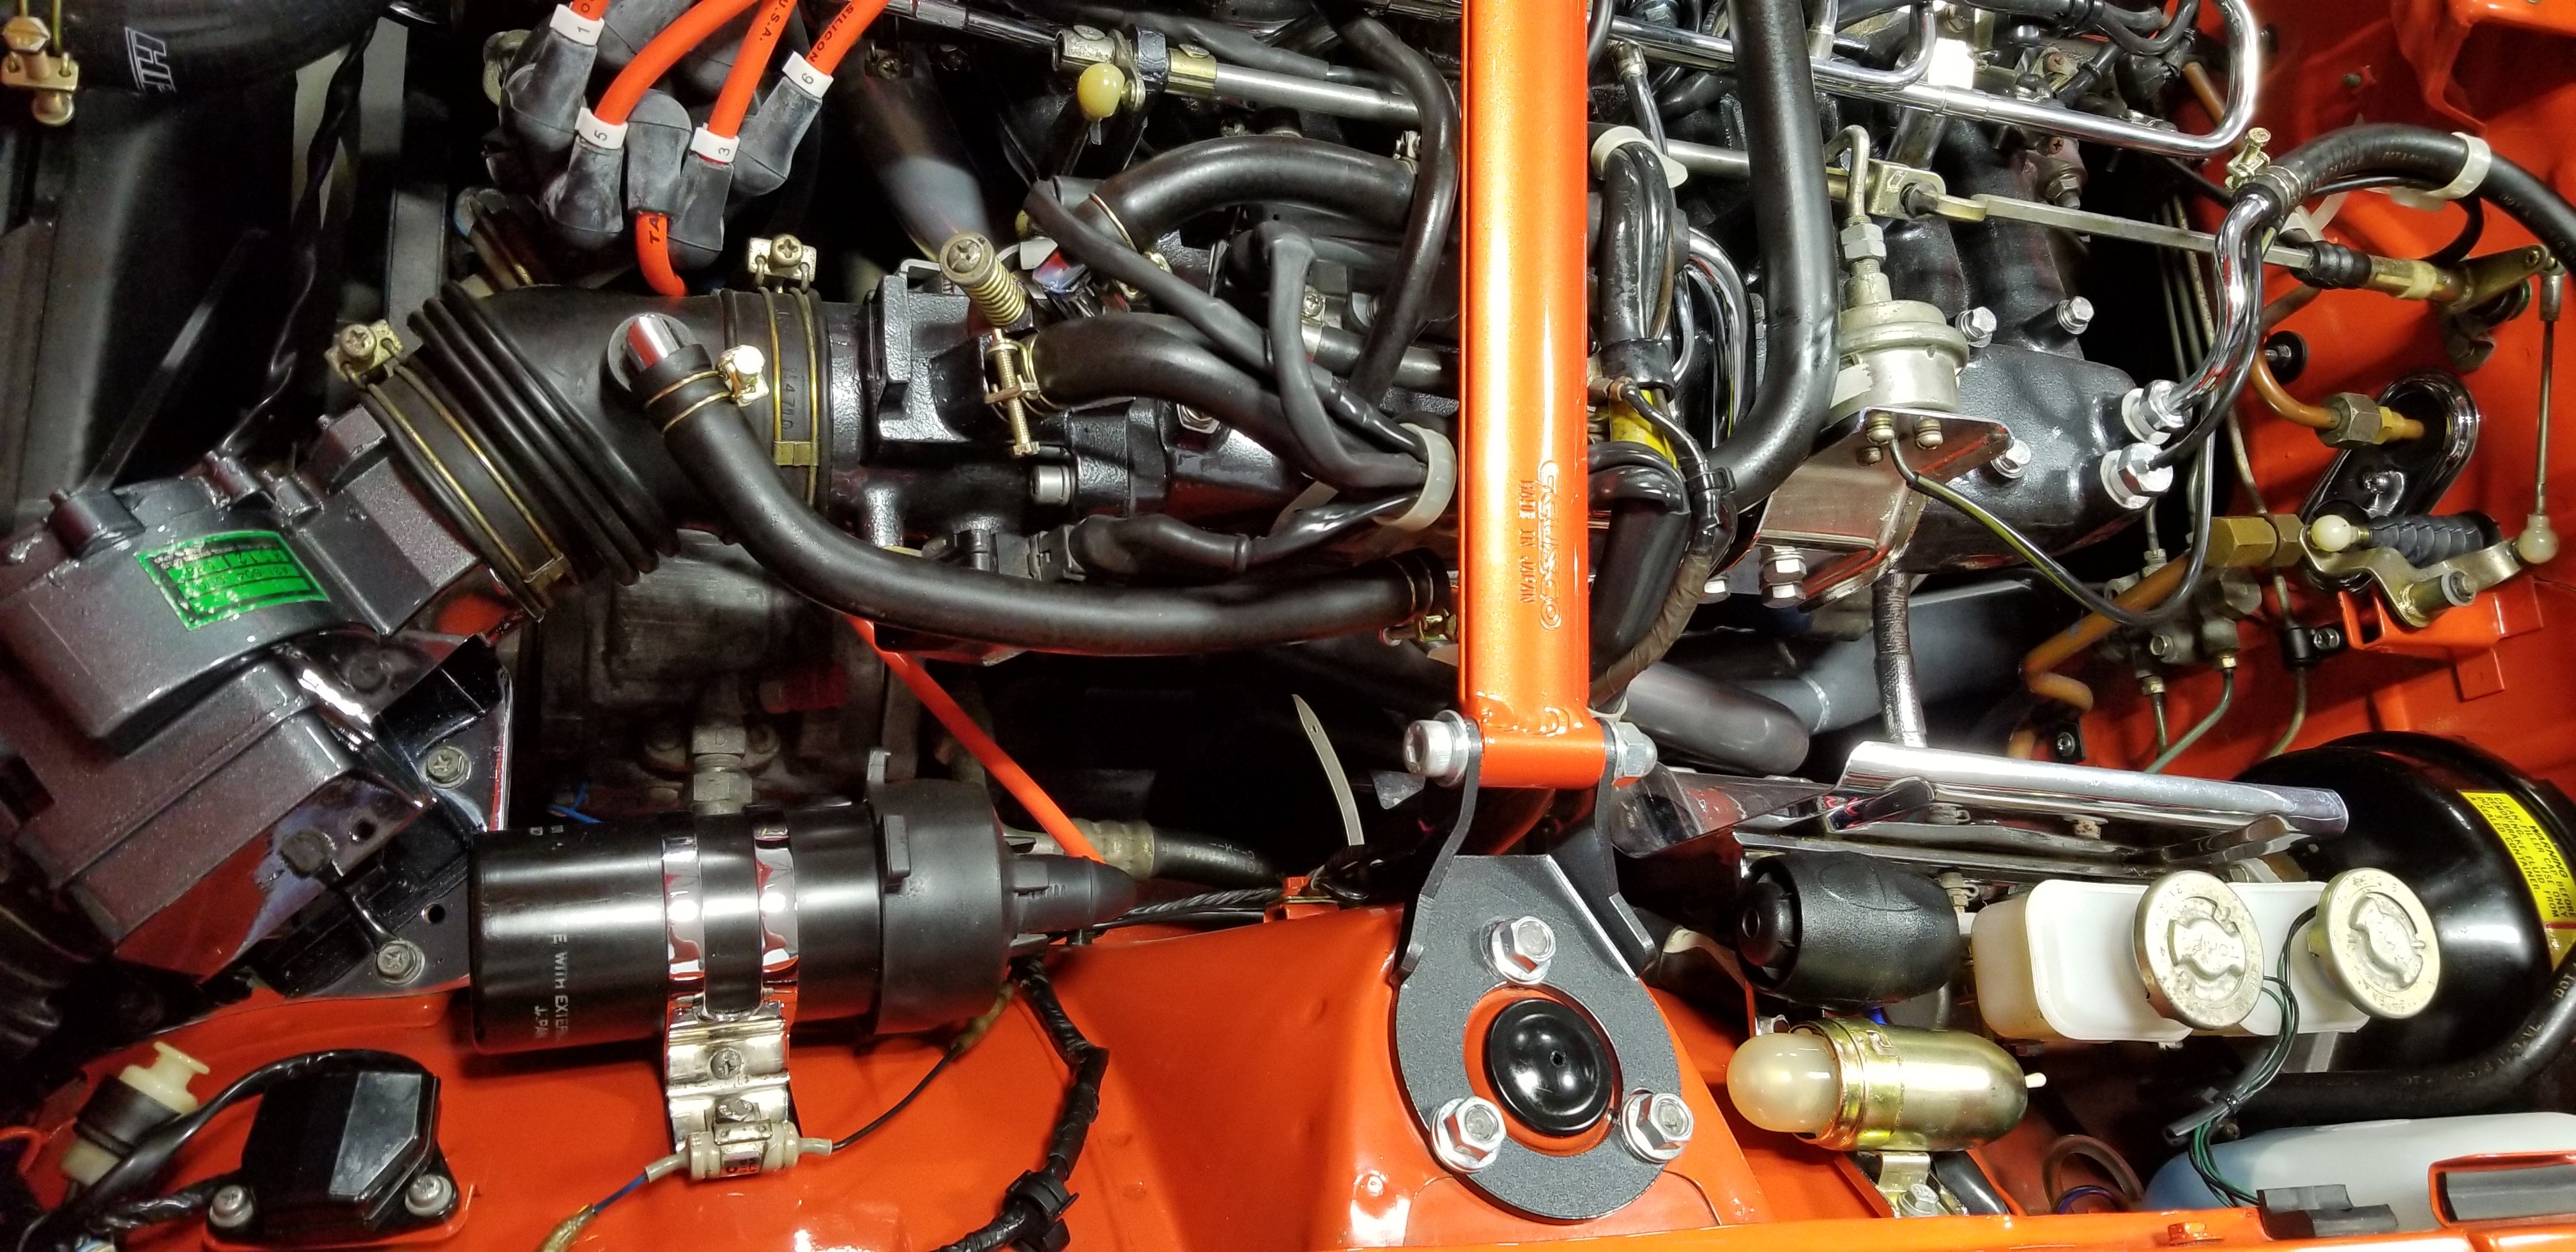
Advanced work on engine bay details: blanched the vacuum bottle, powder coated satin black a bunch of brackets and holders that were looking gnarly, refinished the HVAC dryer bottle with gloss black paint, changed most of my hose clamps to freshly zinc plated ones, painted some scratched areas on the engine bay walls and added some plastic and rubber preserver to all the harnesses and hoses.
-
280Z Restomod Progress
dmoralesbello replied to dmoralesbello's topic in S30 Series - 240z, 260z, 280z
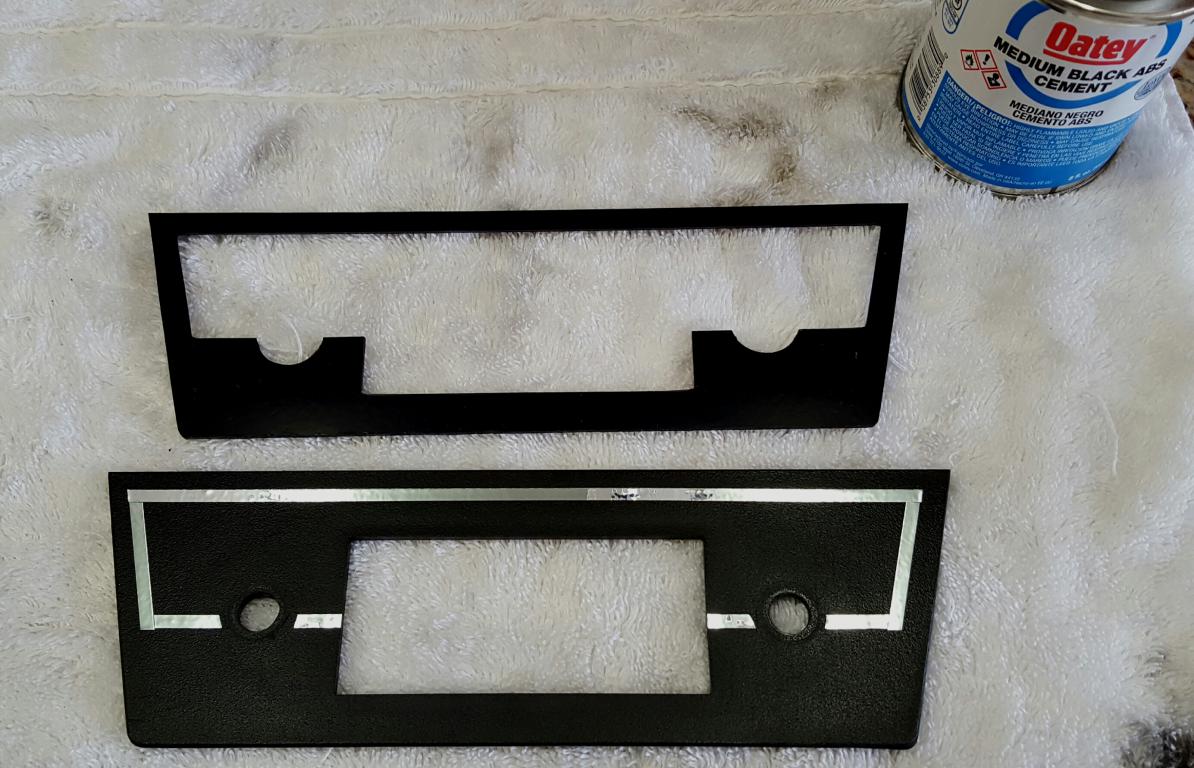
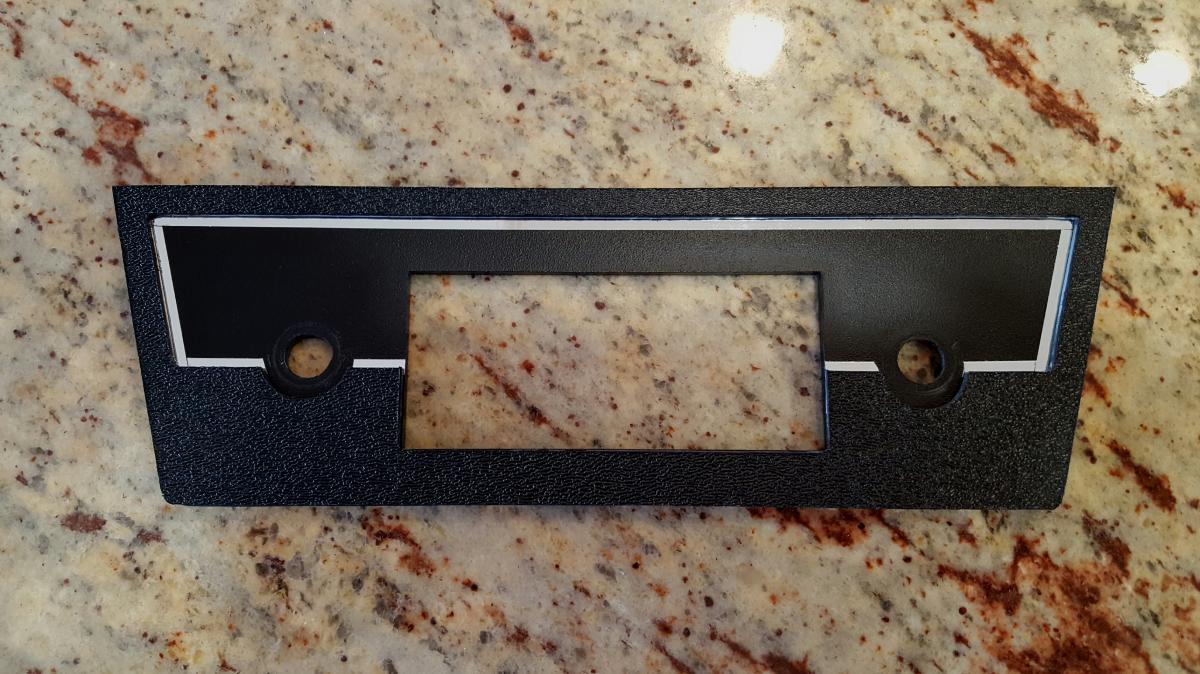
I haven't posted anything since last August but I was busy with many other life projects (like getting ready to retire!! ). I finally did a little playing with the Z and installed a Datsun Compe JDM steering wheel. It looks so much more fitting than the Momo Nero steering wheel I had on there before! It just looks proper. I also installed a "custom" fire extinguisher behind the passenger seat with an ABS plastic fabricated base hidden under the carpeting. Looks very clean and slick. Finally, I finished work on my Retrosound radio faceplate to make it look like the OEM unit by adding lettering above the knobs,
-
L.E.D hazard bulb issue...plz help!?
dmoralesbello replied to jersey280's topic in S30 Series - 240z, 260z, 280z
In the '78 280Z you need to replace 2 OEM flashers with 2 electronic flashers. One for the emergency flashers and a separate one for the turn signals. The first is found high on the drivers side kick plate above the ECU, the second is above the steering column. They are available in the exact configuration as your originals so you don't have to do any additional ground wiring and they will be totally plug 'n play. I purchased mine at Superbrightleds.com. Sorry but I don't have the part numbers at this time but you can pull your originals and they will cross reference the numbers for you. -
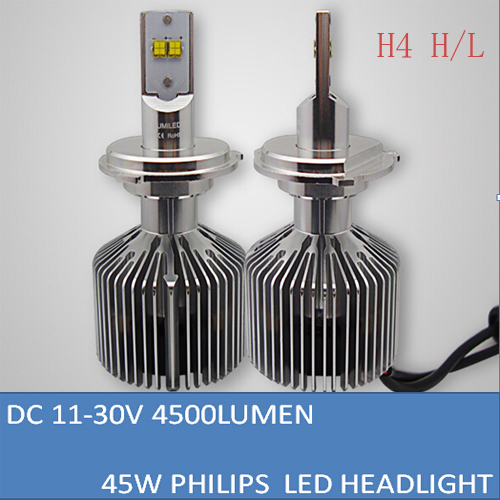
LED Headlight Bulbs, anyone tried them?
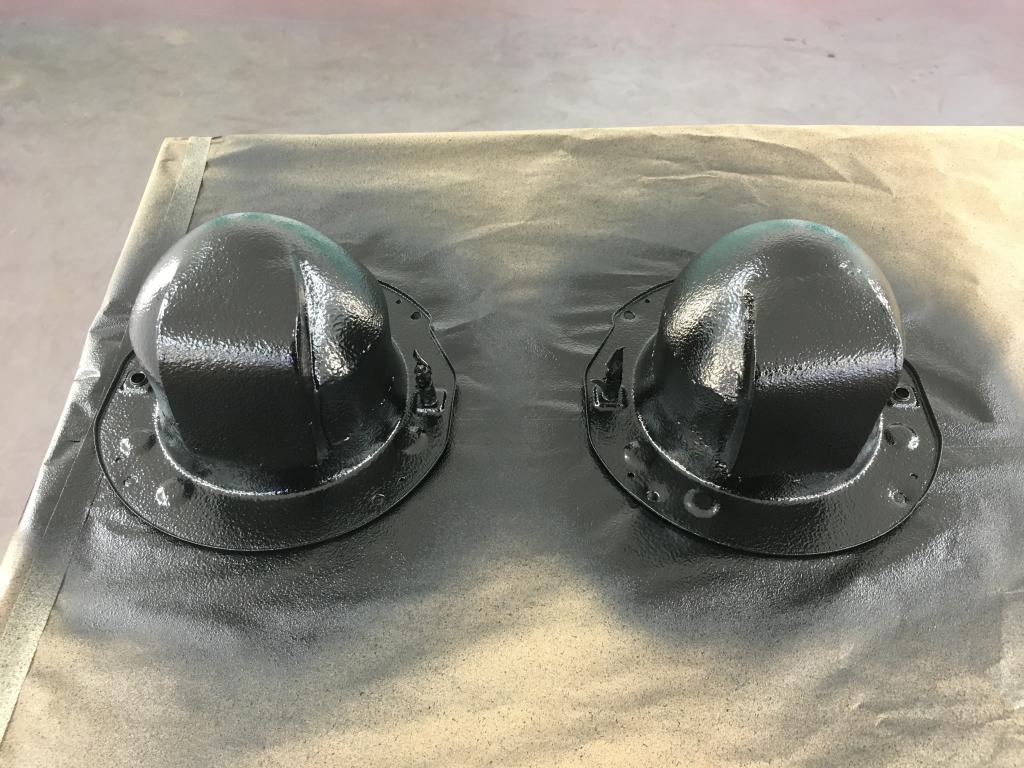
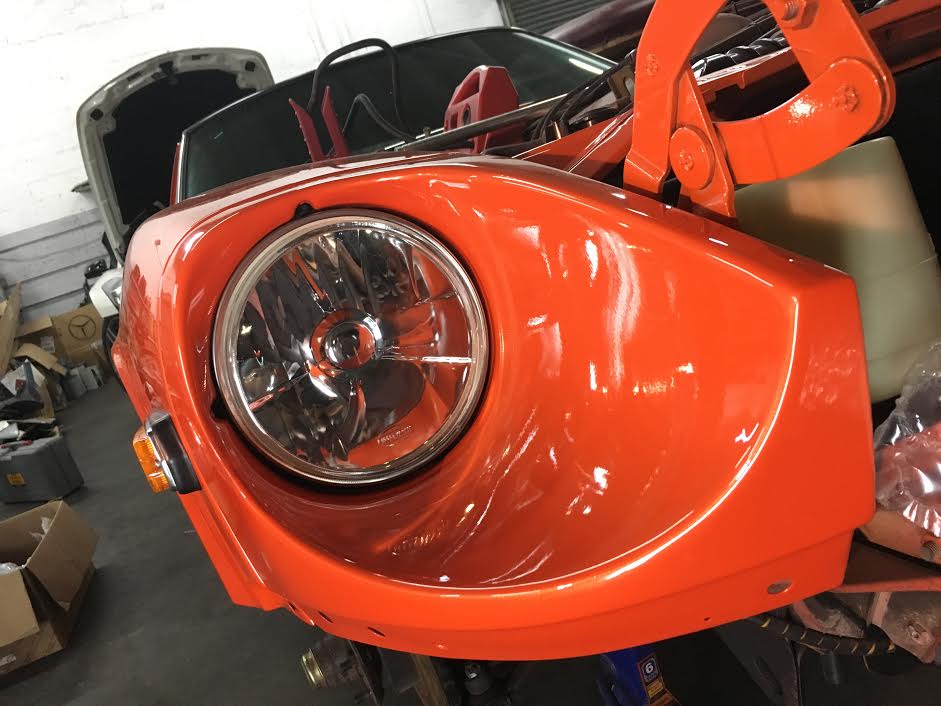
dmoralesbello replied to Samurai7one's topic in S30 Series - 240z, 260z, 280z
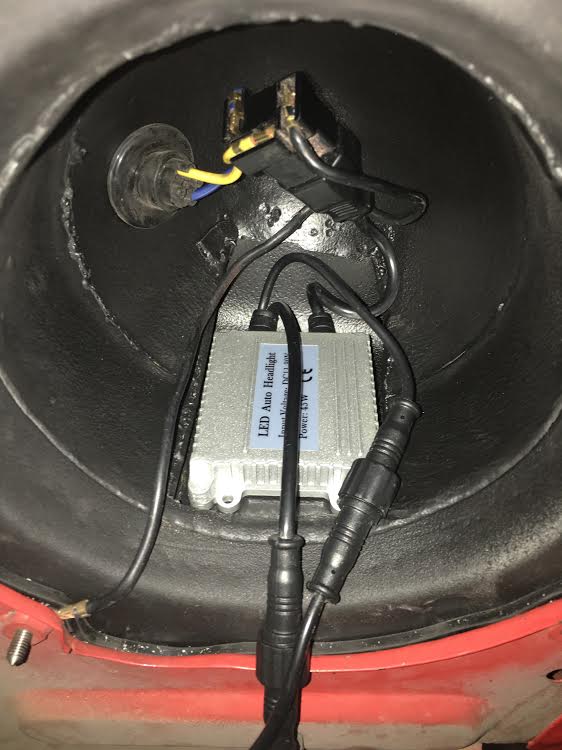
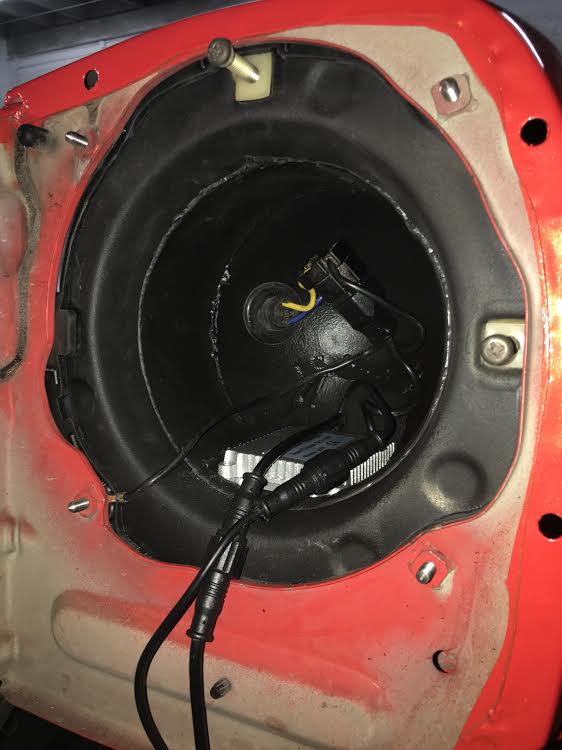
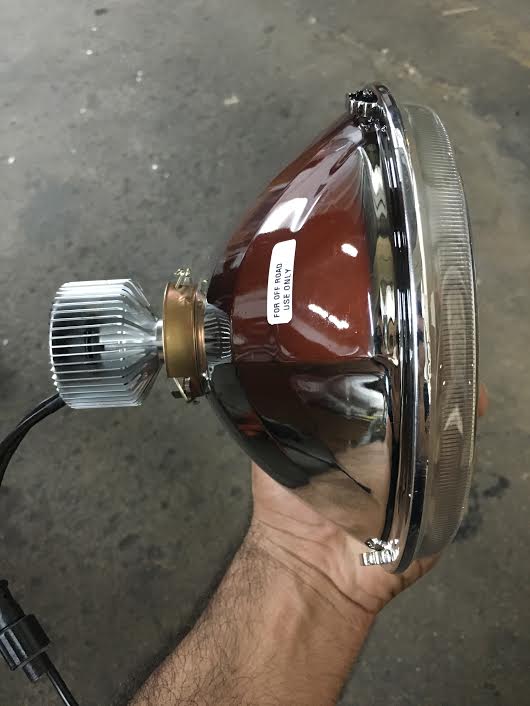
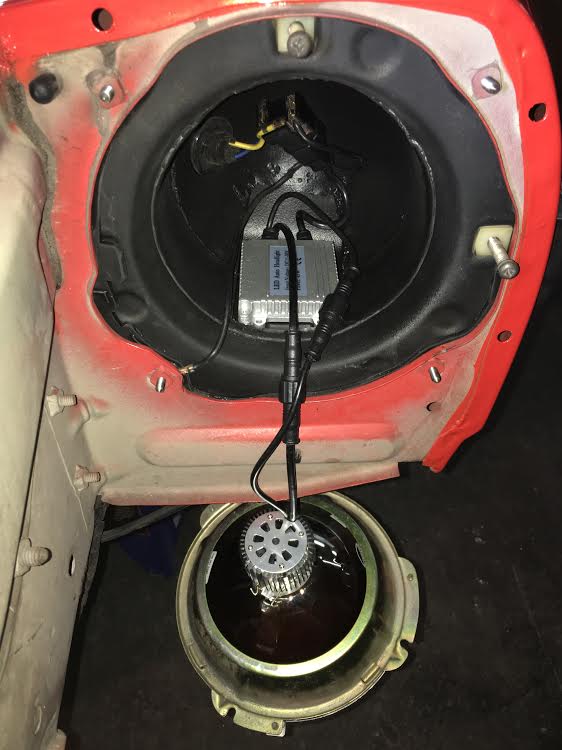
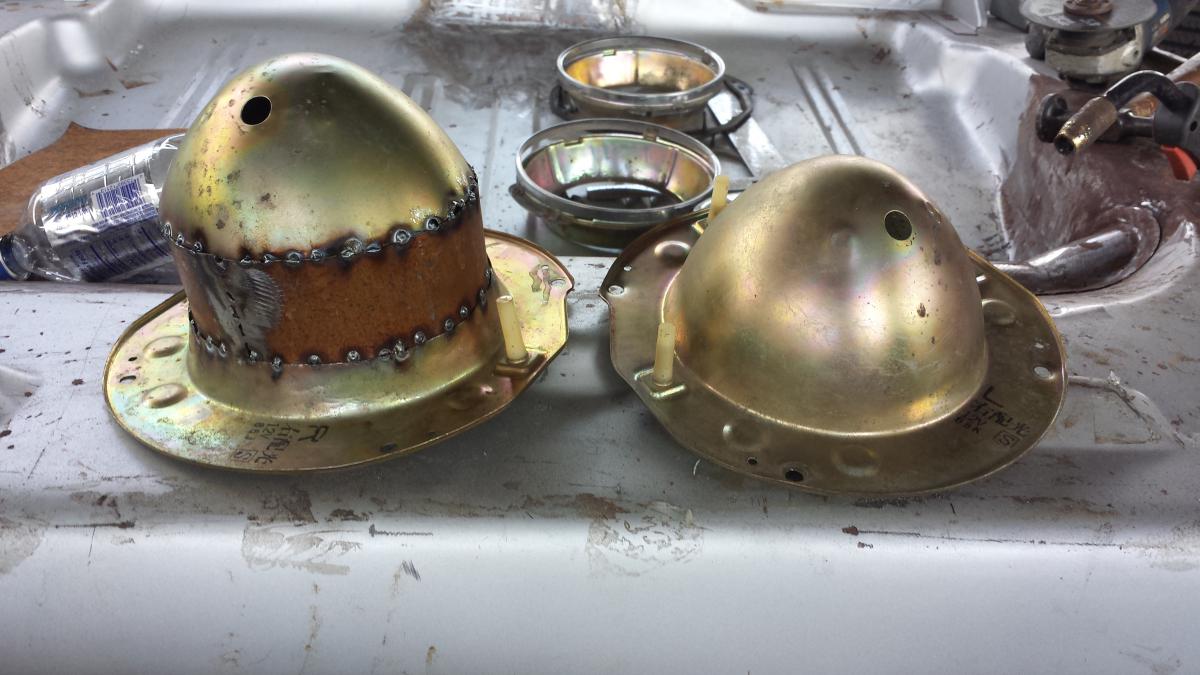
dmoralesbello TRADER FEEDBACK 0 0 0 TOTAL RATING 0% Always Here Members 3 211 posts LocationKey Biscayne, FL, USA Report post Posted December 9, 2015 (edited) Here's an update on the headlight bucket extension mod that we started a while back but are only now in the process of installing. A 3"extension was welded in and a "pocket" for the LED ballast was incorporated into the back of the bucket. After finishing off with black anticorrosive paint a 0.5" hole was drilled on the engine side of each bucket, fitted with a rubber grommet, the OEM wires were fed through and the LED ballast placed in its pocket and held with 3M double stick trim tape. The Autopal headliamp with the LED light installed has the cooling fins protruding from the back plus the ballast but fits nicely into the modified extended bucket. The remaining installation is SOP. The intensity, quality and focus of the light emanating from the LED bulbs is excellent and the final look is very close to stock. Edited November 12, 2016 by dmoralesbello
-
280Z Restomod Progress
dmoralesbello replied to dmoralesbello's topic in S30 Series - 240z, 260z, 280z
Thanks for the compliments Brad. The power windows kit that I used is from Italian manufacturer Colibri. I did a search and found it on Ebay. The other brand I've seen used extensively is SPAL. There are a couple of write ups on this topic in the Classic Z Forum as well. Good luck with your project. -
Looking for New Steering Rack Feedback
dmoralesbello replied to Samurai7one's topic in S30 Series - 240z, 260z, 280z
Excellent write up. Thanks for sharing. -
280Z Restomod Progress
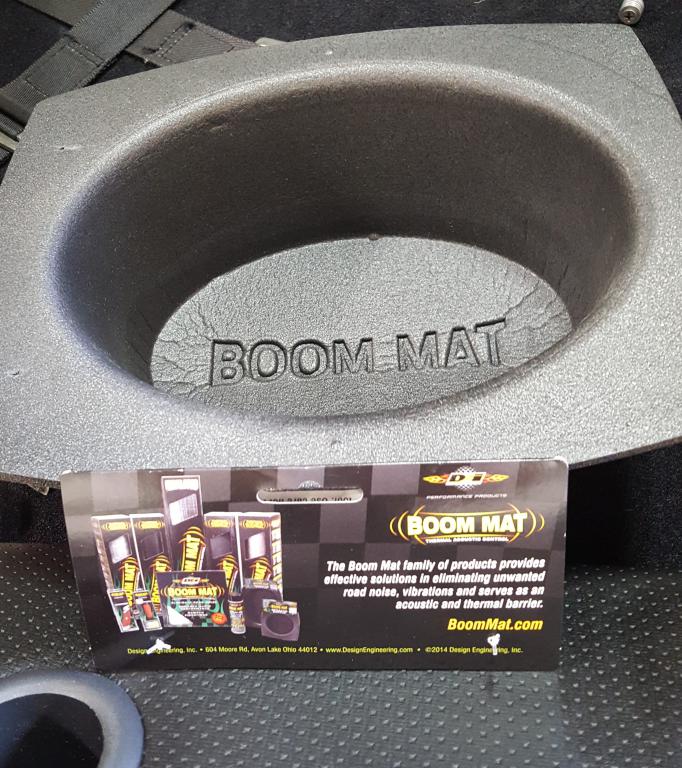
dmoralesbello replied to dmoralesbello's topic in S30 Series - 240z, 260z, 280z
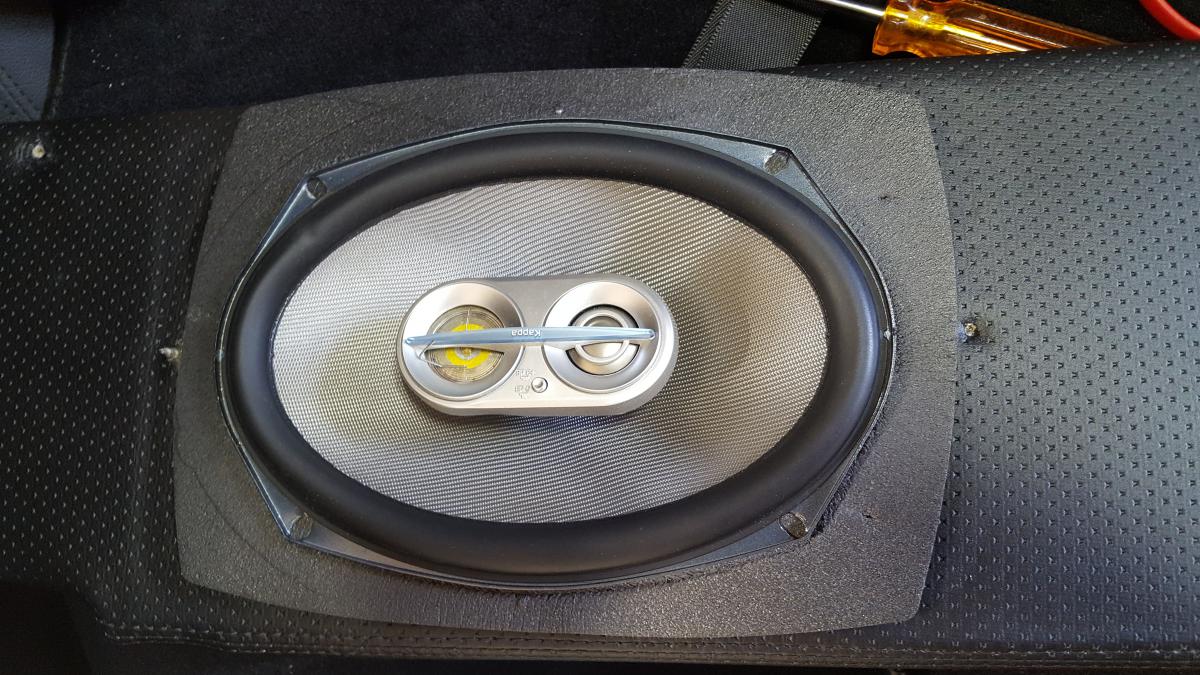
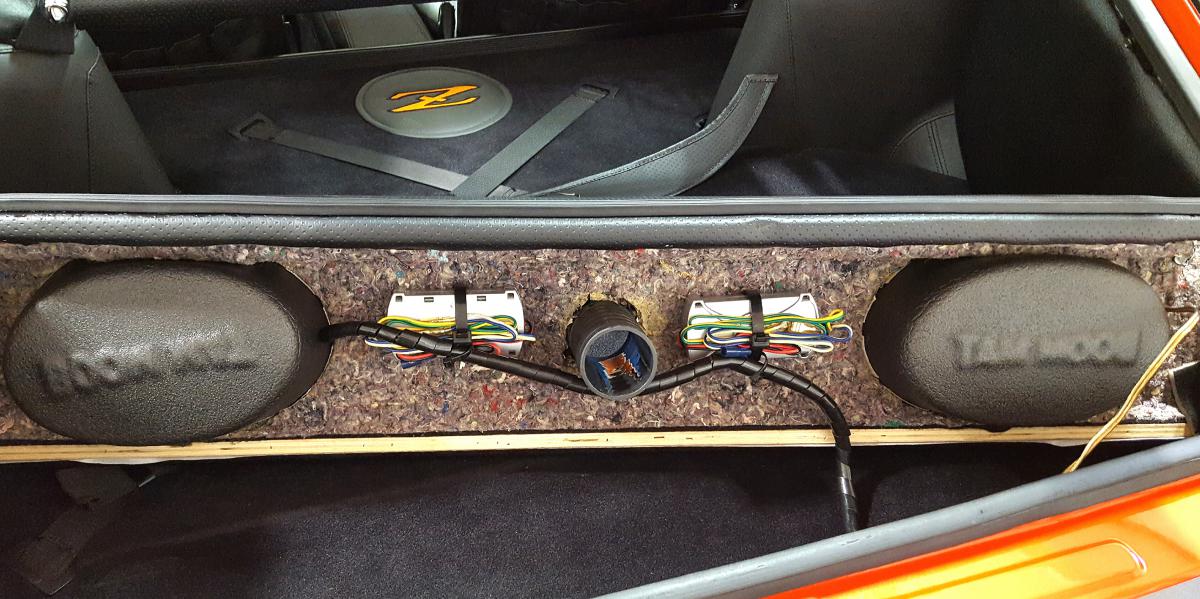
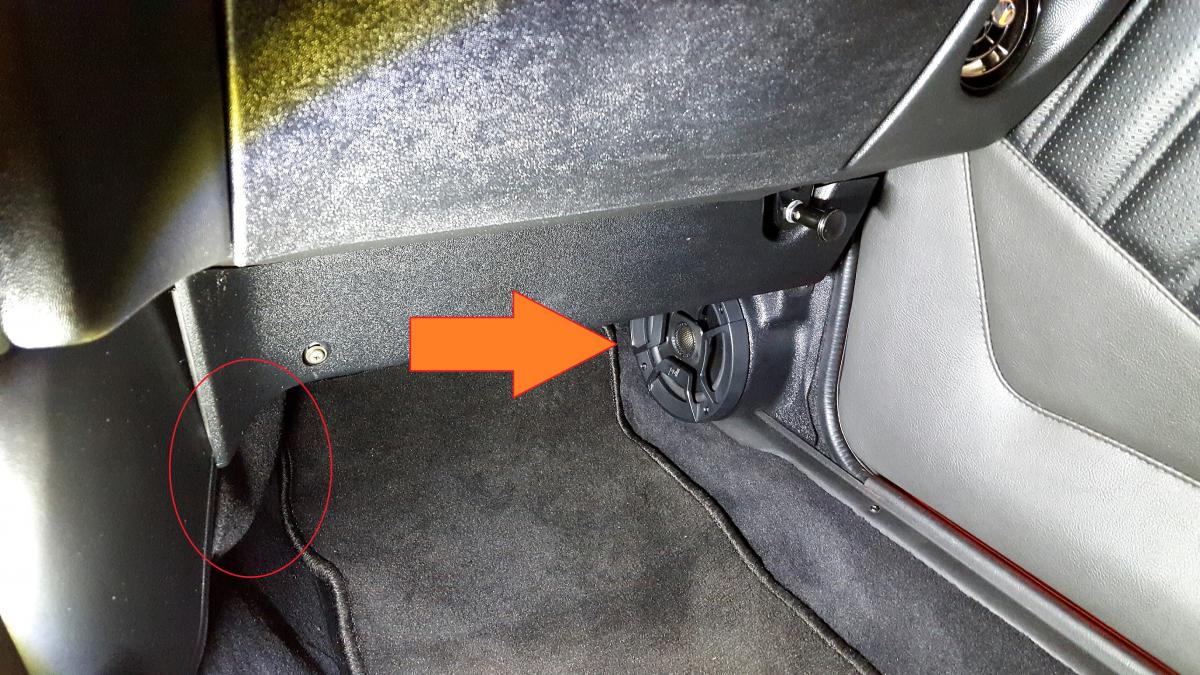
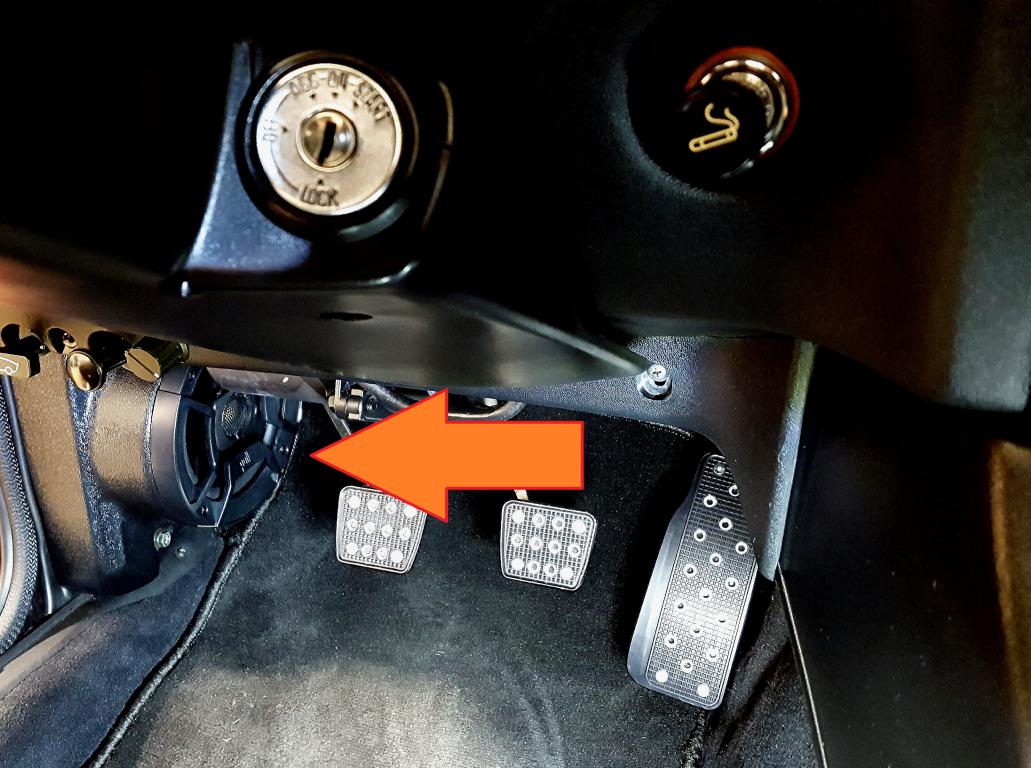
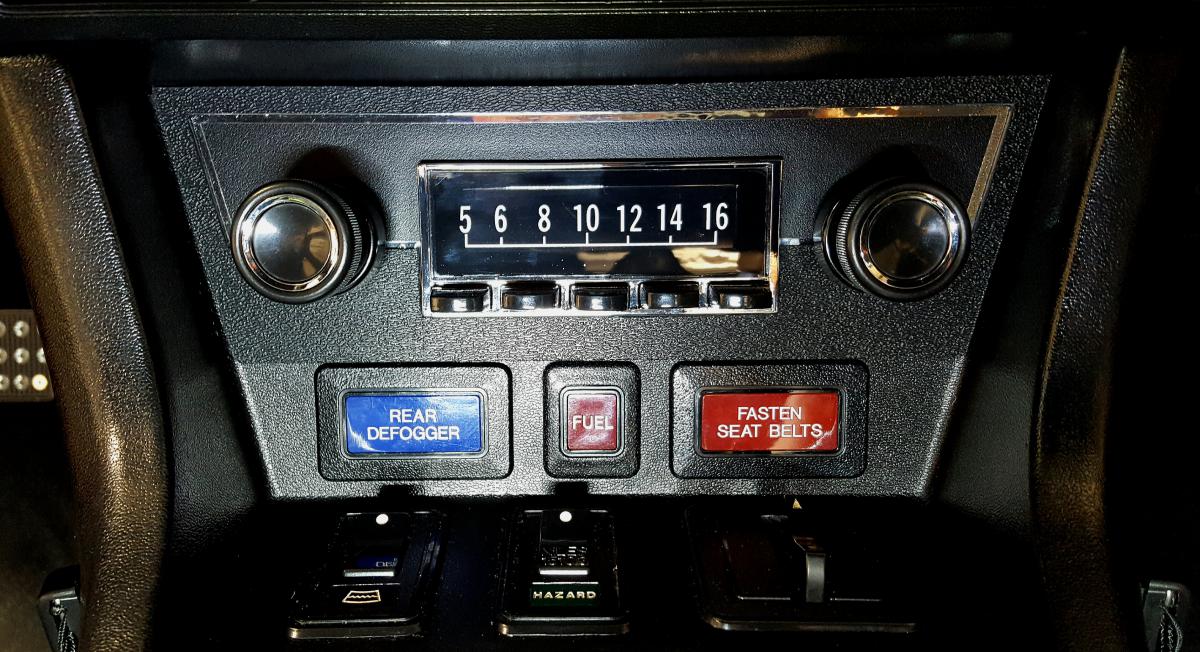
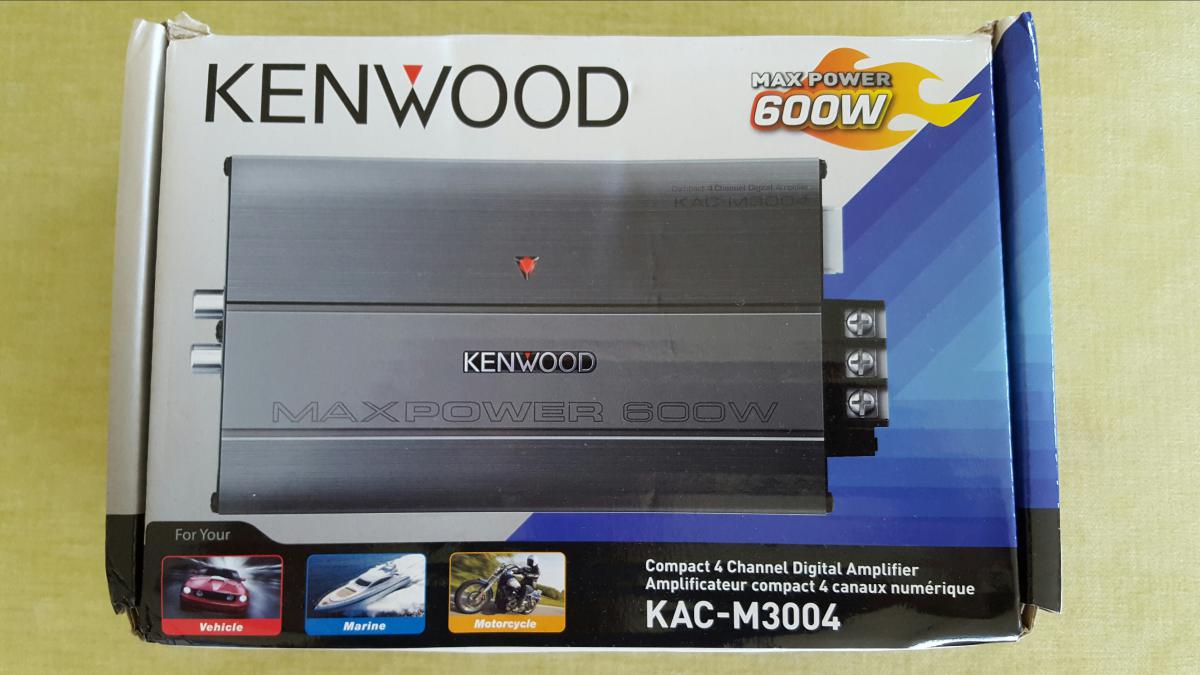
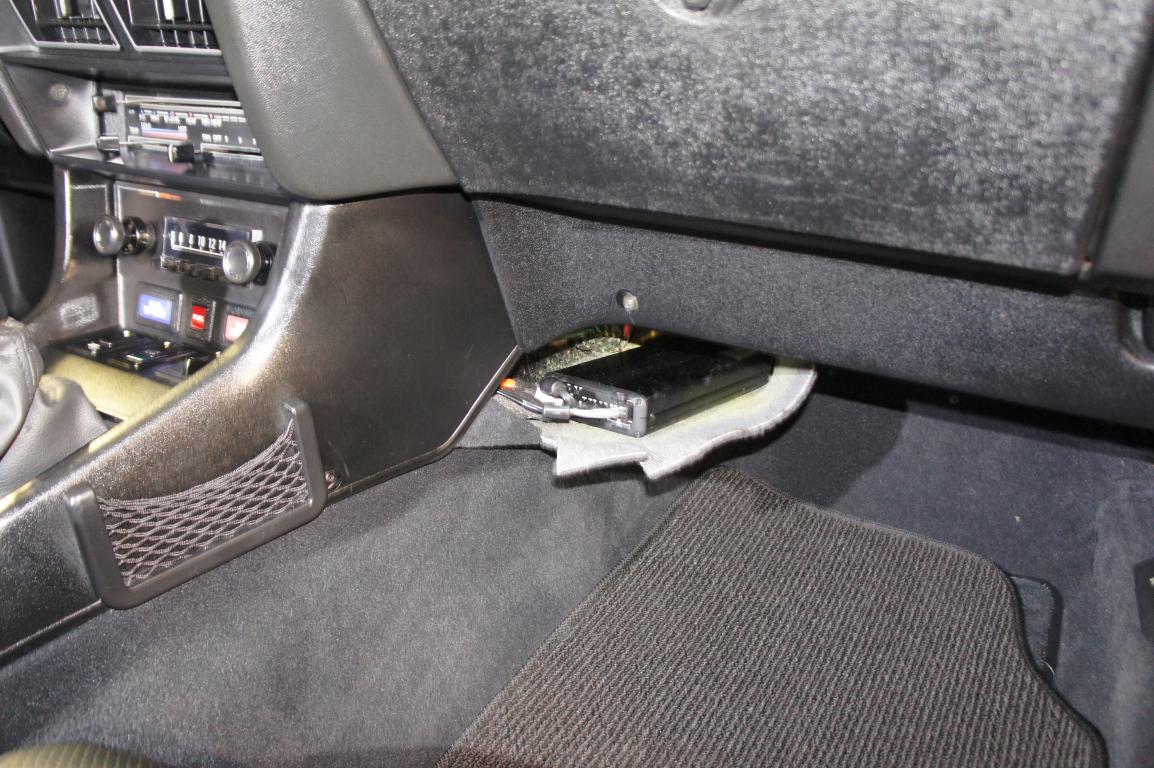
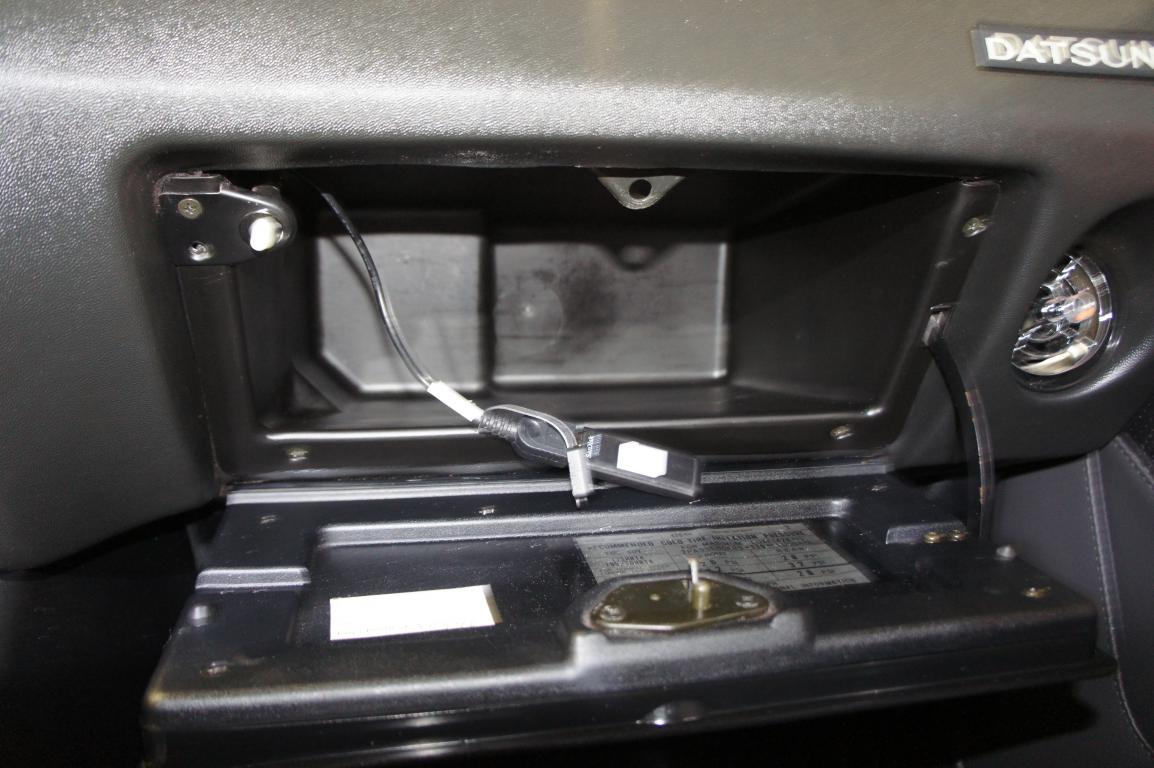
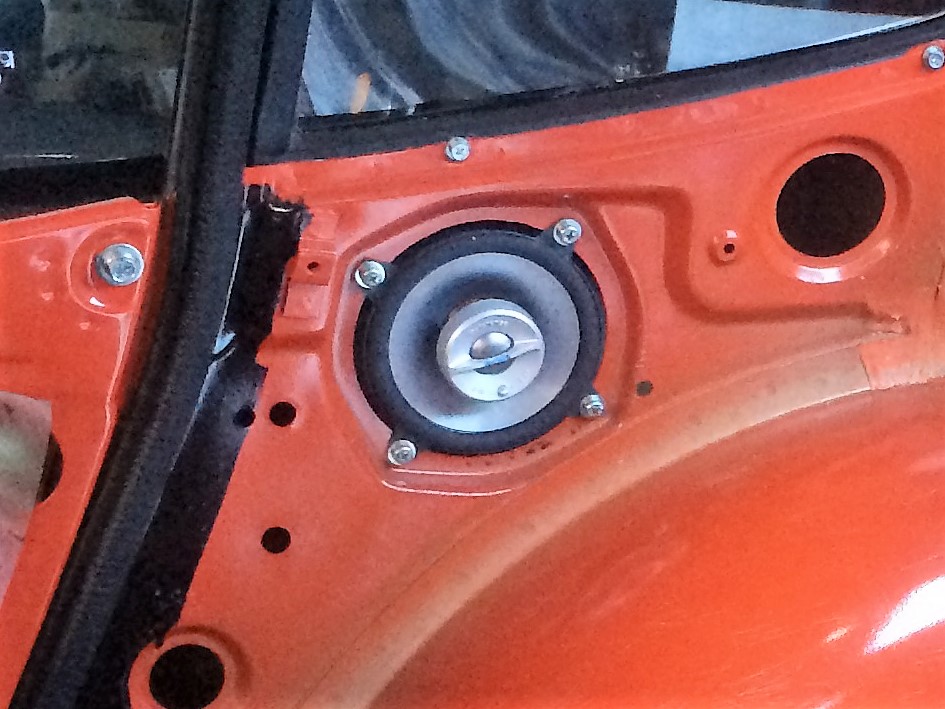
Update on my stereo setup: I wasn't totally satisfied with the underdash location and the quality of those speakers (front) so I trashed those and decided to buy the kick panel speaker pods (from Derek on the sister Classic Z Forum and Ebay) and install a pair of 5.25" Polk Audio coaxials in those pods. I also changed my generic amplifier to an excellent Kenwood unit but placed it similarly under the carpet over the transmission hump. I left the 4" Infinity Kappa coaxials in the stock 280Z position under the quarter windows and the 6x9 Infinity Kappas in the MSA rear deck enclosure acting only as woofers (crossovers and tweeters disconnected). I used soft enclosures around every single speaker. I kept the same Retrosound head unit that I had before but tweaked the faceplate a bit with a textured ABS overlay to look more like the original Datsun faceplate. The remote USB connections are in the glovebox and in the armrest compartment. In conclusion: stereo sounds amazing and it all might pass for OEM (maybe). Pics attached.
-
280Z Restomod Progress
dmoralesbello replied to dmoralesbello's topic in S30 Series - 240z, 260z, 280z
I installed a set of switchback LED boards from Zleds. With clear lenses on the front turn signal housings, the lights are white driving lights which switch to amber sequential turn signal lenses when needed. In conclusion: added safety and added cool. -
Getting rid of that rat smell
dmoralesbello replied to theczechone's topic in S30 Series - 240z, 260z, 280z
I have used a solution consisting of 4 parts Clorox, 1 part Pinesol and 5 parts water to disinfect, clean up and eliminate most pet smells very effectively. Cheap and works like a charm. -
280Z Restomod Progress
dmoralesbello replied to dmoralesbello's topic in S30 Series - 240z, 260z, 280z
Good question but although I haven't had the chance to put it on the scales I'm pretty close to stock OEM weight for a '78 280Z. The only important additional weight I could think of is the soundproofing material which might be 30 extra lbs. and the Zpowersteering unit which is about 20lbs. So total I would guess 50 to 60 lbs over stock. -
Dyno Tune Day Today - 503 WHP!! :-)
dmoralesbello replied to LS3Z's topic in S30 Series - 240z, 260z, 280z
very nicely done car. Can we see some more detailed pics?