dmoralesbello
-
Posts
254 -
Joined
-
Last visited
-
Days Won
3
Content Type
Profiles
Forums
Blogs
Events
Gallery
Downloads
Store
Everything posted by dmoralesbello
-
Excellent looking parts. Are you going to install them?
-
Whatever happened to those promised pics?
-
 Welcome back, dude!
 -
Front side marker lights as turn signals
dmoralesbello replied to dmoralesbello's topic in S30 Series - 240z, 260z, 280z
That's an interesting option. You mean leave the original 1156 socket and bulb, snip the ground wire and splice it into the intermittent hot front turn signal wire (green/white or green/red) ? I guess the turn signals would not be synchronized (like in some cars) but definitely much less work. Would it work with LED bulbs? -
Front side marker lights as turn signals
dmoralesbello replied to dmoralesbello's topic in S30 Series - 240z, 260z, 280z
I decided to do the fronts only to mimic what I see in today's vehicles. I've yet to see a contemporary car with rear fender turn signals. I think those front fender turn signals are meant mainly to warn vehicles in your blind spot that might not see your rear turn signals due to their advanced position in relation to your vehicle as to your intentions to turn or change lanes. -
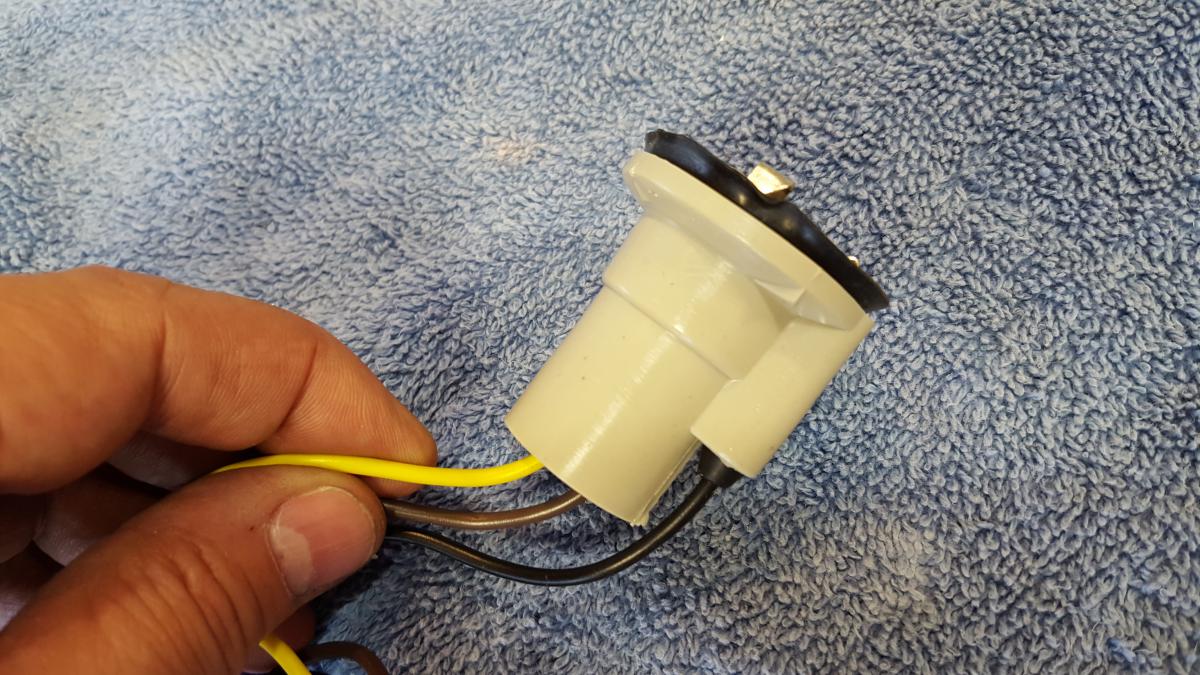
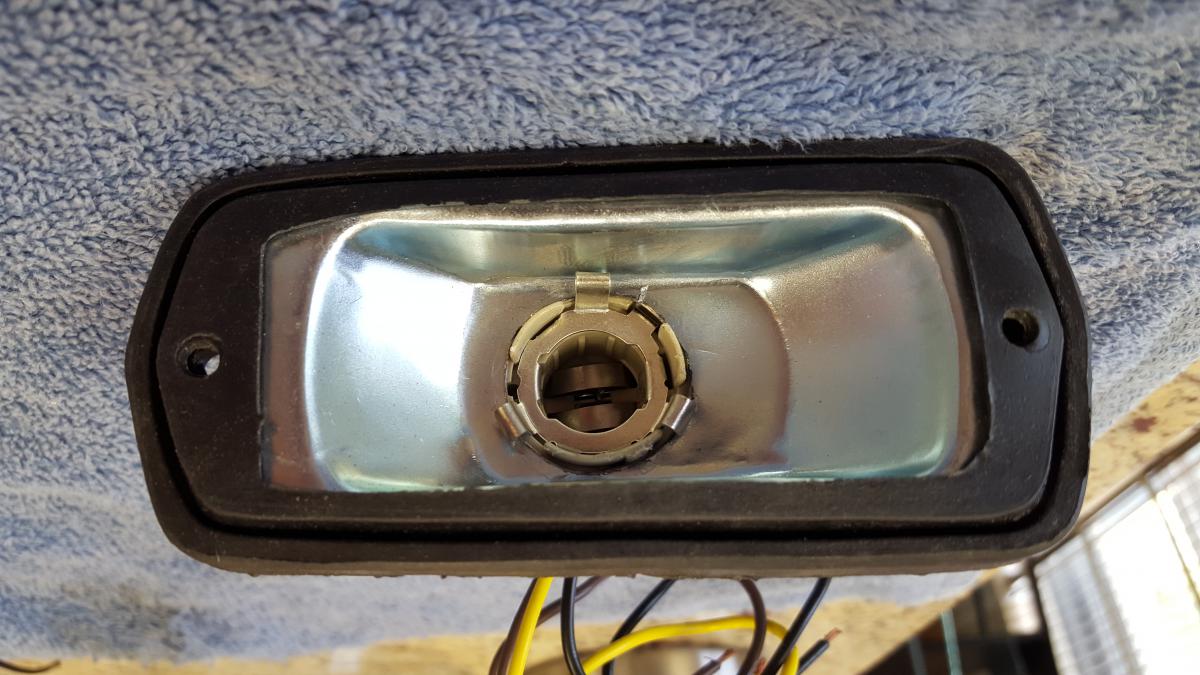
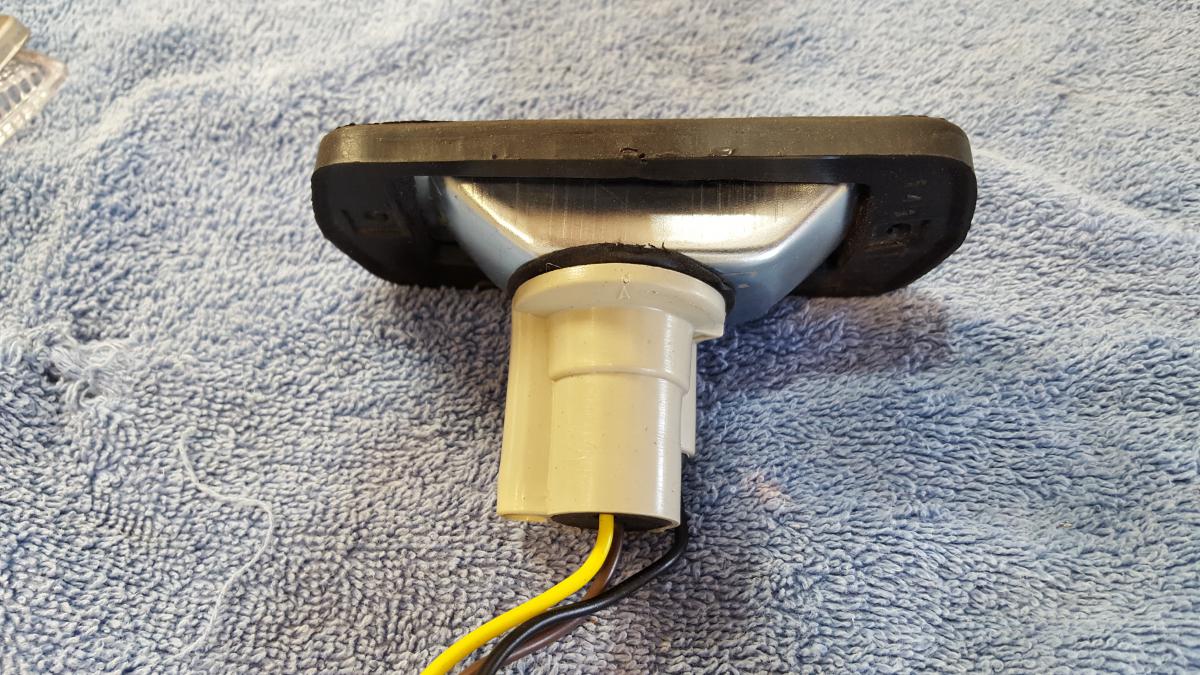
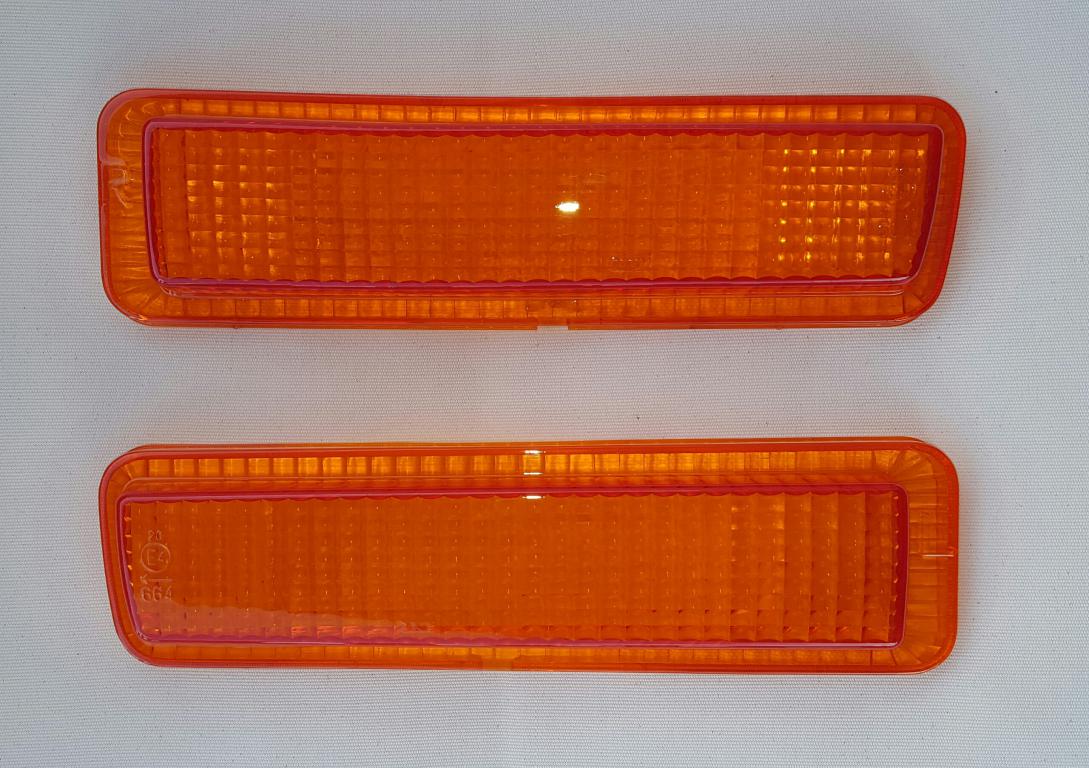
For some time I felt I wanted to update the safety aspect of the 280Z by making the front fender side marker lights work as turn signals along with the front turn signals on the grille. Since I didn't want to experiment with my stock lights I purchased a set of marker lights from Thailand on Ebay. The quality of the metal case was surprisingly good, much like (or perhaps better than) the Datsun part. I pulled it apart and removed the 1156 socket, widened the resulting opening to accept a GM 1157 socket which snapped into place and sealed the joint with black silicone. I did have to lift the front end of the car in order to remove the fender liner and do the electrical work which included a new 3 wire connector and an extra wire from the front turn signals to each side marker ( green/red on the left side and green/white on the right). Now the Z turn signals incorporate the front side markers and bring that aspect to today's safety standards. https://youtu.be/45hY5xX59rA

-
280Z Restomod Progress
dmoralesbello replied to dmoralesbello's topic in S30 Series - 240z, 260z, 280z
I think this was my last project on the Z for the summer: make my front side marker lights work as turn signals as well. Took a little more effort than I anticipated as I modified a set of cheap marker lights from Thailand (Ebay) and saved my OEM lights in case anything went wrong but it worked out well and I'm really happy with the results since it is an improvement in safety and visibility. Here are a couple of pics and I'll write up the mod in detail in a separate post.
-
280Z Restomod Progress
dmoralesbello replied to dmoralesbello's topic in S30 Series - 240z, 260z, 280z
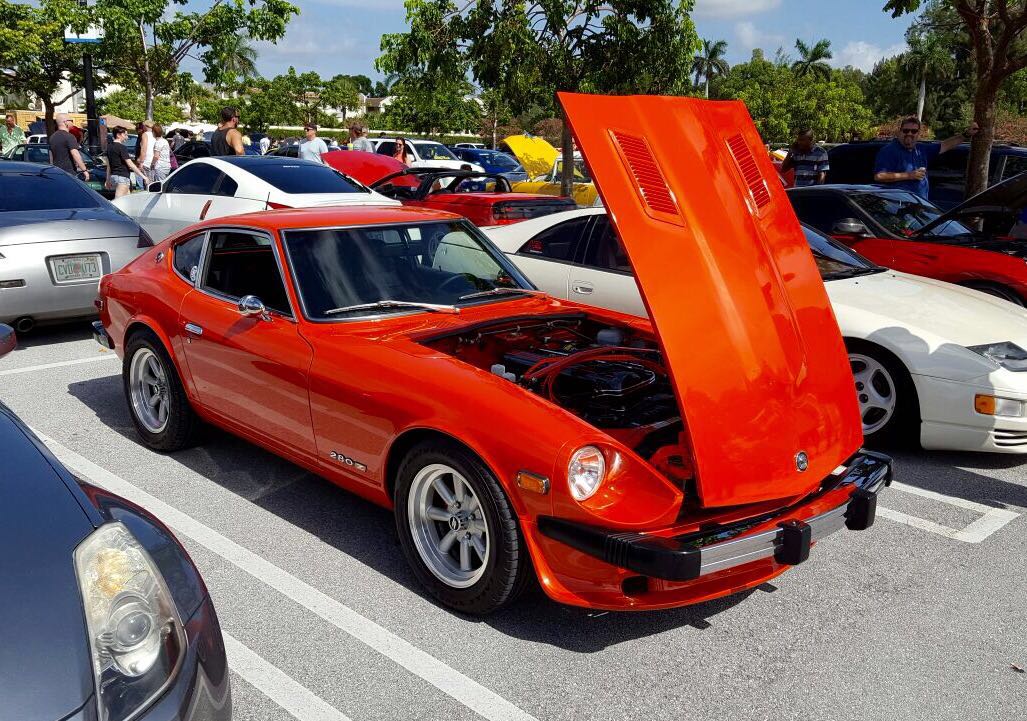
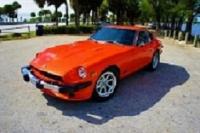
Took the Z out to it's first meet post restoration at Cars and Coffee in Palm Beach today. It was a perfect 150 mile ride with great weather, excellent music, my 14 year old son and lots of great cars. The reaction to the car was fantastic and got to meet a couple of the guys from the South Florida Z Car Group. Doesn't get much better than that.
-
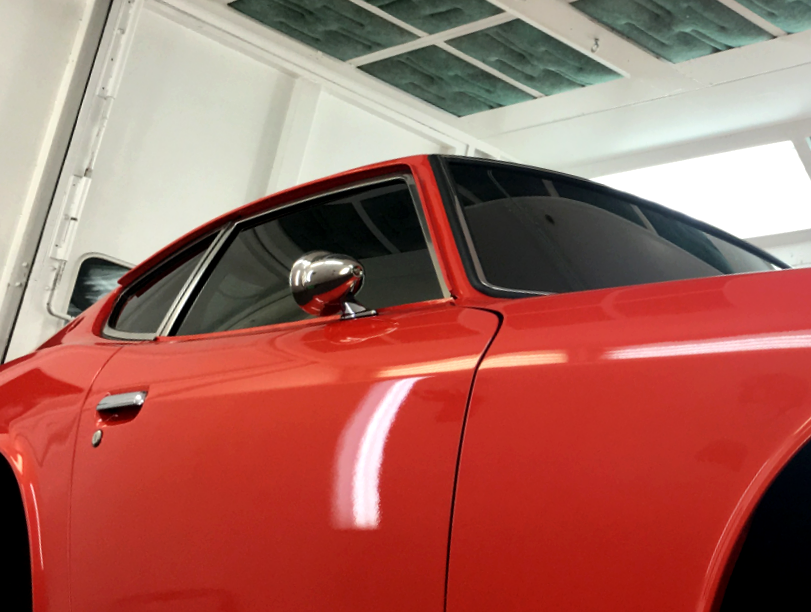
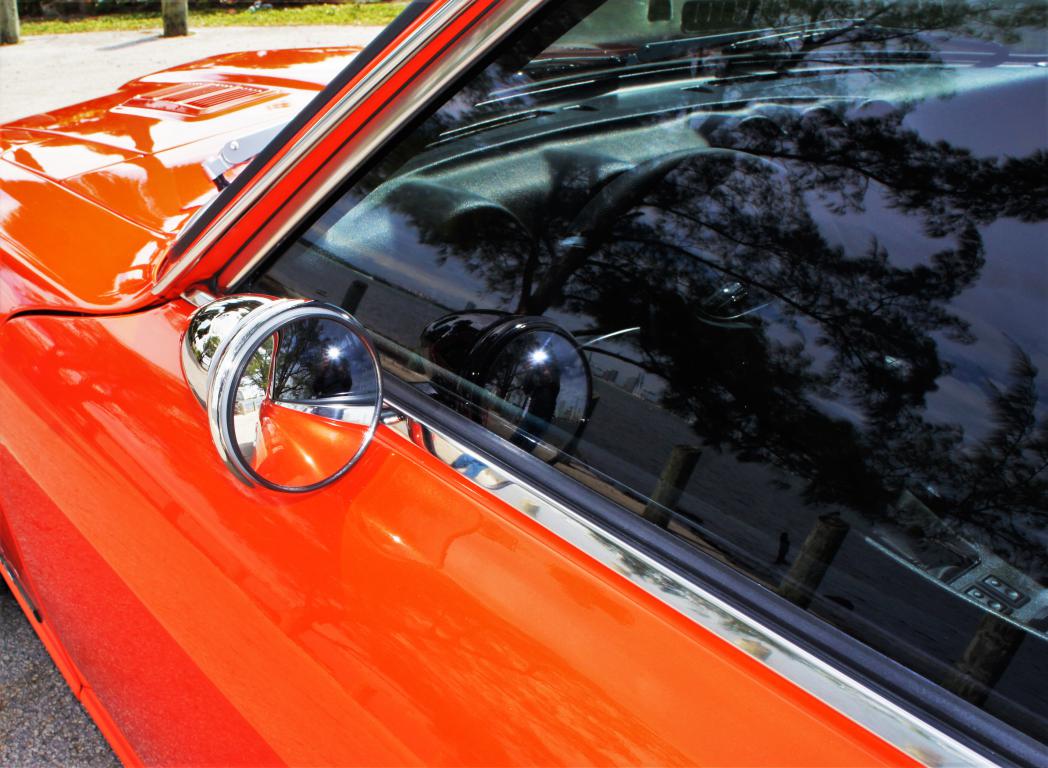
Bullet mirrors useless
dmoralesbello replied to rickyellow zee's topic in S30 Series - 240z, 260z, 280z
I have bullet mirrors as well (not from MSA but from a UK company) which are 3.5" in diameter. They are mounted in the stock positions and I found them both totally useless until I stuck 3.5" convex mirrors (Ebay) on BOTH of them. Fortunately the fit is exact and you can barely tell they're on there. They're not amazingly useful but once you get used to them you can actually see out of them and have a decent field of view. Regardless, I still really like the way they look.
-
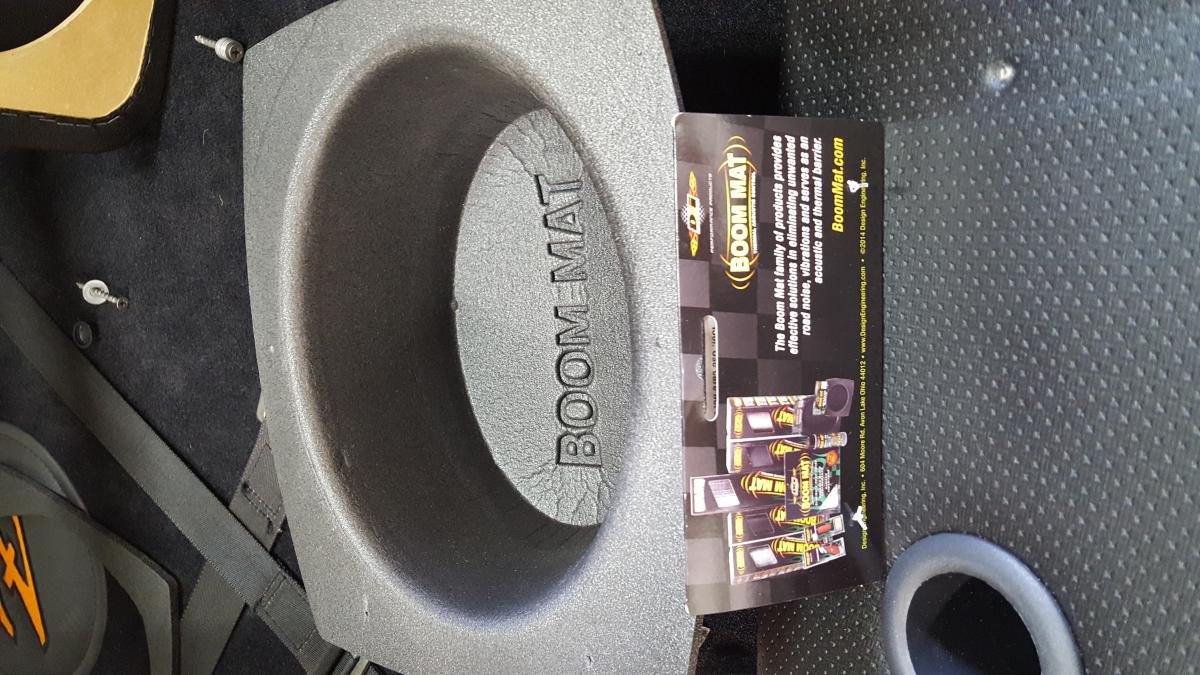
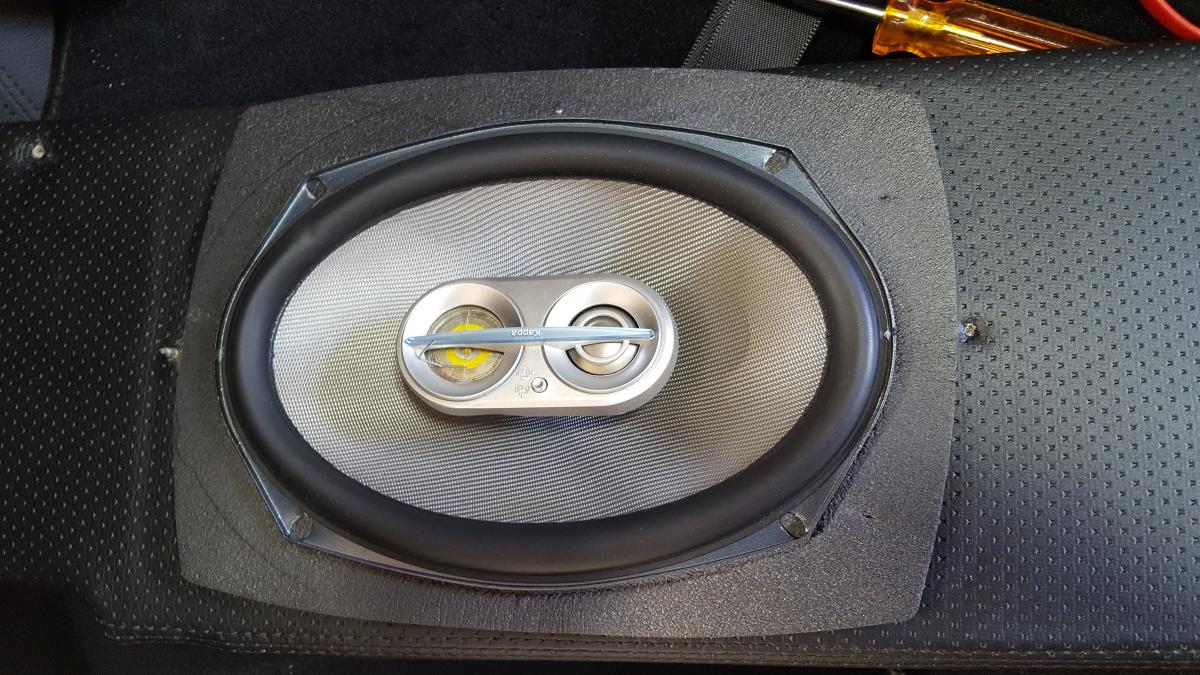
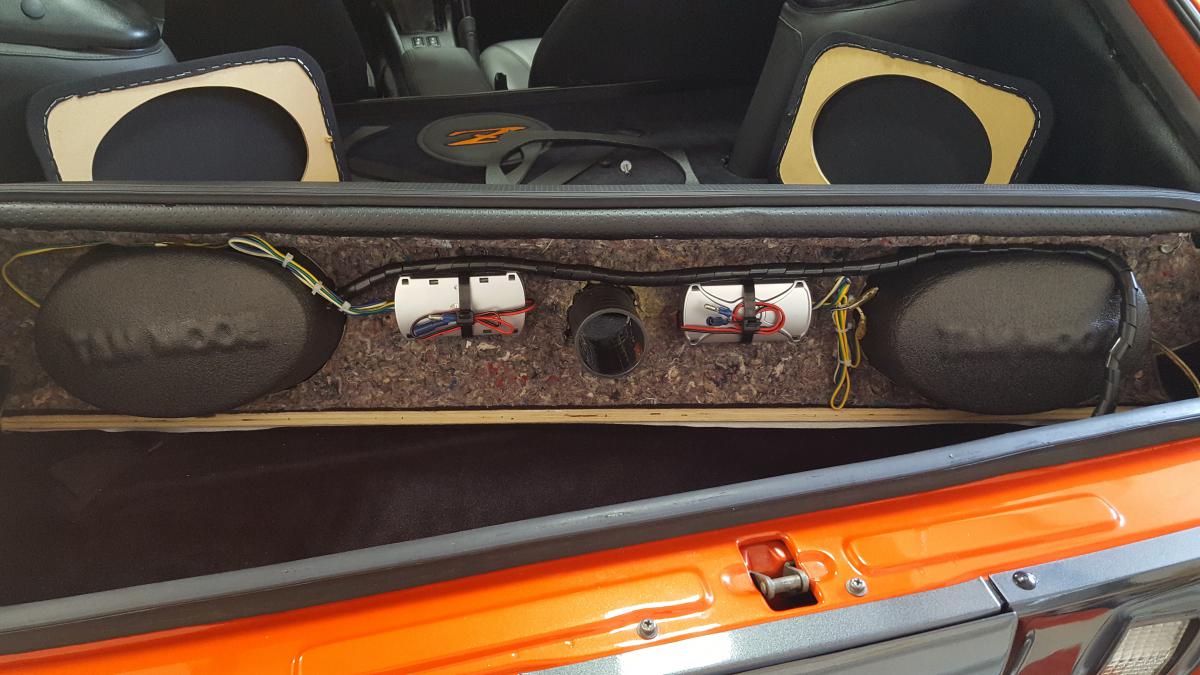
Found this high density foam audio speaker enclosures that are easy to install and improve sound quality by not letting all those waves escape backwards into the car's body. I found it useful for the rear deck speaker mount from MSA where a lot of the sound is lost back toward the tail lights. Trimmed the excess around the front of the speakers and put everything back into place and actually noticed a nice improvement in sound. They come in all speaker sizes so I used the 6x9" ovals for the rear deck speakers and 4" round ones for the speakers below the quarter windows.
-
280Z Restomod Progress
dmoralesbello replied to dmoralesbello's topic in S30 Series - 240z, 260z, 280z
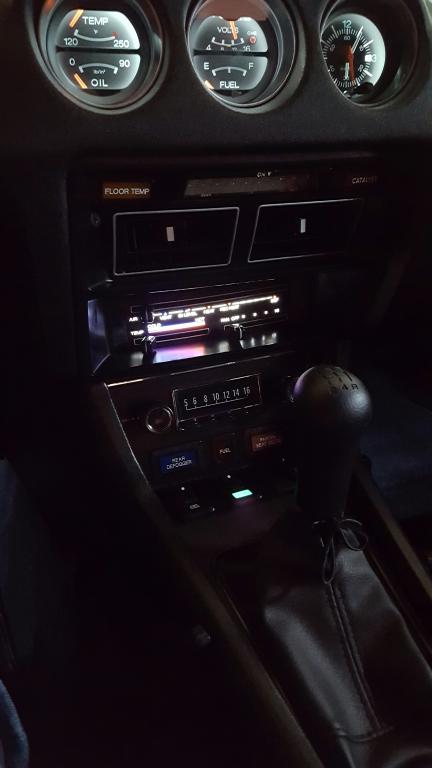
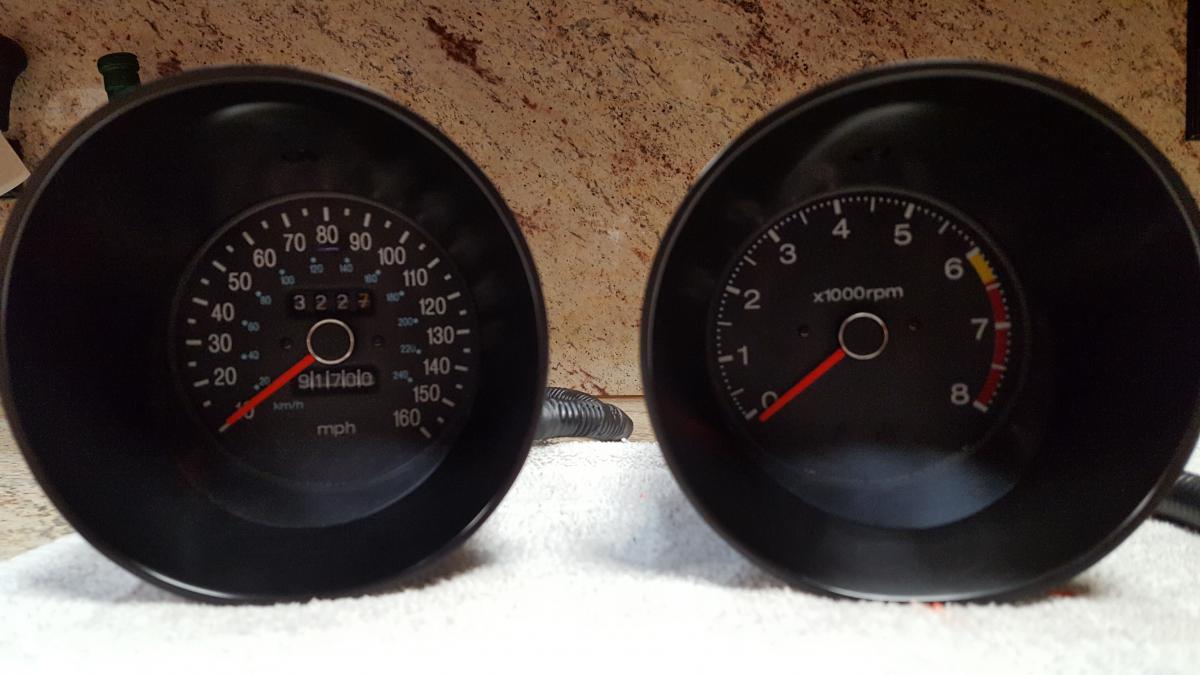
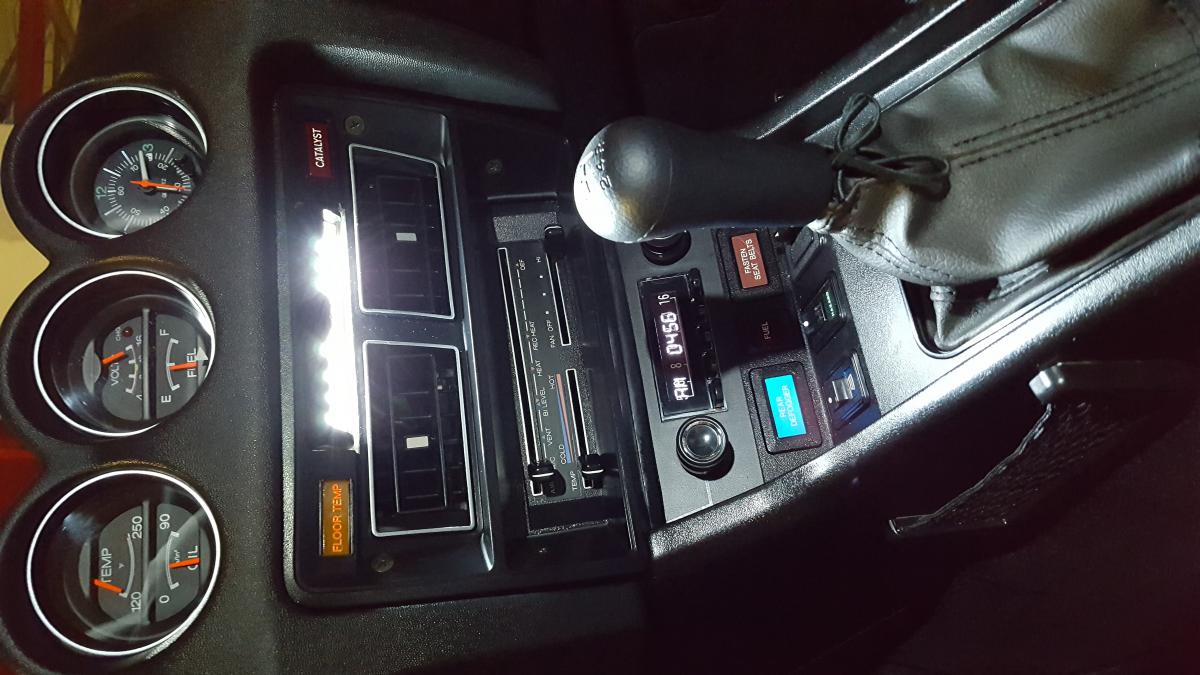
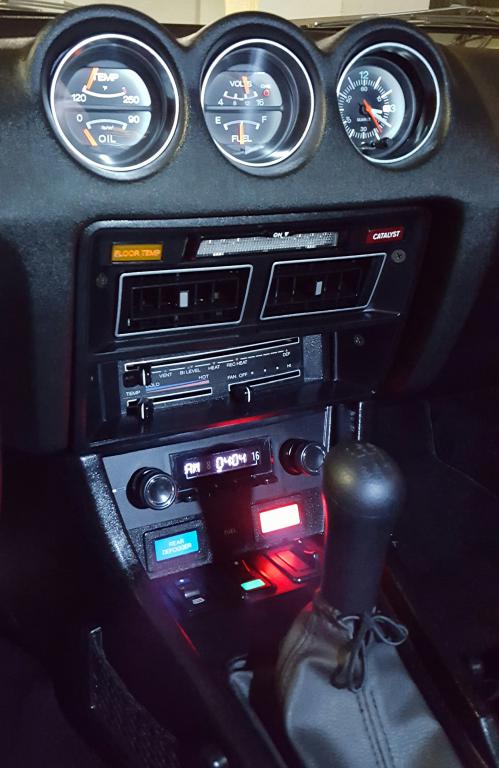
Freshened tach and speedo are back in as well as the hvac control panel. Tough to get a proper picture of the latter but you can get the idea.
-
280Z Restomod Progress
dmoralesbello replied to dmoralesbello's topic in S30 Series - 240z, 260z, 280z
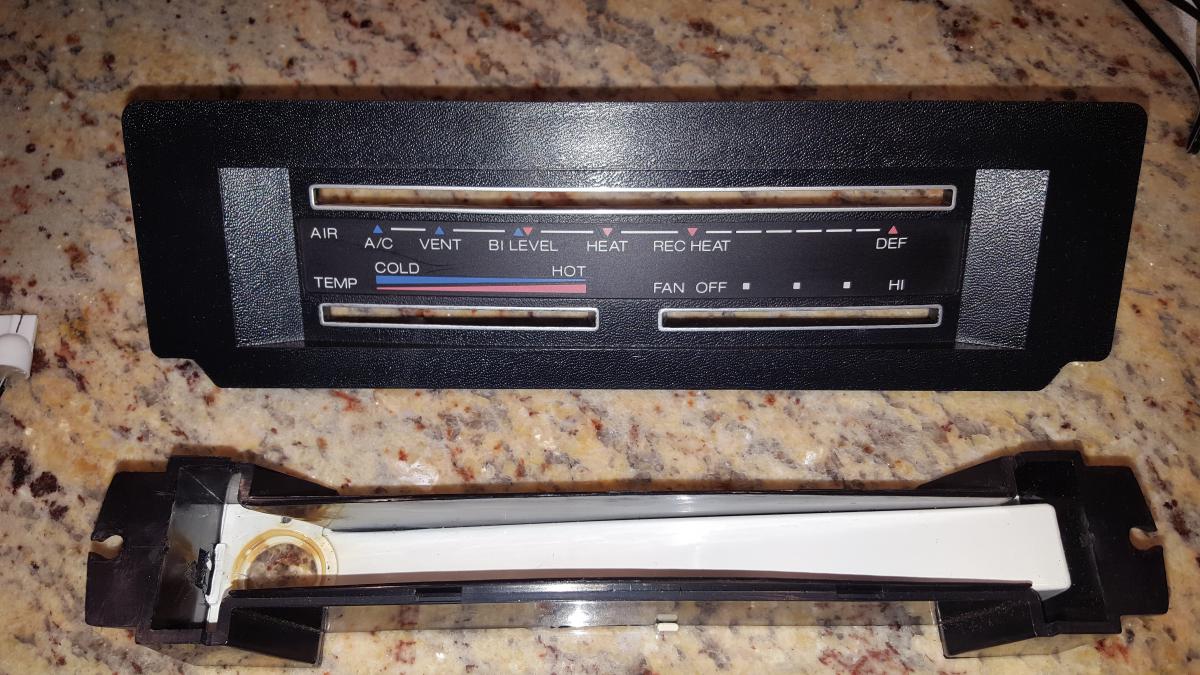
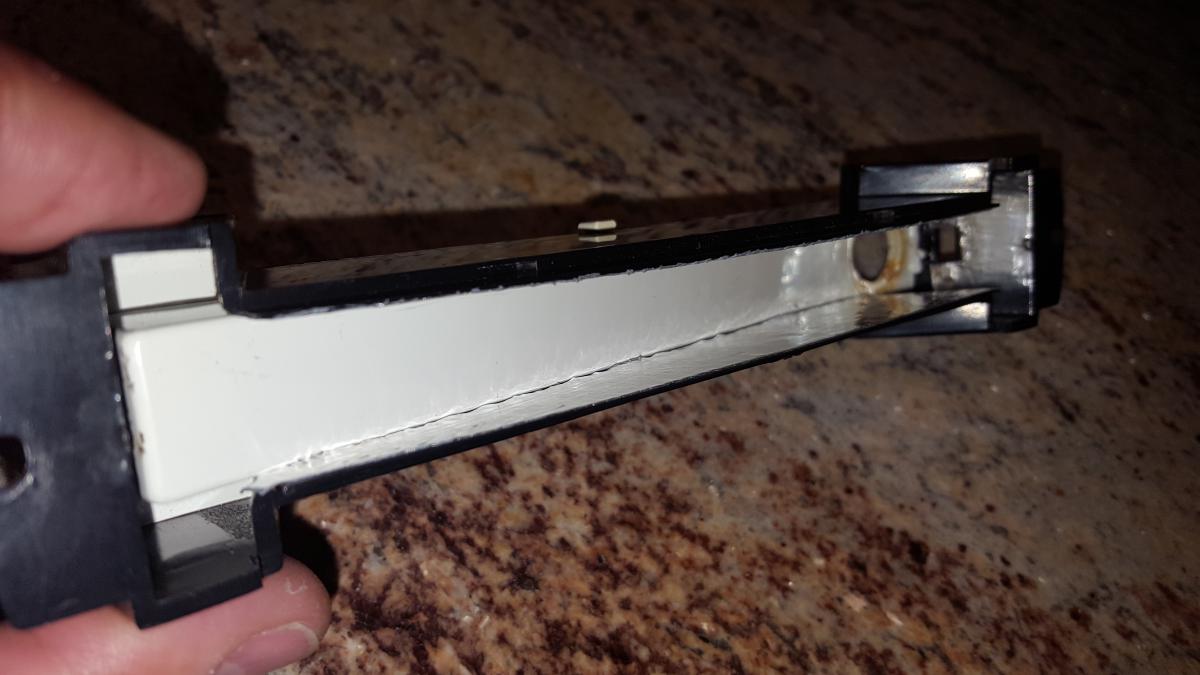
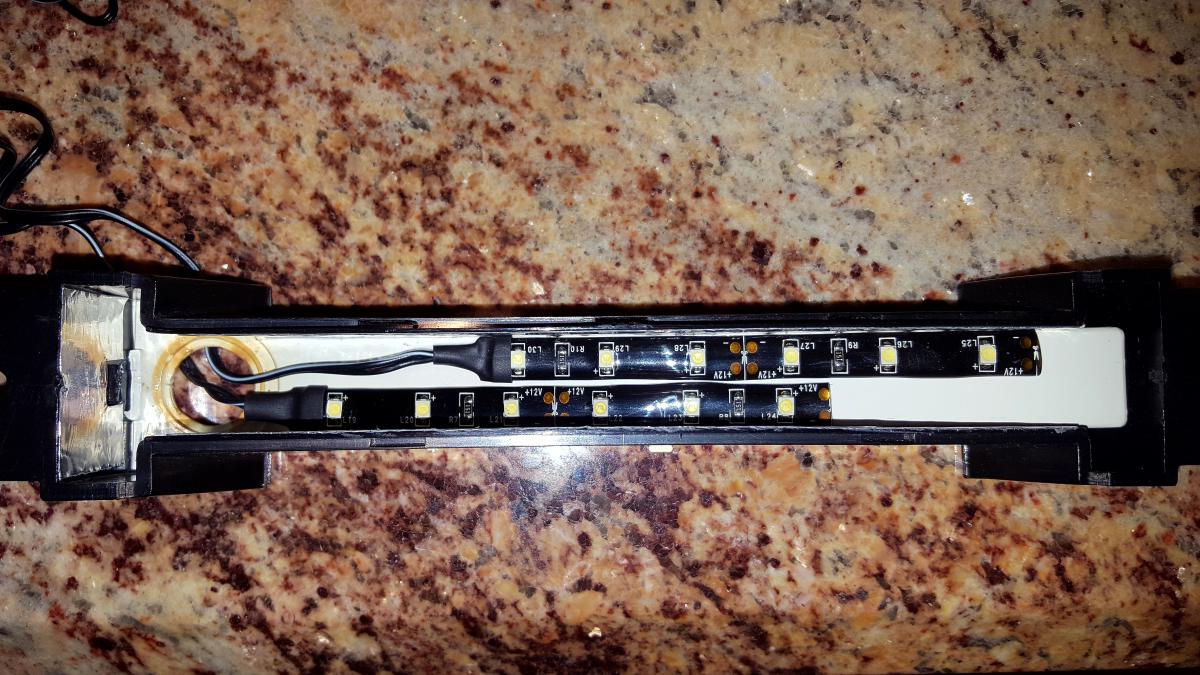
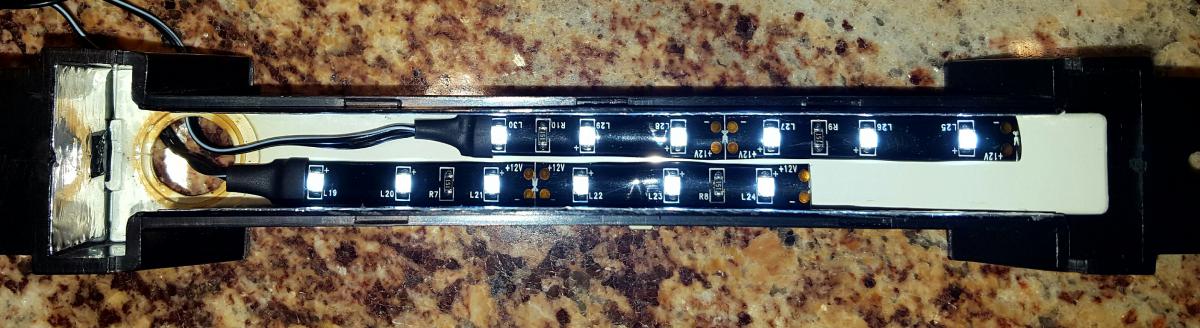
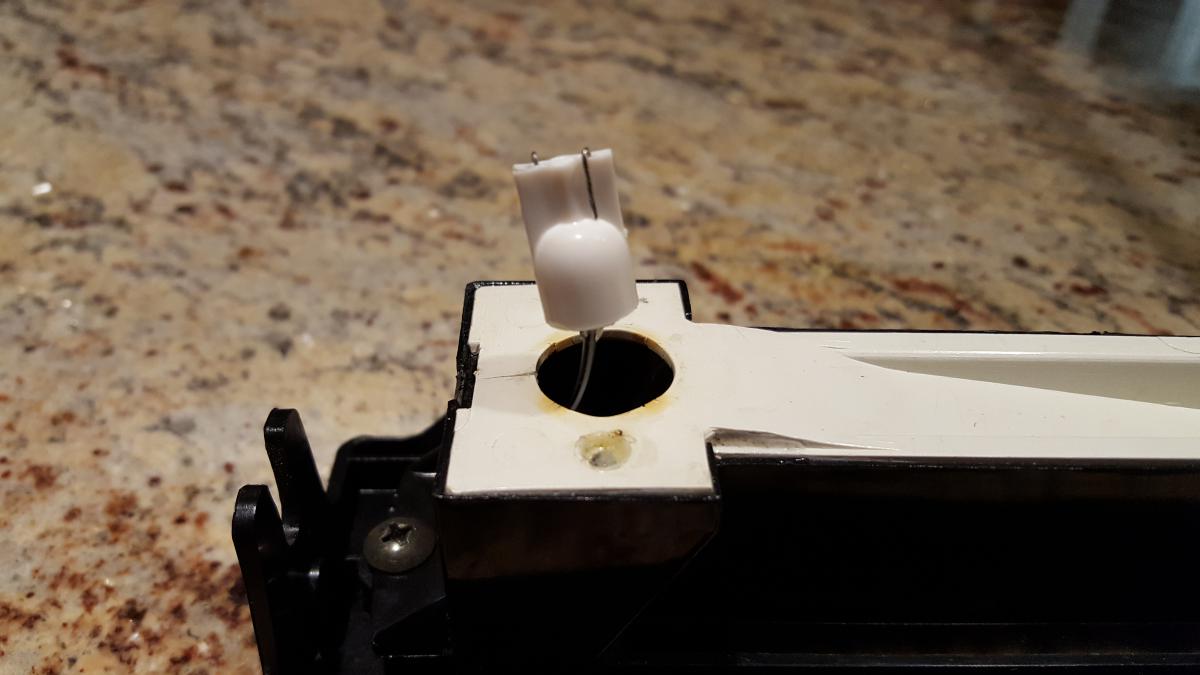
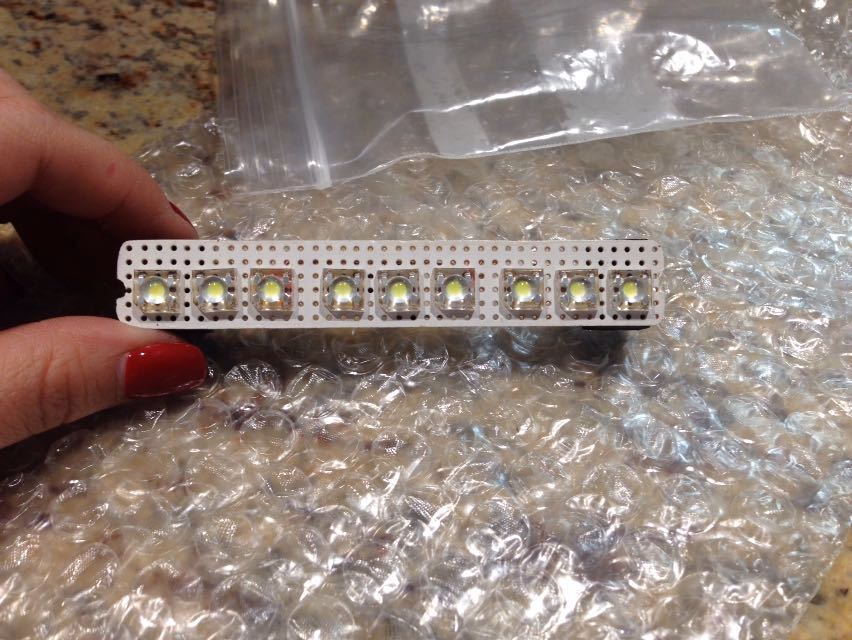
Since I have the dash apart to work on the instruments, I decided to change the simple LED bulb in the HVAC control panel for a strip of LEDs. The single bulb gave me very little illumination compared to that in the rest of the instruments so something had to be done . I used a couple of 3" LED strips and adapted the correct base so it's just plug 'n play. I used aluminum tape to cover the sides of the inside of the case to increase reflection and disperse light a little more so as to avoid hot spots of light. I really like the results and it should look great with the rest of the instrumentation. I'll put it back in the car tomorrow along with the speedo and tach and post finished pics. Here are pics of the process:
-
280Z Restomod Progress
dmoralesbello replied to dmoralesbello's topic in S30 Series - 240z, 260z, 280z
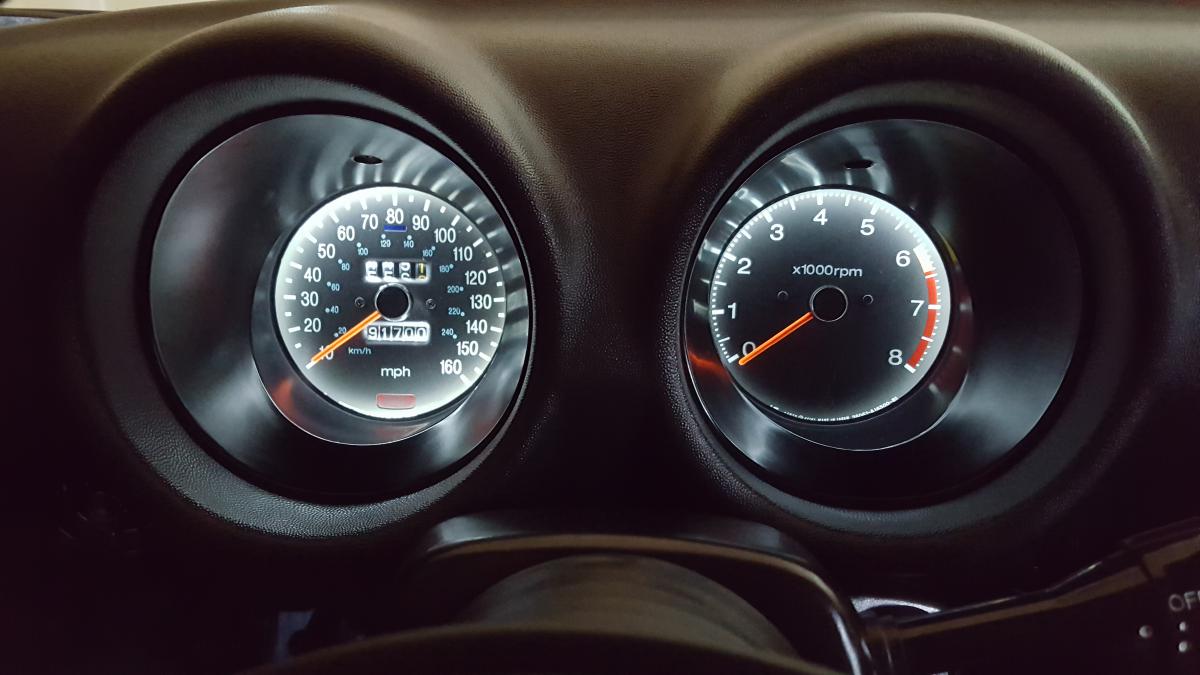
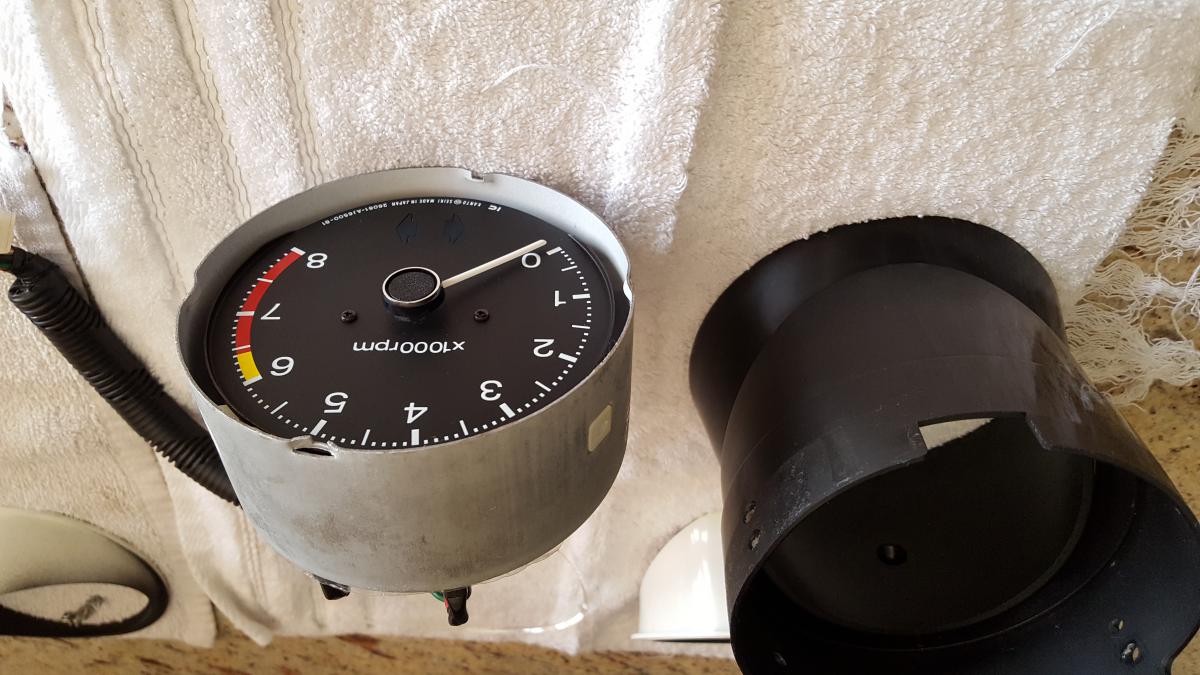
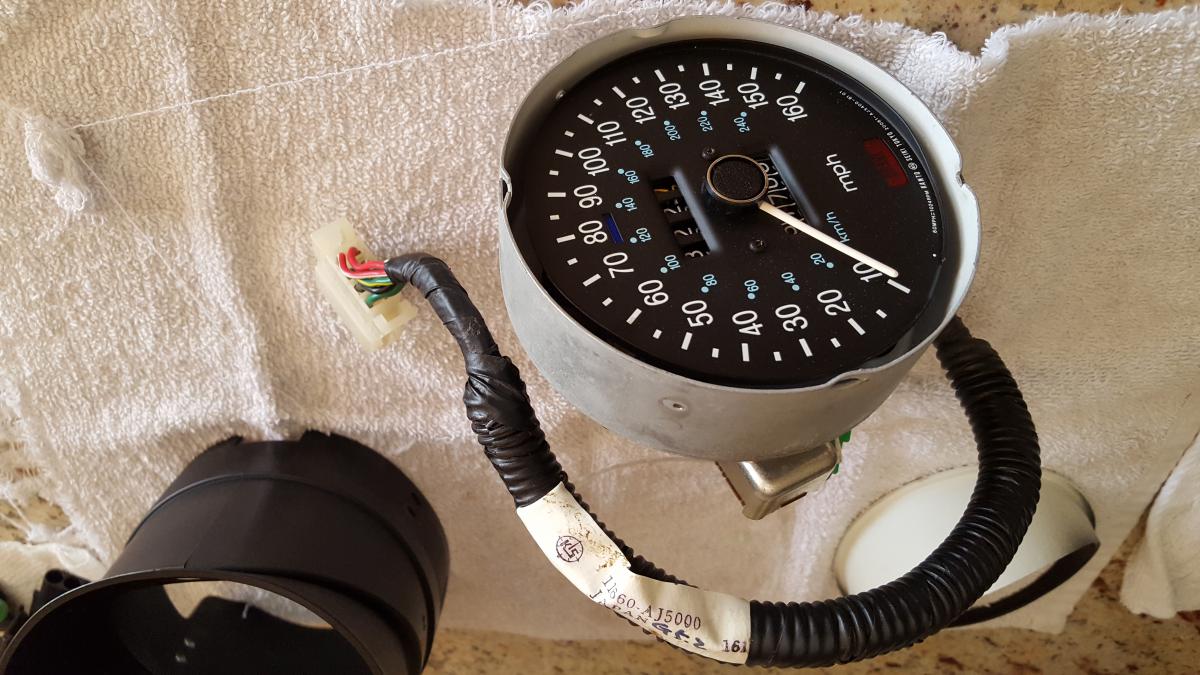
Finally decided to pull the speedo and tach for a refresh (polish lenses again and paint the needles fluo orange) to match the work I had previously done on the center cluster instruments. Usually pulling these instruments is pretty easy but in my case (since I have the Power Z steering kit installed) I had to drop the steering column and power steering motor to be able to access the bolts that hold the tach and speedo from beneath. A bit more work but it went quite well once the electric power steering motor was out of the way. Should have them back in the car tomorrow.
-
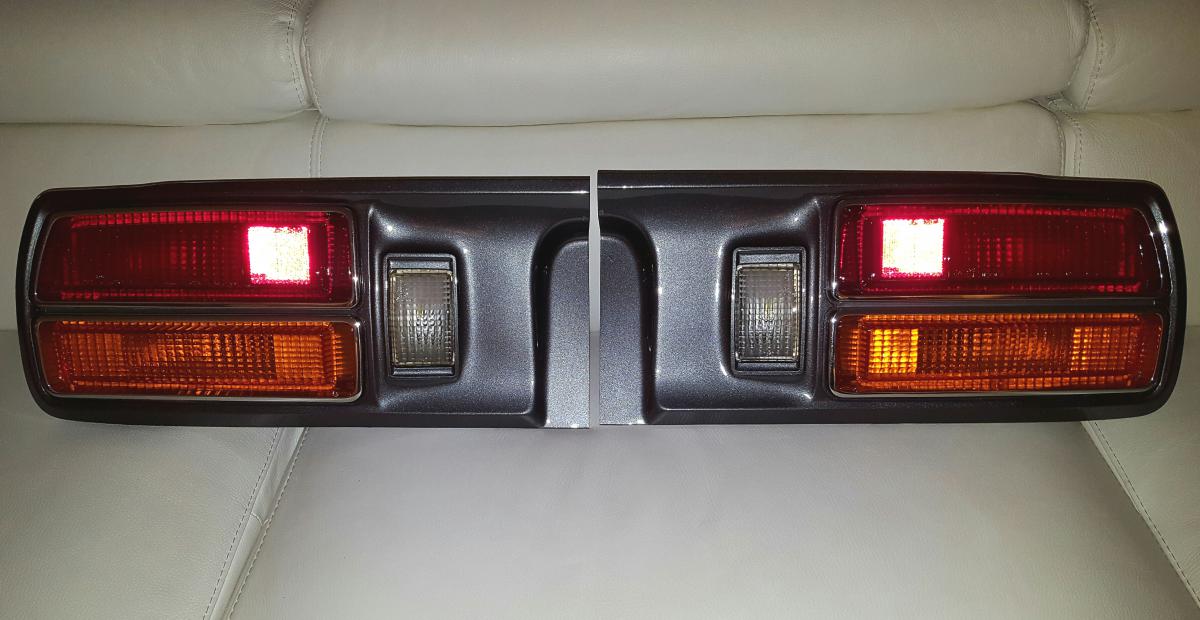
280Z Restomod Progress
dmoralesbello replied to dmoralesbello's topic in S30 Series - 240z, 260z, 280z
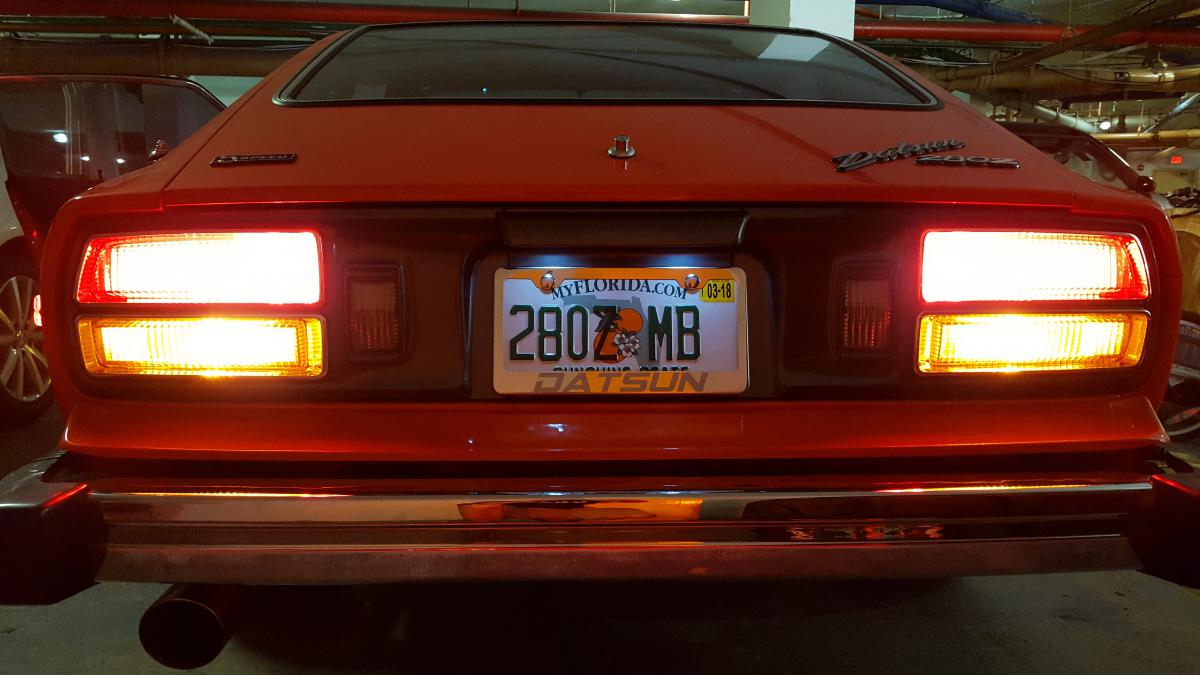
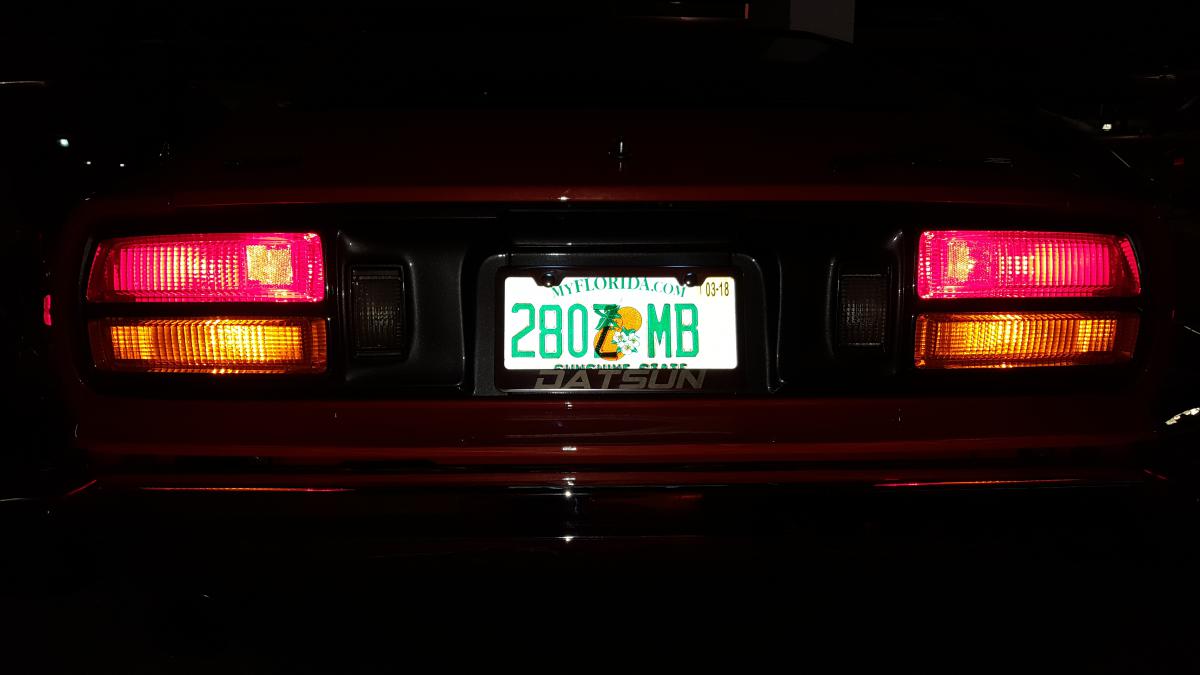
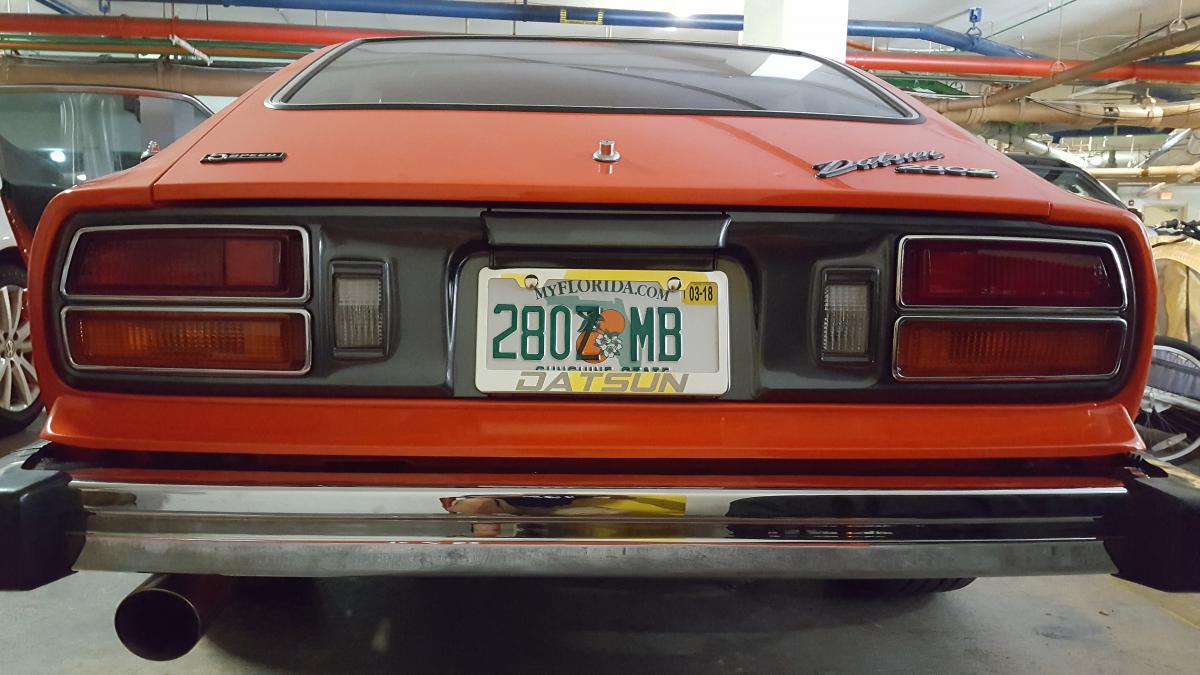
JDM tail lights installed and working!
-
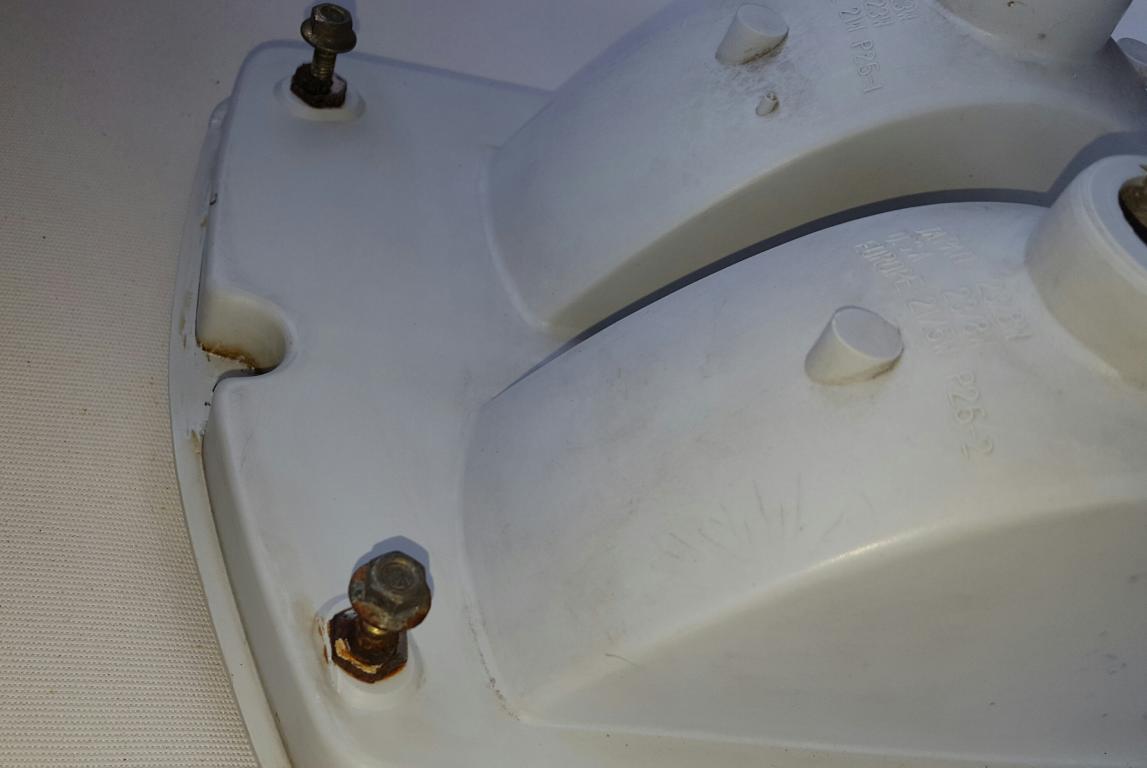
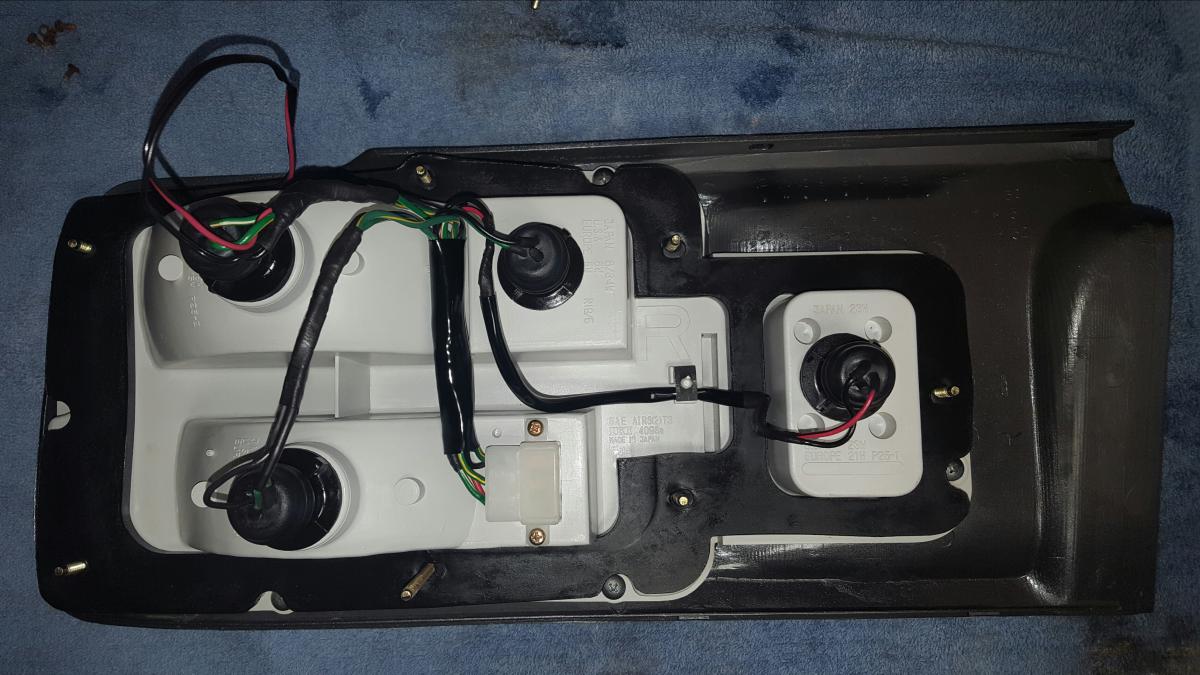
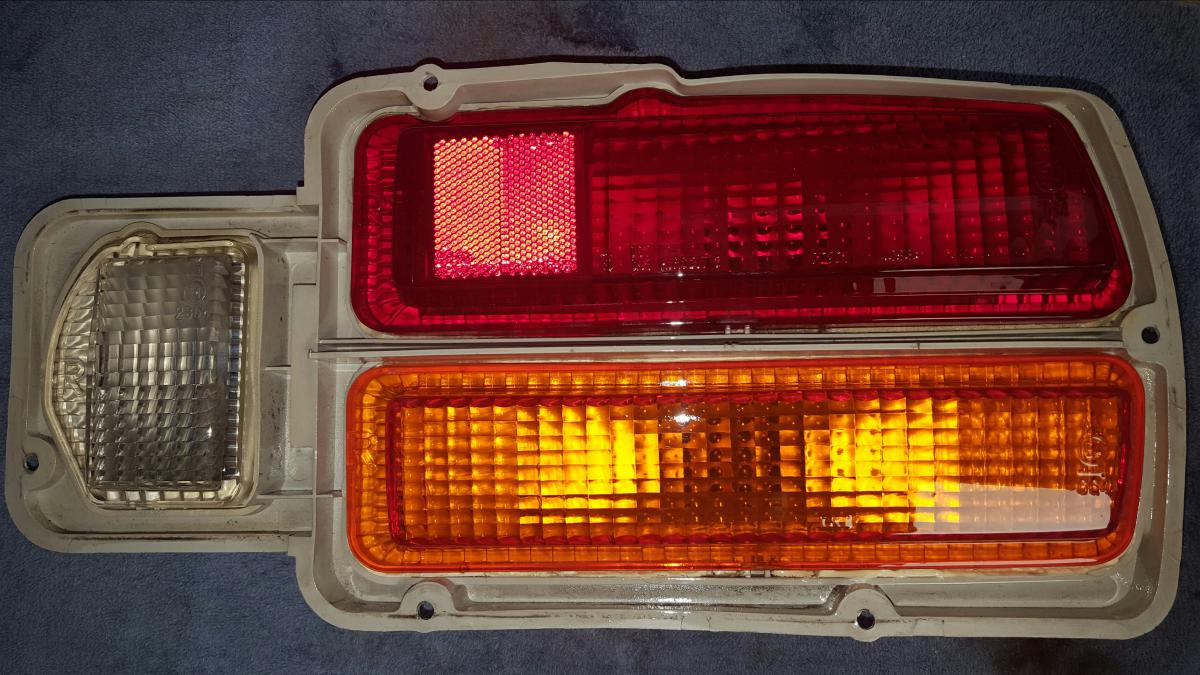
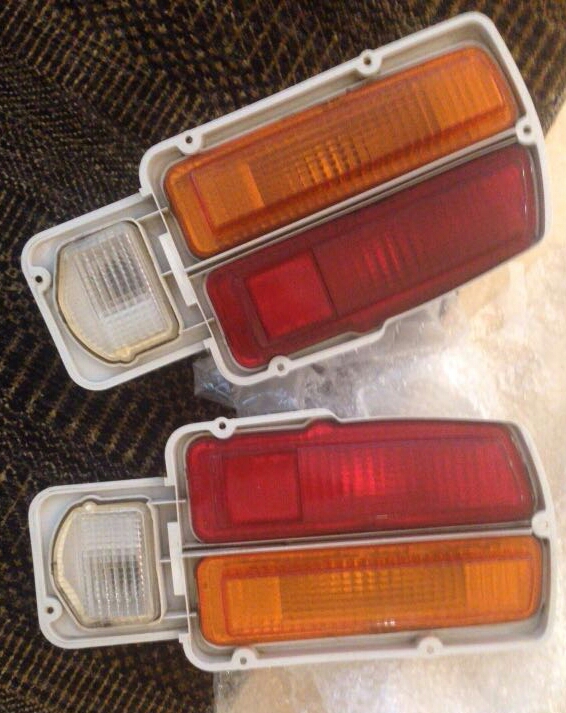
280Z Restomod Progress
dmoralesbello replied to dmoralesbello's topic in S30 Series - 240z, 260z, 280z
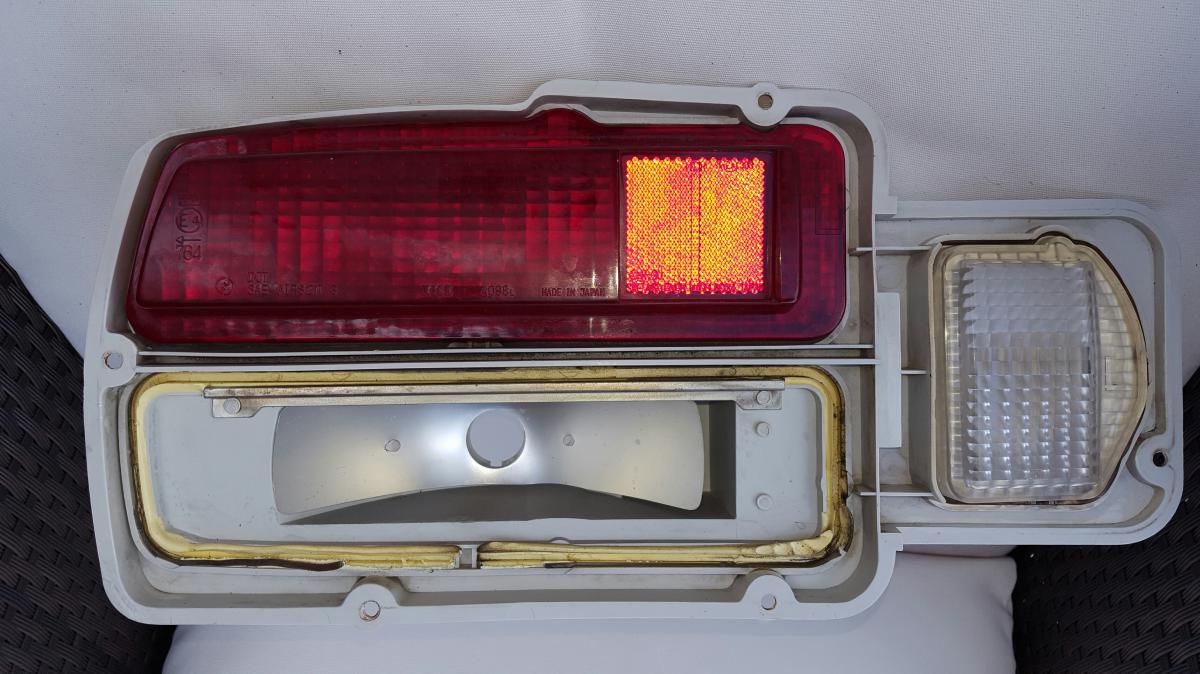
I had gotten a set of JDM tail lights from a Classic Z Car forum member a couple of months ago and finally got around to installing them. Unfortunately when I closely inspected them I noticed several rusted studs that I couldn't change out. My OEM tail lights, in contrast, were in perfect shape so I took the jump and decided to remove the amber lens from the JDM set, remove the lower red lens from my stock set and swap them. Used the oven method, heating to 150 degrees F for 10 minutes which liquifys the glue and allows the careful removal of the lens. Sounds and is simple but scary nonetheless! To re-install you heat the glue again and set in the new lens. To restore the brilliance of the lenses I buffed them with a red Scotch wool and then applied 2 coats of clear. Cleaned up all the wiring as well.
-
280Z Restomod Progress
dmoralesbello replied to dmoralesbello's topic in S30 Series - 240z, 260z, 280z
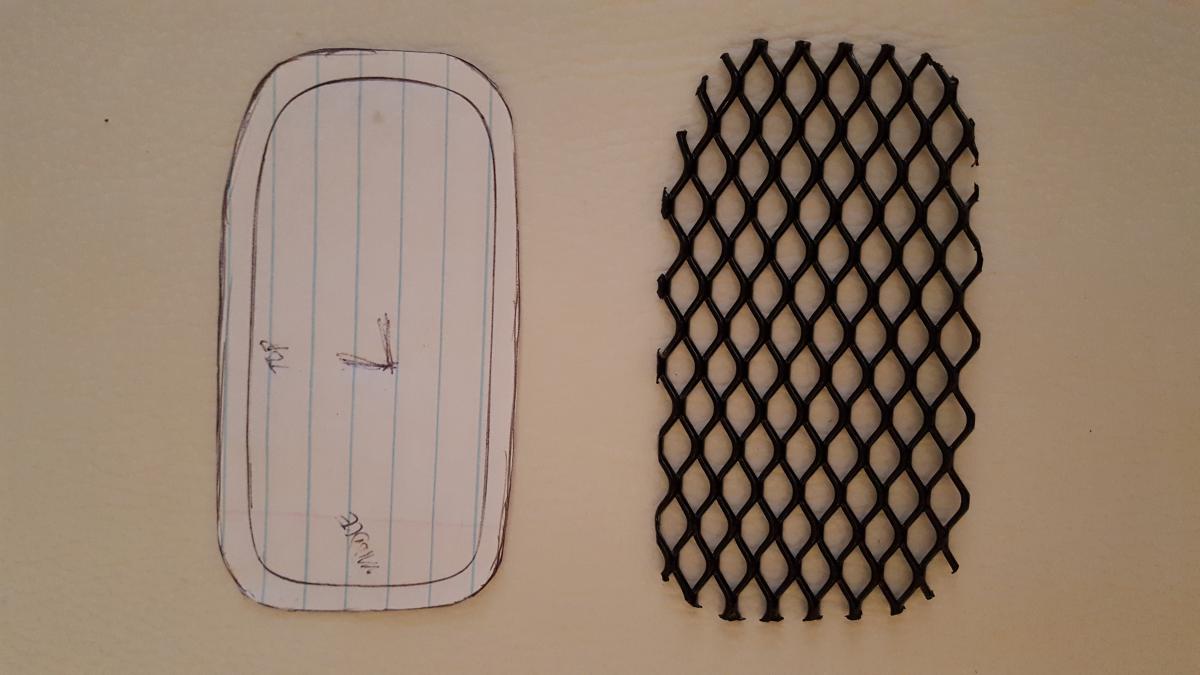
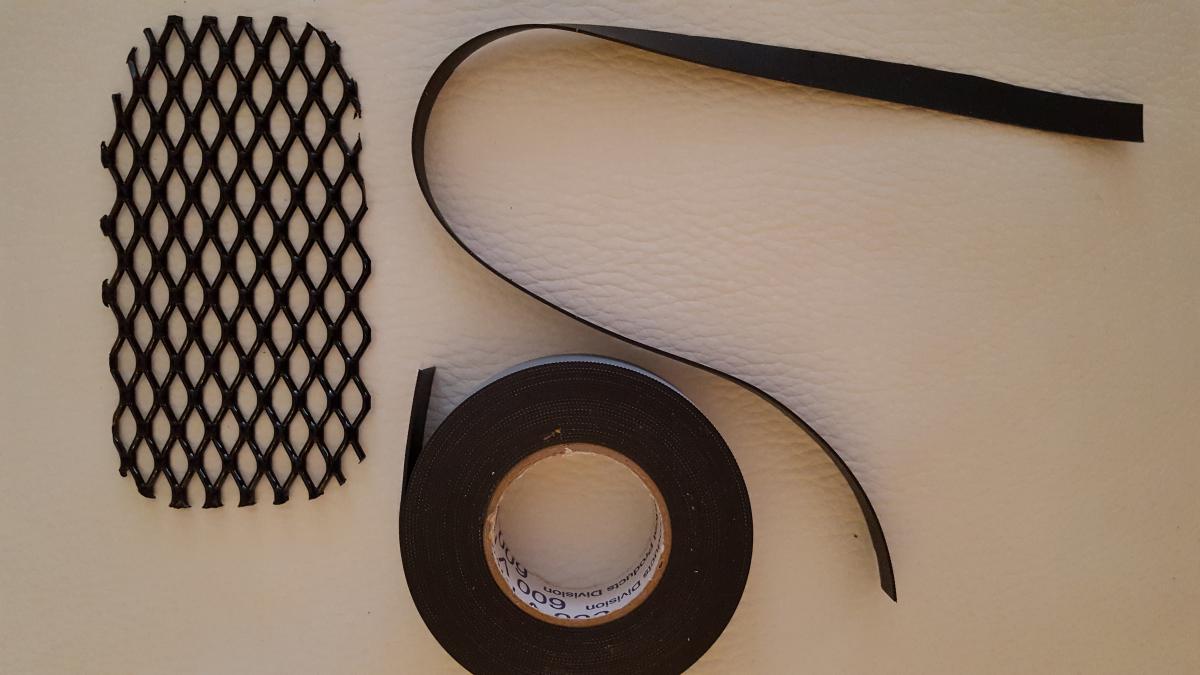
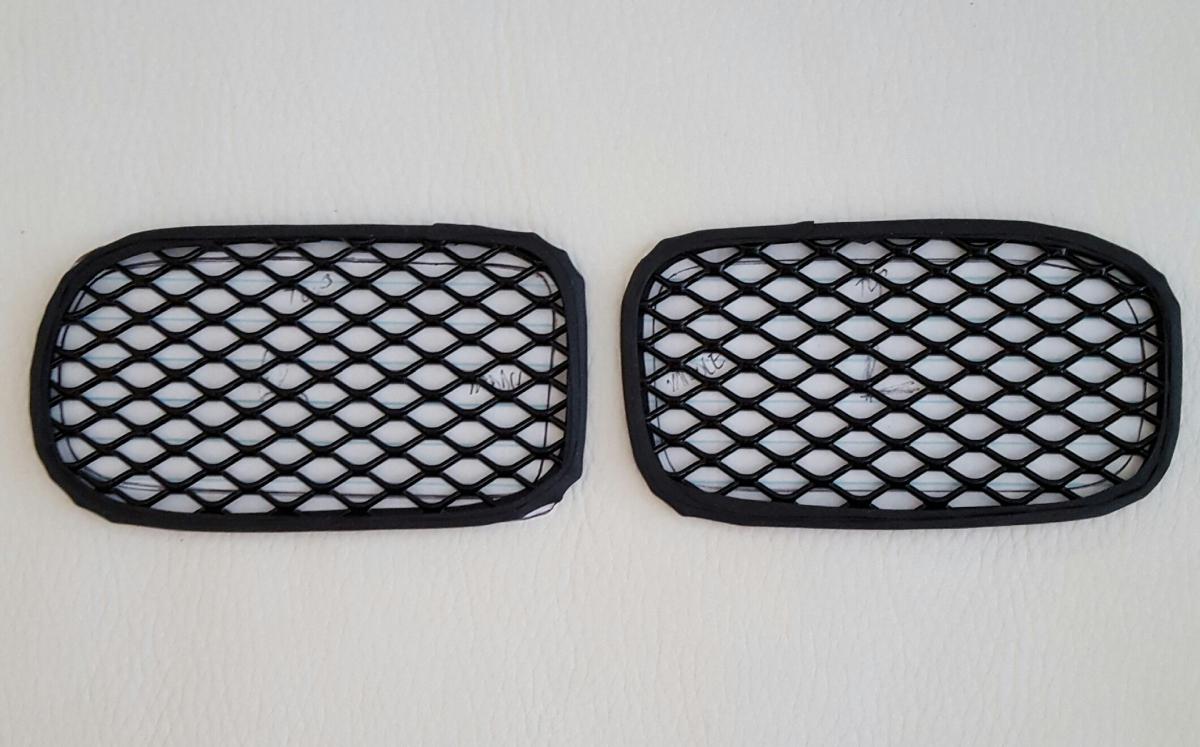
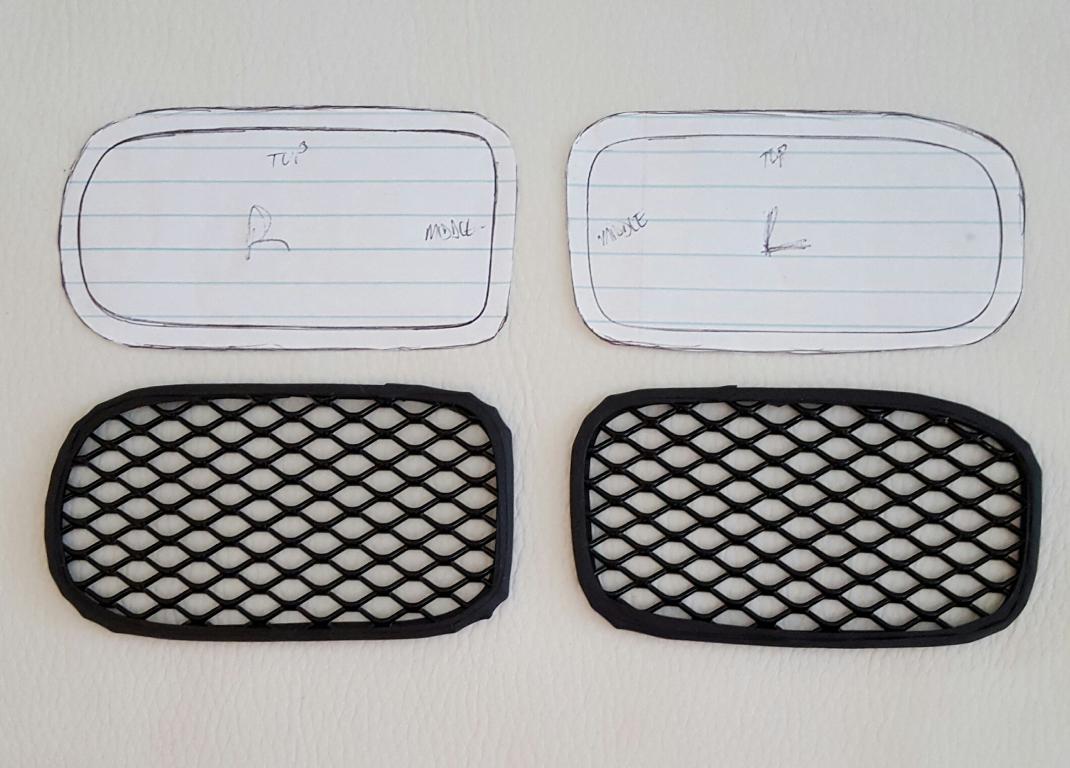
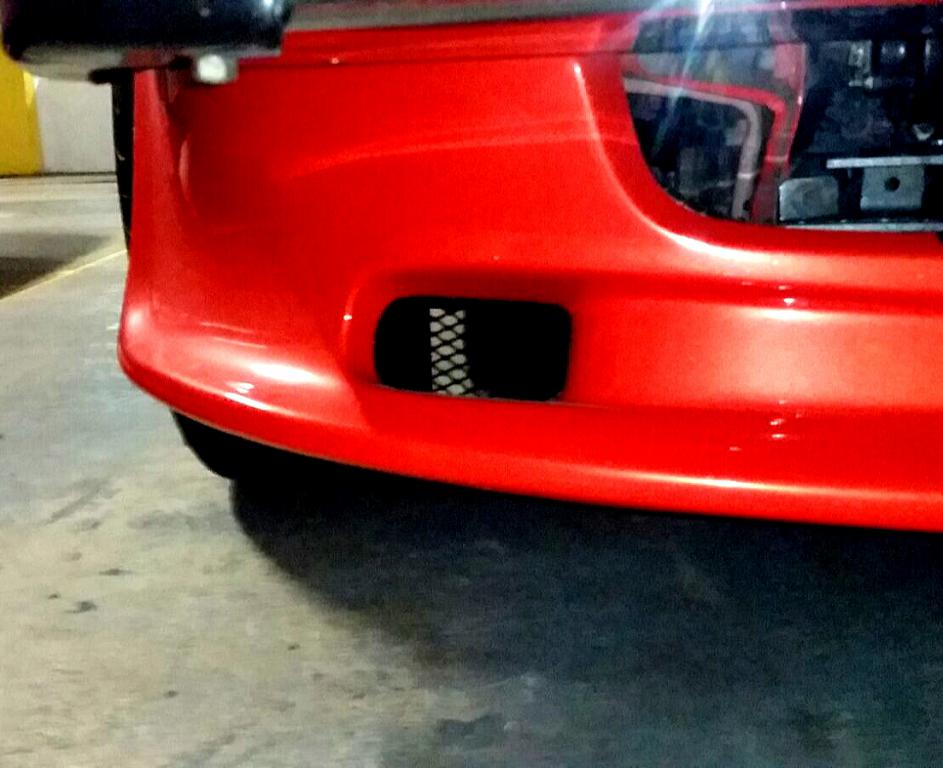
So I wasn't very happy with the unfinished look of the front air dam vent inlets (brake cooling ports) although I very much like the overall shape of the air dam. I decided to make a couple of grill plates that would tidy up those vents and perhaps keep a few pebbles away from my discs. Bought some black powder coated aluminum grill plate in a diamond pattern (0.5 inch) and cut them to shape using a couple of templates taken from inside the air dam. Surprise: they are not very symmetrical! Wrapped the edges with vulcanizing rubber electrical tape, heated with a heat gun to seal the edges of the tape, and glued them onto the back of the air dam. Really simple and now I'm really satisfied with the way those vents look.
-
280Z Restomod Progress
dmoralesbello replied to dmoralesbello's topic in S30 Series - 240z, 260z, 280z
Thanks Gotham. There's been lots written in this and other Z forums regarding the LED conversions. As soon as I get a chance I'll pm you with some details. It's pretty simple and gives the car a whole new look but keeps the retro coolness. -
Replacing 280z door panel trim piece
dmoralesbello replied to uncle charlie's topic in S30 Series - 240z, 260z, 280z
Pretty simple really: with the door card removed, looking at the inside, you will notice 4 (?) small metal tabs that go through the board and twist to hold the trim piece in place. Carefully untwist these (they are delicate) and gently pull the trim form the outside and it should come right off. No adhesive on mine and it was the original door skin. -
280Z Restomod Progress
dmoralesbello replied to dmoralesbello's topic in S30 Series - 240z, 260z, 280z
Simple but cool: LED conversion for the map light from http://datsun-240z-upgrades.net/
-
What I did to avoid the bowing was to burr away with a Dremel some of the wood on the inside door card where the window crank marked it during mock up. Went slowly and test fitted several times so as not go through the wood panel completely. The final fit has no bowing at all.
-
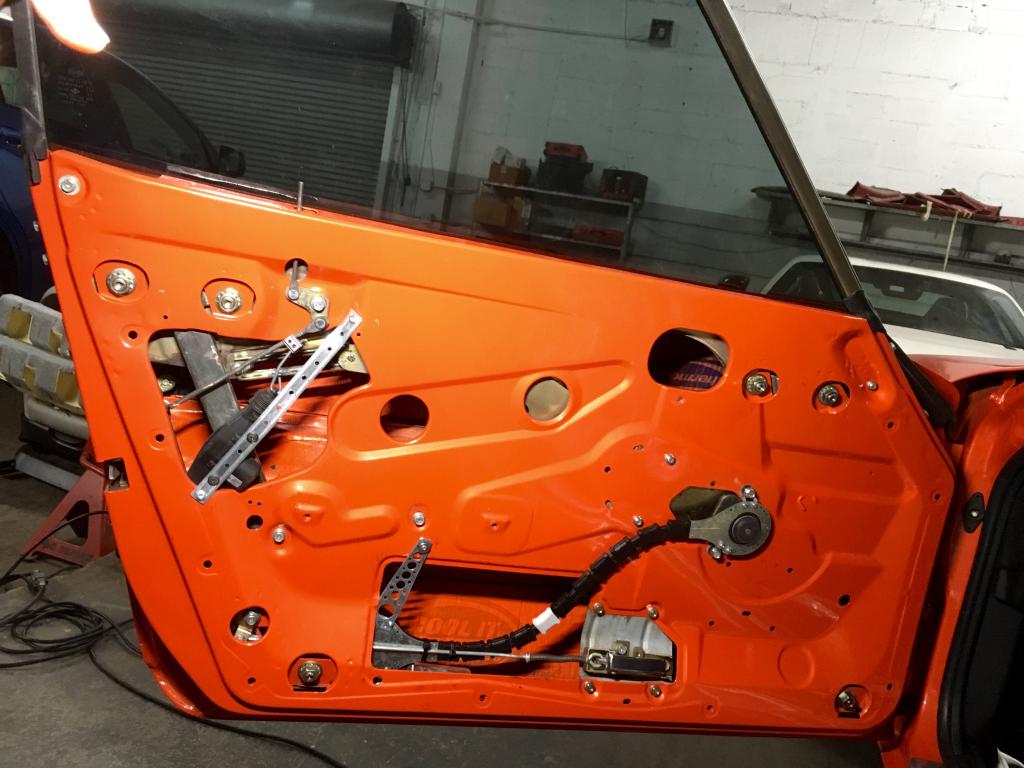
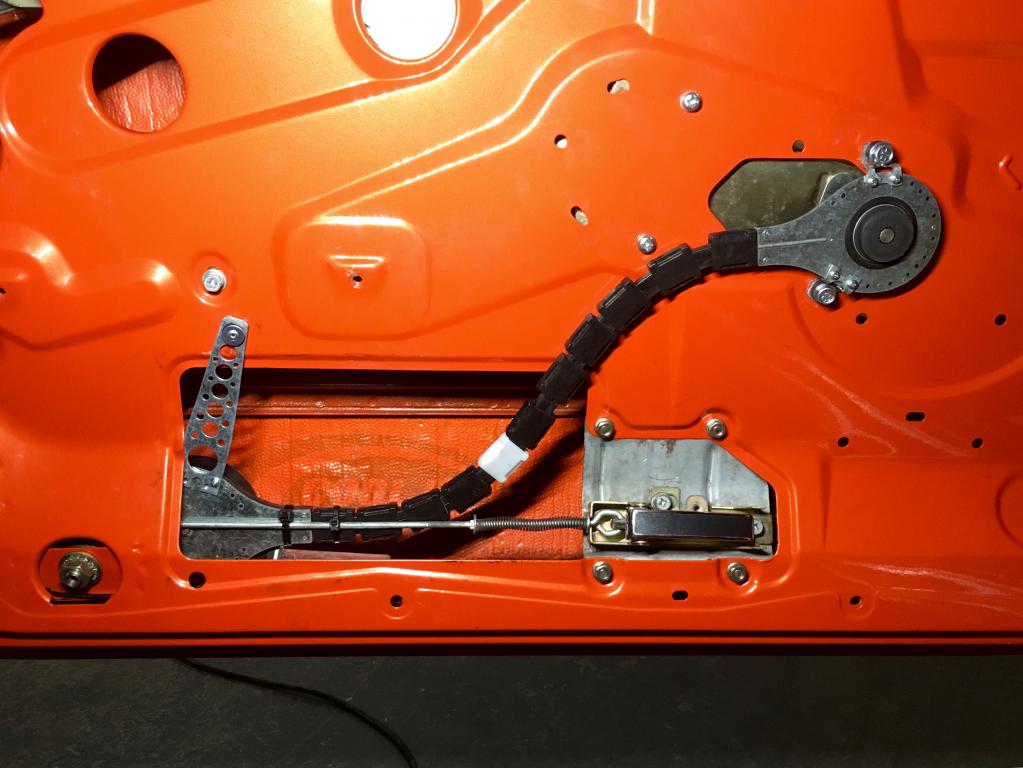
That's a very nice solution although I'm not certain if the structural strength of the door isn't diminished from cutting the sheet metal. I used a well known aftermarket kit made in Italy (Colibri) that was pretty much bolt-on although working out the exact position for the motor took some work. Didn't have to cut any sheet metal. Since I was getting my door cards re-upholstered anyway, the door crank hole was not an issue for me. I placed the illuminated switches in the center console between the shifter and the ash tray. They function quietly and efficiently.
-
280Z Restomod Progress
dmoralesbello replied to dmoralesbello's topic in S30 Series - 240z, 260z, 280z
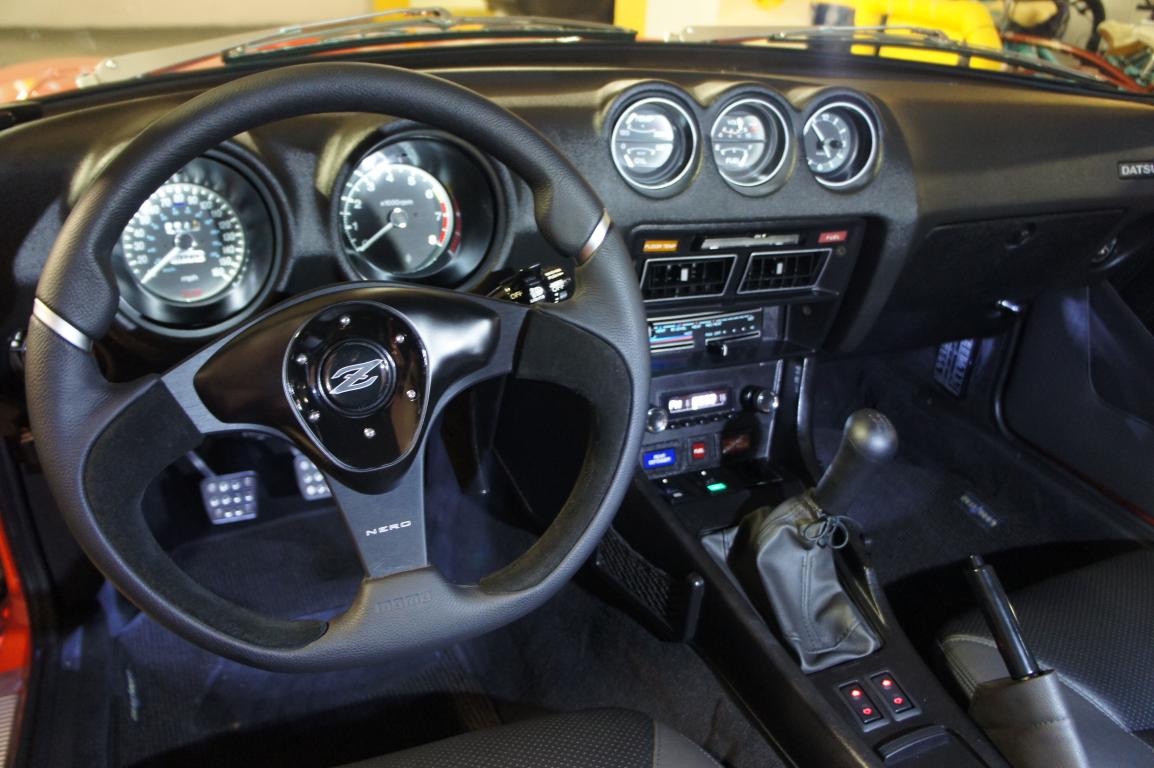
Instruments (with orange needles and calendar clock) are back in and working!
-
280Z Restomod Progress
dmoralesbello replied to dmoralesbello's topic in S30 Series - 240z, 260z, 280z
Thanks! Lots of work but definitely rewarding. -
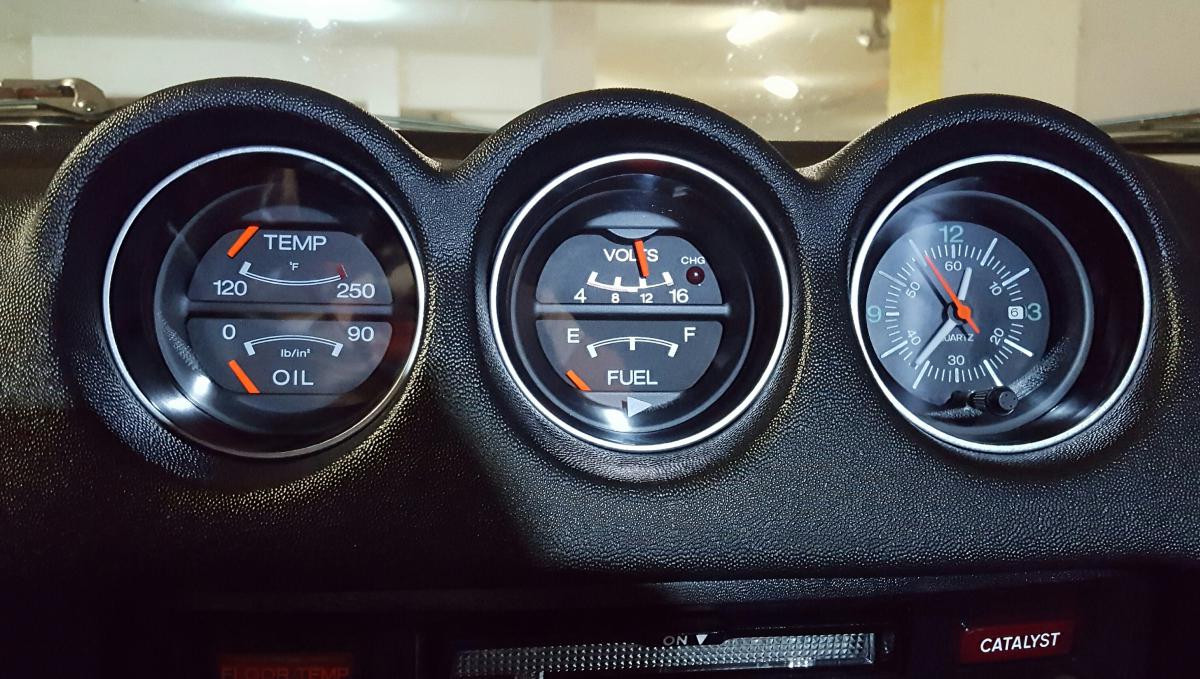
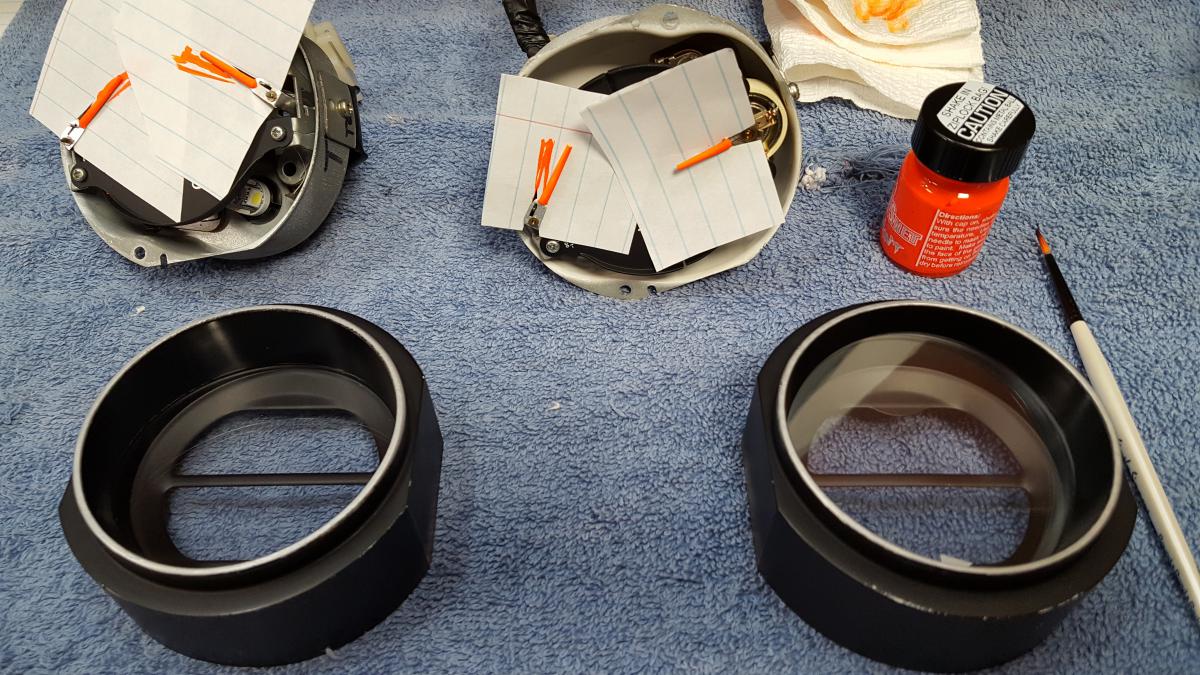
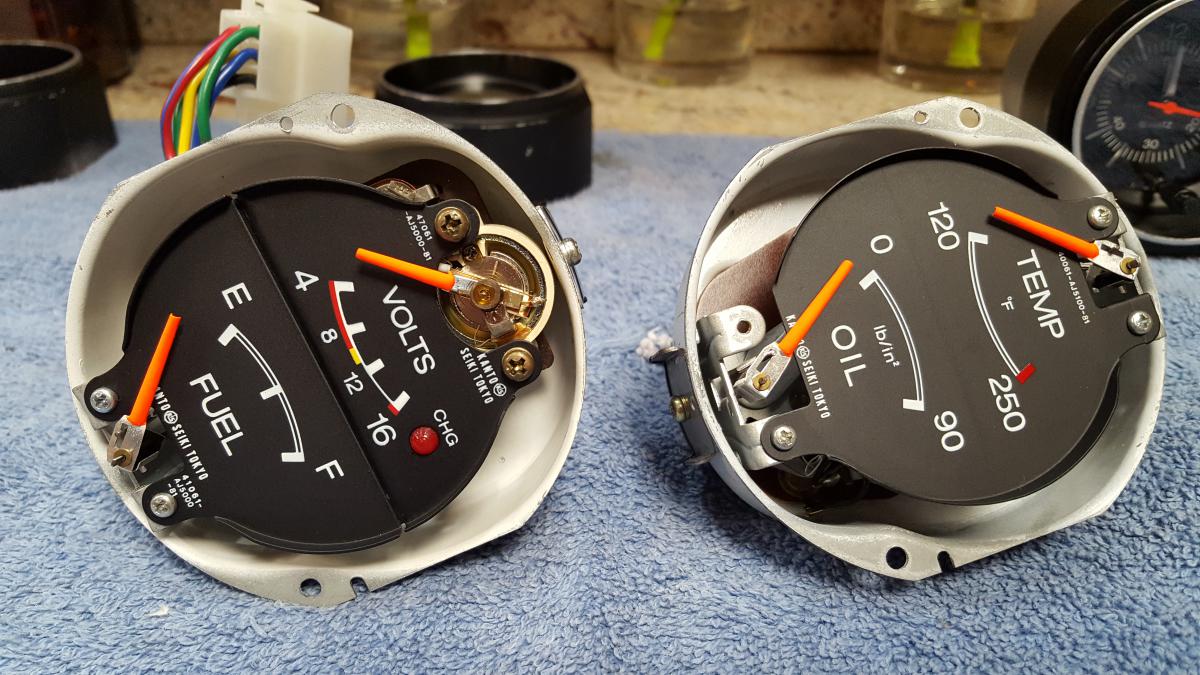
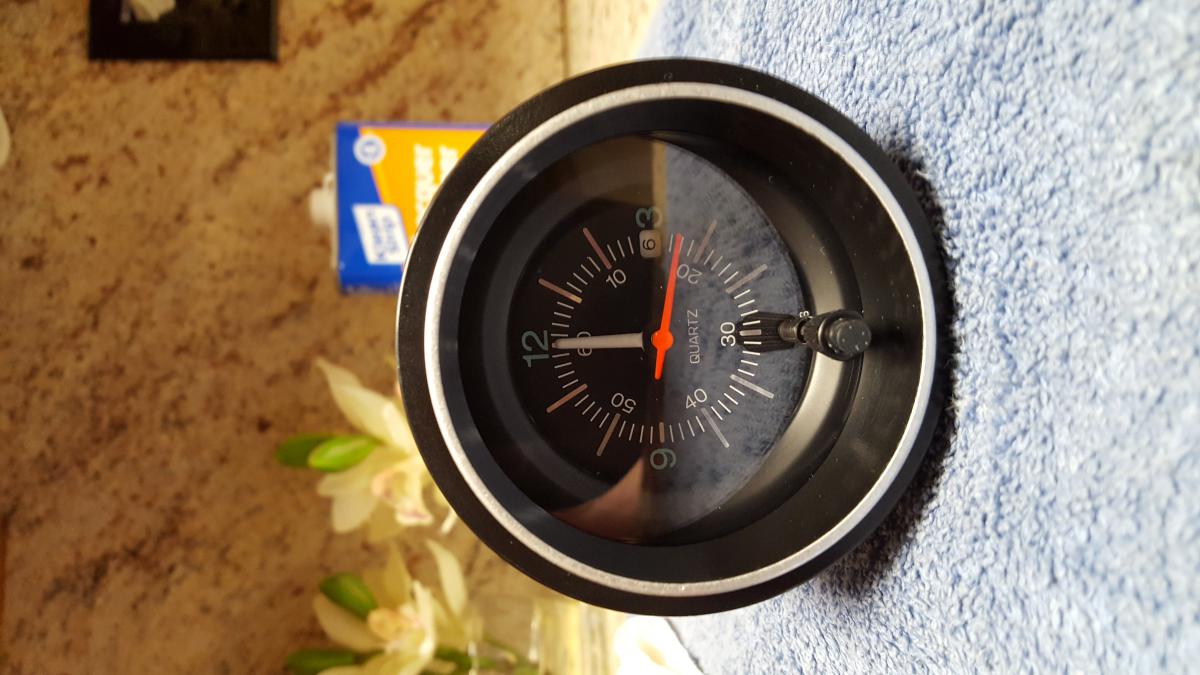
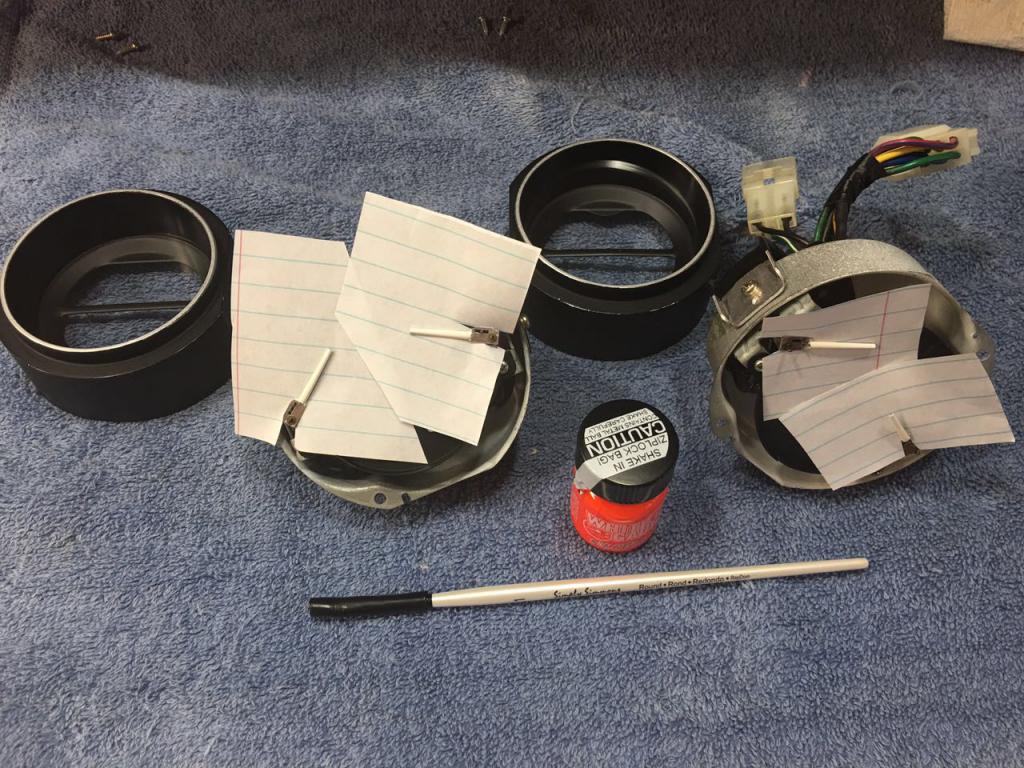
280Z Restomod Progress
dmoralesbello replied to dmoralesbello's topic in S30 Series - 240z, 260z, 280z
Took my center instrument cluster out once again. Wanted to put in my recently acquired calendar clock and decided (while I was at it ) to do something else I've been wanting to do for a while: paint the needles fluorescent orange to match the second hand on the calendar clock. Here are the pictures although I couldn't get rid of the reflection coming off the buffed lenses. I'll have them back in the dash by the end of the weekend along with the LED conversion for the map light.
-
Thanks for all the information fellas. Definitely seems like nifty marketing. What am I going to do? Clean up my OEM starter and just make it look pretty with a little spit and polish.