Twisted46
-
Posts
141 -
Joined
-
Last visited
-
Days Won
5
Content Type
Profiles
Forums
Blogs
Events
Gallery
Downloads
Store
Everything posted by Twisted46
-

brake light Brake Light
Twisted46 replied to S30Johnny's topic in Brakes, Wheels, Suspension and Chassis
Oh boy, you have to love POs! -
brake light Brake Light
Twisted46 replied to S30Johnny's topic in Brakes, Wheels, Suspension and Chassis
I would first replace the bulb, cheap and easy. The next plan of action would be to check for voltage drop at both plugs. -
No (Low) Rear Brake Pressure
Twisted46 replied to Twisted46's topic in Brakes, Wheels, Suspension and Chassis
Victory!!!!! Brake booster replaced (45 minute job) and i can barely move the pedal with the car off!!!! I spent so much time and money chasing down a $.01 piece of rubber but I have better brakes for it. Thanks for coming along for the ride everyone! -
It has already been started but your transmission is going to be the deciding factor here. If you don't have an overdrive gear your cursing RPM will be very high.
-
It fit! Engine is on its front mounts.
Twisted46 replied to wingwalker's topic in Gen I & II Chevy V8 Tech Board
It sure is a good feeling, enjoy! -
There are some calculators you can use but I would seriously consider 6g as your biggest load will come when the car sits for a while and the alternator has to charge the battery. I blew a fusible link by letting and alternator charge an almost flat battery. You will likely never have an issue with 8g but it only takes one unlikely event for hell to break loose. https://www.engineeringtoolbox.com/amps-wire-gauge-d_730.html Yes POs are the biggest problems when working on old cars. I spent weeks looking through the 260z wiring diagrams and probing with a multimeter. I would start at thr tach and work your way to thr end of the loom if you think wires have been crossed or replaced.
-
The OEM tach in your 280z should work just fine hooked up to the HEI output. There should be two black - white wires if you are using OEM, If not then refer to the manual for that harness. Look at the JTR book to make sure you have them correct. I ended up yanking my wiring and going full race car with my own relay and fuse boxes and switches.
-
No (Low) Rear Brake Pressure
Twisted46 replied to Twisted46's topic in Brakes, Wheels, Suspension and Chassis
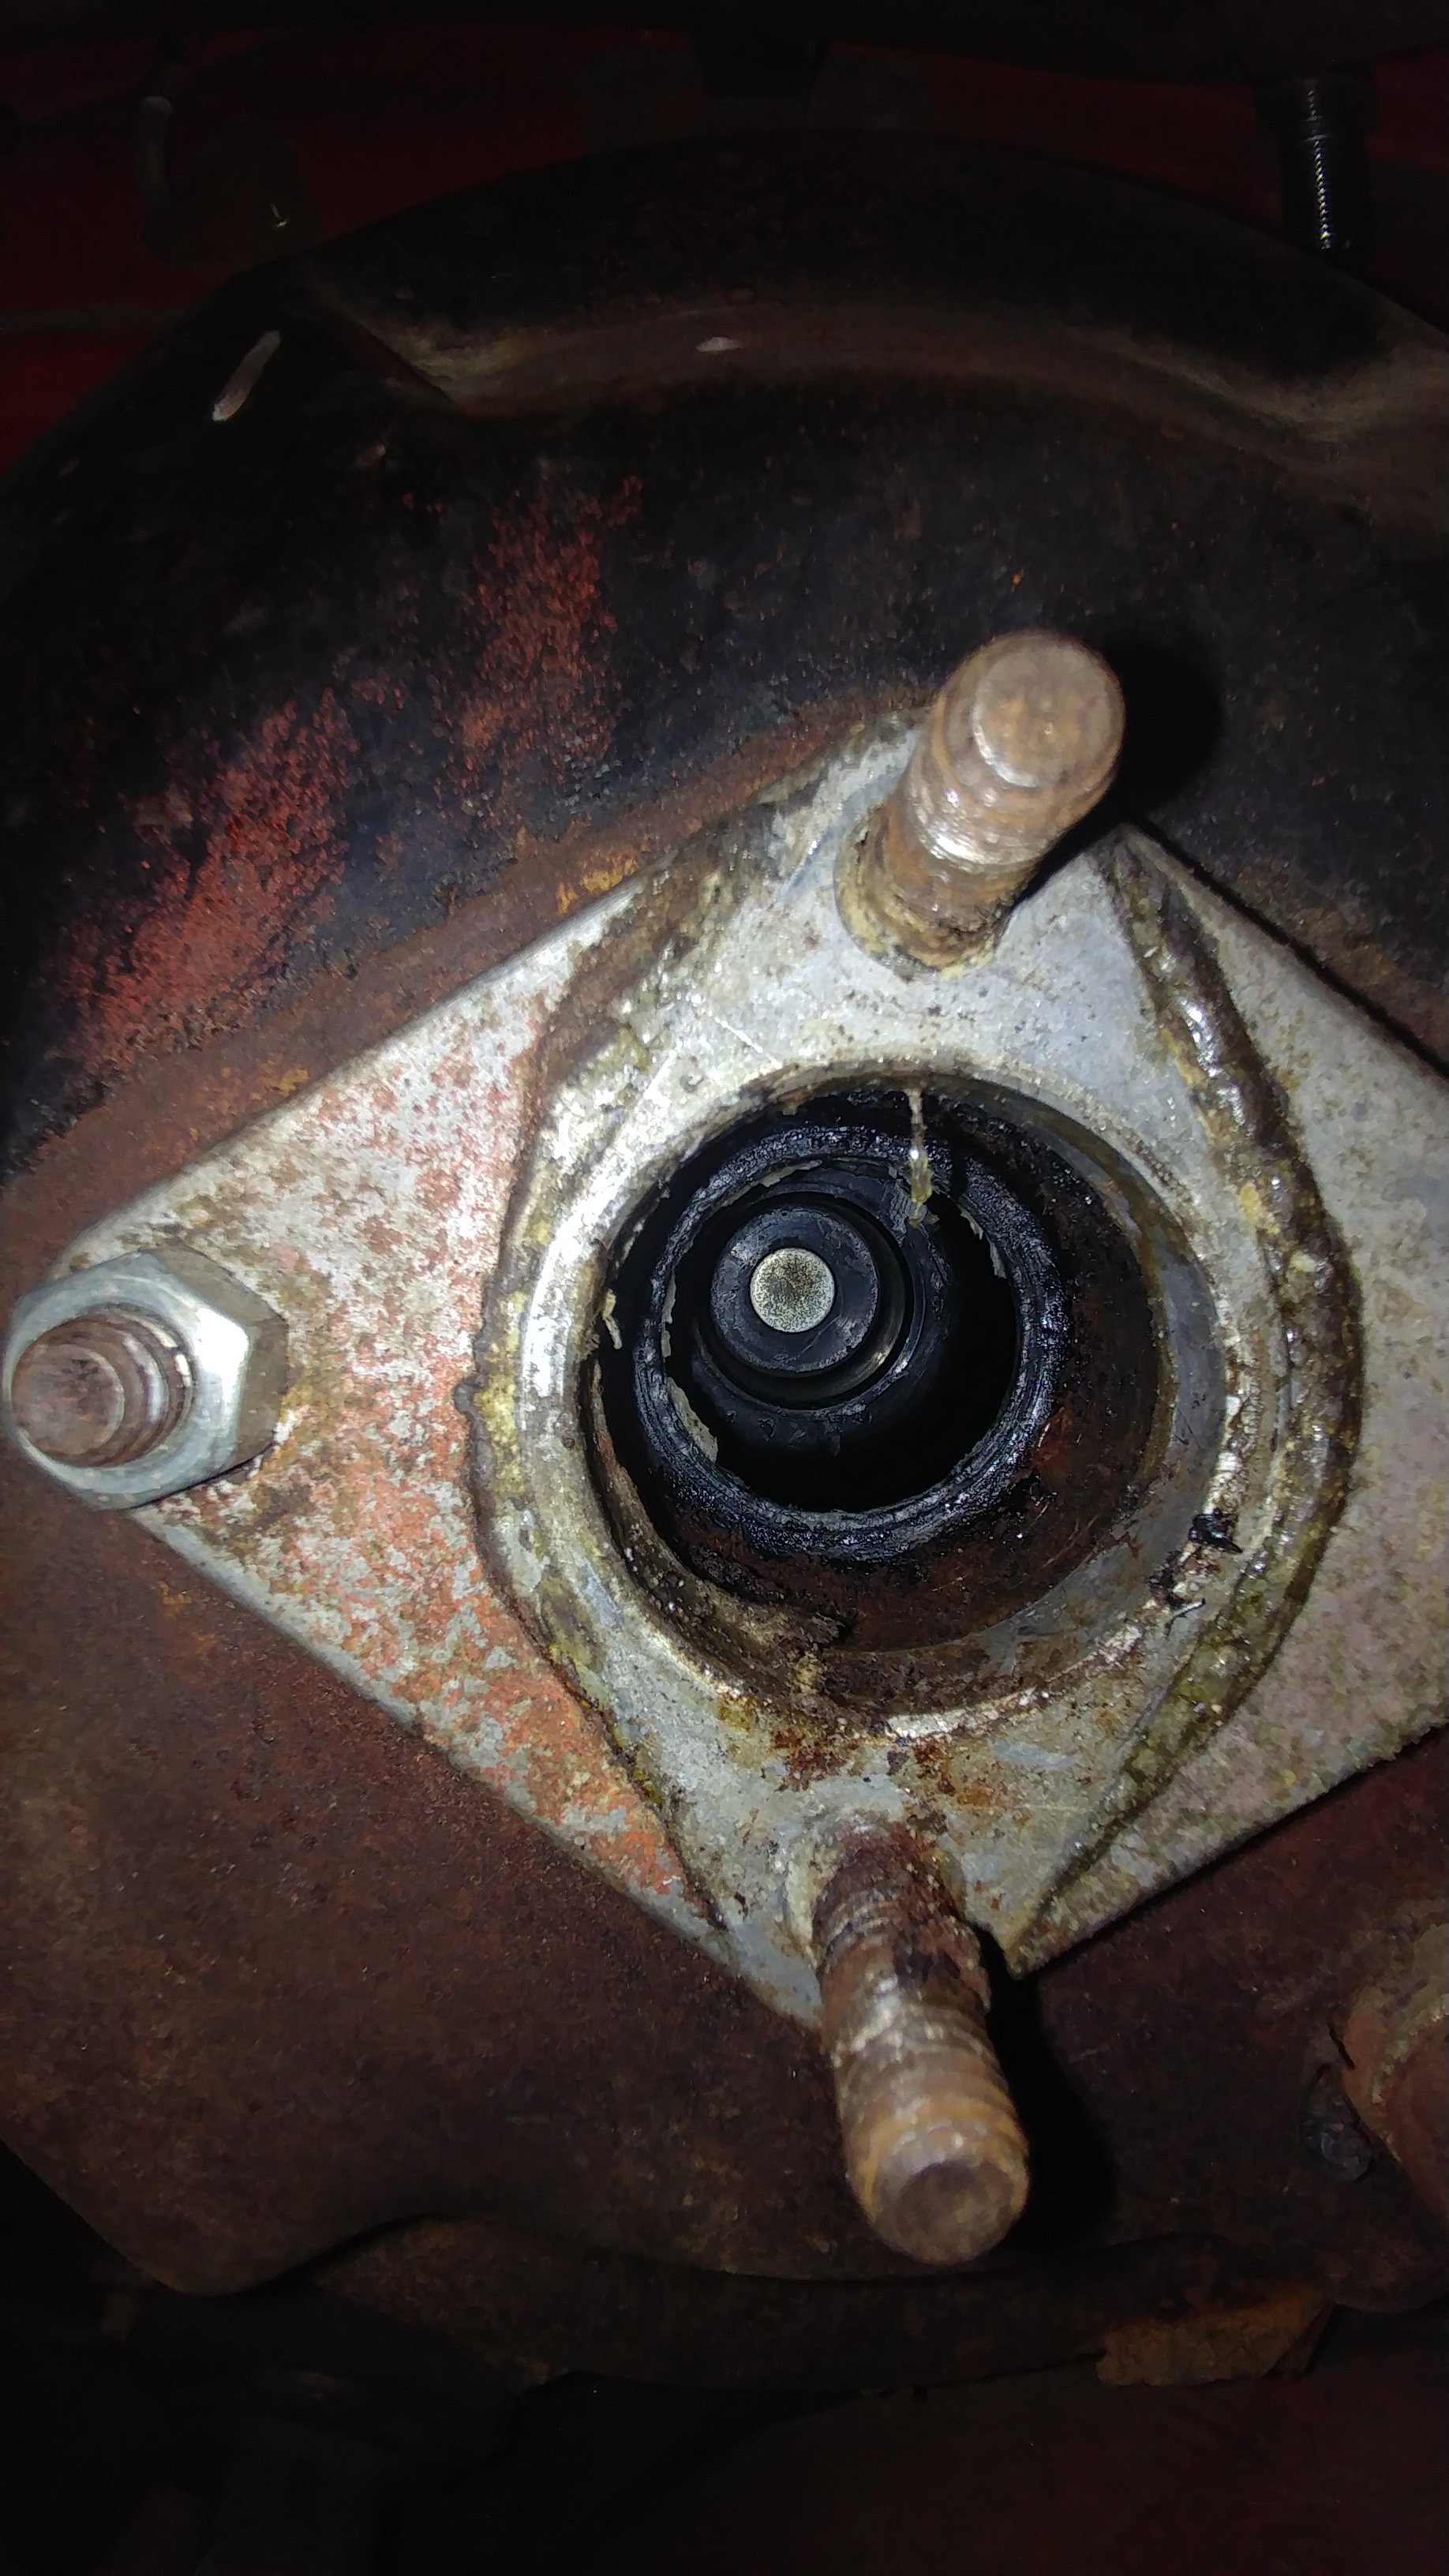
Well I don't see a reaction disk in there.... Edit: also based on the crustynes of the booster and the fact that i can get one from autozone for under $100 with tax and shipping I plan to just replace it.
-
No (Low) Rear Brake Pressure
Twisted46 replied to Twisted46's topic in Brakes, Wheels, Suspension and Chassis
I will check again, I plan to pull out the brake booster anyways to replace it because it keeps making this god-awful honking sound every time I press the brake pedal. I hate to waste another $100 but it's the last hope part of the system. -
No (Low) Rear Brake Pressure
Twisted46 replied to Twisted46's topic in Brakes, Wheels, Suspension and Chassis
A short update, I adjusted the push rod out a little bit and that help with the pedal feel slightly. I need to back it off a little bit as the as the rears would lock up after heavy use. I still do not have enough pedal feel and when I hook up vacuum the pedal goes to the floor instantly. This still seems like an air issue but again we cannot get any more air to bleed out. I was wondering if the safety switch under the master cylinder can cause issues when it gets older? also is there any chance a bad brake booster would cause this? I am only asking these questions because I plan to replace the lines this weekend and I really never want the best with the brakes again. so if I need to replace either of those now would be the best time. -
No (Low) Rear Brake Pressure
Twisted46 replied to Twisted46's topic in Brakes, Wheels, Suspension and Chassis
So I decided I needed a break from working on the brakes.. HAHA.. Anyway I took it to a shop and they tried for 3 hours and didn't make any progress, they took the MC out and bled it and then went to the corners in the right sequence. I wanted them to try before all the lines are yanked out and the car is down for a long time.. again... -
Sold
-
No (Low) Rear Brake Pressure
Twisted46 replied to Twisted46's topic in Brakes, Wheels, Suspension and Chassis
I've got a roll of 3/16 copper tube and a package of M10 flare nuts on the way. I really didn't think much about the hard lines because the brakes worked when I bought it. I am thinking that is a massive air trap though. The good news is that the line from the engine bay to the rear T is fine. Happy Birthday America, Enjoy your holiday all. -
No (Low) Rear Brake Pressure
Twisted46 replied to Twisted46's topic in Brakes, Wheels, Suspension and Chassis
-
No (Low) Rear Brake Pressure
Twisted46 replied to Twisted46's topic in Brakes, Wheels, Suspension and Chassis
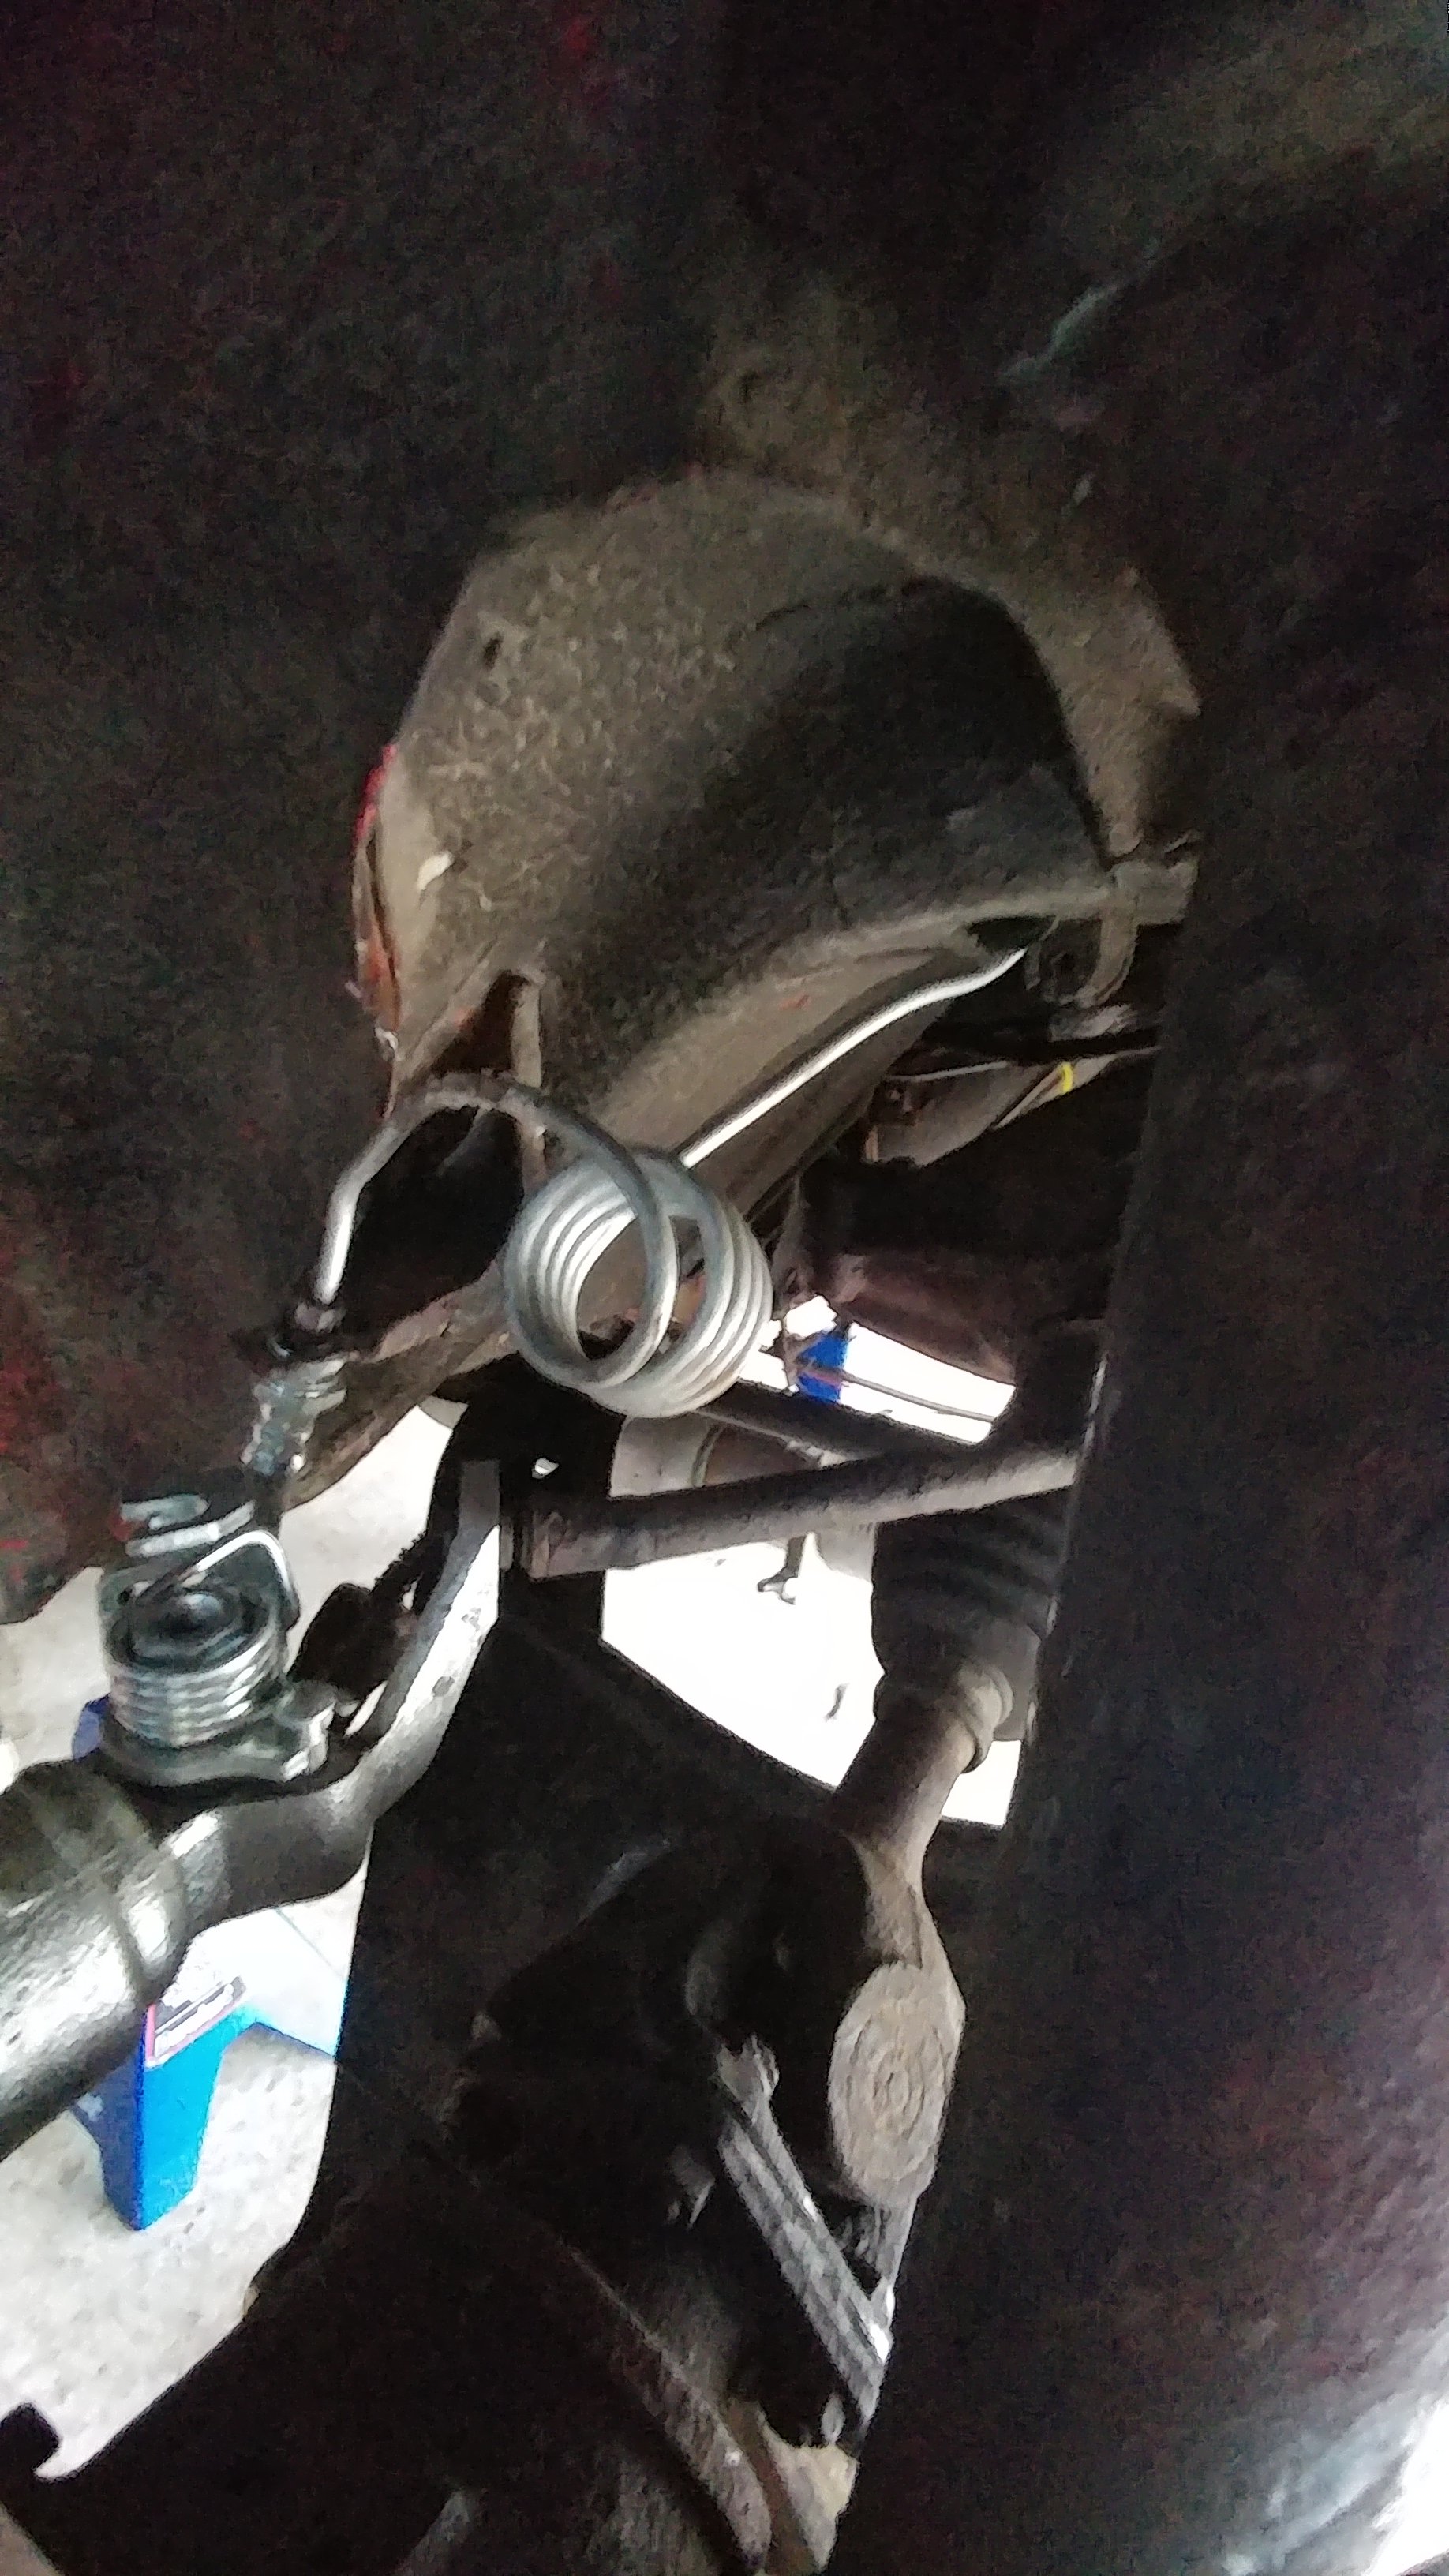
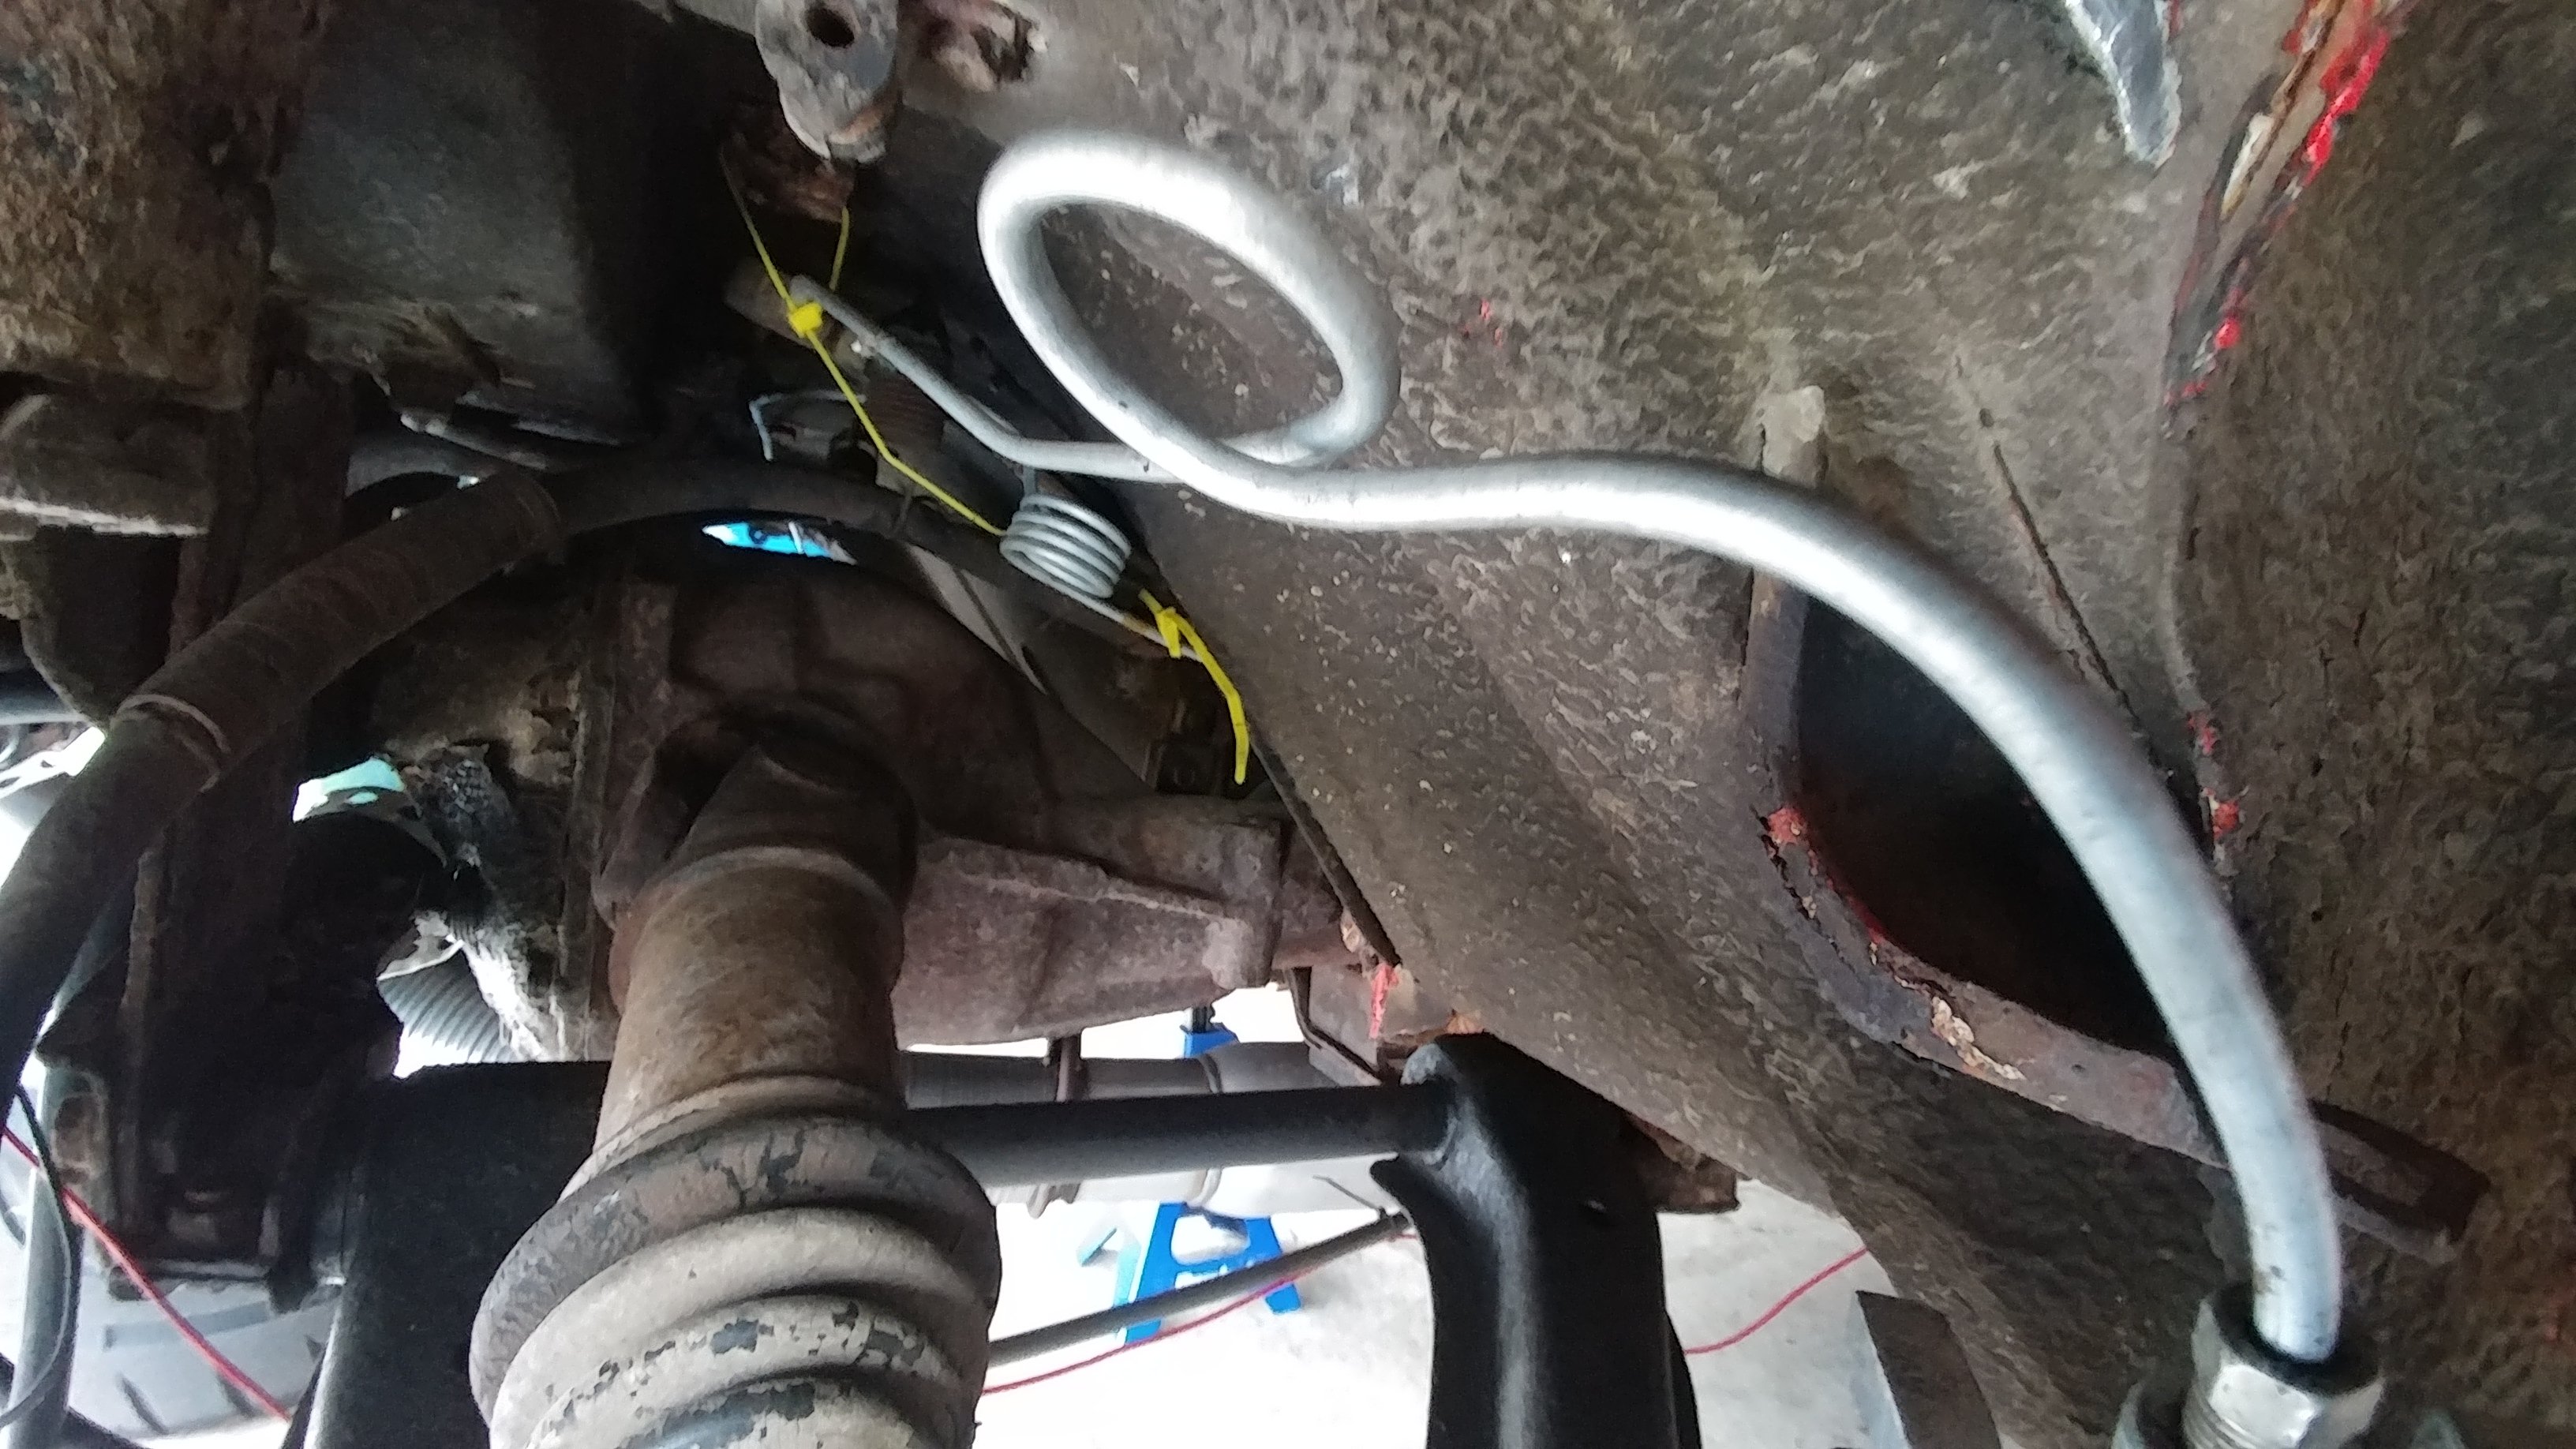
Indeed, someone put some pig tails, 3 or 4 on the passenger and 6 or 7 on the drivers side near the rear drums (now calipers.) I will upload some pictures shortly. -
No (Low) Rear Brake Pressure
Twisted46 replied to Twisted46's topic in Brakes, Wheels, Suspension and Chassis
Well the Wilwood MC is in and.... still the same problem. Now I am wondering if the problem is the POs crazy brake lines coils they put in the lines for the rear. I will try to get a picture later. -
Be warned, the adapters from Flyin Miata are no longer the correct part for this swap. From the description "Adapters have an M10x1.0 inverted flare female fitting and 1/8 NPT (1/8-27) male on the other." I had to cut my lines and install new fittings, not a hard job but definitely ruins the day when you were expecting a 30 minute job and it turns in to a 2 hour job.
-
Alignment Suggestions For Track Day Car
Twisted46 replied to Twisted46's topic in Brakes, Wheels, Suspension and Chassis
What for should i go for? -
Alignment Suggestions For Track Day Car
Twisted46 replied to Twisted46's topic in Brakes, Wheels, Suspension and Chassis
Only Camber plates. I just replaced tie rods along with every most of the other suspension parts so I need it straightened out. -
Hi all, I have an appointment to get an alignment next week. I am guessing these guys will have never had a Datsun in the shop before. What do you track addicts run for alignment settings? Not sure it it matters but I am on German lowering springs so the car is pretty low to the ground. also running 16X8. I didn't really see any room for adjustment out back so we will say front only.
-
No (Low) Rear Brake Pressure
Twisted46 replied to Twisted46's topic in Brakes, Wheels, Suspension and Chassis
So after messing with this countless more times I decided to order an Wilwood 1" MC. The only thing I did not try is reverse bleeding the brakes, mainly because I did not want to take out the speed bleeders just to have to put them back in. Also after further analysis I seem to have 1 pump that is low and then the rest will be higher at the same height with firm pedal. That makes me think it could but and undersized MC like Miles mentioned. I also plan to do larger front brakes at some point so I will need the upgrade. -
You need the book Miles mentioned! You did not mention what your goals are with electrical? Does the car run well? If you are just talking about replacing interior parts that is as easy as ebay/forums/junk yards then find an upholsterer or buy new parts for $$$. Now new are the suspension and brakes? 40 year old rubber does not work well, neither to shocks that have leaked dry. Rusty floor pan or frame rail? if you actually have a bad frame rail do not hammer on the car until it is addressed, if it is weak the V8 can deform the body if you are hard on it. What is wrong with the stock fuel gauge? Fuel floats are very simple devices, is yours hooked up? stock unit?
-
Oil Pressure Gage Not Reading Correctly With SBC
Twisted46 replied to Twisted46's topic in Gen I & II Chevy V8 Tech Board
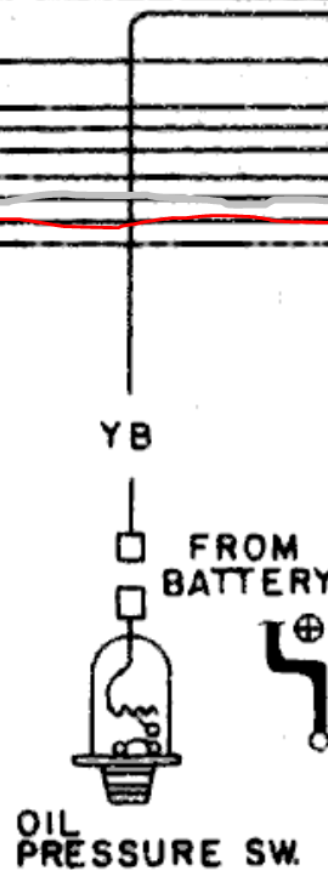
I was able to confirm 12v to the oil pressure sensor in run mode only. The wiring diagram I have shows only the yellow black wire is used for the oil pressure gauge. I will double check but IIRC I just used the sensor that was already on the L6 when I took it out and used a brass fitting to adapt to the chevy block. I check other things you mentioned this weekend. -
Oil Pressure Gage Not Reading Correctly With SBC
Twisted46 replied to Twisted46's topic in Gen I & II Chevy V8 Tech Board
Hi Miles, I actually do not have the oil pressure safety switch, I rely on a kill switch and inertia switch. My ignition and fuel are on dependent switches, my key doesn't do much lol. Anyways right now I only have the yellow-black wire hooked up to the oil pressure sensor.
-
So pretty simply as soon as I turn the key to the ON position the oil pressure gauge (OEM 260z) goes off the scale past 90 and stays there. Once I actually start the car and it is running it pegs over to 0 and stays there no matter what. Now I know I am getting at least some oil pressure as I left the mechanical fuel pump shaft bolt out and it sprayed oil all over the front of the engine bay... sigh. Anyways I have also watched the oil valleys in the heads fill and drain when I pull the valve covers after running it. I followed the JTR book, any ideas what may be happening?