psyber_0ptix
-
Posts
23 -
Joined
-
Last visited
Content Type
Profiles
Forums
Blogs
Events
Gallery
Downloads
Store
Everything posted by psyber_0ptix
-
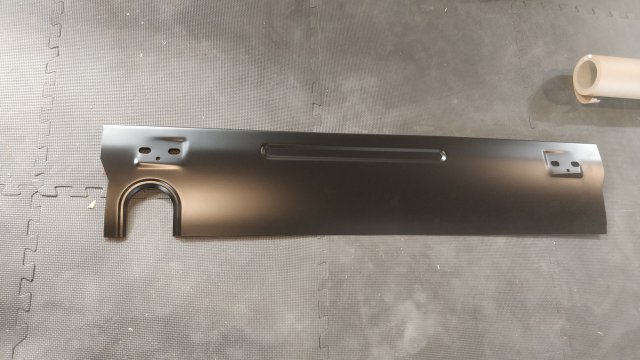
I'm tired of buying panels for this project because I already got everything I could to make it easier. I just couldn't pass this up because it will simplify things instead of being a complete fab job to rebuild. A fellow enthusiast posted a picture of a salvage yard and came across a single 240z among multiple 280z's. It's tail light panel was intact.... And it's been hard to come by. He cut it out and sent it to me for a very reasonable price considering his time, efforts, size, and transit across the country. I had my helpers thoroughly inspect it to great satisfaction. One step closer. Still feels like 100 miles to go.
-
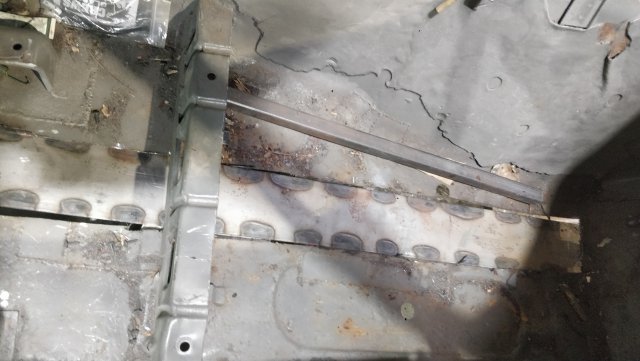
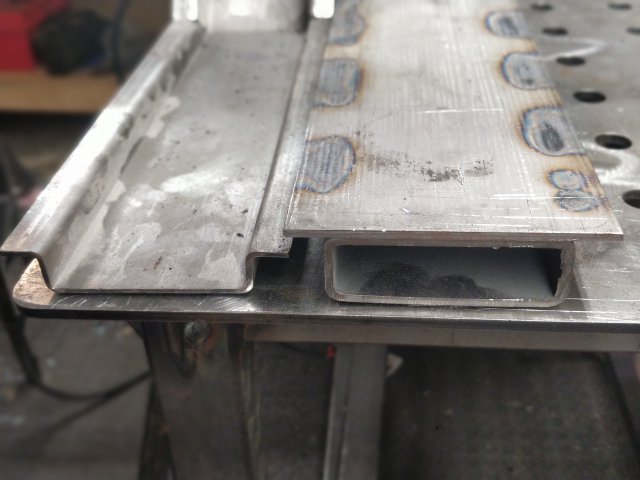
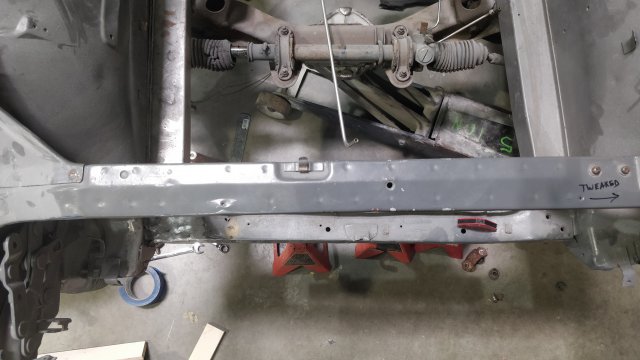
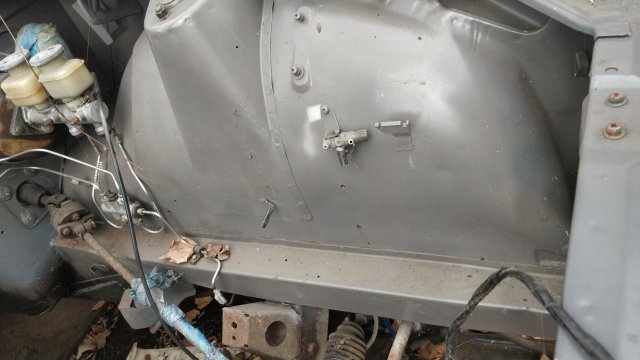
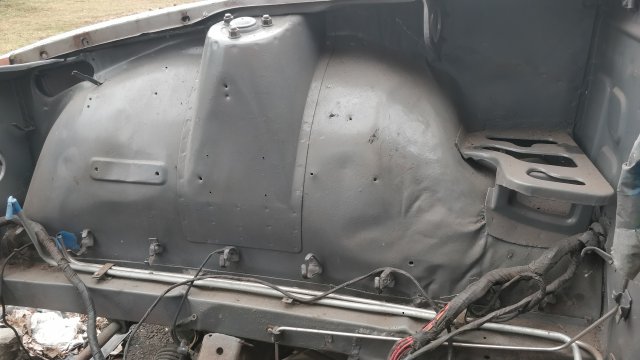
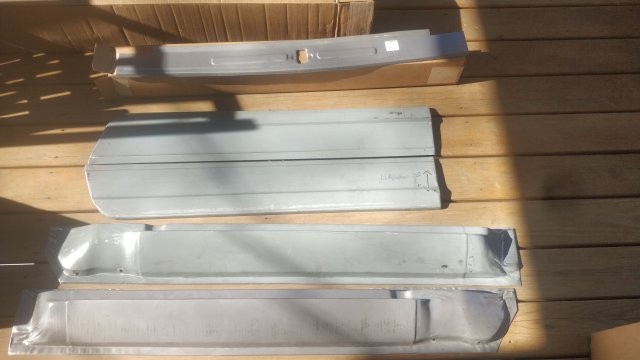
I guess not too much to update. Toying around with maintaining the 370z front speed sensors so ABS and/or traction control will be a realized option. Fitting up the front brakes... Everything's works as expected. Modeling and 3D printing paid off. Safety wire, then fitup. Got a new tiny brake booster. Someone was nice enough to cut off the tail light panel to replace the one on the 72 which is in terribly rough shape. This will be a big time saver since I don't know anything about body work and don't have the experience to do any sheet metal fab. Here's the current state of the rails.

-
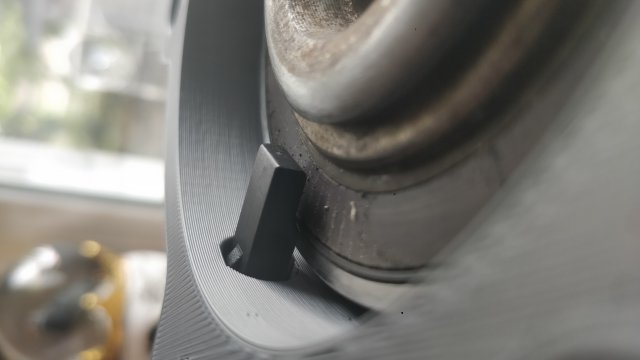
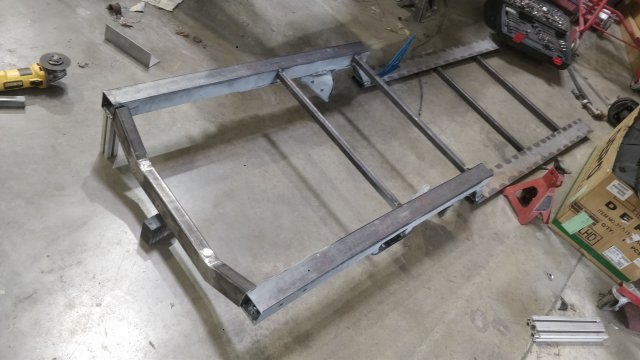
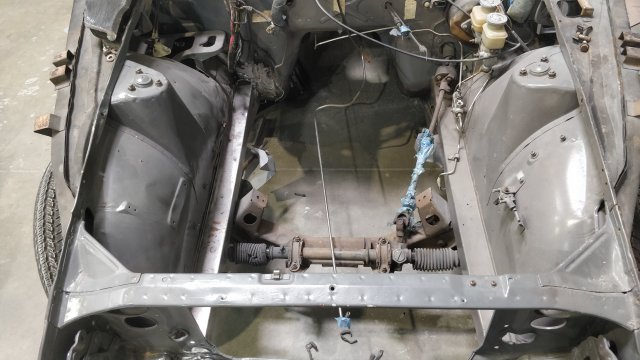
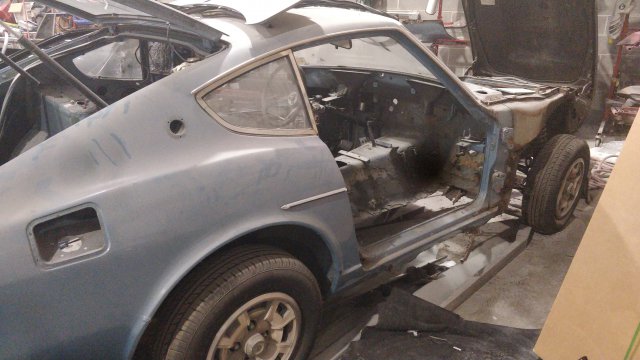
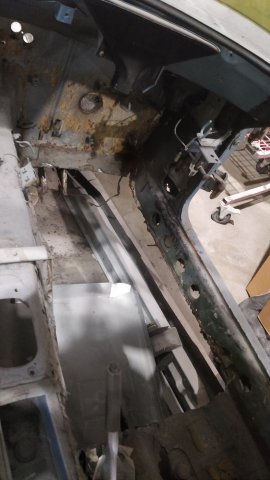
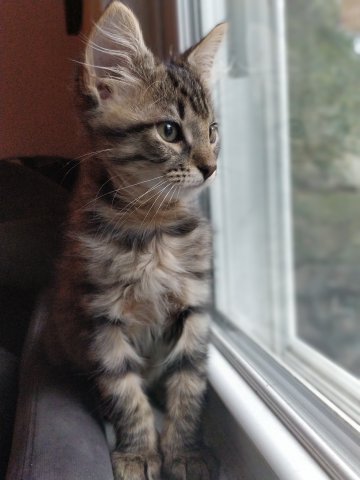
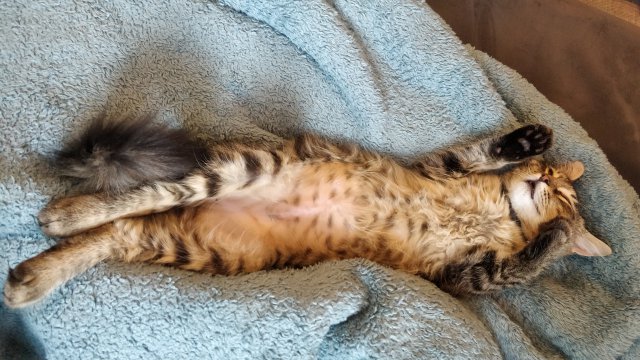
BRAKES So even though I have the Wilwood hats and their correct offsets, I decided to take some liberties and redesign a set with inspiration from the design of the Trackspeed setup I had for the miata. Printed it out and it fits well! Calipers came in, and I have confidence now in the model previously printed. Had the brackets previously designed cut and test fitted to the OEM 370z knuckle. Tooling didn't come in to make the slots, but I'm not too worried about it. Perfect fit! I don't think I'll ever use Heli-coils ever again. Time-serts feel far superior. I didn't want steel bolts galling the aluminum bracket. Who knows how many times I'm going to be taking this thing on and off. Kit comes with pilot drill bit, counterbore tool, special tap, inserts and installation tool. The last two threads are malformed so when driving the install tool all the way through, it'll set the insert and cold forge the bottom into the substrate metal. Some loctite, and it's not going to budge. DRIVETRAIN I decided I'm going with a TR6060, so I needed a shifter. This H-pattern from S1 Sequential will fit the bill. Why do so many of my parts come from Australia? In other updates, got clutch from the nice folks at Competition Clutch who is selling a full face Twin Organic Disc clutch as part of their Vengeance lineup. Excited to get this mounted to the LS3 once I source a TR6060. TIRES If the suspension comes sometime soon, I'll be ready to throw these on to wheels and get the shell rolling BODY Finally cut all the old frame rails out My buddy Denis dropped by to help melt metal Test fitting and aligning the frame Lot's of fitting, trimming and re-fitting. Finally got it tacked on the firewall and in a couple places down the floor. Next week, finish welding the frame in, then try to get help on fixing the body. It's been stagnating for far too long and I want to get this thing done. This post brought to you by Theia basking in the sun... ....Lilith casually posing... and Koios.....being weird.
-
New member struggling to build a Z
psyber_0ptix replied to psyber_0ptix's topic in New Members Forum
Mods haven't moved the build thread over yet, so if anyone is interested in following any updates, you can do so here: -
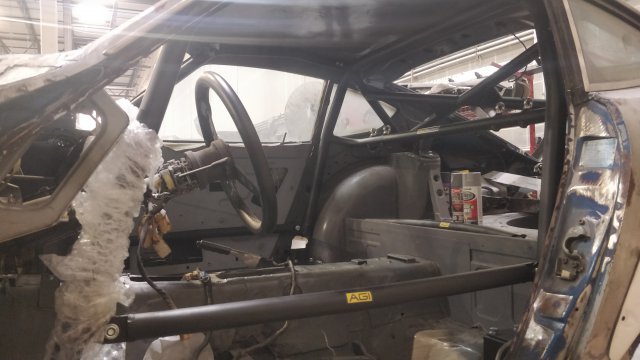
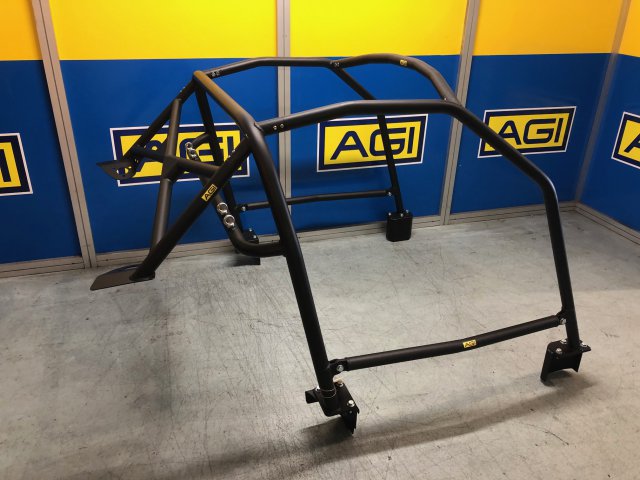
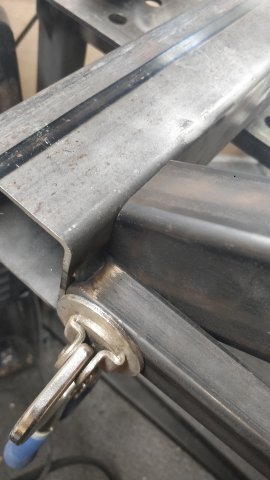
So in a panic trying to get this thing kinda done as I might have to move it out of the shop... Making sparks a couple weekends ago, prepping the inner rocker for the roll cage base mounts. Cut some crusty frame rails out and positioned the new one for mockup. AGI RollCages worked with me to tackle a minor deviation between chassis and sent components to modify the windscreen bar. I cannot recommend AGI enough for their support and level of detail. It's been an open book and one of the easiest companies to deal with. The cage is 100% fitted. With everything buckled down, and rigid, and knowing the car is completely level, I've made a risky decision. I am tying the fore-aft frame together as one unit and will lift it into place to secure it. The rockers are completely tied by the firewall and door latch via cage/door bars, and the main hoop will keep the rear struts from twisting when I cut both rails out of the floor. We'll see if I goofed, otherwise...full-send. Got an estimate of the suspension shipping out in 2 weeks. Hopefully this will be rolling soon.
-
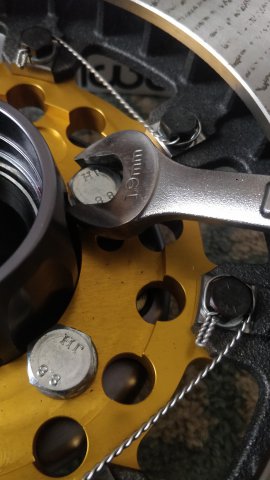
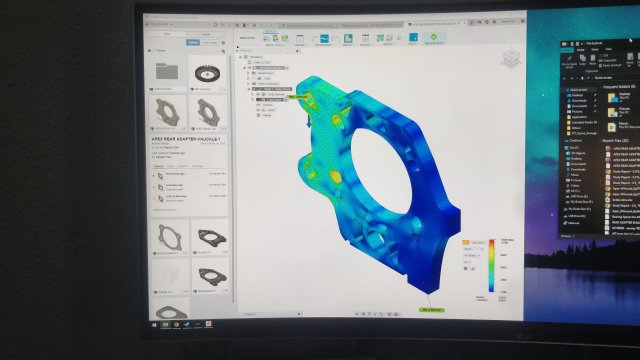
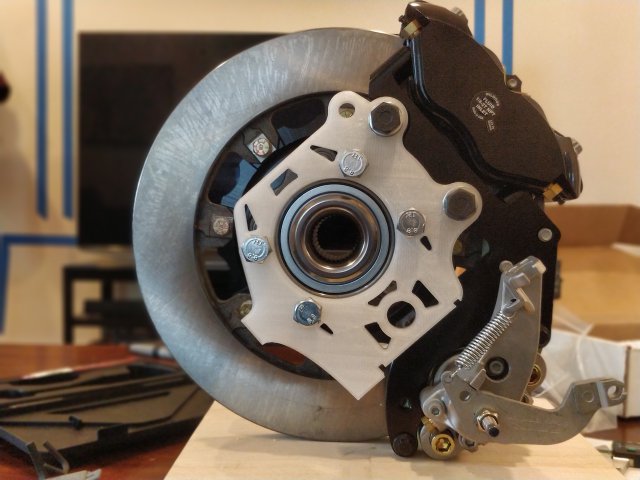
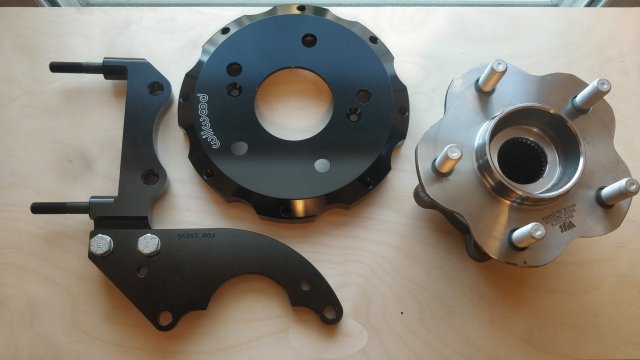
Some progress on the front brakes. The rotor is spec'd for 1.1" thickness but I only had a 0.81" laying around. Same rotor hat in use so the clearance to the "pad" indicates it should fit fine with the full thickness of rotor. Radial distance seems to be spot on. Comparison made between the Forged Narrow Superlite caliper (red) and the Forged Internal Superlite used in T3/ArizonaZCar/Silvermine kits. You can see the difference in width which should help with any clearance woes. Same piston area so they should be compatible. If you want to run larger diameter rotors in the future, you only need to shim the caliper instead of coming up with a new bracket. Yay for being modular!
-
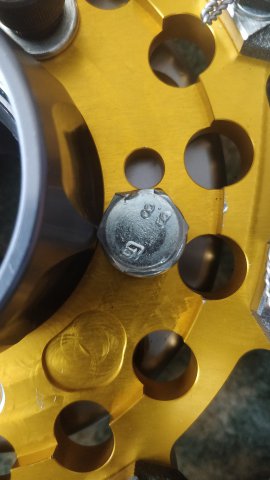
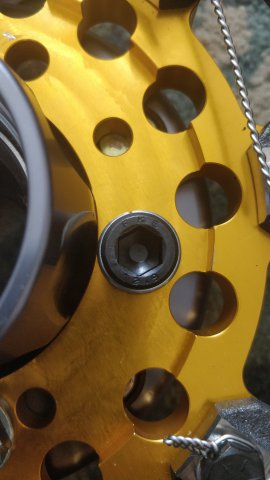
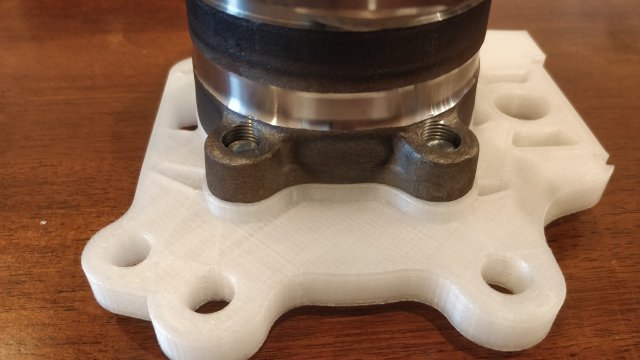
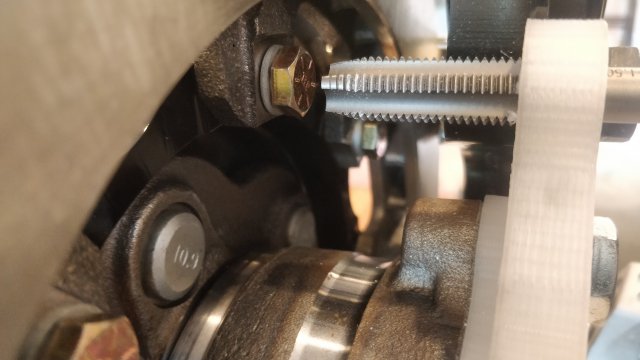
Decided to integrate the radial bracket to the adapter so it's one piece. Printed off to check fitment. I don't have any M14 bolts to check how well the 3D printed threads were made, but it seems to fit the 370z tab spacing just fine. When made, it will take a wilwood bracket-stud kit which is 3/8-16 on the bracket end, and 3/8-24 on the caliper side. Then the Forged Narrow Superlite 6 pot caliper slides right on.
-
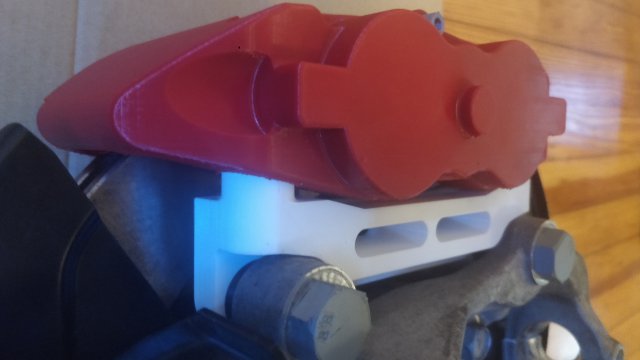
Tried out making a dash badge for some buddies with RB swaps. PETG got a little hairy. I guess I still need to figure out temps.
-
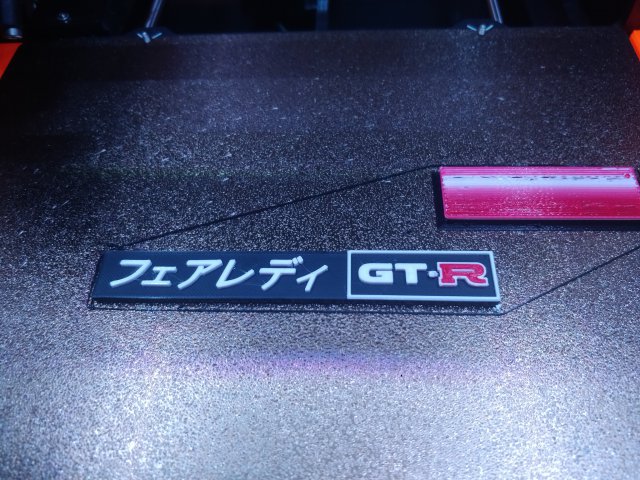
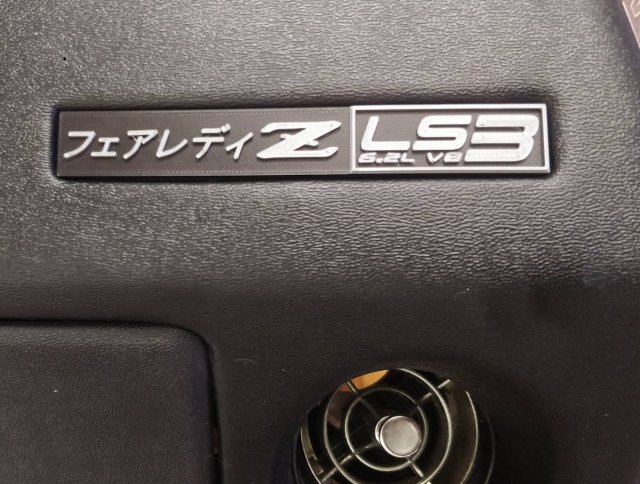
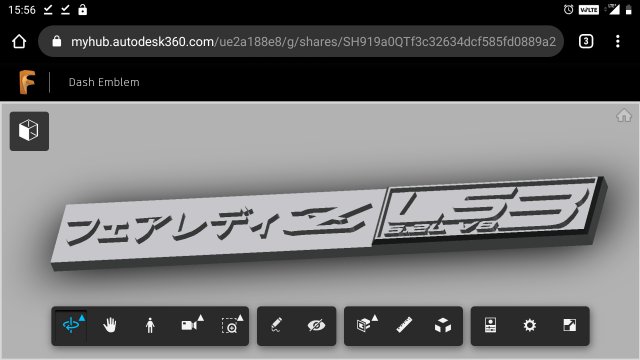
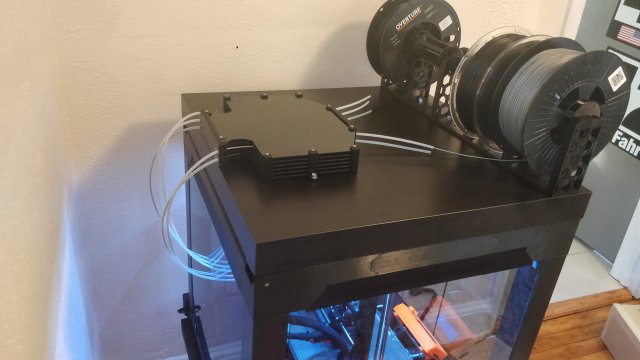
Finally got around to dig into the Datsun. The quality of the AGI cage is awesome. It's no joke when they say it's a two person job. I'm going to have to cut the mounts free to fidget with the bar since the halo cross bar interferes with the roof. Otherwise, a pretty involved installation for an individual but I think I can get it to work. Update 8/8/2020: The windshield bar was found to be too high, they offered to rebend it and send me a new billet ends to try to cut to fit. I toyed around with creating a new dash emblem. I built out the MMU2S for my Prusa i3Mk3s to handle multi-colored printing. The resolution on my 3D printer isn't that good, so I guess it'll be something to get machined. Picked up a 370z front knuckle to take some measurements. Building out a brake kit to balance the rears. Much like last time, I tried to utilize as much off-the-shelf Wilwood parts. This uses the same rotor hats as the rear kit and once again, just needs an adapter between the 370z mounting tabs and the wilwood lug/radial bracket. I think it'll work! Sadly, I don't have the parts to mock up yet and waiting for apexengineered to finalize some things before I can make amendments before committing to purchasing the parts. I'll also try to model up the Forged Internal Superlite calipers also found on T3/Silvermine/Arizona Z Car brake kits. They use a 7420 padshape which is easier to find compounds for than the 7416 of the billet narrow superlites, but at the cost of less wheel clearance and being lug mounted. I think I prefer the radial mount overall. Hopefully more updates over the weekend.
-
New member struggling to build a Z
psyber_0ptix replied to psyber_0ptix's topic in New Members Forum
Thanks for the warm welcome! It's the first time I did a ground-up build so it'll be nice to form an intimate relation ship with every nut and bolt. Gotta know which ones are tender 😅 I wanted to keep it a little more simple. ITB's aside, there's something to be said for being able to pick up any generic part from a parts store. Something something "stock" reliability. It'll be fun since it's my girlfriends first breakout into cars (she actually decided on the LS3) and I get the suspension and brakes. We're still battling over the trans, but we ha e time.... Body first. -
I got a sneaky peaky of AGI's 6pt cage they finished. It's coming home! I wish it were through dash, but I'm still happy!
-
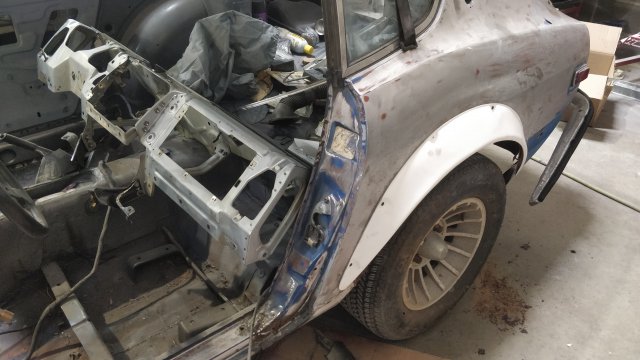
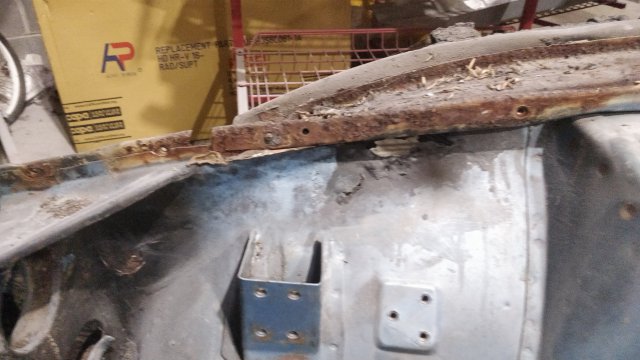
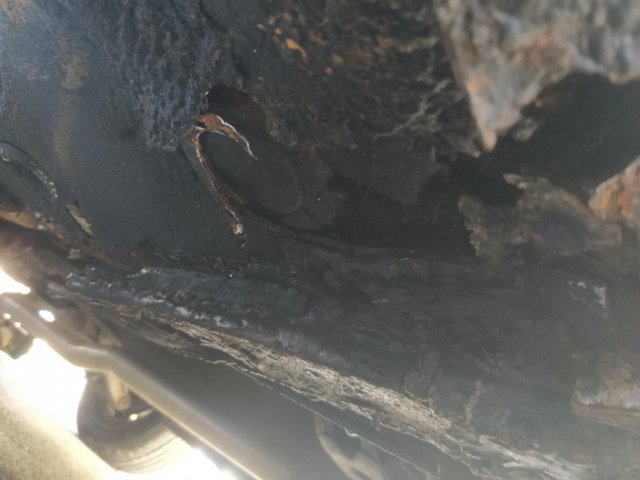
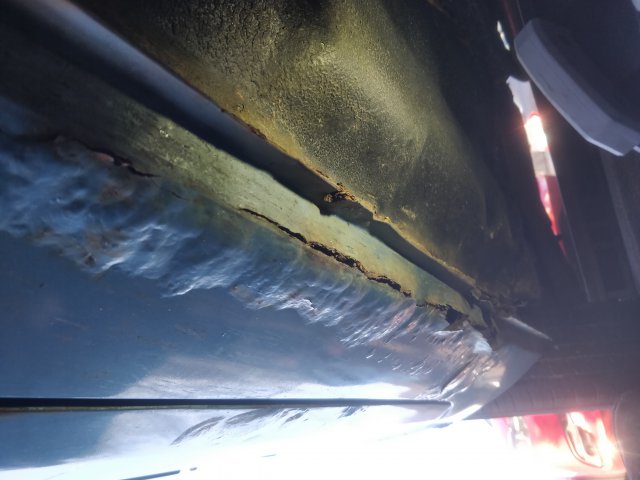
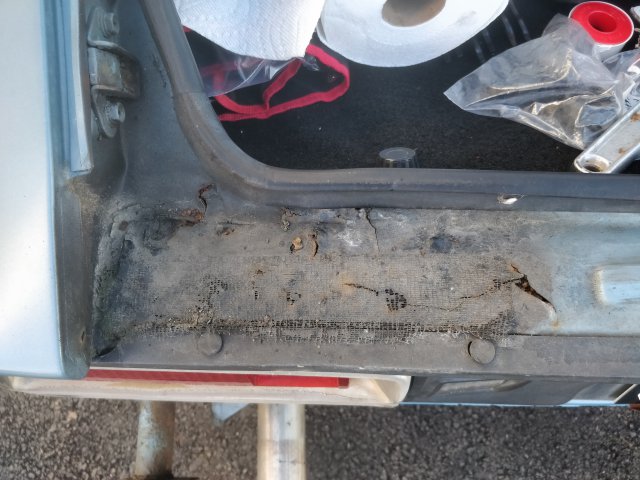
Based on the bartered price for the help of the body shop, and the amount of time it would take to correct the front end of the 280z, it was just easier to 'start' with the 240. That being said, I hope I can resurrect the 280z on my own time as I learn through this process. It's hard to capture but it definitely looked fine, but as you peek away the undercoating, it's just flake. Sanding back to add metal, just opens holes wider and wider because the metal has become paper thin. It's a good candidate for anyone who want's to tube the front end. I don't have a tube bender, nor a garage of my own (sadly I can't build one due to zoning). It's a 12-15 hour drive away, and no guarantee he will even be there. Plus, I've tried to offer a amicable settlement simply requesting a refund multiple times. I've never been so burned from a car community member, but I suppose it's just a matter of time. Everyone has a story about a shop or a guy, this just happens to be mine. From what it appears, I got off easy losing $2k. Others have had their cars stuck at the shop for years, burned 10's of thousands of dollars for sub par service and products. If you ever search on FB or through NICO forums, the phrase "I can't believe he's still in business." Keeps cropping up. Since all I got was radio silence, I'll just have to accept what the credit card companies decide to do with their investigation.
-
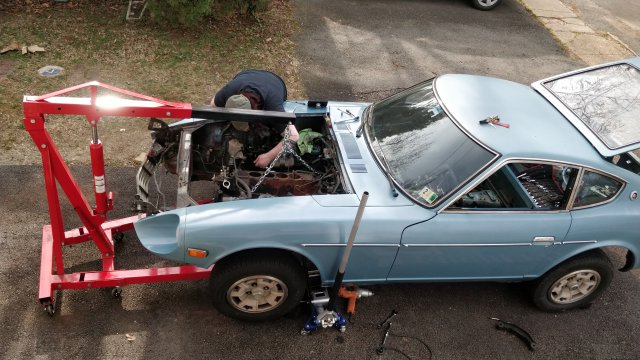
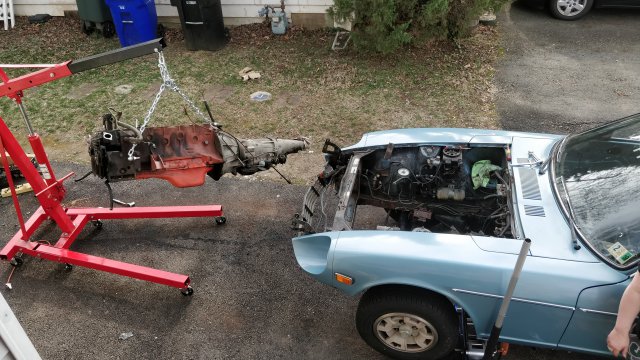
Hey All! I'm new, I've been trying to revive a shell for a while and just abandoned it for another shell. What turned out to be a restoration project with the girlfriend ended up a tumultuous path toward a v8 swapped basket case. Follow the build here: I've been active in Subaru, e30 BMW and Miata communities over the past two decades and have had a history of swapping vehicles. 3 WRX swapped GC's, an s50b30us swapped e30 and even putting GSXR750 forks on a GS500 with a katana rear wheel and hayabusa brakes. My last project was a boosted 450hp Miata that I recently parted out to raise funds towards the Datsun. Here's a trip down memory lane.... It's been a year and a half in my endeavor and I've already had to seek a replacement shell, learned how to throw money down the toilet, and trusted shady vendors to which will keep my money. But despite the negative first impressions, I'm still excited about the car and will just take a scenic route (much like everyone here) toward completion. Current plans are an LS3 with Jenvey ITB's. Still working out which trans but it'll be mated to a 370z diff using the ApexEngineered subframes. Anyway, I made a project thread but did things out of order. I hope the moderators can move it to the correct section. Looking forward to researching and learning!
-
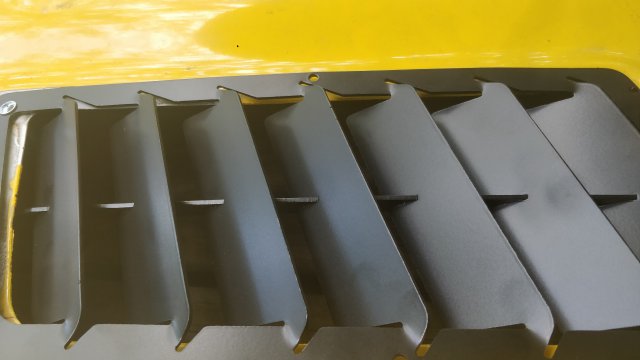
I sent a set of vents to Trackspec Motorsports and they developed a set of replacements. Fits pretty well! The lower flange could have been a bit wider, but that area could be painted black or covered with gasket. They use the stock mount locations, but also have some additional for support around the perimeter. It shipped with black rivets. Hopefully there will be more movement on the rust repair/body soon. Damn Covid19
-
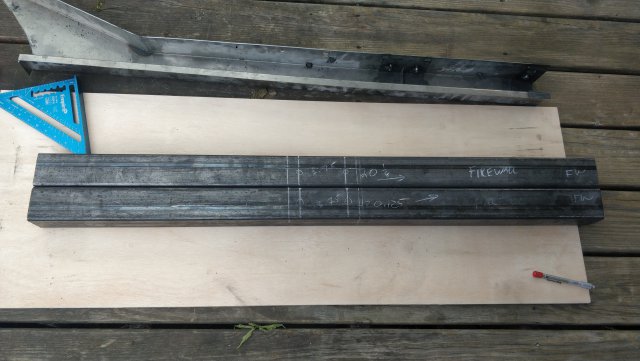
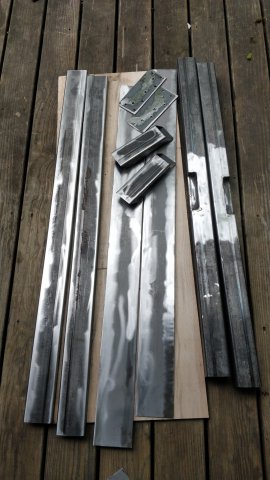
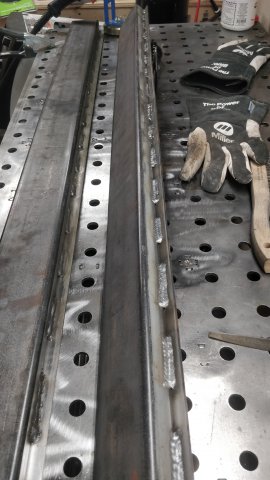
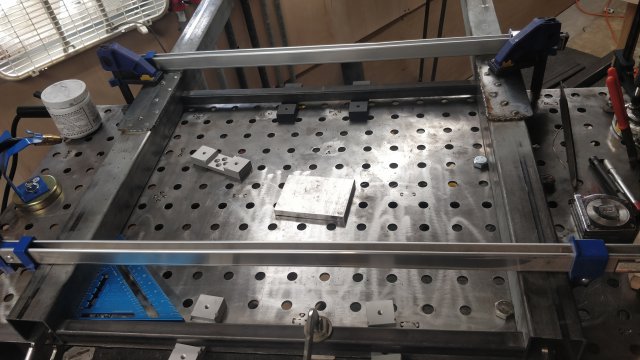
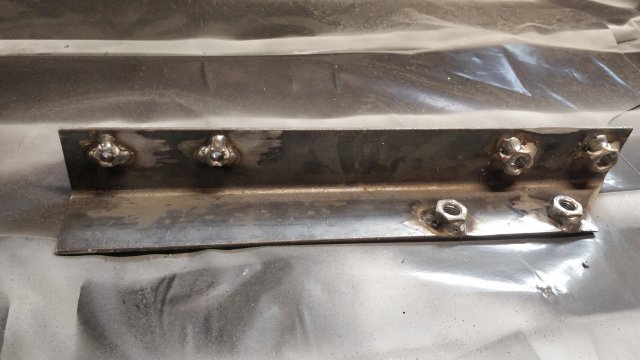
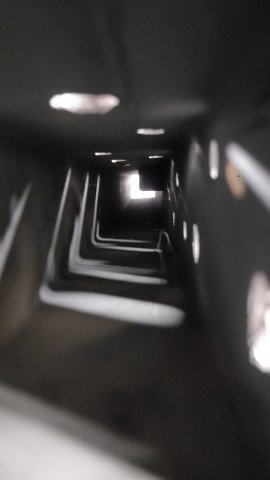
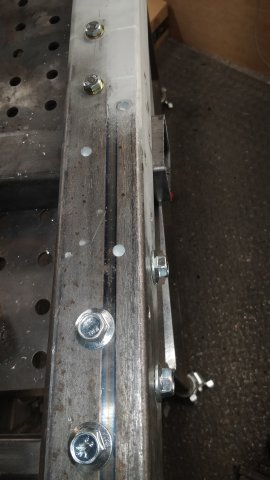
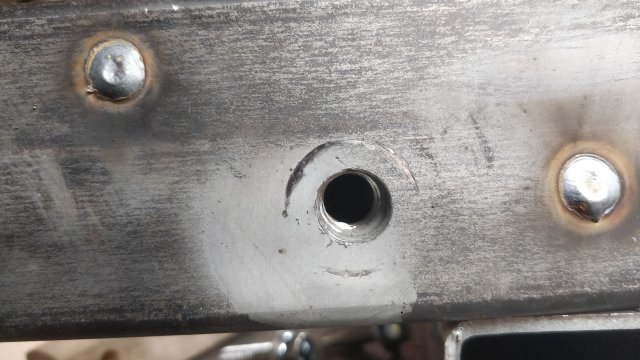
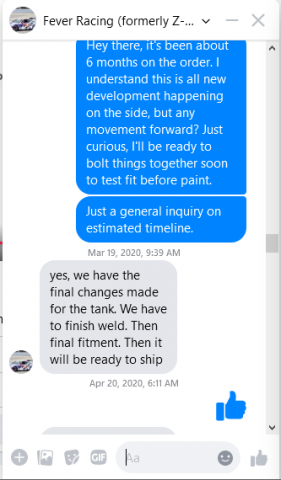
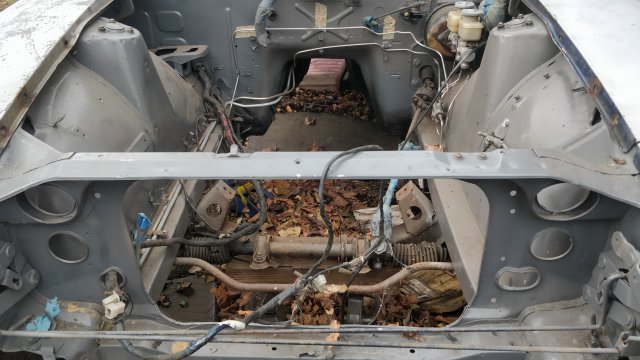
June 2020 I'm super excited to receive my ApexEngineered front subframe. I bought some metal and began hacking away and blob welding things together. It's pretty bad, but no worse than what I saw at the body shop 🤣 Using one of the frame rail replacements as a reference, I marked out critical locations with a soap marker. To create the little alcove for the subframe mount, I just notched a wider section of the square tube. Tried to remove the mill scale as best as I could Learning how to mig weld I started to jig the rails together using 25" 1x1 square tube to keep them square and parallel Checking fitment to what will be the front lower rad support And the subframe as reference for where to drill and later where to place the TC mount cups. It's ugly, but I'll take ownership. I'm still learning. To figure out how to reinforce the sway bar mounts and the tie-down/tow hooks, I got some angle iron that would nest inside the square tube. Marking the locations on the frame rails, I indicated spots to drill for the nuts on the angle. Frame rails look like swiss cheese as I made more holes to plug weld the angle Iron in place. Bolted the angle in place Plug welded Now I have a threaded hole! Almost there! Just have to repeat on the driver side. At this point I've requested a refund from the shop in Tampa. Sadly after discovering a Facebook Group on all the negative dealings with the merchant, I have little faith that I will ever see my money, or the tank I paid for. I was admittedly naive and trusted the reviews (which are presumed baited/paid for). That takes a huge bite out of my budget and Paypal has a strict 180 day buyer protection policy, and the credit card company is also being vague about any possibility of processing a reverse transaction.
-
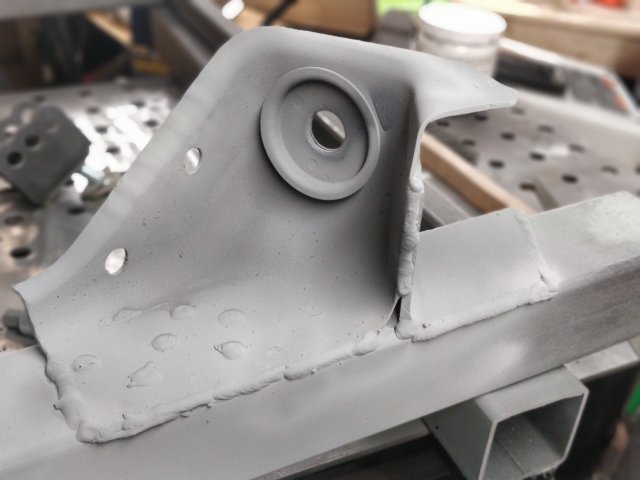
May 2020 Just trying to patch things here and there on the 240z; little movement so far. I wasn't all too keen on how the guy helping out was handling the frame rail refit. The front end also looked tweaked based on the dimples on the upper Fender/Hood support. The 280z dash frame fit so I was happy about that Took a couple more measurements for a new roll bar to be built. Again, AGI has amazing customer service and I wanted to utilize their talents I started questioning how square everything was and decided to take this into my own hands. I was going to use the ApexEngineered front subframe to jig new rails and let the body dude take care of the body. Look at that radiator support/frame rail on the passenger side. It's pushed inward about an inch. No thanks. Removed all sub-frames Reached out about my fuel tank. No response. This is where things have started to go south.
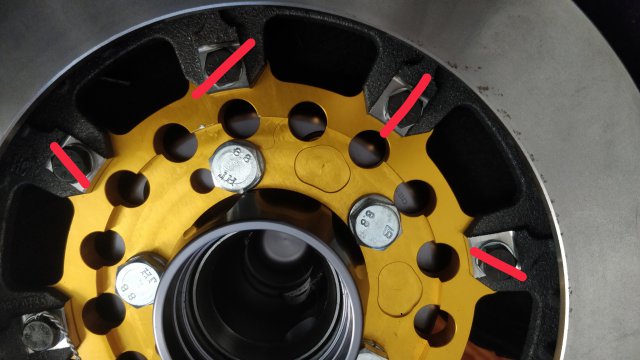
-
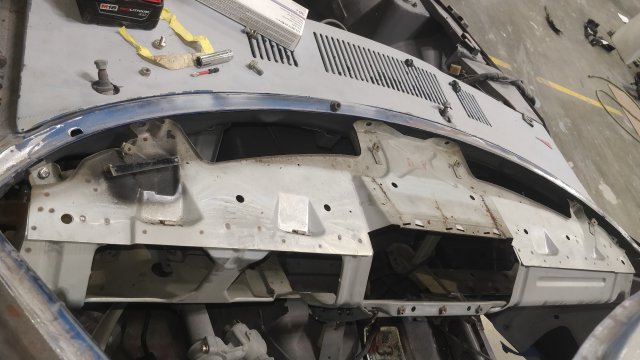
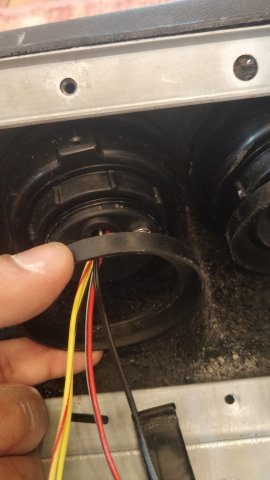
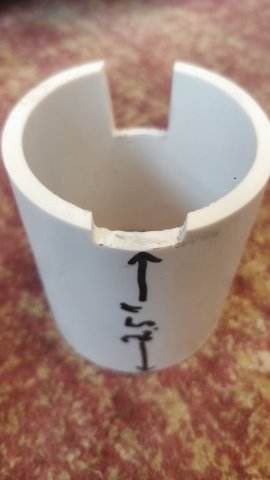
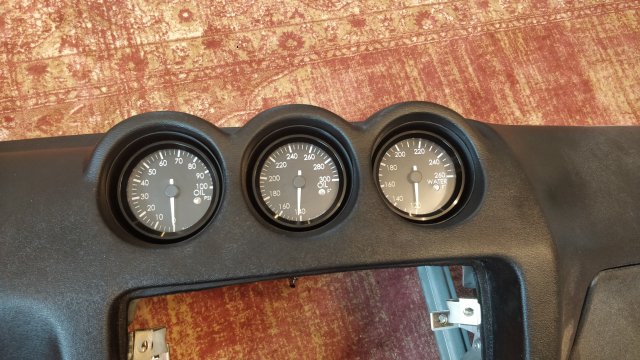
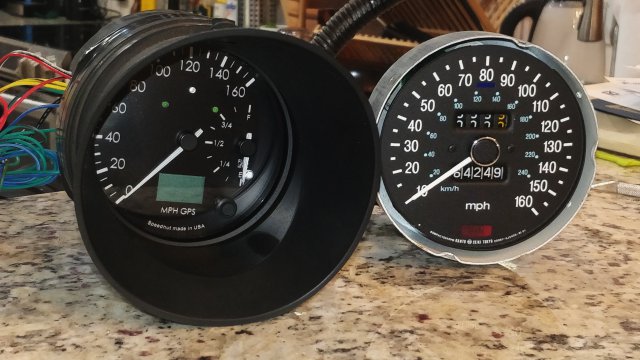
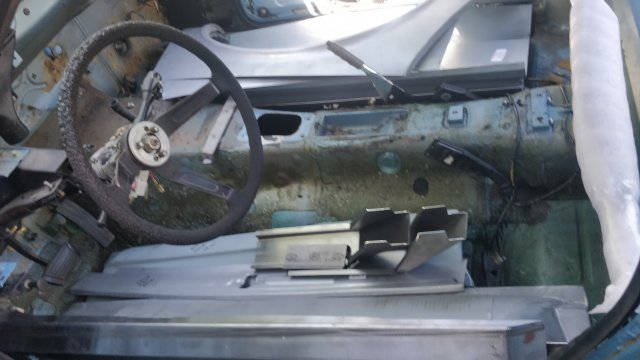
April 2020 In order to install the dash gauges in the 280z dash, I had to order the Mill House Houston gauge pods from Skillard. These are apparently easy peasy with tons of examples for the 240z dash, but it required some critical thinking for the 280z. First the back of the dash had to be shaved so the flange of the Mill House pods would seat flush. In order to provide a compressive force to keep them pressed against the back of the dash, I employed the use of some PVC and strategic notches so the stock metal tabs will hold them in place. I also started playing with the TTT front brake and 5 lug hub. I decided that lock washers were insufficient as on past cars, I've been used to safety wiring my rotor-hat bolts. The huge bolt heads made it difficult to tighten the rotors to the hubs and apply any even torque. No socket would fit. It's really best suited for socket cap screws. While we're on the topic of brakes....the rear setup is slowly coming together. Measuring offsets, bolt patterns and checking clearance. Seems to fit behind a 16x9.5 et0 with some room to spare. 12.19" rotor Next just need to create the bracket that will interface with the ApexEngineered stuff. It goes through several iterations and some FEA to see if it's strong enough (using a 1.4G stop as a reference) 3D printed and test fitted. It works! Made a provision for an M12 hall sensor to be used to pickup the 8 rotor bolts for VSS or traction control input Back at the body shop, some bad news....the executive decision has been made to retire the 280z shell. It was a year long battle and it turns out the 240z 'spare' was in better shape. Now I have to transfer the tags from the 280 to the 240. We're keeping the 280 in case there are odds/ends that need to be cut or transferred over. Goodbye 280z Hello 240z! Sadly, as indicated in the previous posts, I sold many of the high dollar 240z items and now have to scrap this car together as best I can. $6k down the hole. But wait, there's more! The roll bar doesn't fit the 72 chassis, neither does the aluminum fuel tank previously ordered and there are some small nuances with the Apex items. Not only that, the dash that I have lined up and loaded with gauges is still of the 280z variety. Ugh. I called up the shop in Tampa and they were happy to transfer the funds toward a 240z tank. He said it was in stock on the shelf but he'd need a week or two to get the fuel sender and pump together. Great! Ohm at ApexEngineered has been the most communicative in my exploration to develop some things for my Z and has been super helpful throughout the year. He gladly agrees to revise the order to reflect a 240z setup instead of the 280z. Great!! I sold the roll bar, and ended up committing to the 280 dash in the 240 and with some small modification to brackets, it fits fine.
-
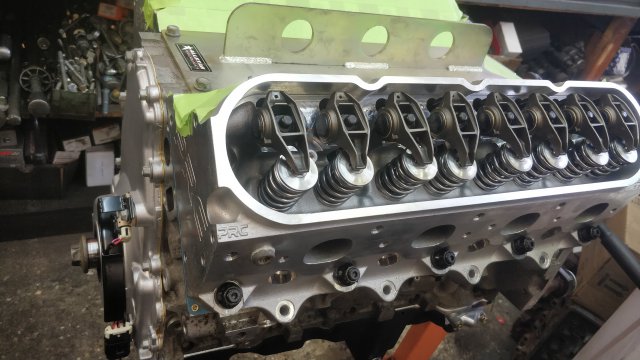
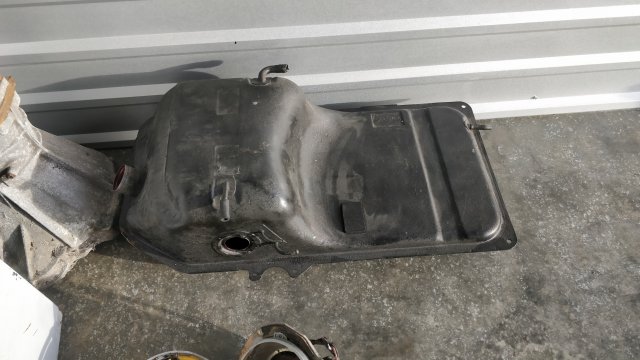
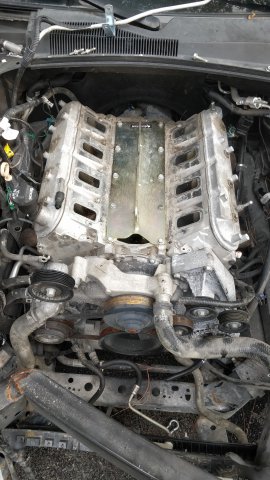
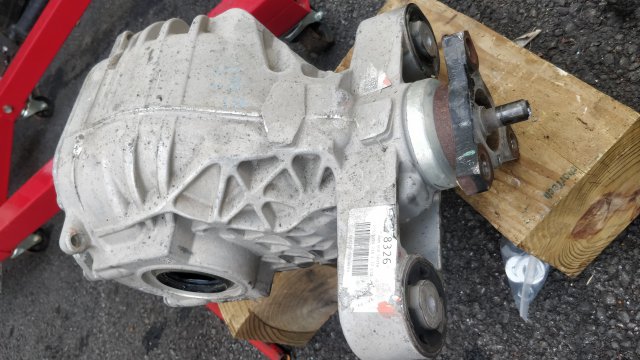
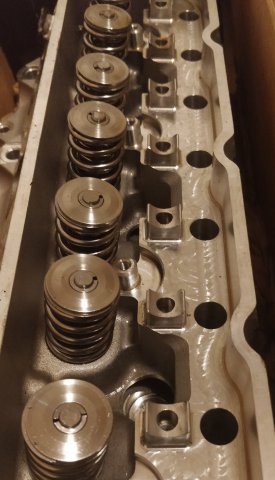
March 2020 A lot of work things happen, many trips. I got a call from the machine shop that the motor is completely ready, refreshed with new bearings, TSP Stage 3 cam, trunion bearing upgrade, new oil pump, and replacing some valves. The motor got a clean bill of health. I've been searching around for rear disk conversions and wasn't really sure I was convinced of the options available. I was going to use the 370z rear wheel bearing ala ApexEngineered goodies, but ultimately no other kit fit that bolt pattern to the knuckle. If I were to keep a parking brake and have good brake balance, I had to do some reasearch, measuring, and calculating. I ordered a wheel bearing, a rotor hat and some brackets I found which might lend itself to developing a balanced rear kit. I check in on the tank....yay, final fitment. I had been looking forward to this for half a year. It's not what I had in mind when the invoice said 4 weeks, 'maybe more.' But good to see things were moving along, a month at a time.
-
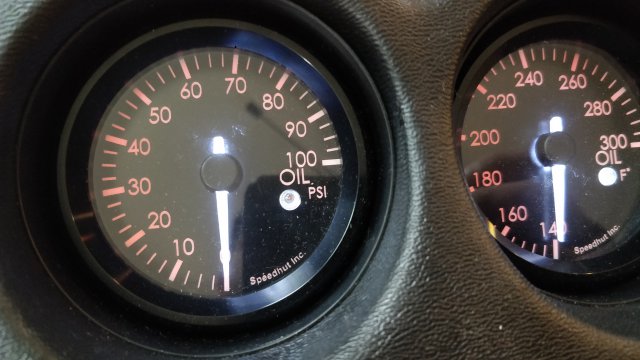
February 2020 Finally getting back to more car things, a lot of stuff was purchased over the past couple months, especially from the Black Friday sales the prior November. Including gauges, a dash, Apex Engineered front/rear subframes and TTT front brakes. Among that stuff was a slew of Skillard items which made this Some minor modifications to allow wires to pass through There was an issue though, the red from SpeedHut is uselessly dim. I had to request two more power inverters to power the large gauges individually and the 3 dash gauges as a set. I wish this was conveyed but it seems to be normal according to their customer service. It was literally dim IN THE DARK. There was just too large of a voltage drop to power the EL panel with so many gauges. Needle brightness for reference.
-
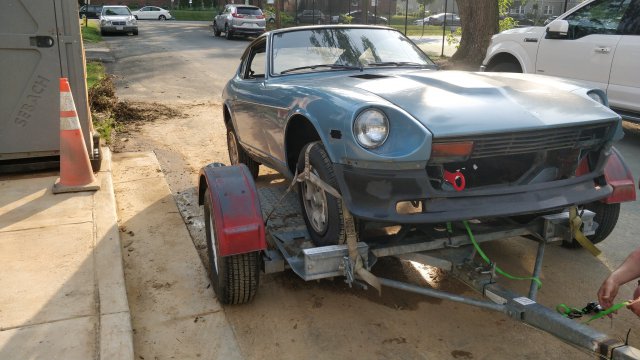
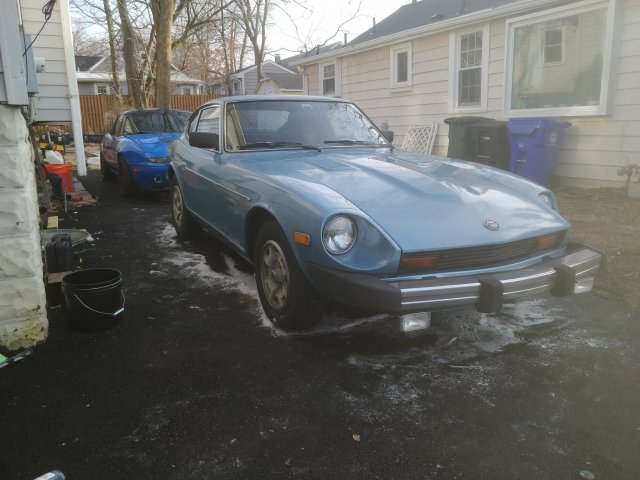
January 2020 I found a front clip, attached to a '72 240z, kinda local going cheap. I decided to buy it and it came with a lot of extras! I ended up selling a lot of the extras and made well over the $800 I paid for everything. This would also become a fatal mistake later.... January 10th, 2020 I got word that the fuel tank I ordered August 2019 was going into production soon!
-
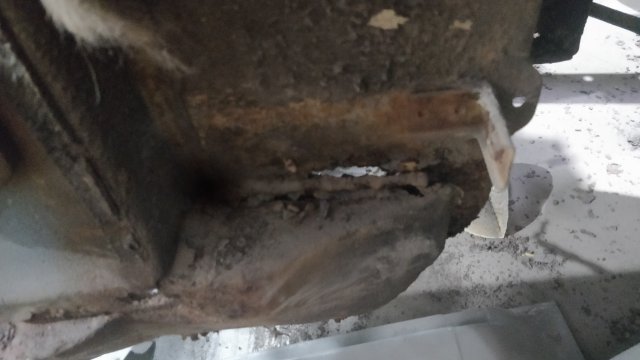
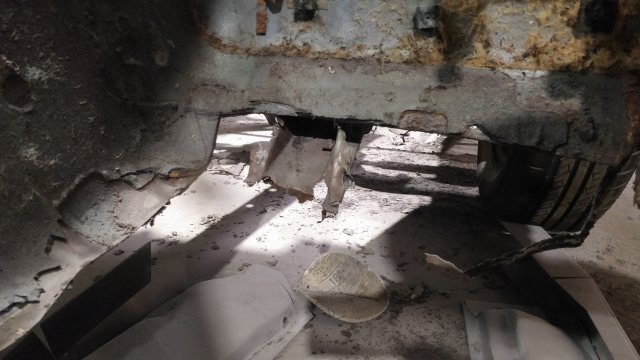
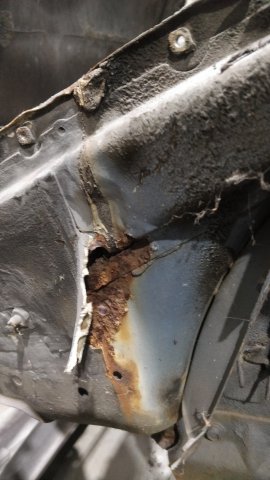
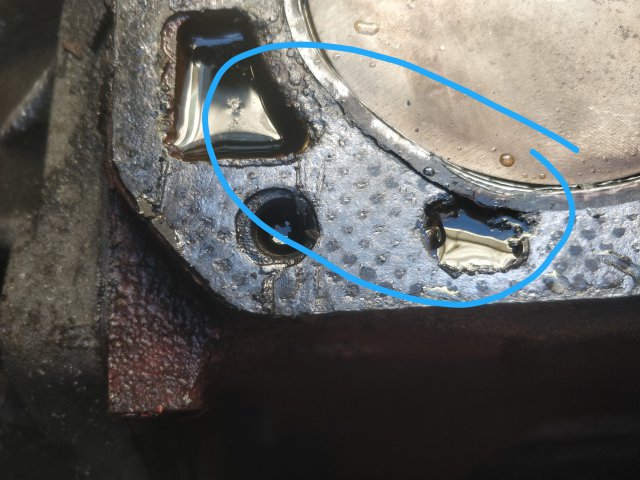
December 2012 Because I've had so many turbo cars which ended up being so high strung and a bunch of cobbled high end aftermarket components, I wanted to go simple with this build. Jenvey ITB's came in. Back at the body shop, the car just keeps getting worse and worse. The skirts on the front strut towers were so diminished it would blow holes through if trying to weld. It was paper thin. We were just uncovering more and more interfaces of rust. Time to look for a new front clip!
-
October 2019 The roll bar comes some months after ordering. Not an issue since the car was in the shop and it shipped from AGI Roll Cages in Australia Cats continue to age
-
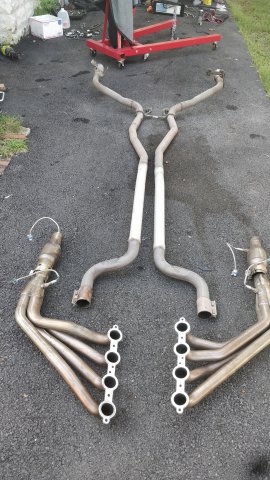
July-September 2019 So a while passes and I ordered a roll bar and started hunting for used or rebuilt motors. I placed an order for an Aluminum Fuel Tank from a Z shop in Tampa with a 4 week lead time for a whopping $2,073. (Little did I know I fell into a trap and would never receive this tank, or my money back even to the time of this post 10 months later) I happened on a Facebook Marketplace listing for a totaled 2013 Camaro SS, in the middle of nowhere South Carolina that was going for cheap. The young owner said he planned on rebuilding it but ended up getting a brand new one (must be nice!). Since it was sitting in the yard for so long, and he was away from home at a technical school 5 days a week, he just wanted to get rid of it. I talked the kid down to $2500 and had it towed up. The intake manifold was gone so these heads were going straight to the machine shop. I also noticed that there were some aftermarket bits (TSP exhaust system from headers back) which allowed me to recoup some funds. All in all, after parting the Camaro out (including the heads) I ended up making back $1960 on my $2500 investment and came out with an LS3 shortblock for $590. I then jumped on a set of TSP heads from a military dude that was suddenly relocating and saved about 25%. I still send them off to the machine shop to give them a once over. and I got cats... Koios (Kee-ohs) Theia
-
May 2019 I was parting out my 450hp Miata at the time and bartered with a buddy who manages a body shop giving him my built block. Like any panicked owner, I bought all the things. Hopefully they could take care of things. So we started to tear it down further and strip it to save on labor at the shop Packed it up and off to the body shop it went...
-
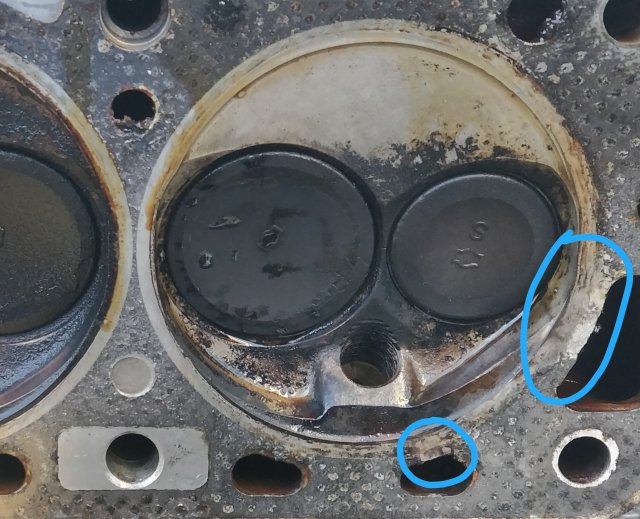
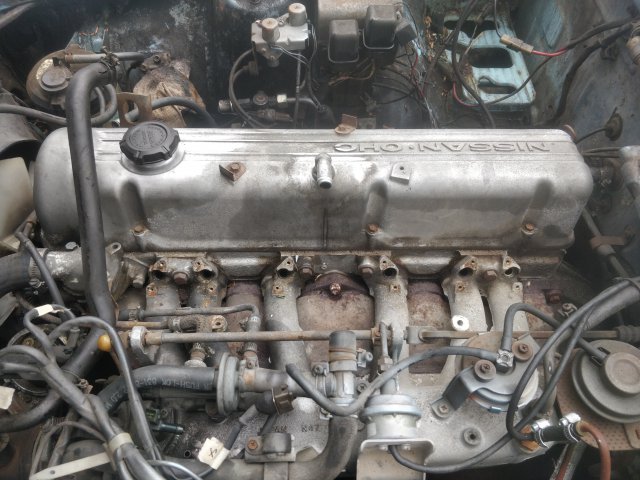
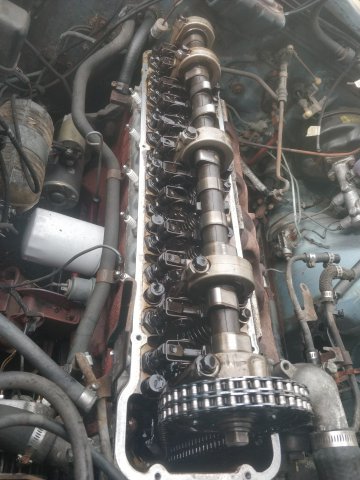
MODS: I apologize, should this be moved to Member Projects? Unoriginal, I know. Blasphemous, for sure; wouldn't have it any other way. I just wanted to pop in with the standard "Long time lurker" introduction. I've been trying to restore a Z for the past year and half, which has ballooned way over my head in what surprises a 40+ year old Datsun has in store for an unsuspecting hobbyist. It started off with buying a running, seemingly decent condition 280z which was to be a joint project for my girlfriend and me. We were going to do right by the car, keep it simple and just restore it. As we started to peel back the layers, that all started to change. Feb-April 2019 The car ran! Only had two owners, came with a lot of documentation and detailed sheet of when/what was done with all corroborating receipts. The guy literally tracked running hours on engine rebuild. It did start puffing a bit and he was forthcoming and stated it needed a head gasket. We start cracking away and the next set of photos you're all familiar with.... We got a quote on rebuilding the head and it came out to over $1000 since the components are hard to come by or custom. Looking at engine options through Datsun Spirit, who are local, just destroyed so much of the budget. Especially now that we had to battle the unseen cancer... We just started to tear everything apart. Sadness ensued. The best part of the car