AydinZ71
-
Posts
1073 -
Joined
-
Last visited
-
Days Won
27
AydinZ71's Achievements
")


-
240z SCCA vintage race car, restoration
AydinZ71 replied to AydinZ71's topic in S30 Series - 240z, 260z, 280z
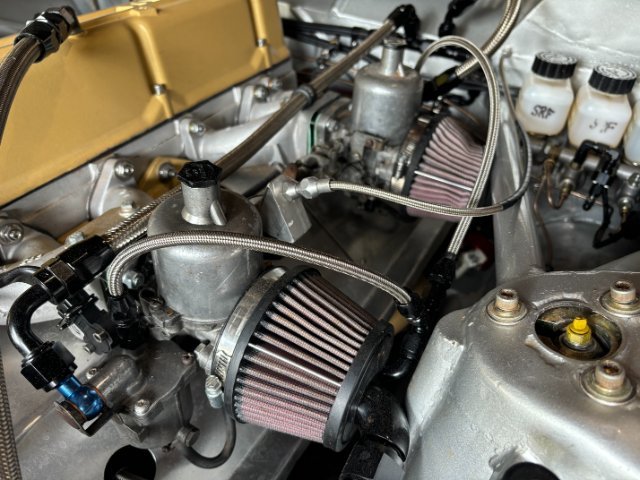
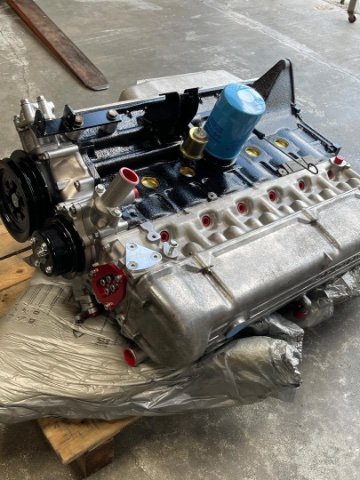
Tomorrow is the big day. Finally breaking in the race engine. 3.1L, 495 gram Kameari rods. 4mm taller rod ratio. Forged pistons with valve recesses. .540 of valve lift. 10.5:1 CR. Haltech running sequential injection, wasted spark ignition. Finally going back to the track this fall. IMG_3175.mov -
Which wheels to avoid
AydinZ71 replied to Bakerz22's topic in Brakes, Wheels, Suspension and Chassis
Assuming you are maintaining your OEM 4X113.3 when stud pattern, and 0 offset: Koenig Rewinds are the cheapest of the lightweight wheels. My 15X7’s were only $106/wheel from Summit, and weighed 14lbs each. On the expensive end, I also have Ray’s Volk TE37’s in 15X7’s and 11lb. Aluminum wheel spacers are not the end of the world they are less than 6” in dia, so the rotational inertia is far less than what your wheel is contributing. On a 15” wheel, most of the mass is way out at (for example) 13” from the axis of rotation. Rotational inertia is proportional to the weight, but also how far the weight is from the center. Greg Ira used Aluminum wheel spacers, and he is a three-time SCCA national champion. When you are trying to maximize allowable track (rule book), using OEM struts, limited camber adjustment, and a 0-offset wheel, sometimes it’s the only way. -
240z SCCA vintage race car, restoration
AydinZ71 replied to AydinZ71's topic in S30 Series - 240z, 260z, 280z
@calZ I saw them on the Big Willow schedule and was curious who they were. I will look into them, thanks. Season is over anyhoooo. Back in the 90's at either track already, and I don't have the right gear for that weather. Prob be back at the track in Nov. Should have the 3.1L installed in a month or so.
-
240z SCCA vintage race car, restoration
AydinZ71 replied to AydinZ71's topic in S30 Series - 240z, 260z, 280z
73057652018__80411D85-1163-4DF2-A035-34420335C36B.mov
-
240z SCCA vintage race car, restoration
AydinZ71 replied to AydinZ71's topic in S30 Series - 240z, 260z, 280z
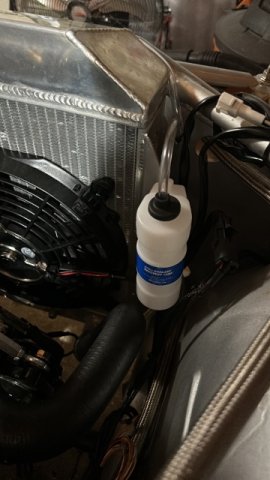
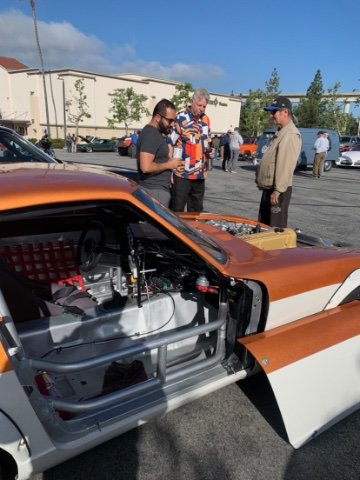
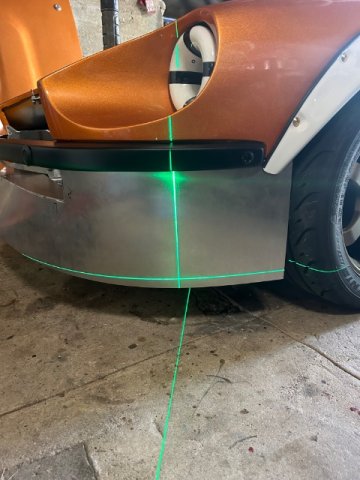
Hi all! Sorry for being MIA past two months. I changed jobs, traveled overseas, and general parenting obligations. @JMortensen I tried it for the first time at my local race equip shop! Need to get a copy on my PC with the Logitech wheel. Not as fancy as the setup they have at the shop, but all I’m trying to do is learn the track. Great recommendation. @clarkspeed appreciate all the feedback as always! @tube80z electronic brake bias didn’t even occur to me, but in hindsight it sounds spot on. Can use transducers with feedback to set-up pre-determined increments. Brilliant. Way beyond my skill or budget but i enjoy learning about the possibilities. updates: - work on air dam is almost complete. Widened to account for the additional track, stiffened, and injected PU foam In to the cavity created to stiffen and dampen. Almost ready for paint. - added AL cladding between the air dam and the rad support to eliminate air blow-by past the rad. Made a significant different in cooling. Will eventually add a wiper on the upper rad support to block air from going over, between the rad and the hood. - added a small electric 12” rad fan to manage overheating at idle. - PIAA lightweight motorcycle headlights installed. -fixed my camber issue in the rear. Moved-out the shock adjustment nob a little more than an inch to gain-back 4 degrees of camber. Rear now sitting at -3 deg. Still need to correct the front, although it’s not nearly as bad. Next up: swapping-in the race engine (3.1L). Looking forward to ditching the SU’s for some Haltech. Unlikely I will find a wheel-to-wheel class I can race with EFI on an L-series, but I’m simply tired of having everything smell like gas (including my hands, clothes, and even my living room).
-
240z SCCA vintage race car, restoration
AydinZ71 replied to AydinZ71's topic in S30 Series - 240z, 260z, 280z
@JMortensen well that explains why I have even more negative camber in the back. That’s actually not as bad as I thought! Gosh, I have not had a stock S30 in so long, I couldn’t even tell you how much lower the race car is 😂. Low enough that the roll center is all screwed up, even with the largest hub/knuckle spacer I could find. The rear too, where the LCA’s are horizontal, and put the roll center underground at times. @tube80z man those hubs and camber plates are pretty neat! Unfortunately, I do believe they are radical enough that they would be spotted and protested. We have to use our OEM struts and are only allowed to add “adjustability”. To be fair, I’m not going to be racing competitively until at least next January, when SCCA novice school opens up again. Private school is waaaaaay too expensive ($6k+). At least I have time to continue learning the tracks. My next opportunity will be NASA HPDE on May 18th. I need to get my camber figured out before then. Also have to finish my radiator cowl, as overheating was an issue last time. Last mod, which would be gravy, is to fabricate the 280zx front rotors and calipers. I was hoping I was overweight and could therefore afford the 2% penalty to use willwood calipers and a different rotor, but alas she is 1900lb W/O fuel. are you considering dropping-in a Tilton pedal assembly with an adjustable mechanical bias knob? That’s what I have on the car now. I take notes on how many turns either direction will lock-up the front or the back. Would you be adjusting the brake bias mid course or just at the beginning of each session? I only have two tracks I plan on participating-in. Big Willow is really fast, but I have yet to try Buttonwillow. -
240z SCCA vintage race car, restoration
AydinZ71 replied to AydinZ71's topic in S30 Series - 240z, 260z, 280z
@JMortensen I am glad its not just me Jon! After-all, I don't have the years of track-going experience you, Cary, and John have, and I humbly admit "camber" could have been a cheese to me as little as five years ago (ok maybe a slight exaggeration) . The more I think about it, I don't see an appropriate way around this without changing the angle of the strut tube relative to the hub. The further the strut gets away from the OEM mounting position, the less the chassis is prepared to accept the loads. My towers are all braced more-or-less at the centerline of the towers, not towards the fenders which is where the mounting is migrating towards. My concern about "bending" the tube: My Koni's are already a "tight" fit as it is. I'm concerned any bending on the tube will just mean the shock will bind when I reinsert it, somewhere along its length. One option is to cut the tube with a cutoff wheel right where it meets the cast strut assembly, locate the new angle, and use MIG welding wire to fill-in the "wedge" created by setting a new angle to the tube. I think your idea of cutting the top of the tower will definitely work (to a limit), as long as you reinforce the surrounding unibody to accommodate shift in load. Its not an option for me (race class), and changing the strut angle may end-up being easier and provide better adjustability in the end. I have not done the math yet, but I actually think one of the misconceptions I had was that the added track is driving the majority of the negative camber. I really think its the significant change in ride-height that's the significant driver in my case. It occurs to me that most street Z's that have been lowered significantly are unlikely to have checked their camber before/after. I know I certainly didn't with my own street car back in the day. PS: Anyone else doing their own string alignment? I have done so twice now, and starting to get a little faster. -
240z SCCA vintage race car, restoration
AydinZ71 replied to AydinZ71's topic in S30 Series - 240z, 260z, 280z
@tube80z thanks as always Cary. I think you are right about that. Even if it’s a rule, the enforcement of such is often non-existent. For example, the rules say you need a catch can for your diff and trans lube, and in practice no one enforced this on Greg’s car throughout all his years at the runoffs. One more option is I seperate the shock tube from the wheel hub, change the angle, and weld it back-on. That would give me the track and ride height I need and still center the strut in the tower. Despite my whining about the camber plate, it does have a well functioning uniball shock attachment that can make-up quite a bit of shock angle without applying lateral force in the shock. just for simplicity, I think I’m going to turn the camber plate 180 deg, drill new mounting holes, make a new center hole for the shock nib, and see if that gets me where I need to be. I’ll also make a 3/8”tk retaining ring to distribute the force of the mounting bolts on top of the shock, since changing the angle is applying forces in the tower in areas that were not as heavily reinforced by OEM. That should “sandwhich” shock tower when the mounting bolts are torqued. My next event will be with NASA in May and I still have a ton of work between now and then, including a radiator front-end cowl/shroud. I have pushed my cooling system to the limit without one, and had overheating issues (even at an 85mph avg spd) on my last session. appreciate the help sir! -
240z SCCA vintage race car, restoration
AydinZ71 replied to AydinZ71's topic in S30 Series - 240z, 260z, 280z
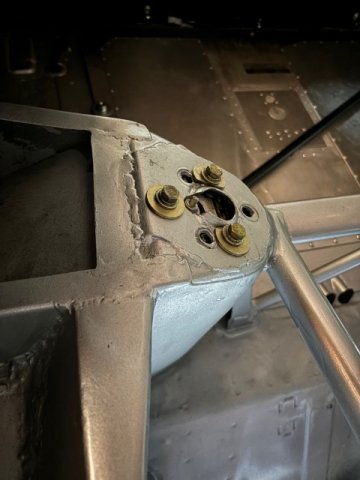
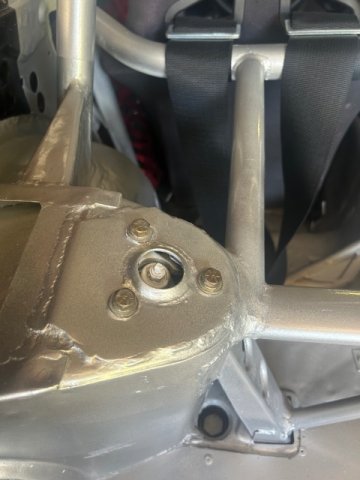
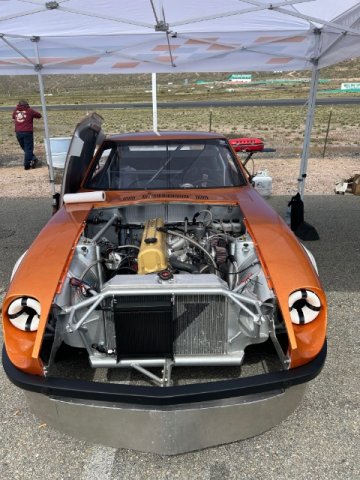
@tube80z true. In hindsight, the shock adjustment nib was always going to interfere with the tower opening, given how much positive camber I need to add back. Thats not GC’s fault. What was frustrating is (see attached picture), this is considered max positive camber. Sooooo… in the neutral position is as far to the outside of the car the camber plate can adjust. I just wish that was more clear when I got them. we are allowed to add adjustability within the existing unibody. I called a few years ago and asked tech what the limits of that definition are. Drilling new holes or slotting the towers is OK. Welding-in a camber plate to replace the strut landing in the tower was NOT considered OK.
-
240z SCCA vintage race car, restoration
AydinZ71 replied to AydinZ71's topic in S30 Series - 240z, 260z, 280z
Might as well as a question I have rattling in my head. engine oil…. im running conventional at the moment with Lucas zDDP additive to break-in the cam/rocker interface (cam regrind). do y’all run VR1 synthetic or conventional during events? I have heard talk that L-series engines prefer conventional, but I’m not sure if it’s true or just old-school thinking. I have also heard flat tapet lifters prefer leaded fuel. I never see much of an explanation for either claims. -
240z SCCA vintage race car, restoration
AydinZ71 replied to AydinZ71's topic in S30 Series - 240z, 260z, 280z
@jhm Thanks John! Really appreciate all your support through the years. It’s been a long road huh! I have definitely added track, as you suggested. I’m at EP spec at the moment, which is 56.9/56.6 (F/R). The added track is certainly factor. After reading old posts and talking to Greg, it’s clear that with the added track and much lower ride height, it’s common to have way too much negative camber with the strut centered in the tower. Thanks for the part suggestion I think I’m going to have to do some modification since the shock adjustment nib is going to strike the tower hole anyways. We’ll get it figured out! If I can get the air dam and shock tower modifications done In time, my next event will be in late May at Big Willow again. This time with NASA and their HPDE sessions. gotta say, once the terror of approaching a turn at 115 faded, the adrenaline is absolutely addictive.
-
240z SCCA vintage race car, restoration
AydinZ71 replied to AydinZ71's topic in S30 Series - 240z, 260z, 280z
@clarkspeed thanks Clark! the biggest problem I have come across is camber. The Ground Control bolt-in camber plates I went with apparently add camber in the negative direction only. Well… when you lower a car several inches and add an inch of track to each side, that’s silly… you are going to have a ton of negative camber added without moving the tower strut location at all. kinda disappointed they didn’t disclose that. The tower mounting location actually needs to move outward (towards the outside of the car), adding positive camber to cancel the negative camber gain from the other suspension settings both front and back. So I’m going to have to turn the plate around 180 degrees and drill new holes. I need to be somewhere around -2.5 up front and -2 in the back, and I’m in the -5 to -7 range! lesson learned… if you buy “bolt on” parts, even if the reason is to meet class rules, it’s safer to assume they were designed for the street crowd. I no longer believe any of these companies, T3, Apex, Ground Control, have designed or tested their parts for anything other than a street car. I’m sure there are exceptions, and recognize im frustrated. I will only de adapting universal parts designed for Motorsport in the future. -
240z SCCA vintage race car, restoration
AydinZ71 replied to AydinZ71's topic in S30 Series - 240z, 260z, 280z
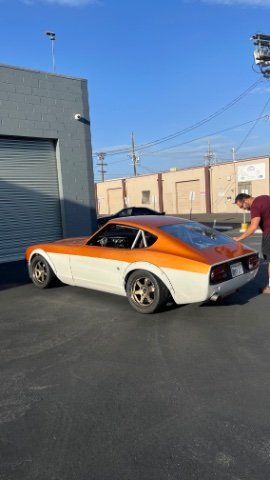
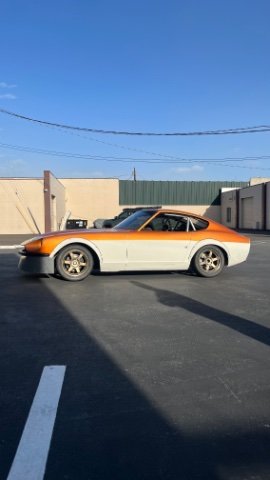
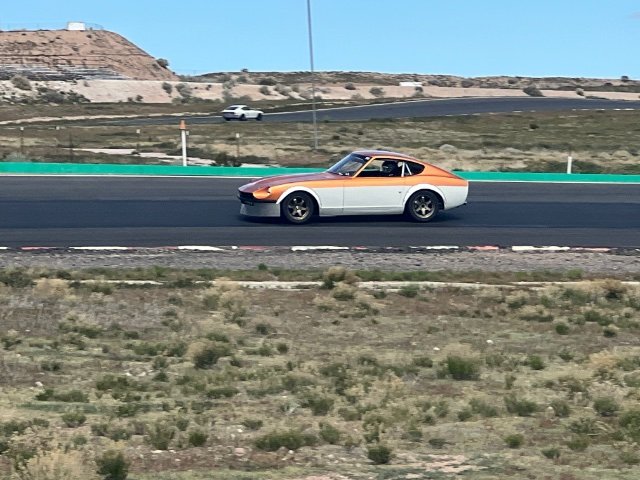
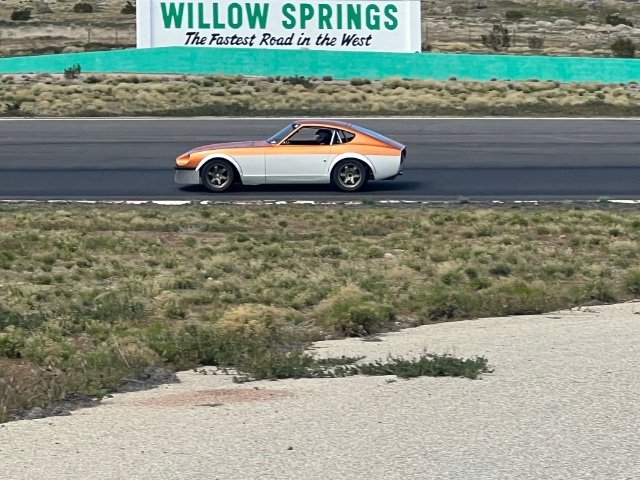
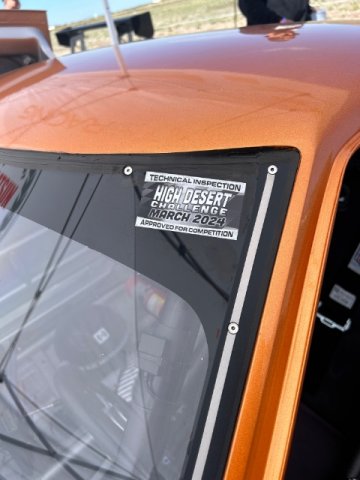
Inaugural day on track at Big Willow was this past Sunday. Car has some issues I’m working on, but I made it home in one-piece. It was a great event.
-
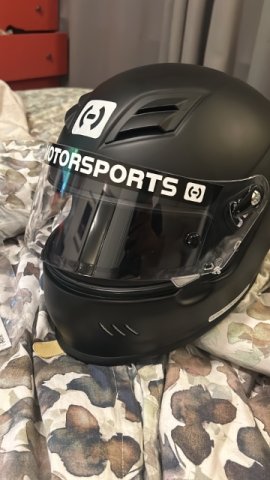
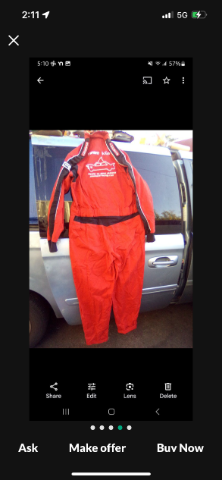
Take your time It’s just merch! You got more important things going on. Good luck my friend.
-
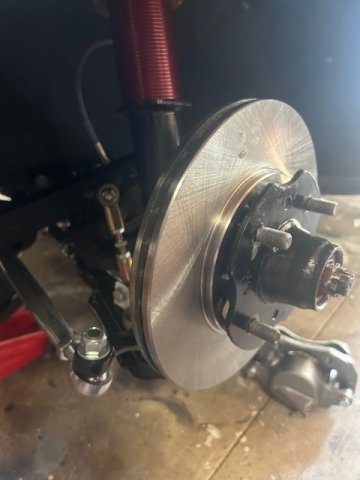
240z SCCA vintage race car, restoration
AydinZ71 replied to AydinZ71's topic in S30 Series - 240z, 260z, 280z
We’re going on track this Sunday at Willow springs Will set-up the car tomorrow at a friends shop since they have a flat-level garage floor (which I do not). Also in the middle of adapting the front brakes to 280zx rotor and caliper per EP spec-line. Caliper mounting on the strut assembly will require some welding and drilling, so it will have to wait till after this weekend. Greg Ira was nice enough to ship me some race pads he has that fit the OEM calipers.