
pparaska
-
Posts
5087 -
Joined
-
Last visited
-
Days Won
3
Content Type
Profiles
Forums
Blogs
Events
Gallery
Downloads
Store
Everything posted by pparaska
-
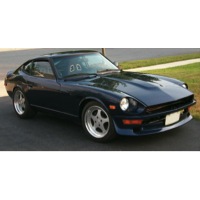
I got my AZ Z car brakes used. Jim Biondo used them for several thousand miles and a number of road track days and was pleased. I've only tested them from a 25 mph speed . (Just got the car running, but not really driveable yet.) The stuff is light! The fronts involve Wilwood Dyanlite calipers (4 piston), a caliper spacer (about 1/2" bar stock with two holes), a custom rotor center to bolt to the Z hub, and a standard 11.5" Wilwood straight vane vented disc. The rear is the old design, Wilwood caliper (light!), off the shelf rotor hat, and cross drilled, non-vented disc. Custom flat (but hogged out) bracket. No parking brake. I made up parking/emergency brakes with custom brackets and mechanical spot calipers from Wilwood. ------------------ Pete Paraska - 73 540Z - Marathon Z Project pparaska@home.com Pete's V8 Datsun 240Z Pages
-
2 Steps Forward, one step...
pparaska replied to Mikelly's topic in Brakes, Wheels, Suspension and Chassis
johnc & TimZ - good points. Me being the really nutso mod freak, I modified the crossmember to provide for adjustment of the inner CA pivots! The adjustments are in the range of 5/8" to 7/8" above and 1/8" to 3/8" outboard of the stock pivot bolt location. The adjustments are independent of one another. I do plan on measuring the bumpsteer curve when I get all the weight on the car and set the ride height, camber, caster, etc. One thing to realize is that if you move the inner CA pivots outboard, you'll need to lengthen the tie rods to get the toe back to where it was, assuming you don't have adjustable control arms (CAs). This changes the length of the tie rods (TRs). But the length of the CA's didn't change (unless you did something to them. What I'm getting at is that one change will trickle down to other changes, and the entire steering system has to be considered. The issue is that the distance between the outer tie rod pivot point, the distance between the ball joints, distance between the inner tie rod ends (fixed by rack selection), the distance between the CA inner pivot bolts, and the lengths of the tie rods and control arms are all related, if bumpsteer and static toe is to be held down. Change one dimension, and you need to change another to get the static toe back. But if that means making the effective length between the tie rod pivots per tie rod and the control arm pivots per CA unequal, then you've created a bumpsteer problem. Not because of the height of the pivot points, but because of the lengths of the links. Bending the steering knuckles could alleviate some of the problems. -
74_5.0L_Z: Yep. Old enough to remember the good old days when you could walk through the yards . 38 feels older than 16 did, that's for sure!
-
2 Steps Forward, one step...
pparaska replied to Mikelly's topic in Brakes, Wheels, Suspension and Chassis
Evan, lowering the Z with shorter springs and or coilovers or by using camber plates and top spring perch that is shorter than the stock isolator and spring perch will drop the strut tower and therefore the frame rail and crossmember. Adding the JTR crossmember to frame rail spacer will also lower the crossmember. The effect of one or both of these is to lower the inner control arm (CA) pivot AND the steering rack (and therefore, the inner tie rod (TR) end). So the effect of lowering the car and/or putting in the JTR-recommended frame rail to crossmember spacer changes the roll center height (lowers it), changes the camber curve, and moves the rest position of the car on it's original bumpsteer curve. On the Z it moves it away from the more constant OE center area of the curve to the more largely sloped bump end of the curve. That's why people advise putting in "bumpsteer" spacers between the strut and steering knuckle - it moves th eat rest position of the car back toward the at rest position it was originally at (before lowering) of the original bumpsteer curve. It helps, but in my experience, not much or enough. -
2 Steps Forward, one step...
pparaska replied to Mikelly's topic in Brakes, Wheels, Suspension and Chassis
quote: Originally posted by Ross C: Now is it the same effect to put a 7/8's spacer under your strut b/t control arm end instead? In a word, no. Putting a spacer under the strut, above the steering knuckle (and therefore above the ball joint AND tie rod end) lowers the ball joint and tie rod end, changing the angle that the control arm makes with the horizontal. This changes the rest position along the car's bumpsteer curve only, and changes the camber gain curve and roll center height. Since it changes the rest position in the bumpsteer curve, it will change the at rest toe. IT IN NO WAY CHANGES THE SHAPE OR SLOPE OF THE BUMP STEER CURVE. I know MSA and others call these "bumpsteer" spacers. I wish they'd cal them "roll center" spacers instead. They do not correct the usually fairly nonlinear and non-constant character of the bumpsteer curve for the Z. All they do is change the at rest position along the curve, and extend one end of the curve, shortening the other end. This can be advantageous, but really doesn't correct the overall shape or slope of the curve (the variation in toe as the wheels move up and down). The reason is that it moves BOTH the ball joint and outer tire rod end at one time. To change the bumpsteer curves shape/slope, you need to move either end of the control arm (CA) OR the tie rod (TR) to the correct direction, not the outer end of each at the same time in the same direction. Zero bumpsteer occurs when the CA and TR are parallel (when view in a front or rear view) and the lengths between the pivot points are equal. (They do not have to be co-planar, or one in front of the other when viewed from the front.) The real problem with the Z is that they are not parallel. Adding the spacers below the strut moves the outer pivots of BOTH the CA and the TR the same amount, so the non-parallel relationship between them is not changed. To get rid of the non-parallelism, you can lower the outer TR end (using a rod end and spacers) or raise the inner pivot of the CA. The latter is what JTR is advising. Of course, you could lower the steering rack to lower the inner TR end, but that's a bit of work! (Al [alsil], be careful of this when you're doing that Ford pwer steering rack swap!) After you make the JTR bumpsteer mod and drive the car around some bumpy curves, you'll love it! All that jerking of the steering wheel will be gone (or mostly gone), and the car is MUCH more enjoyable. I hope I cleared this up. The issue of bumpsteer mods and the false belief by many that the "bumpsteer" spacers fix the problem is at least 10 years old, as I've been trying to correct this misconception for at least that long on the various email lists, etc. ------------------ Pete Paraska - 73 540Z - Marathon Z Project pparaska@home.com Pete's V8 Datsun 240Z Pages -
Who has Arizona Z tubular A-arms?
pparaska replied to a topic in Brakes, Wheels, Suspension and Chassis
Sundance, don't worry, no offense taken. Rust doesn't offend me, but I do hate it! My Z was fairly rusty - I should have never started a project with that shell, live and learn. -
Who has Arizona Z tubular A-arms?
pparaska replied to a topic in Brakes, Wheels, Suspension and Chassis
Sorry, I missed this thread getting updated. Yes, that 2" piece that you outlined in yellow was cut out of the stock inner fender steel. You can use the stock sheet metal. But in the area under the strut tower reinfocement in the iner fender, it stops about 2" above the frame rail. I cut out the thin stock sheet metal to that dimension and replaced it with a thicker piece (16 gage I think) to carry the suspension loads down to the frame rail better. So the answer was design (creep). On the other side, I found it easier to remove a bit of the sheet metal above the rail and add a strip. The strip on that side of the car (right side) was not as tall and I added a piece between it and a bit higher to meet the bottom of the strut tower reinforcement. So on the second side (left side as in the pic) I decided to just do it with one ~2" high piece. I have seen the inner fender sheet metal rust in that area just below the strut tower reinforcement, just above the frame rail. I believe that it's a fatigue corrosion failure so I decided to beef up the stock sheet metal in that area. Better yet would be a tub running down from the to of the strut tower to the top of the frame rail. Hope that helps, ------------------ Pete Paraska - 73 540Z - Marathon Z Project pparaska@home.com Pete's V8 Datsun 240Z Pages -
I talked to Michael at Canton racing. He said that the pan that goes with that part number (11-120) is a left turn pan. P/N 15-240 is a 7" deep, seven quart (6 in the pan) road race pan with 5 trap door baffles, 3 runners, plugs for oil level and oil temp senders, left hand dip stick, 12" long by 13-3/4" sump (at the rear of the pan) with the right side sloped for stock starter clearance. He's sending me a catalog so I can look through the other pans. They have dimensions in the catalog. He said the pan is $325. I bet it would be cheaper through Summit or Jeg's.
-
Yep. I remember that.
-
Super Street - isn't that a drag racing class? I really am interested in a road race pan.
-
Ditto that. It's great to see all the pics of the stuff you're doing!
-
Yep - LADAR uses the IR spectrum. Incandescent lights put out visible, IR, and other parts or the spectrum, and you can use IR filter material over regular lights that will make them look like they are off, but putting out IR to "blind" or fool LADAR. IR LEDs put out mostly IR, you can't tell when they are on with your eyes. And they are usually (always?) much more efficient than incandescent, especially in the IR spectrum.
-
Thanks for all the tips. I need to get a GMPP catalog! MikekZ - the thing that concerns me with that pan is it probably is optimized for left turns only . If I go to www.cantonracing.com, all they have is filters. But I searched on "Canton Oil" and found : http://poske.com/parts/Canton/index.htm and they have a picture of the Canton pan. Their description is: - The best wet sump pan on the market. - 6 trapdoors and 3 runners. - Bolt in slosh baffle with one way screen windage tray with built in scraper. - Oil level check, temp fitting and magnetic drain plug. PART# DESCRIPTION PRICE 11-120 7" Small Block Chevy pre 1980 $209.00 w/left side dipstick. 8 Quart capacity Is that the pan I need? They also have a pickup for the pan for $27. It looks like it would fit my application, since the crossmember is at the very front of the engine. My only concern is my exhaust may hit. I think I can check that based on their picture, for the driver's side anyway.
-
Here's the deal : My SBC has a timing cover / oil pan leak (cheap Mr. Gasket two piece timing cover), so I'm pulling the pan. (incredibly easy on a setback SBC in a Z). I bought a Edelbrock 2 piece cover that is a better design and looks like it should not leak. I was driving a buddie's V8 Z the other day and going up a hill, I hammered it and the oil pressure dropped to zero. (Mike, this was Ken's car, going up the same piece of road he passed you on last week). The oil was full, but obviously uncovering the pickup. I talked with another seasoned V8Z guy (Glen McCoy) who suggested the post-1978 Corvette Oil Pan, pickup and windage tray as a good road race setup. Does anyone have experience getting a 7.5" tall (block surface to bottom of pan) SBC wet sump system to work well in the corners? I have an old 7.5" tall 327 pan on the engine now, and any more depth is the wrong way to go as the pan is a bit too low as it is! The Moroso Road Race pan is deeper, so that isn't and option. ------------------ Pete Paraska - 73 540Z - Marathon Z Project pparaska@home.com Pete's V8 Datsun 240Z Pages
-
I have a printed copy of the 240/260Z microfiche, that a guy on the 240Z-club list http://www.240z.org sells. I don't remember his name. Also, check that site as the guy that runs that list and site is selling a CD of the 240-280Z parts microfiche scans. The parts fiche is SO helpful with the exploded diagrams. and you can find your own numbers to order from Nissan.
-
Not sure, but my guess is that a wedge chamber is like the old fashioned SBC and others with the chamber being basically wedge shaped (if you cut the head short ways and look at the end on view). I'd think a canted valve head could be wedge or hemispherical, with the valves canted at different angles. I'm probably all wrong though.
-
Wow! This thread has really been good. I've definitely learned a few things. TimZ, you ever thought about righting a book, or quicker yet, a tech article on EFI? Yes, I know about the Commander 950 - looks interesting. Monetary reasons and my timeline to just get the car painted and on the road preclude me from taking that path right now. But I'll be researching the EFI systems for future consideration.
-
Who has Arizona Z tubular A-arms?
pparaska replied to a topic in Brakes, Wheels, Suspension and Chassis
If you look at the "Structural Mods" page on my site (see sig), you'll see that I attempted to just cut the top of the rail off and put a tube above it so I wouldn't have to go from scratch puttting the T/C bracket on. A buddy (Ken) did that, as his car was pretty rustless in that area. Mine was too far gone, so out came the entire rail, firewall around it, etc. How did I measure it in 3D? , Liquid level (clear tygon tubing and colored rubbing alcohol), plumb bob, rulers, protractor, grid on the floor, etc. and measured the lateral, for/aft, and vertical height of the T/C rod hole bottom from the mark on the floor. I also did this for all the cross member attachment points, sway bar mounts, front and rear extents of the bottom and top of the rails, etc. I used white electrical tape on the epoxy painted floor, with pen marks at where the plumb bob landed. Very low tech, but plenty accurate. When the new parts went in (rails) I would jig them into position until the measurements matched. The critical ones are the suspension T/C mount, the crossmember holes, and the sway bar holes. Plus I did some overall measurements from the rear suspension pickup points on the car (control arm mount holes, strut isolator mount holes, etc.) the same way and measured about 100 different distances, using diagonals, etc. to make sure the car suspension points were square and in parallel planes. I have about 40 pages of notes on all this for future reference. I know, it's all obscenely anal . What can I say? Donations for phsyco-therapy are being excepted . Seriously, you don't want to mess around here, as a twisted car will have screwed up handling. Having a frame alignment rack to do this on would be ideal, but with some simple tools and patience, you can get there. ------------------ Pete Paraska - 73 540Z - Marathon Z Project pparaska@home.com Pete's V8 Datsun 240Z Pages -
quote: Originally posted by Morgan: ... If money were no object I'd still go with a rb engine though - same power easily and it's nissan! Hey, enough of that - cardinal HybridZ sin!
-
Who has Arizona Z tubular A-arms?
pparaska replied to a topic in Brakes, Wheels, Suspension and Chassis
Cutting off the TC bracket and welding it to the new frame rail was pretty easy - plus I got a chance to weld it in there very well - better than stock. The issue is making all the measurements to get everything in the right position in 3 dimensions and at the right attitude. -
Morgan, I'll say it again - the Holley 4Di has ignition control, and supposedly very fine control of it. Yes it's with a dizzy, but I don't mind that. I think Ross has hit the nail on the head - I'd end up not being satisfied with TBI. He knows how picky I am about things being done optimally, and the compromise of TBI over port injection is not worth the $500-$1000 savings to me. If it were $500 or $600, I would probably do it. Maybe I'll start hunting on ebay . And TimZ is right - I want datalogging and easy control that the SDS doesn't provide. I have no doubt it's a fine system though, I just want a more interactive interface than the SDS module/box provides. Yes, I'm picky to a fault. That's been proven over and over again. Unfortunately, the Pro-Flo makes a compromise I'd not be satisfied with either - no PC control and needing custom chips. It looks like the carb will stay until either I have enough money for an Electromotive setup, etc. (not likely!) or one of the other available systems is upgraded to have the power capability (400+hp), software, etc., and reasonable price that I desire. It WILL happen, and I'd imagine it won't be long. This segment of the performance industry is growing in leaps and bounds. Thanks for all the help, but the slightly controlled fuel leak (carb) will stay for now. This has been a intersting thread. Thanks again.
-
I haven't priced a used laptop, but yes that adds up. It seems that sds and the 4Di system have about the same functionality, with regards to sensors; O2, knock, etc. The issue is that in my opinion the SDS interface is cumbersome, from what I've read about it on their site. Granted, I know nothing about the 4Di laptop software, but if they paid a decent programmer, it ought to be more useable, albeit have the same tuneability and probably more, since user input is so much easier with a keyboard, screen and mouse than the SDS console. As for weight/work/hassle, I don't see it as a big deal, especially if I can tune easier and have datalogging (which they provide, although I don't know the details on what's logged and how well). A laptop is not much weight or size, and it just plugs in. Stow it under the seat if I have to, but this isn't a daily driver, so that's not a big issue for me, security or otherwise. Just my preferences.
-
Z32 rears on early cars-options?
pparaska replied to a topic in Brakes, Wheels, Suspension and Chassis
I prefer a cable e-brake as well. The spots aren't cheap - granted, but $130 for e-brake capability was not a biggie for me. I did wait months while my machinist buddy made FREE brackets, but I was in no hurry (as usual) . Actually, I almost redesigned the AZ Z car rear brake bracket to have provisions for the spot caliper, but it was easier to just bolt a secondary one for the spot to the AZ Z car bracket. Not alot of room, but enough. It would be definitely better to do it all in one bracket though, to have the fingers to hold the spot caliper closer to the rotor. The Wilwood spot caliper is available for several different rotor thickness, but the widest is probably 0.81", I can't remember - check their site. No biggie though, just machine a new spacer to separate the two parts that hold the pads. This is how they make them fit the different rotor thicknesses anyway! And the bracket to hold the spot caliper can be other than flat, but routing a cable to it gets tricky. It's tricky enough as it is! IMO, adding the spot is not that expensive, if it were designed into a bracket that could hold the the spot caliper as well as a light aftermarket or OE caliper wouldn't add much to a set of brackets, if it were done on CNC. -
Since it's Holley, I'd bet that the rating for 900cfm is what they'd use for their carbs - 1.5 psi? This is looking pretty decent. The issue is does it work as well as they say and how easy is it to learn how to tune (depends on the user for sure!) I like it because it has laptop tunability. They do have an in-car module you can buy to do less-fine tuning without a PC, but I'd just buy a used laptop instead! I also like the fact that it seems to take O2 sensor and knock sensor inputs and use them for close loop operation.
-
Z32 rears on early cars-options?
pparaska replied to a topic in Brakes, Wheels, Suspension and Chassis
I really like the idea of finding a rear caliper off of another car that has E-brake that can be cable actuated (preferably with the 240Z cable). If a stock rotor can be found to work with a simple, cheap bracket, that's be great. Price some of Wilwood's hats and rotors - the stuff isn't astronomical and there are alot of sizes available. Here's an approach: Design a bracket that might need to be other than flat to make one of these aftermarket rotor/hat combo's work with an OE caliper. You'd have a store bought OE caliper, a light rotor/hat (my wilwood solids are like feathers), and an e-brake. You could make the same thing work with a non-flat bracket and some sort of OE rotor, I'd think. But OE vented rotors aren't very light. Weight versus money here. I think that's a viable approach. Adding the wilwood mechanical spot caliper for e-brake seems wasteful. I did it because my Wilwood setup was used and pretty cheap. Has anyone looked at Arizona Z cars current vented rear brake setup? I have the older solid rotor version and the bracket is flat, but hogged out a bit where it bolts to the strut. I know the old version rotor and hat were straight from the Wilwood catalog . Anybody know if there is an rear OE E-brake type caliper (like the early 280ZX) that is good, cheap, available, that doesn't use shoes for the e-brake? ------------------ Pete Paraska - 73 540Z - Marathon Z Project pparaska@home.com Pete's V8 Datsun 240Z Pages