rx8ss
-
Posts
48 -
Joined
-
Last visited
Content Type
Profiles
Forums
Blogs
Events
Gallery
Downloads
Store
Everything posted by rx8ss
-
Have you got it on the road yet?
-
Just a couple of more.

-
More
-
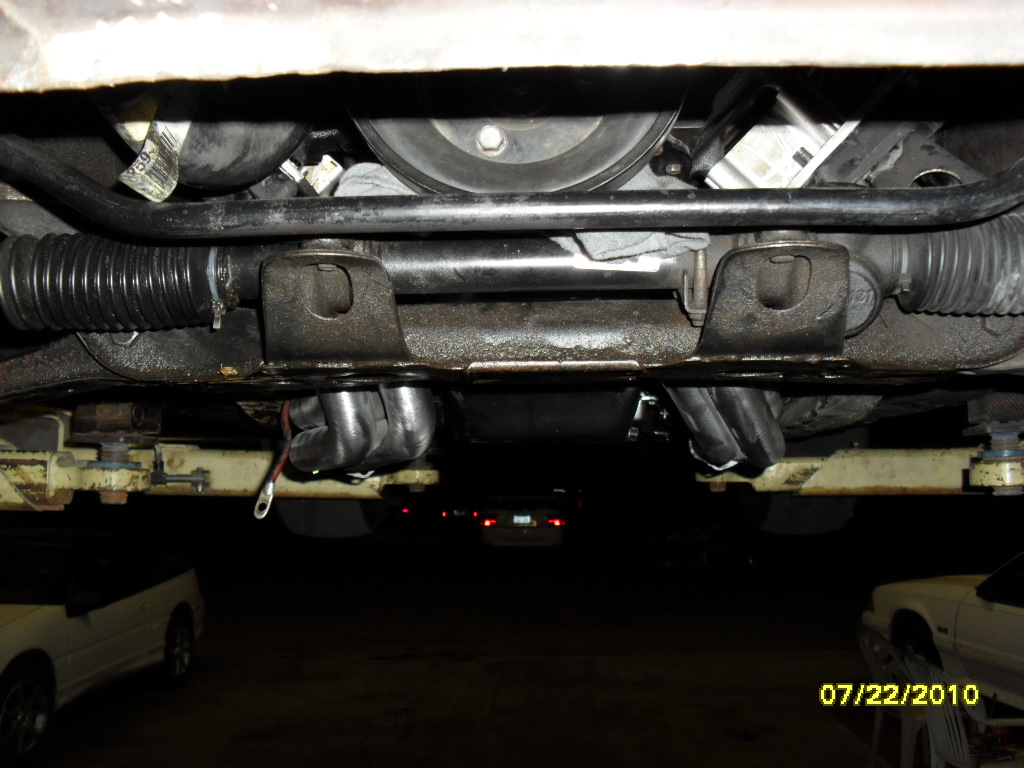
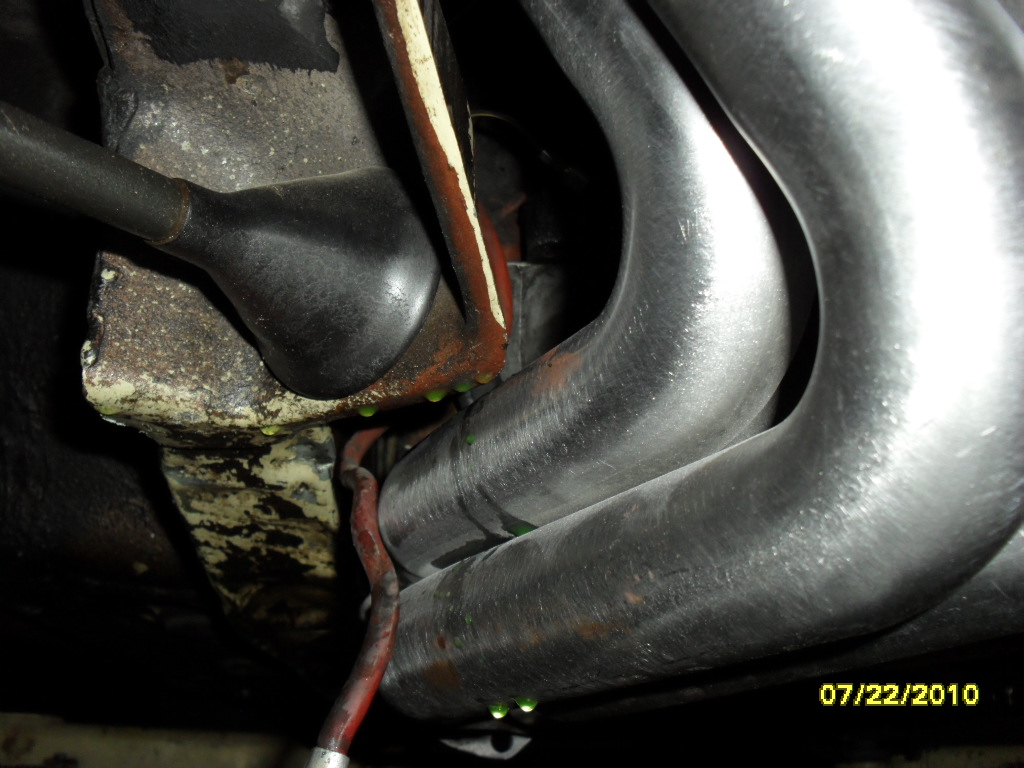
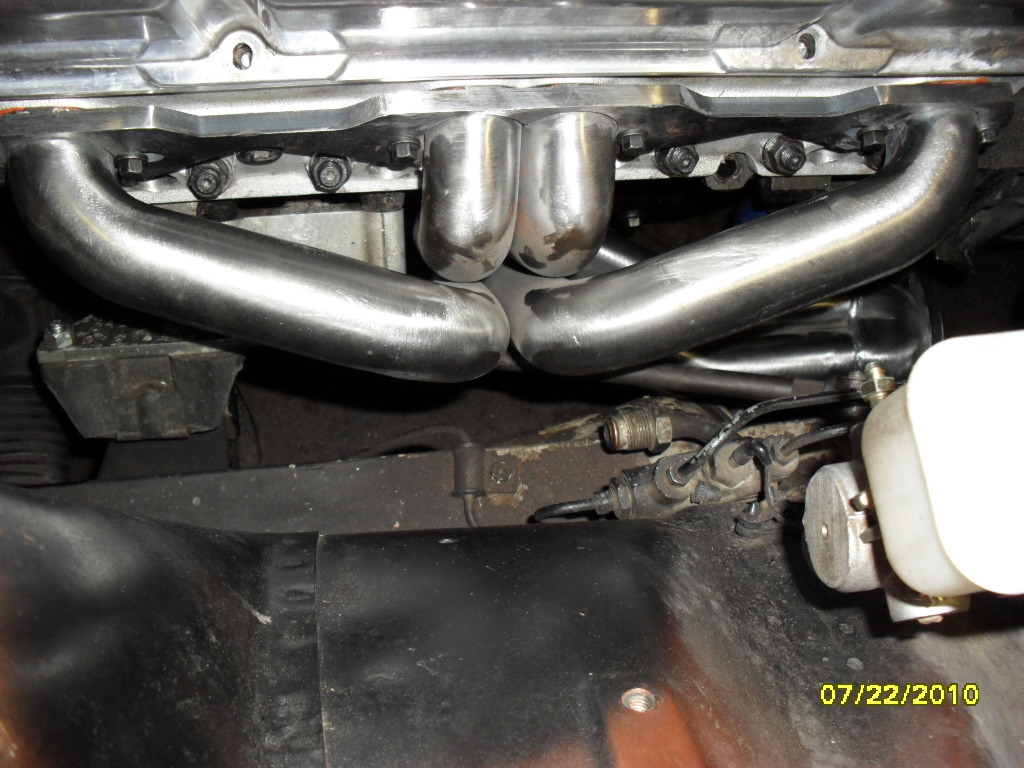
Some pics of the header install. It went amazingly well considering that the headers are not 280z specific. Great fit, looks good.
-
If it is bent, it is wrong. Wheel or control arm/strut that is bent needs replaced. As said before search the suspension area. More info than you need, and lots of good info there for the taking. Good luck.
-
This is a personal recomendation and nothing more. Leave it stock, headers, not less than a 3" exhaust, custom tune, auto. The reason for the auto is that the 6 speed will require a lot more work, but the double over drive is nice and shifting a lot is a pain. Remember that LT1 cooling is a little bit different so hook it up correctly for good cooling.
-
What are going to use the car for? Drag racing Street/drag Street Show Road racing That is the best place to start. Yes you will need a book for your lt1. There are e-bay stand alone harness's at a good price it the best. Auto's are easier on the rear end.
-
Who makes 1 3/4" primary 3" collector SBC 240Z headers?
rx8ss replied to rsicard's topic in Gen I & II Chevy V8 Tech Board
What did you come up with? I have a set of borrowed S&S long tube headers and they do hang down more. Which I do not mind to get the long tube design. Did S&S go under? -
Just a question. Are you sure your vacuum harness is connected correctly. I have worked on several LT1 cars and found that the harness was not connected correctly. This will cause a premature failure as well as using a multi spark booster such as MSD, Accel, or anything. Due to the close quarters of the small space of the cap and rotor in relation to the opti sensor causes major problems. The multi spark systems increase the o-zone levels in the cap thus reducing life. Make sure the bottom hose goes to a vacuum source and the top hose goes after the air filter but before the throttle body. If you can, after you remove the opti that failed. Take the rotor cap off and look at the inside of the cap for any rotor contact. Then look at the rotor and inspect it for breakage or missing retaining screws. Some use screws and some are thermal weld. Please post findings, I am working on a different design and need more input. I have several bad ones and each one is slightly different, but same root cause. Thanks
-
LT-1, JTR mounts, Sanderson headers
rx8ss replied to kenz240z's topic in Gen I & II Chevy V8 Tech Board
Keep us posted on progress. Looks good. I have forged/splayed 383 LT1 in the works. I will either put it in the 280z or my camaro. Depends on how the carb engine does at the track. -
Rear wheel placement in fender well
rx8ss replied to rx8ss's topic in Brakes, Wheels, Suspension and Chassis
Update, the rear bushing are the alum MCA/derilyn and fully adjustable. Found that these things can do toe and slight caster. And becuase of the camber plates I have a fully adjustable rear. The bushing were set for full toe in. Once adjusted for 0 toe and camber and let the caster just end up where ever. That increased my fender/tire clearance by a 1/2". So now it has plenty of room to grow. Launches on the street nice and straight and rides way better. Thanks for all the input. -
I used the ones from a 4 gen f-body. .409 knurl 12 x 1.5 thread if I remember right. Stock knurl is .407 Use a stud installer for best results, that way they seat much better and you will not kill the threads.
-
I did something simular, I removed the brake cyl and ground some extra clearance to put them in.
-
Rear wheel placement in fender well
rx8ss replied to rx8ss's topic in Brakes, Wheels, Suspension and Chassis
Yes, I have camber plates, the alum rear bushing, and derilyn front bushing. So the suspension very stiff and unforgiving, and clanky. With that said, time to roll fenders to keep my slicks. -
Rear wheel placement in fender well
rx8ss replied to rx8ss's topic in Brakes, Wheels, Suspension and Chassis
Good info all around. I am a do it as cheap as you can kind of guy. Good catch on the srtut misalignment if you move it back. That gives me more to think about. Or I could just go to a shorter tire if I really had to. Thanks for the input. -
I have installed a set of slicks and want to know before I do more cutting and grinding. Can the rear tires be moved back in the fender well and maintain the toe alignment? This a 77 280z full suspension mods with exception of adjustable lca's
-
As a past experience I have had with this type problem. This is what I have done and going to do to my car. 2 things should be done. 1st put a skin from the bottom of rad to the subframe. This helps direct the air away from the radiator preventing a recerculation of the hot air. 2nd, put a air dam, spoiler, something that extends the from the bottom front edge of the radiator. This creates a low pressure area on the back side of the radiator and forces the air through the radiator. Just my thoughts.
-
How about if I connect the bars to the tower where they go by them. They are very close to the towers. Would I gain anything?
-
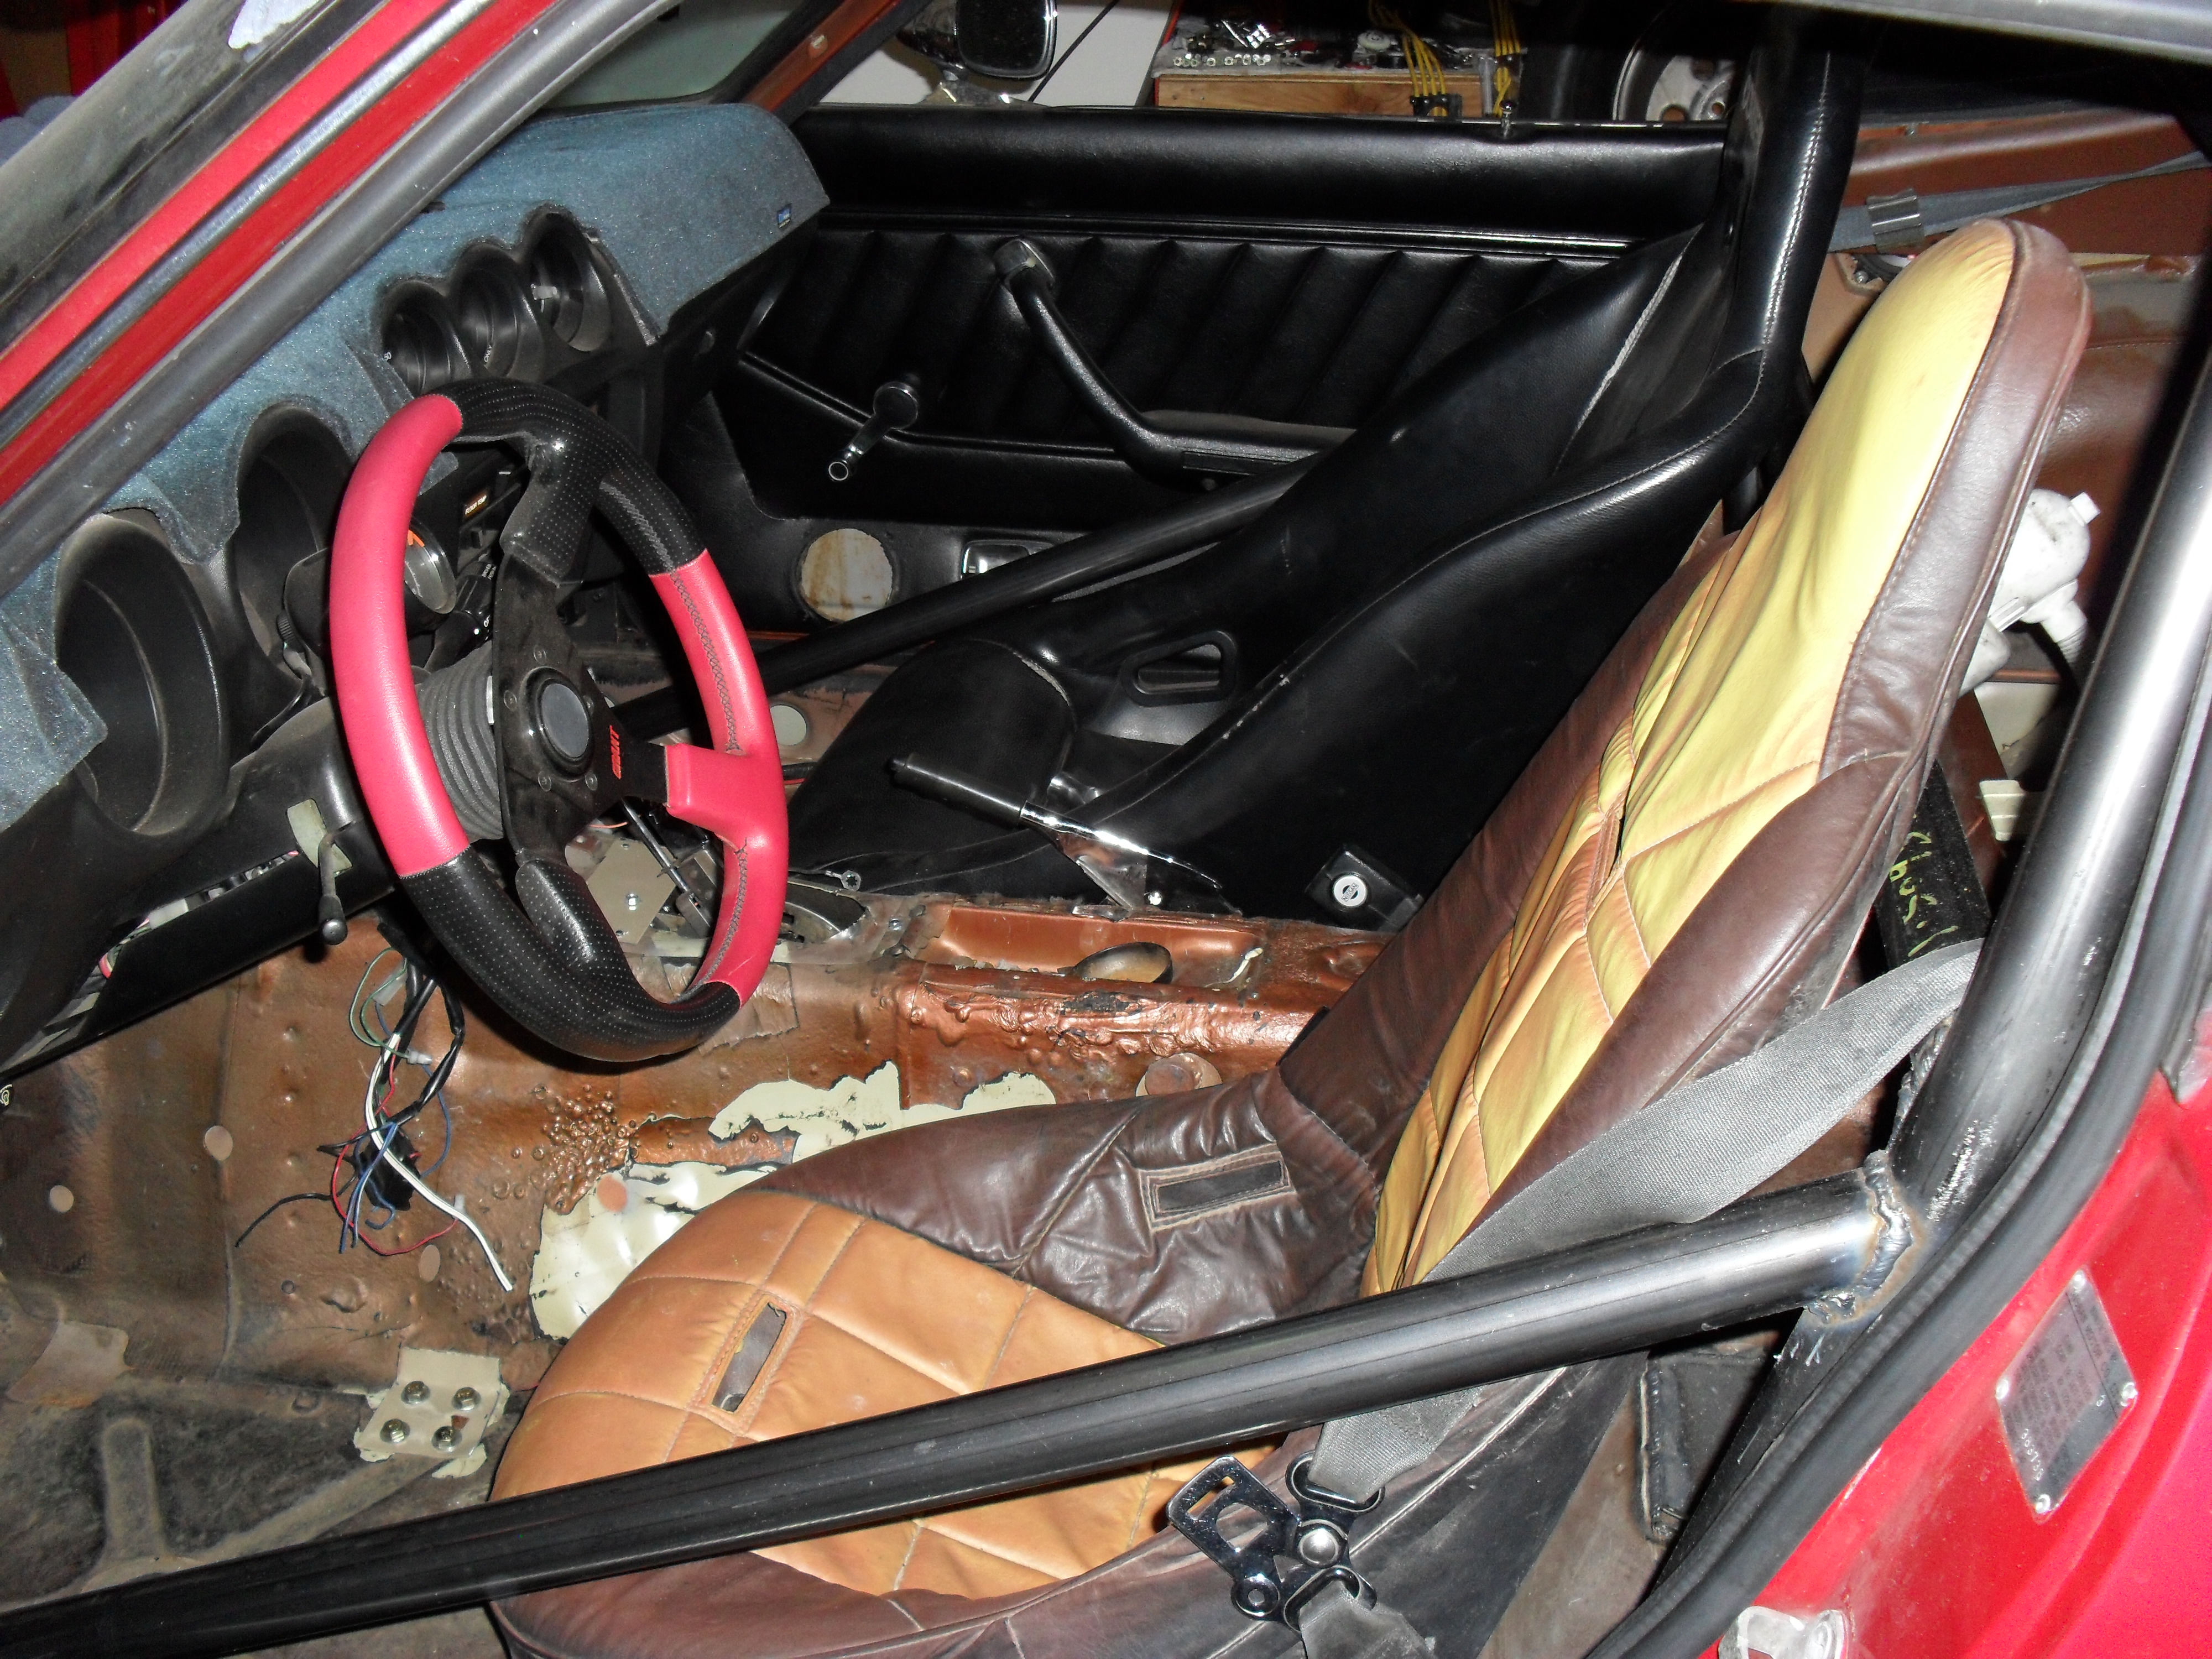
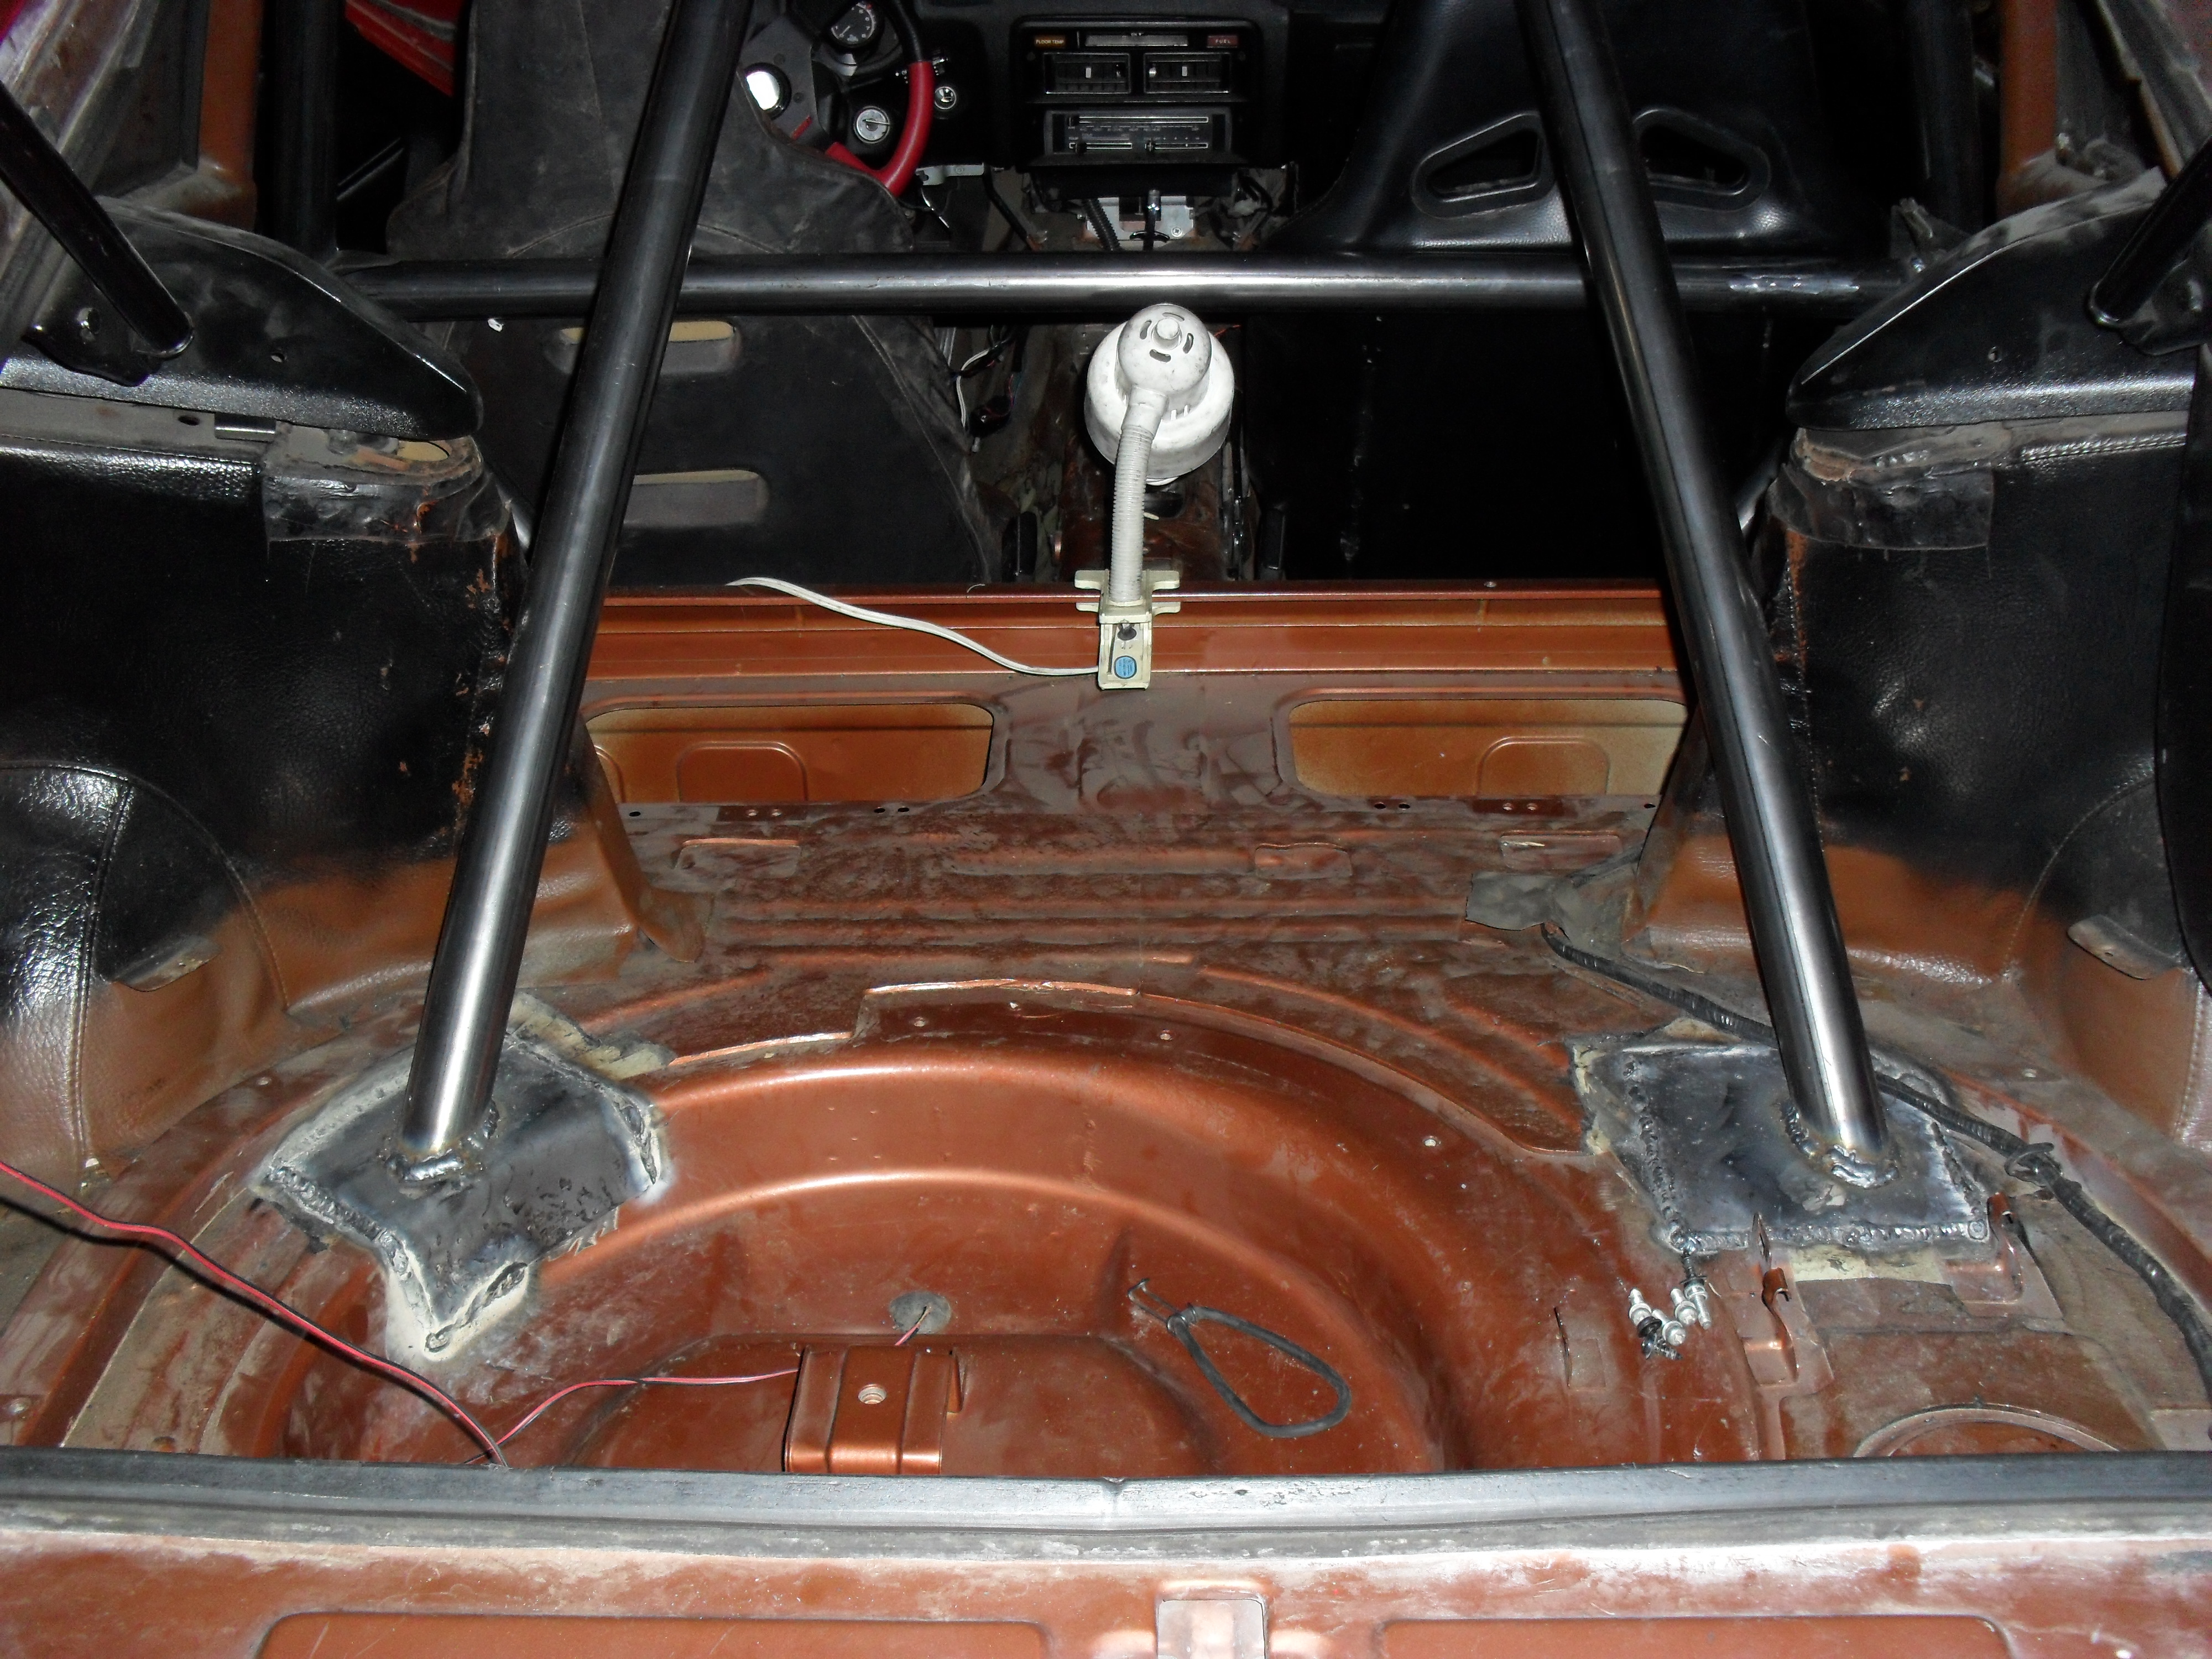
The main hoop is connected to the main rails as well as the seatbelt boxes. And as far as I can tell the seatbelt boxes are part of the structure that the outer rear subframe is connected to. The short inner bars that go behind the seat to the tunnel are connected to the inner subframe mounts. The rear bars are at a slight angle because of the towers and the pads are welded to the chassis channel that go to the rear mustache bar. The door bars are connected to the front frame rail. The only change I am going to make is I am going to add a piece of flat steel from the front pads over to the tunnel where the under carraige support runs along the tunnel for added overall stiffness. For what money was spent, I got what I paid for. As I said and others also, spend the money and have one built for the car for a much safer and better looking bar.
-
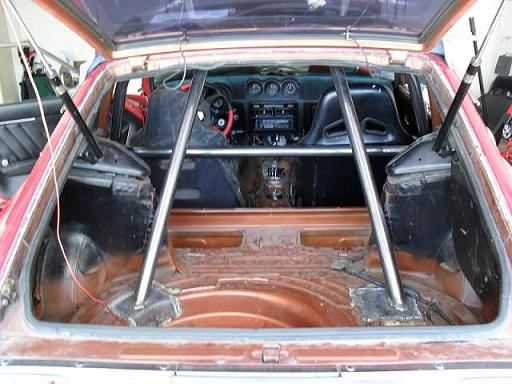
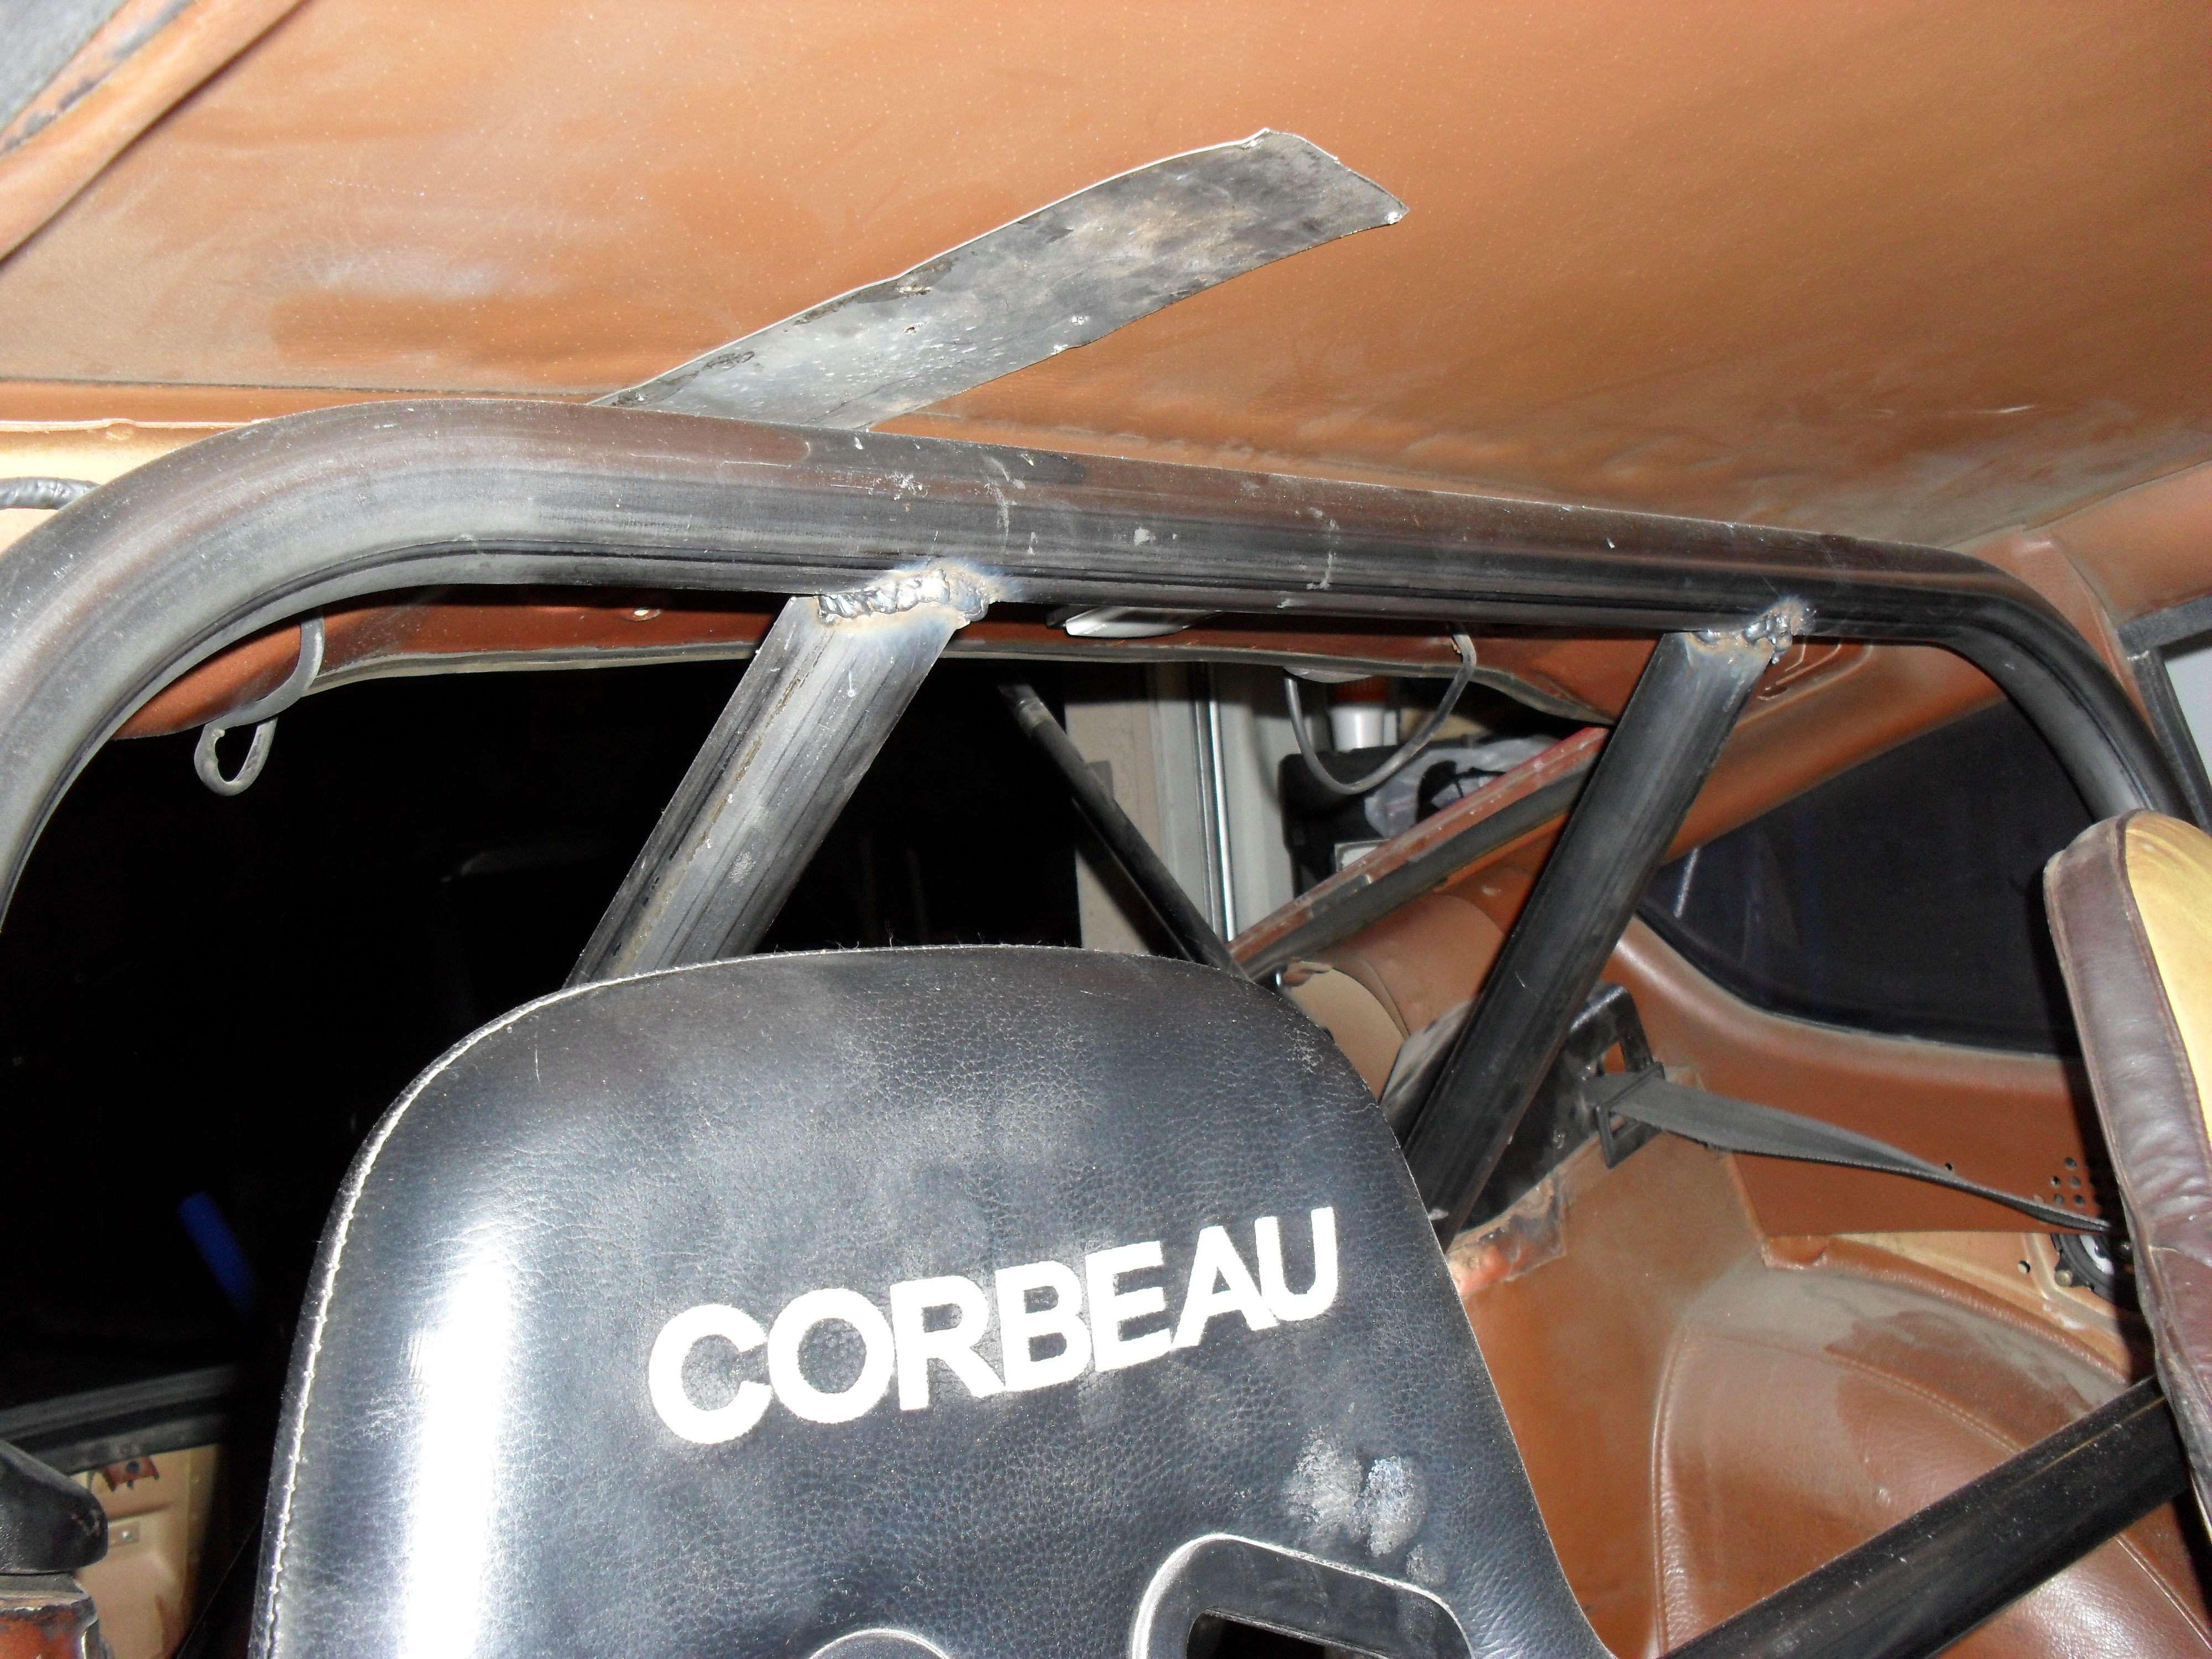
That is why I am not recomending using this idea of using the 240z cage in a 280z. It is not an exact fit. Jegs has listings for some cages but I do not know anything about them.
-
More progress.
-
No not really. The kit was for a 240z and there are some differences in the structure of the car. The kit is very doable, just not for the basic tooled person. Unless you have some mad fabing skills and lots of time. I would not recomend trying this. As for putting in a 240z where is belongs, it would have more than likely went a lot easier. I do not regret doing it, I would do it again if I needed to.
-
Here are a few pics of the install.
-
Very good information you all are bringing up. As for the 240 cage fitting in the 280. Not so much, what a pain. Pay the extra money on get one made for it. The main hoop is too narrow and had to strech it out to the width of the floor pan. The next problem was the the bar was in front of the back of the seat. To correct that one of two things had to happen, make me smaller and move the seat forward or tilt the bar back. Well I tilted the bar back to clear the seat. When I stretched the main hoop, the cross bar is now to short. I cut and added a piece in to lengthen it and I doubt that is leagle. The back braces had to go in a a angle to clear the strut towers, but that got them closer to the rear subframe. The door bars are straight and cause a tight fit for me, but doable. In the end I should have paid the money had a costom cage made at a fab shop.