Search the Community
Showing results for tags '1970'.
-
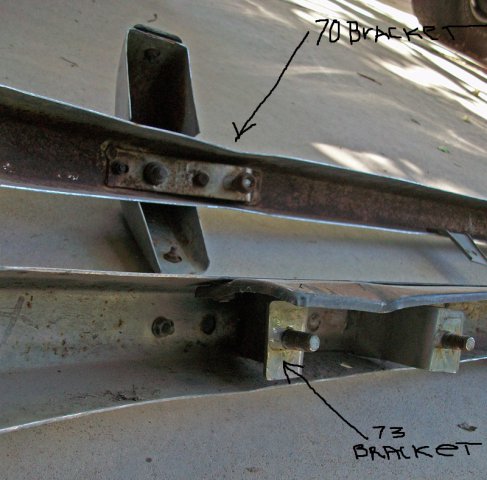
I have a 1970 240z. I aquired a 1973 240z front bumper that has a different setup/bracket. I do not have the arm/rod brackets for the 73 or the "L" brackets for the 70. What do i need to install it on the 70 z? If i buy the early L brackets will they work or do i need to remove the U shape bracket (that looks like the rear) that is bolted inside the bumper and utilize or drill a new hole on the bumper? If the L bracket will work, i am willing to buy them, but didnt want to until i consulted with someone who is more knowlegeable on the issue. Picture: Early on top, 73 on bottom. I have the bottom and the left bolt seems to line up and so does the hole on the bumper behind the bracket stud according to the picture but i have not done any measuring. NOTE: I will also move the guard to a more outer position since the early z's had the guard next to the light bucket and the 73's had them about 4 inches on each side closer to center. In addition, i will have to find an overider that belongs to the early z. the 73 is a shorter bar and will not work.
-
1971 240z "Kirin" Hi there! This is going to be my little Z build. Picked her up as a gift to myself after coming back from Japan. Today she sits eagerly awaiting to be fixed up and driven. After months of sitting I decided it was about time to get a move on it, so here we go! Last Updated: Dec 1st, 2016 - added a couple notes to self May 21st, 2016: Got it running after sitting for 9 months! Now it's sitting again -- Crank Keyway worn-out Note to Readers: I've linked most of the things I've purchased with their part number and a website. If you see something that isn't linked, or want to know where I purchased something, let me know! Exterior -Chassis: rusted -Body: dented steel panels, cracked fiberglass head buckets -Bumper: deleted rear bumper, ugly stock front still installed -Spoiler: Fairlady 432R Reproduction -Grill: Fairlady Z432 Reproduction (1 tuff z) -Paint : 918 Orange (original) -Misc: (order weatherstripping you lazy fool!) / (research rust prevention) / (research body work & paint) Interior Everything was stripped! Lend me your dry ice... Electrical -Battery: New Battery - Optima Red Top 25 / Autozone Universal Battery Mount / (correct size battery cables) -Alternator: upgraded alternator - 140Amp -Wiring Harness: stock (order pretty rainbow colored one - EZ) -Audio: no stereo -Lights: Headlights: Dapper Lighting 7" Classic V2 + White LED Halo (Halogen) / Tail lights: Dapper Lighting Sequential LED -Gauges: stock -Switches: stock -Sensors: Crank Pulley Flying-Magnets system -Ignition System: Distributor-less Simple Digital System Coil Pack Ignition -Spark Plugs: NGK Iridium IX Spark Plugs (PN 739-BPR6EIX) -Spark Plug Wires: 8mm Street Thunder; Spark Plug Wire; Custom Fit 6 cyl.; Black (PN 895-51090) (soon to be removed) -Misc: deleted external voltage regulator / (research windshield wiper motor) Engine & Exhaust - Acc. Belt: Napa (PN _____ ) -Intake Manifold: Mangoletsi -Carburetor(s): Triple Dellorto DHLA 45M -Jets: -Air Filter: K&N re-usable air filter (x3) -Cam: stock? not sure -Block: P30 L24 (Matching #'s) -Head: E31 - Ported (size) -Distributor: stock (delete & plug) -PCV Valve: Valve Cover Breather PCV K&N (PN 800-613) / Crankcase Vent Breather Filter PCV K&N (PN 800-406) (re-route to exhaust) -Exhaust: (research heat shield) -Misc: deleted random wires and screws in engine bay Cooling / Fuel / Oil -Radiator & Plumbing: Mishimoto radiator (PN MMRAD-DATS-70) / Upper & Lower Mishimoto radiator hoses (PN MMHOSE-DATS-70) / 1.75" Mishimoto radiator Tension Clamps / (install custom overflow tank) / (research fan shroud) -Thermostat: 160 degree thermostat & new gasket / 1/4" BSPT Alloy Steel Hex Plug w/ Plumbing tape (x1) -Fan: stock (order electric fan(s) x2) -Water Pump: stock (order gasket) -Misc: deleted manifold / carb coolant line & plugged thermostat housing hole / rotated 90 Deg elbow towards water pump - new 5/8" rubber hose [on order] hose brackets --- -Fuel Tank: stock (research fuel cell) -Fuel Pump: stock (research electrical/mech) -Fuel Regulator: none (research bypass 4+ PSI w/ gauge adapter) -Fuel Filter: Autozone (generic) -Fuel Rail: (removed) -Choke: stock (need to tuck) -Misc: new fuel sending unit, o-ring & lock ring --- -Oil Filter: Fram (size) -Oil Pan: stock -Misc: n/a Suspension / Tires & Brakes -Axels: -Suspension & Steering: clunk. clunk. clunk. -Braking System: I'll eventually stop..(all stock) -Rims: -Tires: cheap Goodyears (insert size) -Misc: n/a Drivetrain -Clutch: custom clutch hardline (3/8-24NPT to M10/1.0) -Master Cylinder: Tilton-76 7/8" Master cylinder (PN 76-875) / adapter (3/8-24NPT double flare to 3/8-24NPT bubble flare) / Girling reservoir, offset 7/16-20 outlet, 5oz -Slave Cylinder: Beck Arnley slave cylinder (PN 072-1258) w/ adjustable rod & return spring / SS clutch hose (PN 21-2170) (order mounting shims) -Throttle System: -Transmission: '77-80 "wide ratio" 5-speed -Differential: not sure yet -Misc: n/a Miscellaneous -AC: none -Heating System: deleted -Bolts: Replacing all bolts with ZCarDepot SS Bolt Kit (PN 650-000) -Hoses: Replaced most fuel vent hoses Going to have to backtrack a little, I hope you don't mind...
-
Hello all!! After replacing the floor pans and bracket base, I broke off a stud on my donor veh 1970 seat frame. It's a very unique bolt. Anyone have any ideas on where I can get a replacement and how to remove the old and install the new one...Help!!!
-
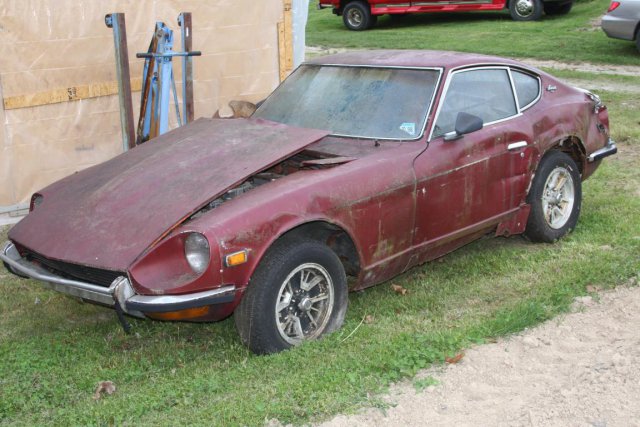
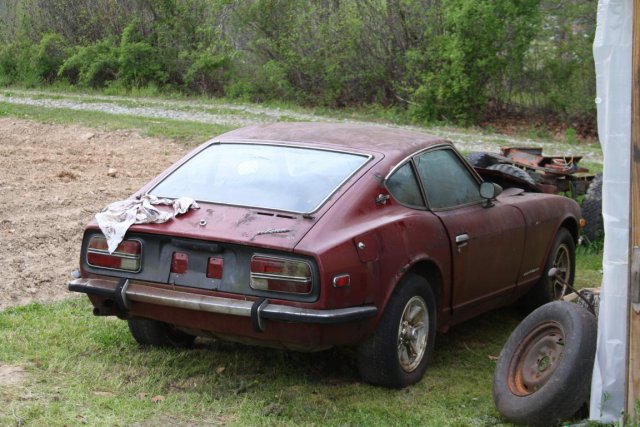
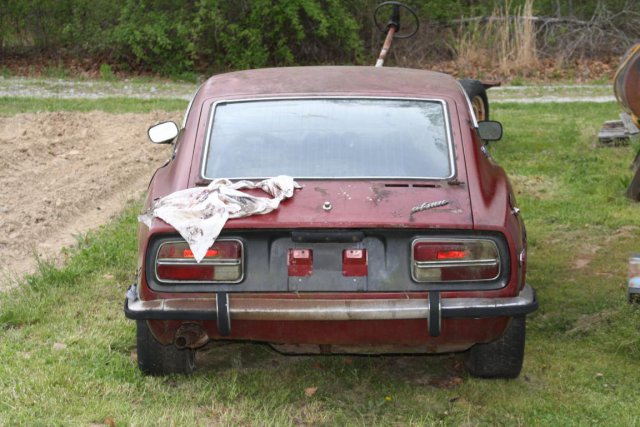
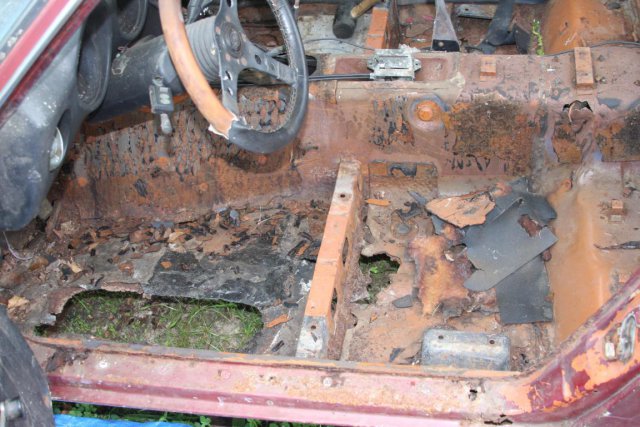
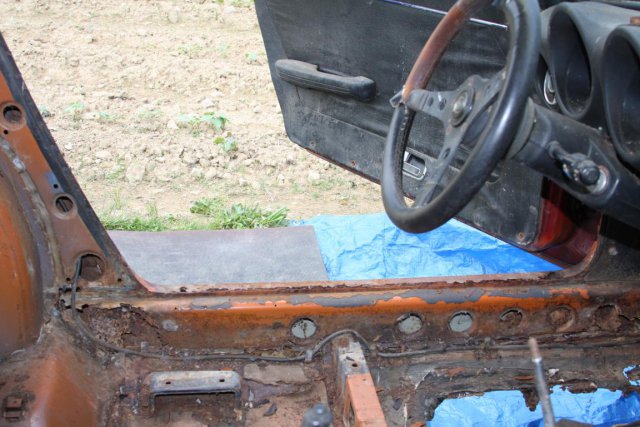
Hello, I'm Agita. I just bought a 240z that is in decently bad shape. It's rusted pretty bad in places and the driver's side panels will need to be replaced. The hood is damaged where some idiot used a crowbar to open it..... not kidding.....what a jerk. Most all of the interior plastic panels are in really good shape, one or two have small cracks that I'm not entirely worried about. One has two holes cut out for speakers..... sadly. I bought a whole driver's door in good condition minus a rust spot the size and shape of a quarter. Much better than the giant dent in mine. I also picked up a cowl that was without damage to replace the damaged one where the idiot with the crowbar used it as a brace to pop the hood. It's a 1970 240z. HLS30-02603 made in March of 1970 I've lurked here for a long while but now I'm gonna jump in. Lots of pics. Please feel free to comment or point anything out. I'm learning and researching as much as I can but I'm far from knowledgeable. I have lots of pictures and am willing to take a pic of anything you would like to see in specific. OK, I don't really know where to start, but the first thing would be the driver's floorboard. I've read about it a lot, and payed close attention to tutorials and all forms of processes listed here and elsewhere. ( feel free to link suggestions, I love reading about it ) I'm reasonably certain that I can replace the floorboards without problem, but I'm concerned about where the seatbelt bolts in near the door. The entire panel twisted out when I went to take the seatbelt off. (see the pic below) Is it okay to just weld in a strong panel then make a place for the seatbelt? Lots more, but lets start there and see what you guys think.

