bfg Posted September 21, 2013 Author Share Posted September 21, 2013 I have but the FSM I have is for a 280z with Air Conditioning which i don't have. All the levers in the diagram don't seem to correspond with anything I have. Quote Link to comment Share on other sites More sharing options...
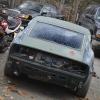
bfg Posted March 3, 2014 Author Share Posted March 3, 2014 (edited) Mega update time: It's been a while so there a few things that have happened since the picture above. I drove the car around well into November. Did a few maintenance things here and there like painting the back: Made a few friends: Then it was into the garage for the winter. She stayed like this for a few weeks: Then this happened: And sadly nothing was touched for a while after that. I've been sandblasting all the pieces I can at work while ordering and waiting for parts when I can. The goal this winter (and likely early summer) will be to spiff up the suspension. Things I've ordered and received so far: MSA sway bar kit lowering springs Tie rod ends Ball joints Front wheel bearings Energy suspension Bushing kit Spindle pins Driverside rocker panel patch lower rear corner patches And $75 worth of misc. Suspension related bolts/hardware. Currently I'm trying to get back up to the garage in Maine so I can remove the old struts and sand blast the strut assemblies at my work in RI. I also need to order paint for the underbody and suspension pieces. I'm debating between SEM Rust Shield, POR 15, and KBS coatings. I have new rear KYB struts but I'd like to find some tokicos or something for all four wheels. I thought my fronts were ok but after removing the front springs I found out they're blown to hell. There's more dampening in a screen door. I also dropped my gas tank. The inside is pretty horrific and I found out the straps were jerryrigged with rivets and thin steel strips. I have a source for a later model S30 gas tank used with the space saver tire. If my tank is not salvageable I may resort to shortening my full spare tire well to fit. Time will tell. Since the last update I've also gotten my hands on a complete E31 engine minus the carbs and flywheel. I believe it sat in a mechanics shop ontop of a metal cabinet for a number of years. The only rust was on the exterior and the inside was pristine aside from the goopy oil and such. I currently have 3 heads, the N42 that's in my car, the E31 head that came with the engine, and an E88 head. I haven't decided which engine combo I want to run in the future but I think I'm going to stick the stock setup for awhile until I can straighten out my goals. Sorry for some of the shitty cell phone pictures, I forgot my camera a lot of the time and just kinda chugged along not thinking about pics. I'll be documenting my progress much more now that I have a stockpile of parts and a lot of work to do. More updates to come. Edited July 1, 2014 by bfg Quote Link to comment Share on other sites More sharing options...
Jesse OBrien Posted March 3, 2014 Share Posted March 3, 2014 I'm definitely inspired to finish my build. Any time I see a zcar, it's good for around 30 units of inspiration. Quote Link to comment Share on other sites More sharing options...
bfg Posted March 7, 2014 Author Share Posted March 7, 2014 I've been bringing as many parts to work as I can so that they can be sand blasted. Here's the total so far: I'm also making usable Emblem molds for my aluminum furnace. I started with the "FairladyZ" emblem as I don't actually own one and they're a bit pricey for me at the moment. I traced an image online and had the bottom 3D printed and laser cut the letters. Quote Link to comment Share on other sites More sharing options...
Jesse OBrien Posted March 7, 2014 Share Posted March 7, 2014 That emblem looks incredible! Would it be worthwhile to do a small production run of them? I know I'm interested in getting my hands on one. Quote Link to comment Share on other sites More sharing options...
bfg Posted March 7, 2014 Author Share Posted March 7, 2014 That's the plan. I have enough aluminum to make a bunch, as long as the mold holds up I'll make as many as needed. I'm also hoping to try some copper casting. I think it would be cool to have polished copper emblems (clear coated to prevent corrosion) on the Z. It would also go with the color scheme I'm thinking about doing if it works. Fingers crossed everything works out the way I'm hoping it will. Heres a pic of the pillar emblem mold I worked on today: Quote Link to comment Share on other sites More sharing options...
bfg Posted March 18, 2014 Author Share Posted March 18, 2014 I was able to pull more stuff to get sand blasted. I'll have more pics on the way soon. In the mean time heres an update on the emblems: And take a look at the inside of my gas tank: No wonder I was going through fuel filters every couple weeks! I'm hoping it's salvageable. Theres still some bare metal in there If not I'm gonna have to look at some alternatives. I've heard camaro tanks sometimes work. From what I've seen it requires a bit of fab work. I'd like the fabrication to be as minimal as possible so I can focus on other things. I also found this tank but lost the link it was from. Looks like it could work: http://www.oreillyauto.com/site/c/detail/GT00/F12B/02539.oap?year=1990&make=Ford&model=Mustang&vi=1133985&ck=Search_02539_1133985_4503&pt=02539&ppt=C0025 More to come. Quote Link to comment Share on other sites More sharing options...
Jesse OBrien Posted March 18, 2014 Share Posted March 18, 2014 I don't know what the inside of my tank looks like, but I'm strongly considering a well-baffled fuel cell this season. If mine is more solid and worth saving, you're welcome to it when I upgrade. Quote Link to comment Share on other sites More sharing options...
bfg Posted March 20, 2014 Author Share Posted March 20, 2014 That would be great! I'm going to get a tank restoration kit for mine and attempt to at least clean it out. If yours isn't dented I'll definitely take it. My tank might be savable but it's still dented to shit on the outside. Quote Link to comment Share on other sites More sharing options...
Jesse OBrien Posted March 20, 2014 Share Posted March 20, 2014 I haven't even peeked at mine yet; I just verified that a fuel pump was back there and ignored it ever since. I probably won't move forwarding with it 'till June or July, but you've got first pick on it if it's worth keeping. Quote Link to comment Share on other sites More sharing options...
bfg Posted April 2, 2014 Author Share Posted April 2, 2014 (edited) Some more parts came in: So now it's a waiting game until I can get back up to Maine to work on her. I've sand blasted a few more parts like the mustache bar and uprights. I still need to disassemble the strut assemblies. Once those are apart I can sand blast those and paint everything with the paint I just ordered. I have new KYB struts for the time being that will replace the 4 blown struts I currently have. After that It should be fun reassembling everything. I also have a gas tank restoration kit on the way and that should complete everything I need for reassembly (minus a few trips to the hardware store and parts store.) Heres a pic of my driver side headlight bucket I restored. Sandblasted, painted, and new hardware all around. I also tried making one of the FairladyZ emblems. I would say it was a success: This one was done somewhat in a rush and I did all of 10 minutes worth of sanding and polishing to get the general Idea of what it would look like cleaned up. I have more casting sand being delivered so that should give me slightly better results if I take some more time prepping the mold. Might be a couple weeks before anything gets done to the car. I'll have more emblem casting updates sooner. Also: I'm trying out some laser cut files for my dashboard emblem. Edited April 2, 2014 by bfg Quote Link to comment Share on other sites More sharing options...
bfg Posted May 7, 2014 Author Share Posted May 7, 2014 So the past couple weeks have been really busy. I've been taking all my parts to work for sandblasting, as you guys know, and I finally got all of the front end and some of the rear end parts done. I managed to get them all painted too. My schedule for the last week and a half consisted of going to work early, painting a first coat, second coat during lunch, and staying late to do a final coat. And thus here are the fruits of my labor: I still have most of the rear end to do but I'm very happy with how well the KBS RustSeal and BlackTop have worked. It looks and feels very durable and the finish quality is fantastic for being brushed on. The next order of business was to tackle the wheel well. In all reality I could have gotten away with just leaving it but there were a few places where the undercoating had cracked and rust was starting to form. I figured while I had all the suspension out it would be worth it to clean them up. And then painted: The excitement could not have been contained when reassembly began. It really is wonderful seeing things being put together rather than dismantled or broken. The front end received ALL NEW bushings, bearings/races, struts, springs, sway bar, ball joints, tie rod ends, stainless brake lines, and hardware. Before: And after: I had before and afters of other parts but the pics didn't come out so great. The new sway bar is mounted but the link bolts it came with are too short so I'll need to order some new ones. My next hurtle is going to be patching the battery tray area. I made an attempt to do that this weekend as well but in order to avoid embarrassment I won't be posting any pictures. I'll also be tackling the spindle pins at some point soon. If anyone has a puller they'd be willing to let me borrow please let me know! Quote Link to comment Share on other sites More sharing options...
bfg Posted May 12, 2014 Author Share Posted May 12, 2014 Got my spindle pins out! I only needed a lug nut and a couple hammers too! Both pins were out in under 30 minutes Quote Link to comment Share on other sites More sharing options...
Nite_Grind Posted May 12, 2014 Share Posted May 12, 2014 (edited) MANNNN this is a nice resto. I don't know if I'm jealous or happy for you! LOL lmk when those badges go into production. IM IN! Edited May 12, 2014 by Nite_Grind Quote Link to comment Share on other sites More sharing options...
bfg Posted May 16, 2014 Author Share Posted May 16, 2014 Check out these before and after beauties: Quote Link to comment Share on other sites More sharing options...
bfg Posted June 2, 2014 Author Share Posted June 2, 2014 (edited) Got the driver side front all buttoned up aside from the small brake hard line that I stripped. The sway bar end links seemed to be too short but I found a solution by compressing everything minus one urethane peice, then clamping it together while backing out the nut and adding in the last urethane piece. I got the passenger side wheel well stripped and painted but neglected to take a picture. I finished painting at 11:30pm and had to leave for work at 5:00am. I was able to get the rear strut towers cleaned and painted. These are the only pieces I haven't sandblasted. They would have been a bit cumbersome to get into work and they were filthy, I wouldn't feel right contaminating our model shop with them. The KBS system to clean and neutralize the rust worked well though. Me and my dad went to the paint and auto parts store he used to go to when he was younger. Him and his brothers and father were big into painting cars back then which is awesome. We ended up walking out with a new paint gun and a couple sample colors! At the moment I think I like the Dark Blue Metallic one the best. We might try a darker version of the Green-Blue metallic before we make a final decision. Next weekend I should have the front completely assembled and most of the rear as well. Edit: I forgot to mention I was finally able to change the trans fluid and topped off the diff fluid. There was evidence the rear pinion seal of the diff was leaking so I was worried I was driving on a dry diff last summer.luckily that wasn't the case. The stuff that came out of the trans was pretty gross. I'm glad that's been taken care of. Edited June 2, 2014 by bfg Quote Link to comment Share on other sites More sharing options...
bfg Posted June 4, 2014 Author Share Posted June 4, 2014 Picked up some used wheels and tires. These are 14x7 and the tires don't look all that bad. They were definitely never rotated though. I'm hoping they'll fill out a bit better than the 14x5.5 and 14x6 rims I have. Anyone know anything about these steel inserts in the bolt holes? Quote Link to comment Share on other sites More sharing options...
hwvigo Posted June 4, 2014 Share Posted June 4, 2014 Love all the work you put in looking great. Quote Link to comment Share on other sites More sharing options...
bfg Posted June 11, 2014 Author Share Posted June 11, 2014 The Passenger side front is almost complete. I just need to mount the hub and mount the battery shelf again and I should be able to drop the front on wheels. Both sides of the rear suspension and differential mounting points are all mounted. The only thing that needs to be done is assembly of the brake components. I also hooked up the gas tank but I still need to make straps. I'm still waiting on dimensions but those will hopefully be done soon. I attempted to start the car but the fuel pump doesn't seem to be working. While looking at the clear inline fuel filter before the pump, I can see that when the engine first turns over a very slight amount of fuel begins to flow. But as the engine continues to turn over it comes to a stop. I tried a couple cycles but the inline fuel filter began to leak on me. I tried tightening the hose clamps around them but one snapped. I have about 30 hose clamps in my garage and every one of them was either too big or too small This was at 8:30pm on Sunday so there was no place to go and get a new one. In other news I've aquired quite the collection of slotted mag rims. In total I have 3 sets of 4. Two sets have bad tires: More to come this weekend I hope. Quote Link to comment Share on other sites More sharing options...
bfg Posted June 17, 2014 Author Share Posted June 17, 2014 Got the car Running! I think the Fuel pump just needed a kick start. After trying several times to start and swapping out the fuel pump I eventually hooked up the original pump directly to the battery. The pump started making noises like it was working so I reinstalled it and the car fired right up. Here's a quick clip of it running: https://www.youtube.com/watch?v=ptGBi2MjsMI I I got everything set up except for the brakes and got her to sit on 4 wheels for the first time since last fall. Unfortunately when I went to install the LAST SS brake line I ended up kinking the line between the brass "T" connector and the old rubber line. I Bought a new hard line to replace it and went to remove the kinked line and with my luck it completely stripped. Not even my giant pair of vice grips were able to budge it. To make matters even worse, the bracket that holds the brass T (as well as the hard line that goes to the front end) are bending very easily when trying to unscrew the line. So it's likely I'll have to go in and replace the rest of the brake lines. I'm thinking since I'll be undoing all the brake/fuel line insulators it would be worth it to do the fuel lines as well. I just need to figure out where to get the longer brake line and the fuel lines. Searching online is a slow process and Fuel line is literally the only thing I've never looked into before so I'm pretty much flying blind. I was so close to driving it too But at least she's running. I Shouldn't complain. Quote Link to comment Share on other sites More sharing options...
Recommended Posts
Join the conversation
You can post now and register later. If you have an account, sign in now to post with your account.