mtnickel Posted February 10, 2014 Share Posted February 10, 2014 (edited) Hi guys, Just a quick question. I'm fabricating a transmission mount for an RB25 into an early 260z. I have the ear-style mount system. I cut off stock ears to make way but am also going to re-use the brackets and stock mount. the Question: Does anyone see why there would be a need to have a transmission mount when using the stock ear mount style? I know the stock engine had a mount, but my rational is that the rubber isolators that go into the ears should provide a fair bit of movement. I would simply cut the round ends off the stock mount and fab up a piece of flat stock to bolt to the transmission and be welded to each end. It would really allow me to keep a large amount of exhaust clearance. Thoughts much appreciated. Second Question: What rear diff mount are people using with the RB? I've read also that some of the rear diff covers on the R200 have the studs positioned differently resulting in different driveline angles from the rear. I've measured mine about 5.4* up. Of course this number is all relative, but to put it into perspective, it points at a spot 3" below the shifter opening. Edited February 16, 2014 by mtnickel Quote Link to comment Share on other sites More sharing options...
WizardBlack Posted February 10, 2014 Share Posted February 10, 2014 (edited) I don't know what type of system you have compared to my oddball '77 280Z, so bear that in mind. I had McKinney send me about every mount he made and none were close. I would just like to talk about the setup of a trans mount system in general. If you are talking about compliance of the trans mount, just be sure that your engine mounts have at least an equal reduction in non-compliance. Otherwise, most of the torsion of the powertrain will be absorbed by the trans mount. That can tear up your trans tunnel or trans or mount. The trans tunnel has a substantial brace for the stock trans so be sure to at least have an equal amount of built up support on the frame for the increased power levels of an RB. I would go to thick urethane on the engine mounts and that will help make sure you don't overload your trans mount. Edited February 10, 2014 by WizardBlack Quote Link to comment Share on other sites More sharing options...
mtnickel Posted February 10, 2014 Author Share Posted February 10, 2014 (edited) I don't know what type of system you have compared to my oddball '77 280Z, so bear that in mind. I had McKinney send me about every mount he made and none were close. I would just like to talk about the setup of a trans mount system in general. If you are talking about compliance of the trans mount, just be sure that your engine mounts have at least an equal reduction in non-compliance. Otherwise, most of the torsion of the powertrain will be absorbed by the trans mount. That can tear up your trans tunnel or trans or mount. The trans tunnel has a substantial brace for the stock trans so be sure to at least have an equal amount of built up support on the frame for the increased power levels of an RB. I would go to thick urethane on the engine mounts and that will help make sure you don't overload your trans mount. thanks for the quick reply. The more I think about it the less it makes sense. You are bang on about the torsional loads. As the mount is 10" wide, rotational changes in the engine may result in large amounts of movement at the ends and stress the tunnel. I should be able to make something work. I am just double plating the tunnel over a 6" x 8" area with thick 2mm plate. I will post some pictures when it's all done. Thanks. Edited February 10, 2014 by mtnickel Quote Link to comment Share on other sites More sharing options...
WizardBlack Posted February 11, 2014 Share Posted February 11, 2014 thanks for the quick reply. The more I think about it the less it makes sense. You are bang on about the torsional loads. As the mount is 10" wide, rotational changes in the engine may result in large amounts of movement at the ends and stress the tunnel. I should be able to make something work. I am just double plating the tunnel over a 6" x 8" area with thick 2mm plate. I will post some pictures when it's all done. Thanks. I gotta do this too, so I will be sure to keep an eye and add whatever I can. My '77 is stripped so I can get some pics and measurements from my RB swap too. Quote Link to comment Share on other sites More sharing options...
WizardBlack Posted February 14, 2014 Share Posted February 14, 2014 I was thinking of something that replicates the seat mounts and runs to the inner rocker panel mount, just like the seat mounts. That spreads the force across the entire floorpan and also ties in those rockers which is where a lot of the strength is. I suspect it will obviously also tie in the frame rails as a bonus. Quote Link to comment Share on other sites More sharing options...
mtnickel Posted February 16, 2014 Author Share Posted February 16, 2014 I was thinking of something that replicates the seat mounts and runs to the inner rocker panel mount, just like the seat mounts. That spreads the force across the entire floorpan and also ties in those rockers which is where a lot of the strength is. I suspect it will obviously also tie in the frame rails as a bonus. That would work i'm sure. Perhaps overkill though. Remember that the trans mount only really needs to support the weight of the transmission and roughly 25% of the engines weight. Anything as strong as the stock mount would work. Even look at the geometry of the mckinney mount...it extends backwards almost 5-6" from the stock mount. The leverages and torques involved would be even less strong than stock, yet you dont' hear stories of the RB doing any damage to the stock mount locations. Anyways, more on my progress. I got the engine fairly well positioned, however I believe how the R200 is mounted it is not going to provide very good driveline geometry. It points up such that its pointing at a spot below the shifter tunnel by about 3". Follow me on the math here: The U-joint's are separated by about 21.75". (you would measure from these pivots for driveline angles, not the yoke or diff flange). For 3 degrees of u-joint angle you get tan(3) = x/21.75. Solve for x = 1.14". So when the diff centerline is pointed at the transmission output shaft, it should be no more than 1.14" away from center. The closest I could get is about 2-2.5" which results in a driveline angle of 4.25-5.5*. The centerline is just too high which puts clearance from trans to tunnel at an 1/8" and physical contact with fuel lines on the reverse/neutral switches. Looks like main option needs to be shimming the diff to a lower angle. I've read that the rear covers can vary a fair bit in the stud position and that some result in a much worse driveline angle (as much as 10*). Since I'm close I wouldn't think that's the case. So looks like those who do it right maybe use a front RT mount or just shim the rear moustache bar. I could probably pull out the top washer as well as grind down the metal of the bar insert maybe another 1/8". Probably gain 1/4" total. That might move the centerline down maybe 1/2-3/4". I really think the better solution may just be the RT mount. Any thoughts? Quote Link to comment Share on other sites More sharing options...
mtnickel Posted February 16, 2014 Author Share Posted February 16, 2014 Wizard, did you mention in the other thread that the offset angle could be as much as 7 degrees? I was under the assumption 3* was max. But now looking at a chart, it looks like I could get away with higher. SHAFT RPM OPERATING ANGLE 5000 3.25° 4500 3.67° 4000 4.25° 3500 5.00° 3000 5.83° 2500 7.00° 2000 8.67° 1500 11.5° This is for operating load and lifetime of 3000hrs. for a doubling of angle or RPM the lifetime will be cut in half. Doing a little math, with a 3.90 diff at 100km/hr (about 63mph), the driveshaft would be turning around 3200rpm. Looks like maybe i can get away with the 5-5.5 degrees I may have. I will do my best to shim up the moustache bar a touch to help things out though. Pics and mounts should be done mid to late next week. Quote Link to comment Share on other sites More sharing options...
ZT-R Posted February 16, 2014 Share Posted February 16, 2014 Does centerline really matter that much? I thought it was mainly the up and down angle. My angle is set to 3* up and down and the diff is off-centered to the passenger side. I spin 8500, no problems yet. Quote Link to comment Share on other sites More sharing options...
mtnickel Posted February 16, 2014 Author Share Posted February 16, 2014 (edited) You're right in that the centerline doesn't matter nearly as much as having EQUAL diff and trans angles. If the angles are unequal, the joints bind basically and cause vibrations. The centerline offset dictates the woroking angle of the u-joint and it's generally accepted that you want the working angle under 3 degrees and at least .5 degrees (so that the bearing lubricates itself). From reading the spicer tech docs the numbers I listed above are more absolute maximums (but not sure if that's instantaneous or during it's working life...most likely during it's life). I just went ahead and got the Poly GM mount for my RT diff mount and will get angles under control. I also picked up a digital angle finder which works pretty slick. With the Frame rails as a level reference, the stock diff mount and moustache bar for an r200 (3.54) in an early 260z result in about a 4.5* upward angle. I'll see where it's at with the Poly mount installed. heres a decent well witten article... http://www.hurst-drivelines.com/files/Universal_Joint_Alignment_Proc_111606.pdf this time they show 3.5 but make no mention of how much higher you can go, but they do state that you can increase that angle and sacrifice longevity. Edited February 17, 2014 by mtnickel Quote Link to comment Share on other sites More sharing options...
WizardBlack Posted February 20, 2014 Share Posted February 20, 2014 (edited) Don't use anything else for level as it doesn't matter. Just assume the flange on the diff is perpendicular to the 0* line for the diff and you should be able to use the shield on the trans if it isn't borked for that side or else something other than that. If the trans is off, you could use your angle finder on the front flange and compare it to the output shield to figure if its offset at all and then put that in your calculations. You can then use those two numbers (or three if you need an adjustment on the trans output shroud) to get your trans mount and engine mount shims dialed in to achieve the same angle for both for trans and diff. From there, you can use string lines on the shimmed powertrain to figure what your included angle will be. I had an SAE master tech helping me and its been a while, but I do recall that much. The big part in his mind was getting both angles the same and getting as close as you could on the 3* range. I think in his mind the recommendations for OEM and silent 100,000 mile performance were a little stricter than necessary for a car like an S30/RB setup. Edited February 20, 2014 by WizardBlack Quote Link to comment Share on other sites More sharing options...
mtnickel Posted February 20, 2014 Author Share Posted February 20, 2014 Don't use anything else for level as it doesn't matter. Just assume the flange on the diff is perpendicular to the 0* line for the diff and you should be able to use the shield on the trans if it isn't borked for that side or else something other than that. If the trans is off, you could use your angle finder on the front flange and compare it to the output shield to figure if its offset at all and then put that in your calculations. You can then use those two numbers (or three if you need an adjustment on the trans output shroud) to get your trans mount and engine mount shims dialed in to achieve the same angle for both for trans and diff. From there, you can use string lines on the shimmed powertrain to figure what your included angle will be. I had an SAE master tech helping me and its been a while, but I do recall that much. The big part in his mind was getting both angles the same and getting as close as you could on the 3* range. I think in his mind the recommendations for OEM and silent 100,000 mile performance were a little stricter than necessary for a car like an S30/RB setup. My angle finder was a great little digital unit about 1.5" long with strong magnets on it. Worked great directly on the output shaft and the diff flange. I was only using the reference line of the frame rails to show that the diff was pointing up a fair bit. The main problem with the R200 in the stock mount is that with the roughly 4.5* upward angle to match that you would need to drop the trans tail a fair bit (to get the 4.5* on the trans). This puts the centerline offset well over 6*. With my new RT diff mount I'm now at about 3* on the diff. I shimmed and jacked my engine to get it to the same 3* and it's sitting pretty in the tunnel. I have about a 1.7" centerline offset still (which equates to about 4.5*) but I can live with that. There really isn't much way around it. The oil pan is about as low as I can go on the cross-member, so the only way I can lower the trans angle is to raise the rear of the trans. I'm already quite close to the stock fuel lines (the rb trans breather pipe just barely rubs them). The only thing else that will work (and is possible) is to drop the diff about 1/2" both front and back. I could put washers under the moustache bar and under the trans mount, but at this point it's not worth it. Now that the engine and trans are sitting pretty I just need to make the mounts. Simply put a 1/4" plate on the engine and a 1/4" plate on a mount on the stock mounting location. Now just some 1x2 Tubing to connect the 2. Going to reuse the stock transmission mount ears as well. Pics to come! Mark Quote Link to comment Share on other sites More sharing options...
WizardBlack Posted February 21, 2014 Share Posted February 21, 2014 Sounds good! I recall it sitting decently as well, but now I have to do it with a Q45 diff, etc. Quote Link to comment Share on other sites More sharing options...
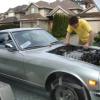
mtnickel Posted February 24, 2014 Author Share Posted February 24, 2014 Pics as promised: Leveled the engine according to the timing belt slit. Not sure exact slant, but i was happy with it:1/4" plate on engine (and same plate was put on the generic Poly mounts. I believe they are for old jeeps).Getting the tilt on the engine and having it not move:The other front support was just 5/8" plywood between the oil pan and the steering rack. Also not the wood that counter's the strap. That positions the pulley bolt exactly between the two frame rails (or maybe 1/16" of the passenger side).Mount done from cardboard template (I wrapped my tubing to make these so I can slide them over the tubing to transfer the angles).Then the distance between the 2 pieces was measured. Then put back on the rail to be cut:I erred on the long side in case I needed to tweak the angles which I did.Here is the passenger side complete:They were only tacked but will be taken to cousin welder to be TIG'd.Here is the 2 of them:They actually angle forward a little bit as I wanted the engine as far back as possible both for balance and to make room for fan and rad.To my dismay the driver side tubing was 2.5mm and the passenger side was 3.0mm tubing (somehow the scraps I got from the metal place weren't the exact same and i didn't notice till after the mount was done). Hope 2.5mm tubing is strong enough. I may add a few angles for support.There's about 1/2-5/8" between engine and firewall and about 1/4" between valve cover and hood support.On to the transmission mount:There are minimal pictures of the actual driveline setting, but it's more or less just using the angle gauge and raising or lowering the transmission tail until the angles match. I got them within .1 degrees. I also used a rigged up laser system to get the left and right correct. Here's my laser which is a combination of a socket (that fits the laser) and the magnetic end of snap on trouble light. (cap not shown unfortunately. it's just an aluminum cap with an imbeded magnet) slipped over the trans output shaft but i had to put a socket on the diff not to get a nice flat surface there).Found Center:I ended up actually measuring where the dot was in relation to the back of the shifter opening so I could reference it when moving the trans tail.Reinforced trans wall with 2mm plate. Here is the wall preped. Note i also cut away the original mount support. It is necessary on the passenger side (for the speed sensor) but not really necessary on the driver side here.I drilled the original 260z mount for 2 studs (stock had 1 in the center, rb mount has 2 spaced apart). Also cleaned up the stock ears. By cutting them as close to the body as possible they retained nearly the correct taper (as the tunnel gets smaller).Then I cut the ends off the mount:The put it all in the car:You can see the 2mm plate here as well as the taper. They needed to be notched in a few spots to give better clearance for the transmission webbing. The driver side mount was positioned as high as possible to allow room for the exhaust.From here it's just a matter of making sure the tail is exactly where you want and then bridging the 2 pieces together.But a few more pics first:Alignment of shifter...It's shifted towards the rear about 1.5" which i actually like. puts it about in line with the steering wheel and I prefer having it a touch closer. (sorry the shaft isn't on but it's similarly placed to the lower hole.Not too much clearance between the trans vent and the stock fuel lines. This was when the trans was at the higher angle. It's probably another 3/8" lower than this now.This was after tacking in the placement pieces:Then after it was filled in and reinstalled:YESSS! Finally it sits on it's own footings!!!Removed and then painted it up all nice. Will still have to weld the ears on a bit better as wellIf you have any questions just ask! Quote Link to comment Share on other sites More sharing options...
Recommended Posts
Join the conversation
You can post now and register later. If you have an account, sign in now to post with your account.