Heathhh Posted March 26, 2010 Share Posted March 26, 2010 (edited) (Beginning Story) Well guys, i have done my fair share of trying to get my engine to run right and i have hit a huge road bump when i thought things finally were starting to bring themselves together for the better. First initial problem that brought me to ask for help is that the 82 280zx N/A that i have, when idling, if the pedal was depressed the engine would then rev, but then quickly shoot down to low rpm's where it wanted to die. It stuttered and then slowly built it's way back up to proper rpm's. So i have done my question asking and searching after i learned how mighty that search bar can be and learned that i have a few things to do before i can think my engine will work properly again. I did the tests and everything had checked out besides the vacuum (i have not done a few tests such as exhaust pressure back flow). I have replaced battery cables, dizzy cap and rotor, plugs, wires, most all vacuum lines, adjusted timing, proper fuel pressure, cleaned all connections i could find besides some connections such as the A/C and wiper fluid dispenser (unnecessary). And just so many more little things such as new fuses. Total was graduation day for me (my car) i thought. I put in the key, and turned and the engine started fairly well with just a slight hesitation from the starter as if the battery was a little low. The engine roared with life and i was excited believing i had finally cured the disease. (Official Problem Start) Smoke from the engine bay. Oh God, i thought. The smoke was coming from underneath the intake manifold were it looked to be coming from the exhaust manifold and the underneath surrounding areas. I thought possibly it was something such as some engine degreaser residue from the day before burning off. It smelled sweet. Oh no, coolant!? While the engine still running, i ran over to check the dipstick (jimmy, ). Milky oil. I took off the oil cap and saw milky oil flying inside there. I shut the car off immediately. I have already invested over 800$ in tools, body repairs, and anything in between. The problem that i wanted to fix was the out of wacko idle i experienced when the pedal was pressed. A vacuum leak, should be easy fix i thought. Well now i am at the point where i suspect the head gasket is leaking coolant in the engine, or possibly any other gasket. The oil had a slight green color to it. But i also thought when the other day i had cleaned the engine, i may have sprayed too much water on it. I let it dry completely so i think that additional information can be tossed. I am a novice at this, just a beginner. I have all the manuals and how to rebuild the OHC engine. I just need a little guidance. Just lead me in the direction i should be going please, so that i may fix this problem and get to enjoying my Z this summer ASAP because it was going to be my DD this summer. I need this fixed within a month definitely. Since i am a beginner, i do not actually know whether or not i should change the oil at this moment, or if i can just leave the oil in there and after i replace the gaskets etc then do an oil change. Is this okay? Or is it a bad idea? That is not my only question either or the only thing i want to know. I want advice on how to go about this and anything in between that can help me out some. How long does a head gasket replacement job take, estimated? Any preferred way you have about taking all of the stuff off, manifolds, lines, etc? So far since my sudden major disappointment, i have just taken off a few hoses and labeled them. It got too cold out and i went back inside on HBZ. The only thing i can be happy about at this moment about my car is that the body work is mostly all done (on the outside it's all done). And the car is very aesthetically pleasing at the moment. Another thing i'm happy about is that HBZ can help me out i'm positive . Thank you guys, community, team, Z owners. -Heath EDIT: Compression test read good all around BEFORE milky oil incident. Compression readings were around 160-175 with only amount of 5 difference through a couple of the cylinders, no more. It read good. Completely STOCK engine, with just over 102,000 miles. Everything ran okay, not great but not horrible either the day of purchase last year August-ish. Edited March 26, 2010 by Heathhh Quote Link to comment Share on other sites More sharing options...
woldson Posted March 26, 2010 Share Posted March 26, 2010 So engine was unknown to you before this point? The fluids were already in it? How many miles, is the engine stock? Compression test? Quote Link to comment Share on other sites More sharing options...
Heathhh Posted March 26, 2010 Author Share Posted March 26, 2010 So engine was unknown to you before this point? The fluids were already in it? How many miles, is the engine stock? Compression test? I just edited the above post. Compression readings good, and other information added at the bottom of the post. Quote Link to comment Share on other sites More sharing options...
frank280zx Posted March 26, 2010 Share Posted March 26, 2010 I just edited the above post. Compression readings good, and other information added at the bottom of the post. You cant run with 'milky oil' so drain the oil, pull the head, and bring the head to a shop for insepction (since you are a bigginer) reinstall and drive .. Quote Link to comment Share on other sites More sharing options...
Heathhh Posted March 26, 2010 Author Share Posted March 26, 2010 (edited) That is what i was curious about. I see 3 ways of doing this. Is it necessary and crucial that i drain the oil now because there is coolant in it, or could i safely just let it be how it is, and until i get the head off and gasket replaced etc, then change the oil and be ok? Or do i need to drain the oil now, get the head off, inspected etc, gasket, head and everything else back installed, and then refill her up with oil? Or or, do i need to drain and change the oil now before i take the head off etc. On top of that, i was also asking any preferred methods of doing this job guys? Any advice before i really start to get dirty with it? Or any comments and questions about what im doing etc. So far i have removed the vacuum hoses, connections, thermostat housing etc, and am about to get under the vehicle to remove the bottom intake mani bolts. Just as the manual has listed in order. Edited March 26, 2010 by Heathhh Quote Link to comment Share on other sites More sharing options...
woldson Posted March 27, 2010 Share Posted March 27, 2010 Drain oil, drain rad, (keep an eye on color/content of fluids). Put a post it on dash to remember to refill. The engine is young, may want to replace/refresh typical stuff on a head rebuild anyhow. The bolts are doable getting the intake/exhaust off. Have a beer and have fun! WEDGE for timing chain! Mark all timing positions with cyl #1 at TDC Quote Link to comment Share on other sites More sharing options...
Heathhh Posted March 29, 2010 Author Share Posted March 29, 2010 Drain oil, drain rad, (keep an eye on color/content of fluids). Put a post it on dash to remember to refill. The engine is young, may want to replace/refresh typical stuff on a head rebuild anyhow.... Right now i am having trouble getting to those bottom bolts on the intake manifold. I tried going from under the exhaust mani to the bolts but cannot slip the ratchet in there, the ratchet is too big for the small space. I am on the last bolt/screw for the horizontal heat shield between the intake/exhaust mani but not enough room to slip the ratchet there either. I put the car up last night and am gonna go at it today with some wrenches to get that bolt for the heat shield. Is there enough room for a ratchet to get those intake mani bolts where that horizontal heat shield is at? Save me some trouble if you guys could also tell me the size of those bolts and how many bottom bolts there are for the intake mani. Darn haynes and OHC rebuild book dont even tell you where they are, size, and how many are down there to loosen up...kind of like buying half a manual if you tell me. I also took off the A/C pump (i cant think if thats what it is or not) but it did not free as much room as i would have liked it to. Any more tips or trouble i might run into by not getting enough information from the manuals? Quote Link to comment Share on other sites More sharing options...
woldson Posted March 29, 2010 Share Posted March 29, 2010 To get to the top center bolt I carfully break away some aluminum. I take the heat shield off first. Many have done it so can you. Wedge chain! Quote Link to comment Share on other sites More sharing options...
Heathhh Posted March 29, 2010 Author Share Posted March 29, 2010 To get to the top center bolt I carfully break away some aluminum. I take the heat shield off first. Many have done it so can you. Wedge chain! I wont forget to wedge the chain, or replace the fluids, already made the note . Is the best way to get to those bolts to take the intake manifold off by taking out the heat shield, and then going right in between there with a ratchet wrench where the heat shield used to be? Quote Link to comment Share on other sites More sharing options...
Heathhh Posted March 29, 2010 Author Share Posted March 29, 2010 Just got all the bolts off, and it was not as hard as i had thought or was experiencing yesterday. Somethin else came up though. Ran into a problem just now. 1982 280zx N/A if you guys dont recall, the EGR system is making me angry. So there is the metal tube that goes from the bottom of the EGR valve and then to the exhaust manifold. It does not mention this in the manuals if i need to unscrew this metal hose or not. By the looks of it, it does look like i need to unscrew it. Anyone have personal experience with this? Hate running into something that wasnt even mentioned the possibility of it being there and restricting the manifold from coming out. Quote Link to comment Share on other sites More sharing options...
woldson Posted March 30, 2010 Share Posted March 30, 2010 I've ditched that system. Cap and or remove. Quote Link to comment Share on other sites More sharing options...
Heathhh Posted March 30, 2010 Author Share Posted March 30, 2010 I've ditched that system. Cap and or remove. I just am having a ton of trouble taking that metal tube off by unscrewing it. Should i just take a saw and cut that sucker off? And then i could use some rubber hose possibly to just reconnect it later on, unless it would burn through with the EGR-Exhaust manifold heat...? I just do not have the resources right now to remove completely, but i can block it off which i actually have already done just by disconnecting those vacuum hoses to the EGR and then blocking them. That was before the gasket fail that i had done that. Quote Link to comment Share on other sites More sharing options...
Heathhh Posted March 30, 2010 Author Share Posted March 30, 2010 (edited) Actually i have an idea. I could just grind that metal hose and cut through it, and then i could grind down the sides by closing the metal hole and temporarily seal the both ends of the hose by doing so with the heat created from the grinder. Well i will be doing that as soon as i get home today from school. By the way, i will also be posting pictures of my progress as well. Wish me luck guys, its a first time thing for me doing this much such as removing the top half of the engine. I will be having fun though, just wish i had access to all the tools! I'm a little short because im just now building my tool selection. Edited March 30, 2010 by Heathhh Quote Link to comment Share on other sites More sharing options...
lowrider Posted March 30, 2010 Share Posted March 30, 2010 Its fairly easy to bock off the EGR, just cut the metal tube. Then when you remove the exhaust manifold, unscrew where the tube attaches then put a plug in. Cut a plate that fits over the EGR. Remove all the rest of the associated EGR junk, and bolt that plate up! Its not all that hard to do! You can see my EGR block off at the end of the first page of my build thread. http://forums.hybridz.org/index.php?app=forums&module=post§ion=post&do=reply_post&f=57&t=74491&qpid=853773 Quote Link to comment Share on other sites More sharing options...
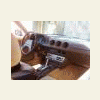
Heathhh Posted March 31, 2010 Author Share Posted March 31, 2010 Had success with taking the Intake Manifold off today. Cut that EGR valve line right through. A little sloppy looking but im not worried about it right now. Here is a couple pictures altogether. Intake Manifold Removed 2nd pic Intake/Exhaust Mani removed I did not feel like resizing them, but i will do so some other time. Take a look if you would and just comment on how the side of the head looks with the intake removed. Ive been told it is best to replace the bolts and screws etc. Is it best to replace them through Courtesy Nissan or where else do you guys suggest that i purchase them from? Thanks guys. So far it is coming along as smoothly as it could... Quote Link to comment Share on other sites More sharing options...
woldson Posted March 31, 2010 Share Posted March 31, 2010 Thanks guys. So far it is coming along as smoothly as it could... Ummm are you familiar with Murphy? Quote Link to comment Share on other sites More sharing options...
Heathhh Posted March 31, 2010 Author Share Posted March 31, 2010 Ummm are you familiar with Murphy? Im sorry i actually do not know what/who you are talking about. Just finished taking off the exhaust manifold. I am not able to push out much more money so things such as getting the head checked by a shop is not likely very much at all. I can take some pictures closely and some of you guys could check it As for the manifolds and valve cover, what is the preferred method of cleaning these pieces? I've heard brake fluid cleans well but is there anything else that is better or should be used? The insides of the manifolds look pretty carbon built up. I'll be taking off the valve cover/head etc this weekend when i have more consistent time to do work. Quote Link to comment Share on other sites More sharing options...
Heathhh Posted March 31, 2010 Author Share Posted March 31, 2010 (edited) Cam and Rocker arm assembly etc. So MILKY! There is also some rust on the cam lobes, is this normal? Valve cover. Looks fairly good. Faulty Valve cover gasket The circled area is of the poorly applied valve cover gasket. If you look closely you can see that the bolt obviously missed the gasket hole and made its own indent in the side of the gasket where the bolt missed. I am NOT pressing with my finger, but only pointing. This brings me up to a problem. What if the water i had used to wash the car had entered here where the gasket was not properly applied? That could be why i had gotten milky oil. But then again, at one point the oil looked as if it had a slight greenish tint to it when i touched it with my finger. Well, it looks like it wouldnt matter now as i should just replace all the gaskets since im already half way done. I wonder if the previous owner tried replacing the gasket, or if it is the factory applied gasket...PITA though either way that it is like that. Edited March 31, 2010 by Heathhh Quote Link to comment Share on other sites More sharing options...
frank280zx Posted April 1, 2010 Share Posted April 1, 2010 Im sorry i actually do not know what/who you are talking about. Just finished taking off the exhaust manifold. I am not able to push out much more money so things such as getting the head checked by a shop is not likely very much at all. I can take some pictures closely and some of you guys could check it As for the manifolds and valve cover, what is the preferred method of cleaning these pieces? I've heard brake fluid cleans well but is there anything else that is better or should be used? The insides of the manifolds look pretty carbon built up. I'll be taking off the valve cover/head etc this weekend when i have more consistent time to do work. Dude... Id get it checked or you will miss even more cash down the line. (This is one of those; penny whise pound foolish situations... or Murphy's) What type of head is it? N42? N47? If your head has a crack (wich personally i have seen on n47's more than any others) al your money and work goes down the drian and you can start all over. Quote Link to comment Share on other sites More sharing options...
Heathhh Posted April 1, 2010 Author Share Posted April 1, 2010 Dude... Id get it checked or you will miss even more cash down the line. (This is one of those; penny whise pound foolish situations... or Murphy's) What type of head is it? N42? N47? If your head has a crack (wich personally i have seen on n47's more than any others) al your money and work goes down the drian and you can start all over. Augh, that is a bummer then. How much does it cost to check out the head at a good shop? Anyway that i and someone else could look it over to find a crack? I can look later at what model head it is. What if when i washed the engine down days before i started the car again, the milky oil is from water leaking in through the valve cover gasket where it was not properly sealed? That could also be where my vacuum leak problem source is at as well. I put pictures above. That seems plausible to me. If i get the head checked, how difficult is it to take all the "guts" out of the head such as the rocker arm assembly etc? Seems like this job is getting bigger and bigger now, and my wallet deflating like never before. I only have about 250$ to put towards it. Otherwise i should save it and put the job on hold till near middle of summer. I would need to buy another DD for summer, im in such a predicament... Quote Link to comment Share on other sites More sharing options...
Recommended Posts
Join the conversation
You can post now and register later. If you have an account, sign in now to post with your account.