.jpg.746fa6c4126f854dadcf6c705718cdf1.jpg)

seattlejester
-
Posts
2793 -
Joined
-
Last visited
-
Days Won
21
Content Type
Profiles
Forums
Blogs
Events
Gallery
Downloads
Store
Posts posted by seattlejester
-
-
Thanks!
We really didn't get a chance to do much comparative driving, the route was long and our breaks were long and we had things to do in the evening to find emptier roads. I would like to imagine in a straight line and maybe even in the twisties I would give all of them a good thrashing
 , I've played with the BMW before and he had a hard time keeping up even with my wonky fuel pump. I think other than the porsche we were the only car to make it on one tank of gas as well.
I think I have a soft spot for the facelift E46, but I do enjoy the E30. His especially, I've never been taken around a corner as hard or quietly. His old setup was running a double muffler so the only thing you would hear would be turbo spool.
-
Work has been interesting and been keeping me busy, but continuing on.
Twinning done correctly:
With the brakes somewhat adjusted (after that experience I decided to leave myself a 1mm buffer from the correct measurement). I tested it to find the brakes fully disengaged and the dead pedal throw was reduced by a good margin.
I added some rubber isolators to the tank strap bolts as well as loctite, sealed up the hole the new much smaller filler neck revealed, and fixed the fuel filler hose.
I even adjusted my hatch which has been loose for years causing a little rattle at speed if a microfiber towel wasn't put on the gasket to help put tension on the aerocatch latch.
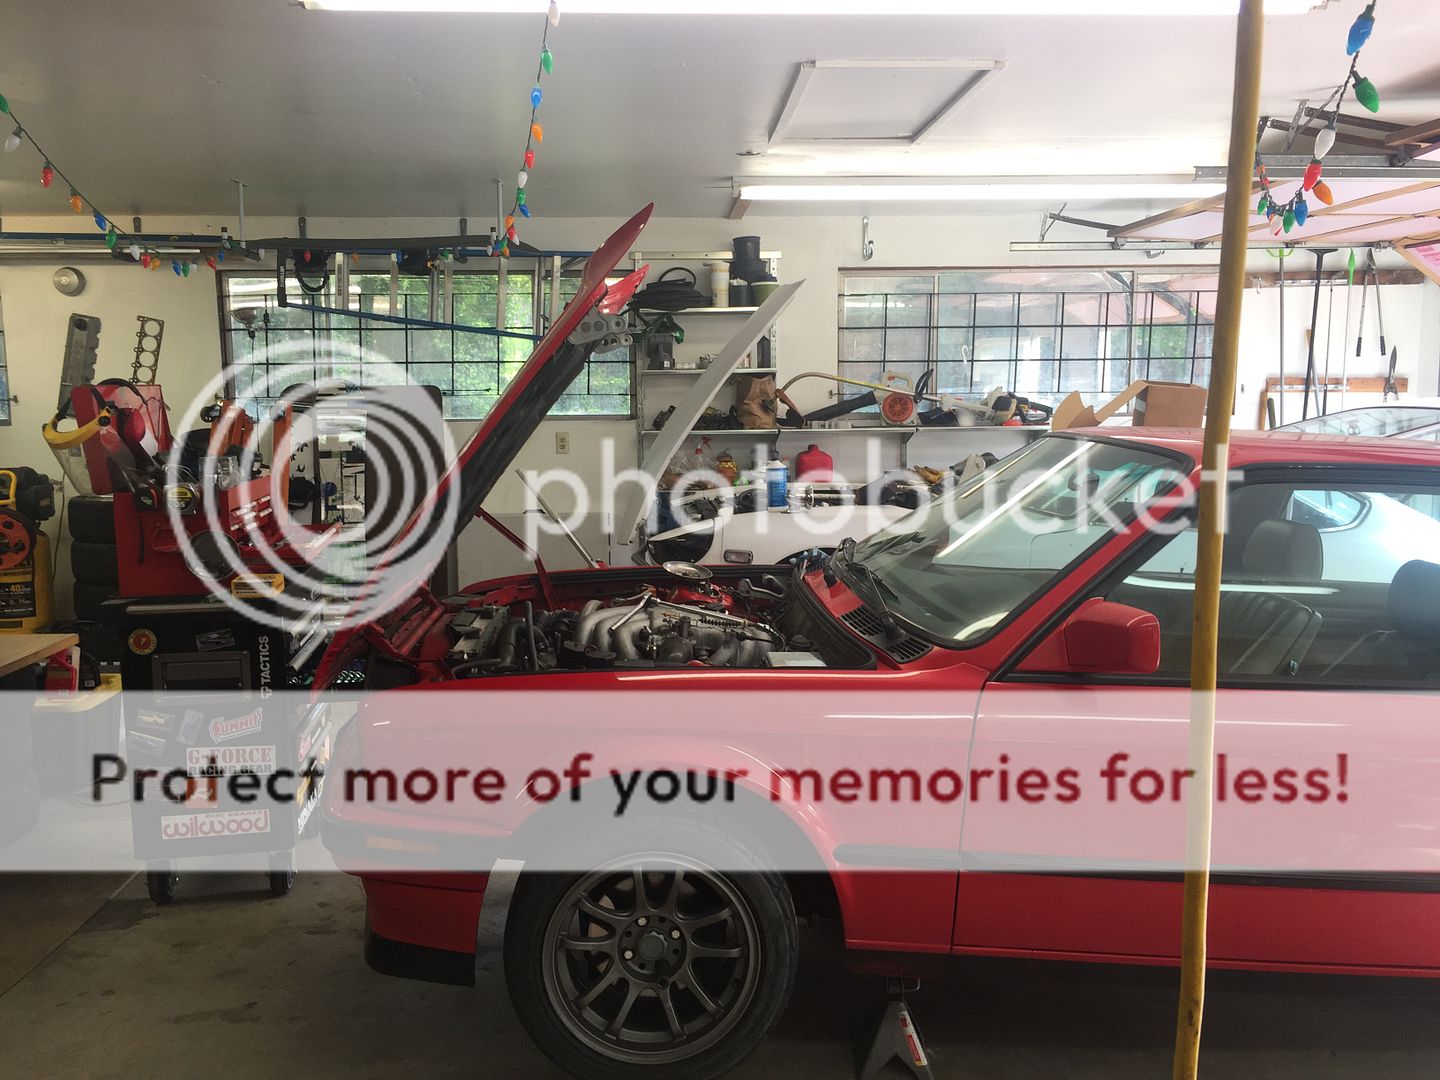
The reason for all this was a drive a friend had setup. The last time we went, my car was in the middle of the full rear end overhaul. Right after finishing if memory serves I killed the battery and popped a fuse which until was found caused a lot of things not to work. Decided I was going to definitely make it this year.
It was supposed to be crummy weather, but as with this time of year it really is unpredictable. The morning started out overcast and cold, but glorious weather waited.
The car made it 140 miles with no real issues.
As the car ticked cool with the hood ajar, my copilot and I sat around waiting for the remainder of our group to arrive.
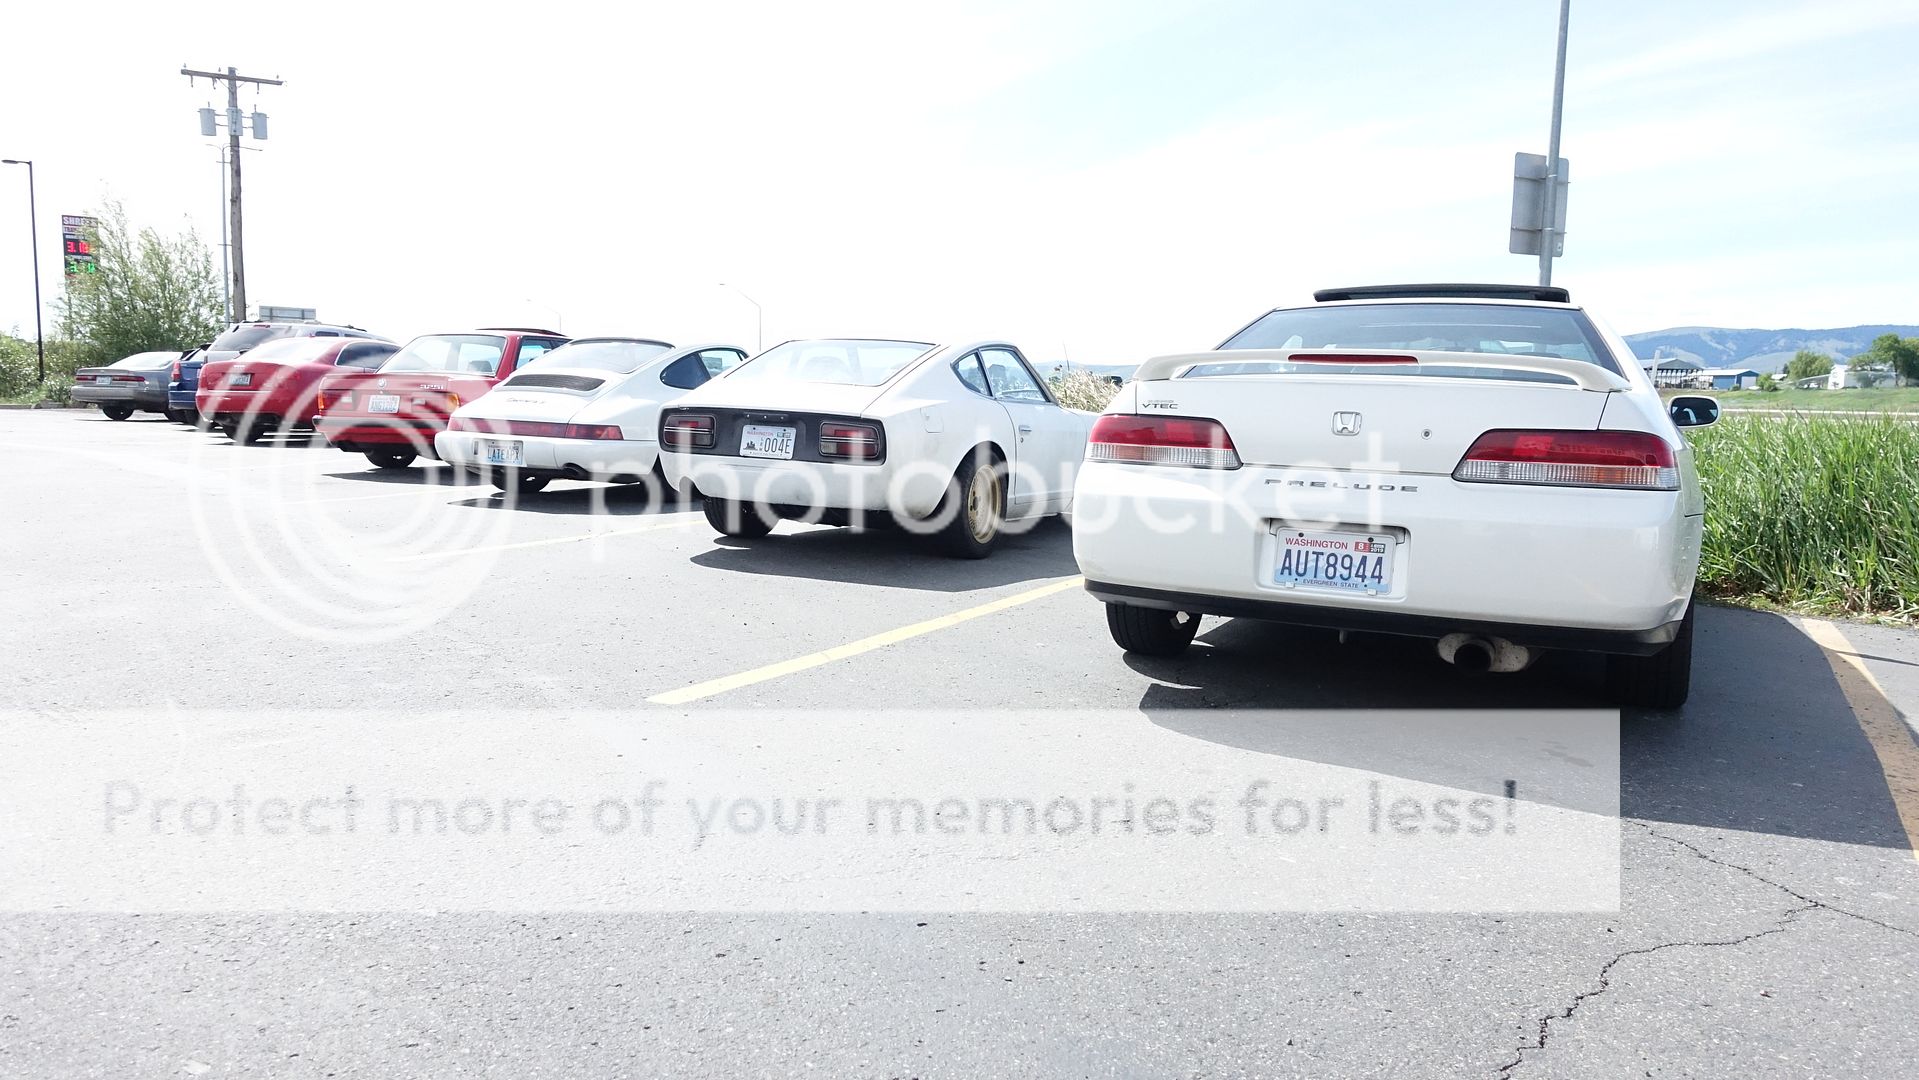
As much as I enjoy Z cars, it seems like all the locals *cough cough* are down or in progress at the moment. I swear it is some type of curse, only one running Z at a time allowed. However I really enjoy the mishmash of cars the last few drives I have done there were no two cars the same.
Had a nice beverage or two (don't worry I was the passenger), and we took off the long way back home through Packwood.
Turns out they had an autocross earlier in the day, may have to try and squeeze one of those in soon.
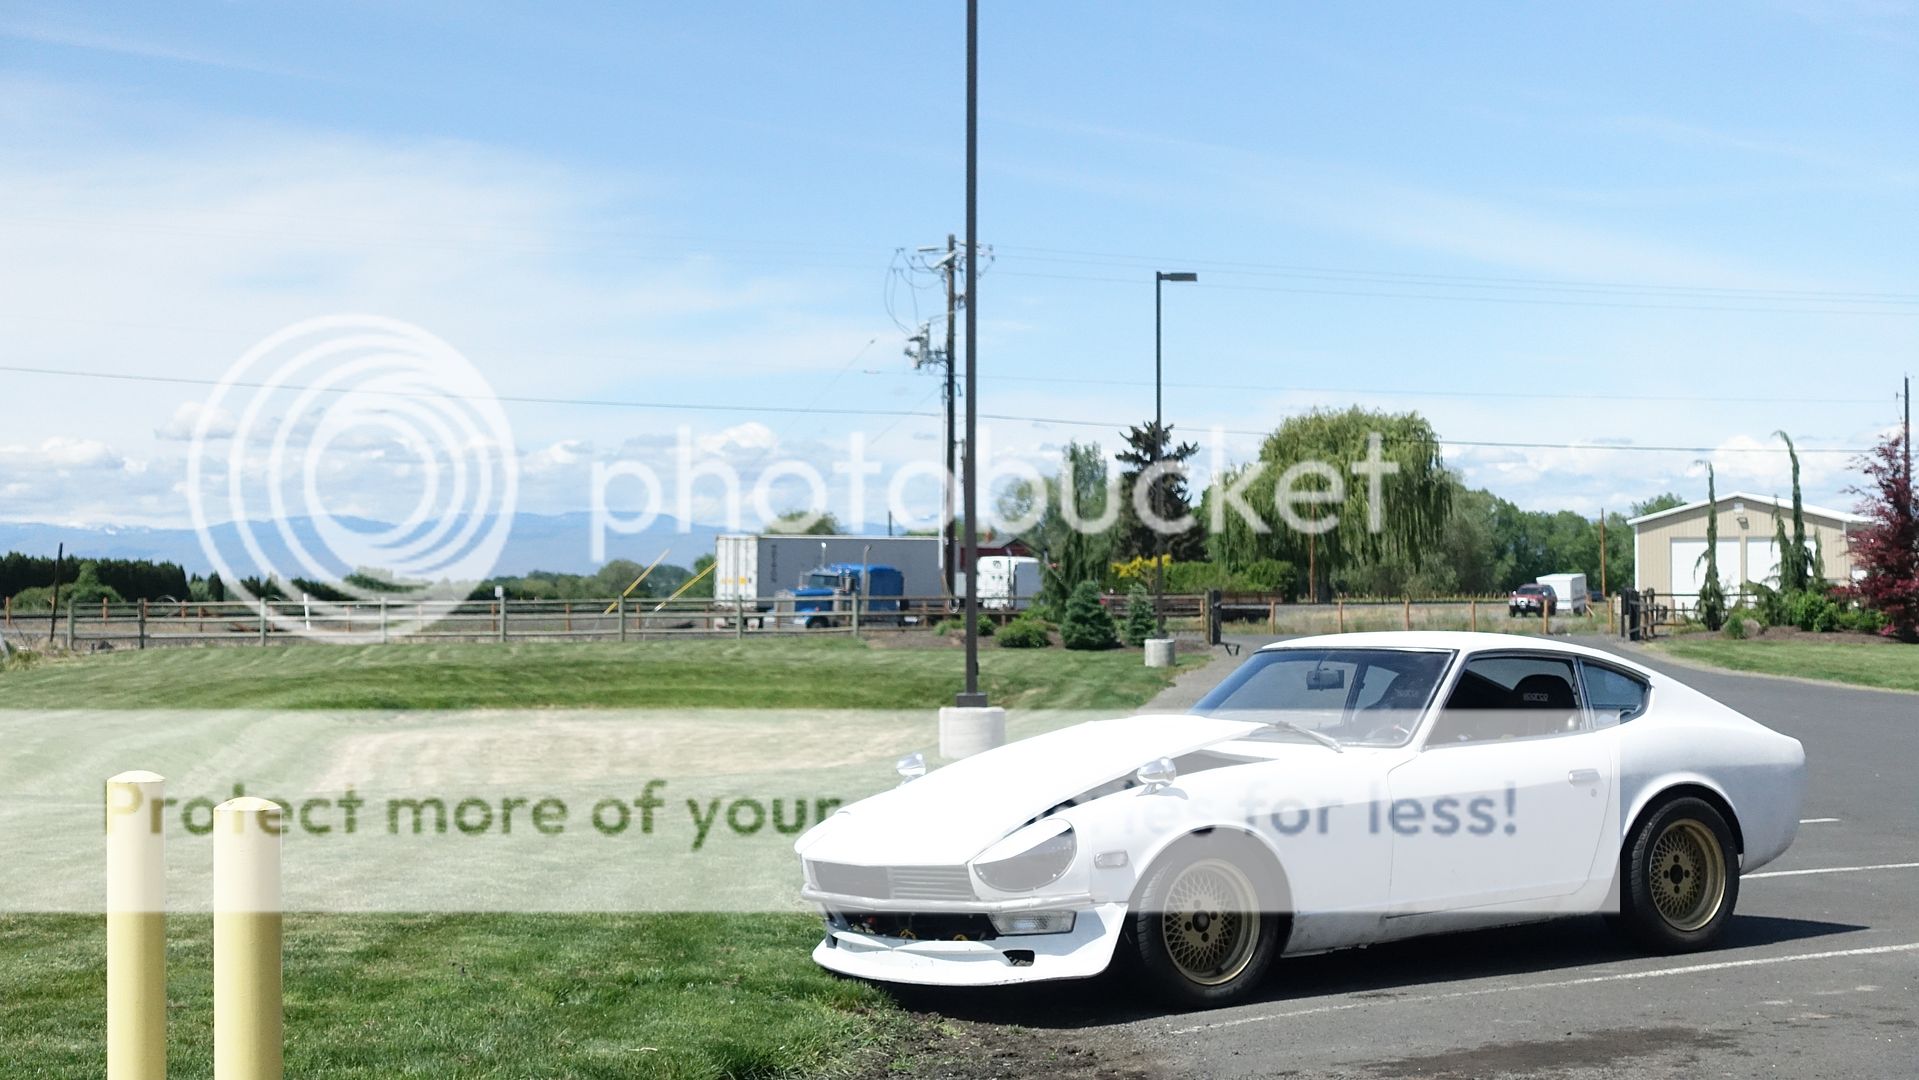
By the time we rejoined a major highway it was golden hour.
And golden hour means great lighting especially for rollers.
So what does this road trip have to do with anything? Well it was the first time I filled up my gas tank to the full mark. With the filler neck hose from a Jeep I bought I was able to make it so that there was no noticeable kink allowing the fuel filler to fill at full speed. The full tank of gas also helped add weight on the rear helping damp balance some of the weight and giving the shocks more weight to play with. To top it off even at our brisk pace combined with some traffic the 3L turbocharged engine managed 360 miles with the 16 gallons. 22.5mpg. That was with some pretty extensive brisk driving. I imagine sticking strictly to cruise we would see something closer to 30 or so.
Definitely some faults did rear their ugly head. The car is loud even with the cat and ultra quiet resonator, the first stint we did without earplugs, only when we stopped to stretch our legs did we realize how loud it had been. Some rattles definitely need to be chased. Under extensive driving the seats do get warm, I imagine time for some heat mat under the seats, maybe some insulation and carpeting. Driving position still sucks not sure what can be done short of cutting out the floor or finding some way to make the seat reclining mechanism narrower or jack the front of the seats up a couple inches. There also was some smoke coming up from the shifter, we didn't find anything more than a bit of oil dampness not even dripping, so perhaps it was the adhesive used for the tunnel shield slowly cooking off.
-
Glad it made it to you!
Can't wait to see the turbo manifold.
The 2jz water neck looks quite different, so I imagine the length would be different for the water tube to the head would be my guess.
I had the same issue with my intake on the 7m, one of the reasons I didn't run an IAC. The solution people came up with is running an adapter to make it 90* or a hose to a remote location. Kind of funny when people copy old designs not realizing the problems they had.
-
Howdy,
Welcome to the forum.
Looks like you posted in the FAQ section. This section does not allow for replies. Please look in the announcement section for stickied posts regarding the fault.
Also please take a moment to read the forum rules. "There is no best" is one of them. That is because it depends on the individual and their needs. The brakes needed for a drag car are going to be different to ones needed for road racing is going to be different to the ones needed for drifting and so on. As a forum rule there is no best, there is a good fit for a desired application, but no real best. Keep that in mind be specific and you will get more specific response, super generic questions may be sent to the tool shed per the forum rules.
-
Interesting, we could probably swap setup notes, I too have LC-1 and a megasquirt with individual coil packs, although on a 2jz. Ever do anything with the brakes? The 4x4 "upgrade" feels a bit light at times. Like you can definitely slow down or stop, but it can be quite the effort.
Glad you found your solution. I guess understand that the traffic is a bit lower than the past, and some people have moved on in life (RIP) or in pursuits. Help those who remain or check in by making things organized and such even if it is tedious. Sometimes it is hard to grasp who the person asking is or what they have figured out.
-
I think asking for $1000, and being happy with $500 might be what to expect. Unless the interior is complete and immaculate. Or all the missing parts are stored elsewhere. Depends on the area though, if you have the only early 240z for miles you might have more value to someone close by.
-
I'd make sure to go over it. Brake lines are important, and if they corroded I would imagine a full replacement of the soft and hard lines might be a good idea.
-
That is a nice looking Z! I personally really like the snow flakes especially in the 80's color scheme with the gold accents on the wheels.
17's are on the bigger side, you can get them in the same wheel height the sidewalls do get a bit on the thin side and depending on the rim style it can be a lot for the car.
The wheels on the GTI are reminiscent of BBS wheels. I'm not sure of the exact model, maybe the BBS CH-R?
-
Hey Luke,
Looks like you posted in the FAQ section, I've moved your post into the wheel and brake area of the forum so people can reply.
Cheers.
-
Welcome to the forums!
I noticed you made a post in the FAQ section of the forum. The section does not allow for responses, so I moved your post to the technical section. Take a moment and make sure you are posting in the correct area for responses.
You may have to look through the wheel thread. To find a specific setup, or if you find wheels with the correct offset using those in google search using hybridz as the filer may find you more pots. Maybe one of the wheel guy's will chime in.
Make sure you read the forum rules and introduce yourself in the new member's section, hope you have a good time.
-
Thanks for taking things in stride. The title change I'm sure helps.
The point on semantics is pretty clear, if you search combo switch as per the previous title, it brings up hundreds of links to the headlight combo switch, and a few on the blinker/high beam combo switch which are a very common problem. Switching relay module or mult-function relay per the part number brings up much fewer, but more specified posts, using the part number you get very very specific, but few posts.
If someone else in the future is looking for the same CA specific relay switching module for the blinkers or turn signals it should now pop up and you will potentially be their savior pending the solution. Don't worry you aren't alone, when I announced I had ordered pipe for my tubular control arms, people were quick to correct me or to make sure I was using the right material. In my mind I know I meant tube, DOM A513 to be specific, but coming from fluids and flow I was thinking pipe, slip of the fingers and now I had to sit and try to convince people I wasn't trying to build structural components from used rusty drainage pipe.
I think it is clear now that you are looking for the CA specific switching relay module/multi function relay, or a work around for that. In the early cars the lack of relays did send a lot of amperage through not so great connections, so I would suggest maintaining a relay point rather than a direct wire unless you are using low amperage items like LED turn signals. Pin it out and swap to a modern relay using male spade connectors to a 4 or 5 post 12v automotive relay.
I have to say this forum was such a place, at least 9 years ago when I joined. My first posts I was dinged for grammar/capitalization. However, that is part of the character of this forum. You get a specified knowledge base that is immense, in return you may have to do a once over on your post and try and use the common term. So I will say don't throw the whole forum or forums in general under the bus. Keep in mind we could not be here if it wasn't for the generosity of donations and the hard work of those on the network end. We almost saw closure a couple years ago and then you would be relegated to searching through facebook posts.
We are more oriented around engine swaps, suspension tech, and such. Looking for stock replacement parts, you may have an easier time on classiczcar as they are excellent at finding and maintaining the stock Z platform and will most likely have found a more bolt in/plug in solution if you are not familiar with pinning out relay wiring. You might try datsun parts and needs as there are a lot of Californian members, ratsun as well who may be able to find you a used replacement part.
-
 1
1
-
-
Semantics is a big deal on this forum. It is one way that separates us from other forums. Making sure an item is called the correct name that people recognize will go a long way.
If you want I can edit the title of your post which directly asks for a workaround to the combo switch. Semantically it seems to be called a multi-function relay.
The relays themselves seem to last quite a while, I'm still using several stock ones in my 71 that was in use till 2010. I would suspect as miles pointed out it may be the switch contacts on the stalk going out. The hazard lights switch has its own set of wiring so it may be acting as a red herring if you are using that as the reasoning in your train of thought.
I suggest taking a breath, people are here to help of their own accord, it may be frustrating to seemingly answer the same question or when someone is caught on a seemingly unrelated point, but realize we need clarity to try and help. It may serve to help their train of thought, and it may seem tedious, but given the free help, maybe try being accommodating? It may serve better to have a post where you clarify exactly what you are looking for that you or others can refer to someone asking a question in the post.
I can't answer as I've only looked at the early Z wiring in detail, but it seems odd for the blinker wiring to go through the floor so I can identify with others as to the confusion. I'm finding a note that the part number was used for a fuel pump relay, might be something else to check. I do know the pins are a standard spade connector so you could wire in a modern relay if you can pin out the contacts and make little adapter lengths, I've done that for some older plugs before. Identify power, ground, switch ground, switch power, and output. Then you can use any modern automotive relay.
-
2
-
-
Welcome to the forums.
That number does not match the part number of the transmission. I would assume a manual transmission?
http://www.zhome.com/ZCMnL/tech/AandBtranny.htm
For physical identifiers
https://www.jdmjunkies.ch/wordpress/2016-06-07/240z-transmissions-manuals-swap-possibillities/
Has a chart with that will decipher the part number if you have it, it should start with an F for a manual.
You can pull the gauges out the back, they are usually retained by a bolt that will be difficult to get to and you may need an extra stubby wrench or socket. Pulling the dash might be a good idea if you plan on replacing all of them, but things like the tachometer are pretty easy to pull. The combination switch (on the right if I'm not mistaken) tends to go bad in the early Z cars, seeing as that is what triggers the dash lights I would try find a wire feeding the dash light and see if any power is running to it.
Regarding the 3 way hose, it will need to see a source, in this case vacuum. You have one hose going to the distributor for vacuum advance, and another on the throttle body idle something or other or maybe anti-stall as you say (not sure, its been a while since I've looked at a stock throttle body) so the third branch should be a source of vacuum most likely on the intake somewhere.
-
Welcome to the forums, I will say this is dangerously close to skirting the rules there. If you would like to sell your product please feel free to make a thread in the vendor forum.
I do wonder if it is some exotic material that justifies the price. That may be information you wish to include in your own thread. If you would like there is even a wind tunnel section that I'm sure would benefit from the data backing up the performance.
-
1
-
-
Thanks Miles, very very helpful!
-
My problem with a similar setup was the EN12 being wired incorrectly and not receiving power and the rockers being out of adjustment not allowing for compression.
With starter fluid you can bypass the fuel portion for now, but you still need spark and compression. Compression is easy to check, turn the engine over by hand, with the valve cover off and you should be able to hear the compression. Check the valve lash and adjust as necessary. Then you will have to check the ignition wiring. I will say some of the wires that can be made out in the background look a bit rough. I recall the diagram I found at first was wrong. I think I pulled from near the ballast resistor, I think we had to use a multimeter to find the correct ignition wire to the EN12 so that it would have the correct power and voltage.
-
Miles also posted this image two days before this happened. I should have taken note:
Equates to 9.9mm past the surface.
-
Goodness I love this forum, you really can find everything.
Quote from this thread:
DO NOT, DO NOT, DO NOT preload the brakes. EVER!!!
The master cylinder needs to fully release in order to open up the little ports that let the brake fluid back into the reservoir. If they can't release ALL THE WAY then they can't release the pressure.
This makes no difference at first, because you let off the brake and there is no pressure, then you step on them and there is, let off and there isn't. As the brakes gets hotter from you applying the brakes, say, in traffic, the heat generated transfers into the fluid, which expands. If the pressure can't release back into the master cylinder reservoir then this results in a light drag on the brakes. As the drag continues, more heat is generated, more fluid expansion, more pressure, more heat, more expansion, more pressure, etc.
I had this happen with my clutch once and I learned to have free play in the system. On the brakes you want a little free play in the master to booster connection, and you want a little in the pedal to the booster connection. 1/8" of free play in both won't make a noticeable difference in the pedal throw, but not having that free play will be a BIG problem.
Pretty sure that is what happened.
I measured what I did and found that I was sticking 13mm past the flange of the aluminum spacer at first, that caused the pre-load on the master and the exact symptom of the brakes coming on and staying on. Then on the side of the freeway I moved it down to 6mm past the flange and the car drove back with no problems. I have it currently set to 9mm which is in spec, but I will be checking for preload and complete release to make sure I don't run into problems again.
-
 1
1
-
-
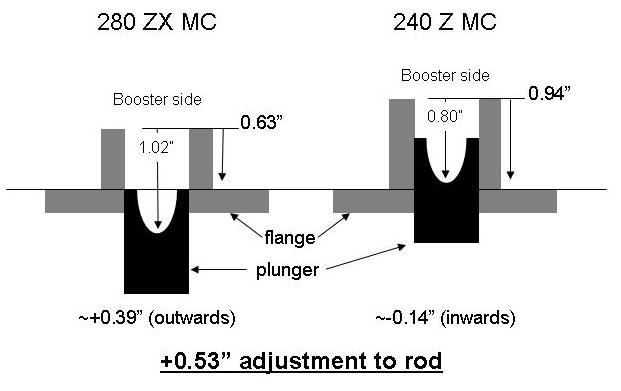
On 5/2/2019 at 12:51 PM, Miles said:
one more thing to check.
There is a push rod between the booster and the MC piston. The rod is adjustable. When you change MCs you have to adjust the push rod because the piston socket depth is different between the 7/8 MC and the 15/16 MC. Look it up.
If the push rod is adjusted too long the brakes will lock up because the longer push rod prevents the piston from retracting all the way which blocks the fluid return port inside the MC. This will result in your brakes locking up after a few stops. If this happens while road testing just open the MC bleed screws and limp home and readjust the push rod.
If the push rod is too short you will experience a long pedal because the piston is not pushed far enough to fully engage the brakes. That is, the piston is not pushing enough fluid. Your brakes will feel mushy and you will experience a pedal with long travel before engaging the piston
Do a search for push rod adjustment. It is critical to properly functioning brakes and brake feel.
Question, this picture is in reference to the flange on the master correct? So between this and the booster there should be the aluminum spacer right?
-
I went through about 2 or 3 large bottles the first time I bled my system with no luck, and went to the parts store where one of the customers suggested this method and it worked pretty well. What worked was similar to what Jmortenson mentioned kind of a reverse bleed. Get two small capped container, drill or punch a hole in the top to snake some hose in, preferably clear, fill the jar with clean brake fluid until hose is submerged. With a short section of hose, set it above the bleed port on the brakes. Break both sets of bleeders loose in the rear or the front whichever you are bleeding and do long slow pumps, basically it also will pull fluid up backwards through the line. You will push air out which will bubble into the reservoir and it will pull fluid back up, if you have sufficient flow and a short enough line in the correct configuration you should find bubbles come out and the fluid going back in the caliper. Combined with fluid in the master it should mange to get enough fluid in the line to surround the bubble and use a bit of capillary action to move it along. Once the system is full it should bleed normally.
That is of course assuming you have enough throw in your system with the correct master, and assuming you have the correct length in the pushrod.
-
On behalf of others and myself, thank you for chiming in and helping all of us out bungling through our installs!
-
Despite my efforts I'm sure I'll be chasing my tail, can't blame anyone, but myself in the long run.
I actually bought an 8.5 inch booster, but turns out the bolt pattern is pretty different. Might be worth taking a look at the length of the pushrod. I thought it was a squishy pedal and I needed more pre-load or something or I needed more booster, but when it was adjusted out and working the brakes were immediate and felt very modern in engagement.
-
If I eventually make enough mistakes, I think my car will finally be sorted.
One of the things not on the list, but very apparent was a large dead zone in the brake pedal.
Turns out you can't just play legos with these cars. I was able to source and have rebuilt a 15/16th master a long time ago, and threw it onto the replacement early booster I bought. Turns out in 73 and later, they started using a longer cap/bolt on the pushrod on the engine bay side of the booster that sticks above the surface. So my 280zx 15/16 master was never going to work well with the shorter setup. Taking it off I found there is a fair amount of adjustment and adjusted it to match a 280z booster I picked up from the parts store. Turns out that one was poorly adjusted as well. I tested the brakes with the wheels in the air and made sure they released, but I'm guessing the booster has to see vacuum in order to be in its functioning state. I drove down a small street with no problems, then when I got on the freeway with the vacuum going suddenly the brakes gradually came on harder and harder until the car would not accelerate.
I was able to dial back the cap a few mm on the side of the road luckily being able to pull over in an extra wide shoulder and drive home without much issue, but please learn from my error. If you have this wonky combo, test your setup with the car running, and make sure you get some vacuum built up whether it is going down a hill or engine braking.
-
Ok lessons learned.
The 43 mm clevis from mcmaster car is roughly 6mm longer than the stock one so it is good for a quarter inch or so more length if needed.
Decided to grab a new 280z booster for the correct push rod. Might as well get the bigger booster I figured. Turns out, not the same bolt pattern in the early Z cars.
Plus the interior side push rod that the clevis screws onto looked to be a 10mm thread.
The engine bay side push rods are indeed markedly different between the early years and the later years
The 280z ones seem to have almost 10mm of additional height on the rod cap/bolt. The one from the store sat with the tip protruding past the surface 22 or so mm.
I played with the cap/bolt on mine (71 240z) and was surprised to find there was almost a solid inch of adjustment.
The spacer on the booster that I believe comes with the master cylinder is roughly 9mm
And I set my nut to sit above the spacer another 13mm
It takes a 7mm socket to undo and a pair of vice grips to hold the push rod which you can pull out a good deal. I believe pulling this can result in the reaction disc falling off in older boosters so be careful. Leaving the adjustment out and not bottomed out also requires a lock nut so be advised.
I set mine to match the store bought booster, which showed 22mm above the face of the booster. I figured this was pretty close to the 10mm number I read with the 10mm spacer that the master cylinder sits on, so I adjusted mine to the same. I then checked with the wheels jacked up to make sure they were rotating and grabbing when I applied the brake. With the correct adjustment on the engine side push rod I actually had to shorten the overall length of the interior push rod where the clevis is to make sure the car was releasing the brakes, so no long clevis required. Just an adjustment to the engine side booster push rod.
However be very careful about the adjustment. Make sure you run the car with the vacuum port hooked up and take all the tools to adjust it with you. (7mm socket and a vice grip in my case). If you have some room in your master cylyinder lines you can pull the master, pull the push rod and adjust it with a 7mm wrench or a socket with it hanging out a bit. I found this out on the side of the freeway. Make sure to check that the brakes are completely releasing. Even the slightly upgraded brakes on my car was enough to completely keep the car from moving, and if this happened dialing back the interior clevis rod end does not do anything, you will have to pull the master off the booster and shorten the engine side push rod. I'll have to go back and check, but pretty sure I ended up somewhere in the middle from my initial adjustment, there definitely is some tuning you can do here and it will give you a really really solid pedal with almost no dead zone if you get it right, get it wrong and you will either have your brakes solidly locked up or a huge dead pedal.


Alternative gas tanks
in Fuel Delivery
Posted
Hello,
Looks like you posted to the FAQ section that does not allow replies. Please take a moment to make sure you are posting in the correct area.
Camaro gas tanks fit pretty well. The later model F bodies are plastic and can be bought for pretty cheap. They do have a slightly odd arrangement in the V8 form with a jet pump and a built in FPR.
Hope those help. For me I just swapped to all camaro including the filler neck. You could shrink down the stock filler size to match the camaro tank. It is a 1 inch hose, the datsun one is quite a bit bigger so you would have to use some reducers if you were set on keeping the datsun stuff.