.jpg.746fa6c4126f854dadcf6c705718cdf1.jpg)

seattlejester
-
Posts
2795 -
Joined
-
Last visited
-
Days Won
21
Content Type
Profiles
Forums
Blogs
Events
Gallery
Downloads
Store
Posts posted by seattlejester
-
-
Welcome to the forums!
Glad you understand your market, and I'm sure it is a welcome addition.
As long as you don't try and sell outside the vendor section, or respond to every post looking for axles with a link to your site this kind of discussion is exactly what I personally like to see.
I will have to agree, I have seen some Z's with upward angles, but they would be at chassis scraping status at that point, maybe a point for Z's would be with the tripod joint on the outer end you get away from potential binding with R200's that the axles face which you are addressing with the "short" offering. CV's have a smoothness that is slightly apparent in my limited experience. Not huge, but I can sometimes notice when I get in other Z's with the stock axle, granted as mentioned they could just be worn ujoints compared to brand new CV's.
One point I ran into when talking about STI axles when I had an STI diff, is that keep in mind the power was sent to all 4 wheels in these cars, on drift subaru's they definitely have to undergo upgrades as the axles don't seem to hold much power. If this is a stock offering, I imagine it would be from one of two cars and both are of this type of setup, and it seems that you are addressing this with the low stated power numbers.
Just as a warning, we as a community tend to be pretty scrutinizing, please do not take offense, maybe view it as an area that could use improvement to put future customers at ease!
-
That is a neat idea. Kudos for making the attempt!
-
Howdy, noticed you posted in the FAQ section, that area of the forum doesn't allow for replies. I've moved your thread to the correct area. Take a moment to make sure you are posting in the correct section if you would like input from others :D.
I'd be a bit worried that with so much weight off the nose and more in the rear the front will feel quite light under acceleration.
I would hesitate to cut the springs as the travel on the stock suspension is not that great and you would be loosing more of it.
I'd say a basic set of coilovers from a company that does custom spring rates may be worth the investment (BC comes to mind), to get the height and springs right you could just calculate the static load on each corner and calculate the compression if you aren't concerned with dynamic performance or you could call them up to work out a custom solution which would be advisable with the weight moving around so much.
You could go with ground control springs and adjustable perches, sectioning the struts would be a good idea to gain more travel, and a new shock wouldn't go amiss, but in the end you would end up about the same if not more than a set of coilovers as above albeit with arguably a better shock and spring.
Lastly you could go with an adjustable spring like cosmo sells. No modification and it sits in the stock area. The springs are pretty harsh and the ride isn't pleasant at least with stock shocks, but it is by far the cheaper of the options.
I'm sure others may chime in. I will say I cut 280z tokico linear springs when they were on my 240z. It was a bit of a hassle as every time I jacked up and lowered the car I would have to line the spring up or they would pop out of their perch, same thing on off camber hills. The spring perches have holes that you could use with some CV boot steel zip ties to potentially hold the spring in the perch, but it would have to fight the shock, so I'm not sure how long that would last.
-
I found some features that I think I have been spoiled with. Of course blind spot indicators are nice, but things like TPMS and backup cameras are really handy. I've even bought those for the datsun. TPMS is nice since I don't drive the car much it gives a nice little reminder if one is low and backup cameras are just nice if you are in tight spaces. As long as the car isn't overtly noisy or at least if the noise is limited to either mechanical via engine whine, exhaust, etc I'm fine. I think it is the little squeaks and odd rattle that gets me more.
-
@Ben280 Had some interesting number when I spoke with him. Something along the line of the doors being much much heavier than I expected. Like 70-80 lbs for the 280z?
-
Probably not.
Nissan bell housing isn't removable. So no bolt in swap type scenario is going to happen.
If you had an access to CAD and a CNC machine you could theoretically make an adapter plate, but then you are looking at custom off set fly wheel and such potentially. If you had a TIG that could weld 1 inch aluminum you could in theory graft it together, but then you are looking at trying to piece together the correct clutch scenario which most likely won't happen.
R154 are generally made for the 7m, the 1jz variants would work. If you used the R154 bell housing, you would have to either covert the engine to the push type via W58 gear, or covert the nissan trans to a pull type (or vice versa). That would of course be assuming you have perfect distance to the input shaft and the flywheel splines and all that jazz mesh, which they don't.
Also not sure what you have, as auto R154's don't exist as far as I know.
If you are on a budget you can go with a W58. If you can't afford that, then you can stick with the automatic and convert to a CD009 using that bell housing and a collins adapter conversion thingy in the future. Keep in mind transmission options are expensive for 2jz's. I've done both the R154 and the CD009 and both will put you in the hole about 2k with minimal effort. Best not to limp in on something like this.
-
Thanks, I think I am going to try and get some lift time soon and I'll grab a few more photos.
It really does look like stock, maybe even better with the speed grooves. The tank is from when they switched over to the LS-1, so 99+ I believe.
Notes while I still remember.
Most parts you can buy from rock auto, straps, hardware, fuel fill neck, gas cap, lock ring, etc.
The Spectra V6 pump says it will push 50gph, but I'm not sure if that is true, I have the pump, but I've never tried it. Their pumps are clipped into a plastic ring and are not readily replaceable other than another spectra pump so be advised. The stock style bucket was found on amazon for about $30, it has the rubber sleeve, jet pump assembly, etc. You can get a stock replacement for something ludicrous like $5-700 from the parts store. Racetronix sells a plug and play kit for the STOCK bucket. It puts a 255lph pump that uses the jet pump and is all wired up, but it is for the STOCK bucket, if you use aftermarket they switched to wider tabs for the fuel pump wires and the plug will not fit.

You will have to harvest the new pins from the new bucket and crimp them onto the thicker wires from the racetronix kit.
The part that is seemingly non existent is the fuel fill hose that connects the neck to the tank. According to the junkyard they cut those to drain the tank. Given the tank has a roll over valve that seems completely unnecessary, but I believe the stock fill neck is welded to the car so it may be how they remove it easily. I found a hose for an old jeep that is the correct diameter, if you can find 1 inch hose rated for gas as well as some 1 inch hose barbs you will be in business, I could not find any locally. Still looking for the right fittings.
Company/part number: Omix-Ada 17740.05 it seems to have sufficient bends and curves to figure something out with some couplers/90 fittings.
Note the V6 and the V8 tanks are identical as far as I can tell. The internal bucket mechanism is different. My setup is a combo, I have the top half of the V6 bucket and the lower portion of the V8, the only benefit is that my fuel return goes straight back into the bucket instead of shooting out from the removed regulator port, not sure if it will make a difference. The difference once again is the V6 has a feed and return and dumps into the bucket, no regulator in line. The V8 setup has a regulator built into the bucket and will not return until 70psi or so.
I am pretty sure these are the fittings I used to adapt to the top of the tank
I already have 6 an line so plug and play.
The pump needs to be primed on your first go around, preferably with adequate fuel. I had it all installed and poured in a few gallons into the tank and the pump wouldn't circulate. Pulled it out and filled the bucket a bit and it gurgled then started pumping. Make sure you prime it the first time before you load it into the tank.
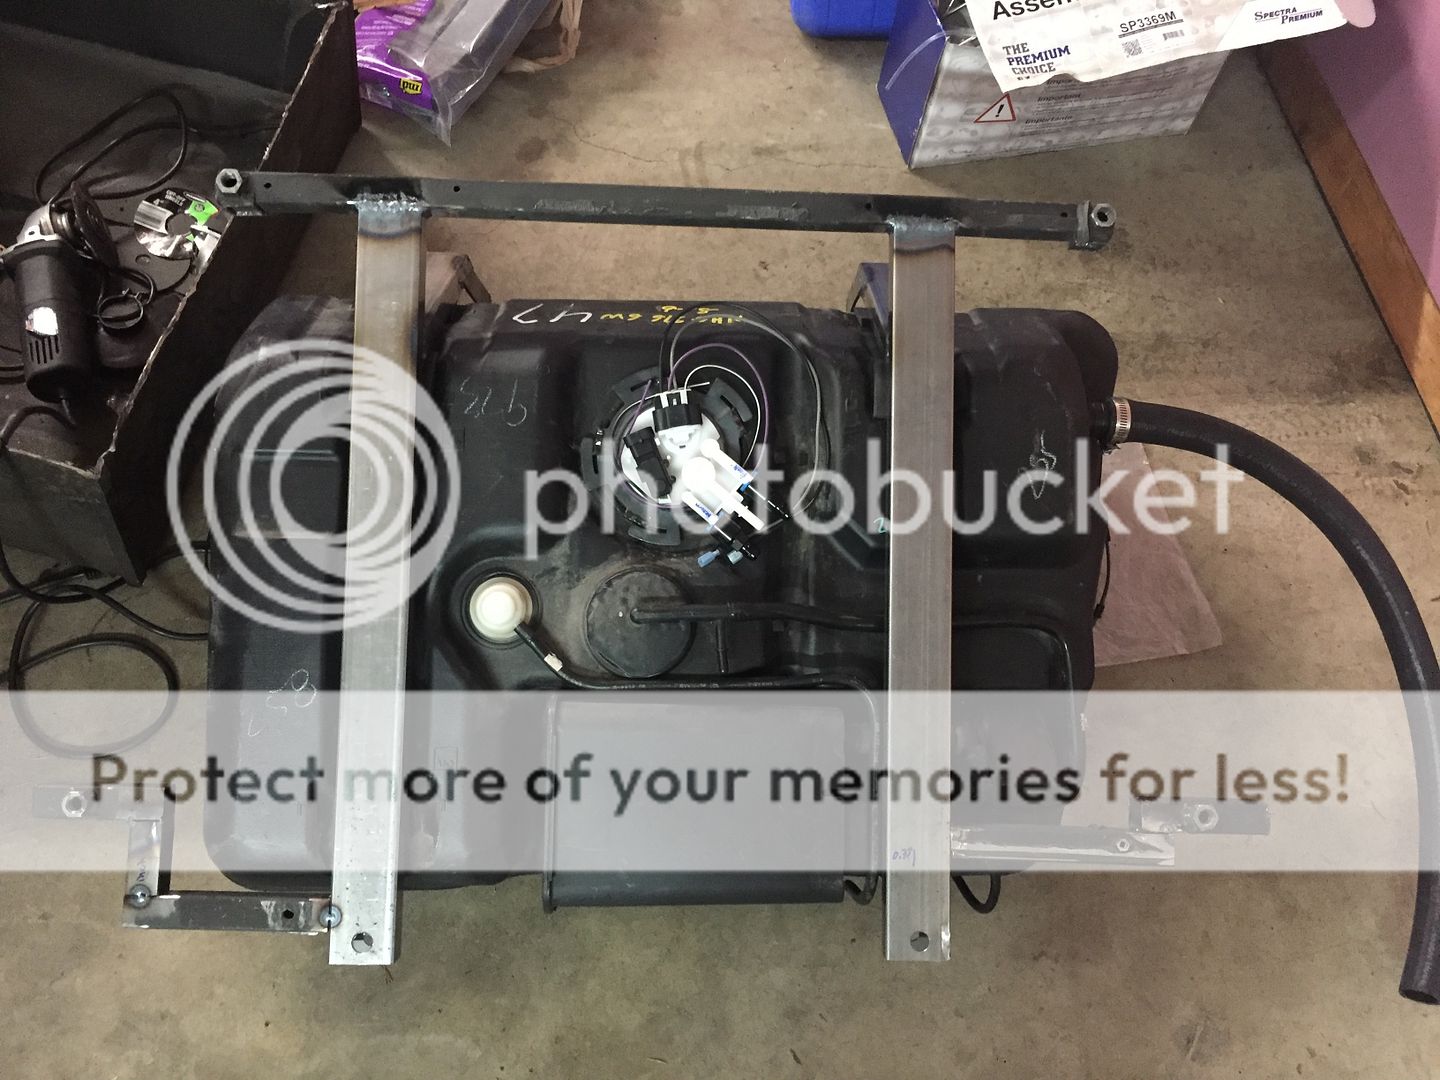
The bars to mount the tank against should be about 2 inches wide (note the frame, not the straps). Make sure you use foam on the pressure points, you can see where they used it on the factory tank from the cut outs they have for it (weather strip foam bought at home depot).
Ohm range is like 40-250 for the sender. Not many gauges seem to do this range.
That is the one I bought and it works well. Pretty nice as mentioned above.
-
Thanks for answering all my questions, it is a bit odd not hearing the pump, but at the same time quite nice to have one noise gone.
-
Curious, do you pictures from the other side? I wonder how well they smoothed the diversion point for the waste gates.
-
Another problem that came up during the autocross was fuel starvation. Part of me thought it was because it was autocross and I was running the fuel cell fairly low. It did seem to get better when I filled up the next day.
Then I went on a local drive. A little over half way through the car started bogging and surging pretty badly running pretty lean even at low load. I could hear the pump cavitating. I filled up again and it seemed to go away after I let the car sit, and only returned after 30 minutes.
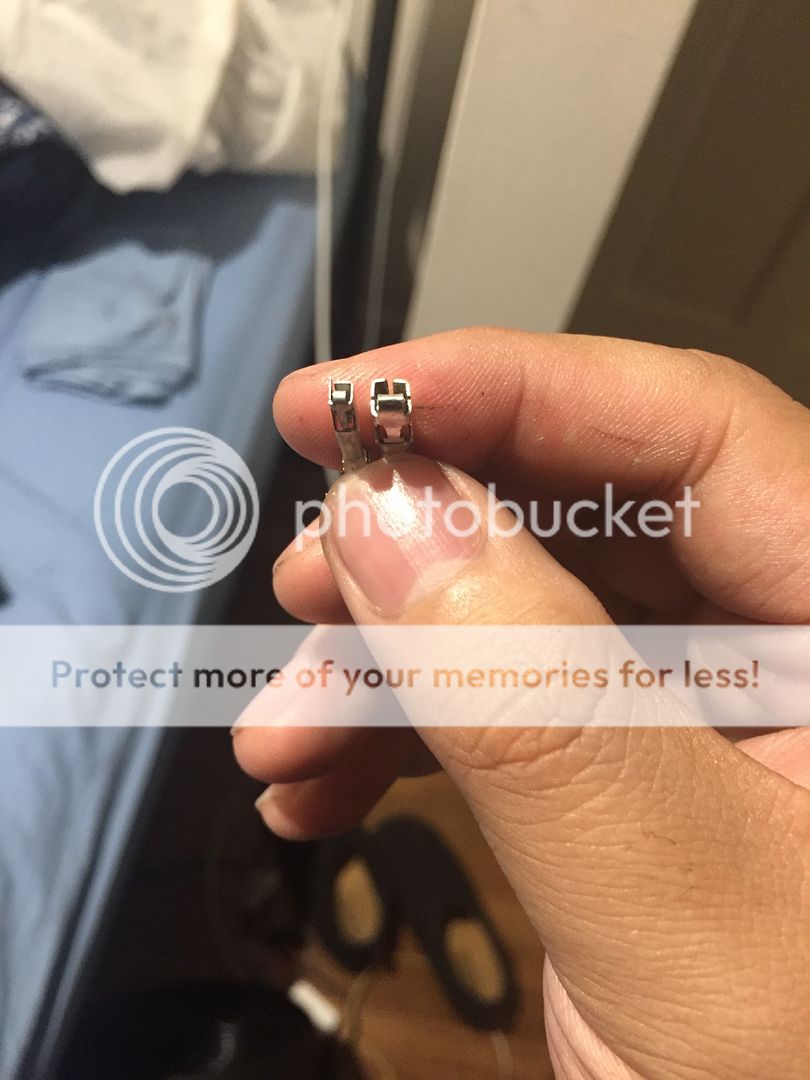
Sent off the fuel pump for warranty in case it was going bad and started assembling a new fuel system. When it returned I threw it back on for a photo shoot only to find the fuel flow from the hose was less then the fuel flow from the fuel cell. I took off the inline filter to find it was about 1/2 blocked.
Even after a bit of cleaning it still had fine debris.
I think this stemmed from when I drained the fuel into a plastic fuel jug and when I poured it back in the little plastic bits from manufacturing also went into the cell. So the car would run ok until enough of the fuel passed through the filter to bring the debris into clogging the filter. After sitting the debris would basically backwash into the cell. Good thing is the filter did its job, and being reusable is a wash away from being clean.
However I had already started down the road of replacing the cell with a tank. Thanks to posts by Joe and a lot of feedback from Omar I decided to go with a camaro tank. That was a whole ordeal in and of it self to acquire and prepare it.
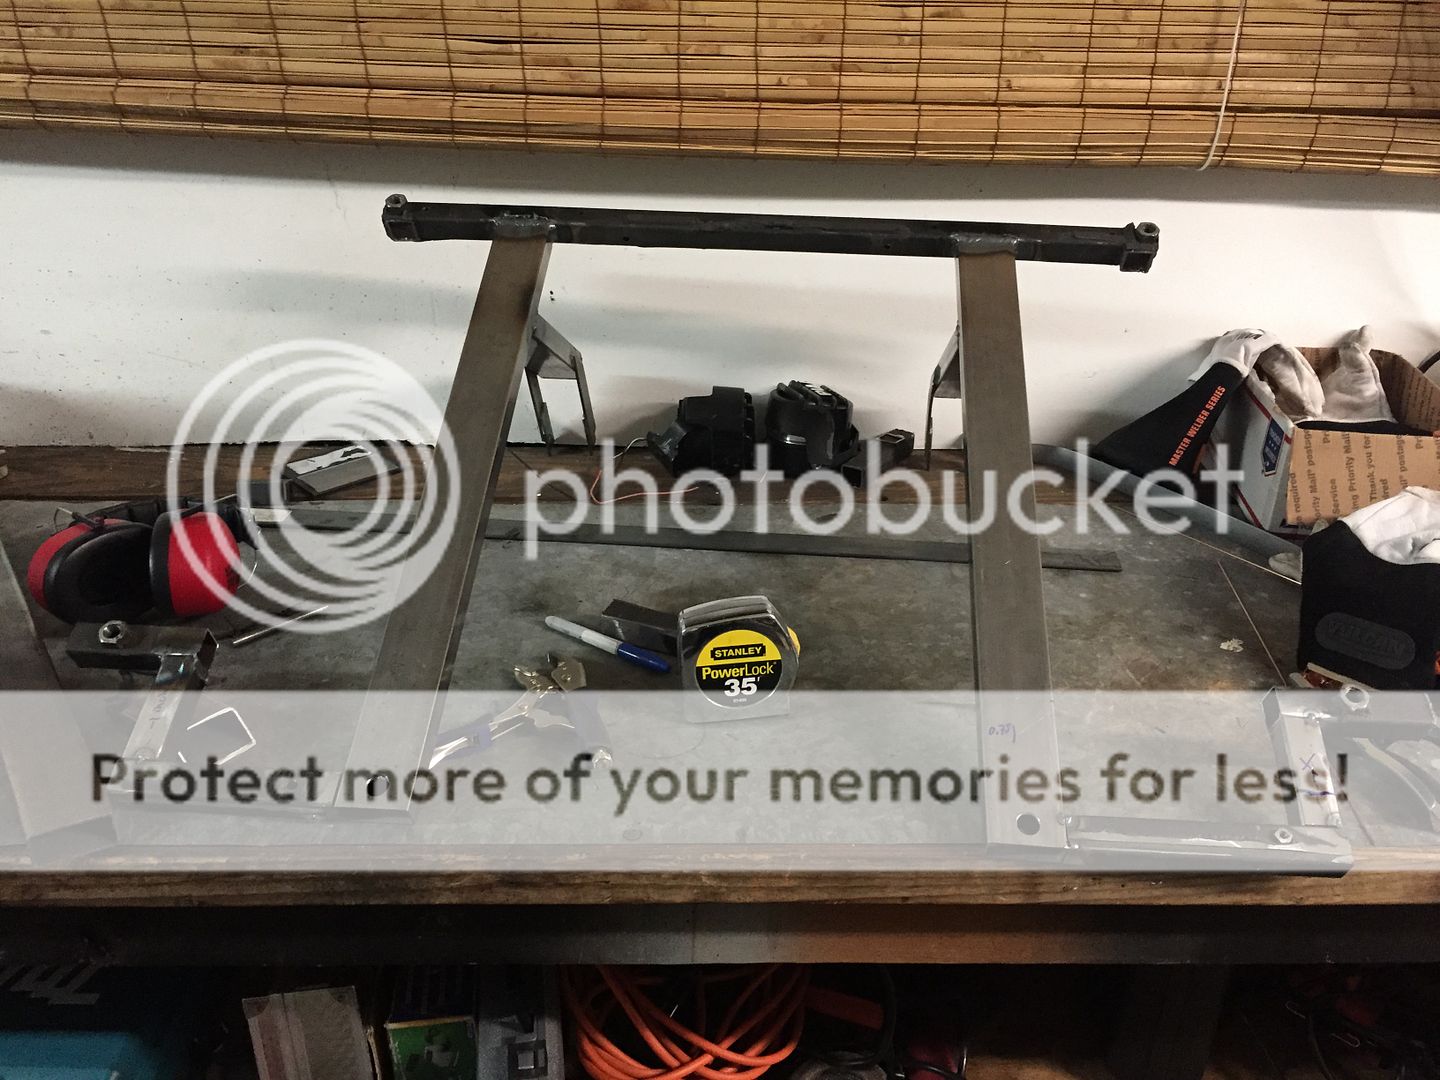
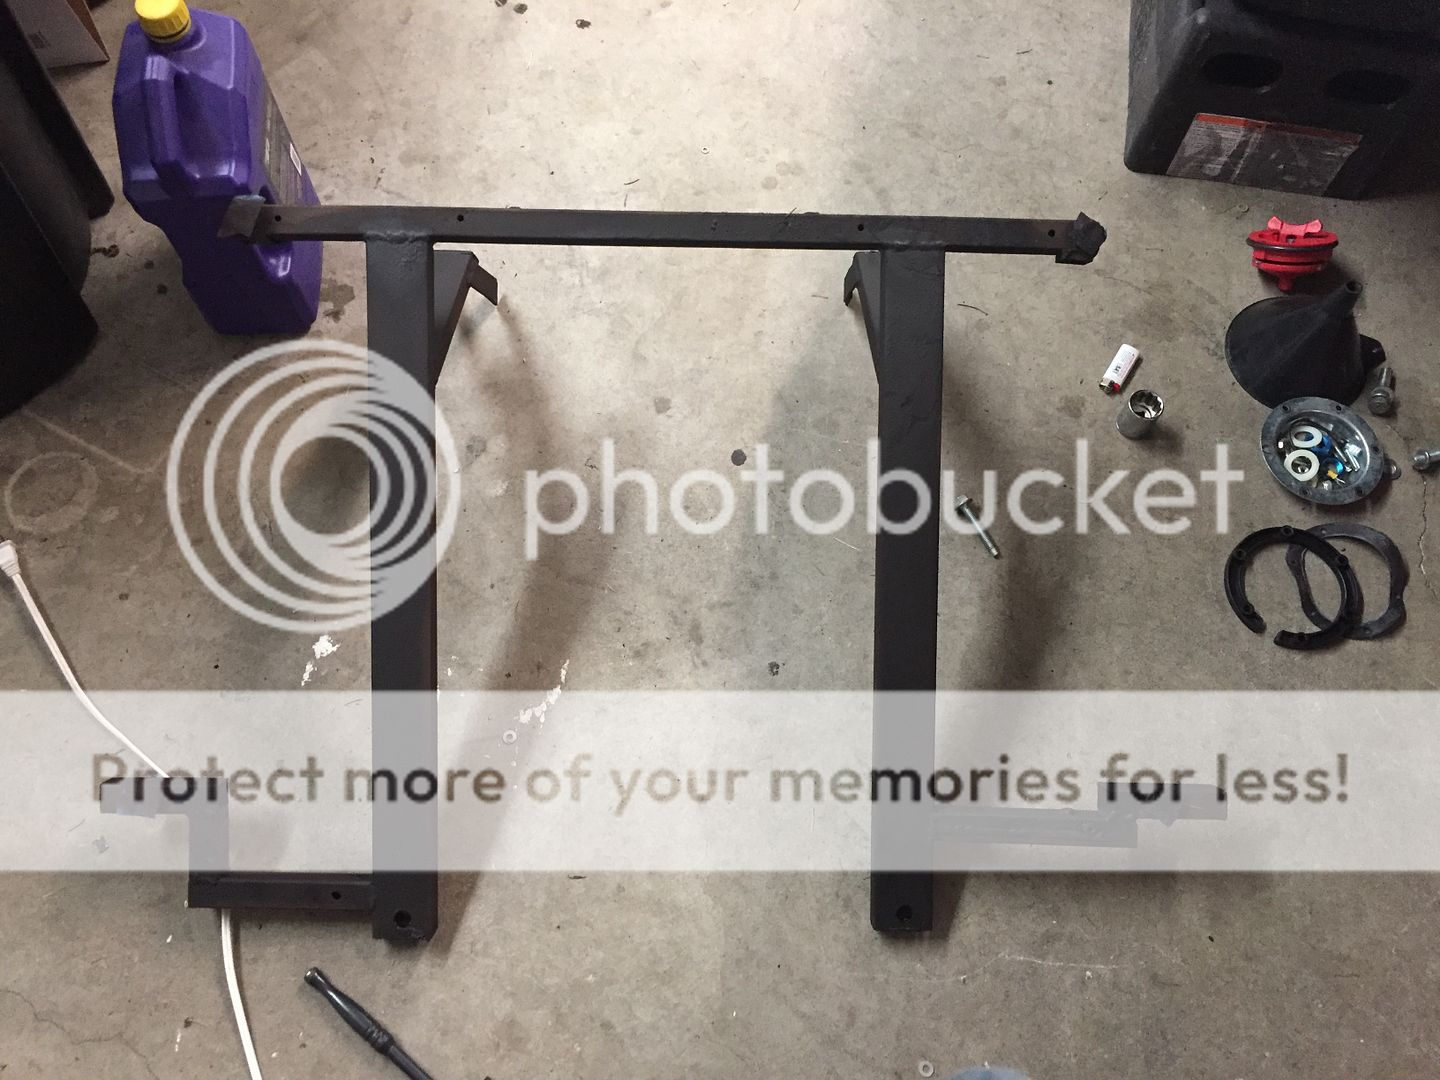
We tigged this frame together, only to find it was too long and wouldn't sit on the mounts I had from the fuel cell.
So it was modified to allow it to slide in at an angle.
A wee bit of undercoat to keep it from instantly rusting.
If desired, the tank could be dropped with the straps, and then the subframe could be removed if needed.
Much more discrete then the fuel cell that used to be there.
The GM sender is also a different ohm range than normal and really difficult to design. I did find a gauge online that worked, but it kind of ruins the current scheme I have going on.
Might have to slowly convert everything else around it now, but the gauge has the startup dance, a really nice back lit LED and when you get low on fuel the gauge buzzes and the logo at the bottom turns orange. Not bad for $40 or so.
-
Tamo, you posted in the FAQ section!
I've gone ahead and moved it for you.
Are you saying you keep getting bubbles? Bleeding can take quite a while depending on your booster size and how many turns you have in the system. Either the standard pedal method or the pressure bleeder on the master seems to work the best in our cars. I usually go through about a 1/4 of a bottle per caliper if I replaced a line.
-
I mean it seems like you want to do exactly what the B is for Build guy did. His swap would be considered a donor swap, swapping everything over from a donor. A shell swap or body on chassis swap, which is more of an older term as we are dealing with mostly unibodies, has to do more along the lines of dropping the body/panels on the floor/chassis of a donor.
Might be good to look at terms to figure out what you really want.
There was a 240sx kit that grafter the front end of a 240z/280z onto it if aesthetics is more or less your goal. Otherwise it is a matter of finding an engine and interior that you like and figuring out how to make it all fit. There isn't really anything about this that is going to be easy or require a minimal amount of fabrication work. Some swaps have been done so they may be easier or kits may be available, but they usually revolve around loosing things such as power steering and a/c. I would look at the how much it cost video he did to have an idea of the cost you will be looking at, if I recall it was almost 50k all said and done.
-
^That is what I imagined. The only time it would really be useful is at tremendously low speeds, and even at that speed a little bit of assist would be a world of difference.
Ben had a setup in his car that seemed even simpler and easier to make. If you don't need collapsible features i.e. track car, you can just use most of the saturn stuff and use a steering wheel adapter to get a sportier wheel. That is what my second setup is destined for more or less. Cutting and welding the stock datsun lower steering shaft to the saturn unit and using the saturn unit for pretty much everything else and either going to a sparco style quick release hub or something of that nature and using a rod end to keep it in alignment.
-
Been doing some research into this. Found some interesting info.
The "inferior motor setup" seems to indeed be employed by silvermine. If you look up the EZsteer setup you can see that is what is integrated in their unit.
I want to say ZPS uses a european make power steering setup, off of a puegot or something, the control box and such look quite similar to the unit on mine, maybe the same manufacturer.
Yes a power steering unit designed for an ATV is inferior to one designed to assist with a car, but.....you really don't need all that much assist in a Z. Mine is built, pretty much ready to install with the creation of a single bracket, and in all honesty I haven't even remembered other than when I am parking that I don't have it.
So, whether the unit being inferior being a deal breaker is really is a bit of a toss up. As a poor analogy, is a hand grenade inferior to a nuke? Yes, but if you are sitting in a small room with either one armed you are still going to be similarly concerned.
Price wise the silvermine unit makes financial sense, it is in the realm of understandable from my experience. I spent $300 on parts, time for labor, wiring, fabrication, welding, and top it off with a new motor I can see it costing what they are asking for. Looks like the EZ steer kits start at $600 so that there is a pretty big chunk of the cost already.
I didn't realize, but this is the first time I have seen pictures of the ZPS setup. My recollection was it was kept under wraps for a while? It looks really quite similar to the setup socorob ended up with and that I copied from him. Given that I would say the ZPS system seems to be on the high end for its construction. They cut out a lot of the fabrication we did by using a pillowball joint (I actually had the same thought, but wasn't sure how much support was needed and two larger bearings spaced apart is quite a bit more in the real of support and alignment), and what looks to be a machined piece for the adaption to the stock Z column. The control unit even looks exactly like the bruno controller. I have about $300 in parts invested in my setup, I can understand with some new parts it may be higher, but I'm not finding the $1200 differential there. Maybe if you included the price of the column that has to be sacrificed, but they are only asking $50 for the core charge. Greg is pretty active maybe he can chime in.
I guess it depends on what you are looking for. I couldn't bring myself to justify even the more affordable silvermine option and I enjoy making things so the fabrication route was really the choice for me. Whether the "inferior" setup found in the silvermine unit will matter is unknown.
-
I'd just replace it and cover it. My car was in active service for 30 odd years and the plugs were still alright. 30 years down the line you can cut out a patch from the mat and replace and recover. If you are going to close them, I'd suggest more permanence then fiber glass. Weld a patch and seam seal it. That will also tell you the health of the surrounding metal which if it is constantly wet might be worse off then you realize.
-
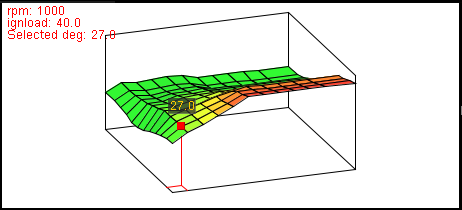
Hmm I looked over my settings
I have 2 strokes per cycle
Simultaneous injection
On Chickenman's recommendation I am running much less required fuel and gaining resolution on the fuel map so mine is 3.8 with 440cc injectors values go from 37-217
Your ignition and fuel maps have values on the y axis that are quite high, you won't exceed much above 100 fuel load without boost so you could gain some resolution there.
Your ignition table looks almost inverted from mine, but that may just be a setting
I realize I can't help you on the ignition or injector parameters as I am running 440cc supra injectors and COP with a HE sensor.
-
Not sure on the numbers side, but it may be a matter of the dyno calibration, the numbers will differ so maybe not a good metric for me to fixate on.
I think it is the bosch sensor that is the failure point in the innovate kit, the gauge really does not matter much as it just converts the value from the sensor, but if the dyno one was reading correctly maybe not as much of a concern.
There is quite a bit of difference, the other tune has some strange values, and the ignition table almost seems like it is set for VVTI.
I'll try real hard to remember to look at the files and compare when I get home.
-
All the data points would be useful.
Wideband make? Innovate is popular, but when they start to fail they can read off by as much as 1-2 points which would mess drastically with your tune. AEM seems less likely to fail in this manner. It is confounding as most dyno places run their own AFR sensor to eliminate this situation.
Stock injectors? Does the JDM market use a different size? From what I see online the values kind of jump around as what is quoted, I'd have to look at the FSM to see if they list it, but if you are running a map based off of the USDM size and have the JDM injectors (for the 2jzgte, the JDM one is 440cc, the USDM is 550cc if memory serves), you would have problems. Make sure they are similar between markets before you adjust all your injector settings.
If the tuner adjusted the timing map, did he find the timing offset on the crank? I had a strange case where I think the distributor was just at the limit of the adjustment so when you asked the ECU to adjust with RPM it would fall off the spark window and fail to fire the spark, made the car drive really poorly with heavy hesitation above low RPM.
That kind of information can be useful for those reasons and others.
The numbers actually seem pretty normal. I've seen less, although I'm only familiar with USDM motors for the most part. If it has 0 correction factor on a dynojet, that seems like really good numbers, 15-25 more would be really on the high end I have seen for NA, I want to say I saw a ITB ge motor make like 220 to the wheels with cams and all sorts of other goodies.
-
If memory serves, they were made to drain the excess paint/coating as cars back then were dipped in vats of paint?
I suppose you could, but really water shouldn't be coming up through them unless they are torn or rotten. I would check door seals and the hatch seal and make sure the rain channels aren't blocked.
-
Welcome to the forums.
Given your lack of history some background posts basic information might be useful, like all the components in regards to the engine, such as 02 sensor, etc.
I'd be curious to see the dyno chart, are you basing the missing power off of feel or numbers online? A stock 2jzge really doesn't put out much power and the feel is quite muted in the heavier chassis.
I would offer some help, but my setup is turbo and low compression so most likely not that applicable. I'll take a look when I get home though. The dyno chart may be nice to see.
Hesitation is most likely related to acceleration enrichment settings so those can be taken a look at as well.
While there are a few of us running megasquirt, you may find more assistance at the megasquirt forums. If not we do pretty much have a resident tuner who you may be able to help you get a little bit more squared away @Chickenman
-
That is clever, might have to try playing around with that idea!
-
^ You would have to shorten the splined shaft then correct?
I guess you could just add a spacer between the bushing stop for the dash mount.
-
I have the answer. Just need to think about it, give me a minute.
Edit:
So as others have suggested other methods such as a flat wheel or inverted wheel, thinner seat, reclined seat, would be much easier.
Early Z assembly
Column to firewall
Internal shaft
The outer tube
Bottom seat of the outer tube
Inner tube with spring.
So the inner tube is a mostly hollow tube that ends right where the steering column attaches to the dash. The outer tube is two parts with one being the upper portion that attaches to the dash, and the lower portion that extends down and has a bellow that attaches to the firewall. Internally there is a shaft that comes through the fire wall. In case of an accident the bottom bellow crushes and the assembly slides away from the driver if that is the greater force or if from the other side the assembly is retained and the hollow tube slides up through the hollow portion.
You would be compromising the safety by shortening the length it has to collapse. If that is not a concern then in theory you could section the inner and outer tube of the upper portion. The splines of the shaft only engage at the bottom of the upper inner tube so unless you wanted to also go about manipulating that it would be better to cut it out of the upper portion. The concern would be as you guessed, getting them welded inline perfectly. If they were off you would have binding issues come up as the top is retained by a sprung c-clip. You do have a bit of room with the springs on both sides, but you may feel some binding. You also would run into issues with retaining the steering lock and the blinker mount. Your steering wheel would also get quite close to the dash with limited room for the steering mounted accessories.
With that said there are a bunch of ways to line up tubes and weld them straight, there is the budget, 90* channel with pipe clamps. Or more high tech methods like 3d printing a brace to line them up.
I ended up cutting the bottom portion to fit a power steering setup. So my problem was welding the shaft, which now in retrospect I have very limited collapse as it widens at the bottom of the splines although I accounted for some of that by retaining the collapsible portion of the donor column as well. It took a few tries to get it to the point you couldn't feel bind, much more difficult, but possible.
Long story short, you could do it. The question is the balance, as it was built around that setup to a point, once you move that you may need to modify the dash and the controls, and at that point you get into "making a new column is easier than trying to modify the old column."
-
Hmm forum issues at the moment, I'll notify and see if we can resolve, from what I see it looks like everyone has lost that tag.
Edit: Correction, some people still definitely have the tag. I was using myself as a comparison, but that may not be a valid comparison.


best adjustable coil overs for daily driving?
in Brakes, Wheels, Suspension and Chassis
Posted
The cosmos run a pretty stiff spring, the suspension felt crashy for lack of a better word. @Boog has/had them on his car so he may chime in. The car I was in was lowered a fair amount though so a lack of travel could be the culprit.
You can install the cosmo's "correctly," in that you remove the spring perch and you can weld a perch for them to sit on, they come with some allen set screws as an install option, but I really would not want to trust a few grub screws to hold up the springs.
The GC spring perches are additionally a good choice, you can choose the spring to match. You can only adjust spring height though so you will be winding preload into the suspension to raise the rear. Not really a problem, you just will be "using up" some of the spring tension to get the height. It will also unload without the use of a helper spring when you jack the car depending on the install point.
Depending on the spring both of these options would require a replacement shock. The GC if you chose to, you could shorten the shock body, run a shorter stock and have a good amount of travel at a variety of ride height. If you decided you will never go lower than stock, then you could run a stock shock and not modify the shock body, although with the modification you could dial in the ride height without worrying about shock travel (I think Z's sit a bit high at stock height).
Cosmo would work, is cheap, but not ideal in a few aspects
GC would work, and if you shortened the shock body you could lower it with no ramifications
BC or other weld on cartridges style coilover will have independent height adjustment so you always maintain a set amount of shock travel, but yes price is expensive.