nismoluv
-
Posts
39 -
Joined
-
Last visited
-
Days Won
1
nismoluv's Achievements
")


-
Ls1 swapped 280zx exhaust issues
nismoluv replied to bajajoas's topic in Gen III & IV Chevy V8Z Tech Board
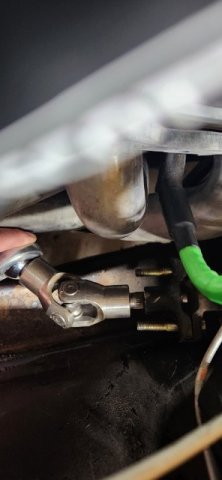
Today I made more progress. To improve the angle I had to chop off more than I wanted too, and remove the rag joint to get that extra inch. Here is a photo of the unfinished angles.
-
Ls1 swapped 280zx exhaust issues
nismoluv replied to bajajoas's topic in Gen III & IV Chevy V8Z Tech Board
I used his list plus a angled bearing plate from jegs or summit for like 10 bucks. I couldn't use the location he used. Still a work in progress so Ill post when i get it all welded up. https://forums.hybridz.org/topic/124248-steering-shaft-relocation/ -
Ls1 swapped 280zx exhaust issues
nismoluv replied to bajajoas's topic in Gen III & IV Chevy V8Z Tech Board
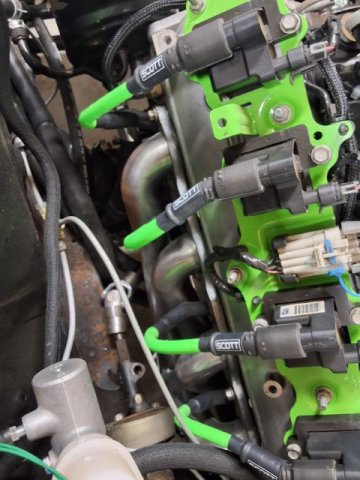
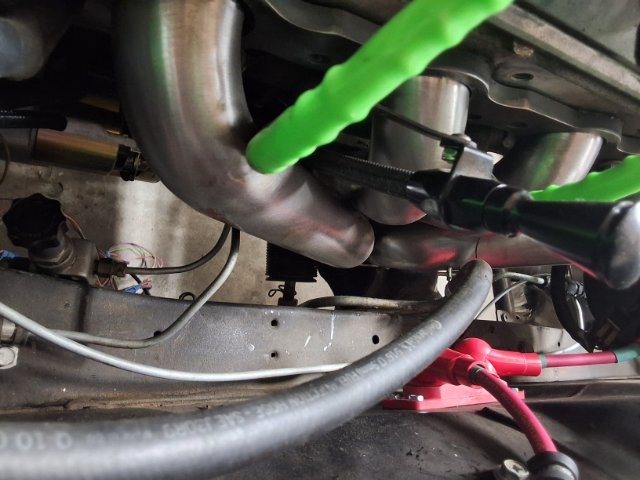
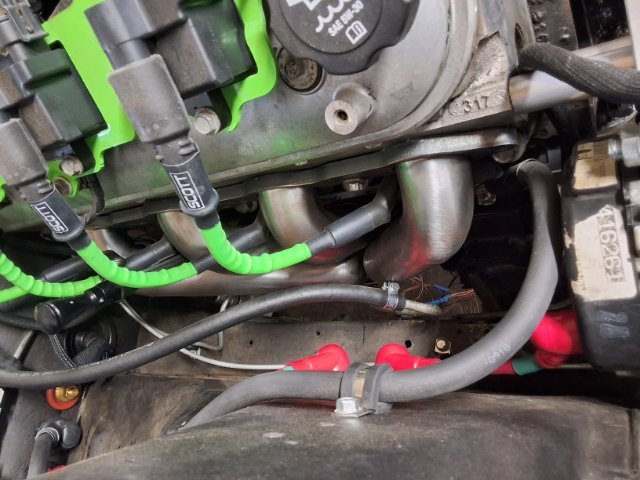
I am currently working on this same issue. I got sandersons D1 headers uncoated since I knew there would be issues, just based off the photos. On the passanger side I dented the backside to clear the mounts. It was just above the collector, I can't remember which cylinder. It was a pain since thats there the collector and primary overlaped. I also got to a point that i didnt want to dent it any more and cut a section off the motor mount. The mounts are lsbillet swap plates and jags that run chevy put together. The portion I cut off shouldnt affect the mounts, unless the engine spontaneously shifts back an inch.... The driver side I am going to modify the steering shaft based off another post. Its pretty good post. Not sure of the link, I copied it into my offline notes. Dont mind the fuel line returnin the photoes still moving things around. Ive been delayed on this project since spring. The wife to do list was piling up.
-
Bought a non-running 280zx. Looking for advice.
nismoluv replied to Akuma_no_S130Z's topic in S130 Series - 280ZX
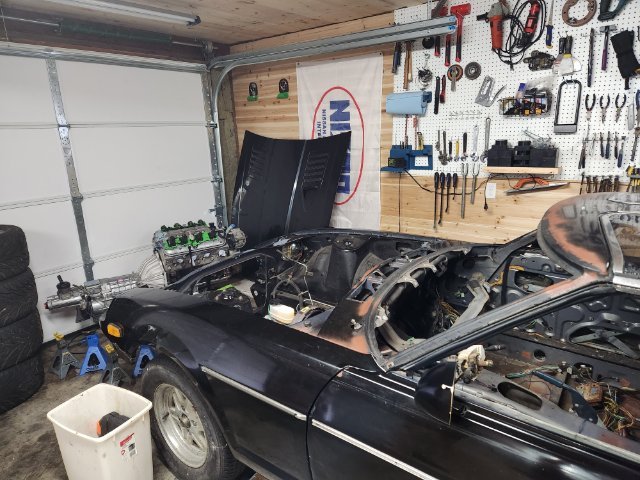
Sorry, you bought a 2+2... That being said, the shop manual can be found at https://www.xenonzcar.com/s130.html The engines in these are stout and can take some abuse. The fragile bits IMO are the fuel system. Just start slow, inspect everything, and take pictures. People liked to hack up wiring and cobble things together cause they didn't understand it or they couldn't afford the parts. Another thing to check before you start dropping money into it is the floorboards and frame rails. Take that windshield out and save the metal under it. I can guarantee you it's rotted out and letting water under you dash into the wiring and such. Pay someone to take it out properly, the trim is fragile too dont start yanking on it. Good luck, current state of my 18 year project attached...
-
Here's the bracket I have currently modeled. working on a duct attachment. Itll look like an exhaust tip cut at 45 degree, and a 90 degree bend. working on the end piece, after I am done "working from home"
-
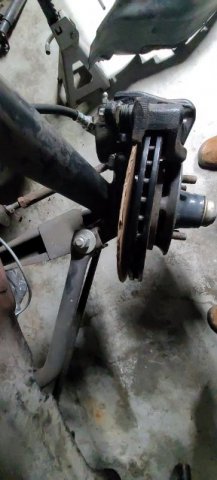
My current model is bolting a slim bracket to the back of the brake caliper bracket. Remove one bolt, loosen the other. (Pictures later). This will eliminate the need to remove the rotor for those of us that previously could not remove the rusted on dust shield and opted to drillout the screws, making the holes unusable with out some rethreading (too much work). The issue I have with this current idea is that the bracket gets a little flimsy in places and when i bulk it up it looks dumb. If i look at making cut outs like the shelby stuff, i can make things look more attactive. Although the shelby stuff look a little too big. The main thing is I have two bolts to bolt this thing too and its a little chunky on the other aide of the mounting bolts. An idea I am entertaining is a clamp on the strut that has a bar that you clamp the brake duct too. I think thats the simplest thing i can think of. Any thoughts.
-
So I have made progress on 3d modeling the parts. I am on my third iteration, slowly making the part smaller and easier to fabricate. This I just saw this from Carrol Shelby. Notice the cut out for the steering linkage. Now I have to have a re-think. https://www.carrollshelbyracing.com/store/p356/Brake_Duct_Cooling_Kit.html
-
I like what skillard is doing but some of the stuff is butt ugly. Sorry.
-
Correct, the backing plate will have a half moon type shape cut out to allow the air to enter the center of the rotor. Hopefully ill have some time to week to digitize this, it'll make sense.
-
The way i was routing it before, the cross section was smaller (less volume) for longer and it was a half moon type shape. it was getting more complicated when at full lock. going vertical i can get to a larger cross section and clear the sway bar sooner. or so i think. fusion 360 and 3d printing to start before making it out of something more metal
-
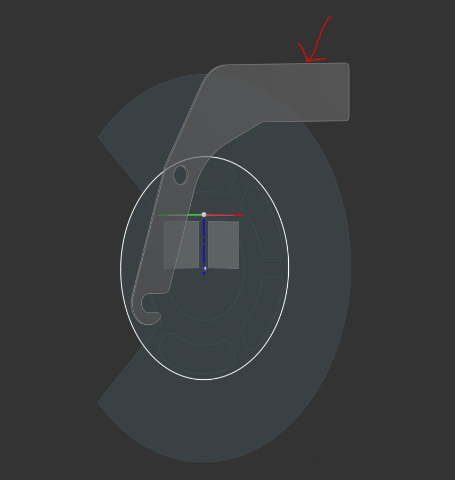
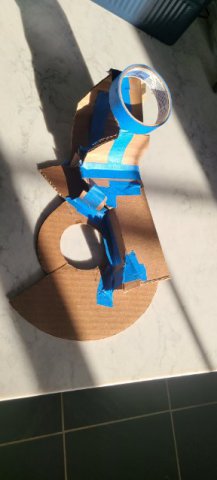
Heres my crazy contraction i came up with last night. Seems to clear everything. Put on your imagination glasses and imagine organic 3d printed shapes.
-
I should have been more clear when saying going vertical. I should have added vertically down the back of the plate entering the center of the rotor. Once i get these in cad i can make them more curvy and organic to increase the volume.
-
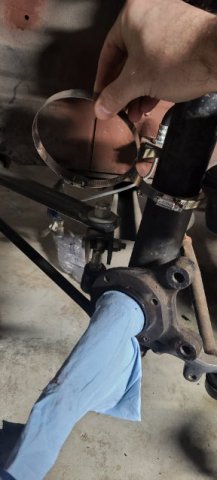
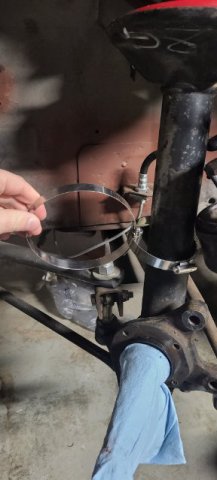
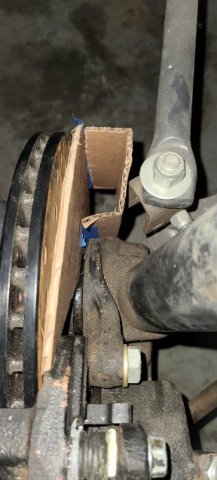
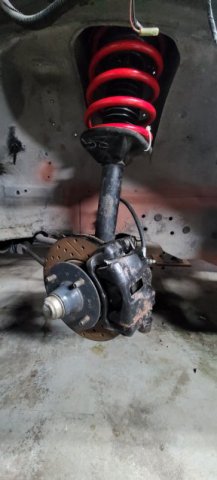
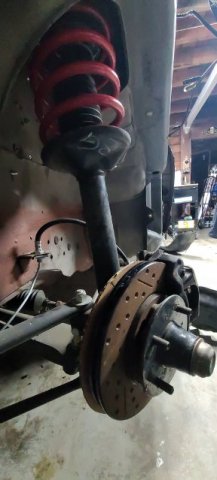
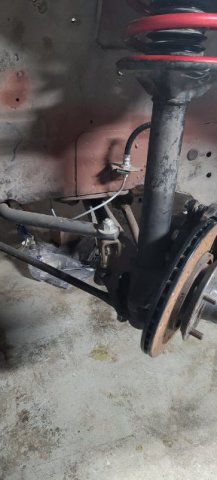
These look great, gives me some ideas to play with. Here is my current space to work with. I was going to connect the ducting straight into the center of the rotor. But i like the idea of coming down vertically into/thru the shield. There is about an inch from the sway bar to the cardboard mockup "shield"
-
Hello everybody, its been awhile. I have been thinking about designing some front brake backing plates/dust shields with cooling ducts. My backing plates where mangled and discarded long ago so I have nothing to compare my cardboard mockups with. I am have some clearance issues with the sway bar which narrows down to an inch or so. I am wondering is anyone has any pictures of cooling ducts or modified backing plates on the ZX.
-
Godzilla Raceworks MS Kit for S130 turbo
nismoluv replied to montyz81's topic in S130 Series - 280ZX
Its been awhile since I have looked at the Megaquirt systems, there a a few different ones now-a-days. On some of the models the tach gauge signal wire is re-routed to the MS box. Or you should be able to splice in the ignition signal before it gets to the MS box. Either way its not so plug and play. How are you liking the MS, smoother running, easier DIY tuning? I have been wanting to do it to my mustang project.