svMike
-
Posts
40 -
Joined
-
Last visited
Content Type
Profiles
Forums
Blogs
Events
Gallery
Downloads
Store
Everything posted by svMike
-
Thanks Ian & whatnow. Didn't mean to threadjack, but I've been looking for ideas on how to get a pinion snubber on my short nose R200.
-
whatnow123, do you have a picture of your pinion snubber?
-

Good TIG welder for learning to weld on
svMike replied to MazerRackham's topic in Fabrication / Welding
+1 on community college welding class. Don't buy a machine until you have some training. The class I took started us off with acetylene torches, then MIG, then TIG or stick, whichever you were interested in. Everyone says MIG is easier, but I disagree. TIG allows you fine control of the puddle so you can adjust as you go. MIG is easy in that it is point and shoot. Point is, you won't know what you want until you get some training and you can know what you prefer. Also, much cheaper to learn on someone's machine, metal and consumables. That's probably your best way to getting it right the first time. Good luck! -
Logo looks like Prosport: http://prosportgauges.com/index.aspx
-
Off rotisserie, on 15x14s
svMike replied to JMortensen's topic in Brakes, Wheels, Suspension and Chassis
Those pics make me smile so much, my face hurts. -
I had the same experience JohnC when I looked into this for my car: paint shops in my area suggested leaving it alone after soda blasting. They were equally empathic that soda needs to be fully neutralized before paint. BarryK of Southern Polyurethanes said the same thing when I asked him about how to prep.
-
Ground Control Camber plate install methods
svMike replied to svMike's topic in Brakes, Wheels, Suspension and Chassis
Thanks Jon, I gave them a call yesterday and they were very helpful in figuring out what I needed. Great customer service. They also gave me some tips on cutting out the tower, which helps since their "instructions" look like they were photocopied from a lunchtime napkin doodle. GreenState has offered his template and I'm also using forrest280z' CAD template, which should hopefully make the install easier. Shooting for this weekend, again. -
Ground Control Camber plate install methods
svMike replied to svMike's topic in Brakes, Wheels, Suspension and Chassis
Thanks for the offer, you've got PM. I called GC yesterday and they sent me the bolt plate along with new bushings and new top bolts. Great customer service there. -
Ground Control Camber plate install methods
svMike replied to svMike's topic in Brakes, Wheels, Suspension and Chassis
Got my camber plates from GC today and I have a few questions. Is there a difference between the front plate and rear plate? All of my plates are identical, but GC website differentiates between front and rear plate. GC ships a bushing that fits over the shock's threaded top. The bushing then fits inside the spherical bearing. This bushing is supposed to fit the threaded body, right? It fits my front shock, but not my rear shock. It looks like I didn't get any of the bolts, nuts and washers that mount the plate the shock tower, I expected these to be included. The top nuts also only fit my rear shock, but not my front shock. Very annoying since I noted which shock I was using and the diameter of the shock threads, they called to confirm and they STILL got it wrong.
-
Ground Control Camber plate install methods
svMike replied to svMike's topic in Brakes, Wheels, Suspension and Chassis
Dan - that thread (Ground Control camber plates) was what got me thinking about installing it on top to begin with. It looks much nicer, but I think I'll mount it under the tower for now. I can always reinforce the bottom and move it to the top if I ever change my mind. Thanks for the help folks. -
Ground Control Camber plate install methods
svMike replied to svMike's topic in Brakes, Wheels, Suspension and Chassis
Thanks Jon, I've already bought the GC plates. I guess I'm trying to figure out of adding a stud plate to the bottom and bolting the camber plate to the top will be better/stronger than the standard GC install. -
I'm going to start installing GC camber plates on my 240Z next week and I wanted some opinions on how these can be installed. It looks like most people are doing it the way GC recommends, which is to slot the tower and install the plate underneath. I've also seen a couple (see Mongo's Z-Car Build) who cut the tower and install a stud plate, then install the GC plate under that. When I spoke to GC, they say that it is much stronger to install it their way, but I sort of agree with Mongo that slotting the tower weakens it. Looking to get some opinions from folks who have done this and their thoughts on either install method.
-
They seem to be popular among the drift/flush/JDM crowd. Can't say what they would be worth, but you should look around in that direction to see who else would be interested and give you an approximate worth. They look like they are in rough shape though...
-
They look like Golf MK2 Recaros. That orange gradient screams 80's
-
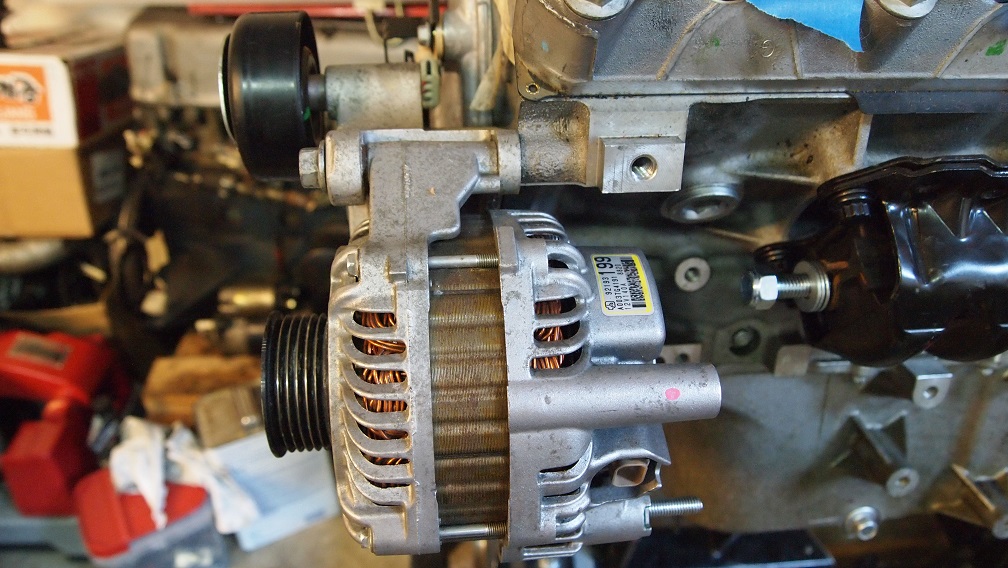
Thanks, I'll look through your pics. The G8 GXP crank pulley is part number 12635649. This interchanges with LS3 Corvettes, so my accessory drive is the closer block offset, not the F-body offset, I also laid the steering rack on the k-member and checked for clearance against the crank pulley. There was about 3" of clearance, but that will shrink when the engine weight sits on the k-member, but I think there is still enough room there. I looked at LS1tech for FEAD arrangements and I think it might be possible to make an extension bracket from the bottom of the alt bracket to the bottom of the alt. This will get the alt to sit like the attached picture. If that works, that belt arrangement should work.
-
Thanks. I was hoping to reuse the alternator that I have, but there is no way to fit that sucker in there. Could you post a picture of your F-body alternator and bracket? My water pump and crank pulley are from G8 GXP, I'll post part numbers when I get home. I think they are the same offset as the LS3 Corvettes, which means I'll need to trim 3/4" from the alt bracket to make the F-body alternator work with the Corvette offset. I've PM'd a few people asking how/what they used to get their LS3 alternators mounted, I'm waiting to hear back. I haven't checked for steering rack clearance yet, I'm waiting for my new oil pump to come in and replace that before I install the crank pulley. I'll measure that and post pictures, might be a while, I just ordered the oil pump today. I already have an engine harness, but it looks like it is fairly straightforward to go from a 4-wire to 2-wire.
-
I have my LS3 on an engine stand and while mocking up the FEAD, I found that the alternator hits the 240Z k-member/JCI engine mount. I attached pictures to show the alternator from the front, side and where it hits the k-member. The engine, alternator and bracket is an LS3 from a 2009 G8 GXP. I plan to only run the alt and water pump from the crank. It looks like I need to swap to the smaller 93-02 LS1 Camaro/Firebird alternator, does that sound right? Can I reuse my alternator bracket?
-
Venting Stock Gas Tank with LS1
svMike replied to UofA_ZCar's topic in Gen III & IV Chevy V8Z Tech Board
Venting to a charcoal canister will help with most of the gas fumes, but the canister itself will need to purge somewhere, that's why it is connected to the intake via the purge solenoid. If you look at how the current GM E-rods are set up, the canister has 3 ports - from tank vent, to purge solenoid, to atmosphere. If you remove charcoal to purge, you may have slight fumes depending on how long the car sits and how hot the day gets. You will also need to get EVAP circuit removed from your ECM. -
I'm going to assume that you've already tuned the rest of the engine (point gap, timing, valves) since carb adjustment should be the very last thing you do. Here's a good video of how to do it:
-
LSx s30 Longtube group buy thread
svMike replied to 1 tuff z's topic in Gen III & IV Chevy V8Z Tech Board
I've gotten my headers, but still waiting on the gaskets. It's not blocking my progress, but the gaskets were part of group buy price. -
Has anyone swapped to a 3157 wedge type socket in their tail lights? My taillight harness has crumbled apart and I'm looking to swap to 3157 or 7443 wedge bulbs. The 240Z taillight housing has detents for keyways on the socket housing, so I'm not sure which wedge socket will fit. Also, most wedge sockets that I've seen are 0.5" in diameter and the 240Z taillight housing has a 1" hole.
-
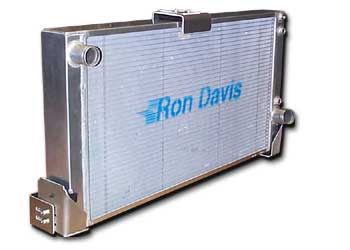
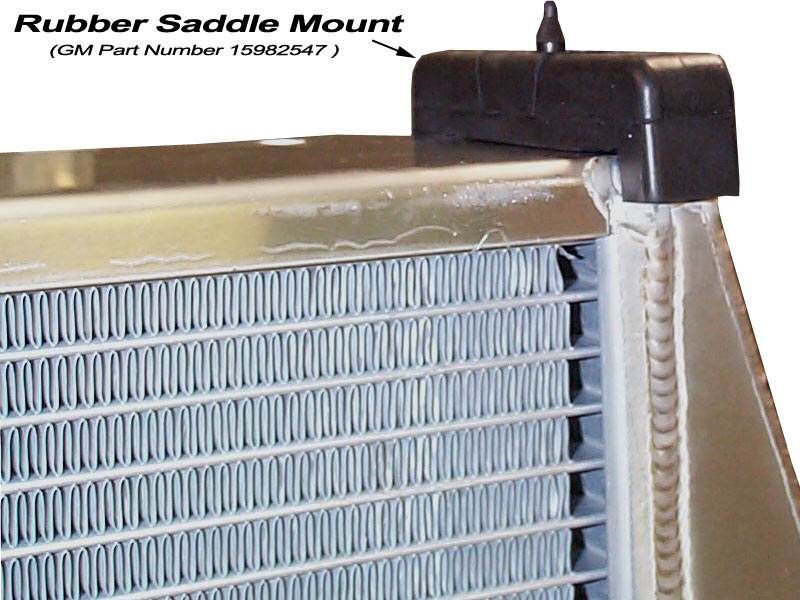
If you can weld, you can make your own saddle mount or cut GM saddle mount to fit your radiator. Pictures from http://www.rondavisradiators.com/tech.htm
-
Thanks for the links. I agree with you there, I would make monZster's Z my morning alarm if I could...
-
Gollum - links to those videos? The Jalopnik vids are specific to cars in a tunnel.
-
Jalopnik readers vote a video featuring a modified 240Z as best sounding. Hear it for yourself: The Ten Best Car-In-Tunnel Videos