drdiabetezx66x
-
Posts
57 -
Joined
-
Last visited
Content Type
Profiles
Forums
Blogs
Events
Gallery
Downloads
Store
Everything posted by drdiabetezx66x
-
Inertia switch? Putting an 81zx drivetrain, 78 wiring harness, in my 74 260z. Eliminated EFI and going carbuerated. Going to install the inertia switch on the passenger side of trans tunnel behind the seat. Think this is a good way to cut fuel to the electric pump in case of accident. If it does happen to trip then it's within reach to reset. Should have it all figured out in the next couple of weeks.
-
I have this style but they are Nissan OEM. Much better quality. They have 4 rivet points on each mirror. Going to install in next couple of weeks. I like the way they look and good visibility.
-
Was looking at these but wasn't a fan of the dual arms on them.
-
When you cut it out make sure to cut a few inches outside the welds to give yourself some extra sheet metal to weld back into the hole you cut out. I know this from experience
-
Y not post here???
-
So I installed some kick panel speaker pods awhile back in my 74 260z. Now comes the time when I have to figure out where to relocate my fuse panel to. Has anyone done this? If so, where did you relocate to? What did you do to encase it? I'm thinking somewhere under the dash but I need away to enclose it. Any ideas would be helpful. Thanks.
-
It actually looks pretty nice. Just a matter of how well it's installed. After just doing all the vinyl in my 260, I'll just stick with the plastic covers. Not fun.
-

Upper window molding
drdiabetezx66x replied to drdiabetezx66x's topic in S30 Series - 240z, 260z, 280z
That's what the part is called....it's the rubber piece that is attached to the chrome that sits on the outside of the car on the top of the door. Not on the frame, on the actual door panel. Runs horizontally across the entire edge of the door. As you said, the "outside window squeegee." Which may he the best description of it lol. -
Anyone have a good source for the upper window molding rubber strip like this? http://www.zcarsource.com/door-upper-molding-rubber-seal-240z-260z-280z-70-78-new_8_56661_197483.html Just want to make sure there are no other good options out there. Thanks!
-
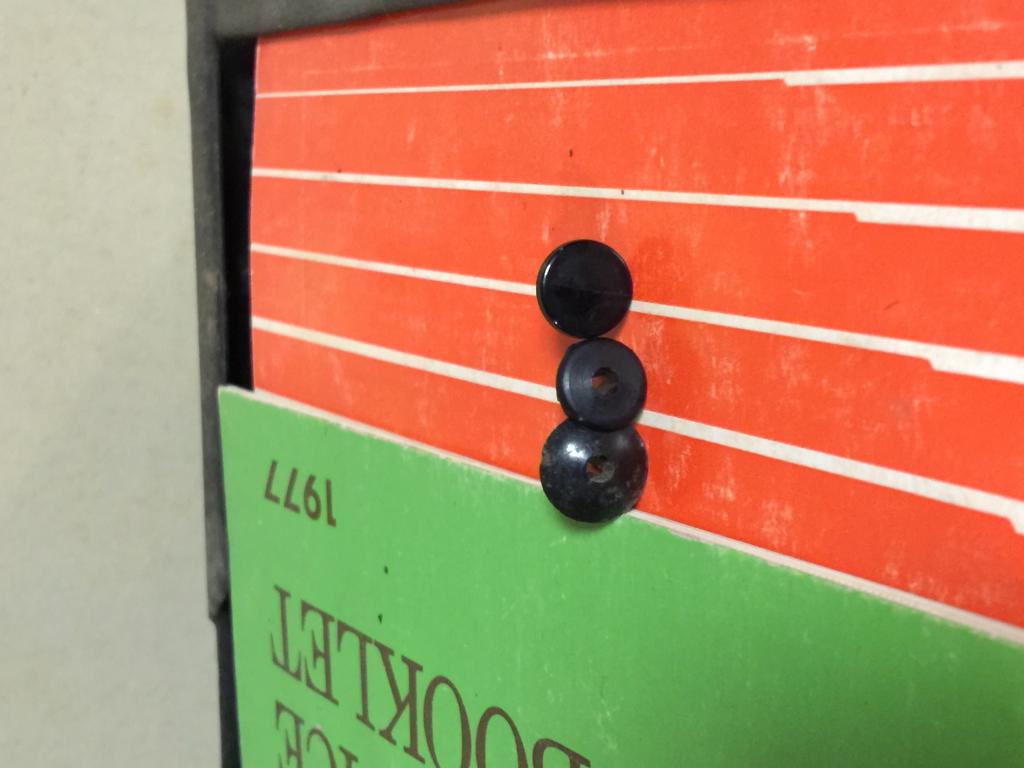
Pictures are messed up. Stock one is on bottom of first pic and right of 2nd.
-
So the McMaster push pin clips were to small. The Christmas tree style fit much better. The head was to small on the pushpins. I'm going to see if I can find some with a larger head. The top one is the stock one, middle is McMaster pushpin and bottom is Christmas tree style (1st image). 2nd image starts with the stock one on right. You can see the difference.

-
I got the expanding shank shank and Christmas tree style. I'll be installing this Sunday and I'll take pics.
-
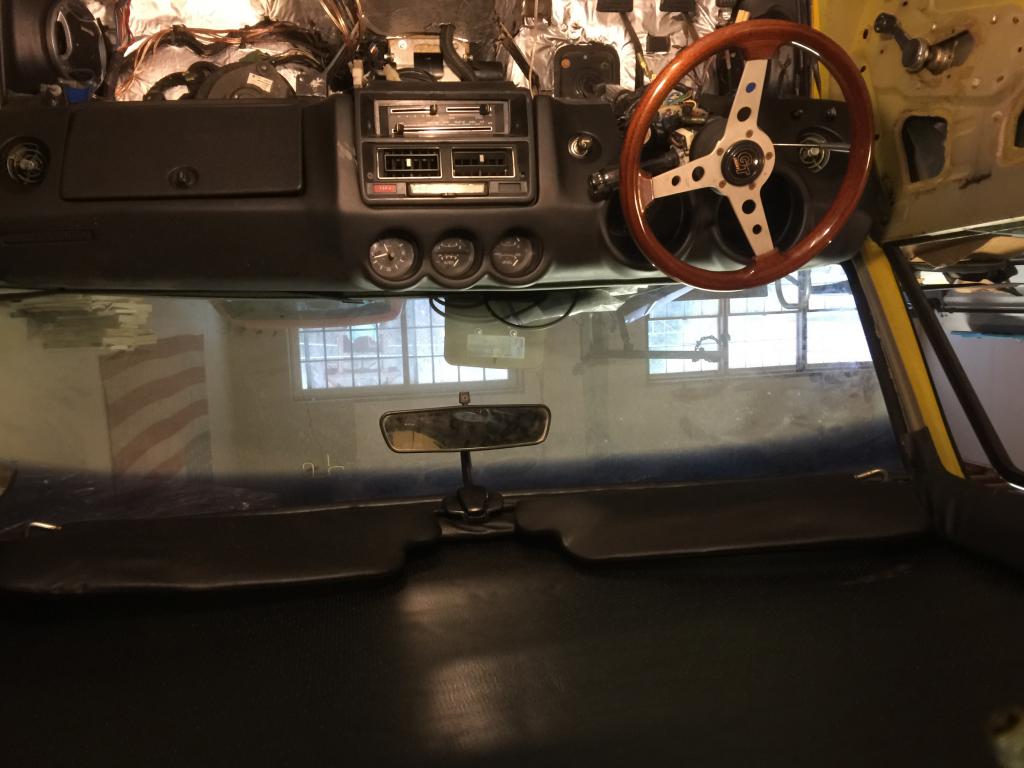
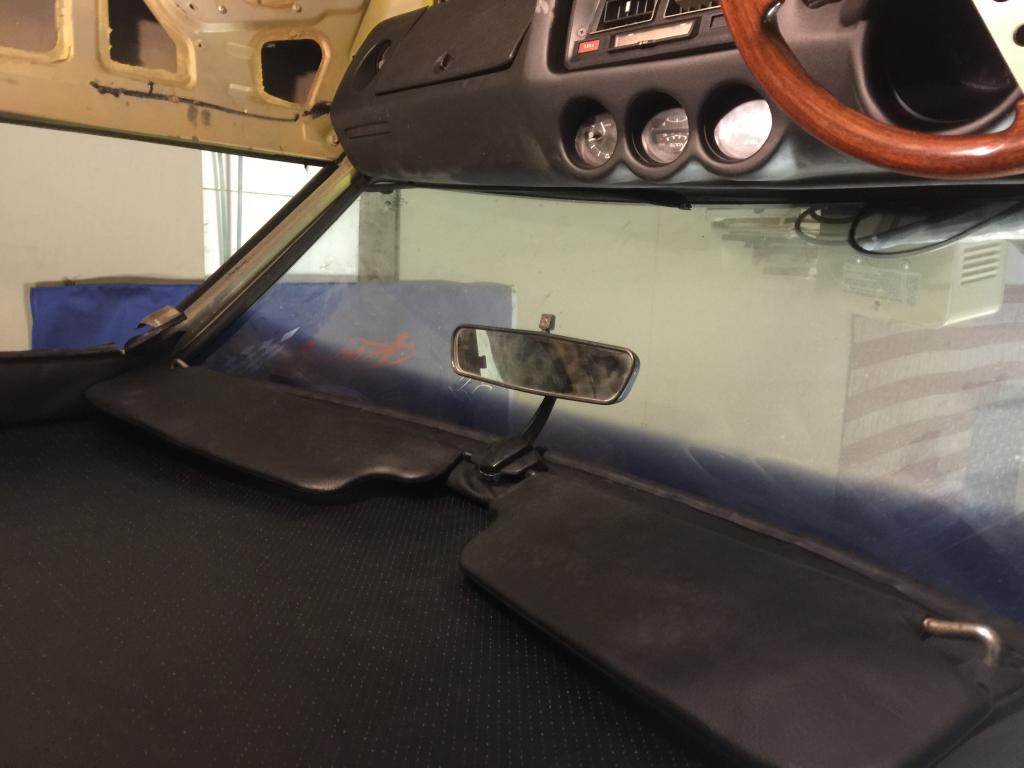
Started putting some vinyl back in place in the interior. Headliner was replaced with some material about awhile back. Then put the vinyl pieces that run along the driver and passenger doors with some original materials. Reatached the visors and rear view last weeks as well. It's starting to look like a car inside! Next week I'll be putting the strut tower vinyl pieces back on, followed by rear quarter window surrounds and dog legs. Ordering some pastic rivets today. Don't know why it's flipping my images from my phone but it is...dammit.
-
Interior vinyl - what is the best way to glue it?
drdiabetezx66x replied to drdiabetezx66x's topic in Interior
I actually used it for the headliner and i guess there was a little more "wiggle room" as far as time. May end up using this again. Thanks. -
Contact adhesive will in fact eat through a plastic cup in under 3 minutes as well as make your pants stick to your leg...solution = lot's of brake cleaner.
-
Guys i am trying to figure out the best way to glue the factory vinyl back on the strut towers. I know contact adhesive is what most people use. Is this really the easiest/best way to do it? With all of the different angles and cuts of the vinyl coverings, it seems like it won't be easy to do on the first shot. Most seem like they start from the top, with the vinyl inside-out, and work their way down. But is there an adhesive that can be used that won't bond on contact like the contact adhesive? Something that once the vinyl is in place, can be moved around a bit to make sure the vinyl is where it needs to go exactly? Any help here would be appreciated. Getting this vinyl glued on is stopping me from finishing a lot of the trim work as it goes underneath quite a few pieces obviously. Thanks
-
Thanks, let us know if they work. Although i would rather replace the originals with ones that don't have the peg in them for reuse if i have to remove the panels. Something more "recyclable" would be better.
-
Do you know which size?
-
-
Also bought s new headliner material and did it myself.
-
I just removed some of the vinyl trim from above the doors and above the windshield so I could get the rubber molded pieces that keep it secured to the top sides. I did this so I can install the pieces in a different car. You have to get the weather stripping off then you can get under the trim pieces. Then go to the end of that piece of trim and there is s rubber "u" shaped piece of rubber that keeps the vinyl pinched to the the car. If you find the end u can simply carefully start pulling it and it will pull the vinyl trim away from the car. Same for all 3 pieces along the top that surround the headliner. Hope that helps. I can take pictures Sunday if not.
-
Vacuum formed kick panel speaker pods.
drdiabetezx66x replied to Derek's topic in Miscellaneous Tech
Haha, Sounds like a plan. I'll get them in their as soon as I can than. Possibly this Sunday. Let me know what "data" you need. -
Vacuum formed kick panel speaker pods.
drdiabetezx66x replied to Derek's topic in Miscellaneous Tech
Got the panels. They look awesome, Derek, Thanks! They will take some cutting to fit them into my '74 260Z, it looks like, but I expected that based on what everyone else has been doing. I will post some pictures when i get to the point where I can actually put them in. -
Vacuum formed kick panel speaker pods.
drdiabetezx66x replied to Derek's topic in Miscellaneous Tech
That didn't take you long, Clive! haha. I'll have mine this weekend if your stopping by, you can take a look. -
Dr. Diabetez's '74 260Z
drdiabetezx66x replied to drdiabetezx66x's topic in S30 Series - 240z, 260z, 280z
Haha, nice to know I have a fan! I'll get more pics up this weekend. Hopefully going to get the old rear out of the car and put the "new" one in, which is freshly spray-can painted black. Looks really good actually! I also ordered the kick panel speaker pods from Derek on here. Should get those tomorrow. I'm very excited about getting the dash and interior started. As soon as we get the wheel well welded back in and new rear end in, i can begin work on that.