

Dat73z
-
Posts
755 -
Joined
-
Last visited
-
Days Won
3
Content Type
Profiles
Forums
Blogs
Events
Gallery
Downloads
Store
Posts posted by Dat73z
-
-
A lot going on lately but I did manage to check the runout on the crank snout. It's around 0.001" so I feel good about cleaning things up and getting the damper on. It's difficult to get a good measurement so there's some error in there but I was mostly checking to ensure nothing is massive bent and I'm not even sure if there is a factory spec for this.
I need to call Rebello next week and verify a couple of items, mainly the interference fit between the new damper and crank.
Edit: turning the engine over by hand, the runout is <0.0005". So I think the last major thing to check is the interference fit.
-
The majority of parts have actually already arrived for the rebuild. I was expecting to wait months, not days. I'm really glad my engine builder reached out to me, I can't thank them enough for all the support.
I've been really busy with other projects and life but I think I can get it all back together with a day or so since at this point it's just a trans pull and pulley install. Just need to find a good window in the coming weeks to get it all done. It'll give my machinist some more time to do the pin work on the dist drive, and hopefully I can get the new crank pulley coated before it gets too cold as well.

-
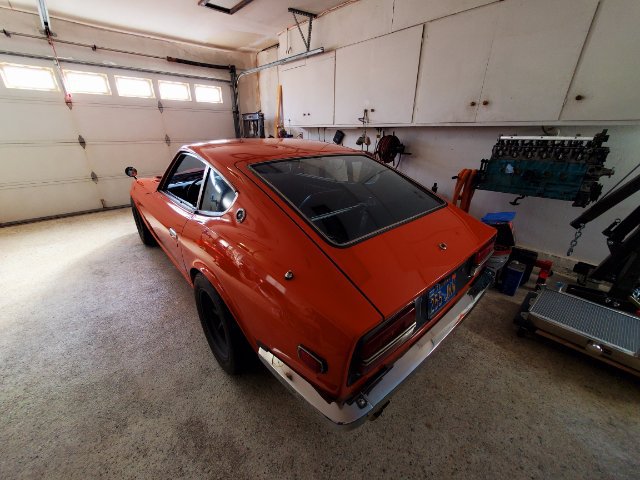
This PM I cleaned up my space and moved the Z over to make room for other projects. I prefer to work on one project at a time but every few years with life changing events I tend to cycle through my fleet anyways so it's probably that time again. I have some buyers already lined up for other vehicles I've been holding onto and wanted to keep but I need to recycle the funds to get my wife into a newer safer car. I plan to keep the Z.
My last update for a while until I get through this rough life patch and all of the parts I need in.
-
Now that time is of the essence I completed the teardown.
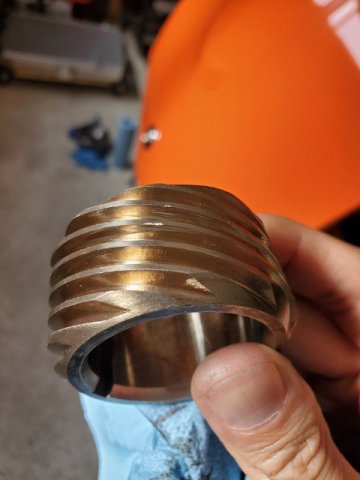
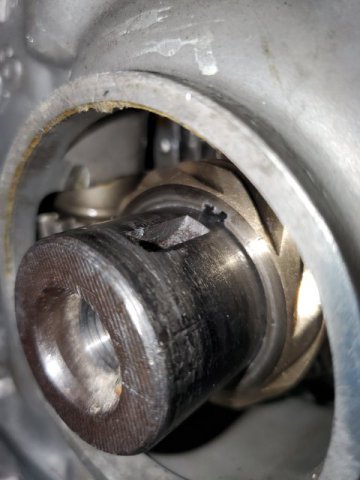
The worm gear looks like a racing bronze unit. There is some light damage but perhaps it is serviceable. I'll need to ask my builder and see. I've seen worse, my last L had both a cracked distributor drive and chipped worm gear. Since I have it all apart I was thinking of having my machinist locally pin a new OE driveshaft spindle.
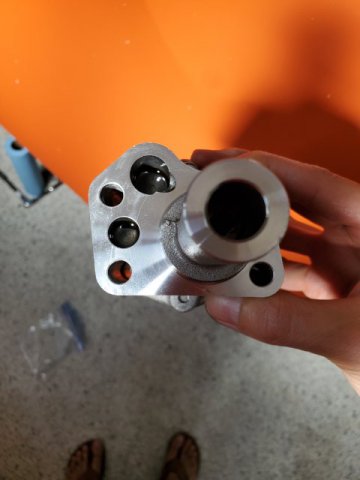
Oil pump looked fine as well, no shavings or junk I could see. Not sure if I need to disassemble further.
This PM I need to get the Z partially reassembled and moved over in the garage to start working on some other vehicles.
-
Started working on the Z this AM and my wife called letting me know she jumped a curb and blew out the tires on my daily. Fortunately she's ok but my car has seen better days.
I think the strategy will be to move the Z over and order parts. Pull my Porsche in to get it sorted and back on daily duty. Wherever parts come in, slam the Z back together and put it back on daily driver duty like I've been using it for this past few months. Give the wife the Porsche to drive and pull in the daily to fix.
The joys of having multiple vehicles in multiple stages of de/reconstruction...man I just can't catch a break
-
This AM I spent a few minutes ordering seals for reassembly and generally cleaning up the area.
Today is really busy for me but later tonight I'll wrap up the disassemby by dropping out the oil pump and removing the drive gears.
Tomorrow I'll grab the mitutoyo and mic the crank snout so I'll have the dimensions for whatever new pulley I'll need to have honed for a good interference fit.
At some point if I can fit it into the schedule I'd like to get a dial indicator from Harbor Freight or somewhere and check for runout at the crank snout.
The longest lead time item will likely be the crank pulley itself but we'll see on Monday.
-
So one thing I was thinking about is the flame on on/off boost out the exhaust I was attempting to resolve. I wonder if my damper was getting loose for a while and my timing was retarding when letting off causing the fireball out the exhaust.
Lots to think about, but whe I get this thing going again I need to get a cell phone mount in the car so I can watch the timing.
Edit: and also a couple weeks ago when I lost an alternator tensioner bolt. I wonder if it was all related.
-
Got distracted but at least the yardwork and a bunch of cleaning got done.
Started back in on where I left off this PM, got everything torn down.
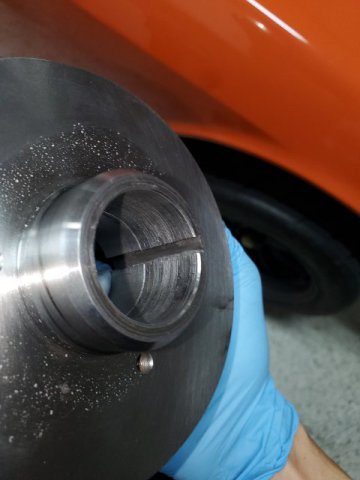
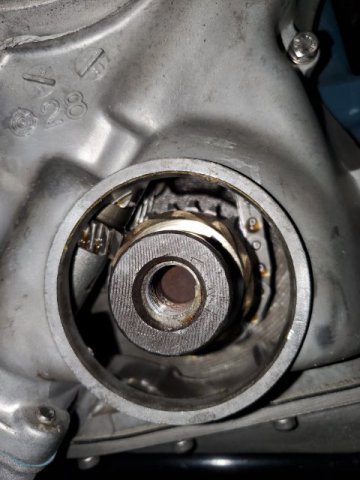
Good news is the crank snout seems in ok shape. The surface is relatively smooth, not many scratches that even catch a nail. I think it must have some heat treatment for surface hardening. The keyway looks ok as well. Distributor gear and drive looks good but I'm planning to drop the pump and inspect everything closer tomorrow.
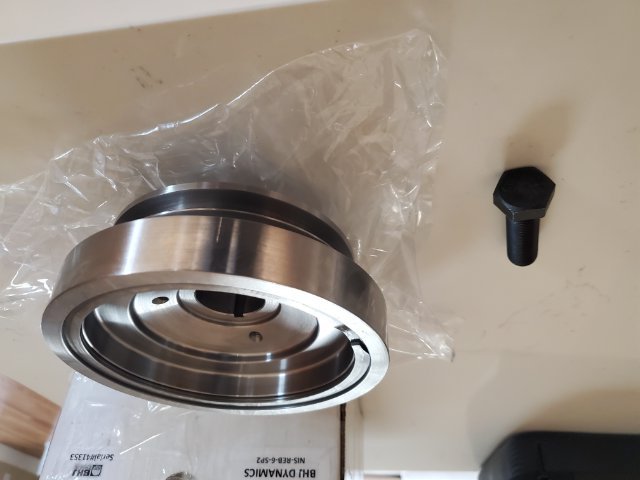
Bad news is the crank pulley looks to be trashed. I'm guessing the squealing and grinding was likely the crank pulley spinning on the crank snout and wallowing out after the woodruff key fully dropped out.
I'm planning to call my engine builder on Monday and assess. I think during the height of the pandemic I waited like 6 months or longer just for the BHJ dual row damper.
Oh well, need to keep moving forward.
-
Had an hr or 2 open up this afternoon so I started back in on the teardown.
Inspecting the oil drain pan, I found one of the crankshaft woodruff keys. I seem to recall there are 2. It doesn't look beat up which I guess is good, and it drained out so I won't need to go on a magnet fishing expedition.
I'm going to try to get everything at least torn down this evening.
-
So my engine builder Dave Rebello reached out to me this AM and let me know for high performance L engines, the factory torque specs are not adequate. I'm probably putting out somewhere around 300whp at 10psi of boost and want to turn it up.
I torqued both the crank pulley and flywheel bolts to factory torque specs and used loctite on both. Apparently I need to torque the crank pulley bolt to 150-155ft lbs, flywheel bolts to 120 and cam bolt to 120+.
I trust my engine builder so I may need to drop the trans after again all and go through all of that.
-
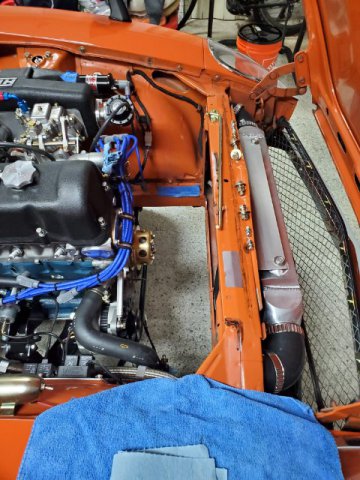
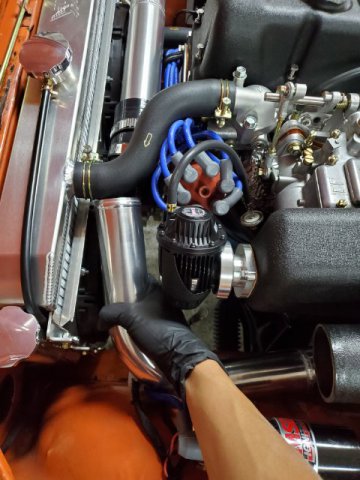
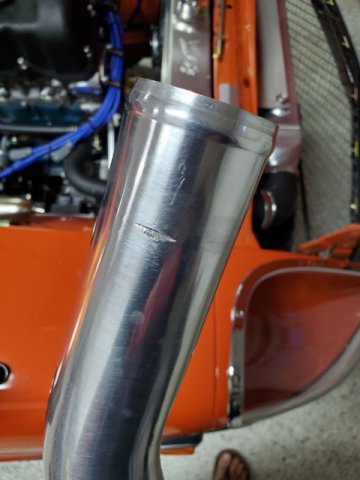
Got the charge piping out easily co sidering how tight the packaging is. I'm glad I considered serviceability when setting up the runs. No oil in the pipes which is good but I noticed the PS side pipe was rubbing on the core support. I think I'll run a tig bead over that area and reposition the pipe.
Unfortunately my coolant bucket is full. Where I live I used to be able to recycle coolant at my local Jiffy lube. Now apparently the county requires me to go to a recycling center which is a city or two over and only open during specific times. Great.
-
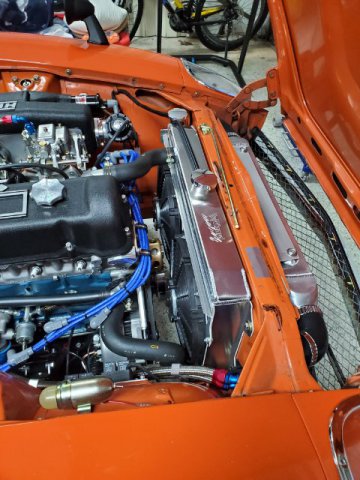
This AM the objective is to get the charge piping and rad out of the car so there's a straight shot to the crank pulley. I'm impressed how much dust the silicone couplers have picked up over a couple thousand miles.
Fortunately my wife has been out of the house every morning at 5:30 AM so I have a bit more time in the AM to get things done.
-
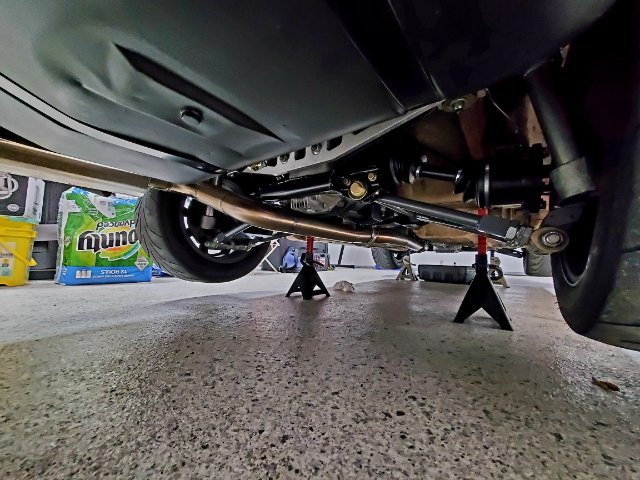
Inspected the undercarriage a bit more before calling it a night. I've always wanted a drill press so I think I'll buy one this weekend and order an aircraft safety wire drill jig. I'd like to drill and safety wire all of the suspension and driveline hardware.
I've been keeping this thread mainly focused on the aspects affecting turbo componentry and tuning but there were a lot of other sidebar projects I didn't document this year to turn the shell back into a driver.
-
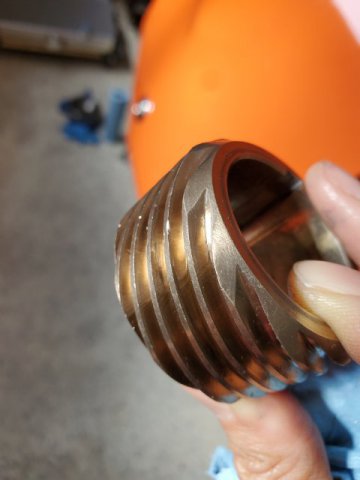
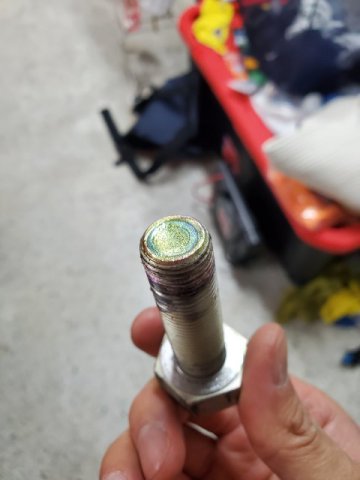
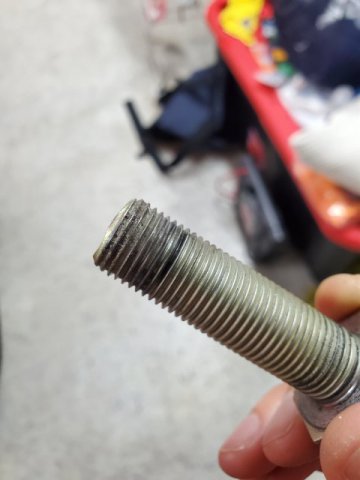
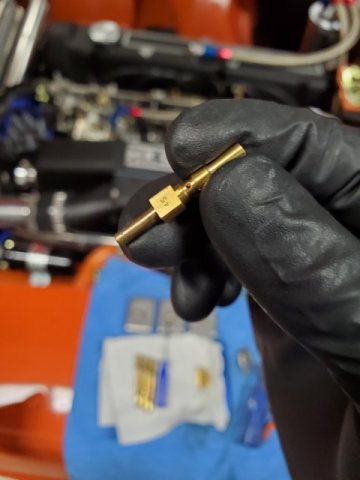
Had a couple mins after dinner to pull and examine the crank bolt and washer.
Volvo washer is still flat as expected. I've seen the OE washer bow out over time.
The crank pulley bolt looks fine. You can see the end was not bottoming out as the zinc coating is still intact/not scratched. The loctite blue might have actually been the high strength red, I can't remember but obviously whatever was on there didn't hold. I think I only applied it at the end, and the threads towards the head don't thread in.
-
After simmering on this more, I've decided I'll make this my fall project. It's a bit of a bummer because I wanted to get another project car that's been waiting outside into the garage and also do AC fab on the Z here and there. A minor setback but I'll keep trying to do 1 thing per day until the Z is back on the road at least.
-
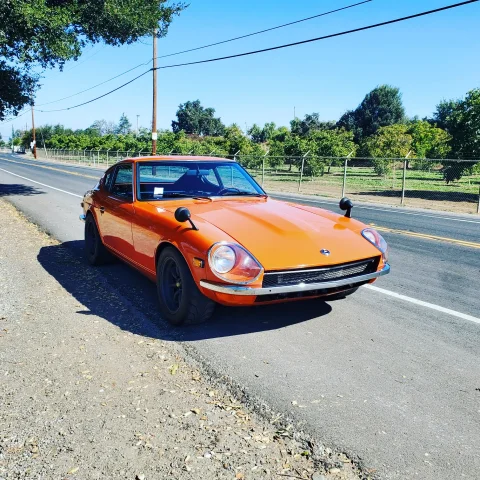
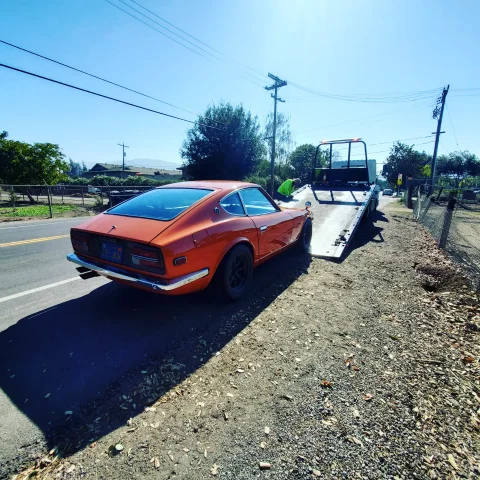
@rossman yeah, I'm glad I decided to call a tow and not drive home!
The pulley was a tight interference fit on the crank when I installed it. And I did check the bolt, washer, and pulley assembly thickness for the correct length when I chased the threads in the crank to ensure I wasn't bottoming out on the threads. I think I may have documented that earlier in the thread around when I had the volvo crank washer machined.
So upon first inspection, no carnage. There were no visible shavings or metal in the oil either but I did take an oil sample and I'm planning to do regular UOIs on this motor.
I think I may need to reschedule my dyno date depending on how soon I can get a new KA crank bolt in. I think I want to also check the crank snout for runout, and the crank pulley for any cracks or damage.
-
@calZ Yeah it's all good though just part of the game, not my first nor last build 😭
So I drained the fluids and they all looked good. I also took an oil sample for analysis. I went to rotate the motor and the crank pulley bolt was barely hanging on, and the crank pulley was just starting to walk off. Good thing I decided not to crank it over after I pulled over.
I know for sure the threads were clean, the pulley was torqued to spec, and I used blue loctite as that was the last thing I did right before dropping the motor in with my friend holding the crank stationary.
So the next steps are to pull the valve cover and borescope down the timing chain area and see if there's any carnage.
-
Went for a drive over lunch and started hearing some grinding/squealing noises so I clutched in and coasted over to the side of the road.
Inspected around the car and didn't see any fluids anywhere so I fired it back up and all sounded normal, started going down the street and hearing some grinding again so I clutched in and as I was coasting to the side of the road the motor stalled out.
I pulled the plugs and borescoped the cylinders and all look good, no damage or fluids in the bores. Tonight I'm going to drop fluids and inspect further. Probably start by turning everything over by hand then move on to pulling out the driveline again. Hopefully I just blew the clutch or transmission but we will see.
-
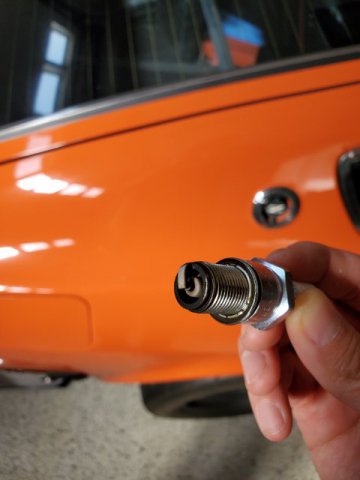
Picked up breakfast this AM with a lot of boost, afrs mostly in the 11-12s on the gauge and checked the plugs after the drive.
Overall the mix looks good, the plugs correspond to what I was seeing on the gauge which is a slightly darker tan than before so slightly richer along with a slightly sootier AFR ring. With the 145MJs the afr ring was just a full ring of grey around so I think a bit more ideal but it's all within where I think they should be.
The carbureration feel was a bit soggy so I dropped down the 150 MJs and will see how that feels over lunch.
-
More tuning going on in the background.
Last night I tried upping the MJ's and AC's. I went from 145MJ/170AC to 155MJ/200AC, so roughly for 1 step MJ for 3 steps AC. I'd like to see the response of the main circuit on/off boost. I got the AFR's about the same as before (11-12) to 7k rpms, but didn't have the time to fully test the entire dynamic range, especially when the main circuit tips in.
I've read a lot of conflicting information online whether it's better to have larger or smaller MJ's/AC's since you can compensate either way for target AFR. Some people say (for an NA setup) larger AC can delay main circuit tip on, other say opposite. In discussing with my buddy who tunes sidedraft carbs on L's, one benefit is a larger MJ/AC (for an NA setup) can be good for racing, when the fuel level changes during long sweepers so you don't lean out.
For blowthrough turbo DCOE cars, one interesting thing I found was to counteract fuel slosh into the MJ stack some tuners and OE's have actually positioned the fuel bowl pressure port directly above the MJ stack to "blow off" any fuel in that area and prevent fuel sloshing into the mains in racing conditions. The area above the MJ stack can also be raised to help, you can see this in the SSS "Devil Z" car, and also OE lotus cars. I never considered that, but it makes sense. Every time I pop off my jet covers, the top of that area is wet with fuel.
I'm not entirely sure about any of this, but I'm going after the best response/"feel" for my target AFR's since I mostly drive on the street. I noticed early on, smaller MJ/AC seemed more responsive on/off boost but I figured I'd try again now that I have more of the setup dialed in. I don't mind having different jet settings for the track if I don't need to worry about the full dynamic range.
-
Maybe someone else with a big block can chime in. It sounds like you don't have any fuel leaks and your timing is good, I assume you've taken a look at all 8 plugs.
Your mix could be pig rich in certain areas of the dynamic driving range, I'd recommend an AFR gauge to know for sure. I've been driving my carb turbo L6 a lot of bumper-to-bumper traffic for hours in-city and my fuel mileage is terrible, <10 mpg with as much boost as I can. On the weekends when I cruise on the freeway long-distance it can be in the 20s.
-
Last night I tried the 40 pump jets.
I started by turning the volume all the way in and doing low RPM WOT pulls to test the shot, and back out from there.
It seems the setup is happy reducing the volume by a few mm. I do want to try the 45's and possibly 50 pump jets back-to-back on a stable-weather day as well to see the difference, but that would be multiple hours of driving and tuning which is time I don't have currently.
This weekend I'll finally go and pick up the 250 needle and seats from my buddy. Both of our schedules just haven't aligned this past month, but as I'm aware that's an issue on long WOT multi-gear pulls I need to get those in before dyno day. It'll be a good excuse to go out for a drive.
-
It's been a busy week but tonight I attempted raising the float level from 28mm to 27mm. The mains were coming on around 2.5-2.8k rpms so way too early, basically right where I'm cruising at freeway speeds. I lowered the level back down to 28mm.
I then swapped the pump jets from 45 to 40s and added a bit more volume back to the shot as a starting point. The AFRs were pegging rich between shifts with a light stumble on/off throttle between full boost 2nd-3rd gear shifts.
Tomorrow I'll see how the setup likes the 40 pumps and go from there.
-
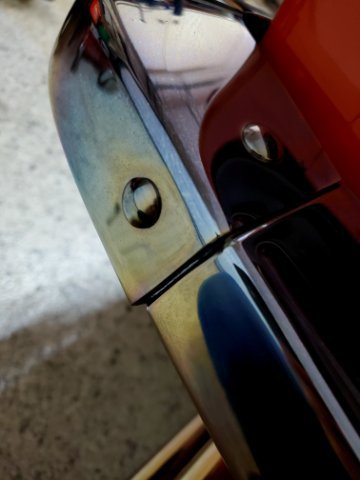
Tonight I spent a few minutes and inspected the exhaust for leaks. I haven't been able to find any. I'm a bit concerned because my bumper chrome has been turning blue/rainbow around the exhaust.
I think the fire out the exhaust on quick on/off boost transition at large throttle angles has been due to too large a pump shot. I already turned down the pump volume so I think the next step is one size lower pump jets which I'll try tomorrow.
This is one of those things I'm hoping the tuner can investigate but I'll try and dial it in on the street first in case there are more important items to address during the limited dyno time.


Triple Blowthrough Turbo
in Turbo / Supercharger
Posted
Out of time this weekend, but my buddy dropped off the 2.5 needle and seats yesterday. The OERs come with 1.8 needle and seats. WOT full boost 2nd-4th gear redline pulls I was running the float bowls out of fuel shifting into 4th. I think this sizing is what the monster/race NA guys run so hopefully with the 20-30psi of fuel pressure I see under boost and high volume EFI pump this issue is resolved.