-
Posts
37 -
Joined
-
Last visited
-
Days Won
5
Content Type
Profiles
Forums
Blogs
Events
Gallery
Downloads
Store
Everything posted by Fridge Gnome
-

280Z GenV L83 Swap
Fridge Gnome replied to Fridge Gnome's topic in Gen III & IV Chevy V8Z Tech Board
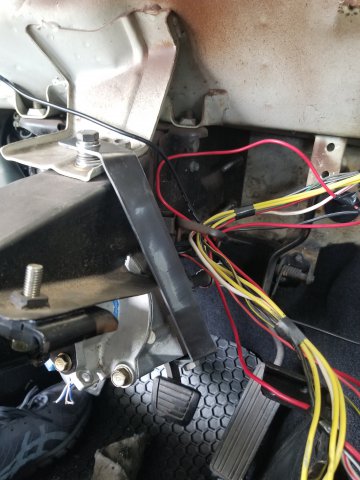
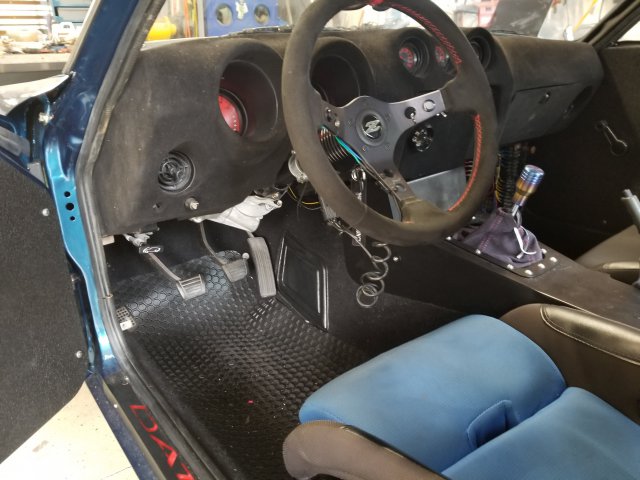
Here is the picture of the modified engine mounts, you can also see another reason I couldn't move the engine back. The vacuum pump flange on the LT block interferes with the mounts so the mount has very little adjustment to move the engine back on the driver side. I would assume it would be possible to modify the mount to fix this, or maybe even trim off the vacuum pump flange. I made up a transmission mount and got it installed today as well. Its bolted to tabs welded to the frame rails. Here is where the shifter sits with the GTO shifter. No interference in any gear, so I'm happy with where it's at. -

280Z GenV L83 Swap
Fridge Gnome replied to Fridge Gnome's topic in Gen III & IV Chevy V8Z Tech Board
Good to know Richard, it looks like the shifter is a little forward of where it was with the old transmission, it would work where its at with the camaro shifter I believe. I'm hoping with the GTO shifter it will be just a little further back as I'd like it a little closer to me than the original position. Forgot to snag pictures of the modified mounts, but I was able to drill new holes in the engine mounts to lower the engine about an inch. From the fender line I'm about 2.25" over, so maybe that will be enough. If not, I should be able to make a spacer to move the throttle body away from the water pump which will allow me to flip it upside down. -

280Z GenV L83 Swap
Fridge Gnome replied to Fridge Gnome's topic in Gen III & IV Chevy V8Z Tech Board
I got the engine in today, I'm using the Dirty Dingo motor mounts and I'll be making my own transmission mount. So first difference between this engine and an LS. It has connections on the back of the engine for the high pressure fuel pump. This means it can't get as close to the firewall as an LS. Theres plenty of room in the front, so engine position is no big deal, however I assume LS engines do need to be near the firewall to allow the transmission to fit around the original transmission mounts. Since I couldn't get this engine too close. I had to cut them off. I'll likely still try to use them as a mounting point for the transmission, but the original flanges wouldn't work. Once those flanges were cut, the engine went bolted in without any interference. I haven't made a transmission mount yet, so time will tell if it will be a problem, I don't think it will be though. That being said, the Dirty Dingo mounts are rather high with this setup. I'm using their adapter plates to use LS mounts with an GenV engine. I'm also using the Holley oil pan, so it has quite a bit of clearance. Clearance is good, but the engine sits a bit high. I'm using a camaro intake and the throttle body sticks up too high. I'm not sure if anything else will also be too high. Headers will be interesting, but I'm probably not doing longtubes. The OEM manifolds won't work, but they aren't too far off, so I think I will be able to find something that works. Anyway, just wanted to get a thread started to at least help me keep some record of the project. Hopefully will finish up a few more things while I'm on break. -
Hey there, there's no genV forum, so I assume this is the right spot. I'm getting started on swapping an L83 out of a 2017 Silverado into my '77 280z. Progress will be slow as I'm working on a masters away from the car right now, but I figured I'd post what I've gotten so far. Info seems pretty scarce on these engines as well, so maybe someone will find it helpful. I'll be keeping the engine stock and mating it with a T56. Here is what I'm starting with: Here is the engine and transmission, T56 is out of an 06 GTO. The L83 is a bit weird and the crankshaft is not meant to accept a manual transmission so requires a 3/8" spacer on the bellhousing (not shown, but where the gap between tranny and bellhouwing is. Apparently leaving that out will result in a broken block 😕
-
Depending on how many electronics your car is going to be reusing, I didn't find it too bad to just get rid of everything except the lights from the old harness and then make wires for everything new. Although I don't have many accessories installed in mine. I believe there is a color wiring diagram available for the 76 as well that should make it easier to dig through it.
-

Saturn Electric Power Steering In A Datsun 280Z
Fridge Gnome replied to socorob's topic in Fabrication / Welding
I do love it. That was a fantastic and fairly easy and cheap mod. It definitely has slightly different left and right bias, but its not very noticeable for me. I'll fix it next time I'm under the dash. Makes parking a breeze and doesn't seem to be twitchy on interstates either. -

Saturn Electric Power Steering In A Datsun 280Z
Fridge Gnome replied to socorob's topic in Fabrication / Welding
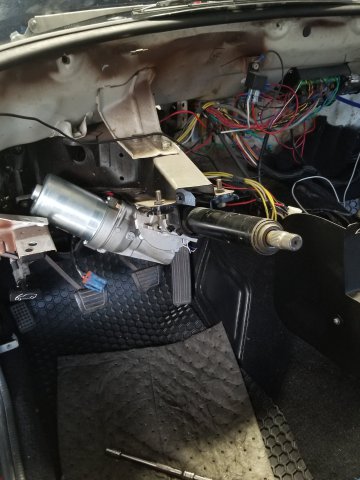
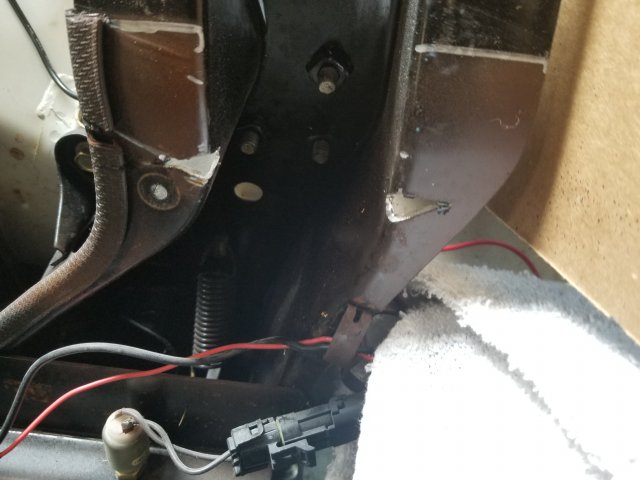
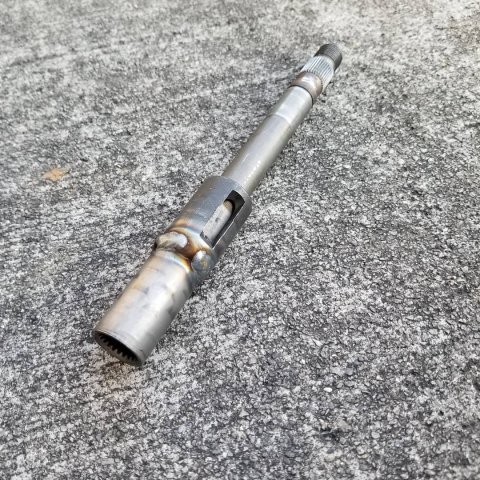
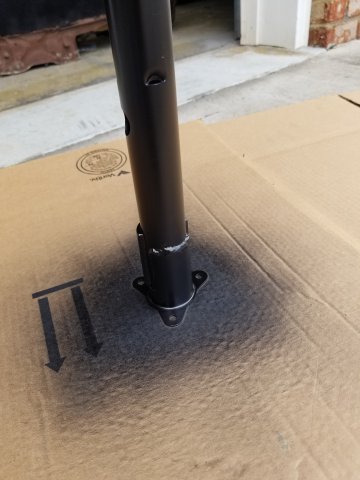
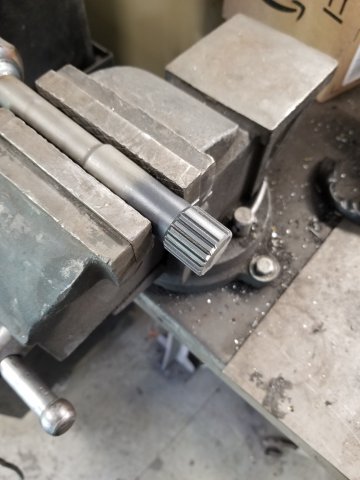
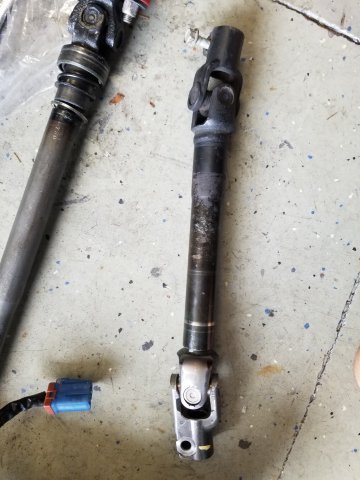
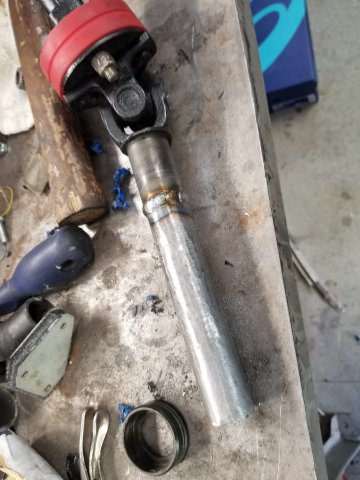
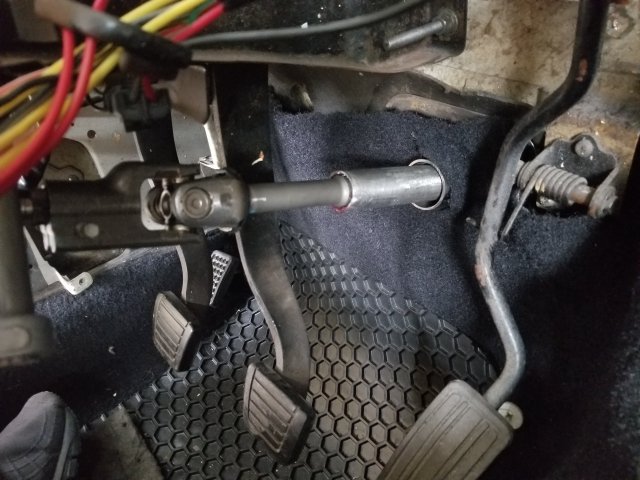
Hopefully you don't mind me adding my experience today. Didn't use anything except the saturn vue column and a 77 280z column. I figured a few more pictures of different setups in the thread is always helpful. I cut down the saturn telescoping joint so it would fully collapse and removed the thicker bottom portion of the female portion as well as turning it down about 1mm so it could pass through the datsun bearing at the firewall. Making it collapse fully let me just expand it to whatever length I needed without worrying about measuring the section behind the power steering motor. Then I could weld the original u-joint to the saturn telescoping joint, and pass the whole thing through the original firewall mount after grinding down the welds. Because the power steering motor was free in the rear, it wasn't as solid as I would like. Particularly the steering wheel could have tilted up because it was only held in with the two mounting screws under the dash. So I added an extra brace that seemed to stiffen it up nicely. Washers are a little sloppy I know, but it works and lets me adjust tension. All back together, doesn't stick out too much. I did remove the control box and bolted it to a thick aluminum plate as a heatsink under the dash. Seems to work just fine, haven't had a chance to drive it, I'll update tomorrow. -
Glad to hear thats a normal amount of play in the diff. It still confuses me a little that if I can make the diff clunk with my hand that it wouldnt cause a problem when its connected to the engine? I have all new bushings on the car, including the transmission mount and control arms. That seemed to cover a lot of the things listed in the faq thread. Thats why Im still looking at the diff even though I know its usually not the culprit. The transmission is out of the car right now and didnt notice any play in it either. Ill see if I can find anything else tonight.
-
I'm trying to find the source of my rear end clunk in my 280z. I have the R200 diff with the improved front mount and new bushings on my mustache bar. Bolts going into the mustache bar are tight. I'm getting a clunk whenever I accelerate or decelerate. It's only one clunk. My U-joints don't seem to have any play in them. I've tried them in and out of the car and don't see any play in them. The only thing I can find is in the attached video. The driveshaft flange going into the diff can rotate some with the ebrake engaged. It makes an audible clunk if I turn it hard enough. Is this a normal amount of play here? Or can I assume this is my problem and I need to start looking in the diff? DiffPlay.mp4
-
Ignition! Chickenman went though my tune and for some reason I had it in my head that the cranking rpm was the rpm I wanted to crank at, instead of what the megasquirt should expect. I had it set as low as possible, so megasquirt thought the engine was running instead of cranking. I also had a low cranking dwell and too high spark duration. I also swapped out the spark plugs with 0.032" gap ones. It runs rough but hopefully I finally have a stable starting point for tuning now. Thanks for all the help.
-
Thanks for the reply. Coil is an Accel SuperStock 8140C, I've check primary and secondary resistance on it and they appeared to match specs. Spark wires are Taylor 8mm. Spark plugs are ngk iridium and the gap is around 0.041". I've played with the dwell some, but I did not notice any impact while cranking. I might be confused with the condenser, I had read in a few places that it could cause a weak spark. The car itself is a '77 (77 body, 83 engine swap), so had a condenser attached, I didn't know the 83s had no condenser. I attached it to the "negative" of the coil. I will try switching to larger wire on the coil primary wiring. I had used the wire from the megasquirt diy wiring harness, which I believe is 16 or 18 awg. As far as grounding, I remade the large grounding wire that runs along the passenger side of the engine bay with 10 awg wire. The original one appeared slightly corroded. I remade it with all the same connection points, including the one on the firewall. The MS is grounded to the engine block at the same point as that large grounding wire. I removed all the vacuum lines from the car and deleted all the original mounting points on the intake manifold, so I don't have that point available. I will double check my grounding for the optical sensor today as well. I've attached my current .msq. 2018-06-03_09.53.06.msq
-
I have a 1983 L28ET, with Megasquirt 2 V3.0. I'm using direct coil control and have IGBTIN wired to JS10 and IGBTOUT to IGN. BIP373 is installed with mica insulator. I'm having trouble getting a spark while cranking. I have always had issues with a weak spark and the car running rich when it would start up in the past. Although being able to get the car to start was intermittent. (Car is still a project and has never run well enough to put on a road.) I have used output test mode with one spark plug connected directly to the coil and get a good purple spark that way. However, with the spark plugs out of the engine I am not seeing any spark while cranking until I let off the key and then sometimes a spark or two will appear as the engine is still spinning after the starter is turned off. I am getting about 11v at the coil while cranking. This is the only difference I can see between output test mode and cranking. With output test mode I have about 12.4v at the coil. Is 11v too weak to produce a spark? I have a new coil, distributor rotor and cap, spark plug wires, condenser, and alternator (internally regulated). I do get an RPM signal in tunerstudio when cranking. Although I have the crank rpm set to 200 and the tach in tunerstudio is reading around 350 rpm. Is this abnormal? I'm running out of ideas as to what the issue could be. My next option is to just start throwing new parts at it and I'd rather not do that blindly. Any help would be appreciated.


