

shika805
-
Posts
304 -
Joined
-
Last visited
Content Type
Profiles
Forums
Blogs
Events
Gallery
Downloads
Store
Posts posted by shika805
-
-
great work good sir, maybe a diagram for the wire install would be good. Where are you planning to place your switches
-
^ damn, i was gonna to check our dealership here. You think they still producing these?
-
interested^ let me know what your find out. my door pannels are both missing in my car.
-
wow, i didnt know how much trouble these spindle pins were, glad mine went out fine.
-
great job, hope my car will look that great with my wats and flares! great work
-
i want to fabricate something that will only project the uv light toward the dial and needlle.
-
yeah, i'm going to fabricate a small UV black light in the housing to illuminate the white needles.
-
aerokroil, worked for me... two hit with a wood piece between it and the hammer!!
-
I got the gauge faces from speedhut and used there module they have online to custom make them.
i had a little issue with them, which became a pain, but after having two of the faces sent back, repaired and finally reinstalled, everything is working right again... they look nice but pretty stressful to get them to work
i stated the issue i had with them in another thread in this section
-
i have the same problem... rear hatch glass seal and doors do not fit well. everything else is ok
really disappointed in black dragon
-
i got the gauge faces today, better packaged then last. I could tell that they repaired the original faces with new wired connections. So far so good, none of the others went out since the last time i tested. Only time will tell, if they will stand the test of time.

-
vinyl and fabric paint by duplicolor, used an adhesion promoter before laying it down
-
damn, that really sucks man... i am kind of scared to put this dash back in after knowing this
-
yeah! i was thinking of that too... i drive a rx7 daily so i have parts just laying around, i'm gonna take some measurements.
-
i think thats a good idea... i might call them also
-
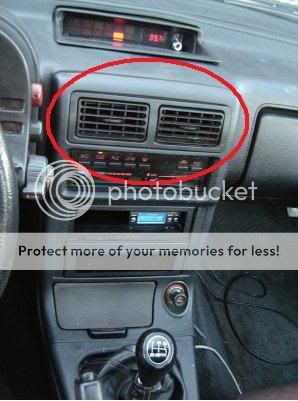
what i was thinking of doing is fabricating the front air vents to be adjustable to passenger and driver. in the photo i posted is an example of the vent i wanted to use... its from a 91 rx7, i think i can make it fit.
a long with that i wanted to make a vent from under the dash to point upwards but concealed but still dont what to do about that???
-
oh definitely... the sub is still no where close to be installed. while in the mean time... check what i did with the dash? 3.5 speaker in the air vents... not that bad i think, perfect fit also!
with flash
without flash
what do you guys think???
-
OMP deep dish steering wheel... black leather mmmmm.
-
this kind of irritates me too.... i've already seen a hand full of people purchase the speedhut gauge faces and no problem at all?? i just dont understand why we got shafted with faulty items. I wanted to get my dash in by last week, wont be able to put it in this week when i get it back because southern california is getting hammered with rain. Just sucks....
-
that true... they're really "finiky" it would be nice to drop 600 on gauges, but 600 is kind of out of my budget for something like that right now... i still have a lot to finish on my car thats more important at this time... but those revolution gauges do look awesome!
-
^yeah i hear ya man... i think i know where mine got damage. When i received my item, they were in a large box, a larger box that the items should have been. The item were loosely moving around in the box. This could have damaged the item during delivery and transport?
-
thanks guys...
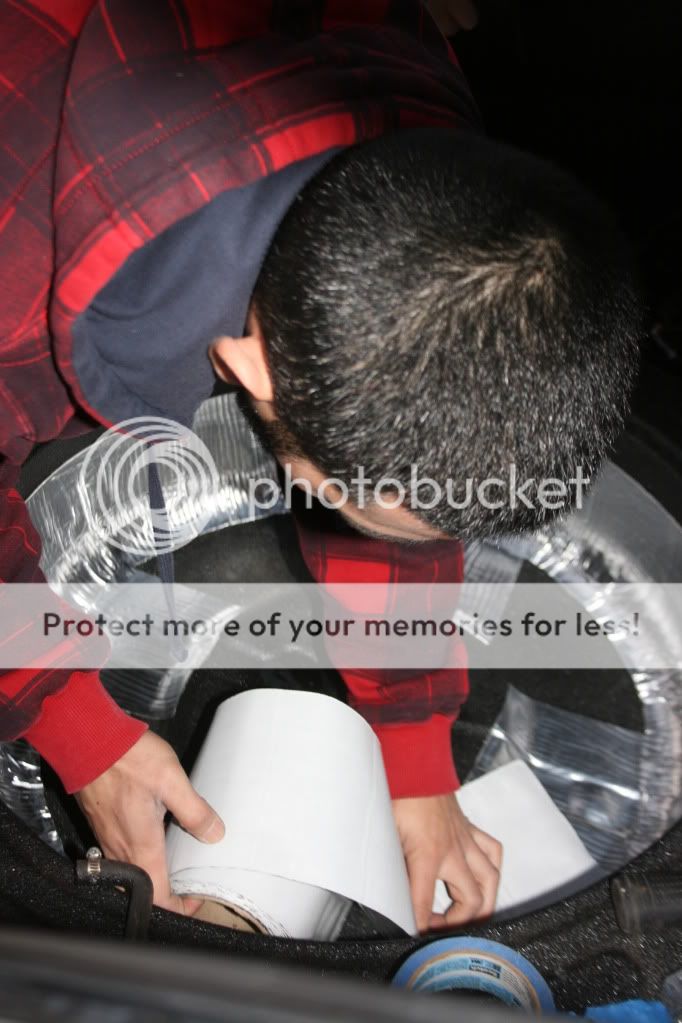
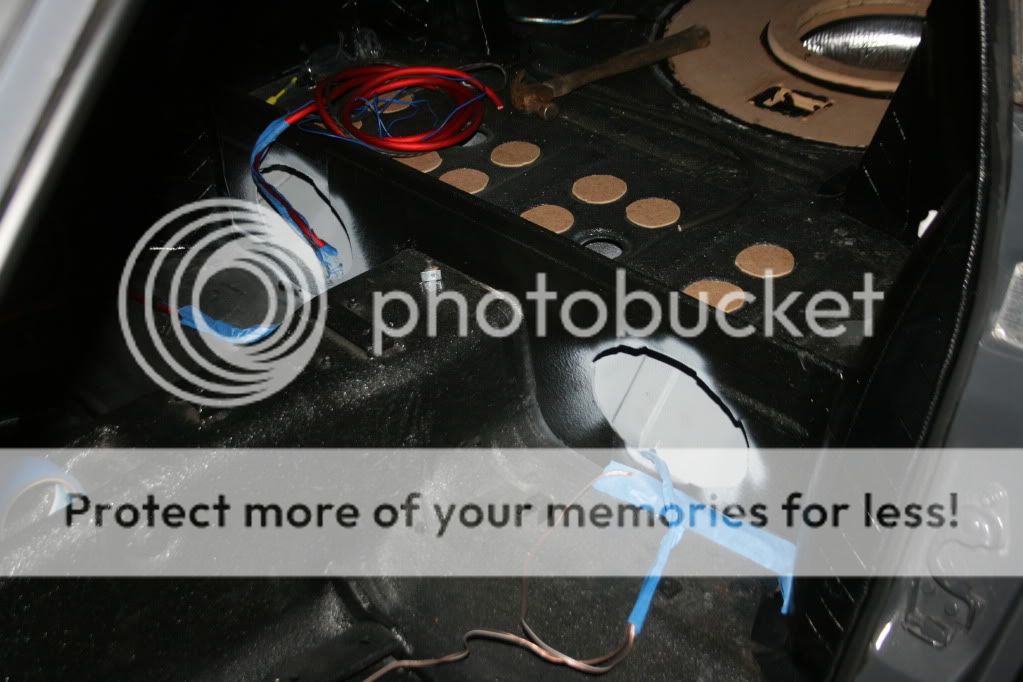
concerning the sub install, i placed "L" brackets to support the MDF board for the sub. I used self tapering screws to secure them in place. I used Loctite all purpose caulking and black silicone to make an air tight space. I made sure that adhesive caulking glued for 24 hours before placing the silicone to fill the gaps. So far so good!
and yes it is widow and roofing Butyl tape... Underneath i had my car lined with a light weight beding material for the interior when it was at the body shop, for added sound insulation.
oh yeah i also had to remove the center mount for the spare wheel to fit the sub also.
-
^yes sir i did... i used krylon wrinkle finish, let it fry for about 24 hrs and then sprayed an adhesion promoter for the vinyl paint... so far it seems to work really well.
-
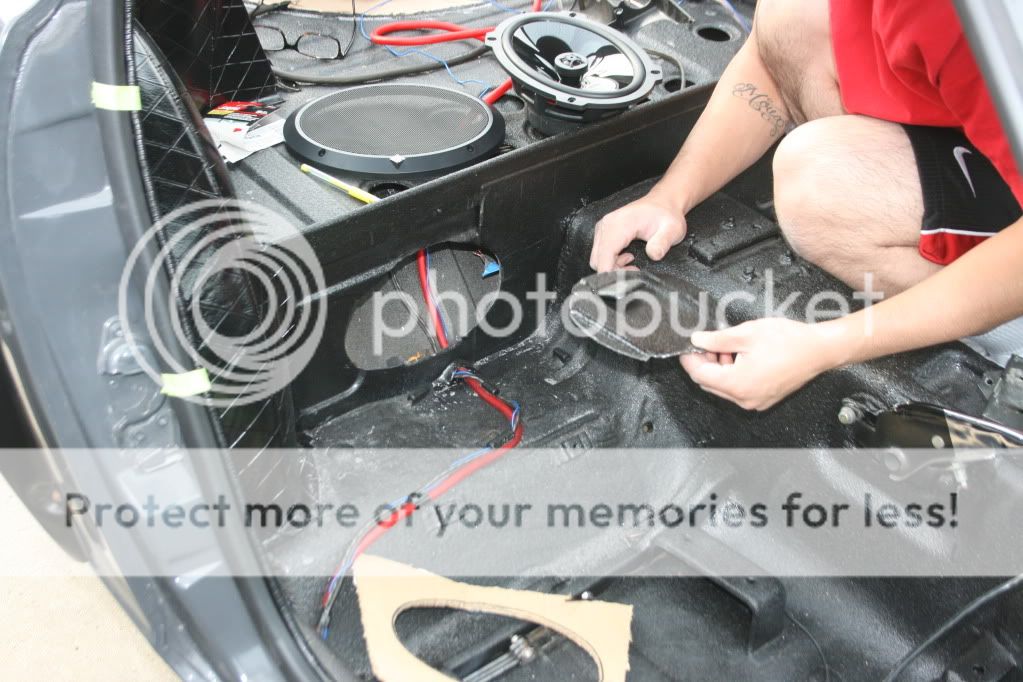
Just the like the title say, just wanted to share what me and a buddy are working on. For the past week we've been working on a custom enclosure for a 12 inch sub located in the spare wheel compartment. New 6x9in speaker locations, also utilizing the air vents on the dash to fit 3.5in speakers for a new look to the interior. Also during this past week i've been working on the install on my new gauge faces i got from speed hut. just wanted to share what i've been working on, i have to give a lot of credit to Hybridz for giving me some awesome ideas! thanks guys! enjoy the photos!
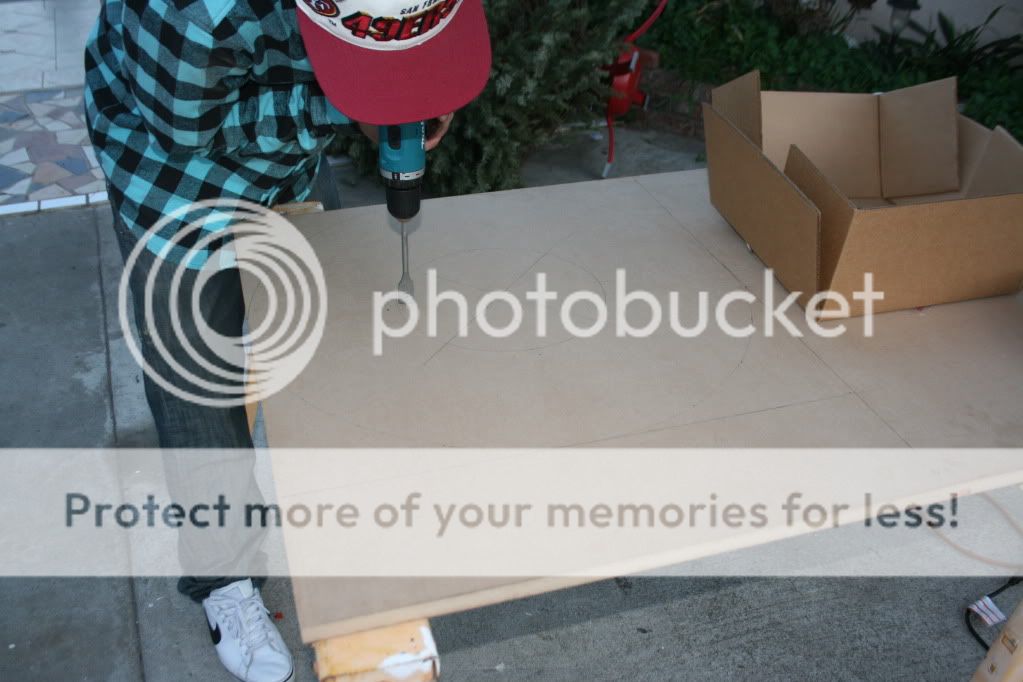
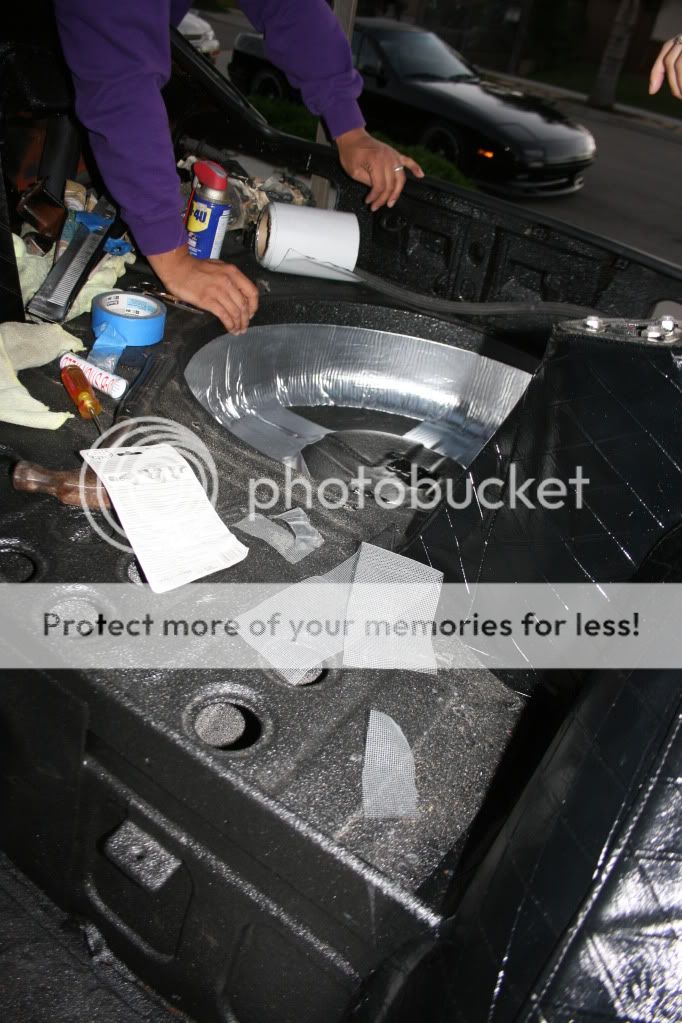
here is the template that we made to fit the enclosure for the sub in the spare wheel comparetment.
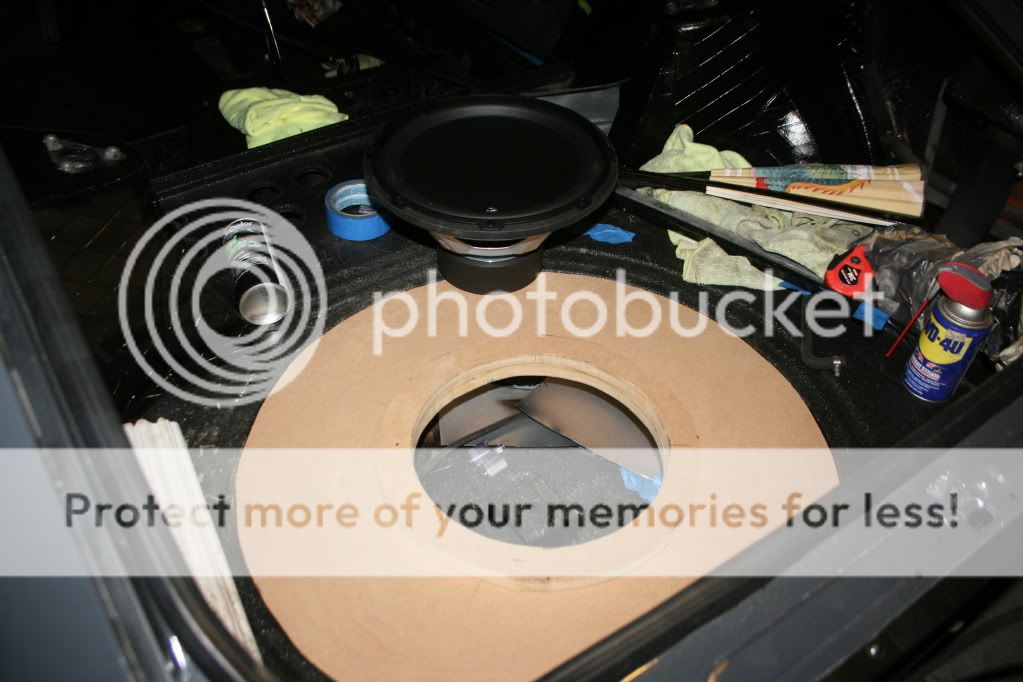
doing a nice test fit. nice and snug, as you can we made a bezel to lift the sub about another inch to get clearance.
placed where the amp would be, just to see how everything looked
my buddy laying some sound deadening material we got at home depot.
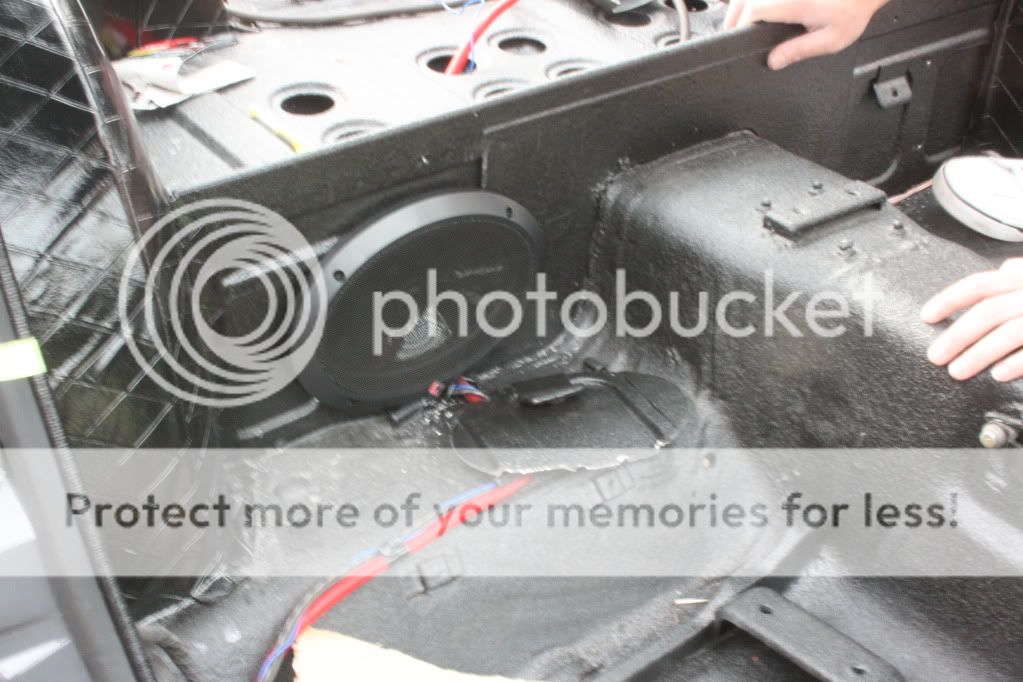
utilized the rear back tool compartments to place new 6x9 speakers
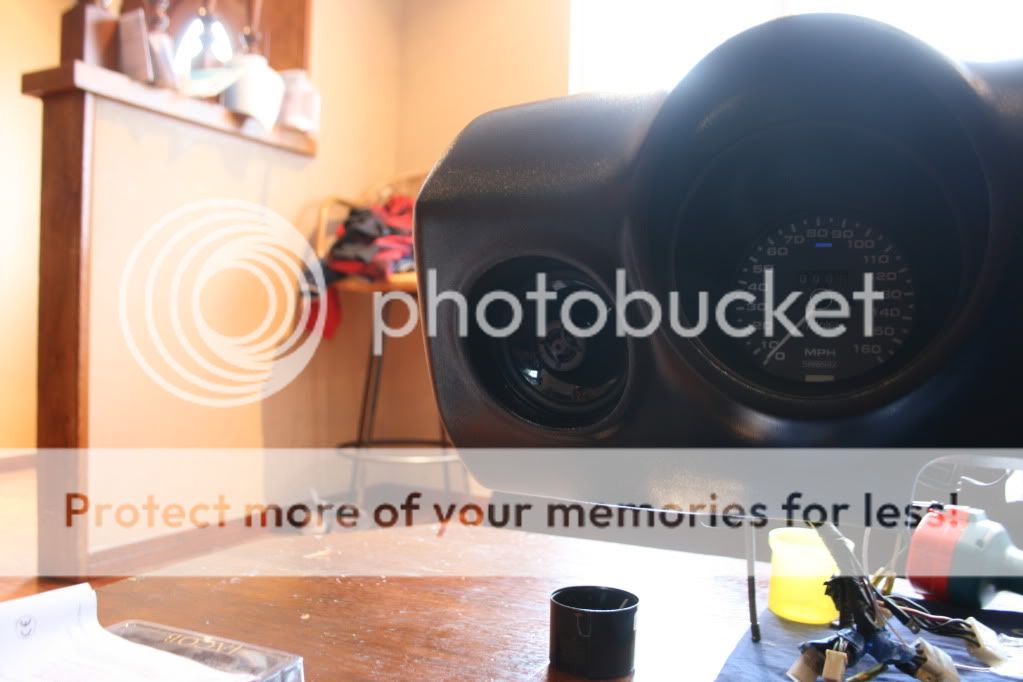
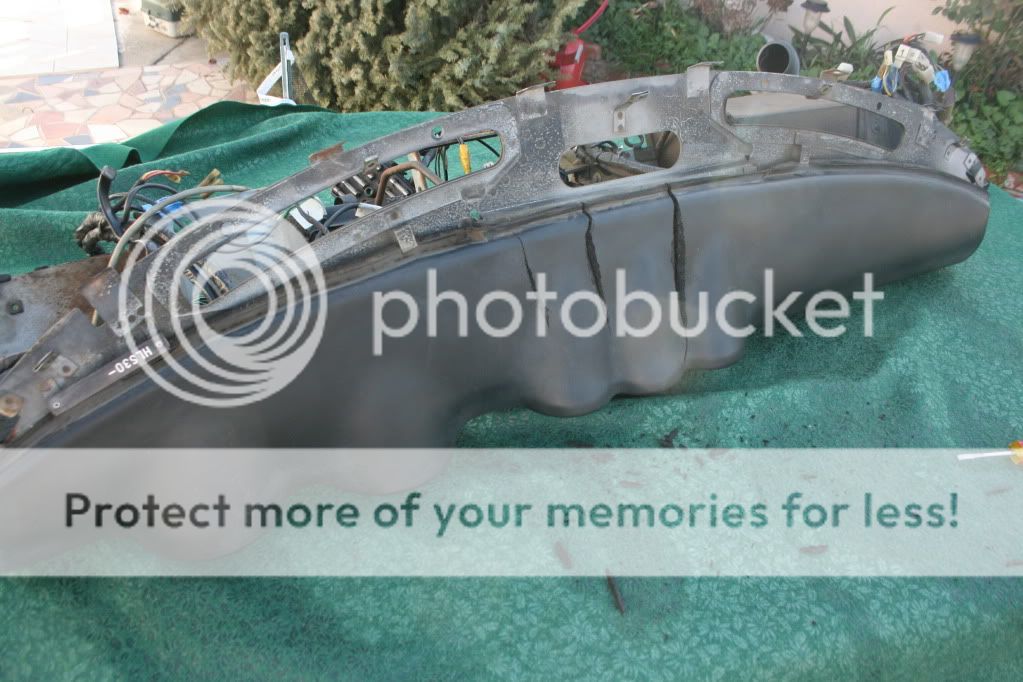
got to work on my dash... before
the result!
here is the gauge install i worked on! had to return one of the gauge faces due to defect.
hope your guys enjoyed!


interior re-do and custom subwoofer/speaker install! enjoy
in Interior
Posted
i used the thread that was posted while back in this section concerning dash repair.
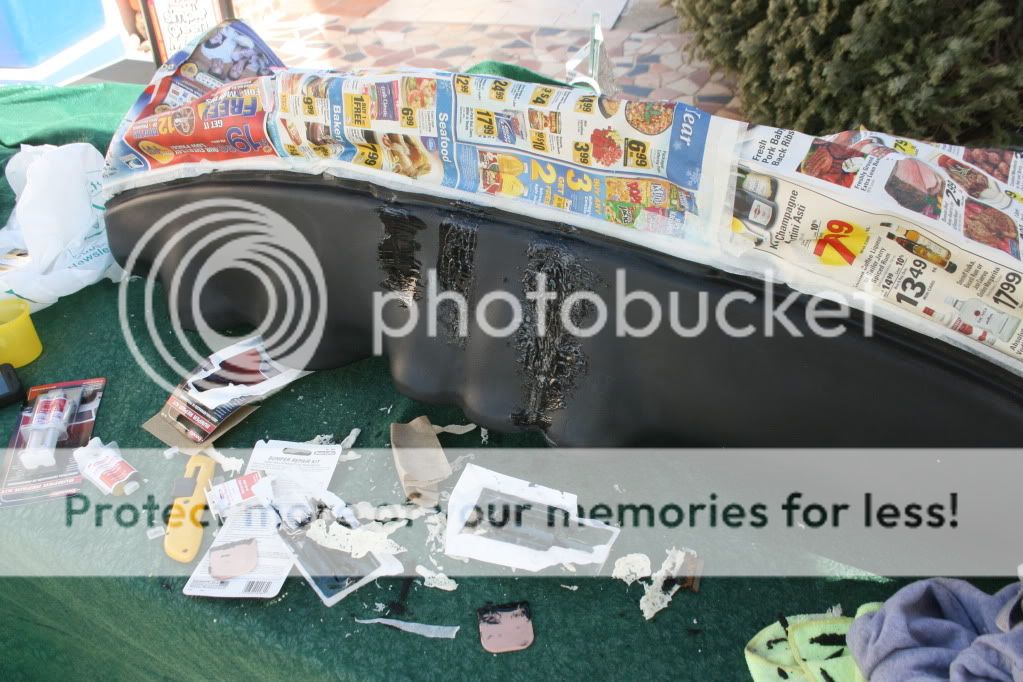
i first cut off the extra material that made the cracks not flush with the rest of the dash. I then used a type of hardening expanding foam to fill in the gaps. I believe the the product i used for that was called "hulk" which i got at home depot. Once the foam expanded and dried i shaved the excess and prepped for some flexible bumper repair. its made from Bondo, heat resistant and flexible.
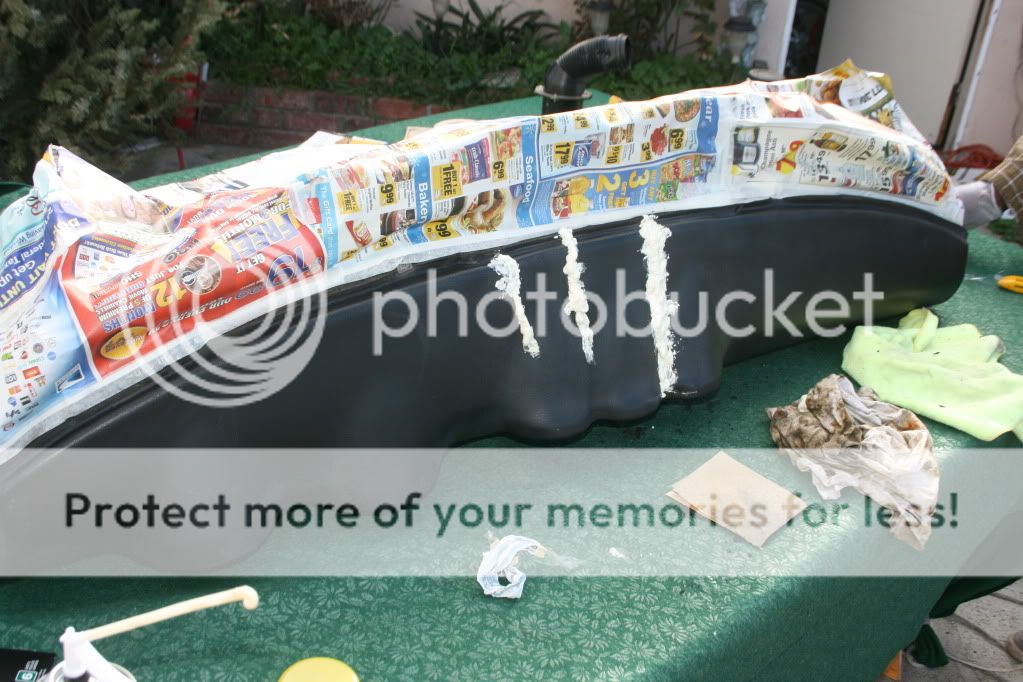
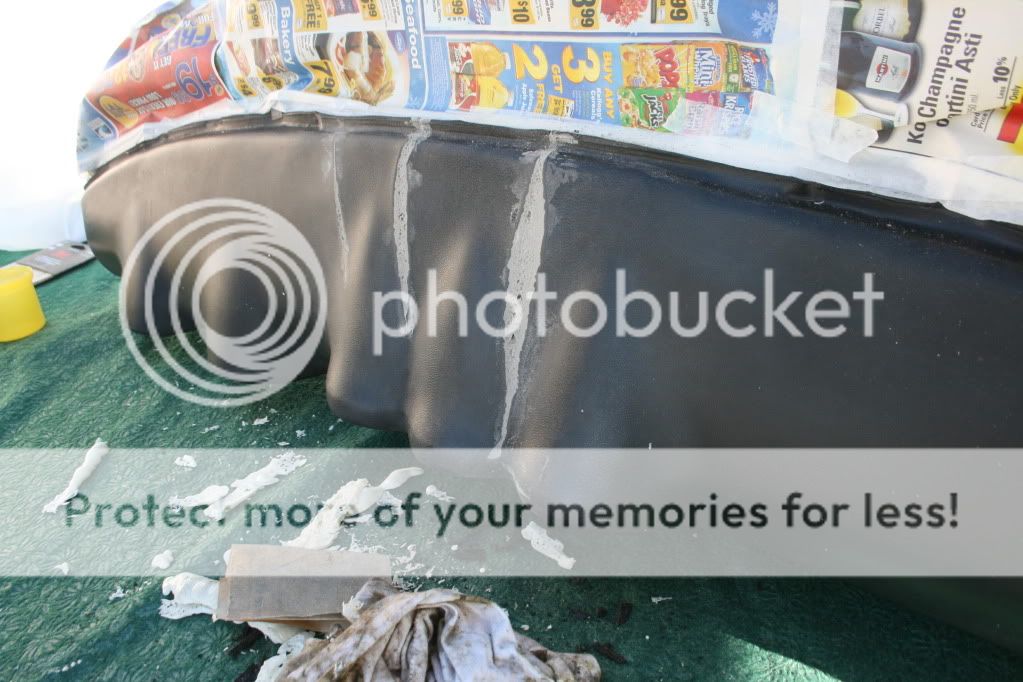
here is the picture of what it looked like. kinda expensive but it was the only stuff that was around here in Santa Barbara, used about two kit for my whole repair.
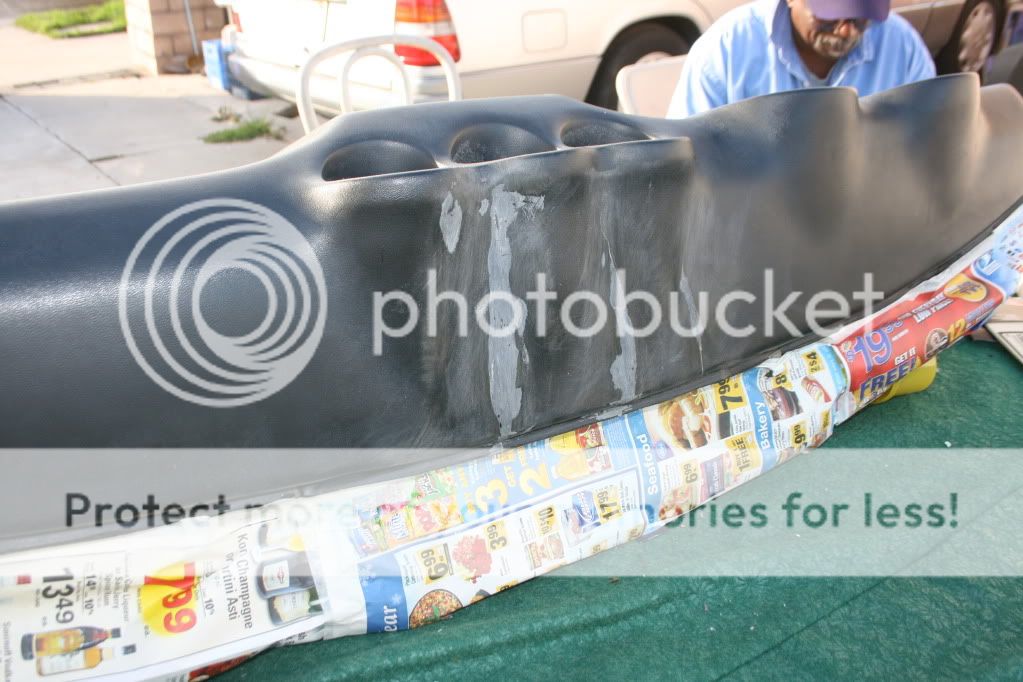
From that point i let the repair kit dry and started sanding. After a few hours of sanding, got it to the point where it was nice and smooth. I prepped for some wrinkle finish from Krylon and let dry for 24 hours.
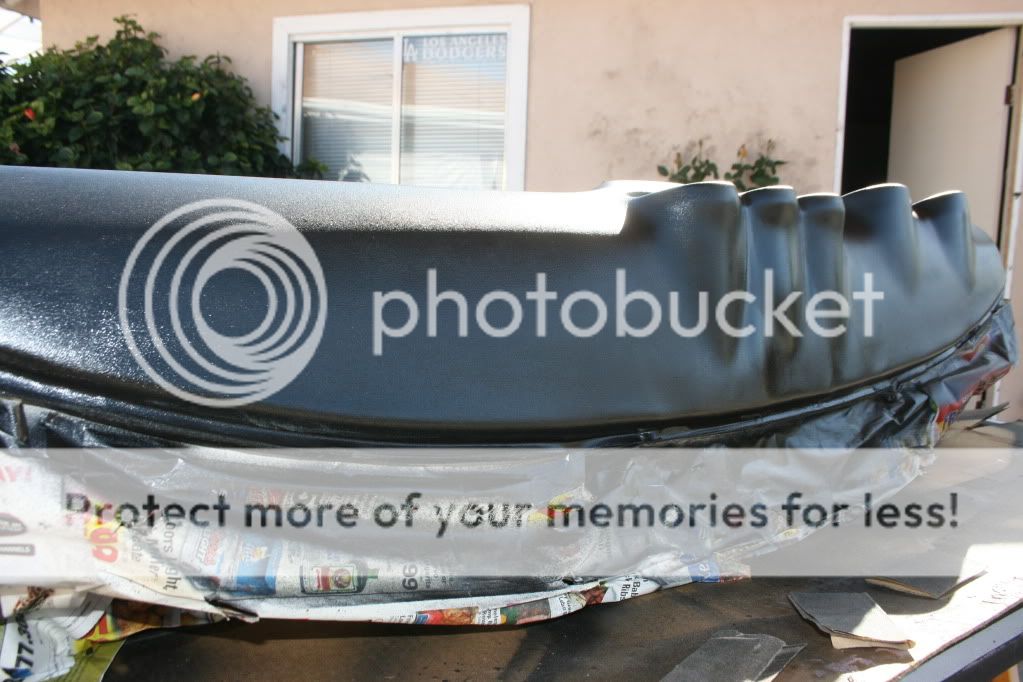
next day i prepped it for an adhesion promoter that came in a can, let it sit for about 20min and sprayed my last coat of Vinyl and Fabric paint... Duplicolor worked really well on the dash.
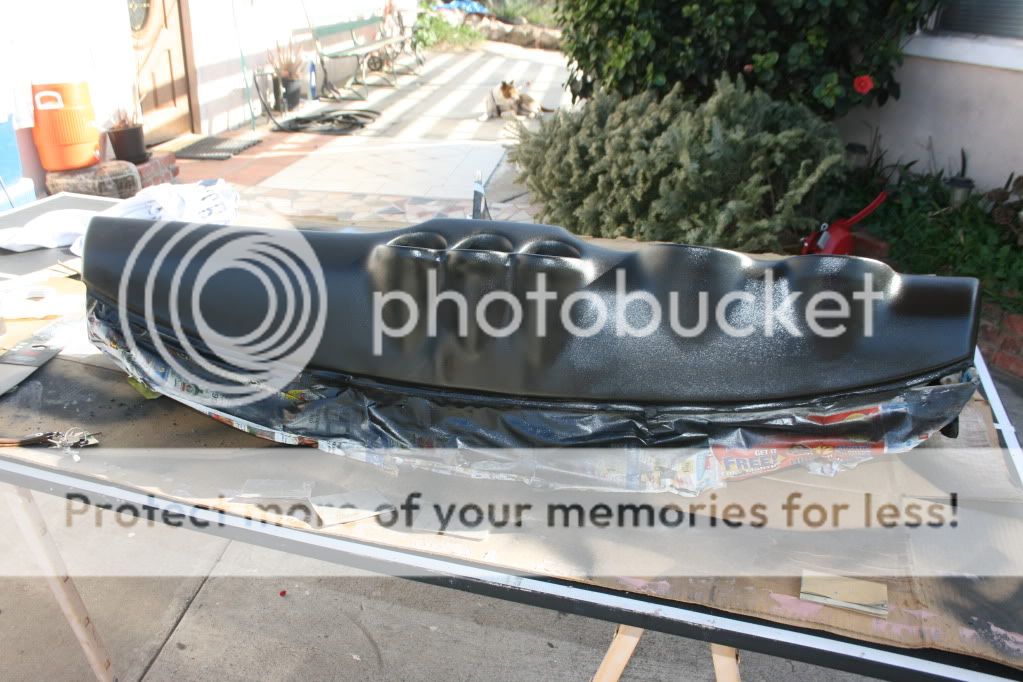
If you were to use bondo (auto body bondo) i think it would crack do to the heat within the compartment of the car. You want a material to go over the dash that is flexible under heat conditions to prevent craking of the dash. Auto Body Bondo would keep its place but the rest of the dash would pull away and create a new crack. Thats why i went with a bumber repait kit, its flexible under any condition and will stay in place.
hope that helps
oh yeah total cost was about 45 bucks, a dash repair is worth doing!!!