A to Z
-
Posts
1115 -
Joined
-
Last visited
-
Days Won
45
About A to Z

Recent Profile Visitors
9333 profile views


A to Z's Achievements
")


-
03-25-2026 ATLAS Z UPDATE: I got some of the fittings in I need for my crankcase pressure to catch can to intake setup. Also tall of my carbon fiber panels have been cut, final polishing on roof section then ready to ship to me and bond them on! Then make the borders shiny!

-
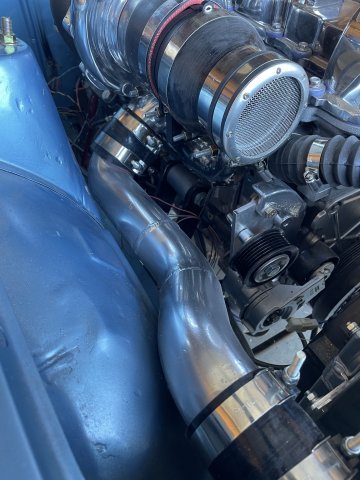
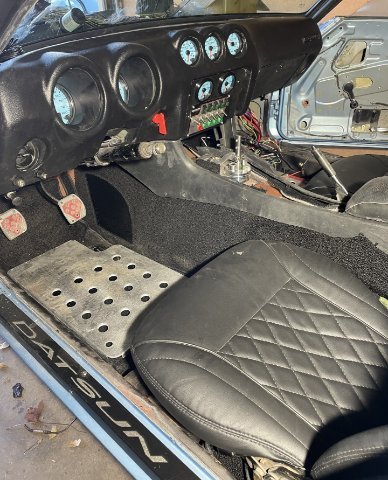
03-21-2026 ATLAS Z UPDATE: After painting the intercooler piping silver yesterday, I didn't think it had enough "pop" to it, so today I I put a couple of coats of chrome spray over the top....I like it much better. I was able to get all the intercooling pipes installed. Then I went ahead and vacuumed out the car, and installed the carpets from Newark Auto I got on eBay. some carpeted pieces I am not installing, as I will leave the vinyl 260Z pieces that the car has from the factory. I dropped in my heel plates from Skillard and then mounted my dashboard and then set the console in to see what modifications would be necessary. The pics of the shift knob on the steel show that I am ready to hold it to the shifter, mark it and then cut out a shifter so that the shift knob is right where I want it. PICS!
-
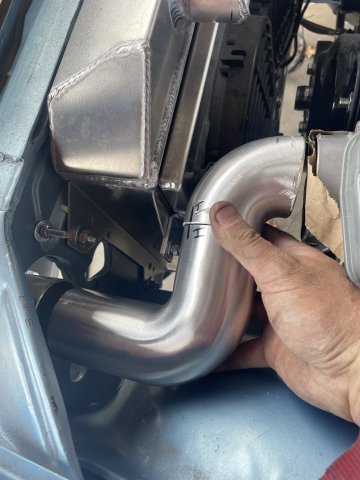
02-20-2026 ATLAS Z UPDATE: Today I got my intercooled pipes back from being welded up, and I decided to see how they would look painted. I used the Duplicolor silver engine block paint. I also was able to finally get the right length of hose for the lower radiator hookup. When time comes, I will tighten it up and assemble the intercooler piping! PICS.
-
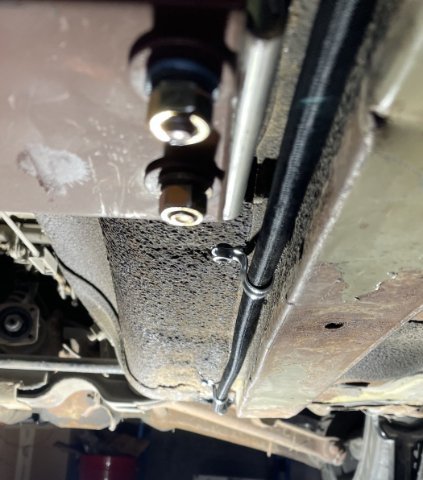
03-16-2026 ATLAS Z UPDATE: My welder showed up today and welded up my cross bracing and a few spots on the trans tunnel where it touches the firewall. While here, he pushed on the outside of the windshield as I pulled the rope and got the windshield in. Tried to get the hatch window in, but it wasn't wanting to do it. So, I will have someone help me with that rear one later. I went ahead and installed my mesh cover for the turbo.....I had to go down a size to clear the engine. I got started on putting the door frames back in and getting the windows working right, more to do on that. PICS:
-
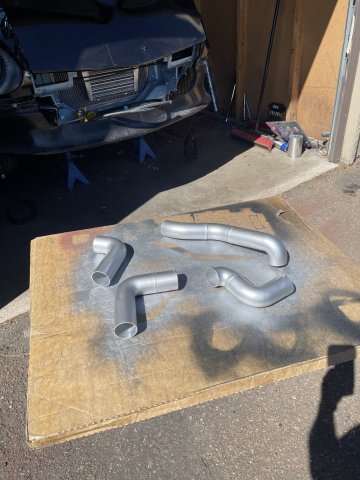
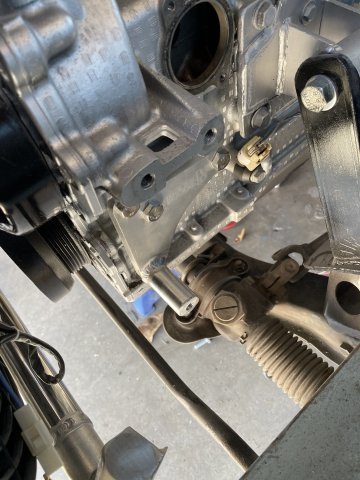
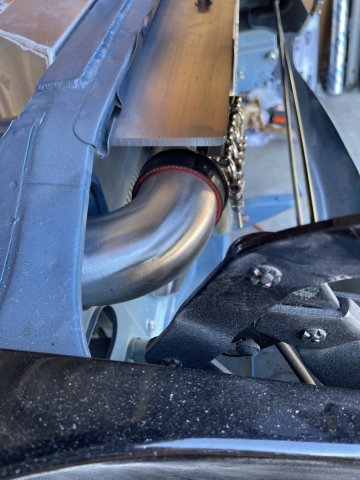
03-14-2026 ATLAS Z UPDATE: Since the intake was off, I went ahead and tackled the project I have been putting off. Modifying the Atlas Industries alternator bracket setup to work on my project. the mounting plate is 1/2" thick, and the alternator just wouldn't clear the frame rail, so after trying to cut the aluminum bracket down, I gave up and traced out the bracket on a piece of 1/4" thick steel and cut it out and drilled the holes out. I then used my Dremel to counter sink the holes so I could use the bolts and everything that came with the kit. I painted the steel bracket with silver engine block paint and the bottom bracket I had to trim 1/4" off of it. Then I was able to install he alternator (brand new AC Delco, nice unit), and then on to the fun part.....belt alignment. Using a straight edge, I had to keep working little by little shaving aluminum off the provided spacer and then lightly grinding the back of the nylon pulley and it turned out great! Then I went ahead and installed the fittings to use a 8AN line for the crankcase breather on the intake between cylinder runners 3 and 4, and I found that by leaving it black it is hidden and you cant see it, so that worked out better than I had planned. once the intake was tightened all down, it was time to finish the intercooler piping. The driver's side was VERY tight. I used two 90 degree sections and trial and error and cutting them down I was able to come up with a decent arrangement. so that piece, to be welded along with a frontal piece to weld a length on to eliminate some couplings were put together and I will take them to get them welded up then take all of the pipes to get powdercoated with the "polished aluminum" finish. I could get them polished.....but it would cost more......opinions? Lastly I put together the intake side, switching to a 4 inch coupling setup with the GM factory style MAF meter. it was 3.75 diameter, so I took some rubber strips that are adhesive on one side and ran a strip of it around the mating surface, and then I was able to tighten the hose perfect on it. I did have to use the 4 inch to 3 inch reducer on the end, as the engine has pieces sticking out that won't allow for 4" pe, etc. I have a 3" screen arriving soon which will be on the front and it should look pretty good. I will have to get inventive to add polished/chromed to it to get rid of too much black. maybe a very thin polished aluminum piece that wraps around it and can be fastened underneath? Anyway, here are some pics:
-
Paneled paint jobs that give inspiration:
-
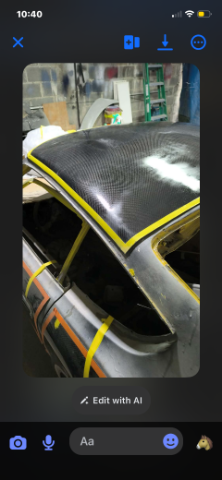
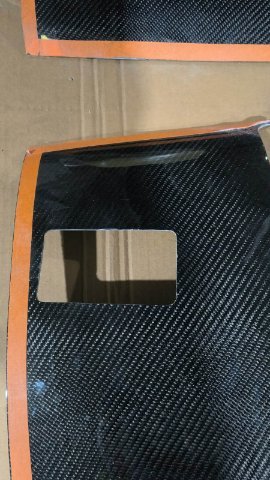
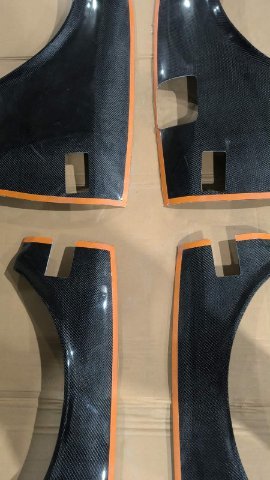
03-13-2026 ATLAS Z UPDATE. A week or two ago, I got with Joshua who runs JP fiber shop and advertises on most of the Z car pages a lot. He is located in the Dominican Republic and makes fiberglass and carbon fiber parts. He made my fiberglass smooth cowl piece. He began a project for me. To make a roof, partial quarters, doors and partial front fenders out of carbon fiber, but just a thin sin.....one that could be trimmed and bonded over existing steel. The idea I have is to make it look like a "Paneled" paint job. Since my 260Z is part american hot rod, part street rod, part sports car, and part Japanese classic, I have used ideas from each genre in this build. To achieve the paneled look, I have had John cut-in, 1 inch around the border of each panel, to include the front fender to door gap areas, and these outlines will be in the factory Nissan #305 light metallic blue, as the cut outs for the door handles and locks, parking lights on the front and rear corners, etc will also show the color "underneath". The body line is the cut off point for the side pieces. The front fenders will remain blue on the tops, with a black windshield frame and top, but a fiber panel is also going on the top. The job is almost completed and then he will mail it to me. I will bond it with the SEM 50 second panel bond epoxy. It is a love it or hate it deal. I fully expect most will hate it/think it looks stupid.....so there's no need to tell me, but I know you will. It is unique....the car becomes "art". here are some pics of the process of making hte panels and a few pics of random cars to show the paneled paint jobs that inspired this. I will be adding my gloss black flares OVER the carbon panels and a black roundel on each door with the number 7 cut out. Click below for video: Main Video 1.mp4
-
THANK YOU Sir. I am really enjoying this car.
-
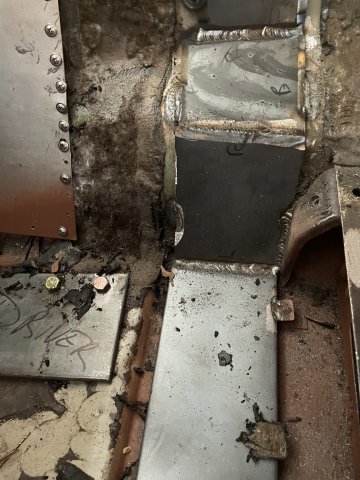
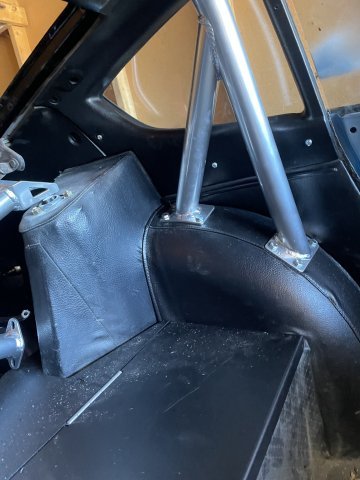
03-08-2026 ATLAS Z UPDATE: I got the rollbar in, a little interior painting around those areas, and then I cut the thick steel plates for my "cross bar" section going on the floor from the door jamb right in front of the seats, over the tunnel down the other side and to the other door jamb. Ready for the welder! I also did a little bit of interior parts painting, but the floor plates took quite a awhile. PICS:
-
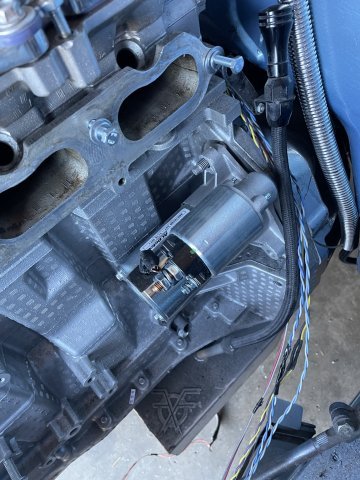
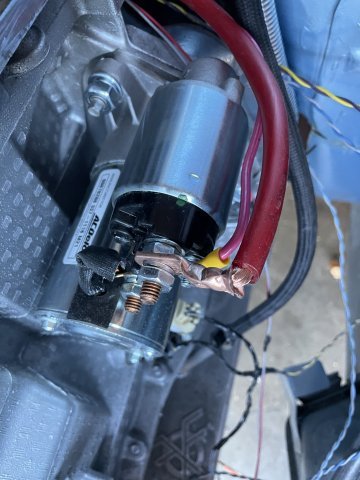
03-07-2026. ATLAS Z UPDATE: I started with the intercooler piping on the turbo side, and have it ready for welding, sanding and polishing. I got started on the intake side, but ran out of parts. Since I had to pull the intake, I enjoyed the easy access to that side of the engine, and installed my new AC Delco starter, and wired the solenoid and main batt power on it. I also was able to plug in the harness points on that side of the engine, install the crank position sensor and both knock sensors, all new GM stuff. Started on the alternator bracket modifying, much more on that to do. Feel got cold, called it a day. PICS
-
03-06-2026 ATLAZ Z UPDATE. Well, today was Seat Belt Day! When the tub and walls need a cleaning, you go ahead and grab your 52 year old belts, some pliers and duct tape to hold them extended and grab a heavy duty brush, some dish washing detergent and get to it! The water going down the drain was a dark brown soup. Dirt, dust, skin, body oils, everything. You know they never get cleaned. Once dry I will have to paint the housing with the SEM Interior paint, but they will be nice. Oh and the tub is all clean and disinfected with Pine Sol! PICS:
-
I agree, and once driving, it will be easy to stop at a muffler shop and put it up in the air and weld a plate or so on there. Well, it has gussets. I think a 4 inch wide, 1/4 thick plate front and back would be a good move. Thanks buddy.
-
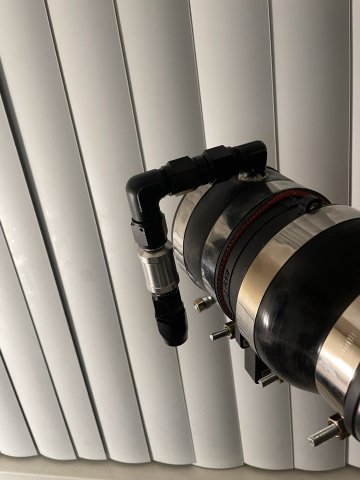
03-03-2026 ATLAS Z UPDATE: Fuel system. I got 90% of it done. I just need some parts to finish. Evil Energy equipment. I love this stuff.
-
-
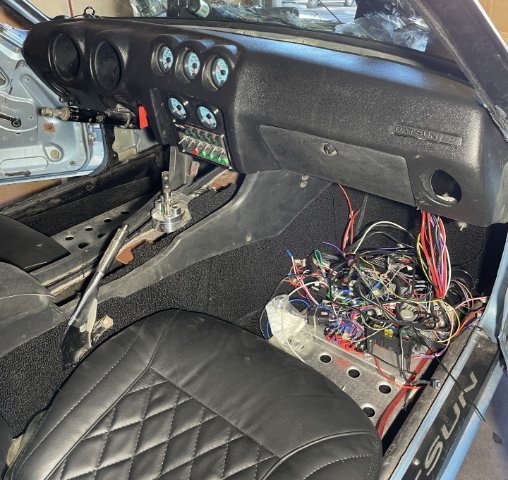
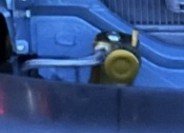
03-01-2026 ATLAS Z UPDATE: Switched gears a bit, I decided to take a break from the trans tunnel and work on small stuff that has been waiting. I pulled out the 4" X 4" aluminum L backet plate I had, and measured and cut it to fit in front of the radiator, then cut out a portion to keep from inhibiting air flow to the intercooler! After I got that installed, I grabbed all the oil fittings and oil lines, and ran the oil line frm the filter boss to port#4 to help oil the 4,5,6 cylinder main bearings a bit, ran the turbo supply line and turbo drain line and installed everything, about 95% done on that. Then I installed the oil catch can and line and will go back and tie the line up later and finish the loop on the top fitting for that. Yeah I know it's gold....it what he had left....I will probably paint it blue. Before calling it a day, I mounted my electrical panel plate to the passenger floor plate or as Skillard calls it a heel plate. Then I just plain old ran out of daylight. PICS