-
Posts
725 -
Joined
-
Last visited
-
Days Won
8
Content Type
Profiles
Forums
Blogs
Events
Gallery
Downloads
Store
Everything posted by FricFrac
-

The Ultimate HID Headlight Upgrade the easy way!
FricFrac replied to FricFrac's topic in Miscellaneous Tech
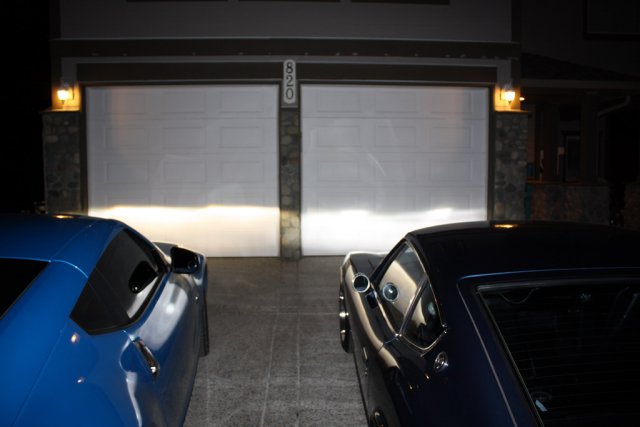
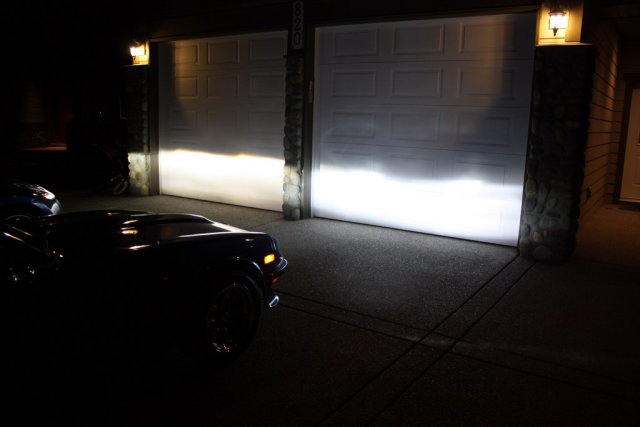
....and the high beam pics. Eveyone wants to check out the high beams ;P You can see the humps on the 370Z more drastically on high beams. -

The Ultimate HID Headlight Upgrade the easy way!
FricFrac replied to FricFrac's topic in Miscellaneous Tech
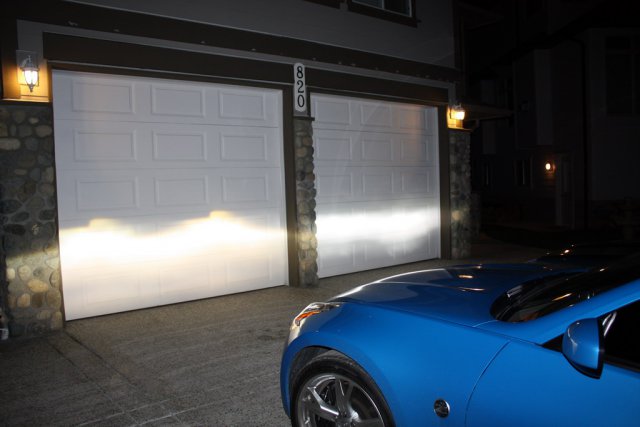
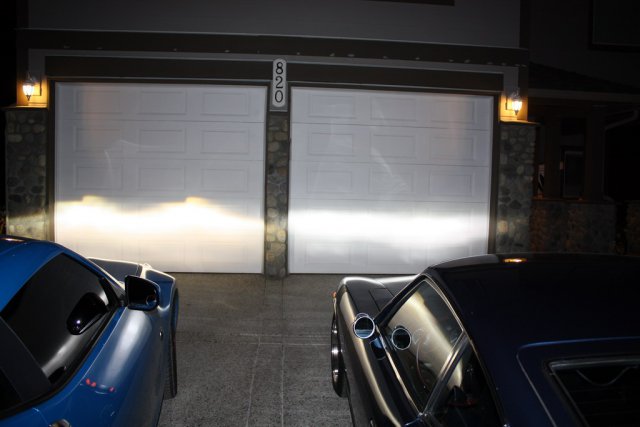
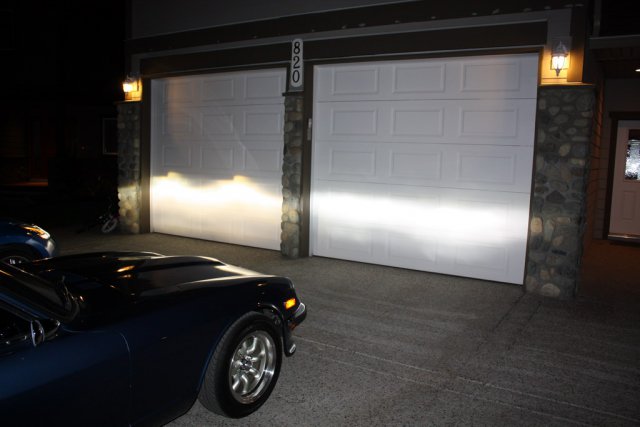
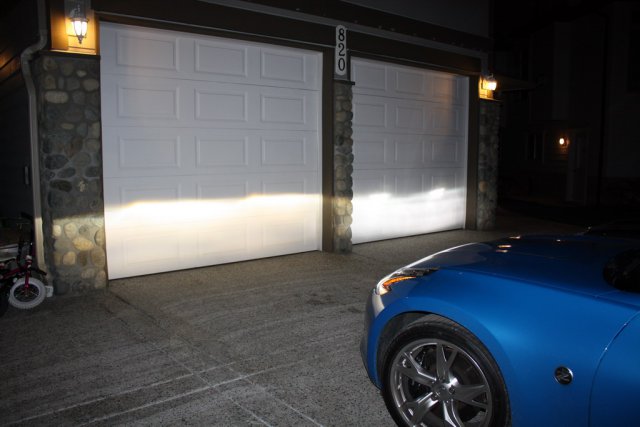
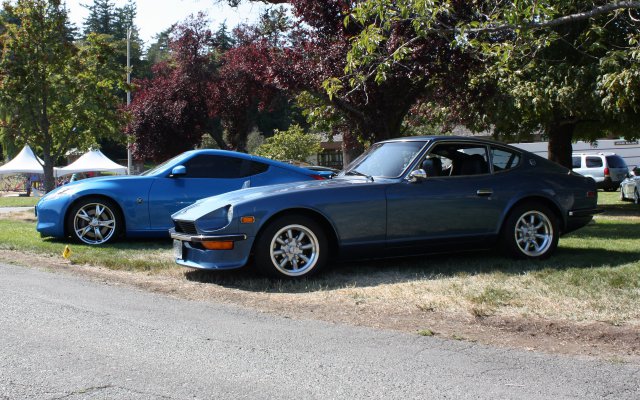
Wow I was really surprised when I did this little experiment/demo with the two cars. The car on the left is my 2009 370Z and the right is my 1972 240Z with the H4 HID conversion. The beam width/height/dispersion wasn't a surprise but I didn't think the "quality" of the lighting would be better on the 240Z. I like the whiter light from the 6000K bulbs in the 240Z compared to the 370Z. The 370Z also has a lot of discolouration at the cut off edge of the beam (you can see it better in real life - the flash washed it out a fair amount). I suspect this is actually from the defraction caused by the lens (a reflector doesn't cause colour seperation because it reflects not refracts). Its totaly minor but interesting to note. Also the beam has a very straight cut off on the 240Z compared to the two humps on the 370Z. The "humps" on the beam pattern on the 370Z are likely from the projector and/or the shape of the lens on the 370Z has a hump in it (you don't typically see it in pictures but seeing it first hand you'll notice it). The 240Z had two smaller humps as well but overall the beam was flatter. They are both very similar and by far the biggest difference is the colour of the bulbs. Beam width on both are well controlled. That's about all I had time for tonight for pictures but it gives you a good idea of the end results. Pictures are the same as seeing it in real life but it gives you a good idea of what's going on. Here are the low beam pics from a few angles. -

The Ultimate HID Headlight Upgrade the easy way!
FricFrac replied to FricFrac's topic in Miscellaneous Tech
A reflector in a H4 lens is a concave dish. That concave dish is how the light is focused. Its exactly the same principal of bending light waves as bending light waves with a lens. Its simple physics. As for the link for the VX-7HD lens well it doesn't exist - because there is no 7HD - I mistyped it - should be the VX-7RD lens ( http://www.visionxusa.com/halogen/sealedbeam/) sorry about that. -

The Ultimate HID Headlight Upgrade the easy way!
FricFrac replied to FricFrac's topic in Miscellaneous Tech
Hov100 sorry bout that's just wrong. HID's are very efficient - much more efficient than sealed beams or Halogens. What you might be thinking is that without projectors the beam from a bulb (and its any bulb - H4 halogen or HID) in a H4 replacement lens may scatter. The scatter has to do with the design of the reflector and its focal point, etc - nothing to do with not using a projector. You could have a cheap projector with a poorly designed focal point that would scatter as well. That is the reason why I think you get what you pay for with a cheap H4 lens. I personally used the Vision-X VX-7HD lens (and I mention that at the risk of being accused of being the president of the Vision-X company selling my wares...). The upper cut off on these are very sharp which helps to keep the light from blinding oncoming traffic. This is important because the way the Bi-Xenon bulb works in the H4 format is the bulb is a single arc that produces an intense light (while only consuming 35W of power). The bulb has a solenoid that pulls the bulb in our out to produce a high or low beam. On a conventional headlight system there is a more intense light on high beam. With the HID the beam is the same intensity but the beam height is controlled to keep the light out of the oncoming driver's vision. With the lens I used the beam height is tightly controlled as well as the beam spread (left to right) as well. As for your ability to change the buckets at 3 AM on the side of the road - good for you. Unfortunately my lifestyle doesn't provide me with the luxury of driving around at 3 AM. I'm busy taking care of kids who's parents are unable to care for them or helping friends move, etc. Once I do have some free time I'll take the buckets out for some pictures. Feeling? I mentioned several times in the original that the set up is a H4 lens and a HID H4 bulb kit. Most people are ready to jump on people for not searching - isn't not reading the post and asking an answered question the same offense? There is no mention of a "real" HID projector housing because one isn't used. A lens bends the light to a focal point as does a reflector. You are inferring that the reflector is inferior to a lens and that's simply not true - both provide a means of focusing the light. The lens I've used provides a sharp cut off for beam height and width protecting oncoming traffic from being blinded. Regardless a lens needs a reflector behind it anyhow to "project" the light otherwise that light traveling away from the lens is mostly absorbed making it less efficient. Again these are "just" high quality HID's in a quality H4 housing. Don't get me wrong - I don't have anything against projectors - I love how they look. I just don't want people to think that a reflector is inferior to a projector. The problem with a projector is that they are difficult/expensive to get and for me the best performance for the $$ was the H4 lens. There are tons of different ones and if you get yours locally if it doesn't work for you then you can take it back and try a different style. I would stay away from the cheap plastic lens/plastic reflector as they are typically cheaply made and poorly designed. I like where you are going on your posted thread because its hard to find a good projector if there isn't anything available at the local wreaking yard can be difficult. Its also hard to replicate something that someone else has done. Personally I'm looking to build a custom headlight for a friend's 240Z with projectors and a custom headlight bucket but finding parts are challenging. Keep up the good work on this front - I'm watching to see what happens with this. I don't mean to come across harshly but from most of the comments slagging the set up I'm a little defensive. I want to provide people with a repeatable quality set up that is as cost effective as I could find. I know there are a LOT of low quality HID kits out there and I was very happy with the one I found and I'm just passing that little tidbit of info along to my fellow Z car enthusiast. You can use whatever you want - its your money. There are also a lot of low quality H4 lenses out there as well. Shop locally if you don't know where to find a good one then you can take it back if it doesn't work out. I hate spending money on something that only works half way or not at all. For me this was money well spent and I feel I got the best bang for my buck with this set up. If you like the looks of a projector and doing a custom set up then go down that road and post your results but don't infer or assume that the projectors are superior. Until someone like Bens1088 can provide the end user with a quality product its difficult to reproduce some of the HID setups. This setup is easily reproduced and you know what you are paying, what you are getting out of it and the benefits that comes along with switching to HID. -

The Ultimate HID Headlight Upgrade the easy way!
FricFrac replied to FricFrac's topic in Miscellaneous Tech
Uh no I'm connected to fellow Z enthusiest who want to get the most out of their vehicles. I figured since HybridZ was about increasing the performance of our Z's this would be an appropriate place to post what I though was valuable information to the community. Personally I like to be able to see at night and I figured most other Z enthusiest would as well. Who cares if your car makes 750 WHP and you've got 6 piston 17" disk brakes if you can't see 50 feet in front of you.... The link I posted was the cheapest place I googled for the kit. As I mentioned in the thread I bought mine locally. I have absolutely no vested intrest in the company listed - just thought it was helpful to have a link. I bought mine at Lordco which is a local automotive parts company. The buckets are a PITA to get out but when I have some free time I'll take some pics to make it a little easier to follow. 99% of people should be able to follow the description as the only real mod is pulling the harness and grommet out of the bucket and drilling the bucket out for a new grommet so the water proof connectors fit. -
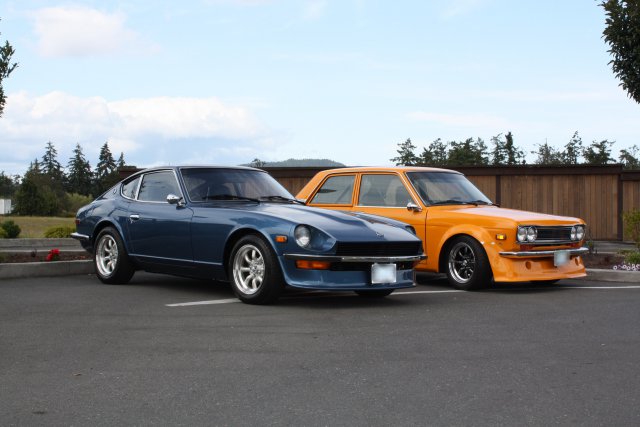
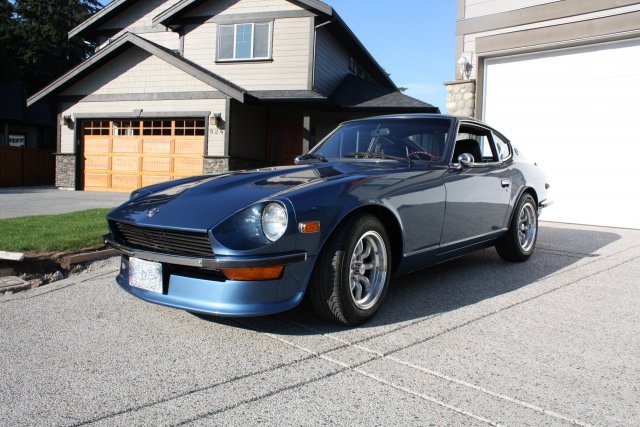
I've been thrilled with my '72 240Z in almost every regard. Although I have a 370Z and the technology is so much more advanced the 240Z is an amazing car. It’s raw and exciting to drive. Well it’s amazing except for the candle in front of the reflector that we call "headlights". The car is all but undriveable at night with the current set up. I did a little digging and found out (as is common knowledge of course) that the power is routed through the column switch and by the time it gets through the 38 year old wiring its not uncommon to get 10V or less at the light. I was going to do the relay conversion and I picked up a nice set of glass/aluminum lenses to convert to H4 as well. Then I started looking at HID conversion and all the mods people had done picking stuff up from the wreakers, etc. A lot of work and money for something that may not work in the end. One of the guys at the local auto parts dealer told me about the Alumina H4 HID kit. The ballast was designed by Phillips and the whole kit is very well made. I bought mine locally but I found the kit available here -> http://www.oxygensensor.net/alumina.html - the Alumina HID Part No. ALU-H4BXK6 Bi-Xenon Kit. The kit includes a wiring harness with what looks like a solid state relay so power is no longer routed through your column switch. You no longer need to build or purchase a relay system for the headlights as the HID kit includes that as well. The Bi-Xenon refers to system working as a high/low beam rather than a fixed beam (ala Xenon rather than Bi-Xenon). That should be taken into consideration when looking at the overall cost of the system. I believe a good relay kit alone is around $150. There are a few reasons you should consider this upgrade. 1. Safety - if you don't already have an upgraded lighting system you are greatly reducing your visibility at night. The stock system without any relay upgrades is all but useless. Upgraded sealed beams are usable but weak. H4 is decent but HID is far superior to even the H4 halogen system. 2. Electrical Draw - your stock 40A (or more if you are running this in a ZX) alternator is fairly taxed with the addition of any extra electrical systems as well as extra draw from old wiring and connectors. Adding a relay kit will reduce the strain on the system but sealed beams draw 50/60W and halogens are 55/65W or even 90/100W. Running HID draws only 35W - almost halving your power consumption. (Don't forget using LED lighting will also greatly reduce your current draw - my 10W festoon bulb is replaced with a 9 LED light I made up that draws 0.3W and is WAY brighter). The conversion is very straight forward but here are a few tips. - Remove the headlight buckets from the inside wheel wells (ok that design stinks but I'm sure that engineer is retired by now I took the stock harness that goes through the headlight bucket out. You can remove the pins from the connector with a small slotted screw driver, etc rather than cutting the wires off to get it through the grommet. - Once the headlight buckets and harness are removed I cut the old grommet out and used a stepped drill bit to drill the hole big enough to get a new grommet that was big enough to let the new H4 HID harness to pass through the headlight bucket. I didn't bother water proofing the bucket as the H4 lens and the H4 HID bulb/harness are water tight. The grommet is there to protect the cable passing through rather than water proofing. The new H4 HID bulb is placed in the new H4 Lens assembly and the H4 Lens assembly is mounted in the bucked just like the original sealed beams. Since there isn't much heat produced with the HID you might be able to get away with the cheap plastic lens/plastic reflector but I personally would rather use the glass/aluminum reflector which is the most robust. - After your lenses are mounted back in the vehicle you need to mount the ballast. The nice thing about this kit is the ballast is very small in comparison to the cheaper versions - you get what you pay for! I mounted mine in front of the radiator with Goop adhesive so they can be removed if needed - otherwise they are on permanently. All the cabling is tied back with zap straps to keep everything in place and neat and tidy. I used a small hole in the rad mount to mount the relay. One of the harnesses that plugged on the back of the sealed beam and ran through the headlight bucket that I had removed previously was plugged back into the wiring loom and the other end plugs directly into the new wiring harness for the H4 HID - simple! Only one is required and this is what controls the relay from the steering column switch but routes power directly from the battery which leads me to… - Power for the system. I'm an Electronics Eng so while I'm learning the mechanics I've got a good handle on the electronics. One of the first things I did was to build a star ground for the car for the engine bay (in general - not specifically for the HID conversion). I added a fuse panel in the engine bay with six circuits for additional upgrades. One of the circuits is for power to the HID kit. Power goes from the positive side of the battery through the fuse panel then to the wiring harness of the HID kit (that's the +12V side). The kit wiring harness has lug terminals to attach ground nearby each ballast to the body for ground. I found an appropriate grounding point on the chassis but I also ran two ground wires directly from the star ground point to each of these body grounding points with a heavy 10 gauge wire. Overkill but I don't have to worry about grounding issues. That's really all it takes to bring your lighting up to the same technology as a new car. Now my 240Z is just as enjoyable to drive at night as it is during the day. Not only that but I'm also reducing the strain on my old wiring system and my column switch and alternator. Win/Win!
-

From scratch rewiring, Megasquirt/Lights/Everything
FricFrac replied to HoustonZ's topic in Ignition and Electrical
Personally I chop off the insulator on the crimp on connectors and solder them - that way water can't wick up the wire. I also use a piece of heat shrink with the hot melt glue or meltable inner jacket to make it water tight. If you are putting all this effort into building the system its cheap insurance to protect it. -
I was looking into this - my friend has a double din stereo system that is basically a carputer running Linux with an audio amp, touch screen, input for backup camera, gps, etc for $400.... seems like the cheapest solution....
-
UV is likely the main one - welding area or tanning booth are both good sources.
-
I'm converting most of the lighting on my car to LEDs and using the stock bulb sockets so everything can be put back to its original condition. There is one very important thing to note about LED lighting and why I'm doing my conversion. The power used by LEDs is very low in comparison to a normal incandescent bulb and there is no plastic melting/discolouring heat generated. For example I just replaced the 10W festoon bulb above the center console (the one with the hood and push button on the 240Z) with a row of 9 white LEDs. The light is very very slightly blue rather than the very yellow original bulb. The light is much brighter but more importantly rather than running at 10W its now 1/3W. This is very important for the old electrical systems in our cars esp. the connectors and column switches. Running LEDs in the interior and exterior greatly reduces the degredation of the electrical system including the alternator. If you need to adjust the intensity of the bulbs there are chips available that will do PWM (best way to dim an LED) and can use the stock dimmer as an input. You can't adjust the intensity with the voltage since an LED needs to get to a certain voltage to turn on and will not rise above that voltage (which is why you need to drop the rest of the voltage across a resistor or use a constant current source which is fairly easy to build with an LM317). LEDs can also be dimmed by adjusting the current through them but they are not linear. 20mA for most will be full brightness but 10mA will be much more than half the apparent brightness - say around 70%. There are a few companies that have drop in LEDs that go right in the socket. A wise investment not just in a bulb that (typically) doesn't burn out but in preventing wear and tear on your electrical system by greatly reducing power demands.
-

Looking for appraisal info for a restored 240Z
FricFrac replied to FricFrac's topic in Non Tech Board
Not quite sure what you mean. The way its restored now is the way it was. It hasn't changed - the old modified parts from 1972 are the same parts that are on it now. Regardless has anyone bought or sold a restored car? -

Looking for appraisal info for a restored 240Z
FricFrac replied to FricFrac's topic in Non Tech Board
-

Looking for appraisal info for a restored 240Z
FricFrac replied to FricFrac's topic in Non Tech Board
-

Looking for appraisal info for a restored 240Z
FricFrac replied to FricFrac's topic in Non Tech Board
Just wondering if the pictures showed up or not.... -

Looking for appraisal info for a restored 240Z
FricFrac replied to FricFrac's topic in Non Tech Board
I found out if you have the car appraised you don't need to do a declaired value and pay the $40 fee plus $5 per $1000 on the vehicle..... How's your project coming along? -

Looking for appraisal info for a restored 240Z
FricFrac replied to FricFrac's topic in Non Tech Board
-
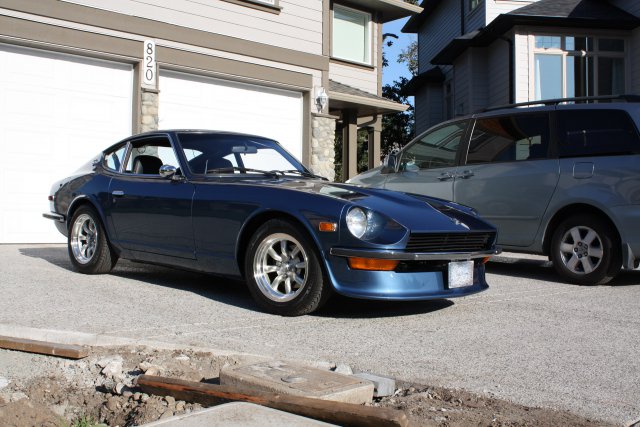
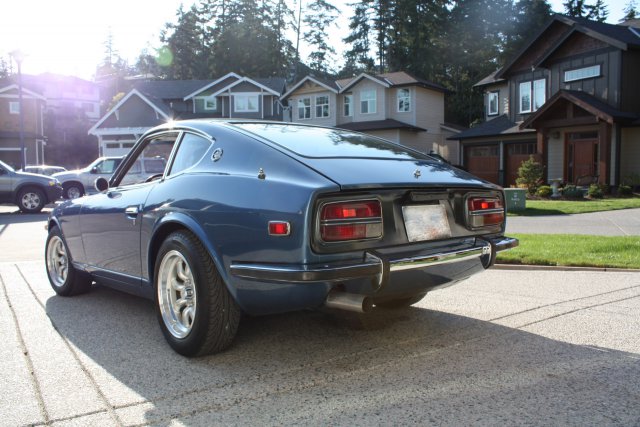
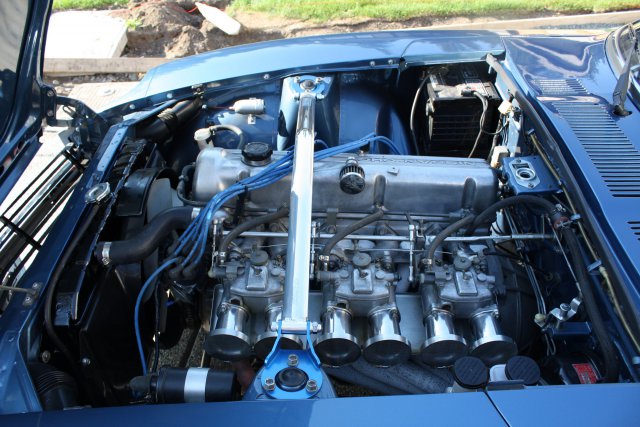
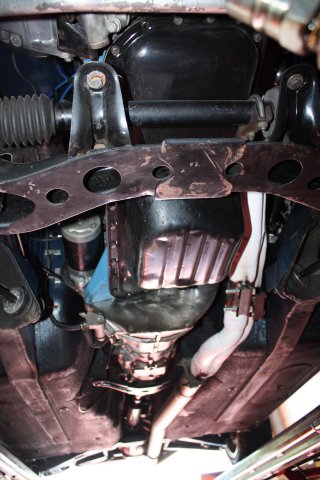
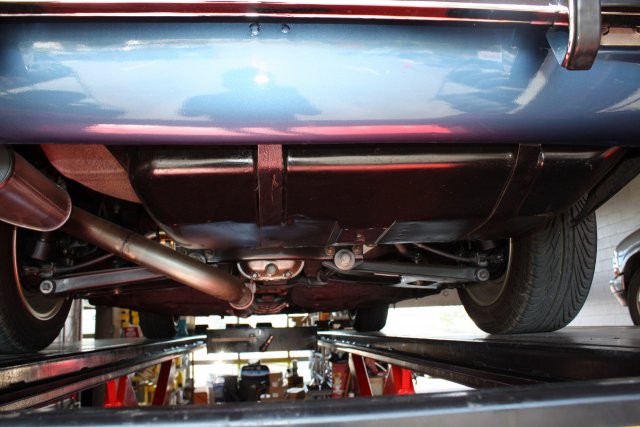
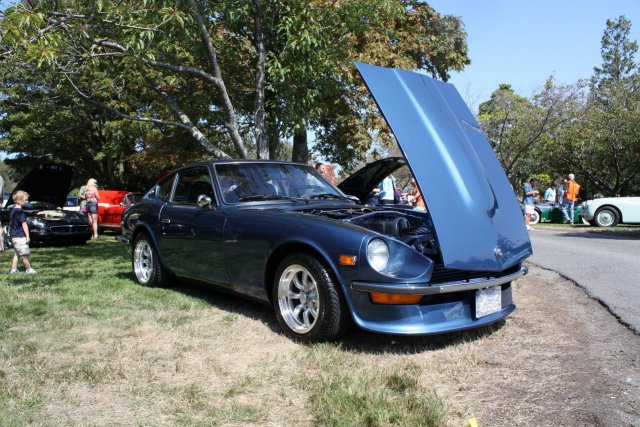
Before the flaming ensues I have searched on this topic and come up with very little info. If you are privy to this info being somewhere on the forums, etc please be helpful and point me in the right direction instead of telling me to use the search function.... I have recently purchased 1972 240Z that has been restored from the ground up. It is, however, somewhat unique. Regardless of it being unique I'm having a hard time tracking down numbers for a declaired value for insurance purposes. I have had the car into an Appraiser but I know the majority of his research will be on E-Bay and I suspect it won't be an accurate estimate to the value of the vehicle. Has anyone had a ground up restored 240Z appraised and if so did you do any of the homework yourself? What values did you come up with? Did anyone use the cost of a restored 240Z when Nissan was doing the Vintage Z restoration project in 1996ish? There are a few unique items on the car as well which I'm unsure if they increase or decrease the value of the car. The car was one of six bought to be built to race - two were completed before an unfortunate accident occured and two of the drivers died in a plane crash. From what I can tell the car was only raced as pace cars in a Memorial race for the two fallen racers (the restored car still has a plaque commemerating the race). The car was modified in 1972 with triple Mikuni carbs, ported and polished, cam, header/exhaust, 5 speed and LSD. From what I've been told by others is the tranny and LSD are made from Unobtainium. I'll have our Z car expert take a look at the tranny to see if its a comp tranny or one from a Fairlady. I suspect since the LSD is a comp part the tranny likely is as well but I'm just guessing until we get the expert to take a look. The car has been restored from the bare sheet metal (which was in amazing shape when stripped down) with great attention to detail. All the engine parts were measured when the engine was machined and rebuilt (new valves, etc). All of the braking system is new as well as many other parts such as the rubbers, etc. The car was restored to its original racing build. I know there was a local car with a partial restoration done that sold for $18.5K and a ground up resto that was $23K. Are these numbers in the ball park? Would the different parts make the car more/less valuable? I realize that there is a ton of variables to value the vehicle but are there any real life examples of what a car like this would be worth? I've been hunting for numbers for 240Zs that have had ground up restorations that have sold but I haven't found anything yet. Anyhow, thanks for your time. I do appreciate any help on this one as I would like to make sure this car is covered properly. The only info I really found on the site was the nightmares people have had getting insurance to cover the cost of some of these cars. I hope I never have to worry about insurance and I will be taking the best possible care of this car that I can. I've been a Z car enthusiest since I was a little kid and I realize how lucky I am to have such a beast. Thanks again.
-
I redid the entire interior of my '81 280ZXGL with the SEM stuff and it works great. I even used it on the leather seats and its pretty amazing stuff. Definately recomend it.

