Bartman
-
Posts
2048 -
Joined
-
Last visited
-
Days Won
3
Content Type
Profiles
Forums
Blogs
Events
Gallery
Downloads
Store
Everything posted by Bartman
-
From the album: Autism Awareness 570Z
-
Broken Extended Wheel Studs
Bartman replied to Bartman's topic in Brakes, Wheels, Suspension and Chassis
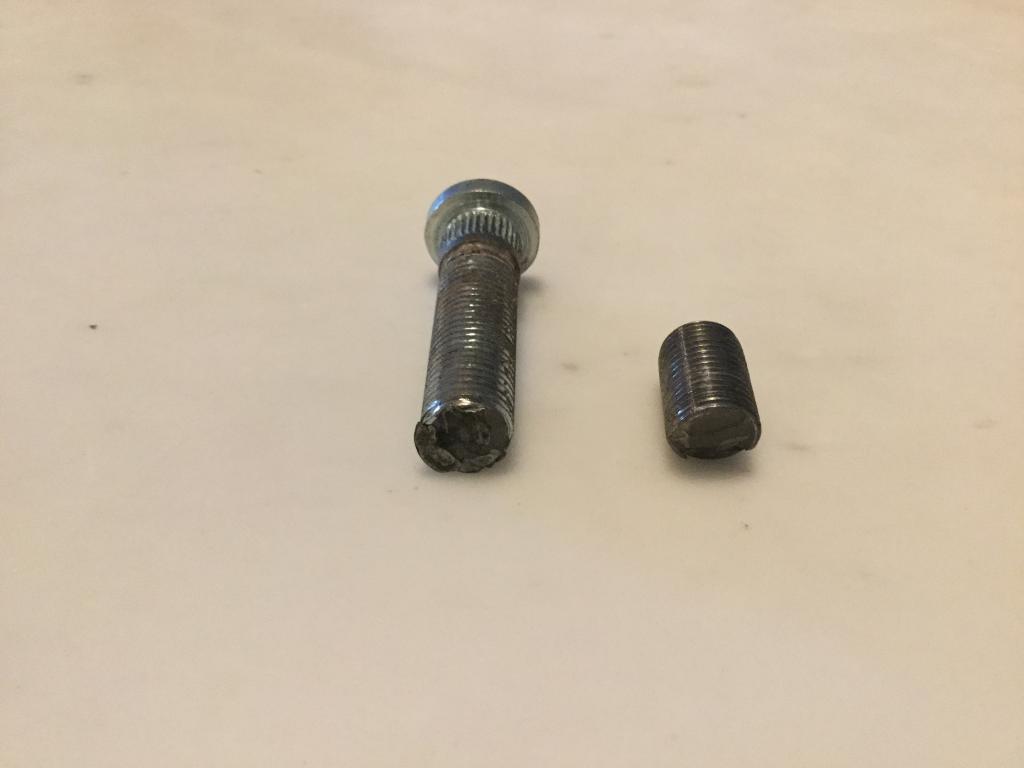
I'm replacing all my rear studs with ARP. I agree torque settings are specific to the strength of the studs themselves and just need to determine the best torque based on these studs. According to ARP it looks like they support at least 98 ft/lbs http://arpinstructions.com/generaltorque.html with the caveat of using their fastener lubricant. 90 may have been to high for Ichiba, but maybe not for ARP. -
Broken Extended Wheel Studs
Bartman replied to Bartman's topic in Brakes, Wheels, Suspension and Chassis
I don't use FSM spec's as my wheels are much larger than stock (275/35 18). I've done some investigation on wheel stud torque values, and as expected there are different values from different sources. It looks like SAE recommendation for 12mm wheel studs is 85 ft/lbs plus or minus 5. -
Broken Extended Wheel Studs
Bartman replied to Bartman's topic in Brakes, Wheels, Suspension and Chassis
I agree the metallurgy looks bad, and will likely replace all my studs with ARP. I do all my own work using 5/8" spacers, and tighten by hand with a torque wrench at 90#. Is this too high? -
I've been using Ichiba extended wheel studs since 2007. To my surprise one broke as I was reinstalling my wheels after purchasing new tires. These were installed on the back of my 73 240Z and I was running 18x9.5 wheels. It wasn't even close to proper torque settings and now I'm concerned about the safety of the remaining studs. Anyone else have wheel stud failures?

-
Just returning the favor (moonbeam kit)
-
Anyone here running Stanceparts air cups? Seems like a good idea to allow a low ride height and still have the ability to raise the car for obstacles, towing, etc. There is a video of this kit installed on a 240Z at the product website stanceparts.com. You normally ride without any air in the cups, so they claim it doesn't affect the handling of the car at all.
-
Carbon Signal JG Spec Moonbeam kit ( 8/100)
Bartman replied to texis30O's topic in Body Kits & Paint
Following. I've already contacted them for a kit for my car as well. -
Turbo Meister's TT SBC 240 Z
Bartman replied to Turbo Meister's topic in S30 Series - 240z, 260z, 280z
Wow, glad you are okay. The Z looks like it will be better than ever! -
I just ordered from the eBay account referenced in the original post. Hopefully it works well for me as well.
-
Item received!
-
that's the piece I need. I'll send you a PM
-
I need the washer that goes on the Hazard Switch shaft. It provides the backing for the spring loaded knob to be installed. See the attached pic.
-
I just say your post from the other site, I guess I forgot to sign up for email updates. I am ordering the rings now.
-
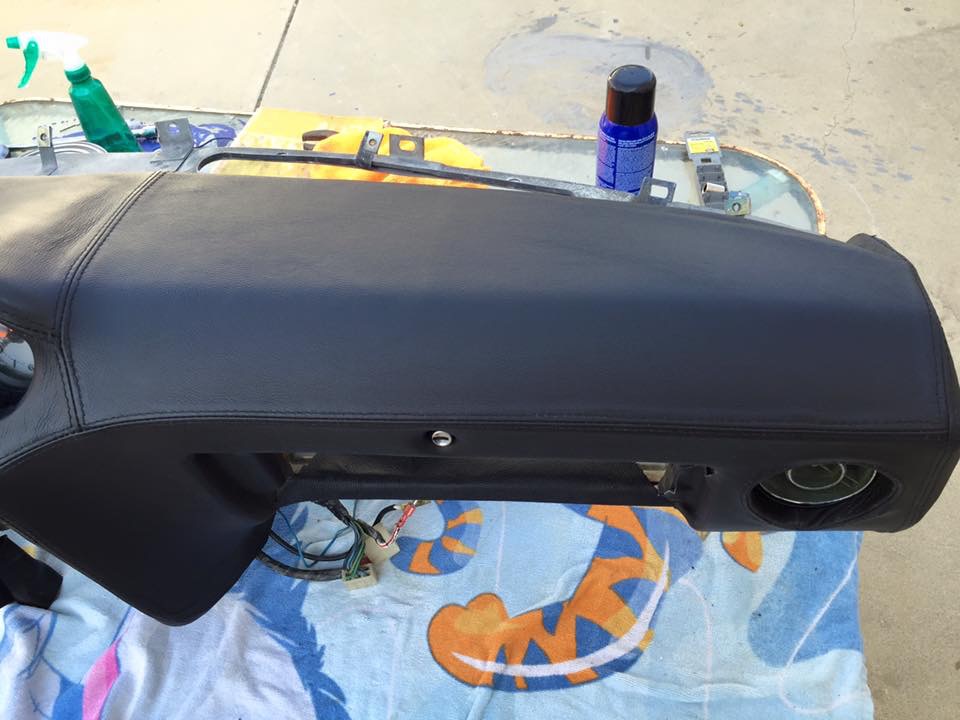
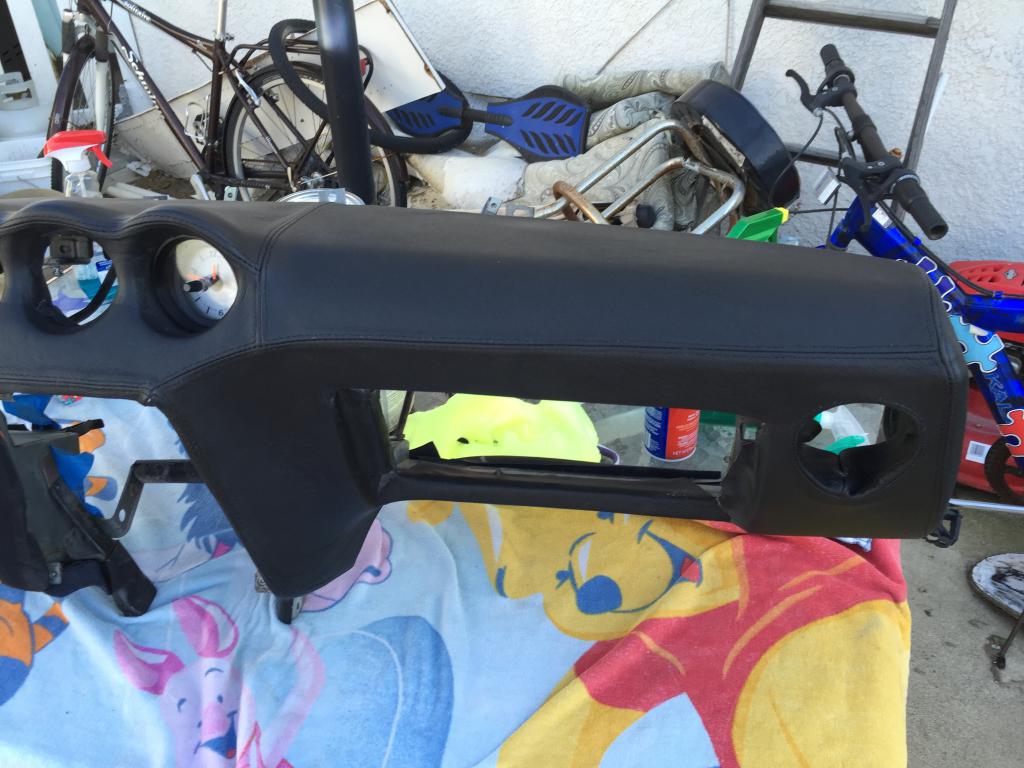
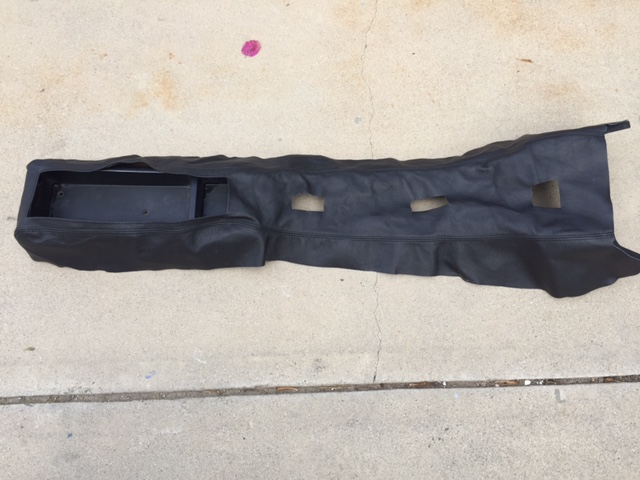
Almost done now. The seam wasn't straight above the dash, so I got that to look a little better now. Cut holes for and installed glovebox mechanism and hazard switch, and installed vents. A little more trimming, conditioning, and massaging and it will be ready for reinstallation.
-
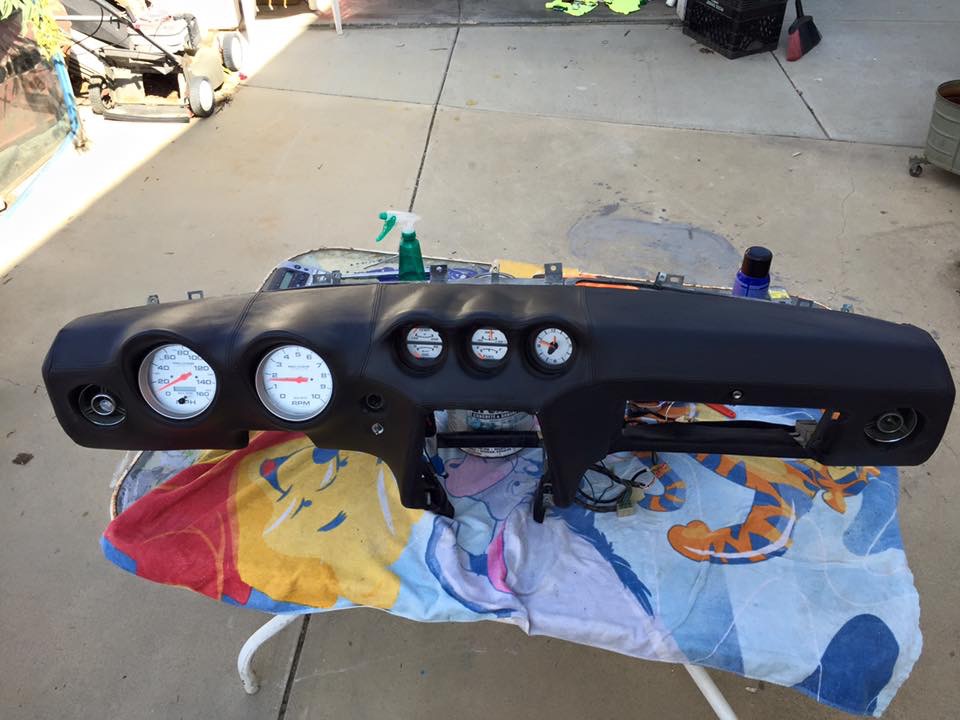
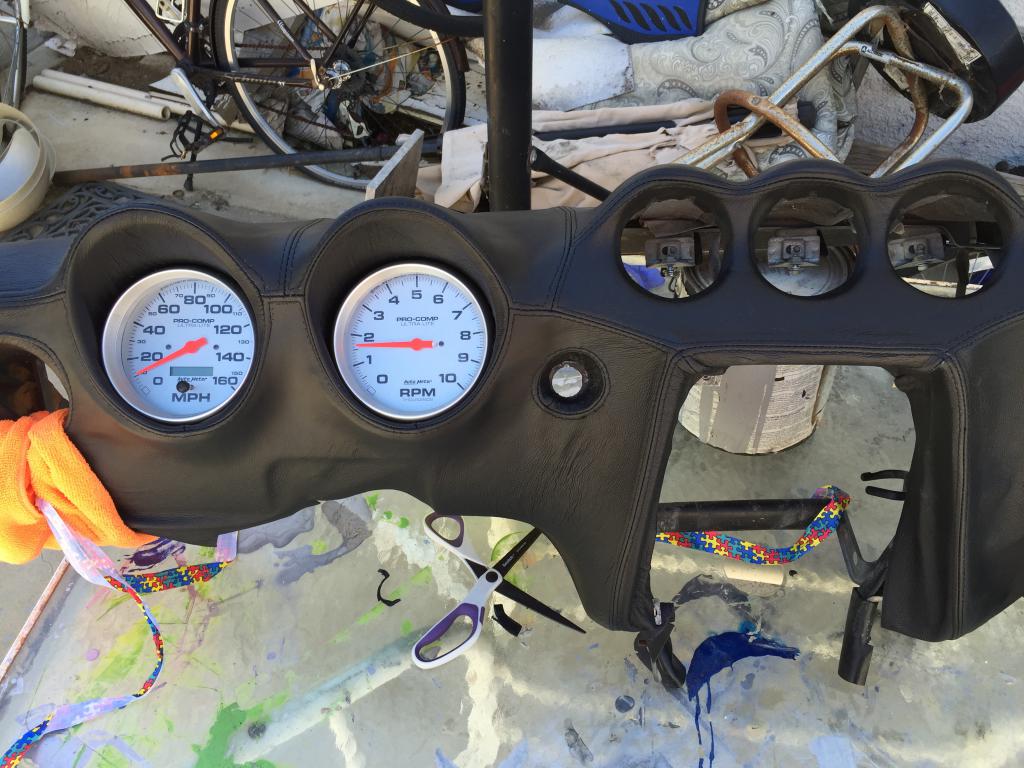
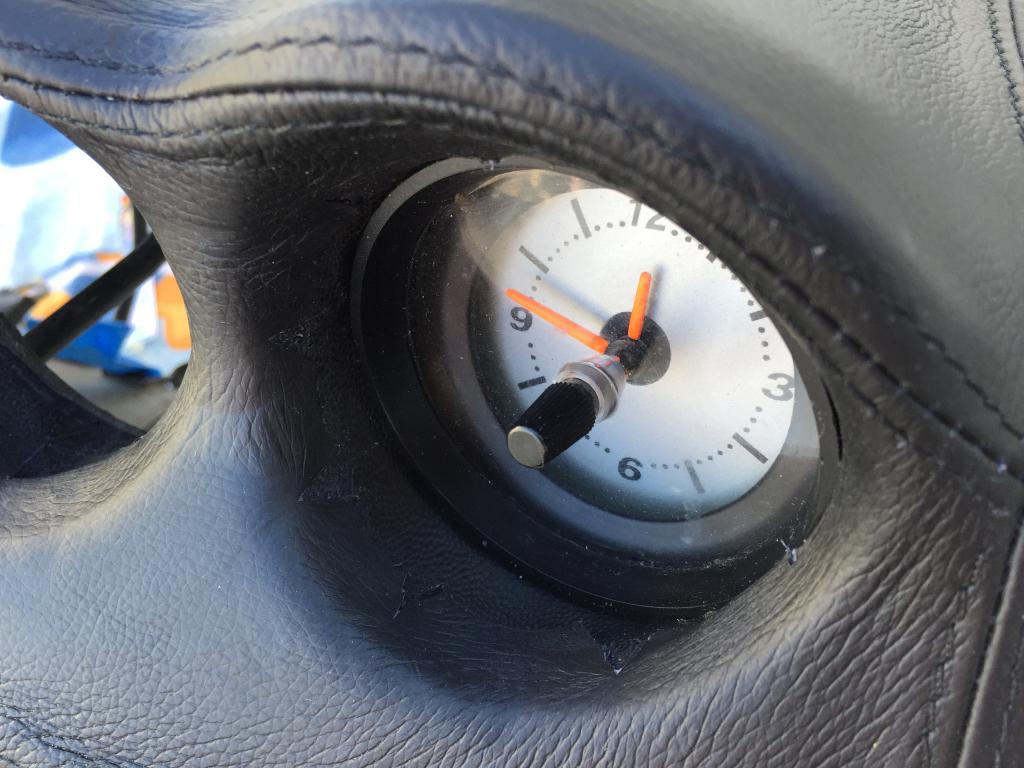
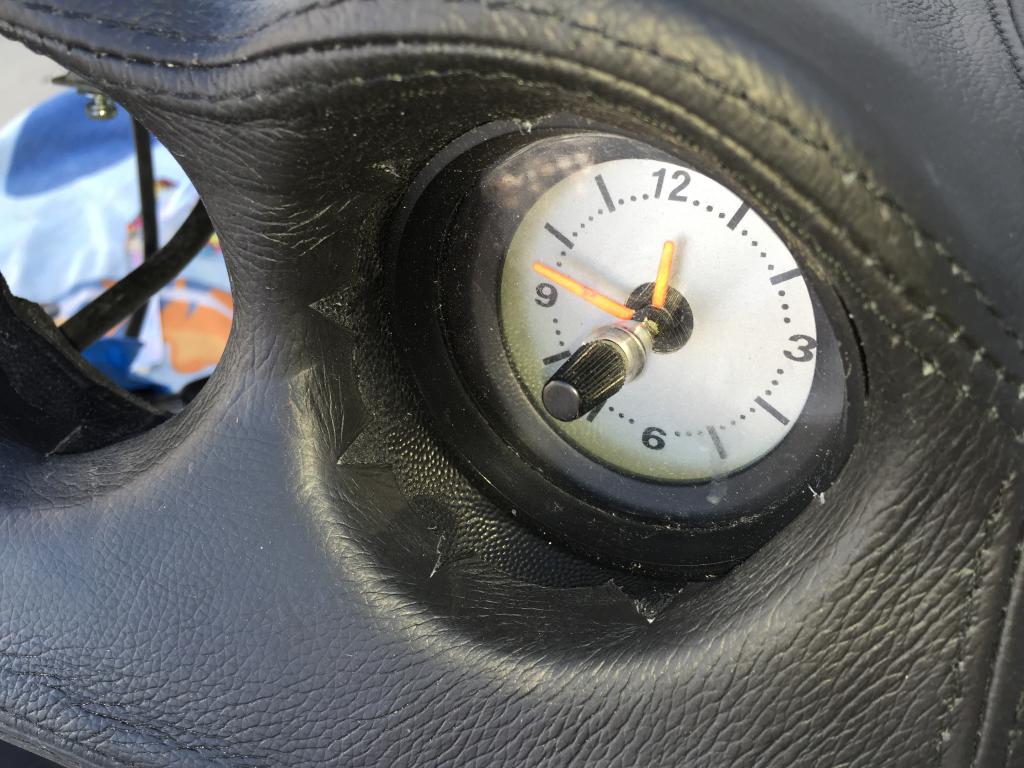
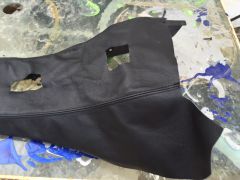
I made a lot of progress. Still need to do a few more things, but it's getting close. I included a couple of close-ups around the clock so you can see there really isn't enough material to get all the way to the center gauges. It really isn't easy to notice, and I had to turn on the flash so that you can really see the issue. The recess for the hazard switch isn't smooth so I'll likely make a hole and put it back. Also need to make an opening for the glovebox lock mechanism.
-
I'm continuing to make progress and the center area is getting very close. Did I mention it takes a lot of time and effort?
-
Yes, using a steamer would be the best solution. I've just been using a little spray bottle with water, and so far it seems to do the trick.
-
From the album: Autism Awareness 570Z
-
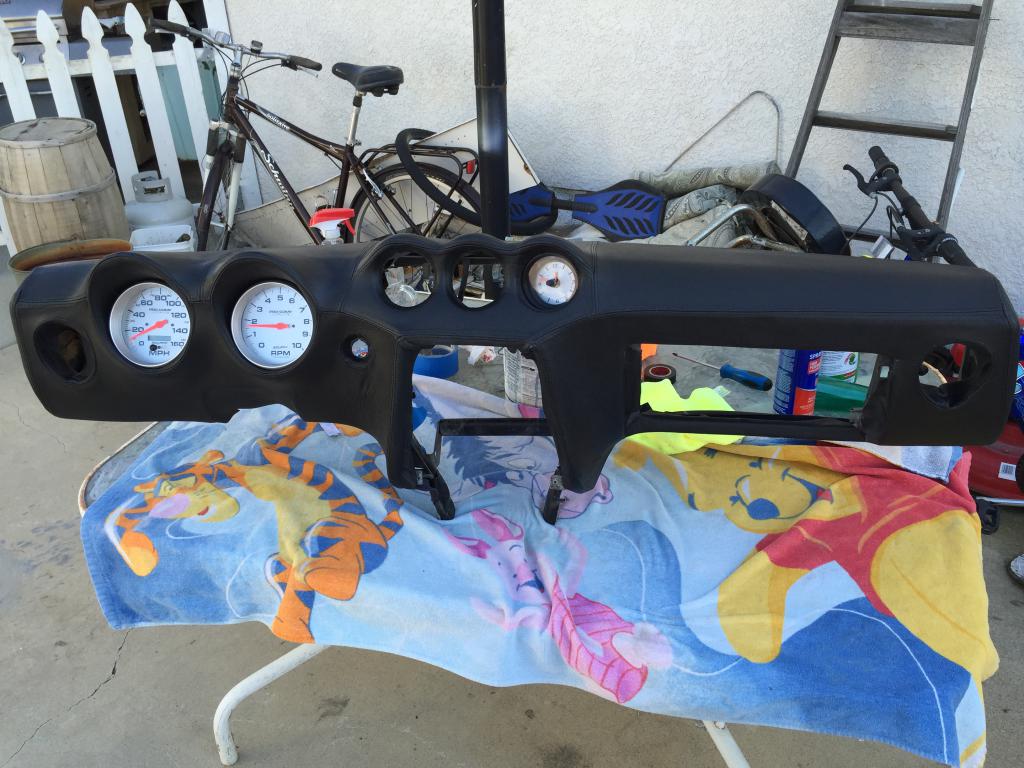
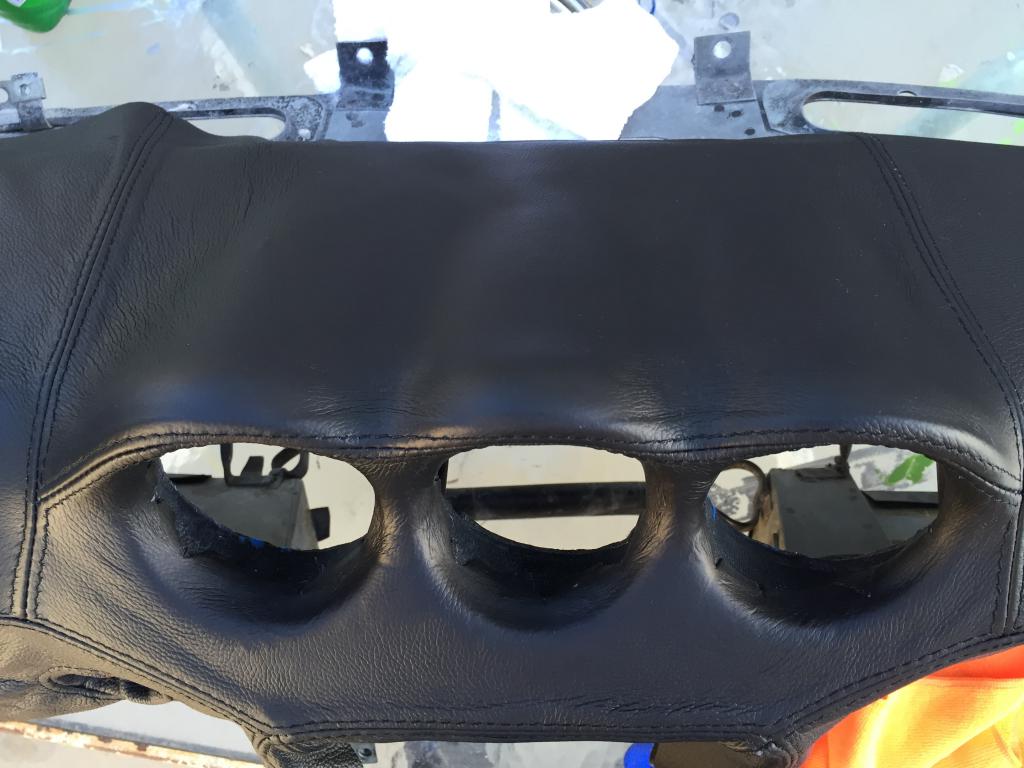
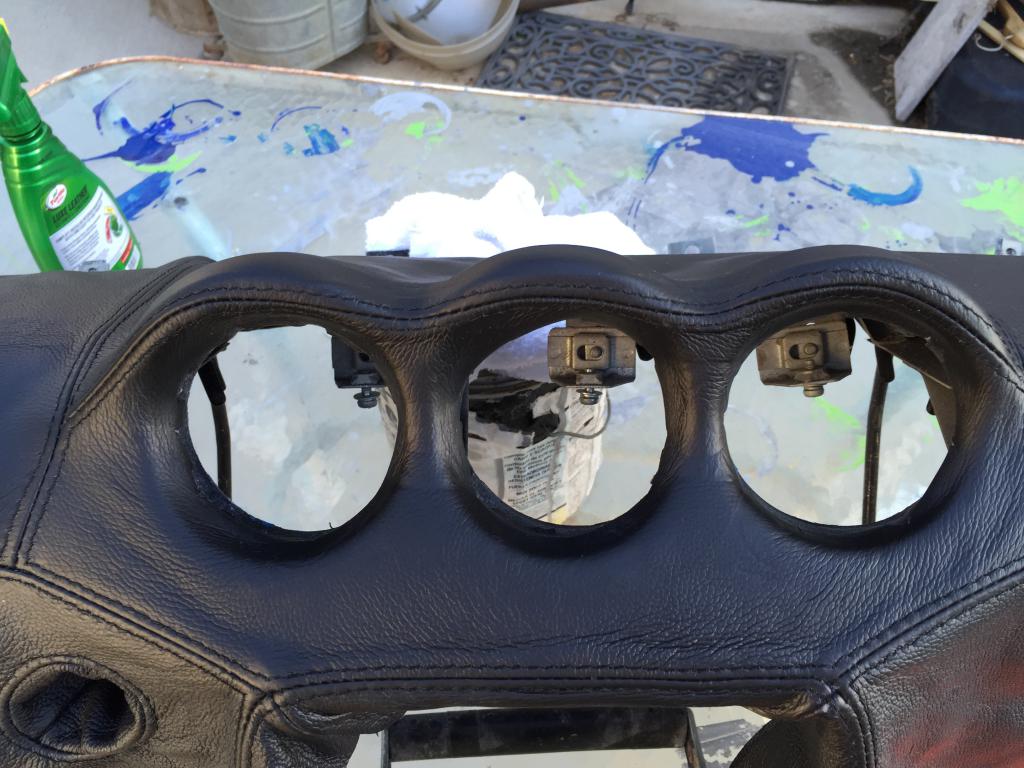
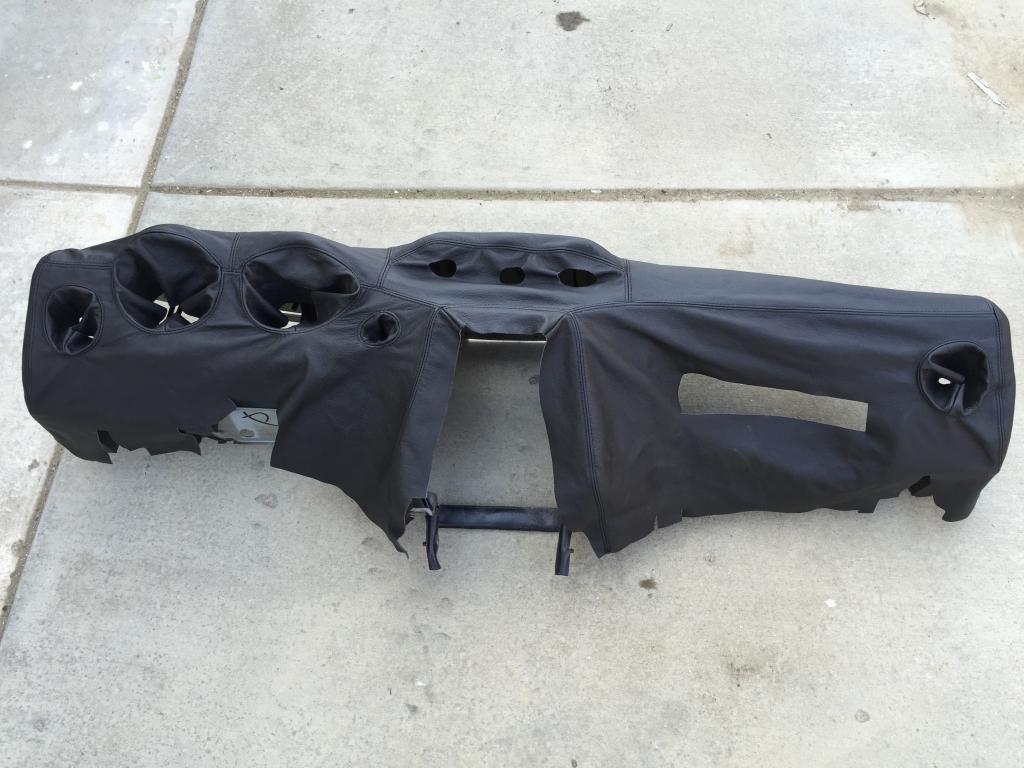
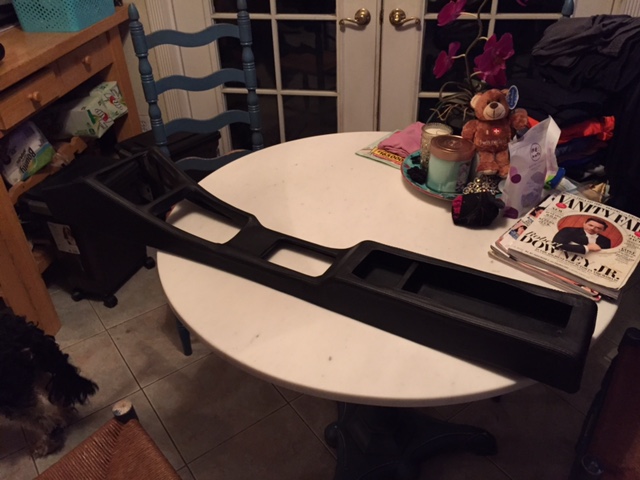
Okay, I will continue to post updates. I found an early image where I just placed the cover over the dash. Here you can see that it really needs a lot of work. For some reason the openings for the center gauges aren't even the same size, with the one on the right clearly larger than the other two. If you look at the stock dash there is a lot or curvature around this area, so it takes a lot of stretching and forming to get it to even come close. In the end I don't think there is enough material to get the leather to make it all the way back to where the center gauges sit in the openings, so I will probably still have to deal with this somehow. There are no openings or provisions whatsoever for the glovebox lock mechanism (my car is a 73 with the lock above the glovebox itself), or the hazard switch. although there are funnels for the speedo and tach, I think there will be a lot of forming and stretching to be done here as well to get it to look right. So there is a lot of work ahead... The console was much easier, but I'm hoping in the end it will be all worth it.
-
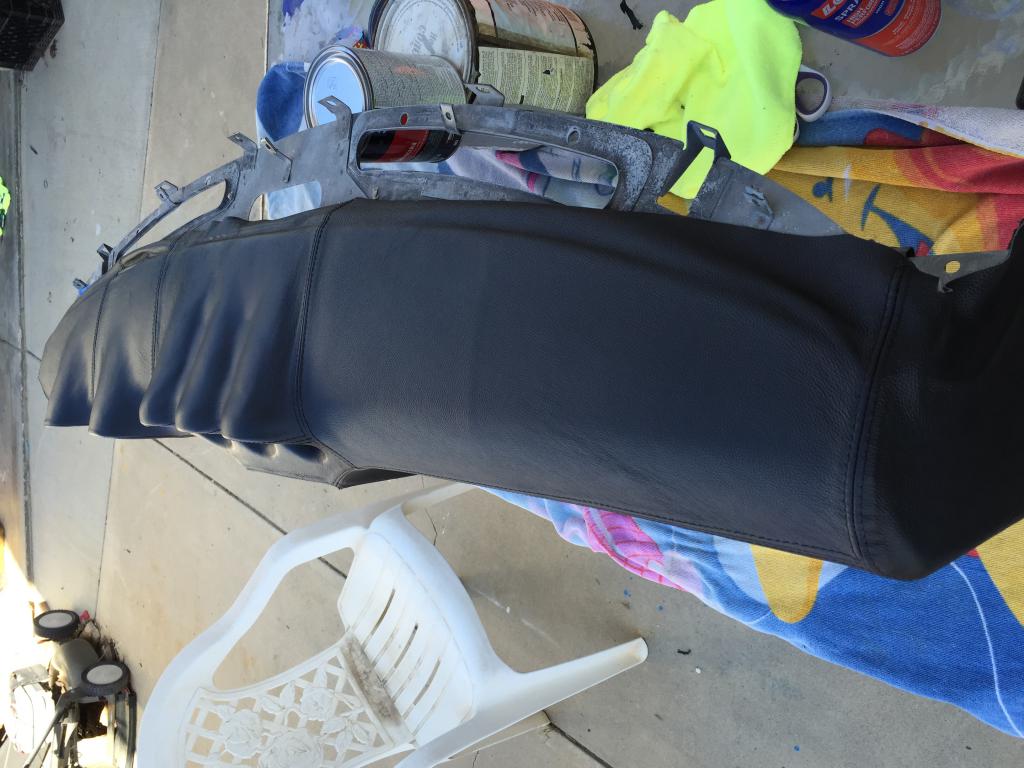
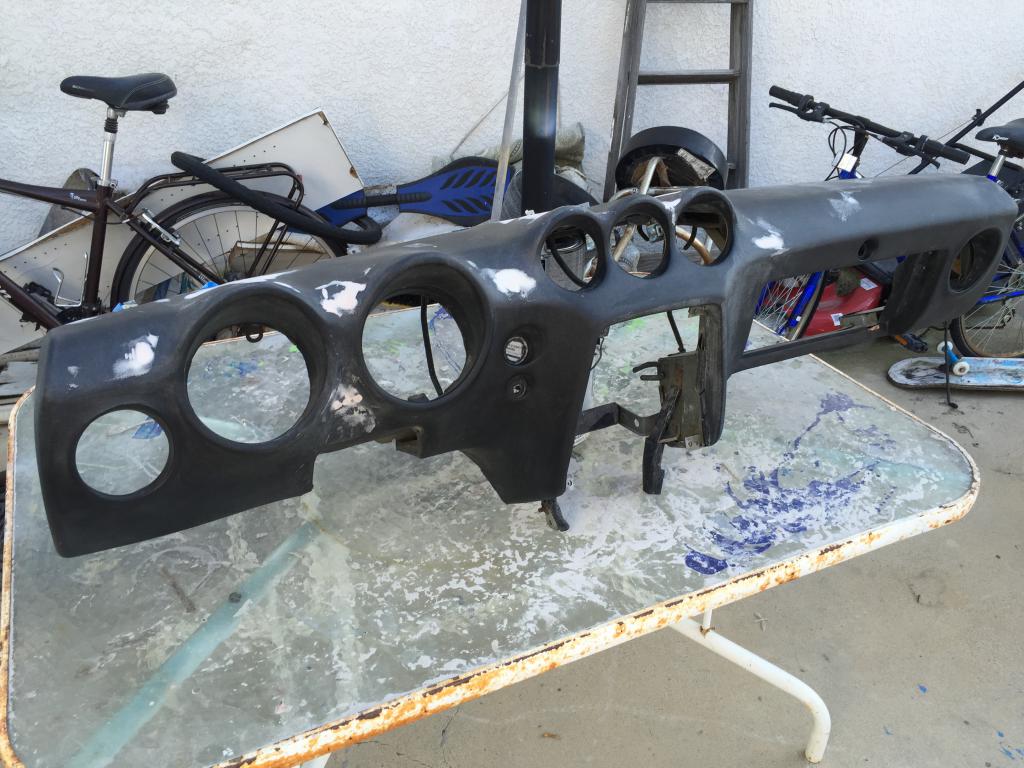
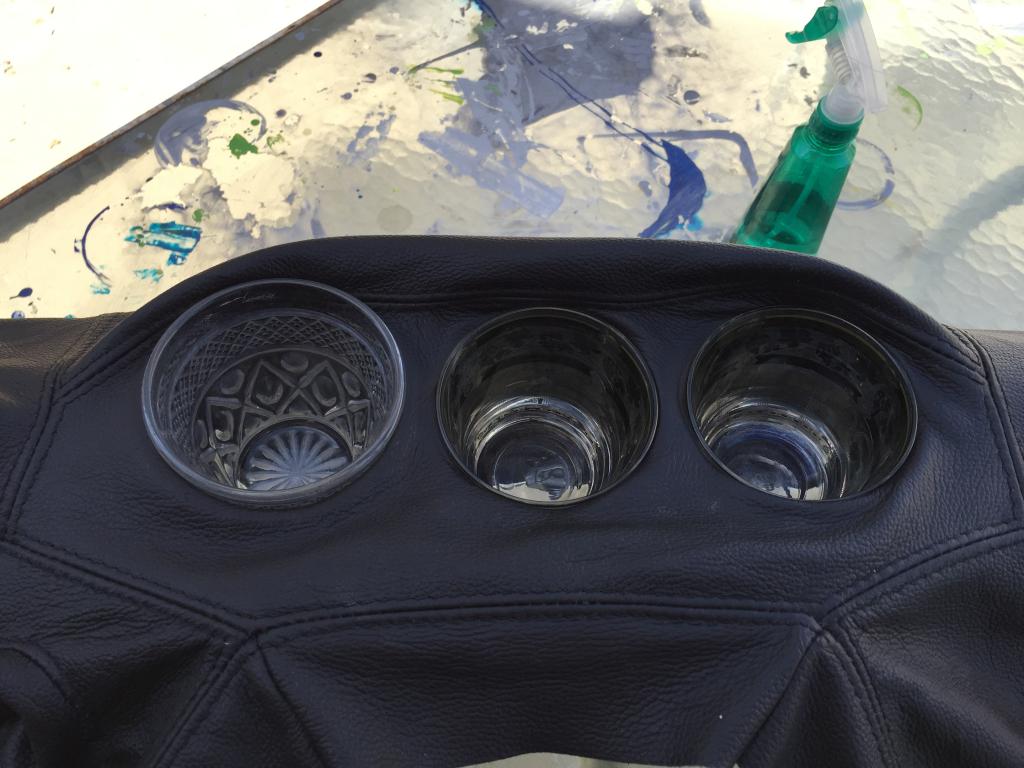
In the middle of installing my leather dash cover. It definitely takes a lot of time and effort, but I hope it will be worth it in the end. Spent time preparing the old dash and then began stretching out the openings for the center gauges with drinking glasses. Then I used soup cans wrapped in rags to stretch to final shape and hold the leather in place while the glue dried. I'm starting from the center and working my way out. If there is enough interest I will keep posting progress.
-
Yes, there is some overhang that could be folded down into the recess - but it will only go down maybe 1/8 to 1/4 of inch or so. I'm putting the lid back on, so I will leave it as is.
-
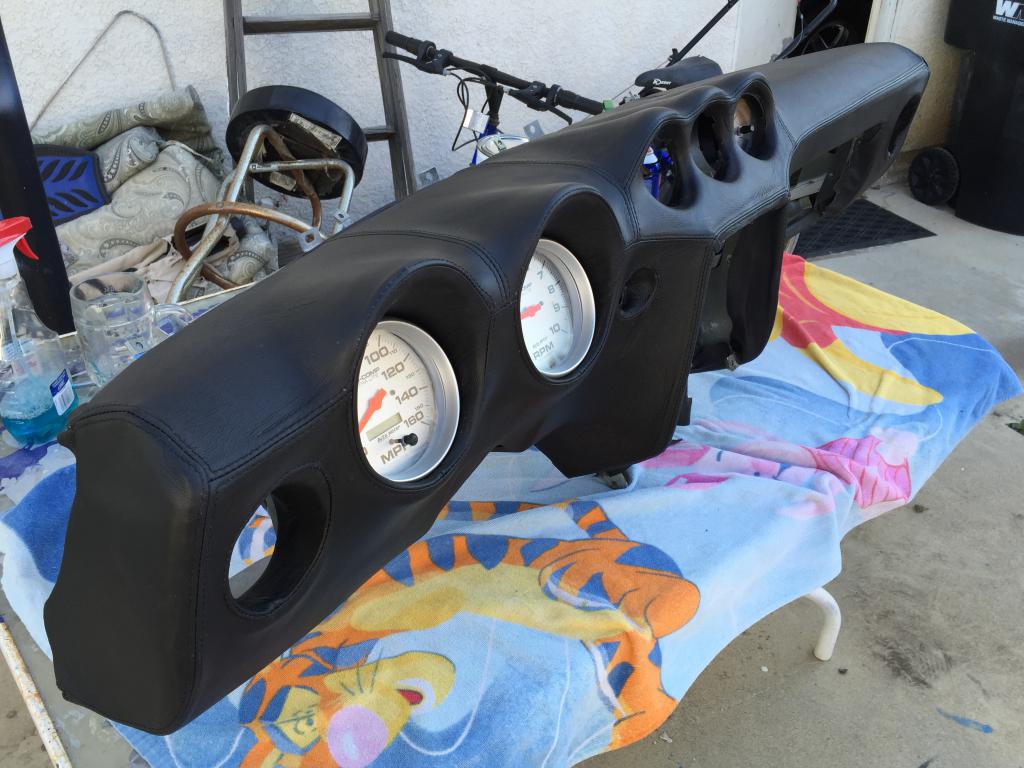
I am very happy with the results!
-
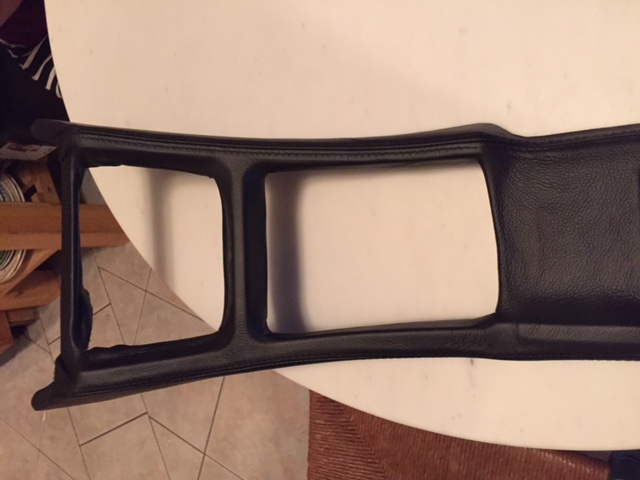
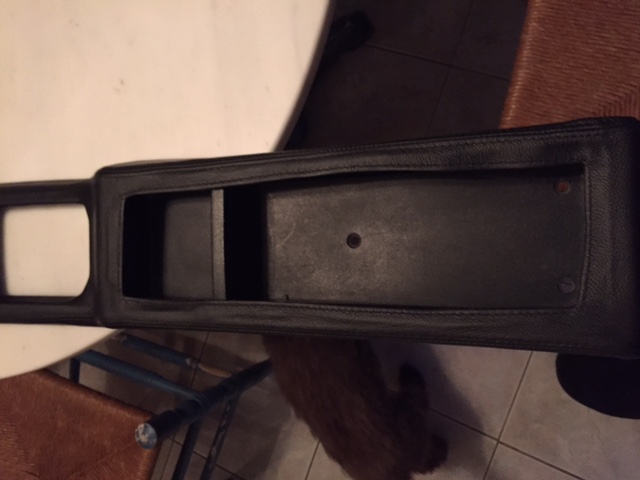
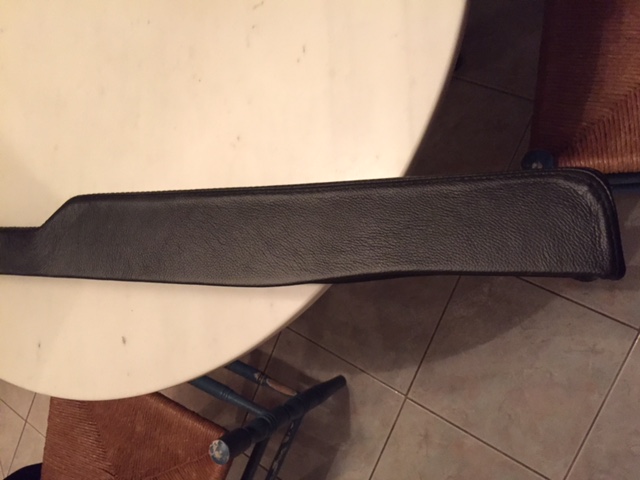
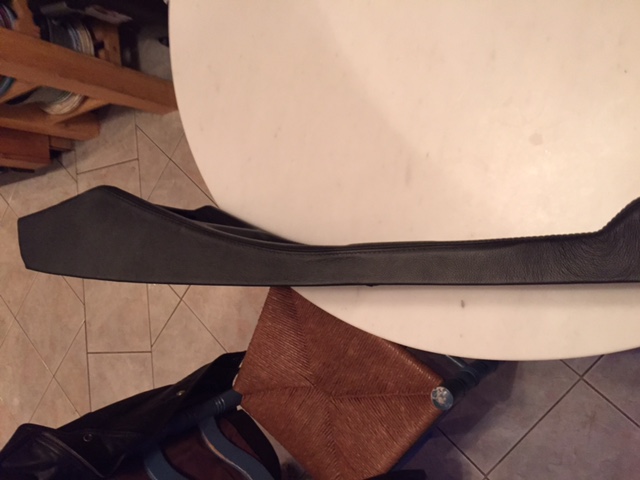
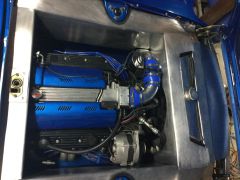
I finally began the installation process by doing some repairs to my console. The cover looks like it should fit well and will easily allow for customization, like whether or not you want to have an opening for the choke lever.
-
From the album: Autism Awareness 570Z