-
Posts
70 -
Joined
-
Last visited
Content Type
Profiles
Forums
Blogs
Events
Gallery
Downloads
Store
Everything posted by wal280z
-

'77 280z L28E Restomod/Street Build
wal280z replied to Exile's topic in S30 Series - 240z, 260z, 280z
-
@Jcurtis - saw this on eBay - not sure if this is what you need. Not my ad. https://www.ebay.com/itm/1973-Datsun-240Z-dash-harness-24013-N3321-and-N3322/114285270354?hash=item1a9beed552:g:JroAAOSwZM9e~I3K
-

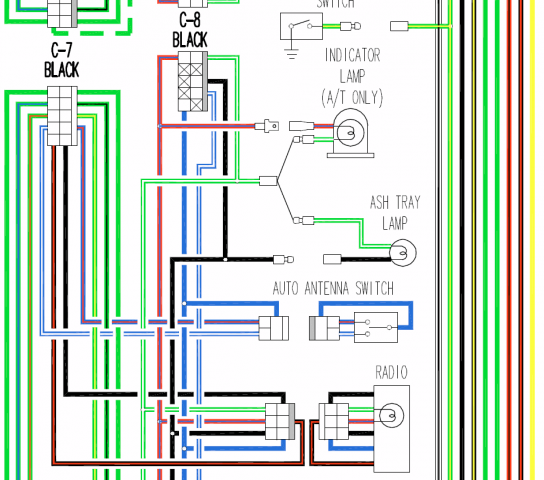
1977 Wiring diagram... come and get it!
wal280z replied to wal280z's topic in Ignition and Electrical
Another round of updates - Revision "N" has just been posted. https://www.classiczcars.com/forums/topic/11727-77-280z-color-wiring-diagram/ -
Trying to de-junk. I never got to give you the full tour as I was messing around with my (former) daily driver. @jhm I'll give the OP two weeks to respond - if you want them to re-sell, come and get em!
-
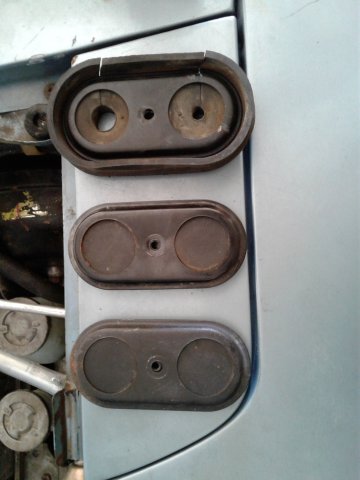
I don't have that piece, but will offer the knowledge of UP TO 1995 Pathfinder / D21 pickup trucks used nearly identical AC grommet blank-off and pass-through bulkhead grommets. The heater grommet you are looking for LOOKED similar, but it also crumbled upon attempt to remove it, whereas the AC grommet must have used a different compound. In the picture below, the top grommet was removed from a 1995 Pathfinder. The middle blank-off grommet was removed from a 1993 D21 pickup The bottom grommet is stock to the Z.
-
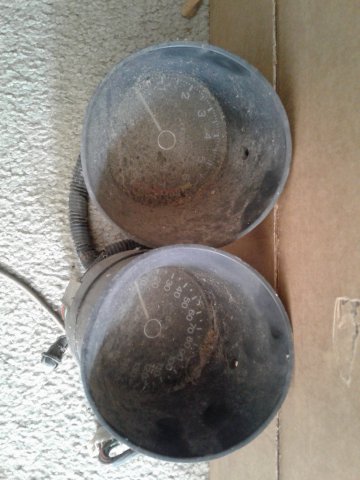
Here is a set pulled from my non-weather proof back porch. Condition is unknown, best use for parts only. Dirt & dust included at no charge. Will ship full gauge / tach for shipping costs from zip code 23462
-
Something I saw today that wasn't there in January, was after selecting the checkbox "I am not a robot" was a series of pictures to match with a brief description. Again, I had to use Internet Explorer...
-
I have experienced the same. I used Firefox, currently up to date. V58.0 It appears to be a browser related issue. I was able to leave feedback (and see feedback) using IE 11.0.9600.........
-
I was able to find the contacts here in the CONUS from https://www.digikey.com/ 7-10 AWG 962932-1 10-11 AWG 962930-1 11-13 AWG 962928-1 All the above part numbers are available at a minimum quantity of one, just make sure you select 'Cut tape' rather than 'Tape and reel' Hope this helps others in updating the vulnerable fusible links.
-
Had to dig and find my old hard drive from the old PC (3 PC's ago). Dang, I did this all in late 2007. I was able to locate the contacts from TGS Onlineshop (Europe) http://shop.t-g-s.de/ , and POSSIBLY from http://www.eagleday.com/ (Eagleday changed the part numbers of the actual part, so being able to compare all the data was an educated guesstimate, but I never ordered those terminals from them, other stuff, but not the subject terminals.), but I was able to salvage sufficient lengths of wire from the donor car(s) by isolating the wires inside the cabin, as the harness enters behind the dash on the drivers side, and extract the wires from the harness by pulling from the engine bay. I was able to request samples from AMP (now Tyco?) but they did not have any terminals available for 10 gauge wire, and although I was able to source some Paladin ratchet style crimp pliers (those were well WORTH the $$), I did not obtain the dies required for the larger wire size. I would like to upgrade my current setup to use a heavier gauge wire from the alternator) to feed the fuse block (and in turn, the battery). [Edit - I attempted to attach the file from AMP but it did not upload for whatever reason - The part numbers are Version B (single wire seal-system)/A (unsealed): = 6-10mm wire = 962939-1 / 962933-1 = 4-6 mm wire = 962937-1 / 962931-1 = >2.5-4 mm wire = 962935-1 / 962929-1 Hope this helps what you were looking for. Wayne
-

1977 Wiring diagram... come and get it!
wal280z replied to wal280z's topic in Ignition and Electrical
Updates have been made to the original diagram, click on the link above to follow the changes made. Those who wish to just download the latest version, click here. http://www.classiczcars.com/topic/11727-color-wiring-diagram-for-280z/?p=454677 -
I did not find an appropriate forum for this posting. FYI for all those who have a Pick and Pull brand junkyard in their area. For those who don't, and wish to make a trek or have parts pulled for them, this would be for you as well. I did a search here for "row52" and didn't see any results. Check out http://row52.com/ You can search nationwide for a specific vehicle in participating junkyards. VIN's listed as well as pictures as the vehicle is stationed in the yard. I've had better results logging in rather than attempting to search anonymously, FWIW
-
Thanks for the alternative options. FWIW - the control unit in post #9 is fully electronic AND fits in the original bezel location.
-
My apoligies in my delayed response. As far as the DCC units, I believe someone has started a seperate thread on the functionality of those. The Maxima control panel mentioned earlier FITS. I'm not saying it WORKS, but that is due to my delay in additional research. I did not achive success on the Altima system, basically due to the conflict with the transmission tunnel. The Mazda RX7 (87) control panel also FITS, however, you really gotta love the hot orange symbols on that, also, it is completely electrical. No cable operation for vents, temp or recirc. Only saying that if someone else is wanting a project. Right now there is a subie WRX in the j/y that I need to pull the dash and do some measuring. It is also fully electric. The vintage air unit looks promising, as well as a custom fabbed evap / heater core box that flows into the S2000 air management unit.
-
Just curious - which year 280 harness / internals are you using? If I recall correctly, the 75 - 76 gauges have the same font style as the 240, the process you are going through might be a bit less painful if you use those years. Also, I recall the 75 had an amp gauge while the 76 had a volt gauge. With that said, I'm not saying that you could skip the changes to the mounting configuration.
-
It may work, but by first measurements, it appears to be too long (right to left to fit into the cabin) Last week I managed to tear into a 95 Altima - and grabbed the air management/heater case - It looked like it would fit, but I found out when I got home it was about 2" too tall. There was a 94 240SX in the junkyard this week - lucky for me someone already removed the dash! The air management/heater case was nearly IDENTICAL, with the exception of the heater flap door motor mounting location and a few chassis mounts. I opted not to get the 240SX casing, as it was broken. But the internal flaps and mechanisms appeared as though they could be swapped from either unit. Reason I bring this up, an unmolested Altima can be found much easier than an unmolested 240SX, at least where I live.
-
Brackets fabricated and the panel installed in the test mule. http://forums.hybridz.org/index.php?/gallery/image/23734-maxima/ Note to interested parties - be sure and grab the Maxima mounting frame when getting donor parts. Cut down as needed.
-
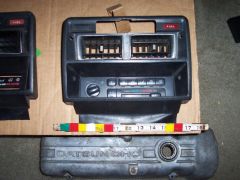
From the album: Heat / AC Control
electronic control panel from 1995 Maxima installed in a 280Z dash frame. The cardboard template in the passenger side footwell is the area of 'open space' inside the dash panel, over the transmission hump. -
The DCC unit you reference is the fancier version of the 'manual' (that's what the FSM calls it) control panel of the Maxima I posted. I do recall seeing that thread - and I'm sure I will reference it upon installation. It does appear, however, that the DCC unit you have will exceed the opening of the stock bezel (which I would like to retain), but it may work for others. I will check out the 240sux in the j/y this weekend for clearance issues (max depth on the 280Z = 11.75" from firewall mount to dash frame. I may be able to gain an additional 3/8" to 5/8" by removing the firewall jute panel and replacing it with dynomat. Thanks for including the link to provide others additional options.
-
Another reason why I am investigating alternate solutions. Yes if you intend on keeping the stock stuff. No if you want to gut it all and replace with new. The electronic mixing valves are really small motors that turn the flaps. There may be additional mechanical operation to that, i.e. cable operated heater control valve. More and more late model vehicles are abandoning the cable operation and going with electronic controls. The Maxima casings were too large to fit without major sheet metal surgery. After my weekend at Pick-N-Pull pulling the dash out of a Vigor (too big) and a Legend (this may work), I did spot an Integra (didn't get the year - it had the 'snake eye headlights') that at least the heater/air management unit may work but I was too late and it was in the row going to the crusher. Some provisions would be necessary to adapt the cable operated heater mode door to the electronic control unit. Update : I have been making brackets for the control panel to mount to the dash. I hope to have that done by next weekend and will post more pictures. The good news is there was welded nuts in the dash frame in the heater control panel for me to utilize... yeah!
-
-
Things I have noticed doing the swap in a 280 The fan has four speeds instead of three. The additional resistor is in the fan housing. The fan housings mount *slightly* different between the two models. You may want to keep the 240 fan housing but swap the motor out. The 240 control panel and the 280 control panel are completely different. Grab the bezel while you are at it and see if it bolts up. I haven't lined it up, but the location of the water ports for the heater appear to be slightly different. I'm sure the connectors may have changed so you may want to grab additional lengths of the wire harness The factory stuff has the vacuum control valves and reservoir bottle in the engine bay - not sure if you want to run those Make sure you trace out where the holes are in the firewall so you can cut them in the same location on your 240 firewall The 280 heater housing has mounting bolts that go through the firewall whereas the 240 has welded nuts on the inside - it appears in the same location - but check to confirm. (finding all of this stuff out while doing my own swap...) The 280 *should* bolt up to where the 240 heater housing mounts to the top of the cowl Of course, the FSM is uploaded somewhere to get the technical details on the AC system from the 76. It's not a bolt in - but it's close enough to work, in my opinion.
-
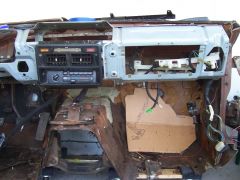
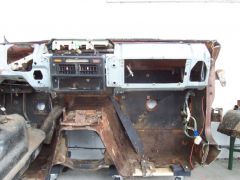
From the album: Heat / AC Control
dash skeleton frame installed - dash bezel install for location purposes. -
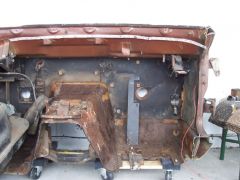
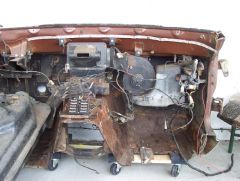
From the album: Heat / AC Control
stock stuff stripped out note the bracket used for the original aftermarket install

