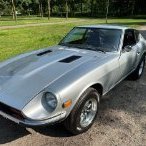
Mitchel0407 Posted August 15, 2025 Share Posted August 15, 2025 Hello everyone and welcome to my 1977 280z project! I will be using this thread to document my journey with this car and all the little thing that will be done to it to ultimately restore and modify it to be my dream car. I bought the car last week at auction for the decent price of €20.500,- kind of on a whim as this has been my dream car ever since I first learned of there existence (thanks Wangan Midnight and the Devil Z, I know its cliché). Yes €20k is a lot of money but a mid-condition one sells for over €32k here in Europe nowadays. (You can see which side I tied up and which side my dad tied up 😂) What drew me to this car was the paint (absolutely not perfect and needs a repaint at some point but looks good enough for now), the goodies like new wheels and tires, new wooden steering wheel, factory 5 speed gearbox, R200 diff and the claim that the engine was rebuild 10 years ago. Although when picking up the car it turned out there was no documentation what so ever. The car runs and drives and is in fairly decent condition but currently has no valid inspection (called APK in the Netherlands) as the previous owner stats it’s because of the car running rich. Of course it has a cracked dashboard, some small surface rust forming and is missing bolts all over the car but these are all thing that can be fixed over time. For now my main goal is the fix some little stuff and get her on the road so I can start to enjoy the car. So naturally I placed the car on my Quick Jack lift and ordered a bunch of parts from Z-Services EU in France. There are a few thing I like to address before taking it in for inspection. The hood doesn’t open as the cable brackets are missing, the door hinges need rebuilding as the doors won’t close properly, some general maintenance and fixing some sweating oil seals around the car. 2 Quote Link to comment Share on other sites More sharing options...
FastFloridian Posted August 15, 2025 Share Posted August 15, 2025 1 hour ago, Mitchel0407 said: Hello everyone and welcome to my 1977 280z project! I will be using this thread to document my journey with this car and all the little thing that will be done to it to ultimately restore and modify it to be my dream car. I bought the car last week at auction for the decent price of €20.500,- kind of on a whim as this has been my dream car ever since I first learned of there existence (thanks Wangan Midnight and the Devil Z, I know its cliché). Yes €20k is a lot of money but a mid-condition one sells for over €32k here in Europe nowadays. (You can see which side I tied up and which side my dad tied up 😂) What drew me to this car was the paint (absolutely not perfect and needs a repaint at some point but looks good enough for now), the goodies like new wheels and tires, new wooden steering wheel, factory 5 speed gearbox, R200 diff and the claim that the engine was rebuild 10 years ago. Although when picking up the car it turned out there was no documentation what so ever. The car runs and drives and is in fairly decent condition but currently has no valid inspection (called APK in the Netherlands) as the previous owner stats it’s because of the car running rich. Of course it has a cracked dashboard, some small surface rust forming and is missing bolts all over the car but these are all thing that can be fixed over time. For now my main goal is the fix some little stuff and get her on the road so I can start to enjoy the car. So naturally I placed the car on my Quick Jack lift and ordered a bunch of parts from Z-Services EU in France. There are a few thing I like to address before taking it in for inspection. The hood doesn’t open as the cable brackets are missing, the door hinges need rebuilding as the doors won’t close properly, some general maintenance and fixing some sweating oil seals around the car. Beautiful Z, it’s in great shape for an almost 50 year old car. I like those wheels too. Quote Link to comment Share on other sites More sharing options...
Mitchel0407 Posted August 15, 2025 Author Share Posted August 15, 2025 4 minutes ago, FastFloridian said: Beautiful Z, it’s in great shape for an almost 50 year old car. I like those wheels too. Came with four almost brand new tires and the original wheels on also pretty good tires. The original wheels good use a repaint tho. 1 Quote Link to comment Share on other sites More sharing options...
Mitchel0407 Posted August 25, 2025 Author Share Posted August 25, 2025 Had a busy weekend working on my girlfriends car (brakes, oil, alternator, water pump and timing belts) but yesterday I had some time left to work on the Z. The car was running rich so I ordered a cheap AFR gauge to measure the air-fuel ratio of the car. I installed the gauge in the engine bay for now with the power wires just clamped to the battery as I can’t drive the car till I get my inspection done. I read some threads about the EFI Z’s running rich or running rough in general so I cleaned the contacts on all the electrical plugs and readjusted the throttle position sensor. The contacts of the AFM and the cold start valve where actually pretty corroded but cleaned up nicely. For good measure I also decided to change the spark plugs and do a compression test. O boy was I glad I did that. The spark plug in the number 1 cylinder turned out to be a different one without a manufacturer name. It was also heavily cracked and the spark plug wire wasn’t even attached! (am I glad I ordered new once). The compression was pretty consistent from what I could tell but my battery and probably also the alternator are dying, only to be caped alive by my battery charger. The engine cracks very slow with the sparkplugs in (even only one) and when dialing back the idle the engine can’t keep a consistent rpm. It even died after a while. I the end I just jumped the battery with my girlfriends car witch helped a lot. After the cleaning the car also ran much better with an AFR of 11.2 and after warming up for a bit it changed to about 13. When revving the car to about 4000rpm the AFR changed to about 15. I’m not very familiar with AFR ratios but 13 at idle (after warmup) seems pretty good to me and hopefully lets me pass inspection. But for that I still need to wait for some backorder parts from Z-Services. 1 Quote Link to comment Share on other sites More sharing options...
Mitchel0407 Posted September 1, 2025 Author Share Posted September 1, 2025 I spend the last few days cleaning the electrical connections and timing the ignition again as it was out of spec. The car runs way better but the AFR gauge still shows 11,5 at idle. I'd like to bring that down (or up depending how you look at it) to 14,7 as the car stinks of gas. The previous owner mentioned that that was the reason it didn't pass inspection (auction company didn't mention that). I tried messing with the idle air mixture screw but that didn't help. When turning clockwise a bunch the car did start to run richer but when turning anti clockwise it didn't get past 11,5 AFR. I did notice the ignition coil is a 1,5 ohm unit with a total resistance of 2 ohm with the external resistor. I believe it needs to be closer to 1 ohm total so I'll probably replace the coil with a 0,5 ohm one. 1 Quote Link to comment Share on other sites More sharing options...
Mitchel0407 Posted October 3, 2025 Author Share Posted October 3, 2025 O boy has this been a productive month for me! Shortly after buying the car the engine started to turn over slower and slower and losing all power even though the battery voltage was good and hooked up to a trickle charger. So I decided to replace both the starter and the battery. It turned out to be just the battery but the starter was pretty cheap so I didn’t mind. Next up I borrowed my dad’s borescope to look inside the cylinders. The cylinder walls looked great but the pistons did have some carbon buildup. This can be explained by the car running rich for a long time and not having been driven a lot the last few years. I did see oil running down the cylinder walls on four of the cylinders but I’ll be replacing the head- and valve cover gaskets once those come in. I also tested the compression again and this time it came back to a stable 125 psi on all six cylinders. After this I dicided to put my focus back the rich idle problem. A more detailed story of that journey can be found in the two threads linked below. The thread on the Classic Zcars forum has a bunch of information about the (working of) Datsun/Bosch AFM’s and replacement units for them. https://forums.hybridz.org/topic/139136-77-280z-running-rich-at-idle/#comment-1251600 https://www.classiczcars.com/forums/topic/69530-77-280z-running-rich-at-idle-afm-screw-doesnt-work/#comments In short I found out one of my problems was that my AFM was bad. As the original Datsun 7 pin units are none existent in Europe and I can’t find anybody that can rebuild the circuit board on one I decided to head down a massive rabbit hole that is the undocumented world of Bosch L-Tronic AFM’s. During my research, documented above, I came across a 2011 Australian forum post that mentioned an Toyota AFM. The part number (F201 13 210 (197100-3420)) came back over here as from a 1988-1992 2.2i GT Turbo 12V Ford (USA) Probe (Mazda 626) for €25,- from a junkyard. So I ordered it immediately to try and test this theory out. The Ford/Mazda/Toyota AFM is larger than the Datsun unit but can be installed by stretching the factory rubbers slightly. The pinout and internals are practically the same and don’t require modification (even the electrical plug was plug-and-play!). The resistance values are different than the Datsun AFM but the output voltage values to the ECU are the same. By tightening the spring (gear) inside (clockwise) the car started and ran perfectly. During this process I also replaced my Bosch spark plugs for NGK BR6ES with a 1,05mm gap and the ignition coil for a 0,6 Ohm Flamethrower 2 unit just to be sure. I also replaced the fuel pressure regulator for a new one and cleaned the injectors using an ultrasonic cleaner and spraying high pressure brake cleaner through them. The car did run a lot better and more stable after all of this even though my idle was still very rich and the idle air screw didn’t seems to effect the idle AFR much. This lead me to a leaking and faulty AAR valve which I blocked off on both sides. My vacuum was good and the fuel pressure was slightly low at 28 psi on my cheap Chinees gauge. I suspect the injectors are just bad and will need to be replaced ad some point but for now the car runs pretty good. Quote Link to comment Share on other sites More sharing options...
Mitchel0407 Posted October 3, 2025 Author Share Posted October 3, 2025 As to keep the technical stuff a bit separate I decided to post the next bit as a separate comment. Last Tuesday I temporarily insured the car and drove it over the highway to S2 Classic Cars in Hengelo (The Netherlands) as they are a highly rated classic car restauration shop in the area with a beautiful showroom to booth. There I had the car thoroughly inspected in preparation for the APK (something like state inspection, MOT or TÜV). This gave me some good and also very bad news. The good news, my work on the engine paid off as the car drove great with good AFR readings while driving and an CO emissions gas reading of 2,4% of the 4,5% allowed for this model year. The inspector also noted that judging by the other reading the engine was very healthy and in great condition. The bad news on the other hand reviled that the chassis of the car was is much less of a condition. Both left and right frame rails are rusted thru which they tried to cover up at some point with underseal. They where also both dented badly in the front by improper jack usage and the passenger side frame rail had a big rust hole in it. To add on top of that the inspector noticed the rear axle was crooked. This caused the drivers side rear wheel to stick out more with an toe out and the passenger rear wheel to have way more negative camber. The inspector couldn’t find anything at this time underneath and suspects the chassis might be slightly twisted or crooked. To know for sure I will need to find a shop that has the proper equipment and reference measurements to measure to chassis. I’m quit mad about both these things as they will cost me a lot to fix (at least they are fixable so thank god). More over the car was advertised and sold to me as “…without rust and free from structural damage.” by both the seller and the auction company. The auction company even inspected the car before it got accepted into the auction and wrote the advertisement texts for the car. Because of this fact, and the surprise bill for thousands of euro’s, I’ll be taking legal steps to try and claim at least some of the costs of the repairs on the seller and auction company. 2 Quote Link to comment Share on other sites More sharing options...
jhm Posted October 3, 2025 Share Posted October 3, 2025 Oh, that is so unfortunate -- sorry to hear about the rust and structural damage. I hope you are successful in the legal claims against the seller and auction company. Sadly, that is all too common on these old cars....it's quite rare to find one without those types of issues, especially in climates like yours. This project suddenly got a lot bigger; but it sounds like you are up to the challenge! Quote Link to comment Share on other sites More sharing options...
Mitchel0407 Posted October 3, 2025 Author Share Posted October 3, 2025 I am planning to fully restore the body, repaint and preform upgrades but I was hoping to al least enjoy the car a few seasons and to take it at a slower pace. If it is in any way possible I would like to keep the car for as long as I can. The S30 Z’s have and always will be THE dream car for me and now I’ve driven it for a bit the bug has only bit me harder. I would love to just throw a bunch of money at the car as I do have some reserves but those are supposed to help me at least the next 50 years. For a bit of background, I’m only 25 and my right leg got crush in a motorcycle accident about 3 years ago. I’m doing good now and am walking on both legs again but the question is for how long that will be the case. 1 Quote Link to comment Share on other sites More sharing options...
Mitchel0407 Posted November 24, 2025 Author Share Posted November 24, 2025 Time to update the build threat again. Things are moving slow at the moment but none the less progress is being made. I have contact with two local body shops in the area for the frame rail repair and to measure the body to see if it’s twisted in any way. One of the body shops is specialized is classic car repair and restauration but will probably be quite expensive but none the less a representative will come by to look at the car this week. The other body shop is a more generic one that also does a lot of classic BMW’s and has done some paint work for me in the past. There hourly rate is a lot cheaper, I know they deliver great work and I know they sometimes are willing to do cash work. To save money on the body shop hours I decided to bite the bullet and order a bunch of parts from Apex Engineered which should arrive somewhere next week. Deciding what to buy was quite difficult as the shipping rate varied a lot but in the End I got the shipping down to $284. I all I bought the frame rails, front fender braces, front and rear control arms, steering knuckles, front crossmember and the rear strut brace. As importing stuff from the US is pretty expensive I decided to place a bigger order then what I strictly needed to maximize the value for my money. As the car needed to get welded anyway I ordered the front fender braces as well to reinforce the front of the car as they weren’t that expensive and seemed to me as a worth wile upgrade. As for the control arms my main reasons for buying those was to delay any major body repairs. If my body turns out to be twisted repairing it would turn into a full on restauration project. I do plan on restoring and repainting the car some day but not now, so as a temporary solution the adjustable control arms allow me to tune the effects of a twisted body out a bit. At some point I would like to get the full Apex Engineered Retro Mod suspension so this will give me a great starting point to work from anyway. To save some more money at the body shop I will strip down the interior and remove the fuel lines myself before sending the car of for welding. But before doing that I still have a chance to fix some small stuff surrounding the engine. My backorder from Zservices in France finally came in together with a used Bosch AAR from a Porsche 944 as my original AAR turned out to be broken. So last week I took the valve cover off to adjust the valves and replace the gasket as it was leaking a lot of oil. Good thing I did as the valves where very out of spec. The adjusters where a pain to get loose but after that adjusting them was very easy. I put everything back together with some new NGK spark plug wires and started her back up. Even with near freezing conditions the car started right up and idled better then ever before. The engine still runs very rich at idle and I suspect it might be an injector issue but other then that the engine runs great and the emissions are within the limits so I will place that issue on hold for now. My plans for the coming weeks are to strip down the interior, remove the fuel lines, front fenders and doors. This will also give me the opportunity to clean and inspect those parts of the car for more hidden surprises. I will also repaint the fuel lines as they are full of undercoating and try to restore the dashboard as with any Z mine is cracked. As for the doors I want to rebuild the door hinges and maybe try and reupholster the door cards as mine are actually of a 2+2 and have a giant hole instead of a second door latch. I’m hoping to get the car back on the road after this so I can finally start to enjoy my 280z this spring. Video van WhatsApp op 2025-11-24 om 10.58.36_fab92d46.mp4 2 Quote Link to comment Share on other sites More sharing options...
jhm Posted November 24, 2025 Share Posted November 24, 2025 Wow, impressive to see how quickly you are jumping into this project. It's such a shame that the car had so many "hidden" issues; but hopefully the chassis is still straight in order to minimize the cost of the repairs. Sounds like a big order of shiny parts you have coming from Apex....enjoy!! Quote Link to comment Share on other sites More sharing options...
Mitchel0407 Posted December 15, 2025 Author Share Posted December 15, 2025 Last week my order from Apex Engineered came in so now I can start stripping down the car and prepping her for the body shop. Money is a bit tight right now so I’ll install all my suspension parts first and probably send the car of to the shop in February. In the meantime I decided to strip out the interior and see what’s hidden underneath. It doesn’t look that bad but for a car that has been quote on quote “restored” only 10 years ago they sure did a shitty job. Lots of surface corrosion sports throughout the interior, lots of missing bolts, fasteners and rubber plugs and unpainted parts from shotty repair work. I cleaned up the surface rust and sprayed a generous amount of rust converter on everything. I will order some more rust converter, primer and color matched paint soon to clean up and protect the inside parts. I’ll also look at some spray wax to protect the hidden parts and crevasses of the chassis. A guy on YouTube I follow (M539 Restorations) uses one from Liqui Molly I believe which seems pretty good so I will give that one a try. It's not all bad news though. It looks like that in all these years the wiring harness stayed unmolested by all the previous owners. I also found out that the car has 4 pretty big and new looking JBL speakers! They didn’t all work when I tested the radio but I believe that might be the head unit itself. I will probably replace it with a Bluetooth capable retro looking one in the future. I also found a full and intact box of original Nissan glass 10amp fuses in the trunk! 1 Quote Link to comment Share on other sites More sharing options...
Mitchel0407 Posted January 13 Author Share Posted January 13 (edited) A new year has started and my battle to get the 280z road worthy goes on. I had liked to get some more things done over the holidays but sickness and other obligations got the better of me. That doesn’t mean I didn’t get some progress in. To prepare for a new years eve party I had to temporarily get the Z inside the garage so I continued my journey of stripping down the Z by removing the fenders and wiper cowl. I kind of regret but I'm also glad I did. Turns out the last “restauration” was a fairly cheap one. Some threads where damaged and instead of repairing the thread or welding in a nut they just left the bolts out, or in case of the lower mounting points of the fenders just weld and bondo them on. After getting them off I was met with the nice surprise of finding out they never painted the inside/back of the fenders or any non-exterior part for that matter, only primer. As a result I was met with a lot of surface corrosion spots. I also discovered the car has some crash damage on the front left that was never properly repaired. Some sanding, rust treatment and painting later the car already looked a lot better. At least now I know the Z won’t rust away in the next couple of years. Every panel I remove it becomes more and more clear that a full restauration to the bare metal of the body is necessary if I want this Z to survive at least another 10 to 20 years. I really wanted to start installing some of my new goodies from Apex so I decided to install the rear strut brace as it won’t interfere with any of the bodywork. It was freezing outside but with the help of a heater it was quit doable. I do love the look of the Apex rear strut brace. It’s strong, elegant, functional but doesn’t scream “aftermarket modification” which I like a lot. I don’t really want my car to stay stock but also not heavily modified, just tasteful, functional and a bit more modernized but still the classic look and feel. The last few couple of days have been pretty cold so I moved back to the garage for some of the car work. Unfortunately my garage isn’t insolated and I don’t have a strong enough heater but it’s better then outside and good enough for some paint work and rebuilding the hinges. Rebuilding the hinges was easier then I though at first. Having a vice does make life a lot easier when removing and installing the hinge pins. To get them out I just used an impact socket and an old bolt that was slightly smaller then the hinge pin. With some force they came right out. All hinge pins where worn which caused the doors to sag and the passenger side (which sagged the most) was even bent! The rebuild kit I bought from Zservices EU was great with the exception of the hinge pin bushings, both the outer and inner tolerance was out of spec on all of them. If it was to tight then that wouldn’t be that much of a problem as I could modify them but the tolerance was to loose causing the bushings to sit loosely in the hinge and the pin to have some play. I decided to rebuild the passenger side hinges anyway and will install them soon to see if they sag with these bushings installed. If they do I will have some custom made at a machine shop. Continuing with the doors I decided to do some spot repair on the upper corners of the doors as both sides had some corrosion under the paint, and the doors where off the car anyway so might as well do them now. Here to I discovered the inside of the door was never painted causing some corrosion on the inside of the doors. The more I work on the car the more I want to punch the previous owner and bodyshop in the face. Even so I can't wait to drive the Z, I guess that’s the S30 life for yea…. Edited January 13 by Mitchel0407 Added some photo's 2 Quote Link to comment Share on other sites More sharing options...
Mitchel0407 Posted April 2 Author Share Posted April 2 A bit more time has past and a bit more work has been done. I have been trying to complete the body work and paint on the doors but I shamefully have to admit that exterior bodywork is not my strong suit. I did get an appointment at the body shop for next week to replace the frame rails and install the Apex front fender braces and asked them to repaint the doors and wiper cowl as well. I guess you win some and you lose some, and boy I lost this one (please don’t judge to hard). I moved on to some other small tasks and replaced the radio antenna for an aftermarket powered one. I did have to solder on a new connector as I don’t have the same connectors and plugs as the factory harness uses but I made sure that any changes are reversible if necessary in the future. I also ran new speaker wires to the aftermarket JBL speakers that came with the car as the existing wires where all corroded from the inside. Here again I used new aftermarket connectors on both sides so the speakers can be easily disconnected or switched from audio channel. The body shop would like the car to stay somewhat drivable under it’s own power so they can easily load her on the trailer and move her around the shop. So I threw on the trickle charger so the battery will be full and see if she will start after a couple of months of sitting still. After a bit of cranking she came to live. After letting her warm up a bit I checked the AFR gauge and to my surprise it was sitting at 14.5 idle! With a bit of gas the AFR rose to 12.3 under power and then settled back down to 14.5 at idle. Did the 280 just fix itself over winter? As the car will be off to the body shop soon I don’t want to just sit around and do nothing until the car is back as I would really like to be able to drive the car somewhere begin May. So I decided to look into the possibility of removing the dashboard while still being able to drive the car. After studying the electrical schematics for a bit I really didn’t see a reason why this shouldn’t be possible so as with anything I just tried it. Worst case scenario I have to put the dashboard back in. Turns out that the dashboard really doesn’t have anything to do with the 280z EFI system. If you disconnect the three big connectors in the passenger footwell and then take the dash out the car starts just fine. So now I have the hilarious combo of a stripped out but still drivable 280z. The car does feel really sad and empty now but soon she will be stronger then ever with some nice suspension upgrades, a new radio and a freshly restored dash and interior panels! Quote Link to comment Share on other sites More sharing options...
Mitchel0407 Posted May 4 Author Share Posted May 4 I’m feeling closer and closer to getting the car back on the road!! The car has been dropped off at the body shop almost 4 weeks ago now, which is at least some good progress. Wen I went to drop off the car they already had a lift ready for me so we could put her in the air right away. There we unfortunately found out that one of the Apex Engineered frame rails had a manufacturing mistake. The passenger side frame rail had been bent the wrong way! I immediately contacted Apex true email as somehow international calls weren’t getting trough to them. The responded the next day (+7 hour time difference) and told me they would send me a new pair once they got there new shipment in the next week. Unfortunately they were later then expected with sending out the new pair and I had to fight of the body shop from reproducing the frame rails locally as the Apex once where on there way. This might have been a mistake time wise as 1,5 weeks ago they finally arrived in the Netherlands afterwards they where hold back (and still are) by customs. They said the paperwork was unreadable/missing, the HS (material) code was missing and customs wasn’t agreeing with the declared value of the package, even though I already paid the fees, which shouldn’t be necessary as it’s a warranty item and I technically didn’t pay for it. So while waiting for the frame rails to come in and for me to get the car back I decided to get to work fixing the interior panels and the dashboard. During which I also participated in one of the meets organized by the Z ZX Club Holland and got to ride along in this amazing 3,1 liter stroker 240Z producing an amazing 320ps to the wheels! While working on the interior my girlfriend decided to get involved and make me a custom set of door cards. These will be complimented with custom seat covers and a reupholstered center console. Please not the picture of the door cards is still a early work in progress and we both have never done something like this. I don’t have many before pictures of the interior pieces but I do have photo’s of the finished result. Almost all of the plastic pieces had cracks in them and the center console was even broken in two, but all in all they weren’t too bad for almost 50 year old plastic. I used a plastic welding kit with steel wire inserts to repair and reinforce the damaged sections before sanding them smooth. I roughed up all the pieces with sanding paper before spraying them with plastic primer, black paint and matt 2K clear coat. For some pieces (like the glove box, center console, upper dashboard trim and the rear taillight panel) I used a texture spray to reapply some texture and/or match them to the repaired dashboard. Fun fact, while writhing this and looking up some terms I realize that my interior taillight panel is from a 70-74 240z and not from a 280z. Bit weird but it fits. *First picture is just wet semi-gloss black paint and doesn’t have the matt clear coat yet, the second picture of the center consol has clear coat and is fully dry. To restore the dashboard I followed some good old YouTube video’s and sanded down all the damaged area’s in a V shape before filling them in with a 2K polyester body filler and sanding the dashboard back to shape. The body filler I used bonded really well to the dashboard foam and was easy (with a ton of elbow grease) to sand back into shape. To seal and strengthen the top layer of the dashboard, and help make it smooth, I decided to use UV (3D printing) resin which I applied in layers using a brush and hardened with a UV lamp before putting the dashboard in the sun for a few hours. It was a bit of a gamble but I was pretty pleased with the result. The resin created a strong, hard and naturally very UV resistend layer reinforcing the dashboard. After sanding it smooth, primer, texture spray, paint and matt 2K clear coat the dashboard was done and now looks pretty good if I say so myself. As a finishing touch my girlfriend even customized the dashboard Datsun 280z badge for me using a chrome and a green inlay! I hope to have my car back soon so I can reinstall the interior and install the Apex Engineered control arms. My goal is to have the car road ready before the end of the month. 1 Quote Link to comment Share on other sites More sharing options...
flatout Posted May 4 Share Posted May 4 The dash looks fantastic. nice job on the entire interior refresh. Quote Link to comment Share on other sites More sharing options...
Mitchel0407 Posted May 12 Author Share Posted May 12 (edited) It’s been a long week where in a lot happened, including me getting engaged to my beautiful girlfriend last week! But personal stuff aside we are here for the Z. The body shop couldn’t wait any longer and with my permission they ended up modifying the passenger side frame rail to fit. All in all they did a great job and the end product looked great and above all was very strong. As an added bonus they even gave the frame rails a new coat of underbody spray and drilled two holes in each rail to coat the inside with wax and prevent condensation buildup. This meant I could finally pick the car up last Friday after being over 4 weeks stuck in the shop. By coincidence I was free from work that day so I even got to start the reassembly of the interior starting with the dashboard. And I also quickly strayed the Apex fender braces silver to match the rest of the car. I finished reassembling the dashboard during which I had a little bracket left over. I have studied every possible parts diagram and video but I can’t seen to find where this bracket came from. It was stashed together with all the dashboard parts and bolts but unfortunately I wasn’t smart enough to take pictures of the disassembly. Does anybody know where this little bracket belongs? Anyway I decided to continue the reassembly of the dashboard and reinstall the dashboard into the car. This went rather smoothly even though installing the dashboard all by yourself is a bit of a pain. I immediately tested all the electrical components to see if all the light (which I replaced with LED’s) and gauges still worked. Everything fortunately worked except the tachometer backlight which turned out to just be a reversed polarity, which isn’t an issue for halogen bulbs but is for LED’s. This was easy enough to fix by switching two pins inside the tachometer connector. I’m now at a point where the dashboard is complete and the carpet is mainly in. Because of a national holiday I will have a four day weekend starting this Thursday. This means I can finish the interior of the car and start installing the Apex front and rear control arms, steering knuckles and front crossmember. I really hope these don’t contain manufacturing faults or else they own me a really big apology. Edited May 12 by Mitchel0407 3 Quote Link to comment Share on other sites More sharing options...
jhm Posted May 12 Share Posted May 12 Great progress! The car's underside, as a whole, looks really good. 👍👍 Sorry I don't recognize that little L-shaped bracket -- it may be custom, from a previous owner. Quote Link to comment Share on other sites More sharing options...
Mitchel0407 Posted May 18 Author Share Posted May 18 My pretty long weekend has come to an end and I’m pleased to say that I accomplished a lot in those four days. I started off with finishing the installation of the interieur. Because of the Apex Engineered rear strut brace I had to make some modification to the floor board, carpet and strut covers. This took a bid more time then I had hoped but I managed to finish the interieur within a day. Me and my girlfriend are still slowly working on the seats and the door card but we will probably end up installing those last. Next came (for me) one of the more exiting parts, starting work on the rear end! So it was time to put down my QuickJack’s and take the wheels off….. Never mind, the previous owner installed locking wheel nuts on all four corners and all four lugs at that! So a trip to the parts store for a lug nut removal socket and some angle grinder lathe action later (and about 3 hours) the wheels where finally off. If you told me the rear end was still factory fresh then I would have believed you. All the bolts where incredibly stuck and most of them where cross threaded (thanks previous mechanic). Not to mention all the rubber bushings where pretty worn out. Luckly with some heat, penetrating oil and a hammer all of the bolts came out. The threads there even still usable, lucky me! Before the reinstallation I did retape all the threads and cleaned up all the nuts and bolts. Before reinstalling everything I took my time to replace the differential gasket and change the differential oil for some new Motul 75W90. I also replaced the mustache bar bushings for polyurethane bushings. Removing the old bushings went pretty smoothly with a saw, some fire and a bit of patience. The only problem I had was during reinstallation of the mustache bar. The only way it would fit back in was by rotating the bar 180 degrees, may explain the difficulty removing the bar in the first place. I don’t know if this is the correct orientation but it wouldn’t fit any other way and I can find many pictures online of the bar in both orientations. I decided to leave the bar as is and finish up by finally installing the Apex rear control arms. Man it feels good to finally make some upgrades, the car feels more and more my own. The refresh of the rear end took a bit more time then I initially thought (two days) so before starting on the front, knowing I couldn’t finish it this weekend, I decided to take on some smaller jobs first. The bodywork on the car is a bit of a slopy mess with some signs of surface rust all along the lower edges of the rear of the car together with fading powder coating / paint on the fuel tank. It may be a bit unorthodox but seeing as I have a rust converter spray / paint that’s pretty close in color to the car I just took a sander to the edges and sand away the rust and knock down the body filler on the bottum edge. I also sanded smooth the fuel tank and used the last bit of remaining texture spray to hide the imperfections on the fuel tank. And even if I say so myself I’m pretty pleased with the result, at least the rear of the car is now less of an eyesore. During all the work on the underside of the car I noticed a small oil leak coming from the speedometer pinion gear. A quick search online showed it had an o ring sealing the pinon gear so I quickly popped it partially out and replaced the o ring inside. Another small job of the list! As I still had a bit of time left in the day I tried my luck at removing at least the front control arms. And I don’t know what magic was used but this was the easiest disassembly ever! A little spray of penetrating oil and a quick tuck on the wrench and out came the bolts by hand. Even the front ball joint and tie rods came right out! All in all it was a very productive weekend. I just placed an order for some small stuff like a few new rubbers, normal lug nuts and two new horns (mine have underseal in them) and will be continuing my refresh of the front suspension next weekend. That will be a bit more tricky as I need to replace the oil pan gasket and the front crossmember. Also I know you guys probably find my work space pretty interesting so enjoy! 2 Quote Link to comment Share on other sites More sharing options...
Mitchel0407 Posted May 26 Author Share Posted May 26 Another week has past and another weekend of work has been completed. Luckly the orders I placed where send out pretty fast so I got all the rubbers and bushings I was missing ready to head to work. I started off with finishing the work on the transmission. As the speedometer gear had been leaking, and I didn’t know how much fluid the transmission had lost (or was even serviced the last time), I decided to change the transmission fluid for some Redline MT-90 transmission oil. That was easier said then done as Redline MT-90 is pretty hard to find in Europe. But it appears I was in luck, one performance parts shop here in The Netherlands had a few cans in stock and send them out for me that same day! Even though the transmission mount and crossmember bushings where is decent shape I still decided to chang them out as a precaution. I used a OEM style rubber transmission mount for vibration reduction but polyurethane bushings in the crossmember for added stiffness. Next came the most exciting but also the scariest part. Replacing the front crossmember, engine mounts and oil pan gasket. I wanted to leave the crossmember for last and start by removing the oil pan. To do that and have easier access to the bolts I first removed the steering rack which I gave a quick clean and paint job while I was at it. I might have figured out why the oil pan was leaking in the first place, it turns out about halve the oil pan bolts where loose! Other than that the process was pretty straight forward. Removing the oil pan did give me a pretty interesting look into the engine which felt pretty weird so I quickly reinstalled the oil pan with new bolts. To remove the crossmember I had to find a way to support the engine in the meantime. For this I created my own, incredibly sketchy, engine support bar together with a jack under the crack pully. Even though it was incredibly sketchy it was surprisingly sturdy and stable. But still I hurried as fast and as careful as I could to remove the old crossmember and install the Apex Engineered crossmember. This went surprisingly smooth with the only difficult part being reinstalling the bolts into the new engine mounts. But with a bit of help of the jack and some patience I got them all in and everything safely secured again. Next came the most difficult part of fitting the Apex crossmember braces. The passenger side went without a problem but the drivers side not so much. There the crossmember brace didn’t fit as the car had aftermarket headers and signs of body damage to the left side of the car. The headers where interfering with the brace and the brace was sitting much more forward then the passenger side. This required some modification of the headers (with a hammer) and a few spare washers as spacers to fix. To modify the headers I had to take them off the car which I really hope I won’t have to do a second time as the bolts are really hard to reach. To finish off the weekend I got a call from the body shop telling me my doors and cowl where finished painting! So I immediately got in my car to pick them up and install them back on the car. The installation went pretty good but I didn’t get the doors to sit perfectly flush, the back always sticks out a bit. This may be because of the weather stripping which I assume to be cheap aftermarket. After the doors came the fenders and the rest of the bodywork. As I was missing a lot of bolts around the car I ordered a nut and bolt kit from ResurrectedClassics a while back. During the previous “restauration” (if you can even call that) they just left damaged bolts out or spot welded panels in place. As I absolutely hated that I took my time to retap all the holes or install rivet nuts wherever I could. I also replaced a lot of the bolts with nice plated bolts from the kit. All of this nearly has the car ready for one of the final inspections of it’s life (as they aren’t mandatory anymore after 50 years). I just have a small list of things left to do. - Reinstall the door cards - Reinstall the seats - Set a rough alignment (enough to get me to the shop) - Install the wheels - Install a new set of horns (existing ones have underbody coating in them) - Repaint and install the front grill - Install the new fender mirrors - Install the rear speakers (for now optional) - Replace the pre fuel pump fuel filter (for now optional) And of course clean the car! 2 Quote Link to comment Share on other sites More sharing options...
Recommended Posts
Join the conversation
You can post now and register later. If you have an account, sign in now to post with your account.