Boy from Oz
-
Posts
541 -
Joined
-
Last visited
-
Days Won
2
Content Type
Profiles
Forums
Blogs
Events
Gallery
Downloads
Store
Everything posted by Boy from Oz
-
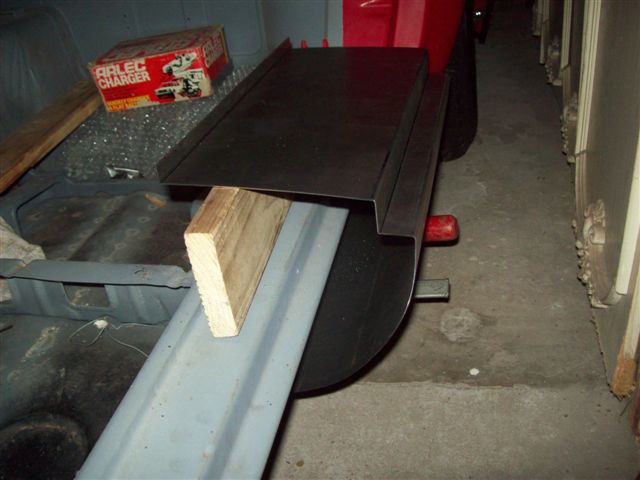
Kclank - Firstly, you look like my long lost twin! There must be something about GTO kits and grey beards. Secondly, what are the panels in photo #12? Thirdly, did those bonnet (hood) hinges in photo #8 come with the kit? I still need to get a set. regards
-
I went ahead and made up a shifter casing but I need to get the lever itself to move sufficiently before cutting out the gate pattern in the top.

-
Where’s the satisfaction in that? Where’s the 1000s of hours of your life wasted. The 1000s of dollars wasted. The abuse from your wife – see previous. The frustration at having to redo something because you took a wrong measurement. The utter frustration of redoing again because you actually got the measurement right first time but stuffed up the calculations. Where’s the garage full of stuff you bought but later realized you didn’t need. The physical scars from the lacerations you sustained when the wrench slipped off the nut. The hole in the garage panel where you threw the wrench – see previous. The emotional scar when you realize you’ve taken on a project you can’t finish Where’s the… Sorry, it's time for my medication.
-
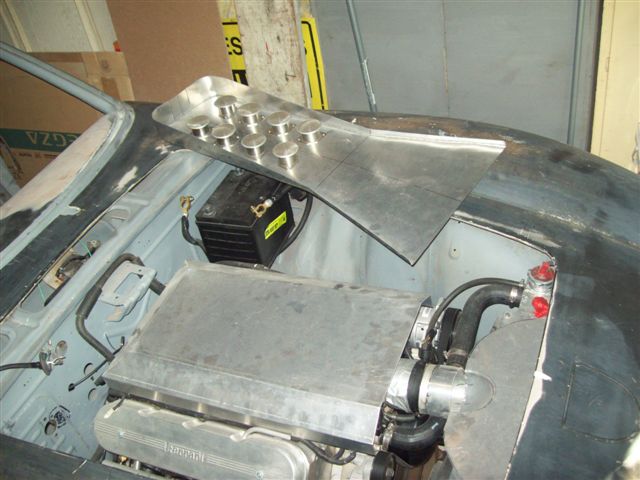
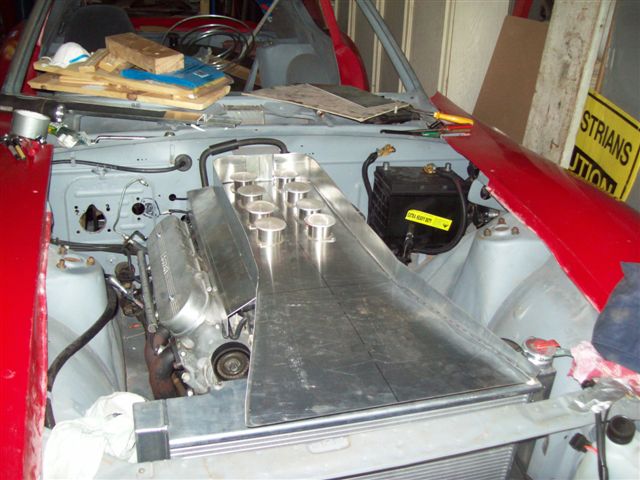
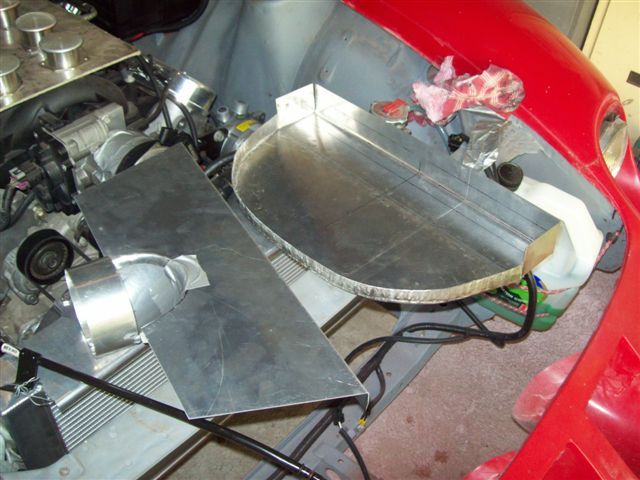
On my LS1 build I've decided to relocate the radiator from the engine bay (see photo) to forward of the radiator surround - it was becoming too crowded in the bay. To enable the body to fit I need to mount the radiator about 120mm forward of the surround (above the stringline in the photo). Before fabricating mount/s I wonder if anyone has info or photos of how the mountings work on an intercooler or radiator mounted forward of the surround. Thanks
-
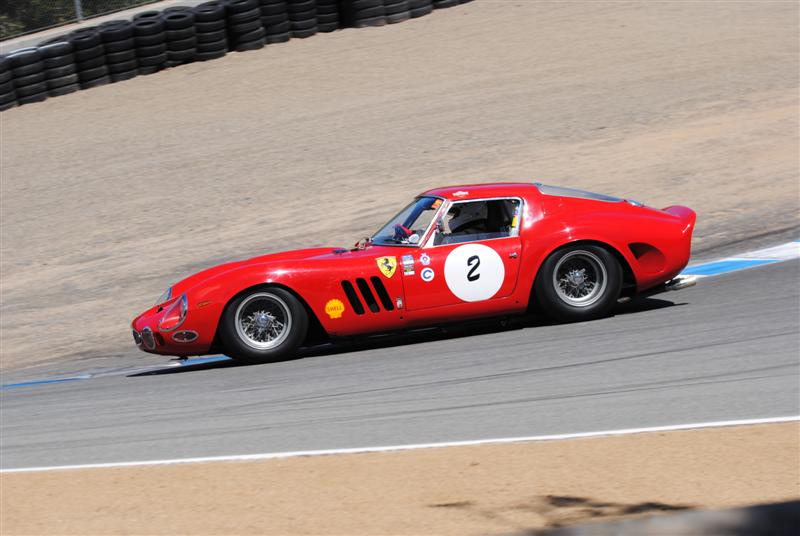
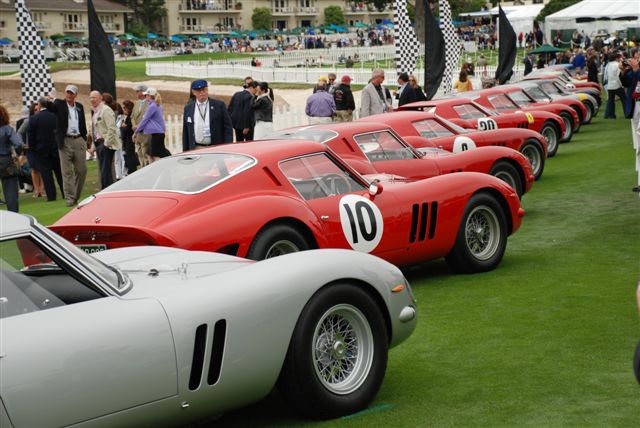
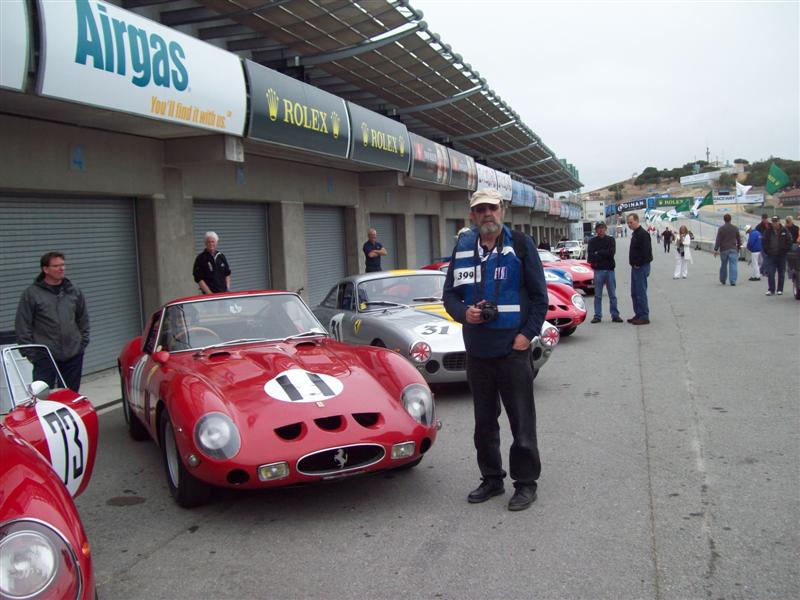
Pretty much as 'C Pierre' states. The slotted shifter you will have to have made, or make yourself. Important to note... the shifter in your car may not have the movement (particularly left to right) to use a slotted gate. The steering wheel is a Nardi but around $3000 if you can find one - the closest is the Nardi Anni 60 which was fitted to some Lancias in the 60s. You can buy a new one but it will need an adaptor and a Ferrari horn button. I picked all those bits second-hand up off the Italian eBay. I doubt you would see an original interior except in period photos and they are nearly all B&W. They were all built as race cars so there was no trim except for blue seats, however, as they were retired and sold for conversion to road cars the various new owners often modified the interiors to suit themselves. Some photos here: http://www.supercars.net/cars/518.html There are also excellent reference books by Anthony Pritchard and, Jess Pourret & Keith Bluemel which detail every GTO built (note; no spyders) available on eBay, etc. Buy your wife one for Mother's Day! Here are some photos I took at the Laguna Seca historic meeting last August.
-

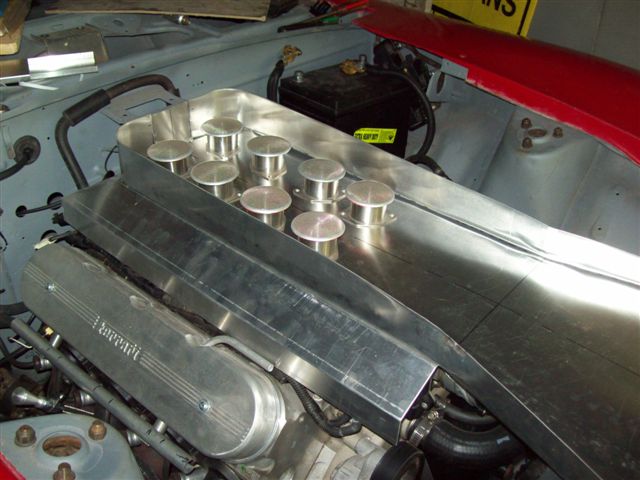
LS with velocity stacks
Boy from Oz replied to RebekahsZ's topic in Gen III & IV Chevy V8Z Tech Board
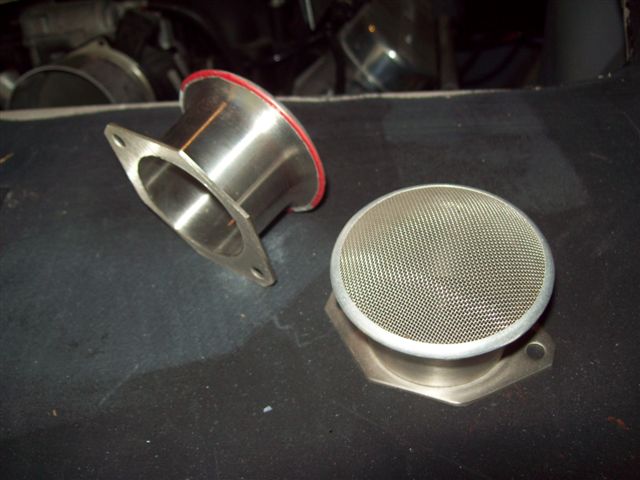
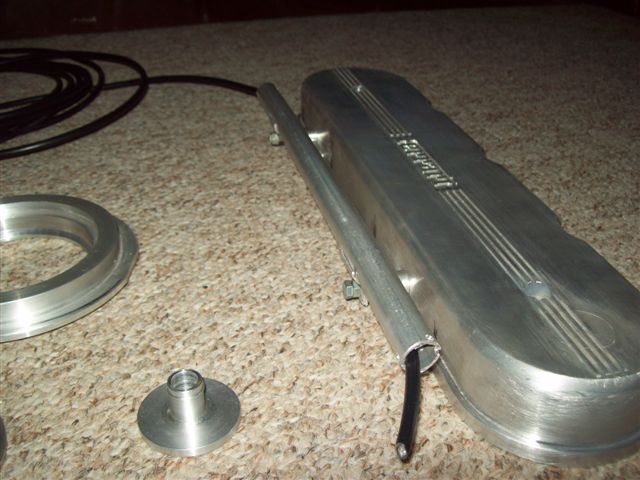
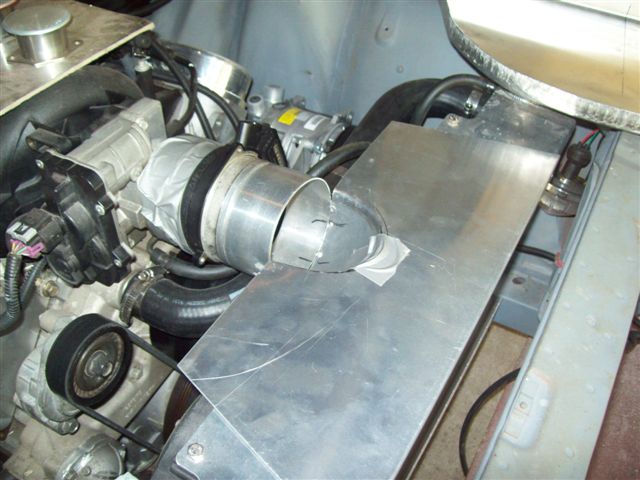
Apologies to 'randy 77zt' for reposting that you-tube link. RebekahsZ - An issue with faux ram tubes is you need to hide the GM throttle body. Here is an idea to test you - reverse the manifold so the TB is at the rear. You would have to fabricate a concealed cold air intake and may even pipe it through the cowl but it would add to the illusion. I simply covered my intake with the scoop. Heck no, it's an LS1 with a few bit of folded aluminium sheet. The tubes are stainless but the trims holding the mesh were made from Coke Cola cans - you can still see the red paint on the underside.
-
LS with velocity stacks
Boy from Oz replied to RebekahsZ's topic in Gen III & IV Chevy V8Z Tech Board
I don't think the Aussie V8 Supercars use LSx motors. Even though I live here I can't stand them - more an open-wheeler man myself. Pretty sure the Supercars use old Aussie-made cast iron blocks, but I could be wrong. (edit) Well I am wrong - hardly any production items in those motors. -
LS with velocity stacks
Boy from Oz replied to RebekahsZ's topic in Gen III & IV Chevy V8Z Tech Board
Oh dear, looks like I'll have to ditch mine before I even use the car!
-
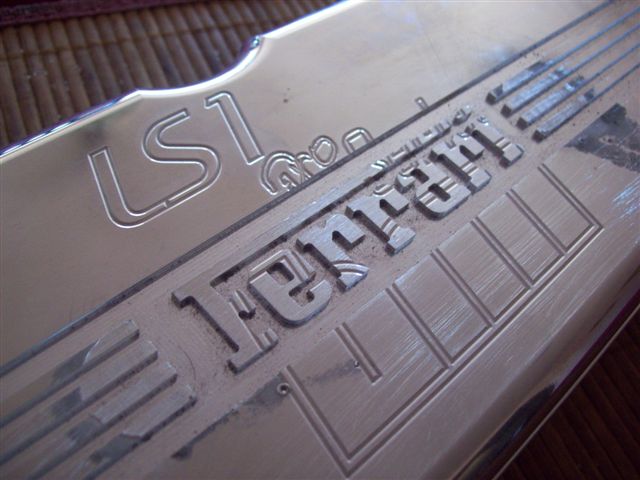
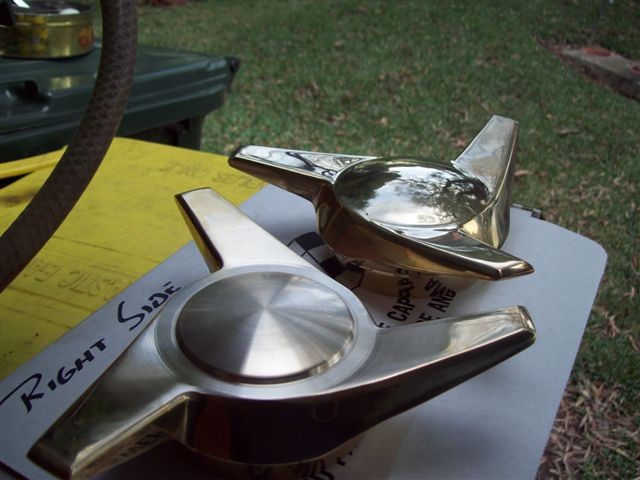
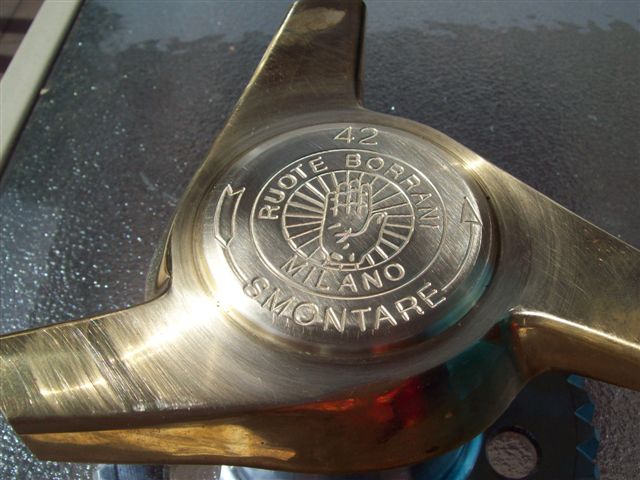
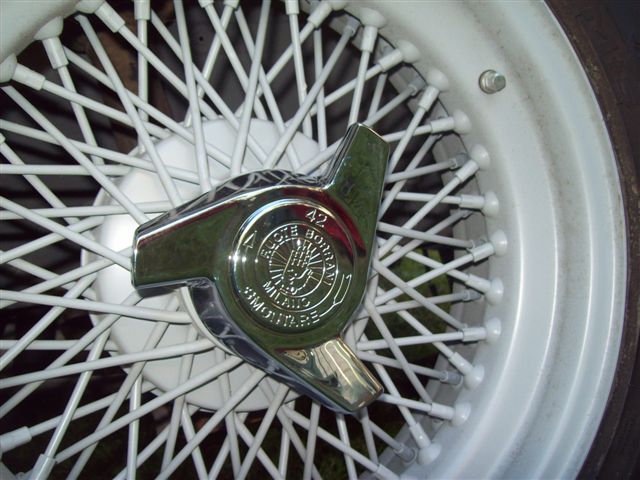
Yes I ordered unplated/unstamped caps but they sent plated ones. I contacted Dayton and they just sent me another (unplated) set. I guess the return postage (to Oz) wasn't worth the cost. I turned the dome down to a flat surface as engraving can only be done on a flat surface, unlike etching. Apparently the cutter will form unequal depths each side and create distorted letters. I sent them to a metal polisher to remove the machining marks and he outsourced the plating. The brass was quite porous and required several base coats of copper before the chromium plating. All the engraver needs is a vector diagram of the logo - www.brandsoftheworld.com - however, the configuration of the spokes on the logo had to be reworked and the other text and arrows added. A chap in the US apparently does it: http://vonflueart.com/ueco/universal-engravers-portfolio/restorations-professionals/ A couple more photos of the process.
-
It took two years and only four engravers but finally I have my Borrani look-alike knock-off caps.
-
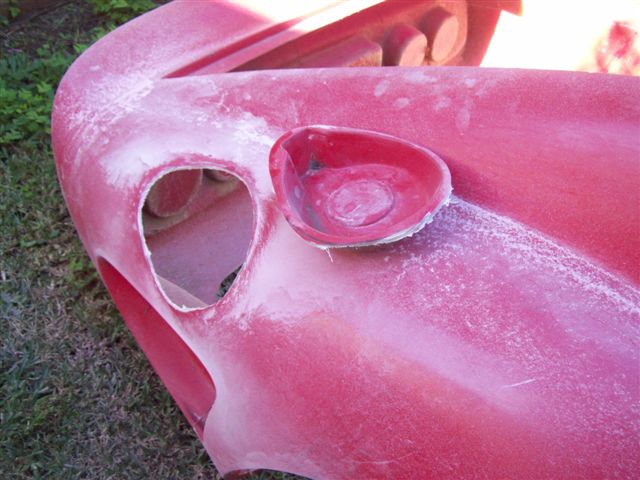
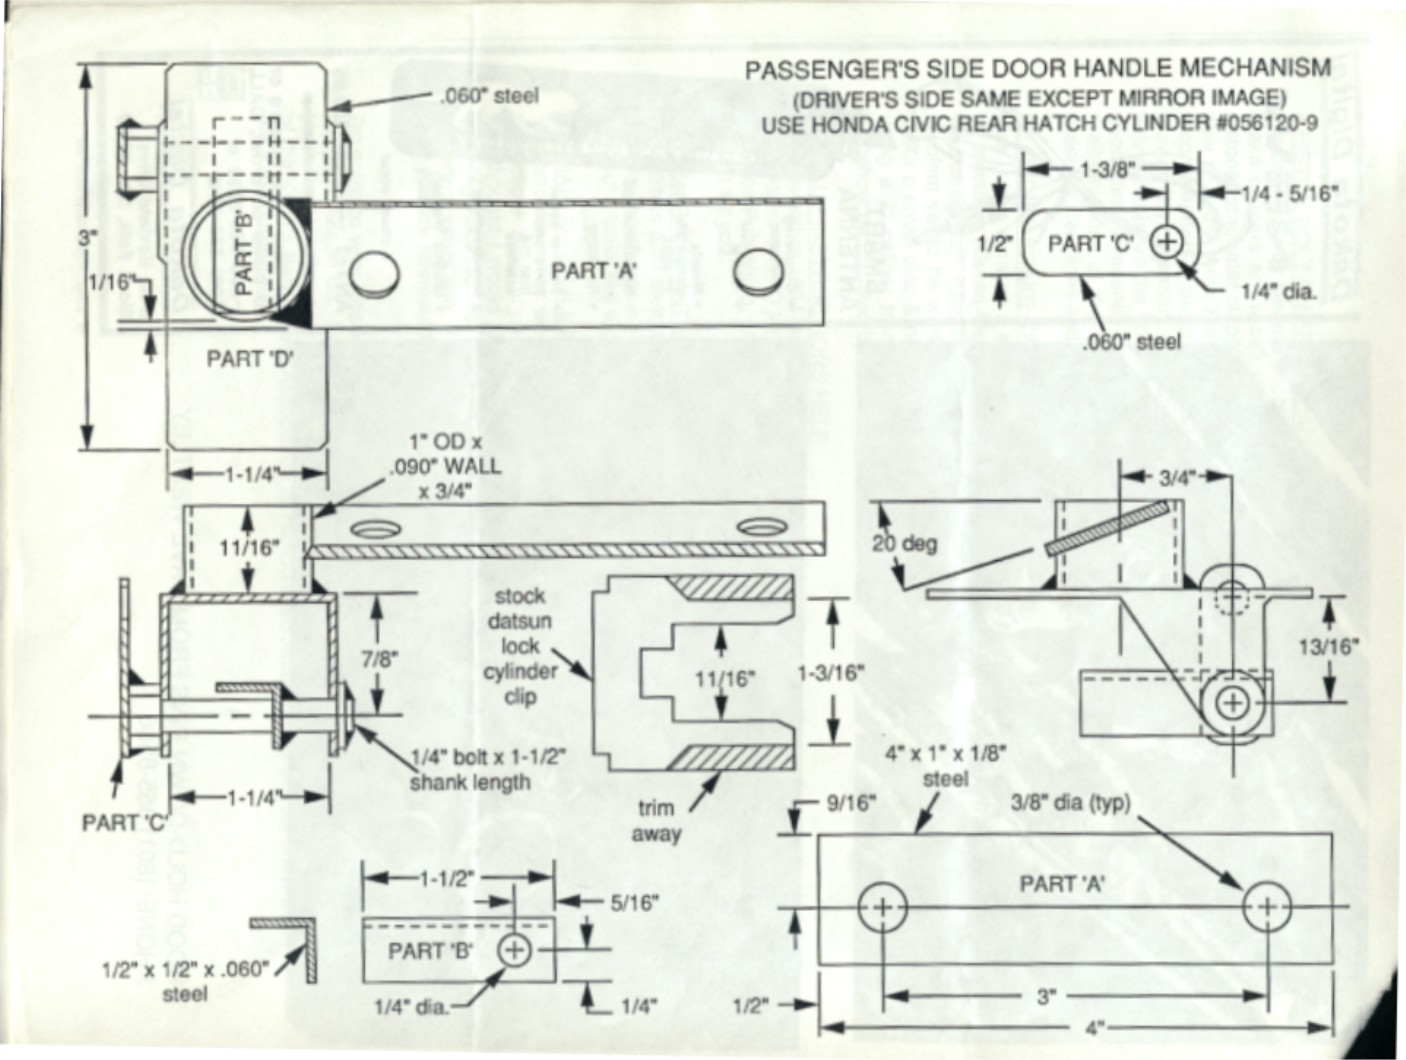
Going by your description you will need to cut out the section of the fibreglass skin which contains the the door-handle recess and re-glass it to match the contour of the skin - I undertook a similar process when I changed the fuel filler to the rear. You will need to fabricate two of the mechanisms shown below. I don't know how easy it will be with the skin attached.
-
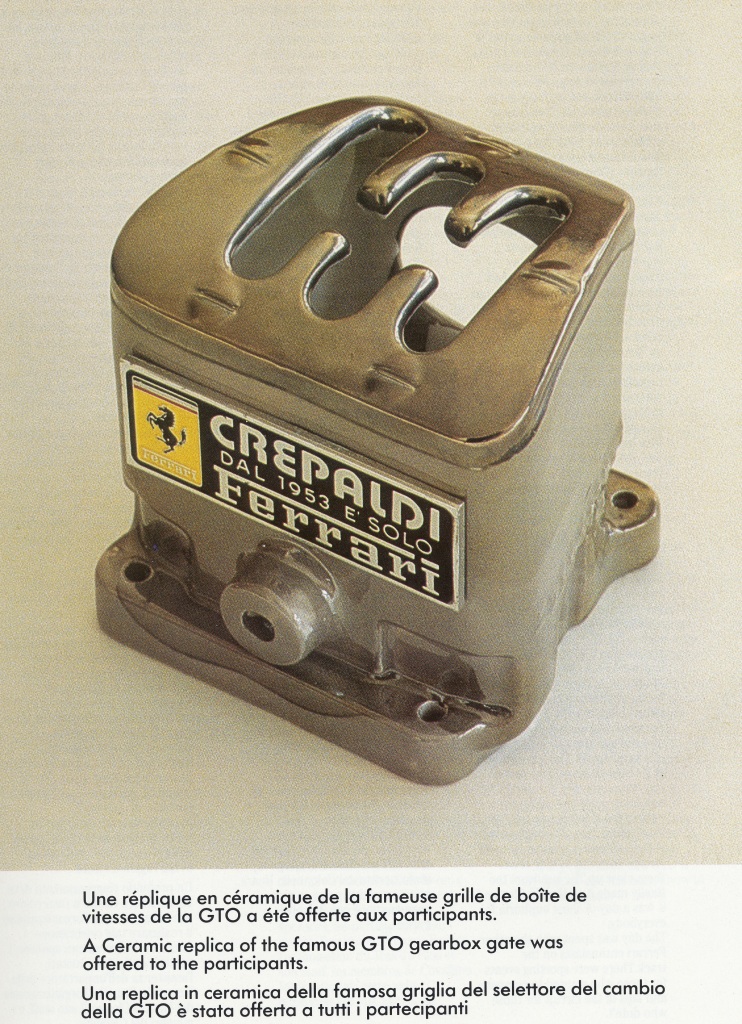
Someone has contacted me regarding the manufacture of the gear-selector gate. I was planning on making one but it was a little further down the track... like so many other things! Anyway, I gave it some thought and went to see a fabricator as to how I should go about it. It's easy to make a quick one-off but it is also possible to machine one out of a solid billet which would look more like the real cast one. There is naturally a bit more time and cost involved but it's also cheaper the more you make. The top gate plate would be blank and you would have to cut it to suit your gear lever pattern. Is there anyone out there who might be interested in one of these? I have no idea of cost (I wouldn't pay over $100) I'm just after expressions of interest. If there are >5 I'll get a price and let people know. Please PM me if you are interested. The photo is of a ceramic replica presented to owner on the 25th anniversary in 1987. Do a Google image search to see the item in a GTO. Note there is no plaque.
-
Passing of Sergio Scaglietti http://forums.autosport.com/index.php?showtopic=157574
-
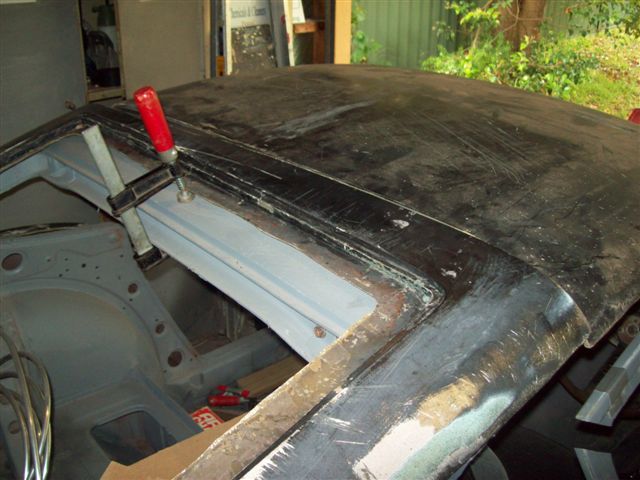
Many thanks 'chelle' for your efforts and I hope you find that manual. I am busy making new headlight covers and trims as the Alpha ones don't fit, also a trim for the grill. I will also keep working on the new doors originally planned for the Alpha kit as they should work on this kit. As 'chelle' and I have been swapping PMs on this kit some of you may not understand the reference to the Puckett rear window position. This photo illustrates how it intrudes 100mm into the roof area. I'm keen to know what options there are for achieving this while maintaining the structural integrity of the roof (the little there is!)
-
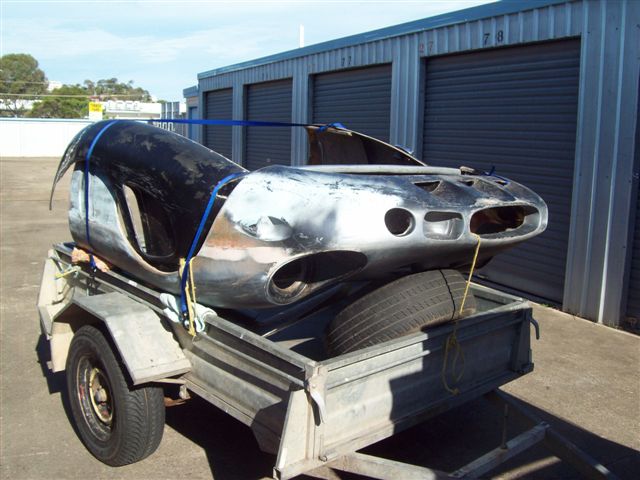
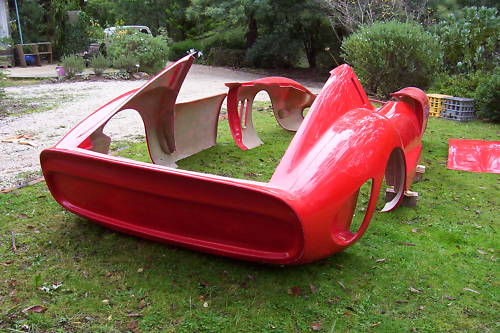
Charles Puckett, Charlie Puckett, Datsun Ferrari, 250 GTO kit, Puckett Auto Works, Puckett Automotive Design. Completely out of the blue I have obtained what appears to be a Puckett kit. It has had a very hard life but apparently has never has been fitted. The front is excellent but the rear is a basket case as it appears someone tried to turn a Belinetta kit into a Spyder. There are many questions I would like to ask about installing a Puckett kit and I wonder if anyone out there has one or knows of someone who owns one? Thanks
-
CP - I've moved your post here. I would suggest you borrow some 15" rims and try insitu - any will do, they don't have to be Daytons. My Willwoods are back in their box and tucked behind the lounge so I'm sorry I can't help. Back at post #614 I gave some details of the Daytons I purchased. Wheels are a bit of a compromise as you will see. I went with 16" rims because I have a special parking brake arrangement for the Willwwods, I thought 16" wheels would make the car look even dumpier (too short a wheelbase) than it already is, but what I've learnt is that 16" rims and high aspect ratio tyres gives the car a large amount of ground clearance. With the clearance I have been able to lower the car 90mm at the rear and it makes the tyres sit right up in the guards. Note I have also removed the spare tyre well. The car has yet to run under its own power so I still don't know how it will look on the road. I'm really after the period look so I went with 6" fronts (centre laced) and 7" rears (reverse-laced). I know it will probably struggle for traction if driven hard but it is not my intention to drive it like that. The 6" front also keep the steering very light. If I had money to burn I might consider 15" dia fronts but I would prefer to spend the money elsewhere. More pics - Keep the dream alive.
-
I've taken a different route with an over-the-radiator (OTR) design. I'm still working on it.
-
Fabulous week visiting Speedracer and at Monterey. If you haven't seen SpeedRacer's car in the flesh then I can tell you the photos do not do it justice, it is not just a GTO kit car but a beautifully finished show car. And yes, I got to drive it.
-
Funny that you should mention Chicago because to get to Speedracer's home in Tennessee the plane from San Francisco goes via O'Hare but unfortunately I have only one hour between flights. I wish you had made contact earlier and I would have arranged half a day to meet with you. There certainly are some weird flight paths in the US as the flight from Tennessee to San Francisco goes via Miami - figure that one out! I'm spending the weekend prior with Speedracer then the whole of Auto Week in Monterey. Too much GTO is never enough.
-
The Monterey news gets even better. I've now learnt that as well as the 20+ GTOs at Pebble Beach there is a 250GT only race at Laguna Seca with 11 starters and most are GTOs. I'm also spending a few days with Speedracer. The trip will be GTO heaven. The doors are gradually coming together. I've popped the front section 50mm out from the 'A' pillar and drawn a line from the front guard to the rear arch - that will be the new body line. I've chopped the door top and bottom so it is now 100mm shorter in height and I've made up a sample of the new sill (rocker) section.
-
Good news - looking forward to another berlinetta build. Keep us posted. Three week until Pebble Beach - I'm getting excited.
-
From what I can see the rear section you have is for a Spyder... This is what you need for a Coupe (berlinetta). (edit) On second thoughts it may have a universal application. As far as I know John Washington has these sections but I believe that Thunder Ranch also have them.
-
I'm inclined to think you are doing it the right way! The outer fibreglass skin is glued to the original door skin so you have quite an increase in thickness on that top ridge. The body kit assembly instruction are fairly basic and wouldn't go into such fine points as to how you deal with the thickness issue, it's up to each builder. Yours is probably glued as you suggest.
-
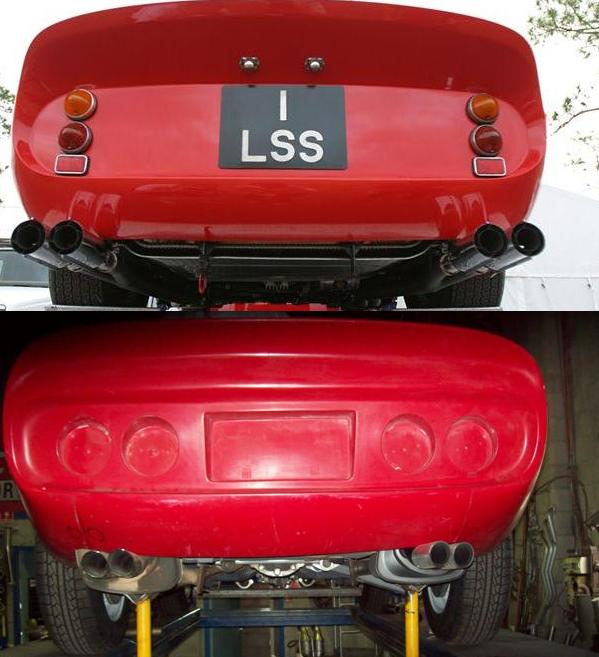
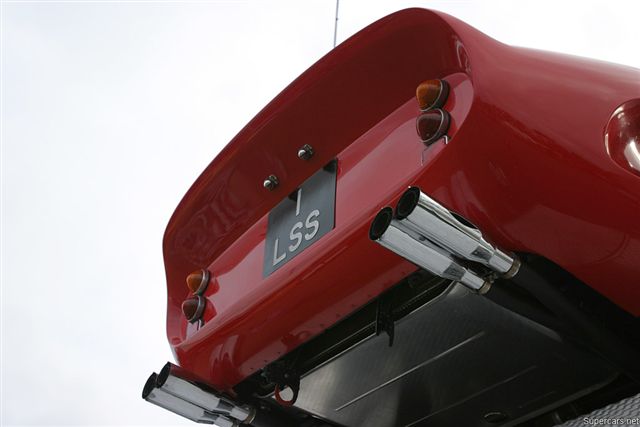
No, in fact it's quite a long way off. I had to fit huge rear mufflers for our registration requirements and even though I plan to swap them after registration I had to have the tank fit in with them. I'm doing away with the original filler location and relocating it behind the numberplate. By the way, I am coming to the US to be at the Pebble Beach Concours d'Elegance in August as there will be over 20 250GTOs on display. Is anyone else going?
-
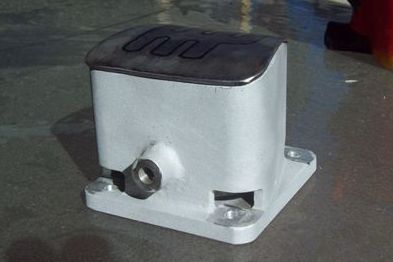
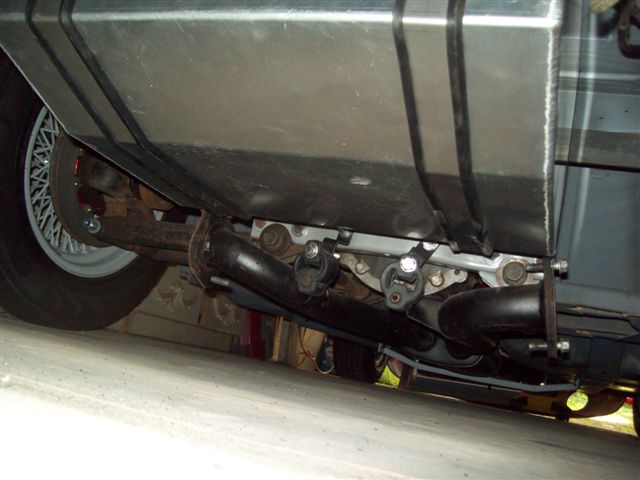
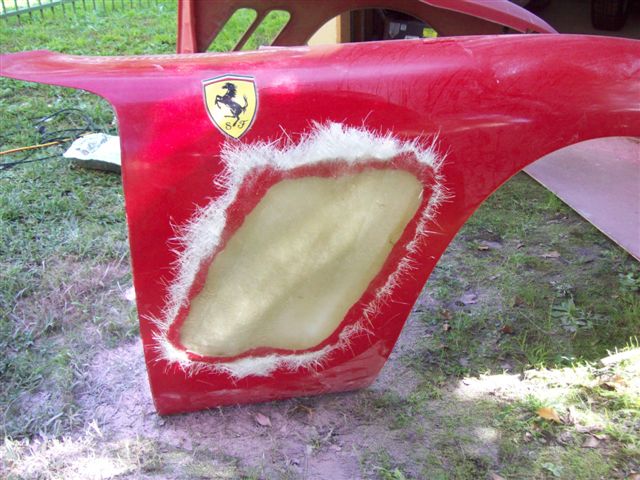
At $14,000 I started to weep when I read that ad. Mine has just ticked over $37,000 and it will never have a nose and tail as good as the Scorpion kit. Not to worry it's the kids' inheritance I'm spending! A few more updates. I have filled in the old vents on the front panel ready to cut new ones (smaller and back a bit more) I have the new fibreglass doors and I'm starting to modify them and the relocated coils on the LS1 are finished with Ferrari like tubes carrying the leads. The fuel tank is made.