Boy from Oz
-
Posts
541 -
Joined
-
Last visited
-
Days Won
2
Content Type
Profiles
Forums
Blogs
Events
Gallery
Downloads
Store
Everything posted by Boy from Oz
-
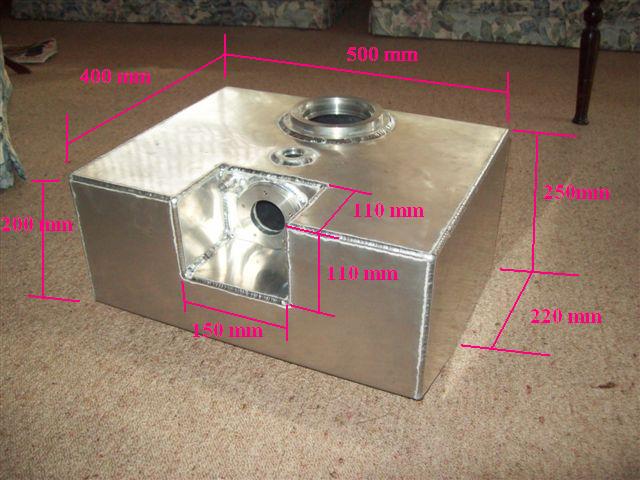
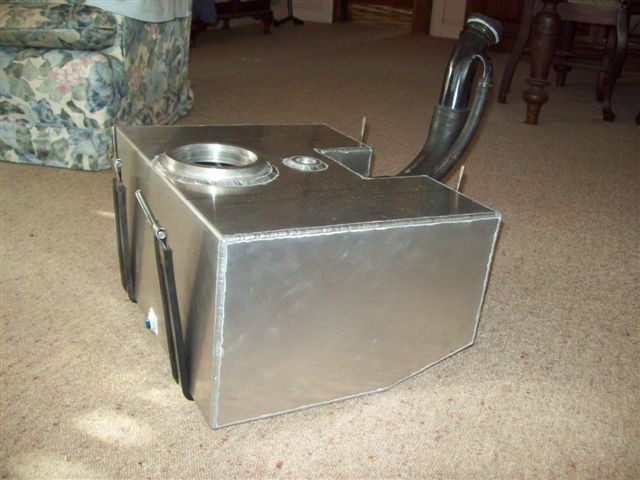
Made it myself, Only 50 litres as I wanted to run twin exhaust for the GTO and we have very tough noise/emission laws down here requiring big mufflers, etc. which restricted the width.

-
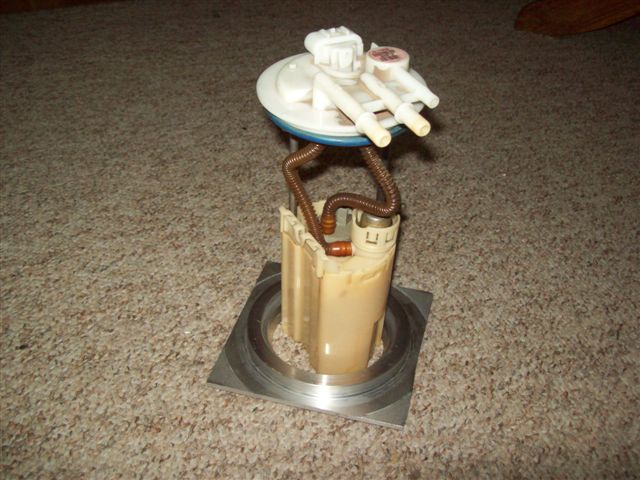
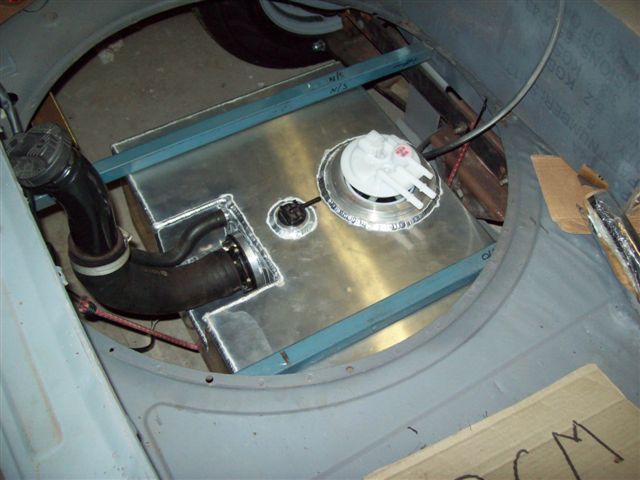
Why not run an in-tank pump? Does away with all those nasty lines just waiting to be ripped off or punctured. I have the filler behind the number-plate.
-

GM LSD IRS diff in S30 - fits like a glove.
Boy from Oz replied to Boy from Oz's topic in Drivetrain
Sorry, but I don't get on here very often as the project has moved to other non-Datsun aspects. If anyone requires information in the future send me a PM to let me know your post has been added to this thread. Here is a link to more detailed information: http://www.viczcar.com/forum/topic/12048-tutorial-holden-diff-fitted-to-a-240z/ -
Not sure if this info might assist but here is how I adapted Porsche 930 CVs. I'm not sure if this is always the case but I found the splines on 'plunge' and 'non-plunge' CVs were different (28 Vs 27) and the after-market axles only cater for 'plunge' CV (28 splines) on both ends http://www.viczcar.com/forum/topic/12048-tutorial-holden-diff-fitted-to-a-240z/
-
LS1 and heater valve?
Boy from Oz replied to Boy from Oz's topic in Gen III & IV Chevy V8Z Tech Board
Yes, there is such a valve (http://www.ebay.com.au/itm/200989576801?ul_noapp=true). Is this what you used or did you simply install the Vintage Air valve to blocks off (restricts) the inward flow to the heater core? Thanks. -
LS1 and heater valve?
Boy from Oz replied to Boy from Oz's topic in Gen III & IV Chevy V8Z Tech Board
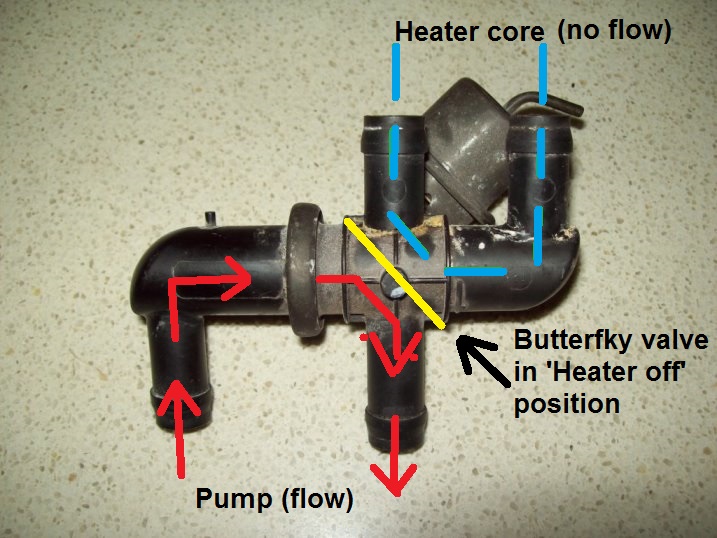
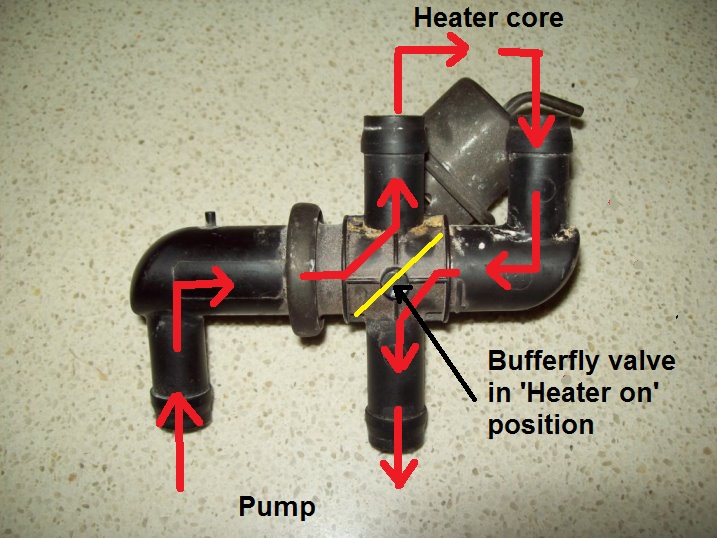
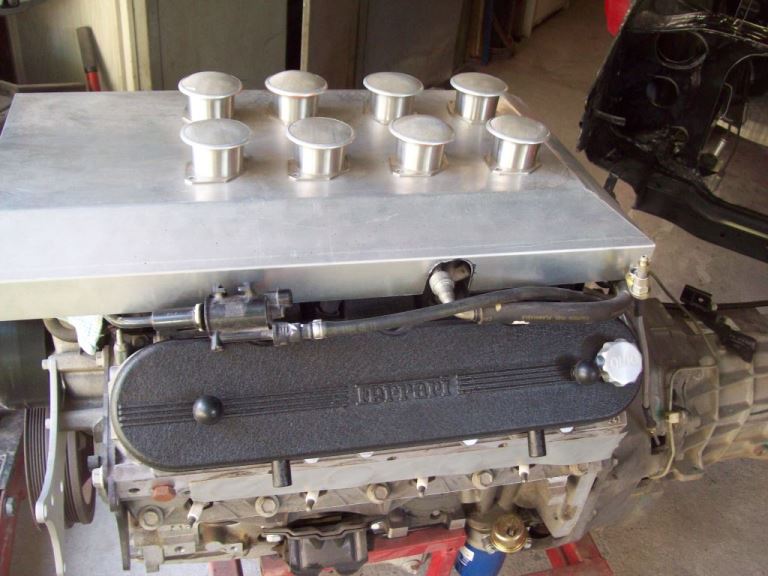
I actually want to use the heater so blocking off at the pump is not an option. Jay, I retained the valve from the donor car (see attached) but like the replacement valves it is vacuum operated whereas the the Vintage Air valve is electronic. What I really want to know is whether blocking both inflow and outflow to the heater core, and creating a return loop, critical in LS1 systems?
-
The installation of a Vintage Air a/c system has been completed on my S30 and I'm just about to connect the heater hoses. I've now been told that I should use the GM hose 'loop' configuration which blocks off flow to and from the heater core and recirculates the hot water back to the pump. I am more familiar with a system which merely blocks off the flow of hot water to the heater core in the cabin, which is what the Vintage Air valve, supplied in the kit, does. As I understand it, heat can conduct its way up the heater outflow hose into the heater core and add an extra load on the a/c to provide a cool cabin temperature and the GM 'loop' system eliminates this. Any thoughts or experiences with this supposed issue? Thanks
-
LS1 Car Club! Post yours!
Boy from Oz replied to maichor's topic in Gen III & IV Chevy V8Z Tech Board
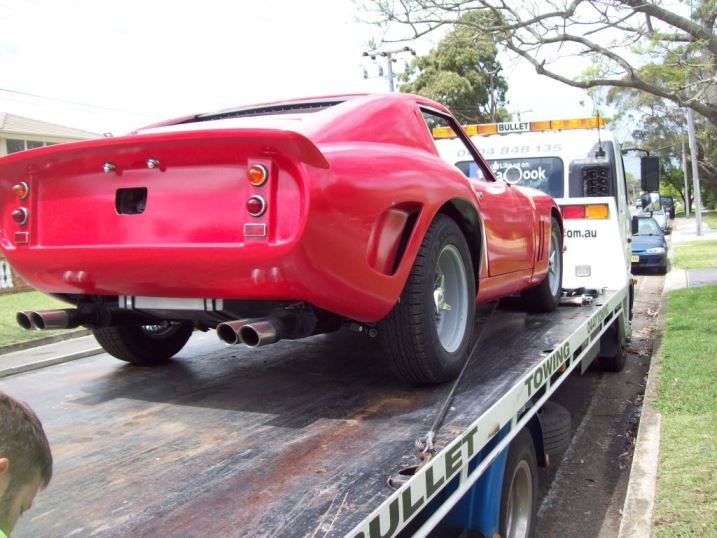
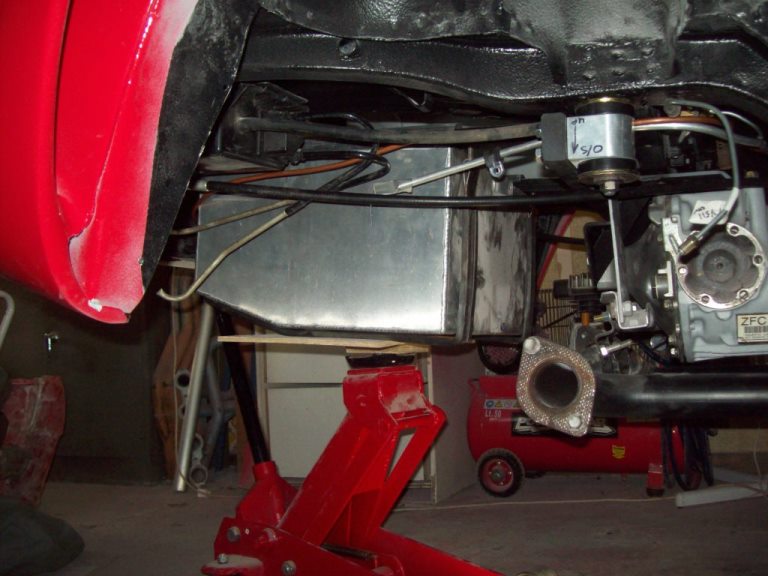
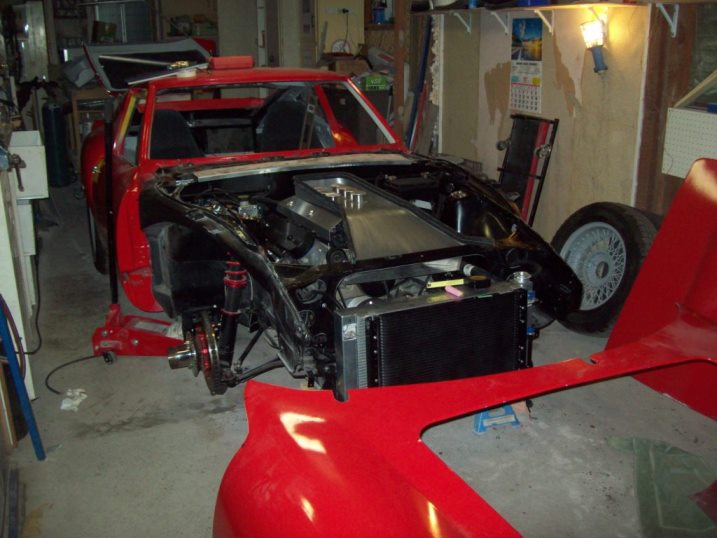
LS1 t56 Long tube extractors (headers) GM, IRS, LSD differential Wilwoods Adjustable LCAs Dayton wire knock-offs PWR radiator - relocated forward of engine bay Aluminium fuel tank GM in-tank fuel pump Puckett, 250 GTO, body RHD https://vimeo.com/194912950
-
1978 DATSUN 260Z ++OR++ FERRARI 250 GTO?
Boy from Oz replied to CHATZ's topic in S30 Series - 240z, 260z, 280z
Oliver, I honestly think persevering with that 260Z will be a waste of time and energy. The further you go the more rust you are going to find. Are you sure that car hasn't been for a swim or is that typical of UK cars on salt covered roads? You might pick up some home-grown advice by joining here - http://zclub.net/ Give this plan some consideration: - Strip, prep and sell the mechanical components. - Cut up the shell to retreive the GTO fibreglass sections - see here http://www.madabout-kitcars.com/pictures/258/1294/OM+Sportscars_Scorpion+GTZ - As 'Craig Duncan' and 'Speedracer' suggest, buy a 240/260 that needs some work (particularly panel work) - getting harder and harder to find in the UK. - Now start a GTO built from scratch, it's the only way you can be sure of the integrity of the shell. Plan B. Sell what you have and put it down to experience. -
1978 DATSUN 260Z ++OR++ FERRARI 250 GTO?
Boy from Oz replied to CHATZ's topic in S30 Series - 240z, 260z, 280z
There's a fibreglass supplier in your own country also: http://www.frpautomotive.com/index.html -
I've reassembled the mechanicals after a 3-4 years break. To my delight the LS1 fired up straight away. The only note of interest was while I was in the cabin turning the key an observer said a puff of smoke came from the throttle body area as I turned the key. I thought perhaps it was dust burning off the MAF which is attached directly to the throttle body. As I understand it the MAF has a hot wire filament(?). Anyway, when I pressed the starter button it burst into life. I left it idle and spent time checking for leaks, etc. Later when I started it again I got no response from the throttle - it starts and idles fine but will not rev. I read where someone with a similar no-DbW response the owner found the motor in the throttle not working. Considering the puff of smoke on the initial turn of the key I thought perhaps the butterfly was stuck after the period on non-use and caused the motor to burn out. I have also read that when the ignition is switched on the butterfly opens and closes quickly before the engine starts. I figured if mine did this then the butterfly motor should be okay. I had someone turn the key but what I did observe was the butterfly actually close from a slightly open position???? Any suggestions on how I might progress fixing this problem. Thanks. PS. Don't suggest a cable.
-
LS1 240 mounts (facts not opinion???)
Boy from Oz replied to trackzpeed's topic in Gen III & IV Chevy V8Z Tech Board
I've just had a look at that Hoke page. His design will have the motor way forward of the JCI mount set-up. -
The axles are under $300. The GTO uses what are commonly referred to as Porsche 930 CVs. They are used on a wide range of cars and are very common in off-road buggies. http://www.ebay.com.au/itm/930-28-SPLINE-AXLES-22-23-24-25-26-27-28-LONG-/290485456372?pt=Motors_Car_Truck_Parts_Accessories&hash=item43a2484df4 Also see: http://www.viczcar.com/forum/index.php/topic,14440.0.html
-
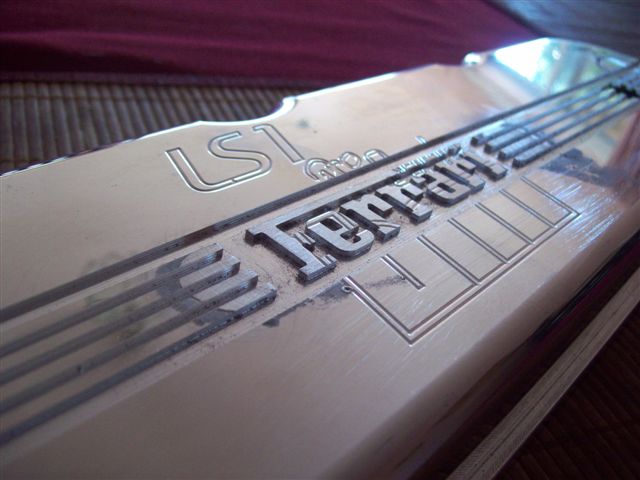
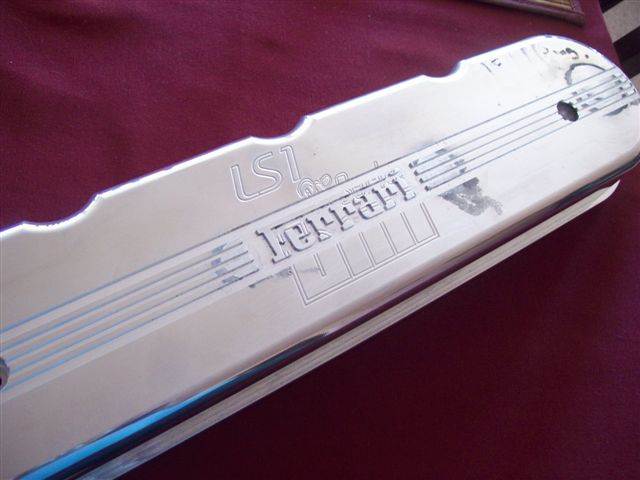
It would depend on how far you want to go and what sort of appearance you are after. An important factor of early Ferrari valve covers is their simplicity - they were racing cars in those days not the the display of opulence of today. Apart from the Ferrari name the series of parallel ridges is just as significant. I'm not all that familiar with a Z valve cover but here is how I would probably go about it. - Have a machine shop mill the top of a cover removing any raised sections and ensuring there is a flat section 1" wide along the center. You could even do it yourself with a hand grinder. - Obtain a strip of aluminium flat bar (1" x 1/4") to fit along the top. - Drill three holes (about 1/2") through the cover where the aluminium is resting. - Weld the aluminium bar to the valve cover from inside ensuring the weld seals the holes. - Have an industrial engraver create the Ferrari logo and grooves. - Finally, POWDER COAT. Do not paint as powder coating looks 10 times better and you will lose the details of the engraving if you use paint. I was able to engrave directly into the valve cover but the outcome should be the same
-
Very very impressive. Congratulations.
-
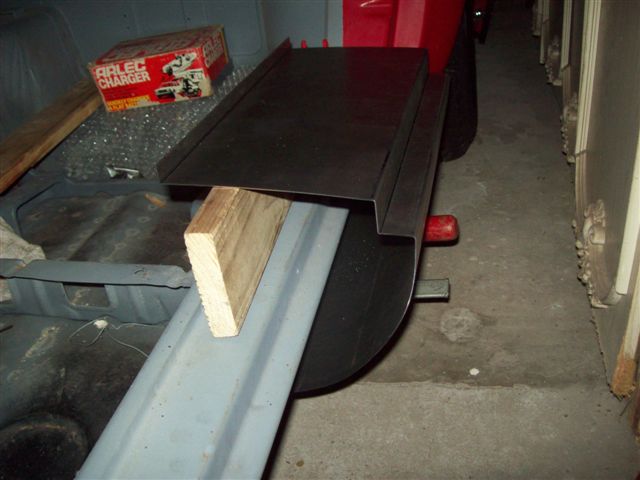
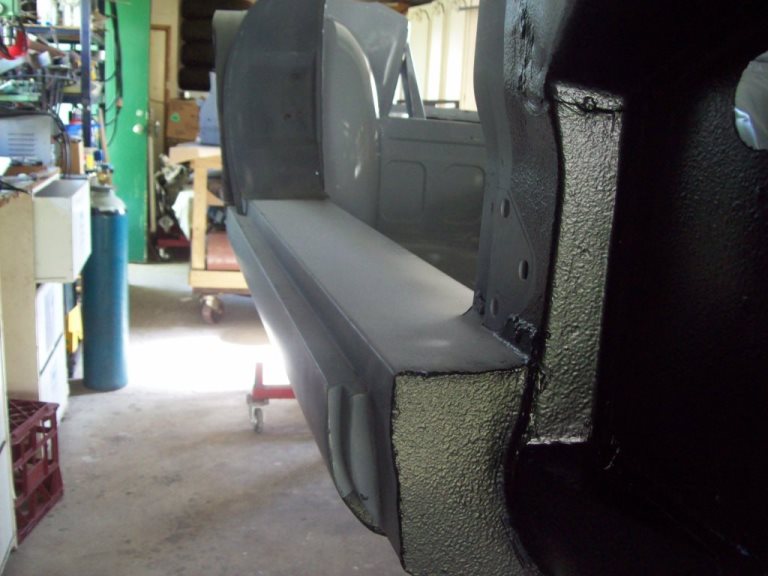
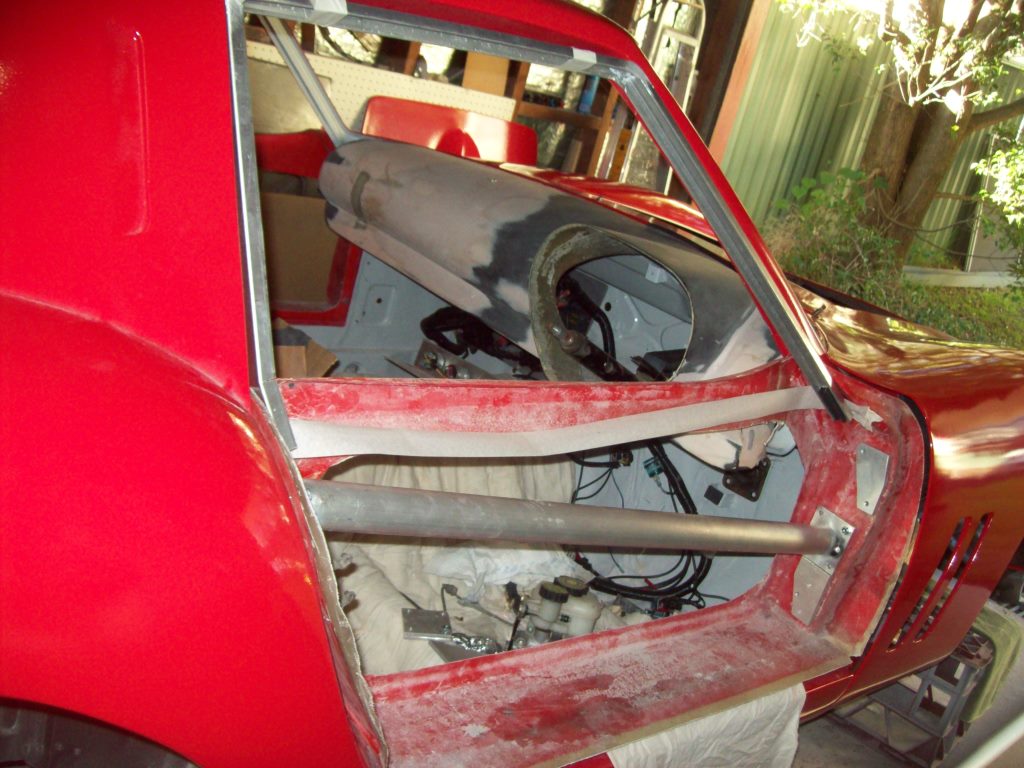
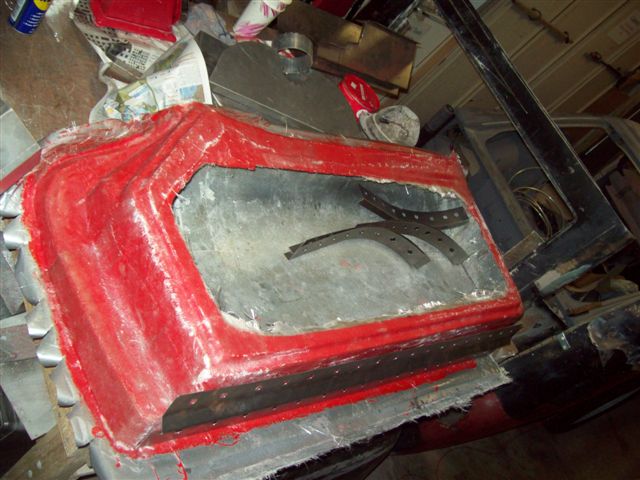
I'm impressed with the work done here, and I don't want to hijack this thread, but on the general topic of widening here is something I did to the rocker panels and doors.
-
It looks as though there was a tray in front of the radiator (damaged in this photo) forcing air through the radiator rather than spilling out underneath. A second larger tray in the centre section, possibly to minimise air turbulence. Neither I would describe as 'dams', though I bow to Mr Pourrer's terminology, and certainly not any form of diffuser.
-
If you send me a message with your email address I send you a copy of the installation guide. It's very old, probably for an Alpha version.
-
WHAT... In 1962 diffusers were only ever found in de fuse box. Wipers were fitted either way depending if the car was LHD or RHD. Similarly the dry-sump tank was always fitted and filled from the opposite side to the driver.
-
Nice work, congratulations.
-
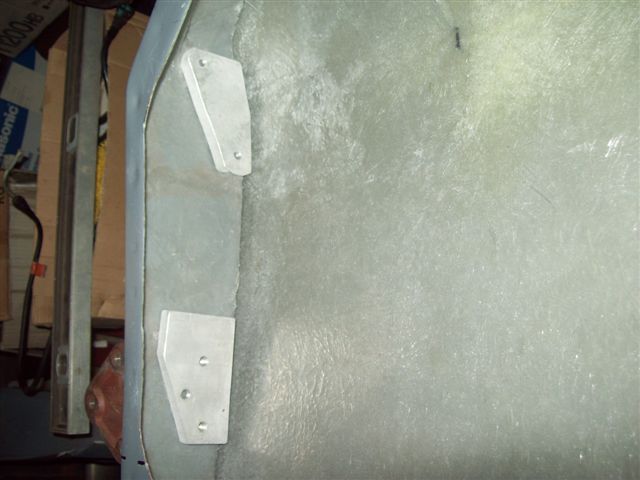
I sorted out one of those simple issues which always seems to take me hours and hours of procrastination to address. In this case is was the driving lights. As you will know the original Marchals cost about the same as the rest of the car combined but they have a unique style of mounting bolt - out the back of the casing - which makes it hard to buy something off-the-shelf. I found some low cost lights on eBay which fitted the opening and had a metal casing which I could modify to suit. Ground off the heads of the rivets holding the original mounts and drilled a hole in the back of the casing. I welded a washer (spreader plate) to the head of a 10mm bolt and poked it through the back of the casing and tack welded. I turned down the head of the bolt to have clearance to the lamp itself. I spread a bit of plasticine on the back of the opening in the bodywork (it's red and a bit hard to see in the photo) and pressed in the light to find the location for the mounting hole. I slapped a bit of paint on the retaining ring to give it a Marchal look. Happy with the outcome.
-
240z Ls1 build help appreciated 300zx parts car
Boy from Oz replied to hrandle's topic in S30 Series - 240z, 260z, 280z
It's called 'patina'. -
Techno Toy Tunning Front LCA
Boy from Oz replied to EvilC's topic in Brakes, Wheels, Suspension and Chassis
This is not correct. Bolts are never in shear unless they are loose. Bolts force two surfaces together and it is the friction between those two surfaces which transmits any forces. The bolts are always in tension. While on this issue, be sure not to apply excessive paint to any mating surfaces as it will compress over time and reduce the tension, and thus the friction, between the surfaces. -
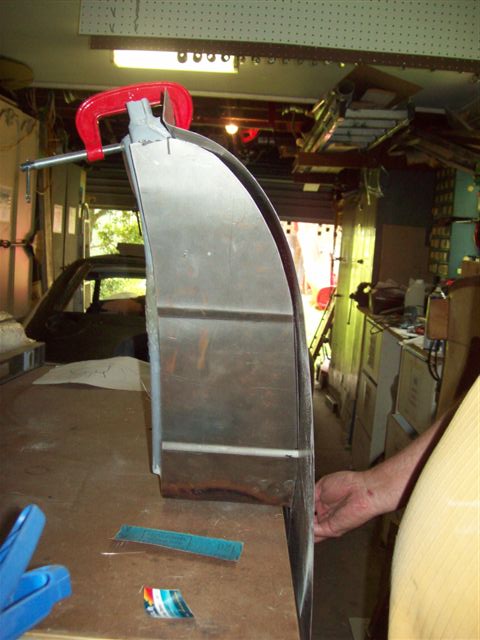
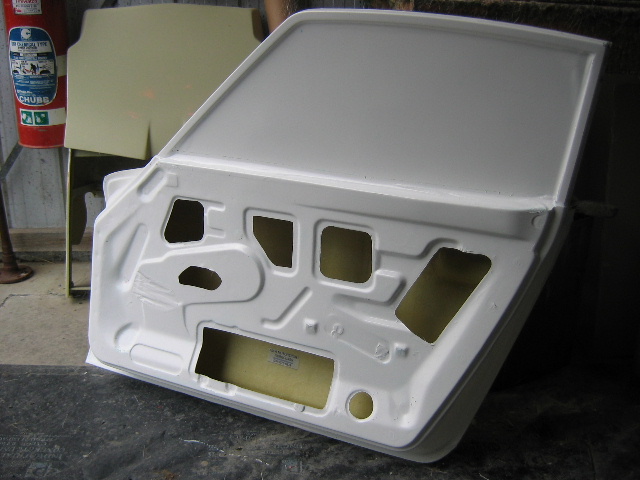
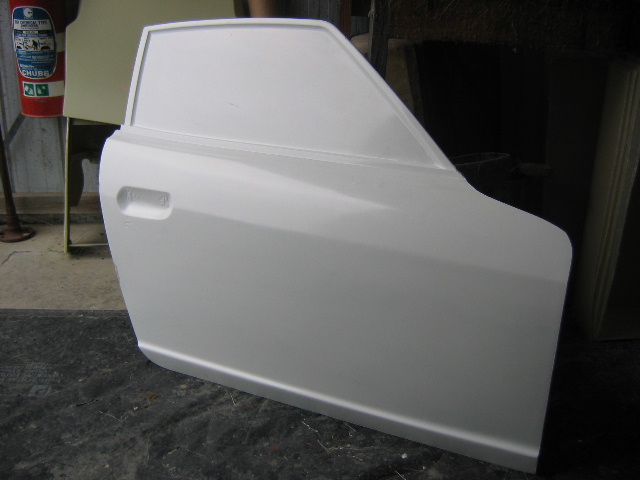
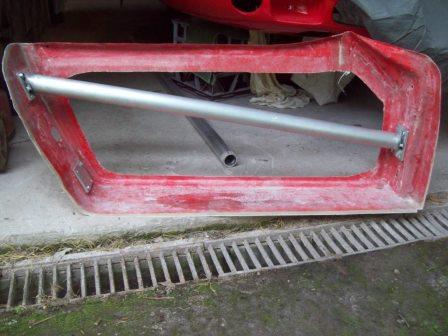
Unfortunately I don't have either complete to compare but I can tell you that I'm an old bloke (Oz term for gentleman) and not particularly strong, but I could easily pick the whole fibreglass door up with one hand and wave it in the air above my head. Again I would emphasize that you would have to fit a plastic window and do away with the glass and winding mechanism to achieve any rear benefit. Come to think of it, that's something you could achieve by experimenting with the original door. (edit) I've just weighted the components and my door is just under 4kg with no hinges nor latch, and no intrusion bar. It does include the aluminium window frame and sliding perspex windows panes.
-
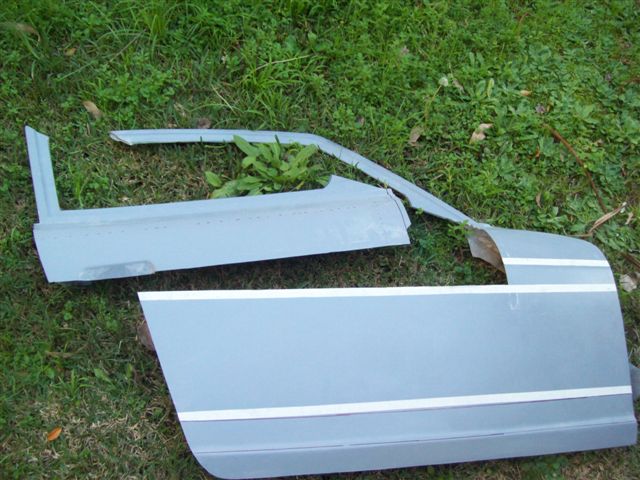
The shipping cost will probably rule them out but I purchased my fibreglass doors from this company in Australia for approx $700US http://www.motorsportfibreglass.com.au/index.php They include the window frame so you can use perspex. I would mention that the door itself is not a major weight component but rather the hinges and the window and winder mechanism are the big weight items. A fibreglass door by itself is something of a waste of money. If you have the basic skills it would not be too hard to make an inside and outside mould (OZ spelling) and then make your own. I chopped up the door to make a special set for my GTO.