RUSSJZ-ZED
-
Posts
142 -
Joined
-
Last visited
Content Type
Profiles
Forums
Blogs
Events
Gallery
Downloads
Store
Everything posted by RUSSJZ-ZED
-
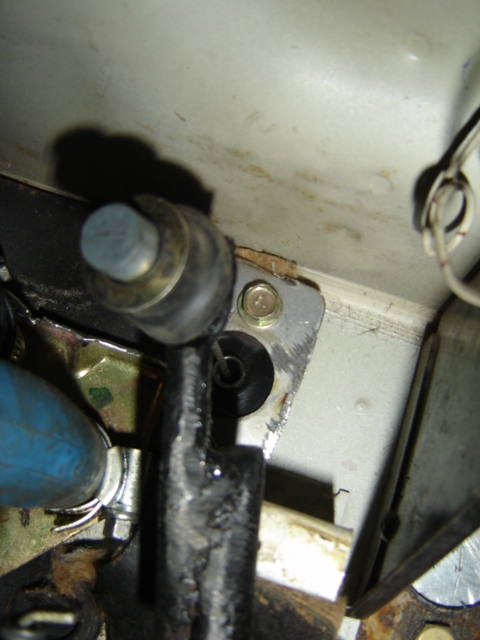
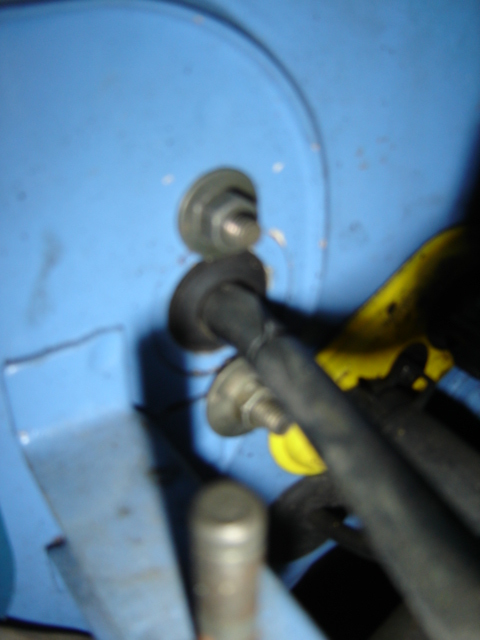
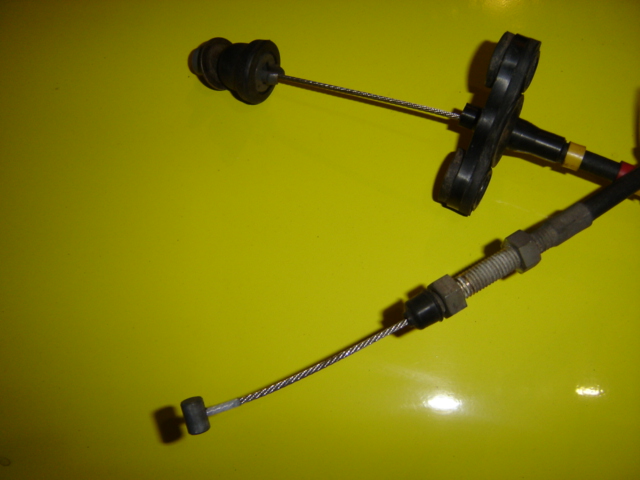
Series 5 were about 1989 to early 1994 last of the ones with pop up lights, I think they may even have shared the same cable with the series 4 as well. Removing without a workshop manual. When you find one in a junk yard, from memory it's unhook from throttle body, then from the inside of cabin above the pedal, there are 2 bolts(nuts?) undo, cable pulls through firewall to inside, hard to see where it goes, but once the two bolts are undone a good pull will drag it through. It has an alloy plate on the cabin side, I seem to remember triming this plate to give a bit of strength to the plastic bracket that can be seen on pic of end of cable,Leave cable intact, when the cable is pushed through the firewall of the Dat,from inside(same way that it fitted in Celica) only needs two holes drilled through for mounting bolts,cable will not even need altering,It all just fits. weld the top of Celica pedal lever onto the Dat one at a height to match the firewall hole. My welding can be shamefully bad, like on that lever:ugg:, figured nobody would see it. Your car is going to be a beast. Love it! Update, found a spare cable, added pic of cable ends, also realised that cable lenght of Left and right hand drive Celicas may be different, The R/H one I used had an outer cable that was just on 30 inches long, for a L/H drive you will only need about 24 inches. Update/2 (all that information because it is not an easy remove from a R/H drive Celica) if Toyota used same cable ends on Celica and Chaser, chances are they were used on other models , check out Toyota USA local models, very easy cable type to fit

-
Try this, While everything is acessable, good time to get rid of the primitive accelerator linkage/elbow on the firewall. Cut the top inch off the end of the accelerator arm inside the cabin, weld on the equivilent piece of the lever from a series 5 Celica from a junkyard,(grab the cable at the same time)The throttle body end of the Celica cable is the same as the 1/2J fitting. Makes the pedal to engine a bit more direct,
-
I think you might have clearance problems if you are using the standard over the top of the engine NA inlet.
-

1JZ 2JZ installation instructions for dummies,2 weeks, drive it!
RUSSJZ-ZED replied to RUSSJZ-ZED's topic in Toyota L6 Forum
....Is there anything you don't like about the swap? for what I want, a fast road car, perfect,easy fit, great balance, and.....POWER!! you would have to ask people that race for opinions as to what bodyshell is best to dump the 1/2J in. Mine was built to drive, can't see the point in "park and polish", never got intersted in racing(lost interest in F1 when they moved the motors from the front to the back-and drag racing WTF?? where's the corners gone? ) The only time I aspire to is lunchtime. -
1JZ 2JZ installation instructions for dummies,2 weeks, drive it!
RUSSJZ-ZED replied to RUSSJZ-ZED's topic in Toyota L6 Forum
The R154 from a JZX90/100/110 has a longer extension housing( than the Mk3 Supra that used a R154) if centered in the shifter hole in tunnel puts the motor a couple of inches clear of firewall, Soarers and Na Mk4 Supras I think use the w58, stick centered should bring the motor closer to firewall. Check other threads for tunnel fit of TT 6 speed Supra box, only seen one out of a car, it apparently can fit, but looks BIG! Looking at a 7m the other day ,can't see any reason that making up mounts similar to what I did for 1J2J would not work off the rails, can't be too difficult to fab a set of brackets to fit to block.much better, weight distribution wise than trying to utilise the Datsun mounts. Anyone that intends to make a set of mounts is doing so at their own risk, the ones I made for mine were inspected and approved for weld strength /design and clearances, by a certifying engineer.In the state that I am in, The Motor Registry only licences about 30 to certify design work. Up to you to check safety /design etc with your relevant state authorities BEFORE you go driving!different rules, state to state, country to country. YOU HAVE BEEN WARNED! Post is to show you what worked for me,I'm not a shop, not interested in manufacturing, if you can see how easy it is , go for it, improve,but just make sure what you do is safe,and approved. Plan B -No more Zeds for a while,I'm about to have a go at building a half scale focke Wulf 190 replica, engineering inspection fees are going to be a killer.but, I can blame the engineer if it falls out of the sky.(providing I bounce right.) -
I think what he is trying to say is that unless you have the brackets from the USA edition Supra(the Lexus/ Aristo, and all the 1Js are different)It probably won't lineup. I have explained to him several times I am not interested in making him a set for a 1J, (need to set up for LHD rack for starters,simple, but I have better things to do) Allight, a badly trained monkey can make these in a day.......your time starts .....Now!
-
Looking good, the motor with all accessories you have on in the pic will fit with no mods if you want the creature comforts- just drop the whole lot down the hole... it works,don't fix it, the power steer is definately worth hanging on to.
-
The engines, complete with car (Commodore, or Skyline) can regularly be found abandoned, awaiting local council pickup,It's been over 20 years since they were a production item,and the cars they were in don't look like ever being collectors items.(It was the best engine ever fitted to the Commodore , when it was discontinued ,GM Australia went backwards to a Buick V6) This is probably an overinflated exchange rate, Oz dollar probably really worth 2 flat rocks,and if our new government displays the same financial genius that it displayed on previous times they were in power, one flat rock will be the rate in the near future.
-
Cost Breakdown on Building TT/Single Turbo Motor
RUSSJZ-ZED replied to BurnMac42's topic in Toyota L6 Forum
You would be suprised at how many there are here,I have had several requests for "ready to go" engine mounts so they can be delivered to the workshop that's going to do the engine swap.(despite impressing the idea that a swap is "look,think,do"-it really is that simple.) Generation X,Y, or whatever we are up to , seem to want it off the shelf, ready to go,charge it. what ever happened to do it yourself?-finding stuff that can be worked in. It's FUN! IMHO, building a car on a visa card,with everything pre-made, (like the Supra recipe) and then getting someone to put it together is like paying to watch someone else have sex. -
1JZ 2JZ installation instructions for dummies,2 weeks, drive it!
RUSSJZ-ZED replied to RUSSJZ-ZED's topic in Toyota L6 Forum
Even the gods have bad days:-) -
1JZ 2JZ installation instructions for dummies,2 weeks, drive it!
RUSSJZ-ZED replied to RUSSJZ-ZED's topic in Toyota L6 Forum
All pic's(70+ -not in chronological order,) on the link below,adding more as I find them.(lots of corners for them to hide in in that little computer box) -
When the RB30 was introduced in Australia in the early 80s they were fitted to a car(GM Commodore) that had been designed for a completely different engine, problems started early on with overheating,radiator sitting to low, air locks in engine, cooked heads. I notice in a lot of pic's of RB transplants that not many people use a recovery/expansion tank.($5 from a junkyard) If your radiator is even borderline close to level -or lower than the head, every warmup will blow out water and suck air when cool,put a tank in, at least you will get to keep the system 100% water/coolant. could cure a lot of the heat problems.
-
1JZ 2JZ installation instructions for dummies,2 weeks, drive it!
RUSSJZ-ZED replied to RUSSJZ-ZED's topic in Toyota L6 Forum
Engine mount bracket info for 240zwannabe and hicomp4ag. Without pulling engine can't do exact templates,but as pointed out in original post, will be minor differences LHD, RHD. also different shaped outriggers to the rubber mount.Depends also on steering shaft-standard/aftermarket power unit, and type/number/positioning of turbo's- a high mount would make things real easy. This is as good as I can do. Engine must be blocked in the EXACT position you intend it to sit. Start with a flat plate 180mmx180x4mm,(7 1/4 inch square) to be mount face to block, bit bigger if it can fit, just so it will sit flat against the 4 bolt holes. set the bolt holes up now, make sure there is enough room for inserting and tightening bolts, Look up the pictures of how I did mine,small bits can be cut out of the sides to clear various "lumps" and pipes on block. You do not need to worry about the center support/ strengthening pieces on the bracket at this point.Add in later once you have the outrigger templates cut.(if it makes it easier for you, cut them out of an old beer box with scissors- just so long as you can duplicate in 4mm minimum steel plate) For the outriggers start with pieces 270mm( 10.1/2 inches )long, check the pictures to get an idea of shape, keep trimming until you are happy with what you have got, then do in steel,with the center strengthening added. It is not hard, just takes a bit of time. Cross section drawing of rail end of mount, and more pic's added to photo's, also desciptions updated, Disregard references to pages the pic's are on in original post, flickr moves pic's along when more are added, and I'm too old to work out how to move them. (there seems to be an unhealthy interest in the weight distribution pic:shock: I thought you guys were car freaks???) Pic's on link below. -
Sump, fitment, and transmission issues
RUSSJZ-ZED replied to mario_82_ZXT's topic in Toyota L6 Forum
Sorry, it is a cross post thing. In your thread "how does this2J look?" your post of two days ago indicated you thought you might have got a bad one. As the ebay (that most replies indicated is not a great place to buy an engine unseen)listing was for a "supra" 2J,Just thought you might like to Know that (as you were now looking for a mid sump) if your mail order engine had a front sump it would not be from a Supra, and there are other differences if it was from an Aristo.More than just the sump.(link to assist you) Had it been a dog,like you seemed to think it was 2 days ago, you would have a claim with ebay/paypal for misleading advertising. But as of today("how does this2J look"post) the engine is a good one ,so this is superfluous information.Also,I missed the part in the other thread where you indicated that you knew the "supra" engine was not a "supra" engine.(front pan and all that) Try "search" for sump/pan info. It's all there. -
Sump, fitment, and transmission issues
RUSSJZ-ZED replied to mario_82_ZXT's topic in Toyota L6 Forum
If the 2J "Supra" engine you bought off ebay:roll: does not have a mid/rear sump it was not out of a Mk4 Supra -probably from an Aristo. Someone correct me if wrong,but I think Mk 4 was only Supra with 2J, and they were mid/rear pan. On closer look at the ebay pic's on the link you posted,little bit hard to tell with angle pic's were taken from, but it looks like it could be a front pan. Good news bad news, engine from a 4 door might not have got the flogging a sports car could have got, bad news, you need a different pan set up.for differenses Supra, Aristo look here. http://www.toymods.net/forums/showthread.php?t=14855 -
Idiots guide to installation,Two weeks from start to finish, two weekends, and a few hours a day.This has to be one of the easiest engine swaps ever, if Datsun had designed the car sans engine ,and had no problems with other companies machinery, this engine would have been right up there on the top of the list of possibles-20 year time gap aside. This is to get a 1J/ 2J running in your car, I'm not bothering to do anymore to it, it is double the power of a factory Dat, If you need the BOV(bolt on Viagra) easy to do later.Try it unmolested first, frightens the poo out of me! Car has more grunt than a hippo with haemorrhoids! The list, to get you running/driving. (brakes/steering/suspension can be done at your convienience. Check other threads for information, this is engine /transmission install only.) pictures of (most) of my install are at /http://www.flickr.com/photos/russjz-zed/sets/72157601989530227/detail/ What you need, 1) Basic mechanical experience, if you can remove,and replace an "L" series, you can do this.( that's providing the"L" still runs when you have re-installed) 2)tools to do the above, engine hoist, 4 or 5or 6 or7 wheel stands(the ones with a screw thread for height adjustments are ideal- "screwup stands") plus a welder, (or a friend, that can) 1/2 inch MDF board, a couple of square feet should be enough. angle grinder. 3) A 1J/2J gte engine/transmission combination, with rear/middle pan/sump. Turbo only ( hood clearance issues with NA inlet set up) IMHO get a half clip, reason.. prior to buying you can hook up a petrol tank/pump (and a silencer if you can) and hear it running. Also, there are a lot of little bits that you will find a use for,cost a heap if you need them. When you are up and running, the rest of it can be ebayed. When you are happy with the way it runs, pull the engine, leave on everything you intend using in the car, gearbox/alternater/power steer/ aircon. etc ( page 3 pic025, and 028) make it fit from day 1 with what you want on it. My swap was with a 1J GTE Vvt, the engine was set low enough to accomodate the 14mm extra height of a 2JZ. 4)enough space to make a mess for two weeks. 5) Several boxes of beer, full strength, you aren't going anwhere, forget the light strength rubbish,it never assisted anybodys thought process's. 6) pair of Jaguar XJS V12 engine mounts 7) nearly forgot, an S30 Day 1. Set yourself up with all of the above, Time to start. Make sure you have put all the heavy bits(engine etc.) where you can access them, nothing like pulling an engine and finding there is not enough space to manouvre the old out, and the new in. We will assume you have the JZ engine/trans on the floor ready to go. Remove the Dat engine and transmission, cut off the transmission tunnel mount "ears". open a beer,you have done enough for the day, you don't need stress, you do need lots of time to tell yourself(and anyone close) how smart you are... if this takes more than 1 day, it's probably because you opened the beer before you started. Day 2. Get the pair of Jaguar XJS V12 engine mounts, I have seen these on ebay (USA) for $30 a pair.I have used these in several swaps, TR8s, and with a 35mm spacer are a real good replacement for Z32 mounts at a fraction of the cost of genuine,(got pic's of how it's done if anyone interested)These mounts are great! proof that Jaguar can get some things right at least once in 30 plus years. Cut two pieces of flat 4mmx90mm plate at least a foot long, longer if you want to put extra strength into your rails, at about mid point drill a hole to locate the Jag mount, sit the plate on the rail, trim off the overhang with a grinder( leave a bit hanging out in the position of the Jag mount, mount should be positioned to sit about 3/4 of it's diameter on top of rail,(page1 pic's 067,071) (at this point it is easier to cut a couple of wooden plugs the diameter and height of the Jag mounts to use untill the final location on the rail is found-the bolt through the rubber gets in the way) No pic of this, put plate and dummy's on rail-DO NOT WELD ON YET! This setup gets the weight of engine bearing down onto the top of the rails, Auto engineers dream! not stressing anything by having weight bearing in weird places/angles. and simple as well. Also gets the mounting point back ,in this position balance is 53% front 47% rear, that's with no spare, 10 litres fuel (2gall) nobody in it. IMHO retaining either of the Dat engine mount uprights on the front frame, and/or the metal Toyota factory mounts on the block, is a mistake that will paint you into corners there is no need to be in. Cut /grind the Dat mounts off (page 1 pic 128) Unbolt metal brackets from toyota engine. Get some half inch MDF (fibre board) to make pattens for fabricated mounts. First cut 2 square plates to bolt to block( different shape on both sides) I don't have a pic of this, but the pic's of my completed fabbed mount brackets will give you the idea(page3 pic's 72 and 74) make them as big as will fit flat against the block,and not interfere with anything,drill and bolt in place. Bigger size will give you room for options for the "outriggers" That's enough for day 2 , beer is called for! Day 3. Set up car body on stands /ramps, get it as close to level as you can, about 18 inches off the floor to allow enough room for you to move around freely underneath. Put 1J/2J on engine hoist, lower it into the engine bay, get it as far back as you can, use the hoist,jacks, stands, (a lot of fine moving around to get it back, centred,and level), Spirit levels, bobs , jack and block it to be where you want it to be , I found it easy to get the shifter positioned first , on a stand and then used the hoist and screw up stands to get the engine height right.(the hoist still in place to take the weight,a piece of 8x2 crossways under the pan,held up with two screw up stands,for fine height adjustments (page1 pic'# 048) By abandoning the Dat mounts on the front frame, the frame is there basically to cross brace the body and carry the rack, if you need to sit the engine real low, the frame can be spaced down to give more clearance. At this point make sure your blocks/chocks/jacks/stands are holding the engine in it's exact final resting place. You don't need movement, and you don't want it landing on your face. With the Jag mounts and the plate on the rails, cut pieces of MDF to attach at right angles to the flat MDF plates that you bolted to block.(back to pic's- page3 pic's72 and 74) and bridge across the dummy mounts sitting on the rails, Keep the two sides about 100mm(4 inches apart, this gives a bit of space on either side of the Jag mount. These you will need to play around with, even if I still had my templates they are for a right hand drive,Also for a single turbo, TT will probably need different curves on the "outriggers" Brackets are not mirror images left and right. Should be much easier to do LHD, as I had to work aroung the steering shaft and turbo on the same side. fiddley, time consuming, but not difficult. See pic's of final shape in metal at - page 3 pic's 72, 74, 85, 86, 87. when you are happy with the shape, cut in 4mm steel and weld up. I went into strength overkill here put in cross bracing, not going to break.If weight is a problem for you, go on a diet, get a skinny girlfriend.(Ive seen some of those chubby American chicks on TV, Get them in the surf, and pods of horny whales start beaching themselves.) Day 4 Lift engine/gearbox out, fit the new metal brackets to block , and lower back into position, get it plumb and straight again. this is it! slide the plate on the rails to centre the Jag mounts under the mount brackets.mark. Lift engine out again. weld plate to rail. Drill hole through to take the bottom bolt on mount. You can do this two ways,just through the top of the rail as I did, or go right through the bottom of the rail as well, using the hole as a centre guide for a hole cutter so you can get at the nut from the bottom( I didn't have a metal hole saw handy, so I just cut a slot on either side.On refection I should have done the hole saw from the bottom, neater.) pic's page 3 pic's 53, 67,71. Bolt Jag mounts onto rail. Lot's of beer time. Day 5 Lower the engine in again, this time you only have to centre it. It should be sitting on the mounts, if you are happy with positioning, mark spot and drill. then lower back onto mounts, bolt on Jag mount should pop up through the newly drilled hole, pic's page 2 pic's 94, 95, 98. even if you are a little out with the hole, just open out hole with a file. Gearbox crossmember time. With a screwup stand or jack, set the height of the box, depending on what rubber mount you want to use , I used the Toyota,cut a piece of 90mm x 4mm bar, about 150mm(6 inches) more each side than what you need to span the tunnel, I used a wood heater to heat the plate, put it in vice(noooo touchies!)and hit it into shape to fit the floor.Welded gussets on the ends to strengthen it up, one inch piece at 90 degrees running side to side on front edge(cant see in pic's didn't get a pic of front edge,Sorry..Pic's page2 100,101. cut two pieces of plate 100mmx100mmx 4 mm to go on the inside of tunnel(cabin side) and then drilled and bolted through. It's there! celebration time! Head for the refridgerator! Day 6. Measure the length of drive shaft required, take the yoke from the Toyota Auto/manual box , the Dat shaft plus measurements to a professional drive shaft guy, You cannot set this up yourself, the balance really does need to be done by an expert.( Local price here in OZ $ 280) Wire. If you can't do it yourself, get a wire expert to come and make it start. Be warned, there is a big difference between making it go, and making it purrrrr! I was lucky, got a genius first off. I have no problems with engine heat using a standard 3 row 260Z radiator, bottom hose from cut fits perfectly, top was any old hose with length and a right angle'. two 12 inch thermo fans fit perfectly onto the back, hooked up to susquential switches, temperature where I live hits 40C in summer (100F), never had the gauge go past half way. Day 7. Intercooler, I only needed to cut one 4 inch hole in radiater support to get a hose through,450mm x300mm high x 75mm thick, sitting on a flat 60mm bar(it's actually a TR7 radiator support), couple of radiator brackets from a junkyard to anchor the top in place. (pic's page 1 pic#056) Day 8 Fuel, I was lucky in that my car was a december 1976 build, It came with fuel return line fitted, leaving the original pump in place to act as a lift pump, installed a 1 litre surge tank, with a Bosche Motorsport (350HP) pump in line,only time I thought I had a surge problem, I was in fact totally out of fuel! Thats 8 days of the 2 weeks, the rest of the time will be waiting around for the driveshaft guy to get around to doing your job, and finding out the wire guy you picked is full of sh1t. These obstacles easily overcome with the rest of the beer! Make it run, Get it to a muffler shop, There is no mystique about this engine swap,Don't be put off by the fact that it's a Toyota into a Datsun, They don't come any easier! YOU HAVE LIFT OFF !!!
-
( ??? there is a little bit more than just the engine weight in the equation) On standard suspension, probably like a whale with an alcohol problem. uprate suspension(plus power steer) corners like a rat. Might pay to put brakes in as well.you may need to slow it down before you hit the corner.
-
Unmolested output RB26DETT 206KW @6800rpm 353Nm@4800rpm(R33) 392Nm@4400rpm(R34) 1JZ-GTE (TT) 206KW @6200rpm 362Nm@4800rpm 1JZ GTE-Vvt(single T) 206KW @6200rpm 378Nm@2400rpm 2JZ GTE(sequentialTT) 206KW@5600rpm 430Nm@3600rpm 2JZGTE Vvti(seq TT) 206Kw@5600rpm 451Nm@3600rpm:burnout:
-
Point taken. I'll try it another way, IMHO, A truckload of work, for no real gains.(except....won't be needing the heater:) )
-
For starters you guys drive on the wrong side of the road:mrgreen: so the J series turbo/exhaust is on the opposite side of the engine to your steering shaft( even doing a RHD installation, it all fits without drama. The 2JZ is a much better engine than an RB 26/25/20/30(standard,the 1JZ makes more power than an RB26-and the torque is at the end where you want it) Only body mod is remove the gearbox mount"ears"-5 min with a grinder.
-
Why go to all this trouble just to be different? I have weighed mine , with 10 litres(2 1/2 gal) of fuel, no spare and no-one in it, the balance is 53% front 47% rear, with a driver, a tank full, a spare and a box of beer in the back, would probably reverse the figures.the balance is near perfect. No one is going to see it when the hood is closed,The 1J/2J has to be one of the easiest engine transplants into a Z, no body mods, simple, the village idiot could do it,it fits like a glove- that is a glove on a hand, what you are contemplating is a glove on a foot. That Honda looks a nightmare! and, there are probably V6's out there that would have fitted better without the crazy mods , and make big power. Way back, I came across a picture of an MGB(roadster)in Japan with a 2J in it, did not look to have had mods to body to fit it,(MGC 6 cylinder was a huge boat anchor, so it probably went in easy) Text was in Japanese, so a bit short on detail, the guy standing next to it looked happy!
-
-
Looking good!-this car isn't just to go to the supermarket...Right? In your pic's one of them shows the steering shaft with quite a bit of extra length from the firewall to the top joint, Puzzled???(bear in mind I have to think all this reversed for RHD) was the shaft out of place in the pic,or have you extended the column shaft to change the angle? One of the update pic's has the rack in place, what sort of clearance do you have, intermediate shaft to the mount? Working out height of engine against pressed lines in the metal across the firewall, (and allowing for the 14mm height diff between a 1J and 2J) I think I got mine about a half inch lower,but on a RHD the Toyota factory mount was always going to be in the way. Better clearance on the left hand side?(I had a Turbo and exhaust to contend with as well) PS. Paint it now.
-
I think Toyota might work out a touch too expensive if you are stuck with the wrong pan, might be a bit kinder to the wallet used. Parts needed to swap-All straight bolt on,All different. Oil pan Alloy skirt baffle plates Dip stick tube dip stick
-
So the mid pan and rear pan are one and the same? Explains why I have only come across the two types. (Cressidas -late '80s early '90s in this Country were nearly all 7M non turbo, the guys converting to 1J/2J need the front pan/sump because of position of crossmember, The Mid/rear ones are 2 a penny, front pans are rocking horse sh1t , I think only from Aristo and Chaser)