
~KnuckleDuster~
-
Posts
1294 -
Joined
-
Last visited
-
Days Won
3
Content Type
Profiles
Forums
Blogs
Events
Gallery
Downloads
Store
Posts posted by ~KnuckleDuster~
-
-
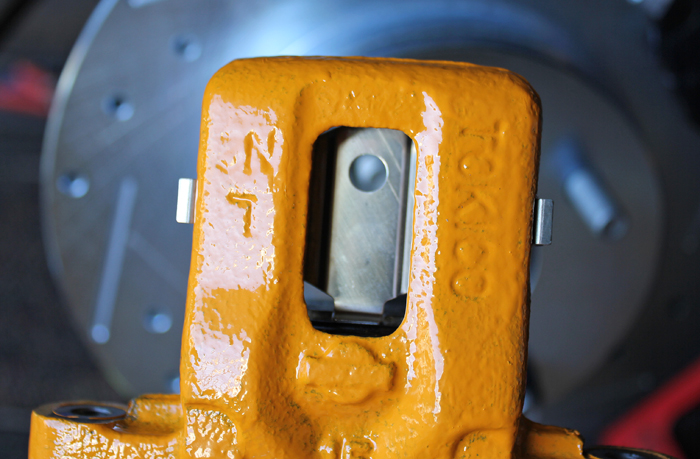
3 coats of grabber orange

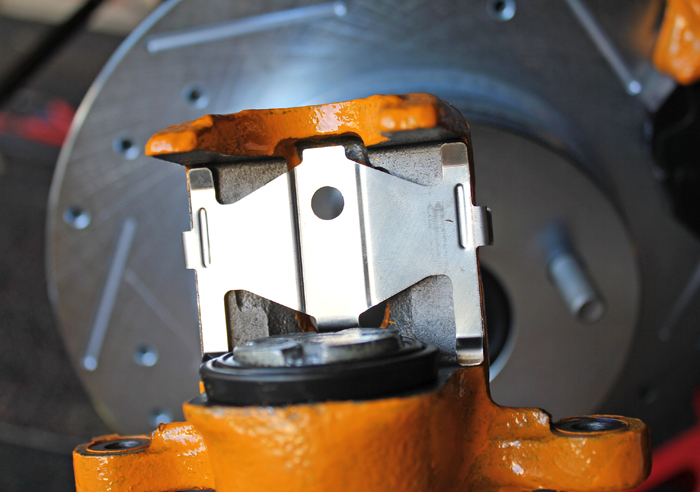
A couple pics of how the pad clips go in, there was no information on this that I could find. Pictures make it so much easier!
Almost done just need to bleed them
Russell speed bleeders for the rear are part # 639560
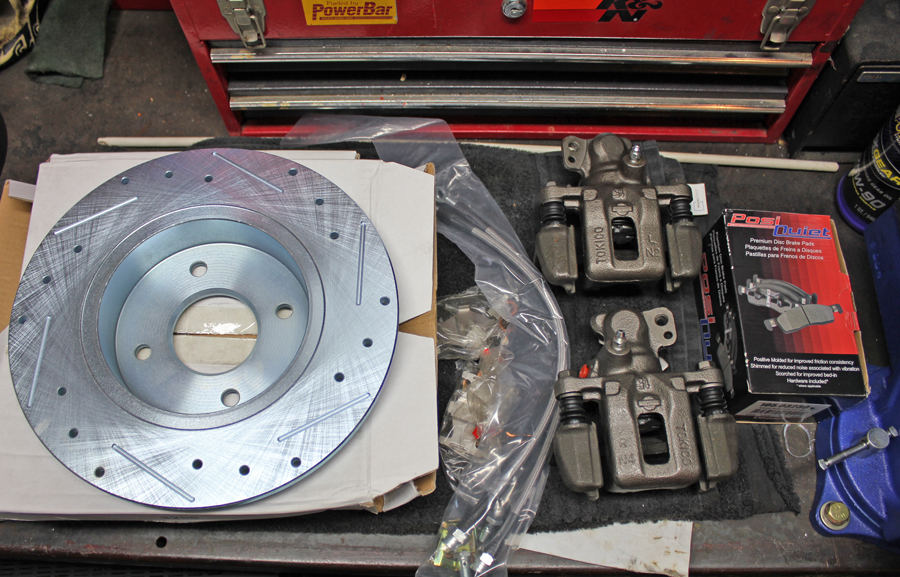
Posi Quiet Ceramic Pads 105.03230
-
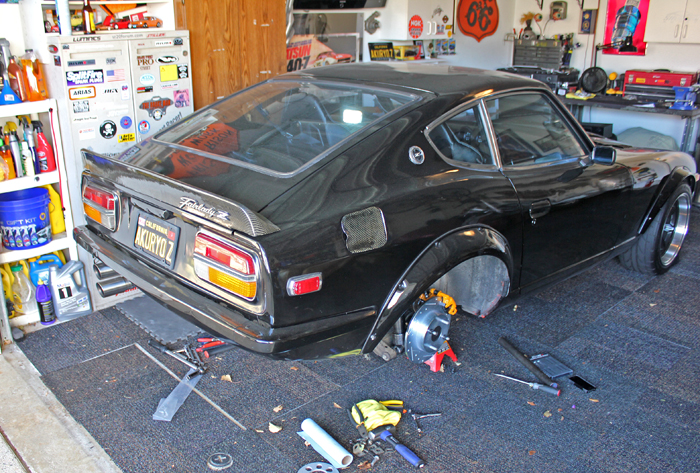
Been slowly working on the rear brakes. Hardest parts are done. Cleaned and painted the hub face & installed Nismo 50mm extended wheel studs. I'm going to put some 5mm wheel spacers on and see how she looks. I intended on doing the front studs w/ spacers when I had it all apart but I got impatient..future project yayyy.
-
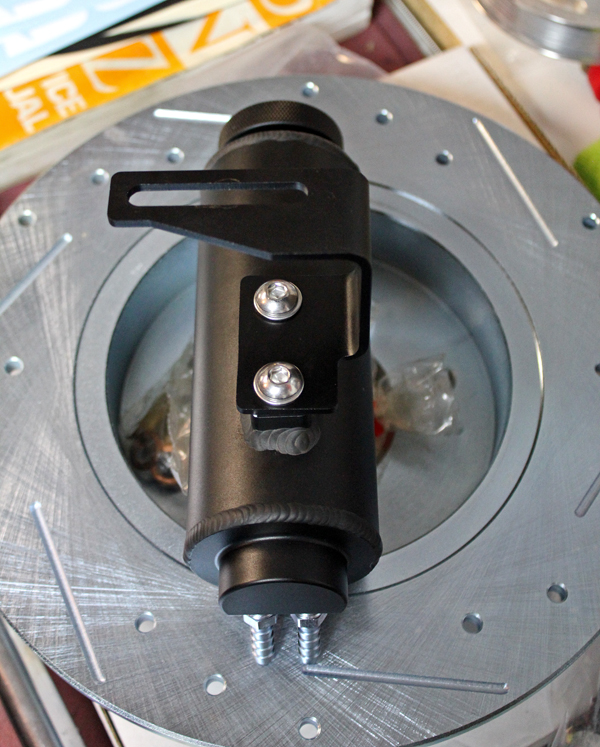
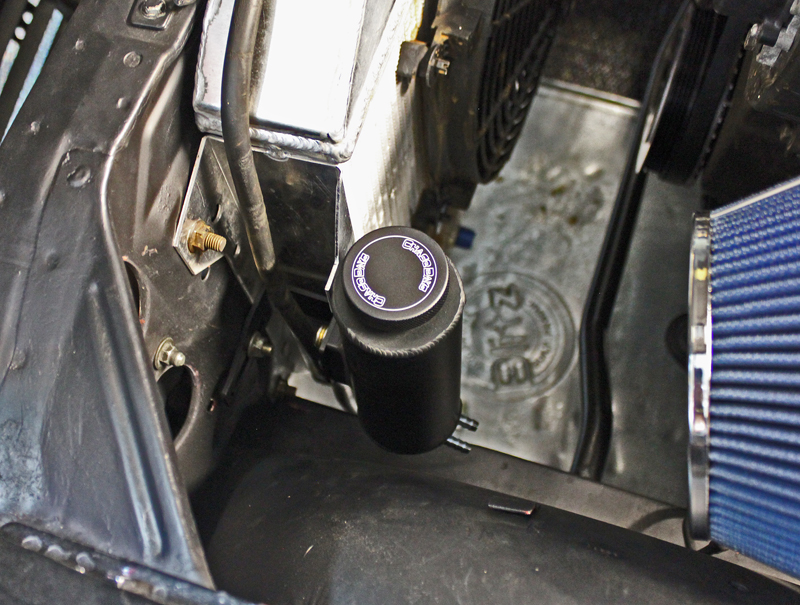
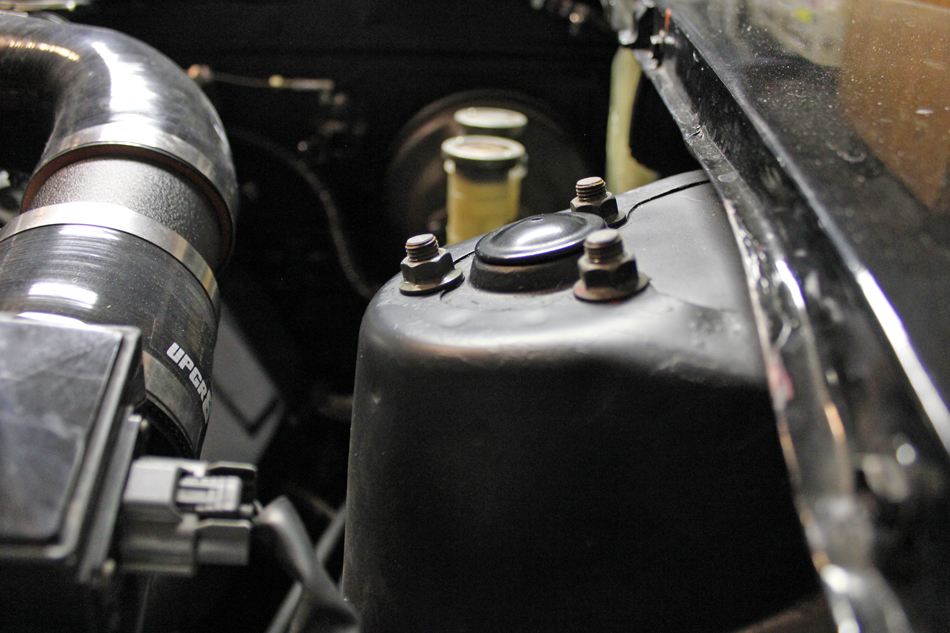
Now that I've got my coolant lines all sorted out and air free the radiator overflow tube has been pissing out coolant when warming up, so figured it was time to get an overflow tank and keep my garage floor and driveway clean. I went with this one from a place called Chase Bays. I wanted something in aluminum, black, and not a pile of crap. Still need to route my hoses but I like the way it looks and it should function just fine.
-
Has it made the car turn better on corner exit/acceleration? That is where I see my car handling like POOP right now. I still haven't put the bar back in as it sounds like I'll have clearance issues with the companion flanges.
It feels better everywhere, especially corner exits. Most would say upgraded sway bars are one of those best bang for the buck mods you can do. The fit is really tight back there, it just clears the halfshaft boots by a half inch or less. Maybe your best bet is a forward facing rear sway, although I still don't know if that will clear still. I'm sure there's something out there that will work for you..
-
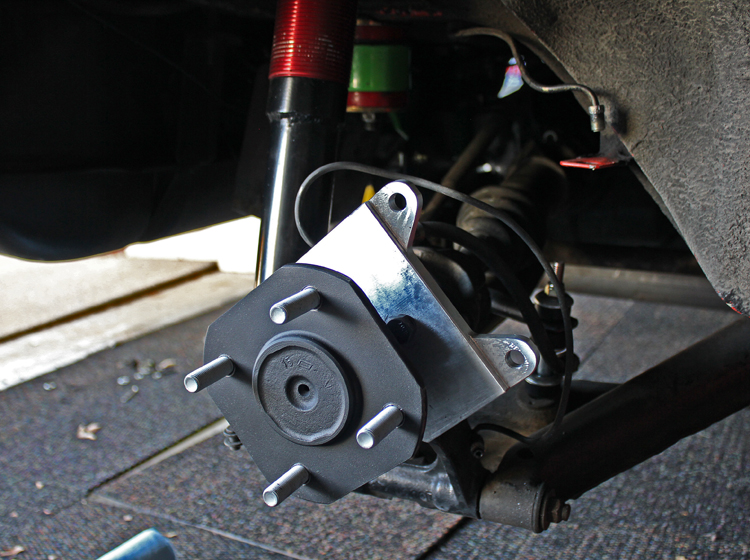
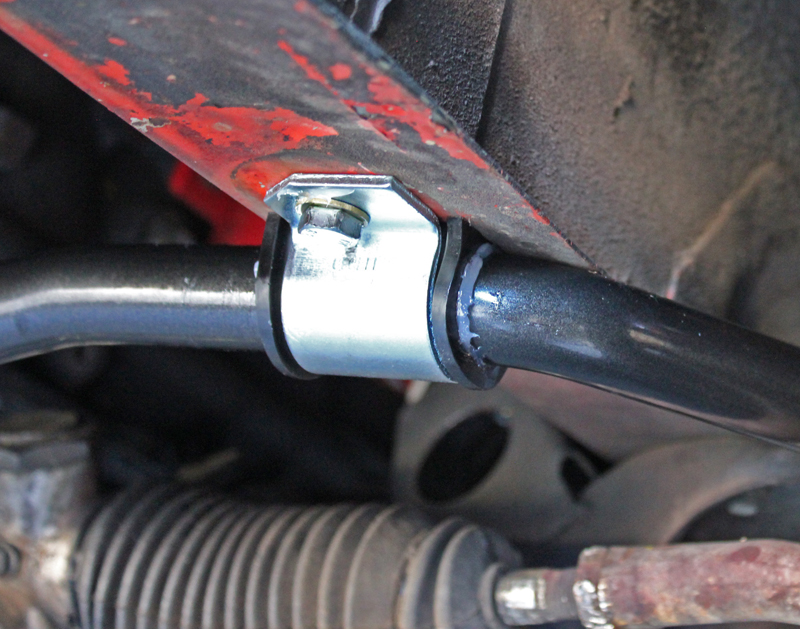
Man I really like the look of that sway bar! Is this how they recommend mounting it? Did you drill holes in those upright pieces? I'm interested in something like this. I can't get enough of your updates!
Thanks, yeah that's installed per the directions. It comes with the new uprights with tabs that stick out all pre-drilled. It made a huge difference in handling.
-
Dang! Nice numbers. Would love to feel that much power in a Z without a turbo hah
-
I can't speak for the MSD unit but I will say that I have never been able to get a clean signal off of the white wire on the back of the coil pack harness. When adjusting timing I have always had to use the spark plug wire between the coil and the plug. I even have a newer style timing light and every time I pull the signal from the white wire I get a random flash and the RPMs on the light are all out of whack.
I've come to find out the new digital timing guns don't work on that wire too. You need an old style one. I bought a standard cheapo light for $30 and it works just fine.
-
I used the resister method as well and I haven't had any problems. Is it possible you have a bad tachometer?
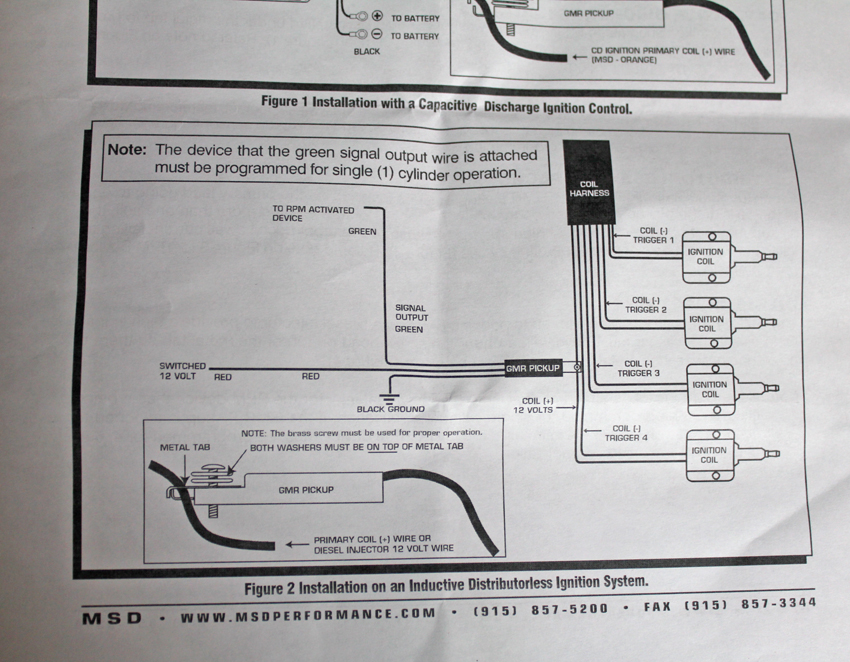
I doubt it, it's brand new. Maybe I had the wrong signal wire from the get go when I had the resistor wired in, I'll have to double check the pinouts. It just bugs me that I can get this MSD unit to work that's designed to send the proper signal to a tach. It even has directions for a distributerless engine with coil packs.
-
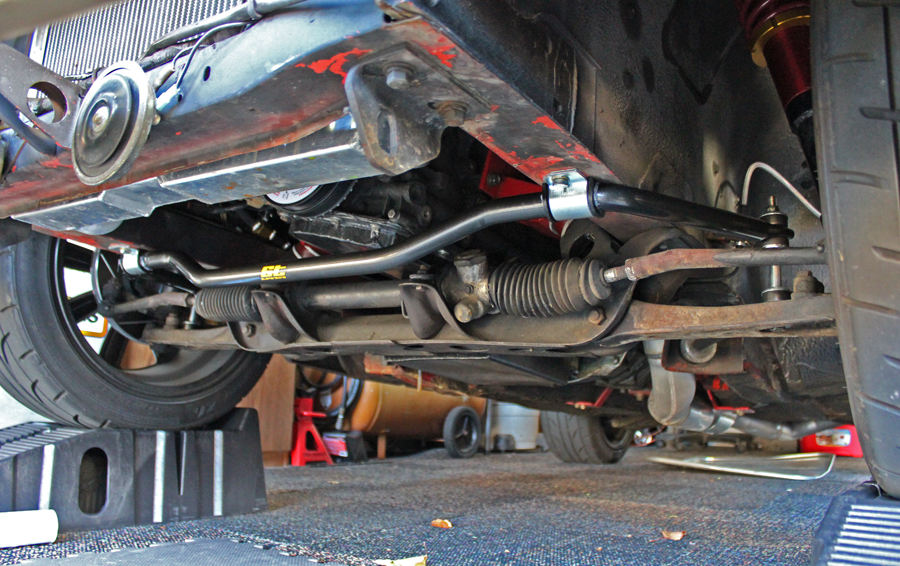
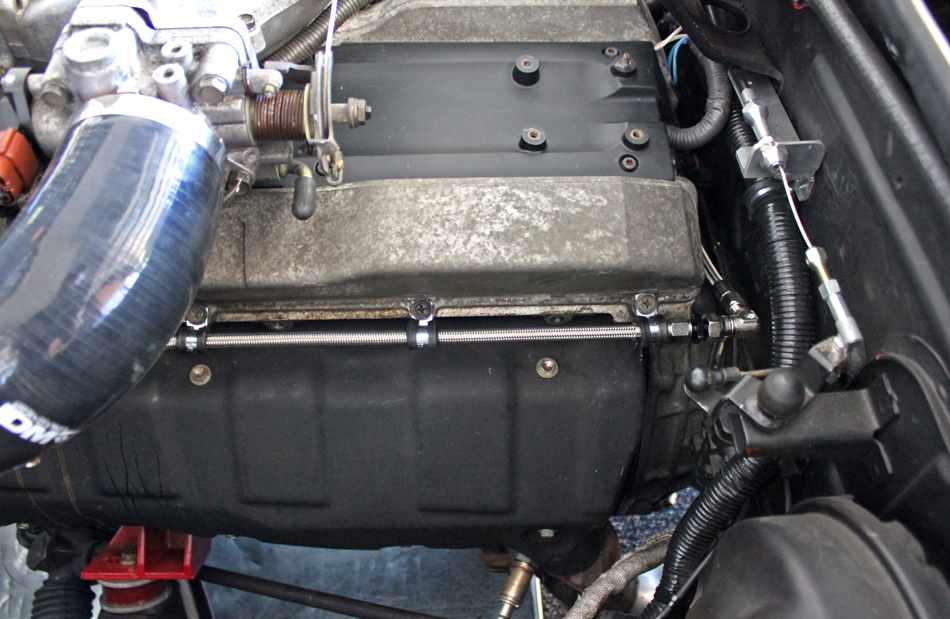
Rear sway bar installed. Test drove, feels great!
-
Ok. I've been dealing with no tach's in RB's since 2008 and it's getting old. I originally bought an MSD tach adapter to try unit I read about it poping the resistor in the ecu. I tried wiring in the 10k resistor between the signal wire and 12v power (i think that's what it was) and nothing there. I found one thread where a guy successfully used this MSD GMR pickup and it's the closest I've been to getting a working tach. It clamps to the coil packs power supply and sends the signal to the tach. I've got it clamped to the same big white wire you would use for your timing gun. The tach is moving but it get stuck and fails to drop and will freeze in place. Directions state for distributerless coild packs set the tach to 1 pulse 4 cyl. mode. I've tried both 1 and 2 pulse 4cyl. modes on the dip switches and nothing. Can anyone help me along? I feel like I'm so close!
-
Installed the front sway bar. Haven't had a chance to test it out yet. 6 lbs heavier than the stock one!
Contacting the frame rails on the side. Is this normal? I already have to add spacers in the rear now this with the front?!? I went with ST because they were so highly recommended but there's some little issues that I don't care for...
Rear brake stuff is in, just waiting on paint & wheel studs now.
-
Also looks right isn't the best unless you want the car to look good for pictures. Looks right usually means even all around, that means when you sit in the car it will no longer be even, and if you are low that means rubbing consistently on one side.
Ideally you want to adjust one end, ala front or rear. Sway bars and their end links do make a difference. Especially if you are doing one side at a time. If you jack up the car, put one side on ramps and drop the strut housing via the three bolts from the top, the sway bar end link will actually hold it in place.
It looked way off before, the right rear always appeared to be slammed, even now with it adjusted all the way up it still looks a little low. If I lower the right front to help raise it then the front is too low and rubs the flare.
I have a new set of sways to install, when I have everything disconnected Ill get some measurements.
-
Could be the flares are the problem. Measure your ride height from the pinch seam on the lowest point in the rockers. With a tape measure-Not by what looks right. Start out just trying to get the rockers to 5.5" off a smooth garage floor, measured right in front of each rear wheel and right behind each front wheel. Try to set the left and right sides the same for now. Keep notes.
Once I get some time Ill do some more in depth measuring and start a log. I appreciate everyone's input, I'll get some some measurements and report back!
-
That is always a possibility. I know that getting the alignment sheet that said zero thrust angle was a relief for me.
I have heard that a frame alignment doesn't have to be too bad if a shop has a high turn around rate. I've heard some quotes of 800-1000 for minor tweaks. They could at least measure the pickup points and tell you how bad it is. If it is tweaked you can either level it via the suspension or have them pull the pickup points into place.
Honestly it looks like that crushed part might need replacing though. Looks like the tie rod ball joints and the control arm ball joints could use replacing as well.
That's good to know.
Yeah most of the front suspension pieces have been neglected, I just recently got the car up and running right so my new focus is on the suspension and brakes (backwards I know!)
-
I like them because they use the larger Z31 rotor. The piston size is the larger one, unlike the smaller 280zx or S13 calipers. I upgraded to the S12W caliper at the same time from the S12+8 vented. I havent tracked the car or locked them up yet, so I am not sure how balanced they are.
I am glad I got the flat valve covers for my RB25, I like the look with the wrinkle black coat. Very retro! They only were R32 though, R33/34 had those humps for the air/oil separator.
Just ordered the silver mine kit. Now I have to pay twice for the brake caliper paint, damn!
Yeah your covers are nice and clean.
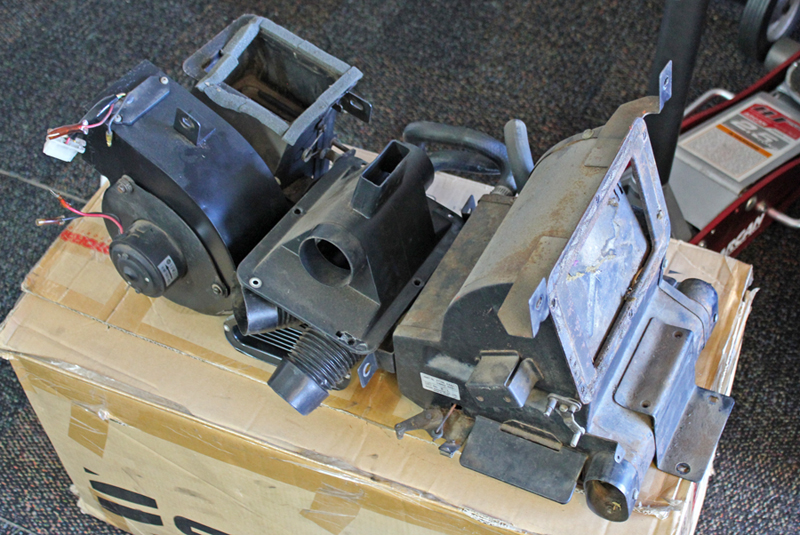
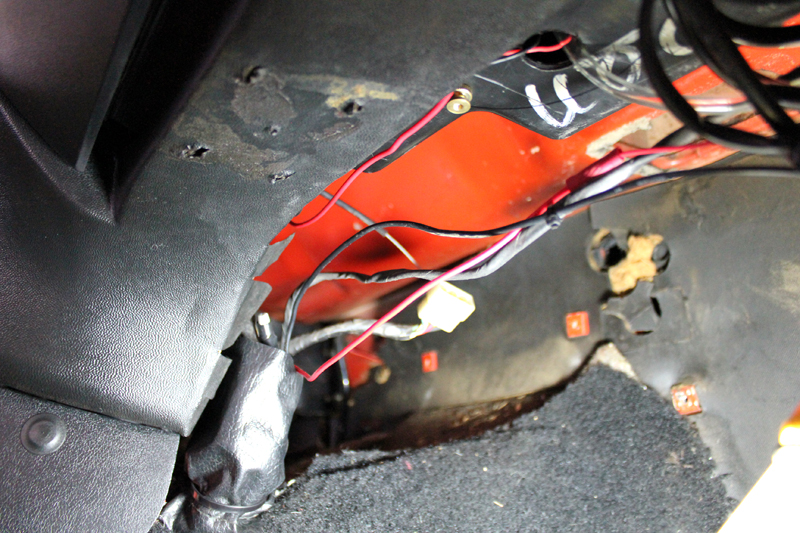
In preparation for installing my tach adapter under the dash I decided to first remove the heater core, blower motor and most of the tubing. This stuff was alot heavier than I expected . Heater core 13lbs. blower motor and 8lbs, removing twenty one pounds of something that will never be used or missed, priceless.
So much room for activities now..
-
What rear setup are you going with? I did the Datsun Parts brackets and 86 Maxima calipers.
Your bay is really coming along.
I was planning on doing the same thing. Do you like them? Noticeable stopping power or just the benefit of being modern?
Thanks, these cam covers are starting to stick out like a sore thumb though. I'm keeping my eye out for an extra set I can send to the powder coater.
-
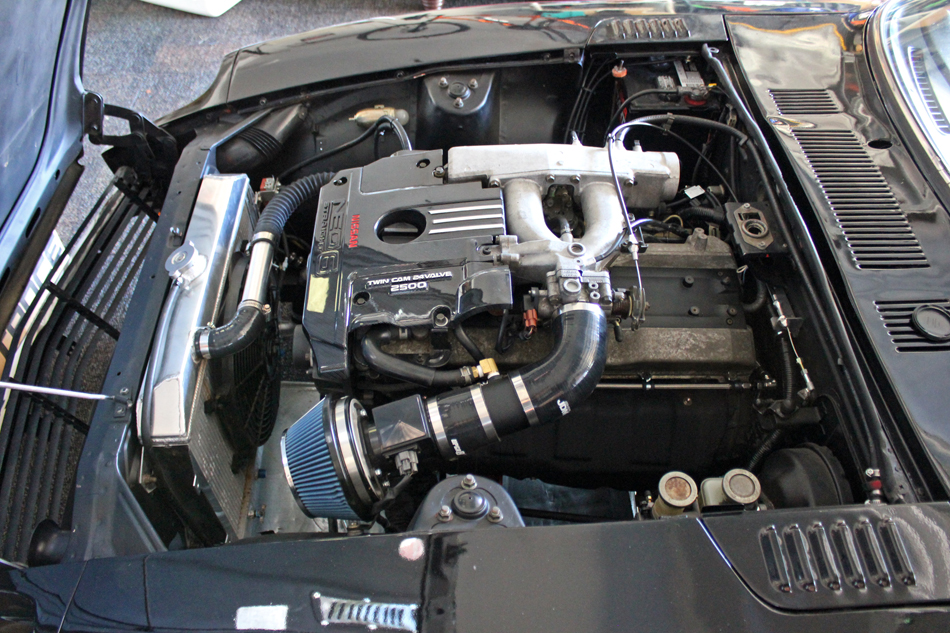
So I've had the coolant lines re-routed since the beginning of the swap. Here in California you don't need coolant to warm up the throttle body and thus heat soak everything around it so I bypassed this. At the time I had a rubber line going across the top of the motor back down to the return. I had a left over turbo water line kit laying around and thought this could be nice way to re-route the coolant cleanly around the motor rather than over top of it.
Here's a recent shot of the engine bay.
When doing the rear diff swap I noticed the passenger side brake master cylinder was leaking and the rear brake reservoir was empty, so rather than spend the money to re-vamp the drums I'm going to go with the rear disc. swap
-
That is always a possibility. I know that getting the alignment sheet that said zero thrust angle was a relief for me.
I have heard that a frame alignment doesn't have to be too bad if a shop has a high turn around rate. I've heard some quotes of 800-1000 for minor tweaks. They could at least measure the pickup points and tell you how bad it is. If it is tweaked you can either level it via the suspension or have them pull the pickup points into place.
Honestly it looks like that crushed part might need replacing though. Looks like the tie rod ball joints and the control arm ball joints could use replacing as well.
Ok that's not too bad if it comes to that..
Would you consider leveling the car with the coilovers, then put the car in a good level concrete garage floor and measure around from "pick up point" to point with a tape measure? The pick up points are basically for the front: the TC boxes (there's a bolt in the center), the inner LCA pivots (there's a bolt in the center) and the bottom facing of the study tower. For the rear: the front and back center LCA mounts, and the bottom face of the strut tower. Before you submit yourself to a frame puller, measure that stuff yourself. The floors really don't affect alignment-they can be bashed to hell and the car can still be square. If you have struts mod-ed for Tokicos, you should be running springs in the rear that are 2" longer than in the front. And with Tokicos, the front springs typically are loose (an inch or more) if the car is jacked up. My spare chassis has had the shit smashed out of it and it still sits level. I'm sorry you are having trouble.
Ill see what I can do. My free time is weird right now due to a new born but in some ways I feel like I have more time with the car (at least for now hah)
Also, when you say "not level" are you measuring from the pinch welds on the rockers? These cars aren't really square from the factory. My fender gaps are all a little off, side to side. Have you had any fenders or quarter panels replaced?
What I mean by that is when I was adjusting the coilovers my goal was simply to raise the rear end up. That progressed into adjusting all of them of course and in order for the car to sit "level looking" while maintaining the proper fender gap the right rear coilover had to be set all the way up while the right front coilover was set all the way low, meanwhile the driver side of the car f&r was in the middle. Now I don't know anything about properly adjusting coilovers, this was my first car having this new found adjustability so I just moved one side up at a time chasing the proper height. It could be that my fender flares were installed half ass'ed, I'm attempting to make even fender gaps all around and maybe the fender flares are causing some of the problems although they look like there in the proper locations..
-
I think it is important to look into the sway bar suggestion. If they are still connected you aren't going to see an independent adjustment. This of course means that you need a way to make your sway bar end links adjustable either via a threaded portion or shims for proper spacing to achieve minimal preload.
I had some similar issues. Measure left and right and one side was sitting much lower, raised it and found no change, winding a certain collar down lifts up another side of the car etc. I took it into a really good alignment shop (one that does SCCA cars or NASA cars) will be able to set you in the right direction. I was also expecting news about how bad my chassis was going to be, but they set the ride height without any issues.
I have a good alignment shop in mind thats a couple hours away, they will corner balance the car too. Yeah I fear I'm going to drive all that way for them to tell me that my car is a POS and there's nothing they can do hah.
-
I will check to see what this would cost to check out, I can only imagine..nice old car comes in and these guys start seeing dollar signs. If the frame was tweaked I'm not even sure if I want to pay the money to straighten it out. Doesn't seem like a cheap fix. Maybe I just need to run a slightly longer spring in the front passenger side to raise the spring rate up a tad. The car still handles well enough for what I do with it. Only when really pushing the car to it's limits do I begin to notice the effects of this.
-
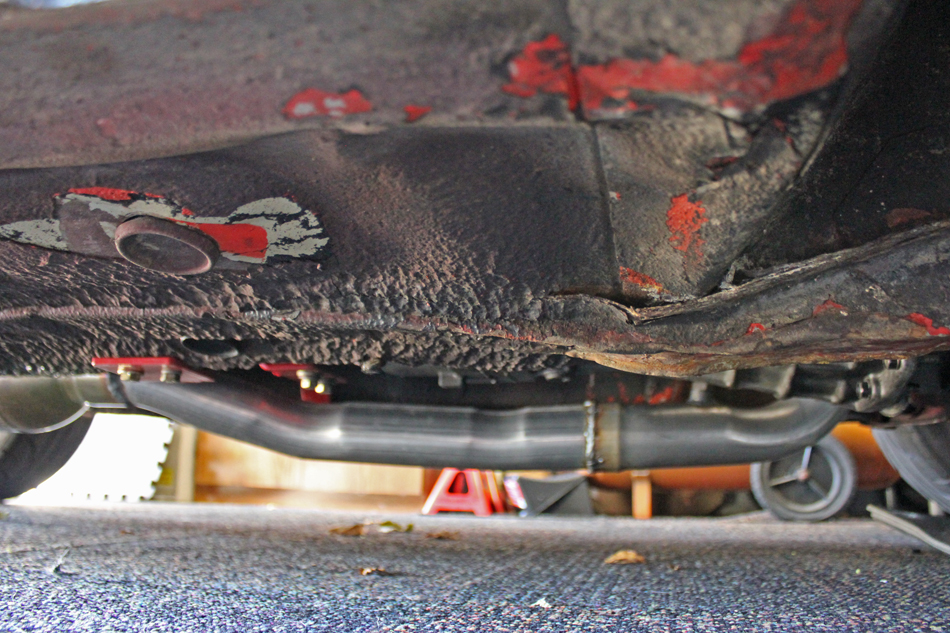
Ok here's the nasty. Looks like jack abuse directly to the floor to me. I can't find much evidence of previous accidents, just this beat up floor and frame rails.
and strut tower tops for those interested
-
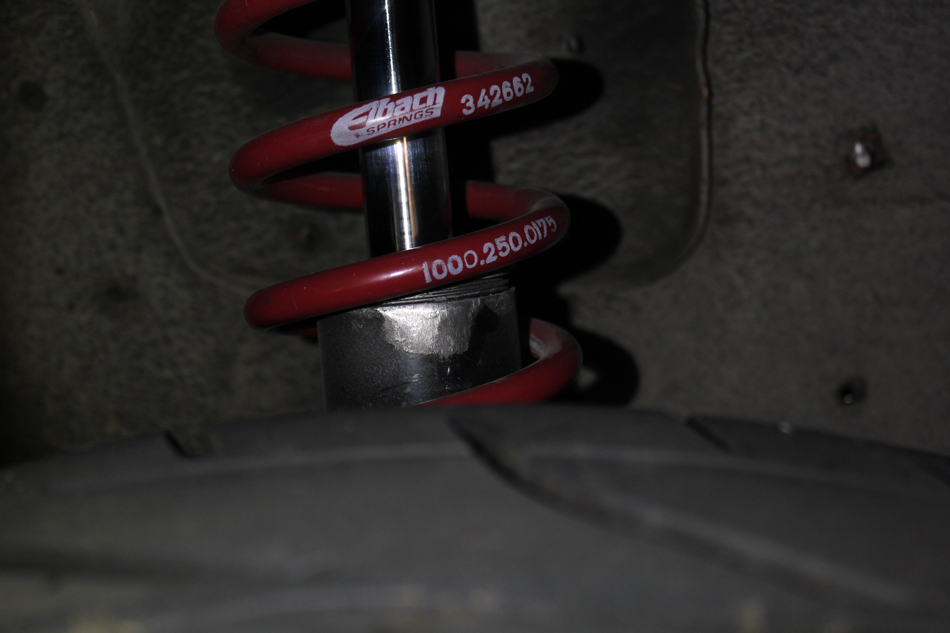
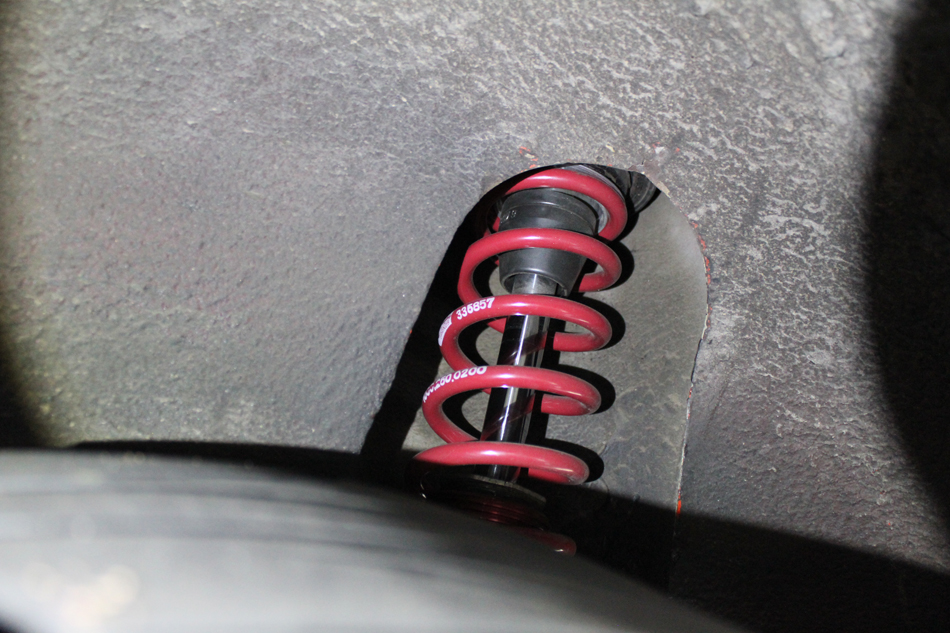
Also that does sorta look like shaft wear right under the Eibach logo, but again maybe it's just the picture.
Also, unrelated but I keep thinking these pictures are of my car because I also have a green moustache bar lol. Mine's rattle can green as opposed to powder coated but still.
Their is some wear there..
I wish it was a different color, nothing else is green hah oh well you never see it.
-
I'm starting to think more and more my frame might be tweaked. My frame rails are pretty beat up and there's even a raised hump on the passenger floor board. Could be from horrible jacking or who knows what. I'll get some pictures up tomorrow of the underside.
-
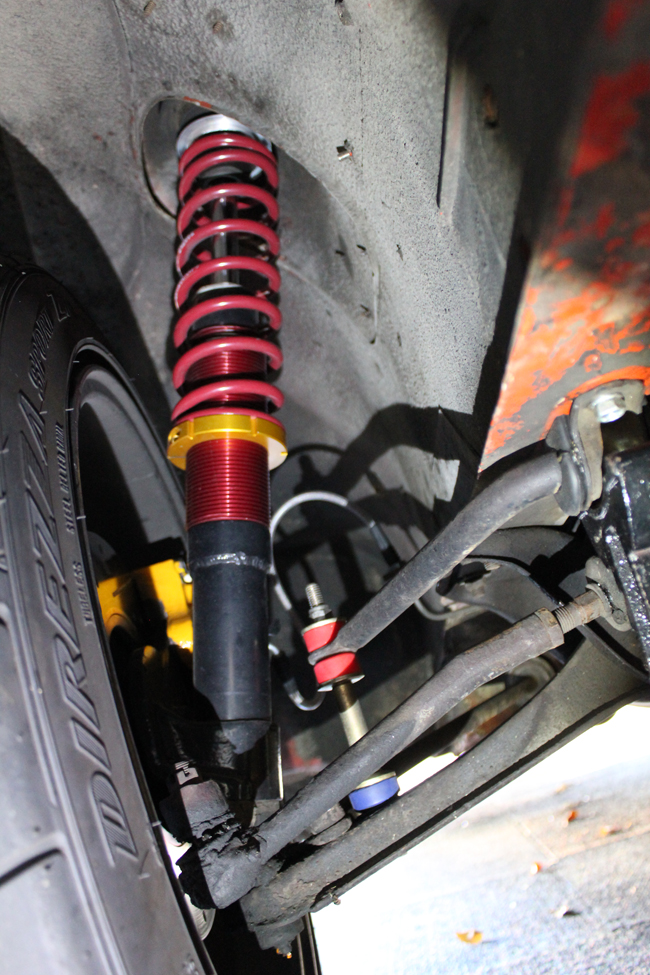
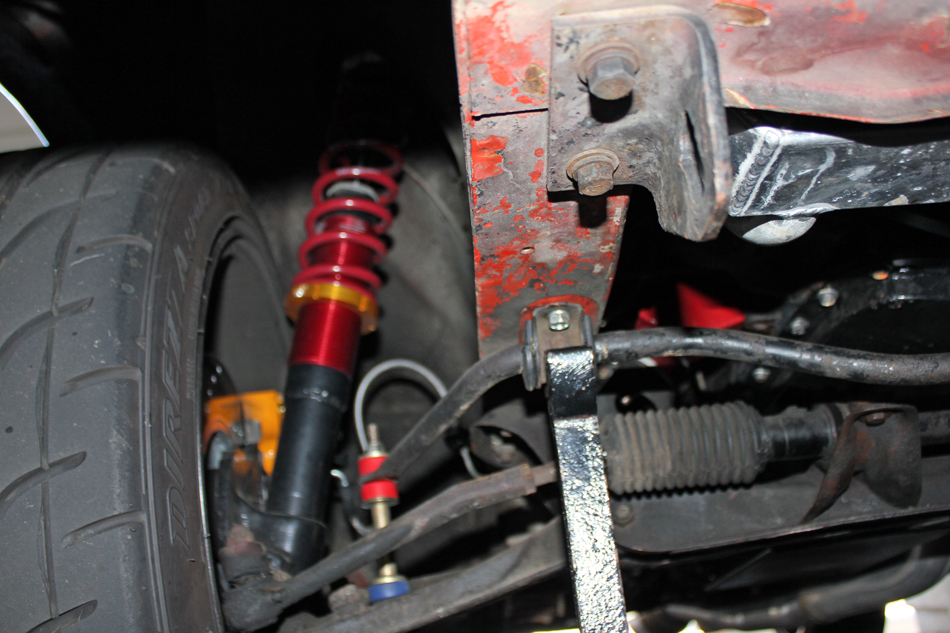
The strut assemblies were changed out with completely different assemblies. Purchased as a complete package. I've got the car looking level but I can feel an unevenness in what seems like the spring rate due to the varying compression. Left turns feel softer due to that front right being loosey goosey.
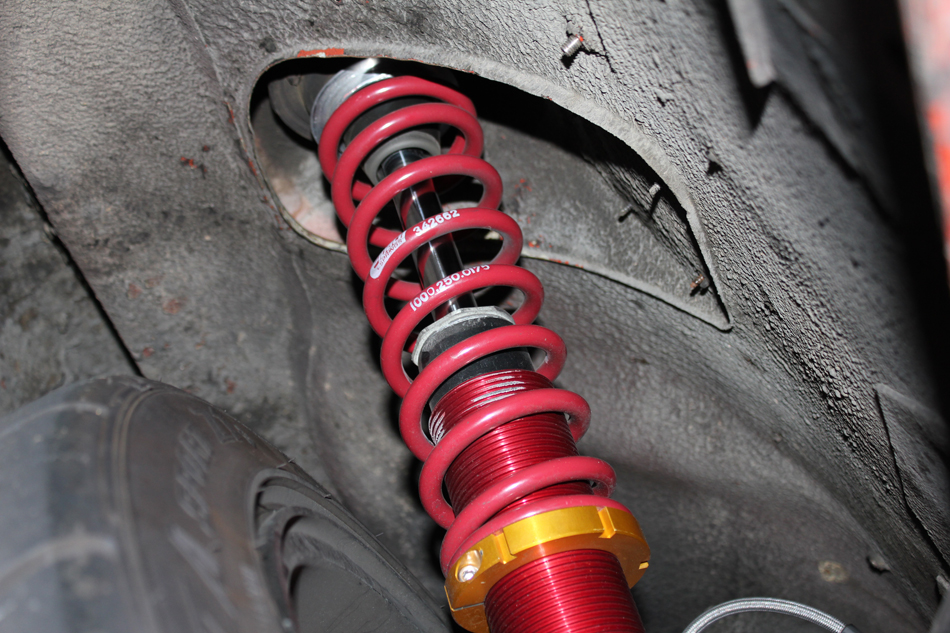
Here's some pictures of what things look like now.
Front Right:
Right Front:
Right Rear:
Left Rear:


~73 Turbo L28 to N/A RB25 240z Project~
in S30 Series - 240z, 260z, 280z
Posted
Test drove, feels good. The 50mm wheel studs with a 5mm spacer fill out the lug nuts nicely. Looks a little more aggressive with the rear tires filling into the flares.