-
Posts
859 -
Joined
-
Last visited
-
Days Won
2
Content Type
Profiles
Forums
Blogs
Events
Gallery
Downloads
Store
Everything posted by Z-TARD
-
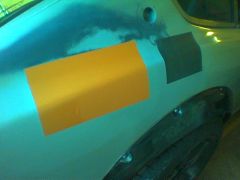
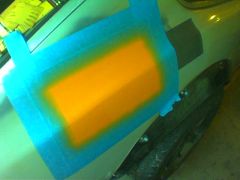
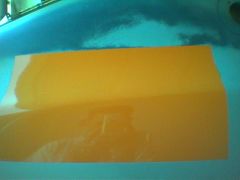
The first coat cured overnight, and I was able to wet sand with 1000 grit and put on another coat. I'm pretty impressed with how this paint sprays when thinned out. It should take 3 or maybe 4 coats max to get really good coverage, but overall I think this is very do-able for painting the entire car. Now I just need to determine how much paint it will take to cover the Z 4 times. Pics to follow as soon as I wet sand the second coat. Mike
-
It probably has a lot to do with the design of the intake system downstream of the turbonator/tornado thingy. I put one in my 98 cherokee just for $hits and giggles, and saw a consistent 2-3 mpg increase. This was measured from running 10 tanks of gas through it, then removing it and measuring again for several tanks. When it was removed, my mileage went down by 2-3 mpg. I then added a 3" lift and Mickey Thompson 31" Baja Claw radials, which completely nullified any benefits gained by using it in the first place Side note: Adding acetone to the gas also increased mileage somewhat, around 1-2 mpg. Mike
-
Hmmm. Interesting. Probably loaded with asbestos, mercury, and uranium for better adhesion I mixed up some orange tonight using the sunburst yellow and sunrise red from the stop rust paint. It thins out very well with mineral spirits. I used an airbrush to spray mine on, since I only did a small 10" test square. Call me chicken, but I can't see myself being able to pull this off with a roller..... Anyway, it sprays very nicely, with not much of a smell at all. Thinning with mineral spirits makes for a very pleasant spraying experience. The paint dries to the touch in about an hour, hopefully I'll be able to wet sand tommorrow and throw on another coat. If this turns out well, I may do the 240 in orange, and just use duracoat for the bumpers and trim parts that would normally be chrome. I'll post some more crappy cell phone pics later. Mike
-
I kind of figured as much. It's weird that they don't offer it in the same colors as the Tremclad. If you can't tell already, I'm pretty hung up on that orange color I think I'll try thinning this stuff enough to spray and do some more experimenting this weekend. Mike
-
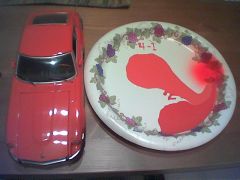
The top blob is the 4-1 yellow/red mix, the bottom one is the 2-1 mix. 4-1 seems pretty close to my 1/18th 240Z...... the spot on the right is chevy orange for comparrison. Yeah, I was pretty bored
-
I looked at the dried paint mixing samples today, and surprisingly the orange doesn't look half bad now. 4 parts of the #7747 Sunburst Yellow to one part of #7762 Surise Red makes a pretty close match to the color of that guys charger, "Real Orange". It's maybe a little dull, not sure how to brighten up the mix except maybe to use a brighter shade of yellow for mixing. The paint I got at home depot is the protective enamel, listed under the Stops Rust lineup on the rustoleum website. The can says to thin with mineral spirits, and hopefully this would help it to harden a little more than un-thinned paint, because my sample spots are still pretty soft. The metallics all look like crap. I guess thats what I get for painting the spots with a bamboo skewer.... The aluminum color seperates too much from the base colors. Spraying is probably the best option for the metallics. Realistically, I would rather spray any of these colors rather than roll, just to get more even coverage. It is cool to have a good source of cheap paint though. I wonder how this stuff would spray out of a cheapo electric airless sprayer? My only concern with these paints would be their ability to stand up to bright sunlight. The flat black rattle can rustoleum that I painted "The Turd" with last year is not holding up well in the Tucson sun at all. I rinsed off the car last time I was out there and I could see a lot of black running off in the water. The paint on the upper surface of the car has become very thin, and rubs off with just a little pressure on a rag.
-
Camber Plate Fabrication Project.
Z-TARD replied to Here comes trouble's topic in Brakes, Wheels, Suspension and Chassis
Any more progress Larry? This is a very interesting project, the lug nut through the spherical bearing is pure genius. Mind if I copycat this for my 240? Mike -
.......I picked up 7 little 4oz. cans last night...... So far I've just been messing around mixing colors on a paper plate. They didn't have any orange, so I tried to make it. Turns out yellow and red make something that looks like it came out of the backside of a baby that just ate carrots. It's definitely orange, but not a good kind of orange. Mixing the aluminum color with most of the solid colors results in a decent metallic look, hard to keep mixed though as the aluminum always wants to float to the surface. If I could find the Real Orange #1953 color in the Stops Rust paint, I would probably go this route. The caterpillar yellow is also pretty cool, but more and more I'm leaning towards using DuraCoat. Maybe "The Turd" will eventually get a rustoleum paint job.
-
Not that I'd advise this, but you can probably get away with using regular fans provided that you have enough ventilation. Explosions occur when the vapor content in the air is anywhere between the Lower Explosive Limit (LEL) and the Upper Explosive Limit (UEL). thinking of this in terms that us car guys can understand, imagine a combustion chamber in a cars engine. If the mixture in the chamber is too lean, you get no boom. Likewise, if it too rich, ditto. Anywhere between these two extremes though, and you wont have to use a razor to shave ever again, because you'll be covered in scar tissue. The trick is to make sure you always keep your paint booth below the LEL (in a too lean condition). In a small set up like you would have in a garage this probably shouldn't be too hard to do. If you notice vapor building up in the booth, stop spraying long enough for it to clear a little. Having a filter between the exhaust fan and the inside of the booth will reduce the explosion hazard a lot too. The best thing to do obviously is to use a fan that does not produce a source of ignition, if that is unavailable, use a lot of regular fans. Mike
-
Awesome! I'm thinking that if I had parked my car anywhere near a dumpster, the trash guy probably would have picked it up along with the trash.
-
I was able to dig up some test results for this stuff: http://www.jimsgunsupply.com/index2.html Advantages: Aesthetically pleasing appearance. Ideal for the firearms industry, with resistance to most lubricants, cutting oils, and bore solvents. Full gloss range available from flat to high gloss. Unlimited color range. Excellent hardness and adhesion. Excellent impact, mar, and abrasion resistance. Excellent water and chemical resistance. Performance: Conical Mandrel Passes 1/8†mandrel. Direct impact resistance 100 in. lb. Reverse impact resistance 80 in. lb. Salt Spray test 300 hrs. Pencil hardness H to 2H. Characteristics: Volume solids 21.0 to 32.5 +/- 1%. Film thickness can be varied from .25 to 1.5 mils dry. Flash point 37 to 65 F Pensky-Martins Closed Cup. Drying: To Touch: 20 min. To Handle: 60 min. To Pack: Overnight. Force Dry: 30 min. at 180 F. 1 hr. at 108 F. I have no idea what the results of these tests mean, but maybe someone with more knowledge than me can chime in here.
-
It's been my experience so far that this stuff will bond very aggresively to just about anything that isn't covered in grease. I got some on my watch band a few months ago, when I get bored I scratch at it to see if it will ever come off. So far, nadda. I wouldn't worry too much about fiberglass, this stuff goes on thin enough that it remains very flexible. A large part of it's strength is due to its elasticity. Because it is so thin though, it may not offer much impact resistance on a car body. It probably wont end up much harder that the material that it is sprayed on top of. Probably better to apply this stuff over an already painted car than over a relatively soft layer of primer. As far as pricing, there are only a few places I've found that carry it, and none of them have a significant price advantage over buying it directly from the manufacturer. $90 for 32 ounces is about as good as I could find. Out of curiosity, how many ounces of paint are nrmally required to paint a small car like a Z? I was figuring on buying two of the 32 ounce kits, but my guesstimation is only that, a guess. Mike
-
Cobalt Blue Metallic #7251. Might have to add in a little black and green to get it a little closer to the car in the picture. http://www.rustoleum.com/product.asp?frm_product_id=22&SBL=1
-
Here is the test spot after a quick once over with some 2000 grit sandpaper. I used some 400 on the upper left corner, which was able to get into the duracoat a little, but not much. The 2000 grit just knocks the lint and dirt off of it, and thats about it. This is just one coat, applied with an airbrush. It can't be very thick, but I would be comfortable using only one coat of this stuff as it is nearly indestructible. After a day of curing, there is no sign of any kind of reaction with the base paint, and the adhesion seems to be good as well. I tried peeling some of it up on the edges with a fingernail and got nothin. I'm torn between this and the $50 Rustoleum/roller paint job. The DuraCoat will end up costing about $200 for materials, and will have to be sprayed. The Rustoleum will cost a lot less, but although it is durable, it will be nowhere near as durable as the DuraCoat. The DuraCoat will also be a little more original I think. So far I don't know of anyone who has used this stuff on a car. Not too many SOCOM Black or Parkerized Z's running around. I'll have to think about this some more before I finally decide which paint to use, either way is probably better than an el cheapo Earl Shieb or Makko job. Mike
-
-
Wow, cool stuff. I was going to try out DuraCoat, but this would be a lot cheaper and easier to touch up. The Caterpillar yellow looks a lot like the yellow color that came on the Fairlady 432's:
-
I painted a small 6x6 inch square on the rear fender today, covering an area where some primer is blended into the original finish. So far, no adverse reaction to either the primer or the original paint. This stuff should make for an awesome satin finish on cars. Some FAQ from the DuraCoat website: As an average gun owner, can I properly apply DuraCoat products without training? Absolutely! DuraCoat is extremely easy to apply. Anyone can do it. DuraCoat was designed for the average gun owner. Preheating, baking and blasting are not required. Expensive, space consuming equipment is not needed. Simply clean and degrease the surface prior to application. If you don't have access to an airbrush, HVLP spray gun or conventional spray gun, our EZ Airbrush (#1SAB) is all the equipment needed and sells for less than $25.00. How durable is DuraCoat? DuraCoat is permanent. With normal use, a firearm finished with DuraCoat will last several lifetimes. What is DuraCoat? DuraCoat is a two part chemical coating. Unlike other firearm finishes, DuraCoat was created specifically for firearms. Other firearm finishes are "spin-off's" from other industries. Is DuraCoat Teflon based? No. Teflon is a lubricating coating which is great for internals, but will not wear as well as DuraCoat on the exterior surface of a firearm. DuraCoat's combination of elasticity and hardness creates a finish impervious to impact, scratching and the elements. Some users say DuraCoat displays some lubricating qualities, but this phenomenon was never intended when DuraCoat was created. How do I apply DuraCoat? DuraCoat can be applied by airbrush, conventional spray gun, or HVLP spray gun. Can DuraCoat be brushed on? No, absolutely not. DuraCoat is for spray application only. Do I need a special degreaser? Yes. Some degreasers, especially those used in the automotive industry, can leave a residue. This residue will form a barrier between the surface and DuraCoat causing a coating failure. We manufacture TruStrip degreaser solely for the firearms industry. TruStrip is capable of cleaning the contaminates commonly found on and in firearms and will not leave a residue. Do I need a special solvent to clean my airbrush or spray gun? Lacquer thinner will work, but clean your equipment with DuraCoat reducer occasionally. This will keep your airbrush or spray gun in top working condition. Is reducing DuraCoat required? Depending on your spray equipment, spray technique, climate and environment your DuraCoat may or may not need reducing. If your DuraCoat does not lay down smooth on the surface of your firearm, it most likely needs to be reduced. Always have some DuraCoat Reducer on hand as it may be required on given days due to weather conditions. DuraCoat Retarder Reducer cures problems normally occurring in high humidity weather. One of these high humidity problems called "blushing" makes the DuraCoat appear cloudy. Another called "dry spray" occurs when some of the DuraCoat dries before it reaches the firearm and causes a rough or dusty surface. Can I blend DuraCoat colors together? Yes. All DuraCoat colors can be intermixed. With a handful of stock DuraCoat colors, you can create an infinite number of colors by blending them. When is DuraCoat fully cured? DuraCoat is dry to the touch in 20 minutes, can be handled in 1 hour and is ready for use overnight. Although DuraCoat will gain most of its final hardness, elasticity and chemical resistance over a 2-3 week period, time will continue to enhance DuraCoat's characteristics over a lifetime. DuraCoat, like fine wine, gets better with age. As we say, "DuraCoat wears in, not out." I hunt along saltwater. Will DuraCoat withstand the salty environment? Certainly. DuraCoat is well suited for salty environments. One of DuraCoat's attributes is its extreme ability to resist salt corrosion. A firearm coated with DuraCoat simply will not rust...EVER! What is the shelf life of DuraCoat? The shelf life of DuraCoat is 12-18 months if properly sealed and stored in a cool, dark place. The shelf life of DuraCoat hardener is 6 months, but can be extended by sealing it in a zip lock bag and placing it in a refrigerator. How easy is DuraCoat removed? Not easy at all. The elastic nature of DuraCoat resists blasting. A qualified individual, with the proper blast media, can safely remove DuraCoat without damaging the surface of the firearm. Be careful. In most cases, we recommend lightly blasting the surface, being cautious not to remove any DuraCoat. Just "beat up" the DuraCoat giving it "tooth" so your new application of DuraCoat has something to adhere to.
-
I've been using this stuff for a while now on my gun projects. http://www.lauerweaponry.com/duracoatcolors.cfm?colortype=stock&Category=220 Over time it has proven to be an EXTREMELY durable finish. Naturally, I've been considering this stuff for painting my 240Z. Depending on the amount of hardener added to it, it will vary from a flat primer like finish all the way to semi gloss. I've only sprayed it with an airbrush so far, but I think an automotive type spray gun would work just as well. This stuff coats very well, and is very difficult to make it run. Dries to the touch in about an hour, and reaches full cure in a week or two depending on heat, and the amount of hardener. Clear coats are also available. Pricing seems pretty reasonable at $90 for 32 ounces. I'll probably leave mine as a satin finish, I like the color called "parker", designed to emulate the look of parkerized finishes on military rifles. It's also available in brighter colors too: http://www.lauerweaponry.com/duracoatcolors.cfm?&colortype=electric&Category=230 My only concern is it's compatibility with the original datsun paint, and if spraying it over this finish will cause it to peel, etc. I'll try out some on a small test area and let you guys know how it works. Mike
-
I finished reinforcing the backside of it, and it eneded up being quite strong afterwards, and still pretty light. I also decided on adding another coat of resin to the exterior to cover some of the low spots.... I've been waiting now for about 2 weeks for the final layer of resin to cure so I can sand it down to a smooth surface. I took a lot of precautions with the epoxy resin to make sure it was mixed well, but for some reason the last layer just didn't quite kick all the way. It's still pretty tacky, hopefully the resin below that is cured enoguh to sand on. As a last resort, I do have a container of Herculiner that will hide most of the mistakes i've made on this . I just ordered a bunch of peel ply and bagging material, along with about a years supply of nitrile gloves, so I'm much better prepared for doing another project now than I was when I did the dash. Let me know when you have a free weekend, I've got a ton of ideas for hood designs, along with a full roll of heavy fiberglass cloth for mold making, etc. Mike
-
Thanks Ed. My brother isn't a car guy for the most part, in addition to working nights as well so I didn't want to bother him with it. I think I got my $260 worth, but not much more. I got all the new sheetmetal for it from the junkyard for about another $140. Altogether I'm into this car about $1500 at this point, which isn't to bad for a Z that is for the most part rust free.....

