dat240zg
-
Posts
818 -
Joined
-
Last visited
-
Days Won
1
Content Type
Profiles
Forums
Blogs
Events
Gallery
Downloads
Store
Everything posted by dat240zg
-
Thoughts on where to run the engine bay harness??
dat240zg replied to dat240zg's topic in Body Kits & Paint
Bart: Honestly, I haven't decided on where to locate the PCM. I'm not certain about its ability to be exposed to the elements without issue. I'd love to mount it up in the wiper box, on the passenger side of things where there is more covering. I am running heat/air (Hot Rod Air system) and am going to have wipers. My thought was to seperate the wires that will be heading to the front of the car (horn, lights, fog lamps, turns, etc) and run them hidden while the rest of the harness - power, alt, etc and engine harness run hidden up high. What are your thoughts about the PCM being "slightly" exposed up in the wiper box? Bryan -
Thoughts on where to run the engine bay harness??
dat240zg replied to dat240zg's topic in Body Kits & Paint
Good Point - I forgot to mention the motorvation. It's an LT-1. I recognize that I'll have a couple of wires that I'll have to seperate. What I've been thinking of doing is to not have any wires coming out of the stock locations in the firewall and instead run the wires through an alternate route (previously mentioned), and those wires that are tied to the motor, up and out the hole for the wiper harness, straight to the back of the motor. When the guys did the body work I had them get rid of the fresh air vent hole (right in front of the passenger, by the wipers) and so I have a nice bit of space in there (under the valence) that I can use to clean things up. What I don't want to do is pull a bone head move and drill a couple of holes and then realize that I missed thinking of something. Speaking from experience, unfortunately. Bryan -
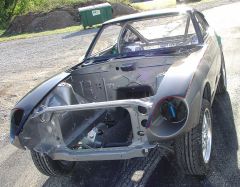
I'm at the point now in the reassembly that I'm getting ready to run the Painless harness to the engine bay. I'd like some ideas of where to or which way to run the harness. I'd like to have the clean look, so I'd rather not run it down the frame rail (stock). Several thoughts that I had considered: 1. Drill a hole in both ends of the frame rail and run it through there to the front of the car and then throught the bottom of the radiator support. Pro's: Very clean Con's: Holes in the frame rail, potential for future rust. 2. Take the harness in to the engine bay through the stock hole, then up into the top of the fender rail (in between the frame and the under side of the fender). Pro's: Less work, slightly clean look Con's: Still have some of the harness out in the open, would also have to resolve how to get the harness back into the front of the radiator support for lights, etc. 3. Run the harness through the fresh air vent on the passenger side, all the way out to the front of the radiator support. Pro's: Nice and clean, no permanent holes Con's: I lose some of the functionality of the vents. Any of you guys have any other thoughts or tricks that you've done that you'd be willing to share? Thanks much for your thoughts. Bryan Dat240zg
-
Ha...man I didn't even think about Allie and Bosco being in the pic. Those are our two "kids". Talk about personality. Thanks for the comments on the Z as well. I started running the new brake lines and am going to work at running the braided fuel lines up in the tranny tunnel near to where the stockers used to go. After that, it's time to drop in the LT1/T56 and get these loose ends tied up. Thanks again. Bryan
-
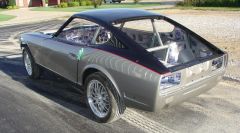
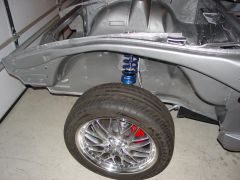
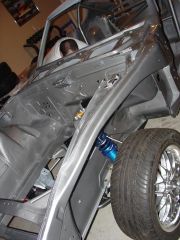
Well, it's been a busy few weeks - progress is slow, but pretty steady. As it stands now, the fuel tank is in and wired, the rebuilt pedal box is installed, the mastercylinders and new powerbooster are hung. I've now gone through the doors, cleaning and repaired/replaced/cleaned/lubricated all of the door and window hardware. The most exciting moment was Saturday for sure when my new 2 piece adapters came in and I was able to mount my wheels. I'll have more pics a little later, but here are three that I shot earlier: I'm diggin the ride height now....I may have to start a new trend, how high can you go????? Seriously, I should be able to get the rear down about 2 inches and will adjust the front once the motor and tranny are in. Woo Hoo! Bryan
-

-

-
-
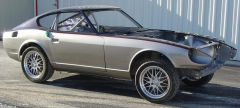
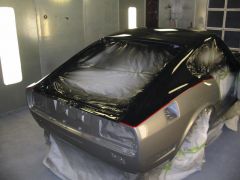 Thanks much. The colors are '07 Mercedes Pewter Effect and '07 Porsche Basalt.Finish date goal is Nov. 21. Stay tuned!!
 -
Thanks again guys. Gary and his crew did a really nice job. I feel like a goof ball, going in the house and then back to the garage again just to snag a look. As far as the subwoofer, it's going in the spare tire well - since I've switched bolt patterns, the spare doesn't work anyways, so... The sub is a Mazda/Bose unit designed for spare tire wells. Fits really nice, was inexpensive and is out of sight to prying eyes. By safety bars, are you referring to the roll bar? If so, it started as a Jegster unit and was modified and tied in several more places. I'll take some pics of the mounts that they made. I really appreciate the compliments - this car has almost made me pull out my last two hairs several times. Bryan
-
Man, I love those flairs. Very Nice! Bryan
-

-
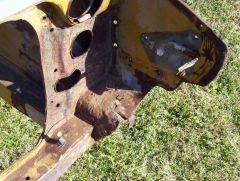
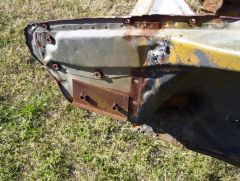
We ended up having a "memorial service" and then cut just ahead of the strut towers. Here was why: What the pics don't show was the twisting and tweaking of the frame rail on the drivers side. At some point someone had covered the damage with bondo, but it was out by a quarter inch. During the repair: After: Yesterday (Saturday) I was able to re-run the wiring harness, wire up the taillights, antenna and subwoofer. Hope to make more progress today. Bryan
-
-
-
-
-
-
-
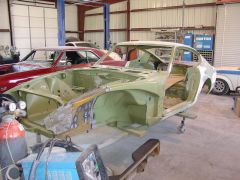
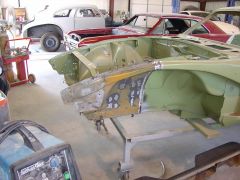
Thanks much guys. It's sitting pretty high right now. The coilovers are set about as high up as they can go to make it easier for them to tape up and get around the car when it was at the shop. I'll drop it back down here in the next week or so after I get to installing the brake lines and such. Thanks again for the kind words. My goal is to get it finished in time for the Tulsa Route 66 car show in November. Bryan
-
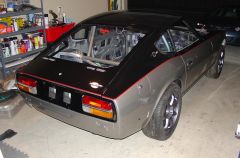
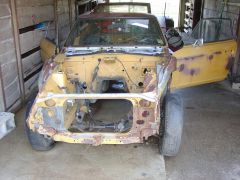
Well, I went and picked up the Z this morning and the paint is finally done! Gotta be honest...man, do I feel jazzed! It was awesome to go finally roll it back in to the garage for reassembly. To think that it started with this a year ago: And here was this morning: Here are a couple of more pics: Today I was able to get the wiring done for the rear of the car and a few other things. Can't wait for tomorrow! Bryan
-
-
-
-