yellowoctupus
-
Posts
421 -
Joined
-
Last visited
-
Days Won
2
Content Type
Profiles
Forums
Blogs
Events
Gallery
Downloads
Store
Everything posted by yellowoctupus
-
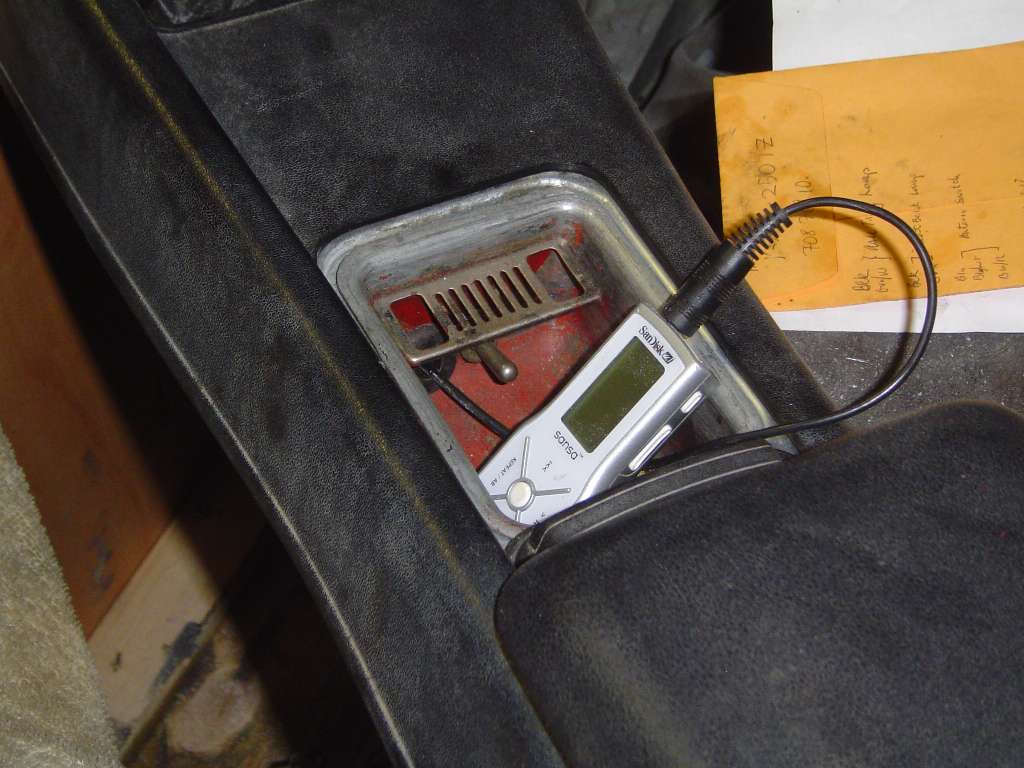
Not a 4.6 update, but the radio's all hooked up. Kind've a pain to do with no stock brackets, but it's pretty sturdy and all lines up nice. There's a switch in the ashtray; you switch power from the radio to one of the pins on the Aux input plug, and the amp is powered through the AUX input instead. Kooky, eh? I'll post wiring details later. Nissan did some weird stuff that is left out of all their factory wiring diagrams like switching wire colors at harness plugs etc. Also, FYI the center knobs are not stock, I was missing one of the black plastic ones, so I put a set-screw into some solid aluminum ones from a 70's Sanyo radio on it which worked out pretty well.

-

Best adhesive for fiberglass to metal bond
yellowoctupus replied to mclark999's topic in Body Kits & Paint
Kitty hair seemed to work pretty good putting a fiberglass scoop on my 65 Mustang. I also put in countersunk rivets every 2" or so, so cracking loose from vibration shouldn't be an issue. -
4.6L Ford DOHC modular motor in my 240z
yellowoctupus replied to notheredave's topic in Ford V8Z Tech Board
Sounds like some pretty sound reasons What kind of dyno does your friend have? I was considering making a bench top inertial type for measuring small engines/motorcycles, but time hasn't allotted for that silliness yet. -
Sooooooo, with the new clutch in, the crazy Chrysler dual brake MC I put in just barely doesn't push enough fluid to disengage the clutch. The car's basically undriveable, although I kinda revmatched it around the block once or twice. Here's a PDF of the Tilton Master Cylinder I'm putting in tomorrow. It's a 1" bore, 1.2" stroke brake/clutch universal MC. Scored it from evilbay, and it came with a drawing dated 1985. It's great to see a company come up with a design and then keep it for years in production, instead of coming out with some throw away design every other year, making your three year old part unserviceable. Ok, sorry for bichin, I'm off my soap box. FYI, clutch pedal stroke is maxed out at 1" at the stock pushrod location. Maybe you could stretch a little more travel out of it, but that would require removing the floor bumpstop, or changing the adjustable 'topout' bumper. With a 7/8" slave cylinder (Wilwood pull) and 1" Tilton MC with 1" travel, I can get 1.4" travel from the slave. I was going to upload an easy clutch component calculator I made in excel to this post, but I can't attach it for some reason. Send me a PM if you want it, and I'll email it to you. You just put in the three of the four things you know (MC travel, slave travel, slave piston diameter, MC piston diameter) and it will spit out the last variable for you. The 'doglegged' shifter arm I made JUST BARELY fits under the hazard light switch in the center console (maybe 3/16" clearance), I wasn't kidding about having to cut the stock shifter down short. Also, I had to make a fancy pocketed shifter hole cover since the shifter arm dips so low for clearance. I may make the shifter arm a little bit longer, as it looks like a short shifter with the console pleather boot installed. I also now have the full wiring figured out for my stock Hitachi radio, including how to run an MP3 player into it. I have a jack wired into the ashtray in the center console, so it's still bone stock looking inside the passenger compartment. TiltonMC.pdf
-
4.6L Ford DOHC modular motor in my 240z
yellowoctupus replied to notheredave's topic in Ford V8Z Tech Board
If you're doing a stand alone kit, why run a MAF? If you're doing something like a Megasquirt, they run off a board mounted MAP sensor. -
How much did everyone spend on their V8 Conversion?
yellowoctupus replied to a topic in Gen I & II Chevy V8 Tech Board
Prior to engine swap $1500 into completely great running, rust free 78Z. 4.6 mod engine & T-45 5speed $450 Reprogrammed ECU $100 (2nd) T-45 Transmission $50 Clutch etc $65 Driveshaft $300 Clutch slave & master $80 Misc Gauges, junkyard parts $150 Thrush Muffler/exhaust bits n pieces $50 Money back from 280 engine sale $400 At the end of the day, for the whole swap I'm in under $1000, which was my goal. I'm sure little bits and pieces here and there will bring me closer to $100, but don't be scared away from doing a swap looking at some of these guys who build RIDICULOUS cars for $20k+++. Don't get me wrong, they're awesome machines in the end, but you don't have to spend that kind of money for a daily driver sleeper car -
From the album: 1978 460z
-
4.6L Ford DOHC modular motor in my 240z
yellowoctupus replied to notheredave's topic in Ford V8Z Tech Board
Nice, here's a guy who's always aimin to please Wish I worked with people of this responsiveness level. Looks good chrome, IMHO, but not bad painted either. We've been watching you getting tons of shiny parts gathered up, have any of them gravitated towards that engine bay? By the way, my M112/M122 was a typo on my part, but that's interesting, as I did't know they made both models. I was aware of the M45/62/90/112, but not the M122. That's huge. -
4.6L Ford DOHC modular motor in my 240z
yellowoctupus replied to notheredave's topic in Ford V8Z Tech Board
I'm not 100% behind the gold bumper, I think you should either stick with white or chrome, but that M112 looks pretty sweet for sure! I'm assuming you're planning on running a cowl hood? -
Tranny is out, putting in another T-45 (lets hope this one shifts into reverse!). I'm putting in a reman LUK clutch/pressure plate this week, and figured while all this is out, I might as well finish up the shifter so it fits under the stock center console. Needless to say, it's really tight up there. The shifter comes out of the transmission right below the rear defrost/ haz light switches, so there's maybe 1" of room for the shifter to move back and forth with. It's too bad it's so tight, I got a T-45 B&M shifter at the pick n pull and wanted to use it (it has adjustable stops), but there's no way it would fit. No way no how. I had some broken 3mm German Allen drivers from work that somebody threw out, they're made out of some really nice steel with a funky red rubber handle (actually pretty ergonomic). I reefed on one in a vice exerting at least 4x the force I would shifting and it didn't bend at all. (It's 5/16" in diameter). I am still using the stock shifter ball joint, but I cut it off super short, drilled a 5/16" hole in it, and pressed in the allen arm. Once I gave it the crazy dogleg bends (heated it up with a oxy/act torch) and test fit it in the car with my junk console, I welded the shaft end into the hole to prevent it from rotating during gate changes. (from the 1-2 to 3-4 gate; Left to right movement, etc) Next up is the speedo/tach. I don't have pictures yet, and they're not 100% done (still have to finish up backlighting, check engine light etc) but I massaged a set of gauges from a 1994 T-bird into the stock tach and speedo pods. I put them in a day before pulling the tranny, so I at least got to test them first. Speaking of the speedo cal, after I put them in, of course the speedo wasn't dead on. It has a 21 tooth driven gear, and what it needs is a 23. Ford Racing has a good chart of part nubmers -->http://www.fordracingparts.com/download/tipsPDF/SpeedometerGearUsageChart.pdf but of course no 23 tooth gear. The only FORD solution is pulling the tailshaft extension housing off and changing the drive gear from the 8 tooth to the 6 or 7. Luckily for all the actual Ford racing guys out there, Steeda and a bunch of other companies offer a non Ford PN 23 tooth gear! Yay! -->http://www.uprproducts.com/mustang-23-tooth-speedo-gear.html
-
Are you referring to the two wires that are in the 'T' style connector? I think they just run to the voltage regulator which in turn go to the voltage gauge to turn on the 'charging' led. I didn't hook them up in my 78, and everything still works fine. (edit: Perhaps the yellow wire goes to the 'brake warning lamp check relay'. This should light when the engine is not turning over, but the ignition is on. This info per the 77 FSM.) You can get the full wiring diagram here--> Top link is 76 PDF, Bottom link is 76 GIF. http://www.atlanticz.ca/zclub/techtips/wiringdiagrams/76_280z_wiring.pdf http://www.atlanticz.ca/zclub/techtips/wiringdiagrams/76_280z_wiring.gif
-
4.6L Ford DOHC modular motor in my 240z
yellowoctupus replied to notheredave's topic in Ford V8Z Tech Board
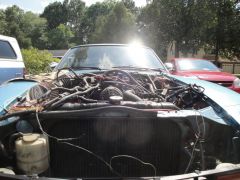
Neat pile of stuff. I've never seen a Mag for these newer motors. Is it still points, or breakerless? That is the one thing that does continue to work even with PATS, is spark, so you could still run the stock ignition if you wanted, with the coilpacks pretty easily. I am likin' the look of those individual throttle bodies though. -
2000mi mark coming up, somehow the tranny keeps putting along. Lately I'm working on getting gauges functional. Still have to do speedo and tach, but here's some notes on Oil and water temp: Water Temp: Make sure you have a return ground path for the original Z RTD (it's a plastic manifold = not a good electrical path..) I welded a stud to the Z sending unit hold-down collar, and ran a grounding strap from that to the block. I also had to get a universal gauge fitting adapter kit, and cut down the Z hold-down collar 1/8" for proper thread engagement. Seems to work well so far. By the way, I took a 'non functioning' sending unit apart for fun, it's pretty neat, I'll post some pictures later. Also, it works fine now that I took it apart... Oil Pressure: I have been trying to use the mustang wiring harness as much as possible to not create a spiderweb of extra wires under the hood for gauges etc, so I made a plug converter to go from the original Mustang oil pressure switch (yes, even though the Mustang dash shows a gauge, the sending unit closes the circuit, and there's a fixed resistor behind the gauge, which makes the needle swing up to that set point. Pretty sweet, huh?) Just ignore the grey wire in the picture, that wasn't used (I was using a used M/F 3/16" spade connector and drilled a hole in the male end to accept the M5 bolt). I could have cut off the stock Mustang 'push on' end, but it's really a pain to get to, and I insist on soldered connections everywhere (even after crimping), and I certainly can't get down under the block to solder a different end on.
-
Did you find any completed 4V builds?
-
Yeah, Gotta watch out for that life thing. It'll sneak up on you when you're not lookin.
-
Just a quick update, I've had the car on the road for about a month now, driving it every day to work (30mi/day), and even taking it on a few (~150mi) longer trips on the highway. It's really fun, starts right up and runs like a dream. I don't have reverse, and have to double clutch it into 5th, but I think it's probably a bent shift fork. (Haven't had time to tear down the trans and check though, as this is my only car at the moment.) A few notes: 1: Possibly change out the clutch M/C for a 1" bore (currently 1-1/8")and lengthen the pedal throw 2: Likewise lengthen the pedal throw on the accelerator, as it's a tad bit touchy. I'm used to it now, but anyone who takes the car for a spin has some difficulty getting used to it. 3: The exhaust has a low spot that is on a bend at the rear axle, that could be straightened out, it has hit twice while going through big dips in the road. 4: Get some better (tackier, etc?) tires. She gets a bit squirrley on rainy roads. Just rolling on the throttle (no clutch work), it will spin the tires in 4th. I didn't try 5th. So far, although I'm not sure I'd recommend this swap (compared to a 5.0, etc) I'm 100% happy with the way it works and drives. It's awesome.
-
ford smallblock bellhousing bolt pattern
yellowoctupus replied to zcar?'s topic in Ford V8Z Tech Board
Oh yeah. I missed that part in your post, saying all that you needed was the starter holes. -
ford smallblock bellhousing bolt pattern
yellowoctupus replied to zcar?'s topic in Ford V8Z Tech Board
I think this is a good shot of the dimensions you're looking for: 302/351 You'll like this one, it's a homemade bellhousing, Chevy 350 to Ford Top loader: Homemade Bellhousing -
Can a rear spoiler reduce exhaust fumes?
yellowoctupus replied to Andrew Bayley's topic in Body Kits & Paint
So, for anyone who wants to take a shot at the actual vacuum caused at the back of your car, I learned this by simple experience. I was driving my 78 a few years ago, and apparently didn't catch the latch on my back hatch. It was shut, it just didn't 'click'. When I was going 90-110 (it was a few years ago, so I'm not sure exactly what speed it was at) the hatch popped WIDE OPEN. ALL THE WAY. I even have good working OEM gas struts on it still, and it POPPPED right open. So, if you take a force gauge (or put yourself on a scale, and see how much more you 'weigh' when you're opening the hatch lid, then see at what speed your hatch opens, that will tell you how much 'upforce' you have at a certain speed. Comparatively, with the addition of a spoiler, the force to open the hatch may increase with the weight of the spoiler, but the speed at which it opens should hopefully be MUCH greater than it was before. Any takers for a some high speed test runs? -
1984 SVO 175 hp (130 kW) @ 4400 rpm 210 lb·ft (280 N·m) @ 3000 rpm In 300ZX form, it produced 160 hp (120 kW) and 173 lb·ft (235 N·m) Those are just some stock numbers off of Wikipedia, I'm not sure I'd want to go through the bother myself, for a high revving relatively small engine, that doesn't leave you with much better than stock. It would be neat though, as four cylinder US motor swaps are pretty rare!
-
4.6L Ford DOHC modular motor in my 240z
yellowoctupus replied to notheredave's topic in Ford V8Z Tech Board
It will be WAY cheaper if you're having a professional welder do the work to tack the mounts yourself, and bring it all in to their shop to weld everything up at once. Also, you'll have to pull the mounts out if you have them bolted in the chassis or something, so they can weld all the 'hard to get to' installed sides of the mounts. -
Gearing, top speed, tires and 1/4 mile
yellowoctupus replied to notheredave's topic in Ford V8Z Tech Board
Took me a minute or two, but I knew there was a pile of old 1/4 mi times out there somewhere with stock Z's: http://zhome.com/History/zcarperf.html Just as a check to your calculated times. -
Solar, wish I had known it was just a 7 / 9 series, as I just bought a stock Z rad a week before your post. Thanks though. Do you know for sure about the outlet locations? ANOTHER FORD SWAP DOCUMENTED: http://zhome.com/rnt/FordPower/ Not good if you like pics, but more 5.0 documentation nonetheless. FYI, if you're on the Zhome page and are annoyed that they made it a 'framed' webpage where you are always on the same 'home page' at the top, right click the particular page you're on and choose 'This Frame' --> 'Show only this page'. Now you can post links and save pages as bookmarks from this site and other 'Framed' websites.
-
Running hot with new alum radiator
yellowoctupus replied to slyhog22056's topic in Ford V8Z Tech Board
Ok, not to hi-jack this, but........while we're talking about cooling system problems.... On my swap (96 Ford 4.6 SOHC), the rear of the block where the manifold heater outlet is is much higher than the radiator, I had assumed that the water pump would force out any air trapped in lines, is this incorrect? The other question I have is since it's the highest point, that's where I've been filling it, by removing a line, and pouring my coolant into the back of the block, does someone make an inline filler or something? Or is there a car out there with a similar at least radiator style filler port or something? (Like this, but not plastic... Prestoline Flush T ) -
So....the car is basically ready to drive, less putting the rad. fan back in, and hooking up one wire to the stock Z fusebox for lights etc. Here's some pics of the finished exhaust and the battery arrangement I put together. It's not in the most convenient location, but I used the battery box area under the hood for my intake (and future airbox), and I really don't like when people have them inside their cars (in case of leakage, fire etc). I went with a Thrush welded 2 chamber style muffler (PN 17649). From stock manifolds, I have 2.5" running until it comes together at a union behind the transmission, then it goes out 3". I was going to go with a quieter muffler, such as the Thrush Super Hush, but found an ACTUAL picture of the 3" through model and it actually necks down right before going into the muffler. What's the point in that?? Anyhow, it sounds pretty sweet with this one. Idles pretty quiet, but when you get into the throttle, it howls like all get out. The exhaust is fully hung in there now. May need to add one additional support by the 3" SS flex though. I'll have to see how much movement there is when I'm driving. This is the battery mount, it holds to the bottom of the 'trunk' area by 7 M6 screws. The bottom portion bolts on to the two hangers, so the battery can be removed with only the lower mount by 4 easy to access M8 bolts. One of the bolts is the ground connection. The positive lead has enough extra cable that I can drop the battery to the ground and unhook it there. You CAN get to both of the terminal clamps from the 'as mounted' location though. It's just a little tighter to work on there. The cable starts basically at the left headlight (a the fusebox/electrical distribution box), then I drilled an extra hole in the AC firewall insulator. This brings in the cable just to the left of center at the heater. Then the cable runs under the center counsel. Used some insulator grommets I had kicking around and brought the cable into the trunk area, and exited right above the rear diff. I cut the 3" access hole to push the cable through. It was super tight on the grommet, but WD-40 and some long curved jaw needle nose pliers helped push it through relatively painlessly. Under the car to keep the cable from wrapping around the passenger axle, there is a rubber hanger that is used for the e-brake, I just fed this cable on top of it too. Worked out beautifully. As a side note, has anyone reclaimed the little toolbox things in a 280z, the way they were in a 240z? I was a little surprised to see the cutouts right there for them. Just wasted dead space right now. Someday I'm going to re-do that back area with the 240z height style in mind. (At least the first foot or so. Maybe just hinge the whole first foot in the opposite direction as the rear access is right now, so it's handy to get to from the passenger compartment.... Battery box sits just barely above the diff/ gas tank level, which is what I was going for. You could bring it up about 3/8" before hitting the fuel lines; as it is I had to remove some of the bend one of the fuel lines originally had to get it to fit. This mount is so solid, I can't flex it in any direction; it can probably be used as a new jack lift point.