ZeeNoEvil
-
Posts
18 -
Joined
-
Last visited
Content Type
Profiles
Forums
Blogs
Events
Gallery
Downloads
Store
Everything posted by ZeeNoEvil
-
Used this to cover up my unused switch holes. 14 ga. stainless, polished, taped off with 1/4 wide tape then sand blasted. Made a paper template first.
-
"The hardness of the stainless steel wouldn't conform well and, like I mentioned, would most likely result in a leak." You could buy a -6AN steel fitting (any store selling hydraulic supplies) and use it to seat or conform the stainless line to then swap out the steel fitting for your aluminum hose ends.
-
1977
-
Thanks all for your kind words. I would love to make a couple dozen of these if only I had a lathe, It's way to time consuming and awkward to turn parts with a mill. I think there might be a market for this if someone was set up to do it. Wasn't someone on here making small billet aluminum parts a while back? Maybe they would be better set up to do this. Ideas are free and sharing them is the right thing to do. It what makes this site what it is. I also made some door lock knobs from scrap TV tower reinforcement rods.
-
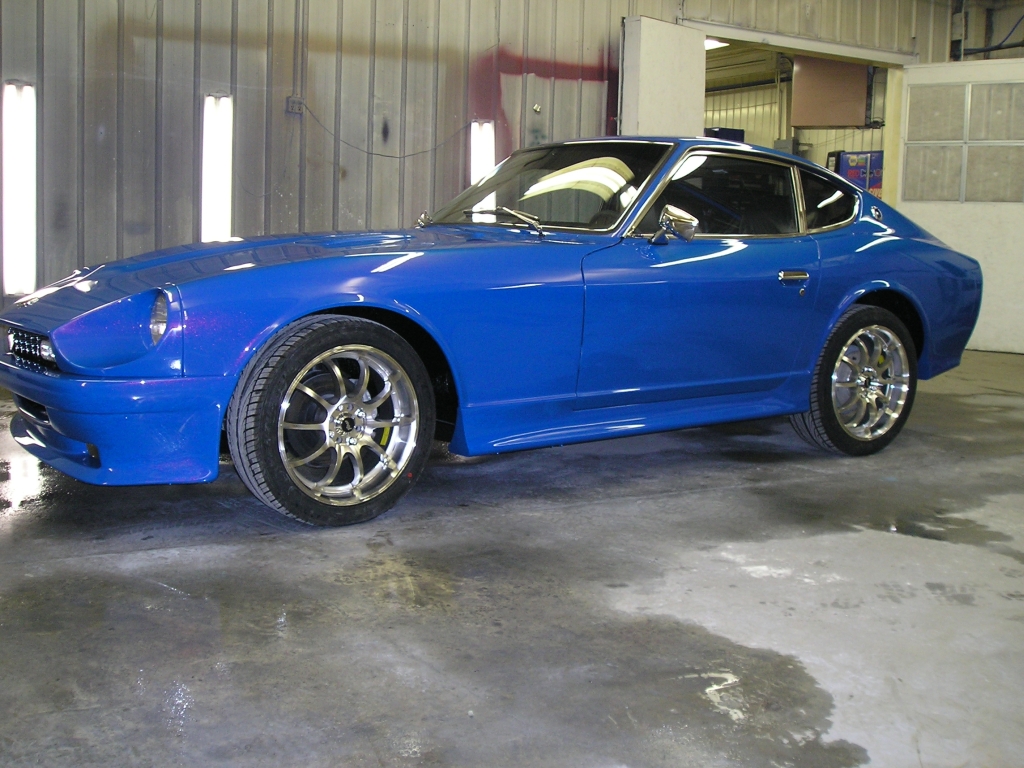
My Daughter hated the looks of the stock steering wheel. After searching for a new one, they were either too expensive, too small, or "I don't like that one". I decided to make the original look better. Basically it was the couch pillow horn button and the rather bland looking spokes that I attempted to do something about. Every thing was made with the use of a Bridgeport mill (can only wish I had a lathe). I kept the "Z" logo from the original horn button.
-
Martin Senour Tec Line Northern Lights Sunset.
-
Home made aluminum in my daughter's 77 280Z.
-
Custom tail light brainstorming w/ pics.
ZeeNoEvil replied to YeaJimi's topic in S130 Series - 280ZX
I've used these type lights several times as front turn/park lights but without the rubber grommets. I found a place that sells chrome or stainless bezels that cover up the grommets and I think would make it look much cleaner although I have never purchased from them. http://www.empirechromeshop.com/c-67-light-accessories.aspx?pagenum=2 -
-
Try hiding it in plain site, disguise it as a speaker box.
-
No Brake Hardlines on new project!
ZeeNoEvil replied to Benz's topic in Brakes, Wheels, Suspension and Chassis
Cheapest place I have found on-line for copper/nickel brake line is tooltopia.com. They have a better price then even the Napa dealer can get it for, as well as brake tools. Line is cheap compared to the labor, take your time stay focused and $100 worth of material can easily be a $600 to $1,000 finished product. Well worth the effort, do it right and you'll wish they were on the outside of the car for everyone to see. -
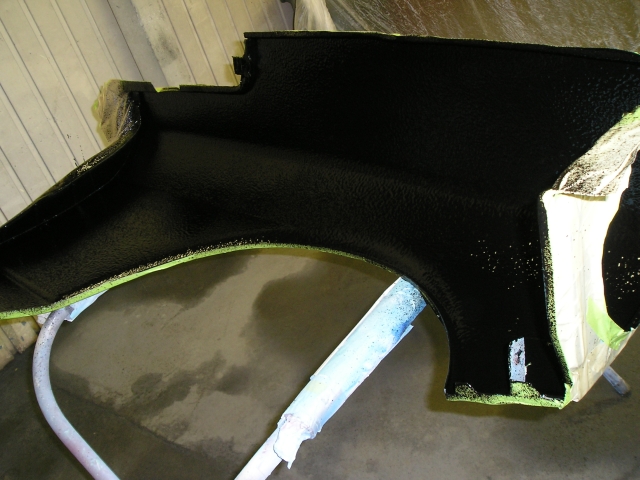
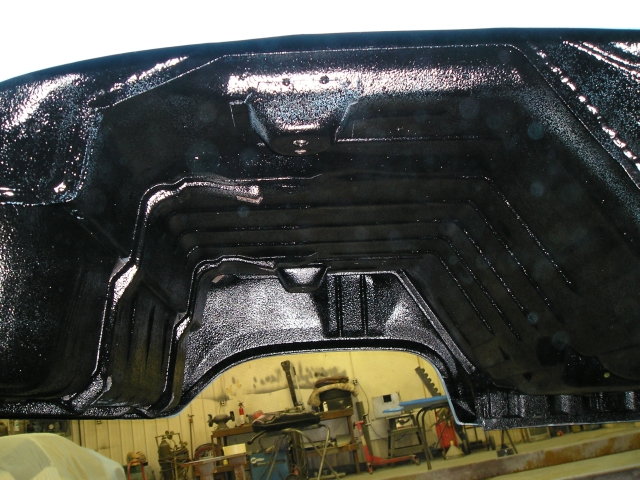
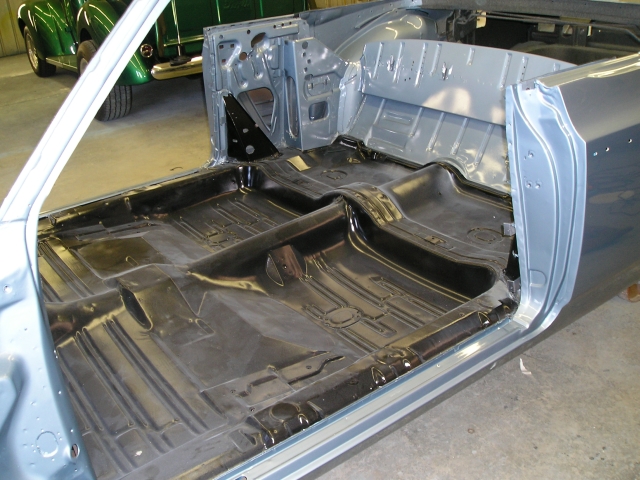
I've always put carpet over it myself. Have seen a lot of abused pickup beds that hold up just fine. You can scuff it and scratch it but I've never seen it wear out, takes a week to fully cure, but you could walk on it the next day. We did a 67 TR4A last year and I climbed in and out of it countless time doing the wiring and it never hurt it any. Lot's of pictures at http://www.facebook....to/174180992411
-
Do not use ketone, this is the wrong stuff. Xylene is what you want to use. My mistake and my apologies for not double checking. I will try to edit my previous post.
-
The stuff we use is SEM Rock-It tintable bedliner. It can also be purchased in black and in a kit with a free gun. http://sem.ws/Catalog.asp?prod=315A automotive paint suppy should be able to tint this to any car color if you don't want black. Ketone xylene is a solvent that works for us although it is not stated in the instructions, (Do not use thinners or reducers!) Mask off any mounting surfaces that may effect alignment of parts and remove masking before final cure or you may not get it off. They also make a tape with a wire in it but I have never used it.

-
Works very well full strength underneath. On the interior we dilute it with ketone xylene so it lays flat and is thinner. Horrible stuff to try and take off for repairs though.
-
The frame was made of 1/2" sq. tubing. Some left over scrap brass tubing from a manufacturing process and some scrapped inserts from a injection mold shop. Everything was threaded 10-32. Face pieces were then sent out for chrome plating. Everthing was drawn up in Cad to get the various tube lengths. I thought afterwards that stainless steel intake valves with a good polish would have worked well also. Chrome was $200, but it is nice!
-
The grill idea came to me while thinking of a plate with a bunch of holes drilled into it. That led to the thought of why not keep the holes and get rid of the plate. I kind of always liked the floating grill concept used countless times over the years. The trick was keeping the "V" of the hood and the rearward slant of the original grill opening.
-
My Daughter's 77 280Z.
-
Deleted picture as it was too large.
-
Sounds like air in the system by the way the temperature varies. Run the engine to operating temp, then clamp or pinch off the upper radiator hose. Run the engine at 2,000 rpm for about twenty seconds releasing the clamp on the hose, continue running at 2,000 for another ten seconds, shut off the engine and let sit for a hour. Check your fluid level. A more sophisticated way would be to drain, vacuum down the system then let the vacuum draw in the fluid.
-
Thanks for the reply Avernier, I guess the cap I have on it now has the deep returns and seems to look fine to me although it is obvious it's a cap. It was put on some years ago and is looking dated and warped along the top (silicone is no longer holding it down). Until I pull it off and see the original dash, it might be worth while to look into refinishing the original. I'll keep reading, and this spring rip into it. Busy putting the body together right now but thinking constantly about all the other things that need to be done. Thanks again!
-
Will be putting my '77 280Z interior together soon and want to replace the aftermarket dash cap with a new aftermarket one. I found listings for two different caps, "full face" and full face/deep returns". Could someone explain the difference and how it might effect installation or appearance.
-
I had to finish up after someone else on a MG restoration and ran into similar symptoms, also with a "new" radiator. A plastic plug was left in the lower outlet. it was painted black and almost impossible to see. Hope this helps.