Tank
-
Posts
106 -
Joined
-
Last visited
-
Days Won
2
Content Type
Profiles
Forums
Blogs
Events
Gallery
Downloads
Store
Everything posted by Tank
-
-
-
From the album: Progress
-
From the album: Progress
-
From the album: Progress
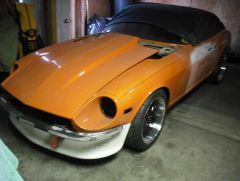
Suspension complete -
A buddy of mine texted me pictures of these two Sunday from the Auto Fair at LMS, very nice!
-
A typical HybridZ S30 suspension/brake build
Tank replied to Tank's topic in S30 Series - 240z, 260z, 280z
I bought mine at zccjdm.com and modified the front bumper mount for it ['73 bumper mounts]. The rear required no modification. -
A typical HybridZ S30 suspension/brake build
Tank replied to Tank's topic in S30 Series - 240z, 260z, 280z
Thanks, I figured I would need those a time or two! -
A typical HybridZ S30 suspension/brake build
Tank replied to Tank's topic in S30 Series - 240z, 260z, 280z
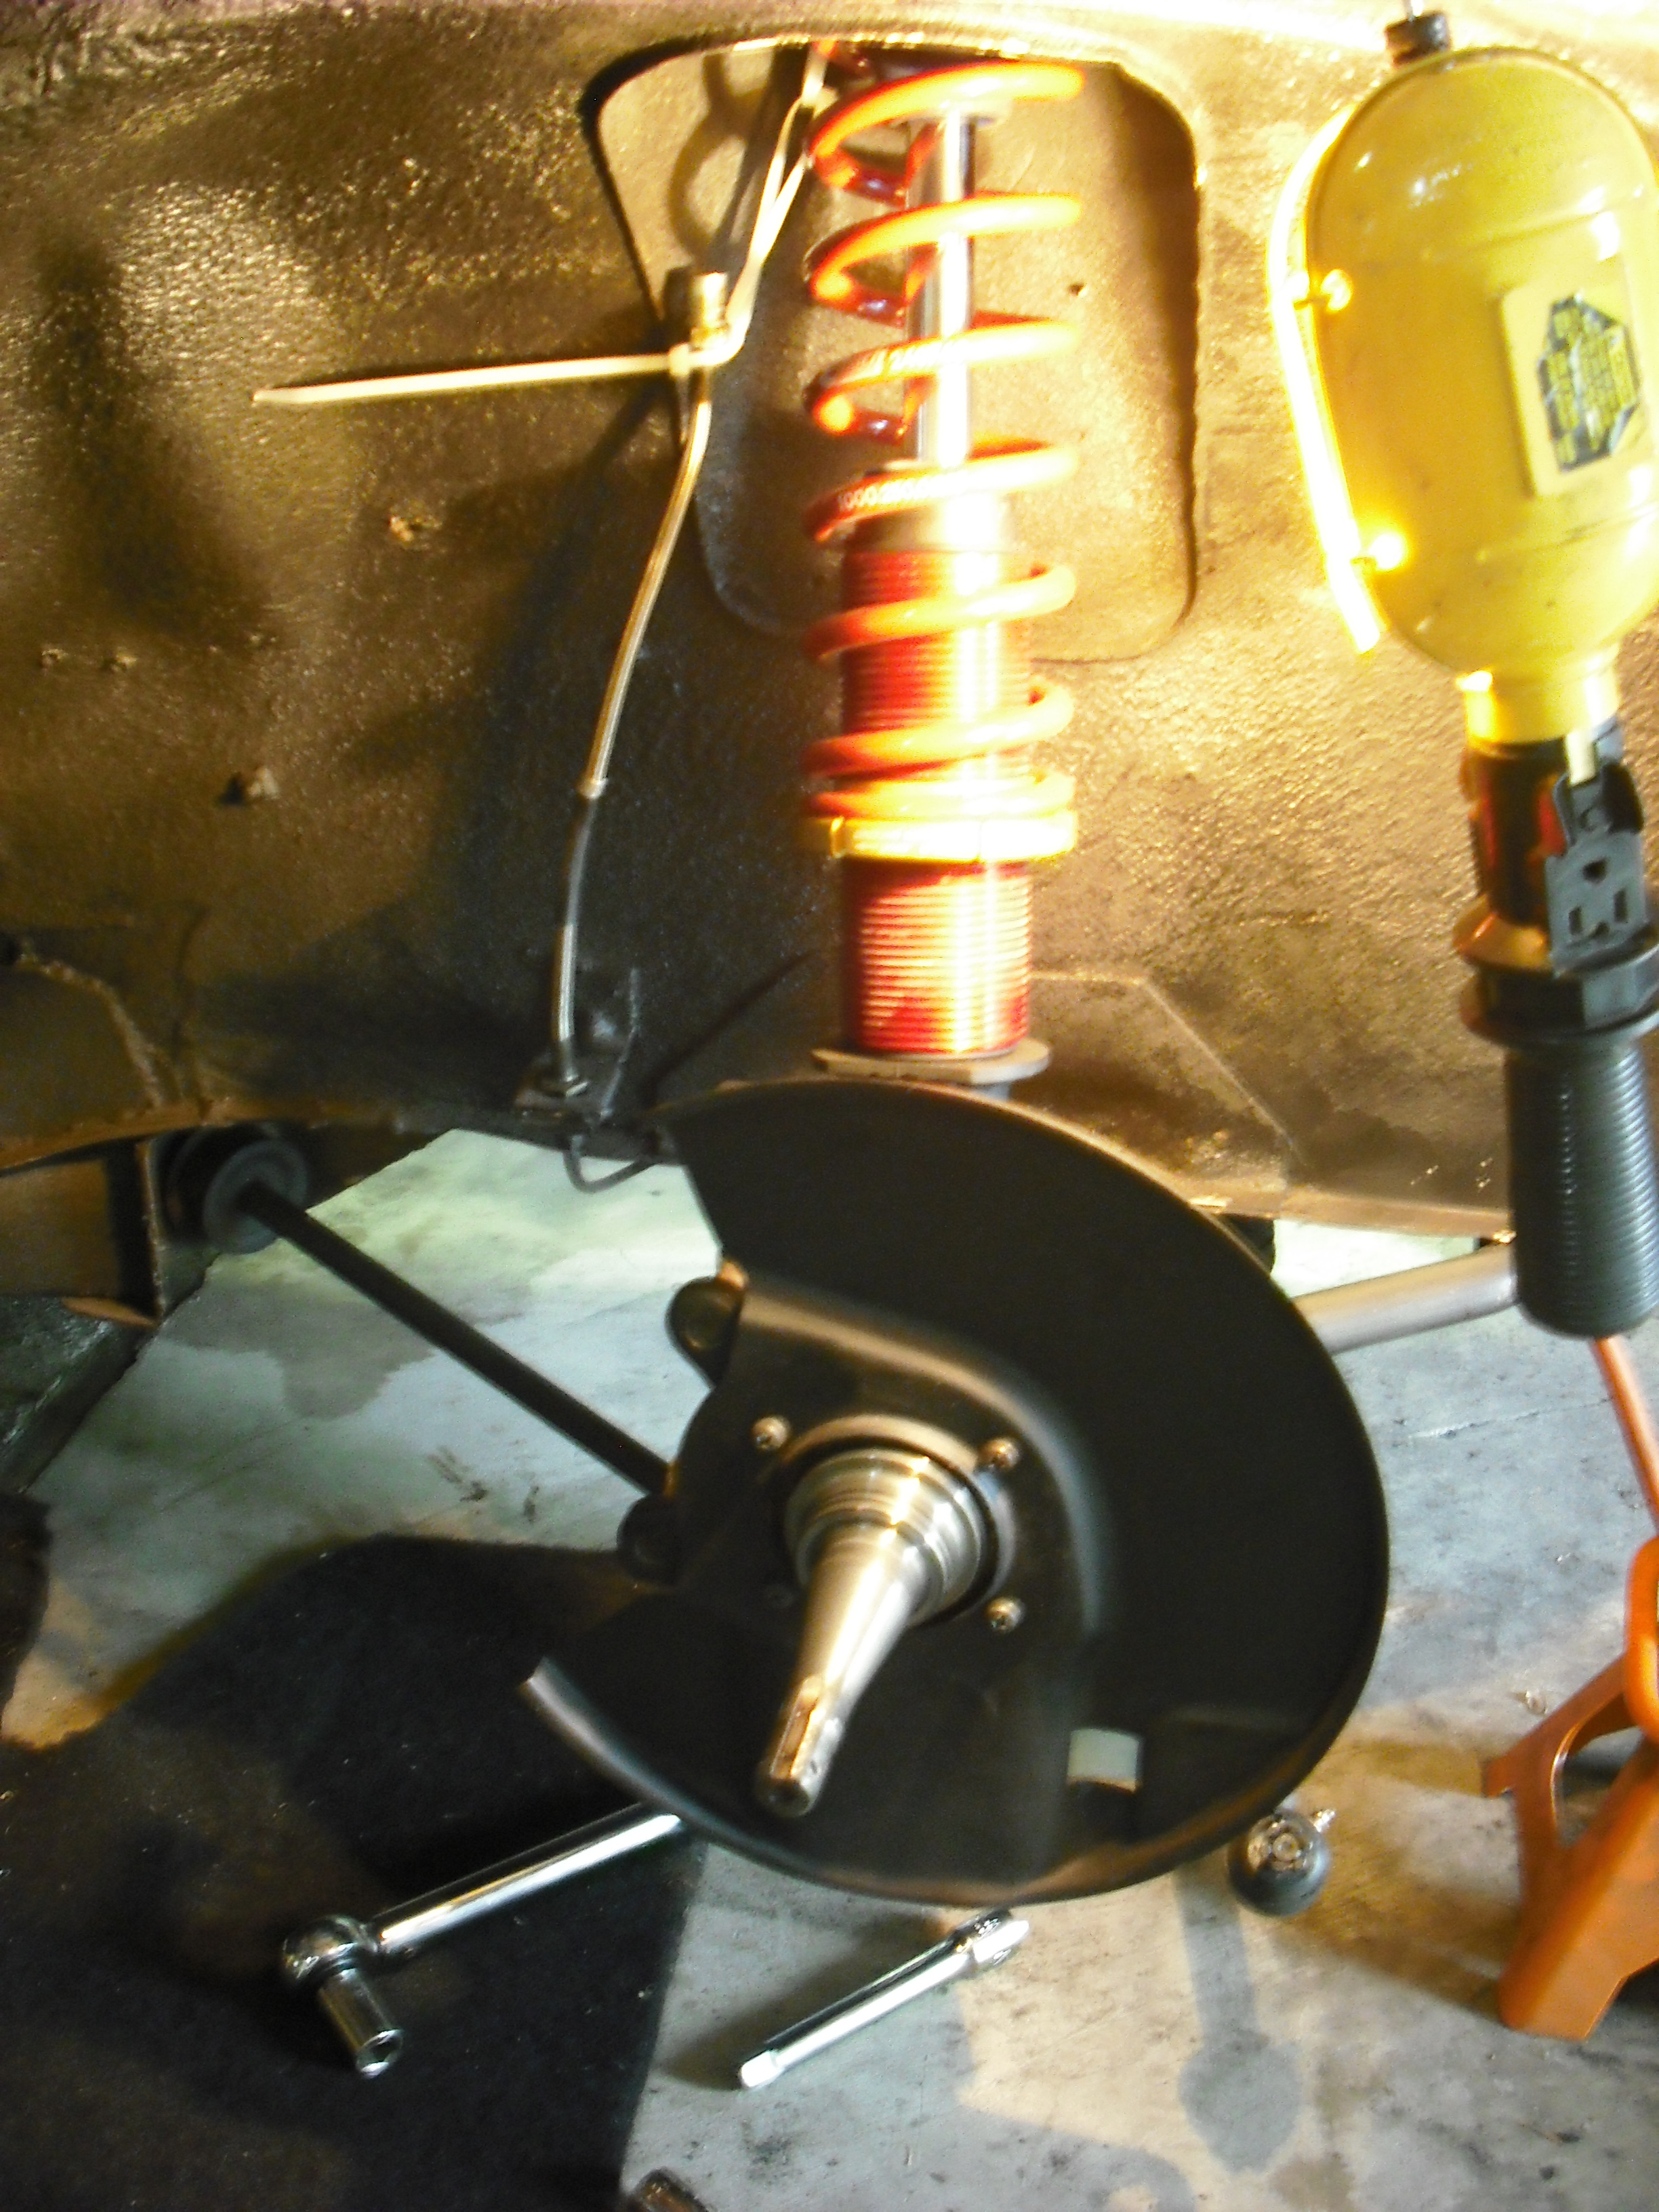
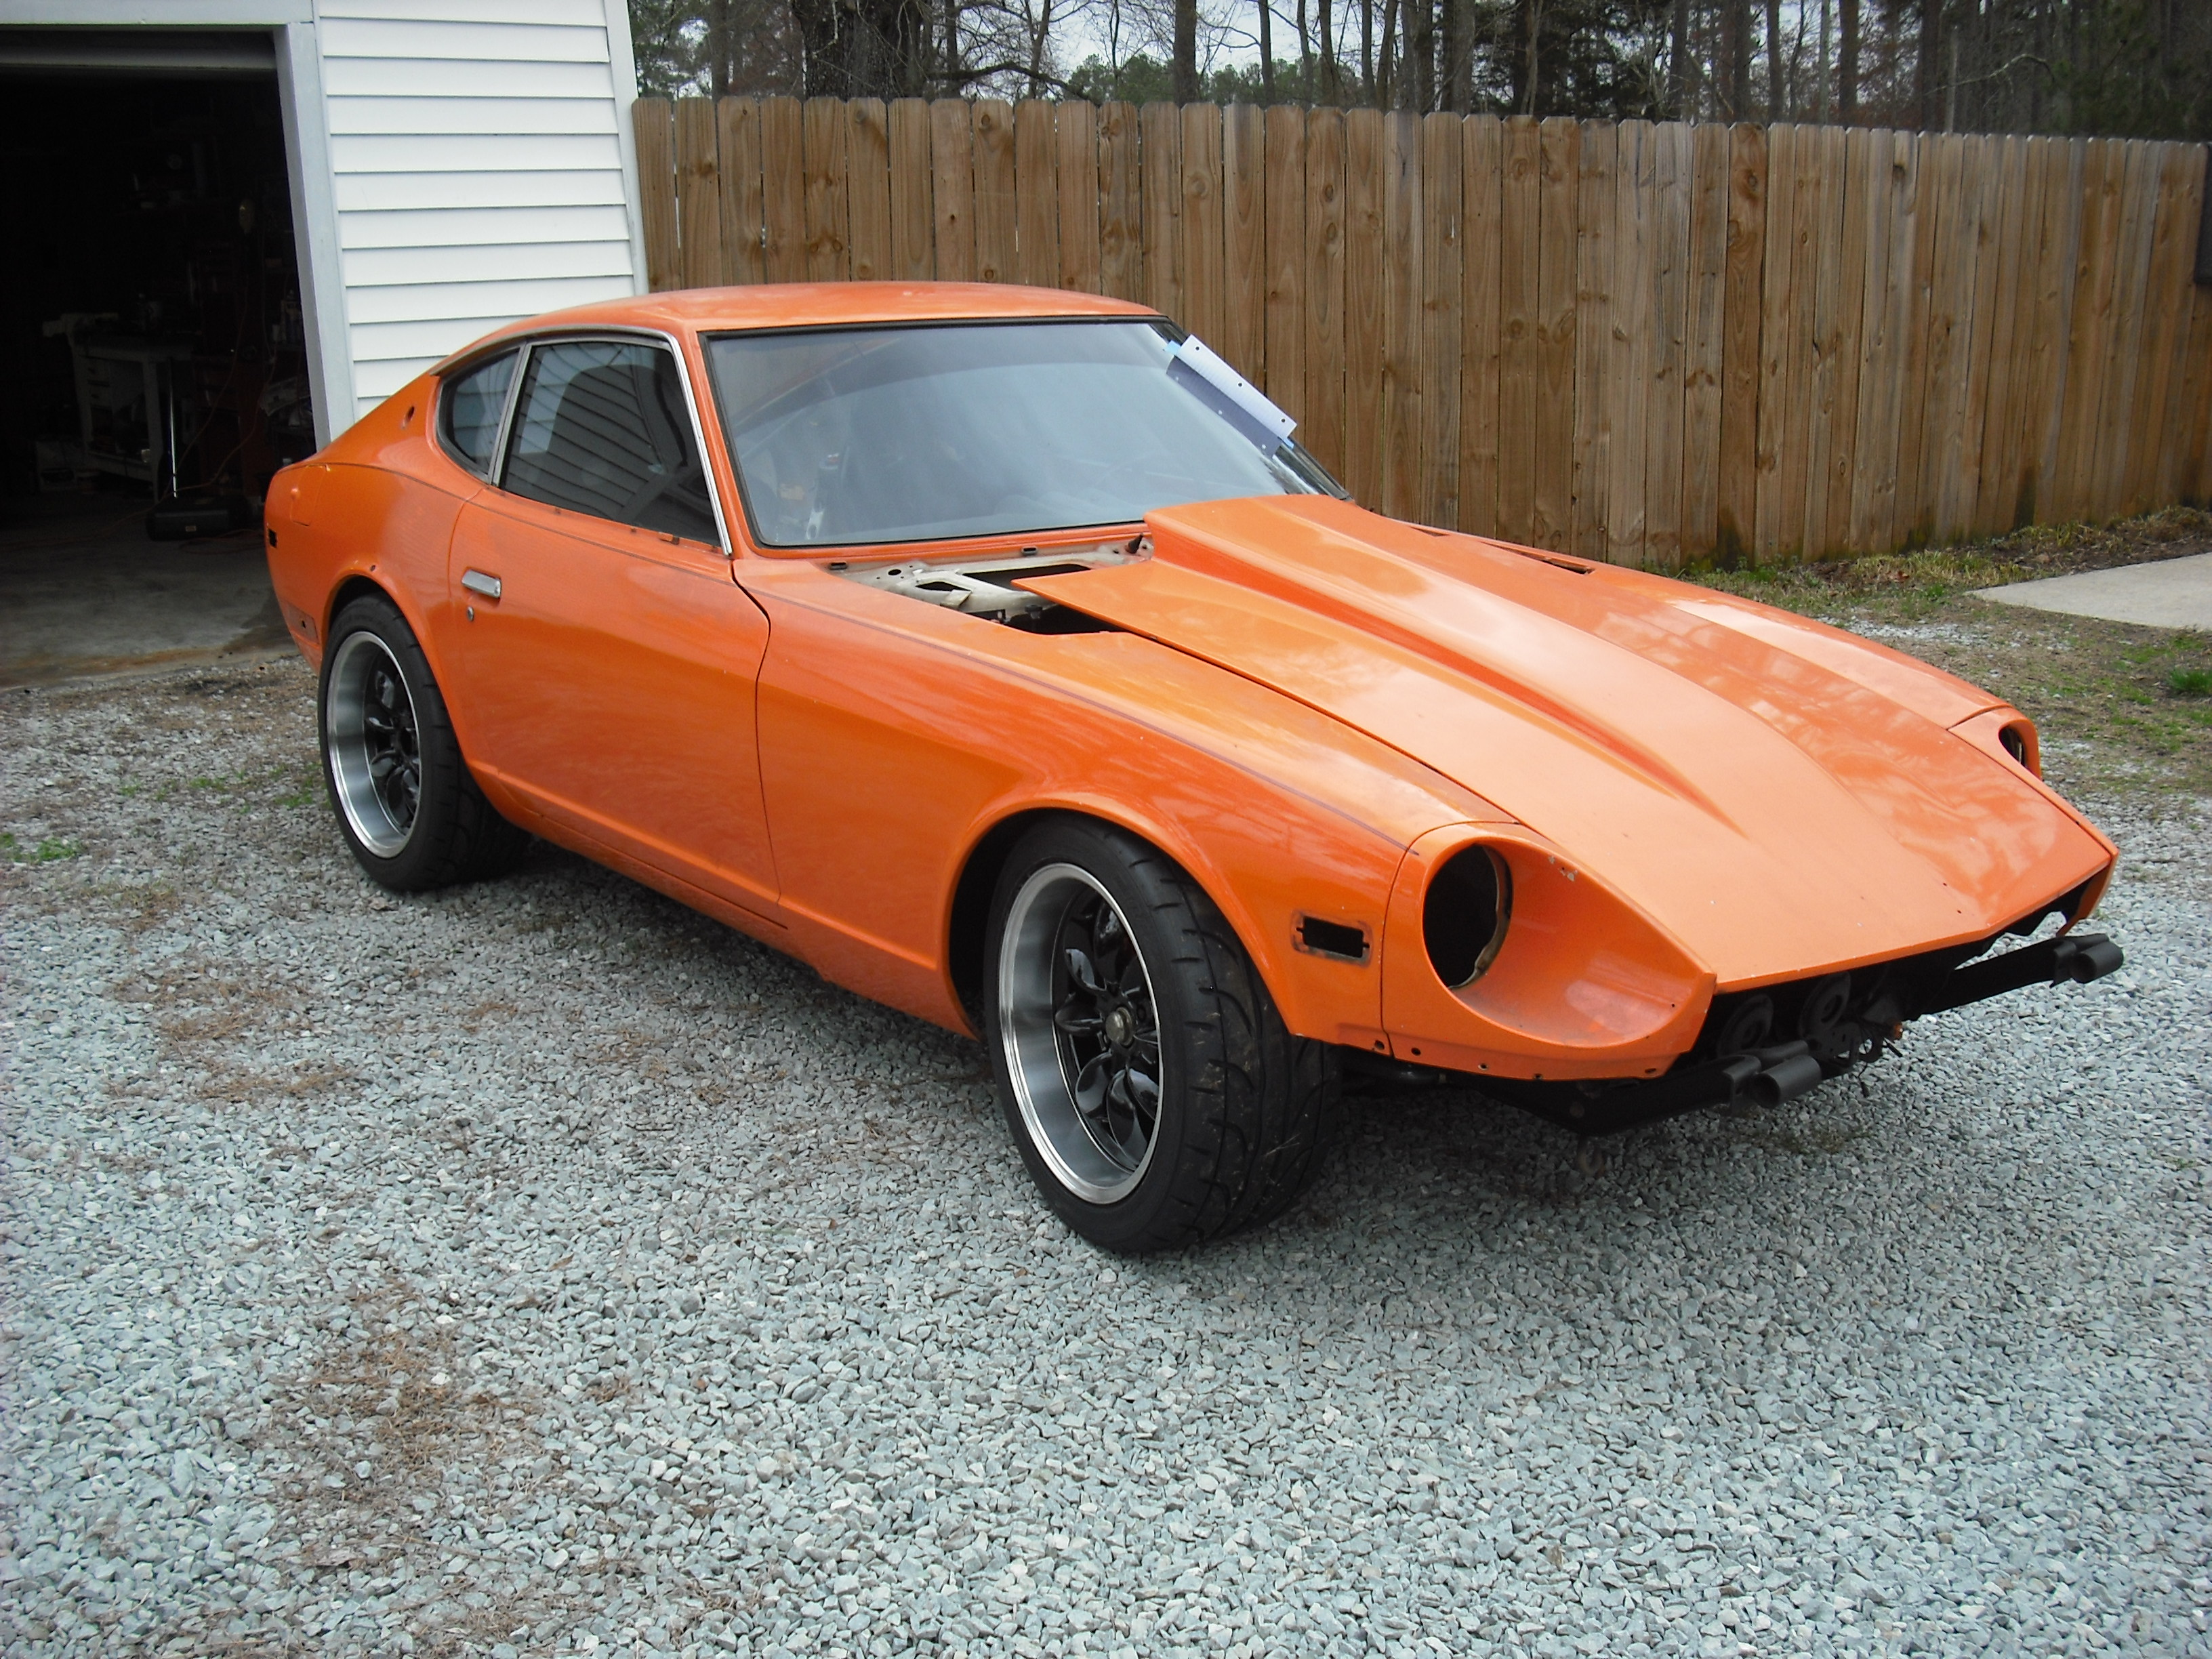
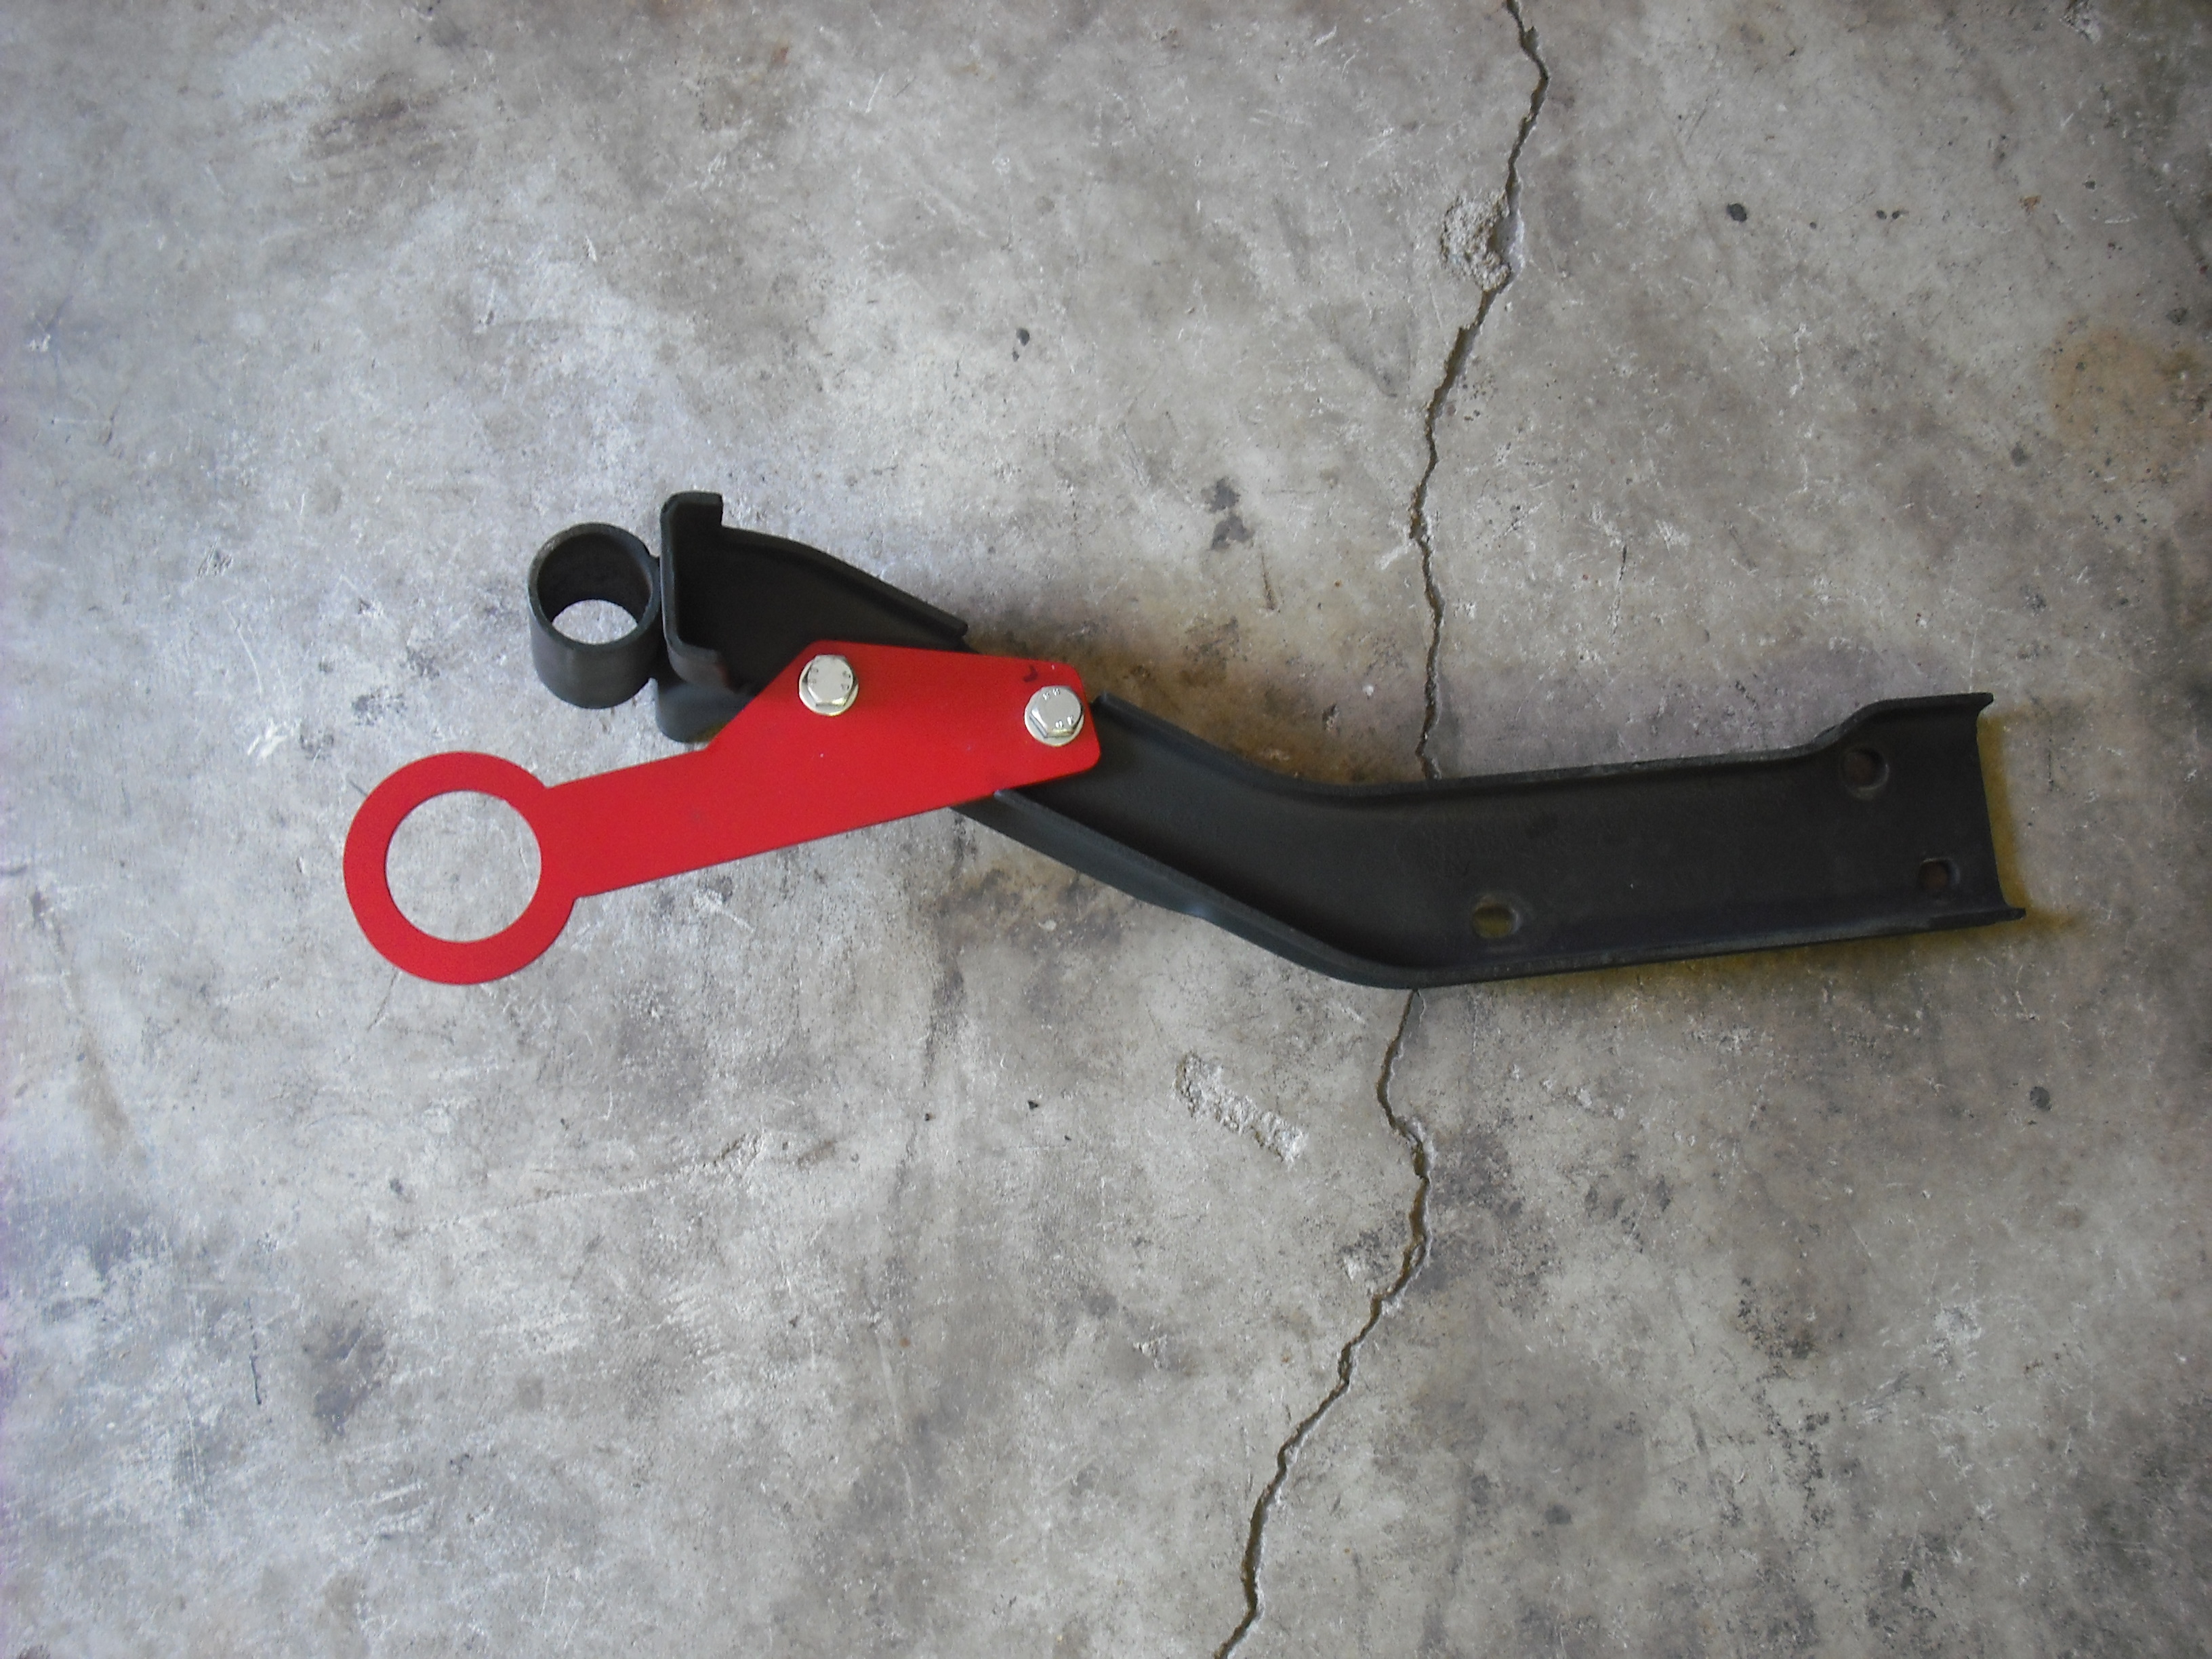
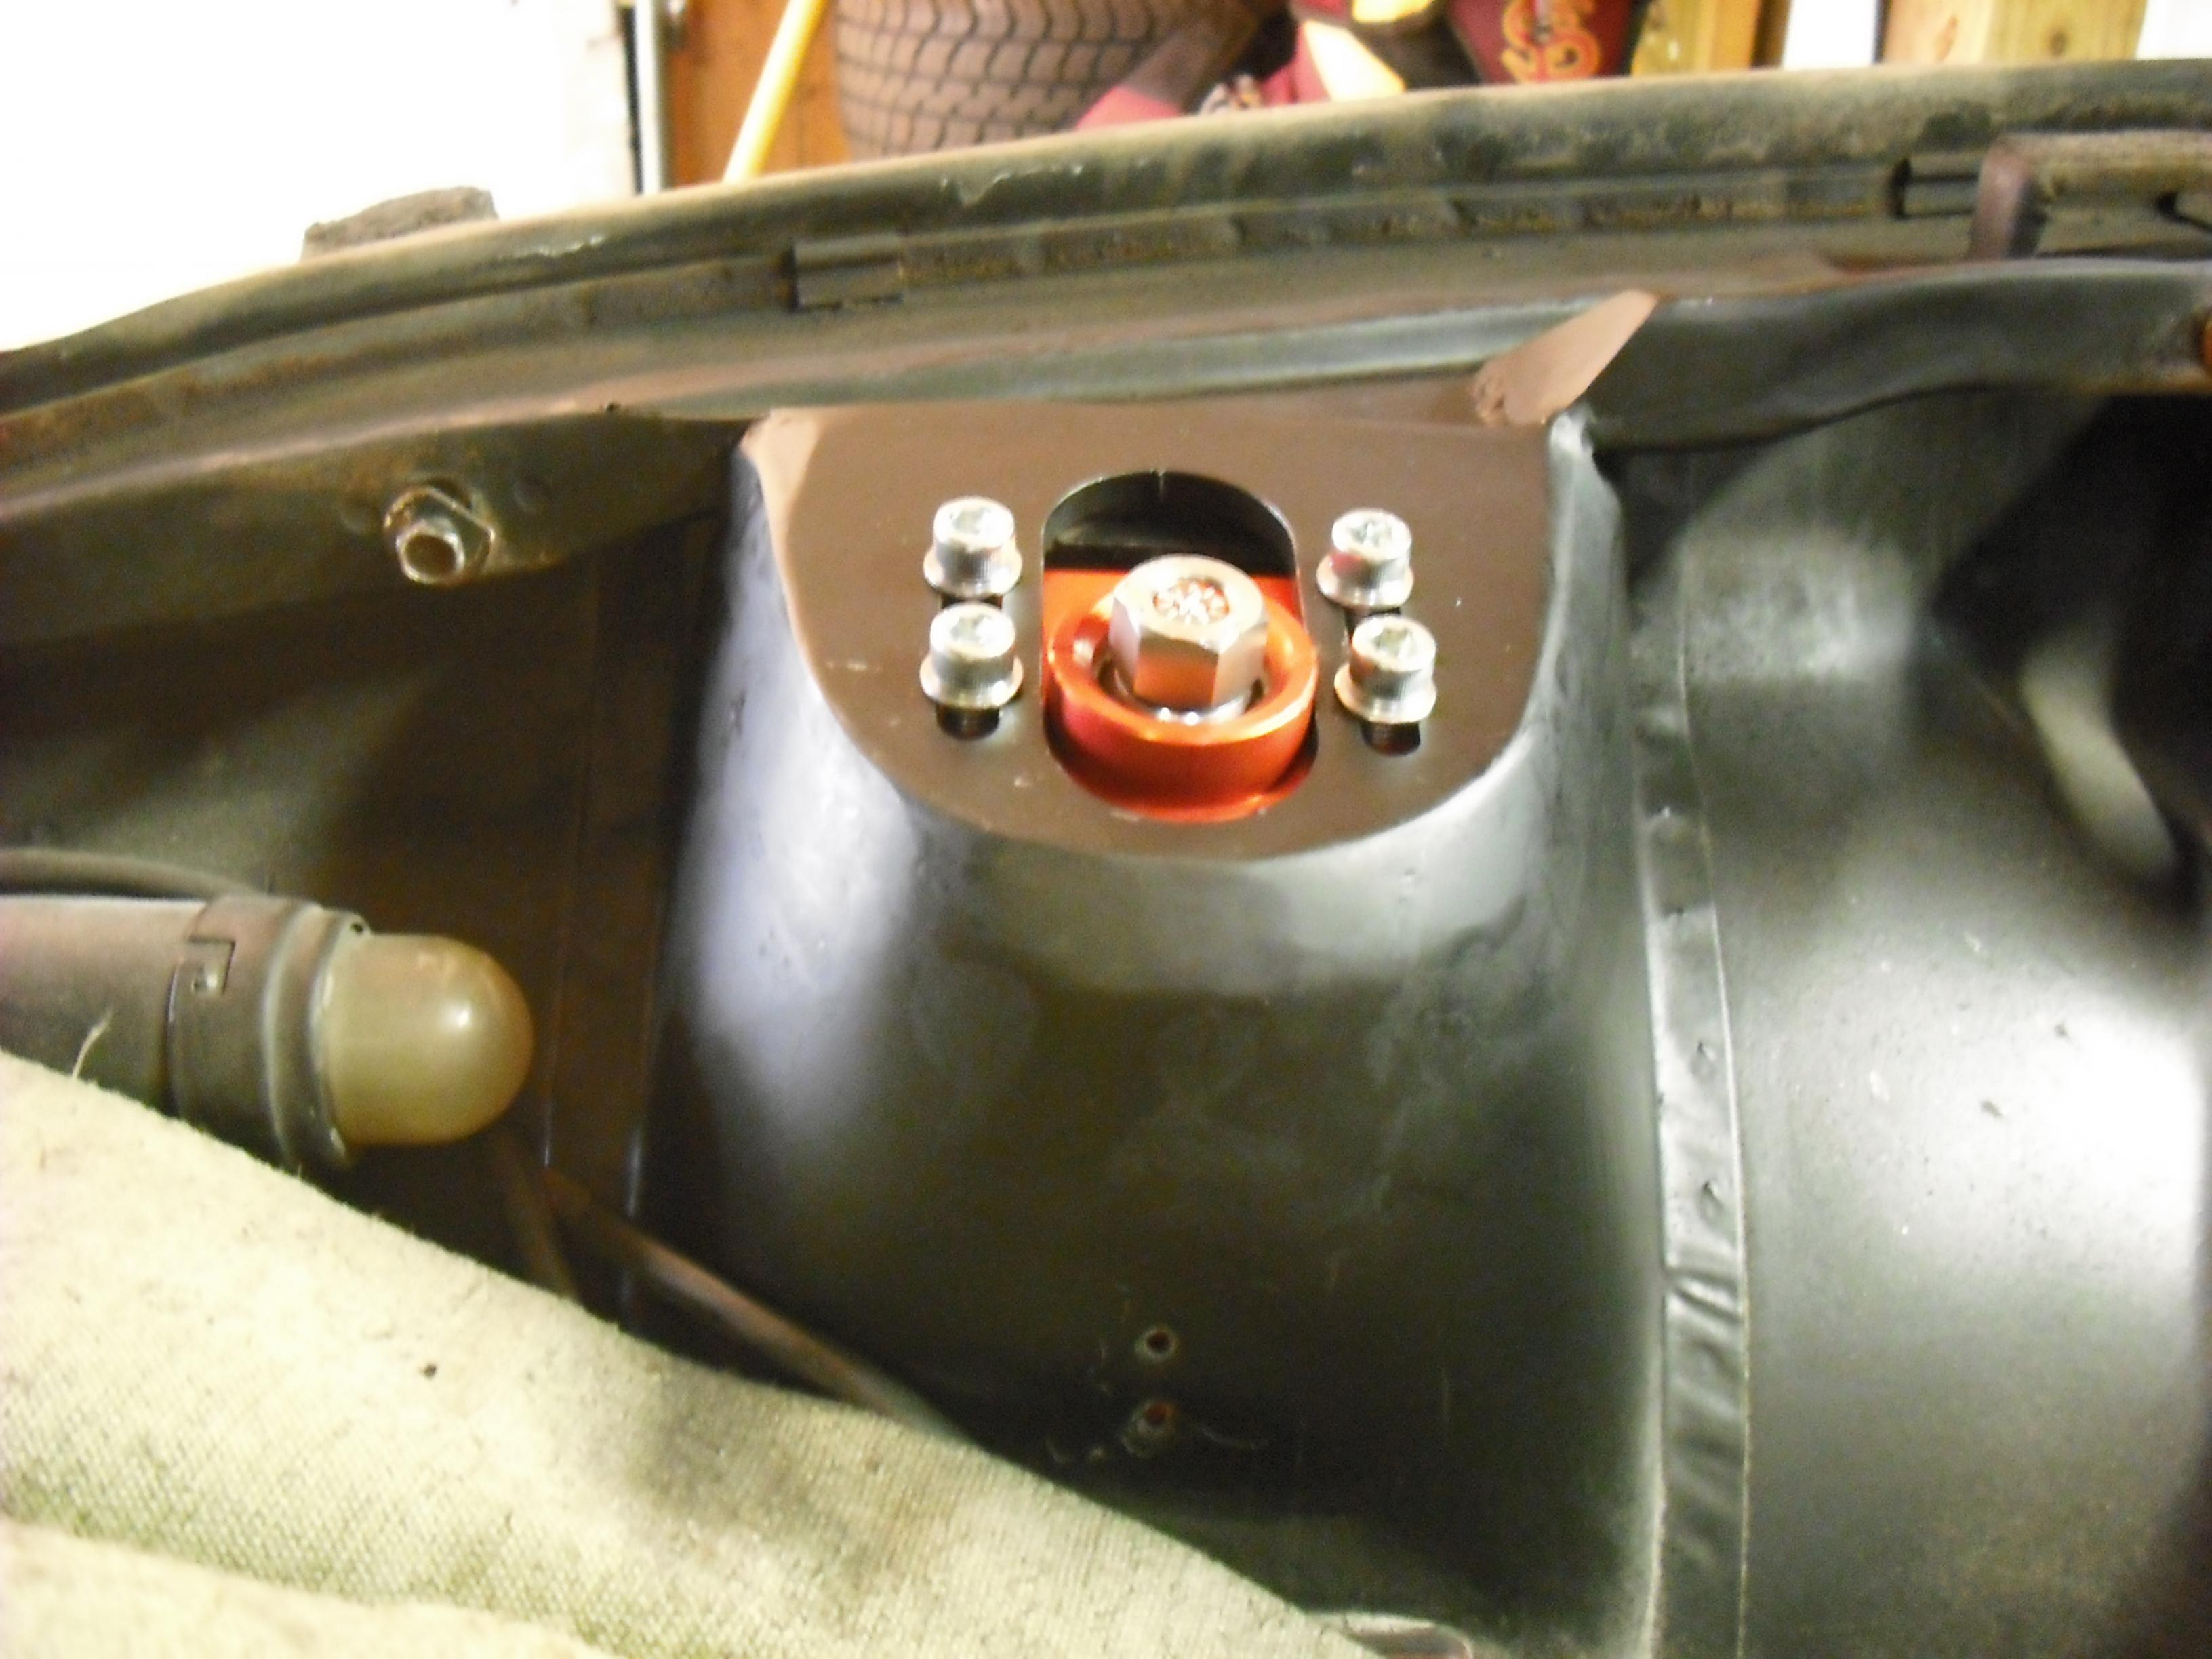
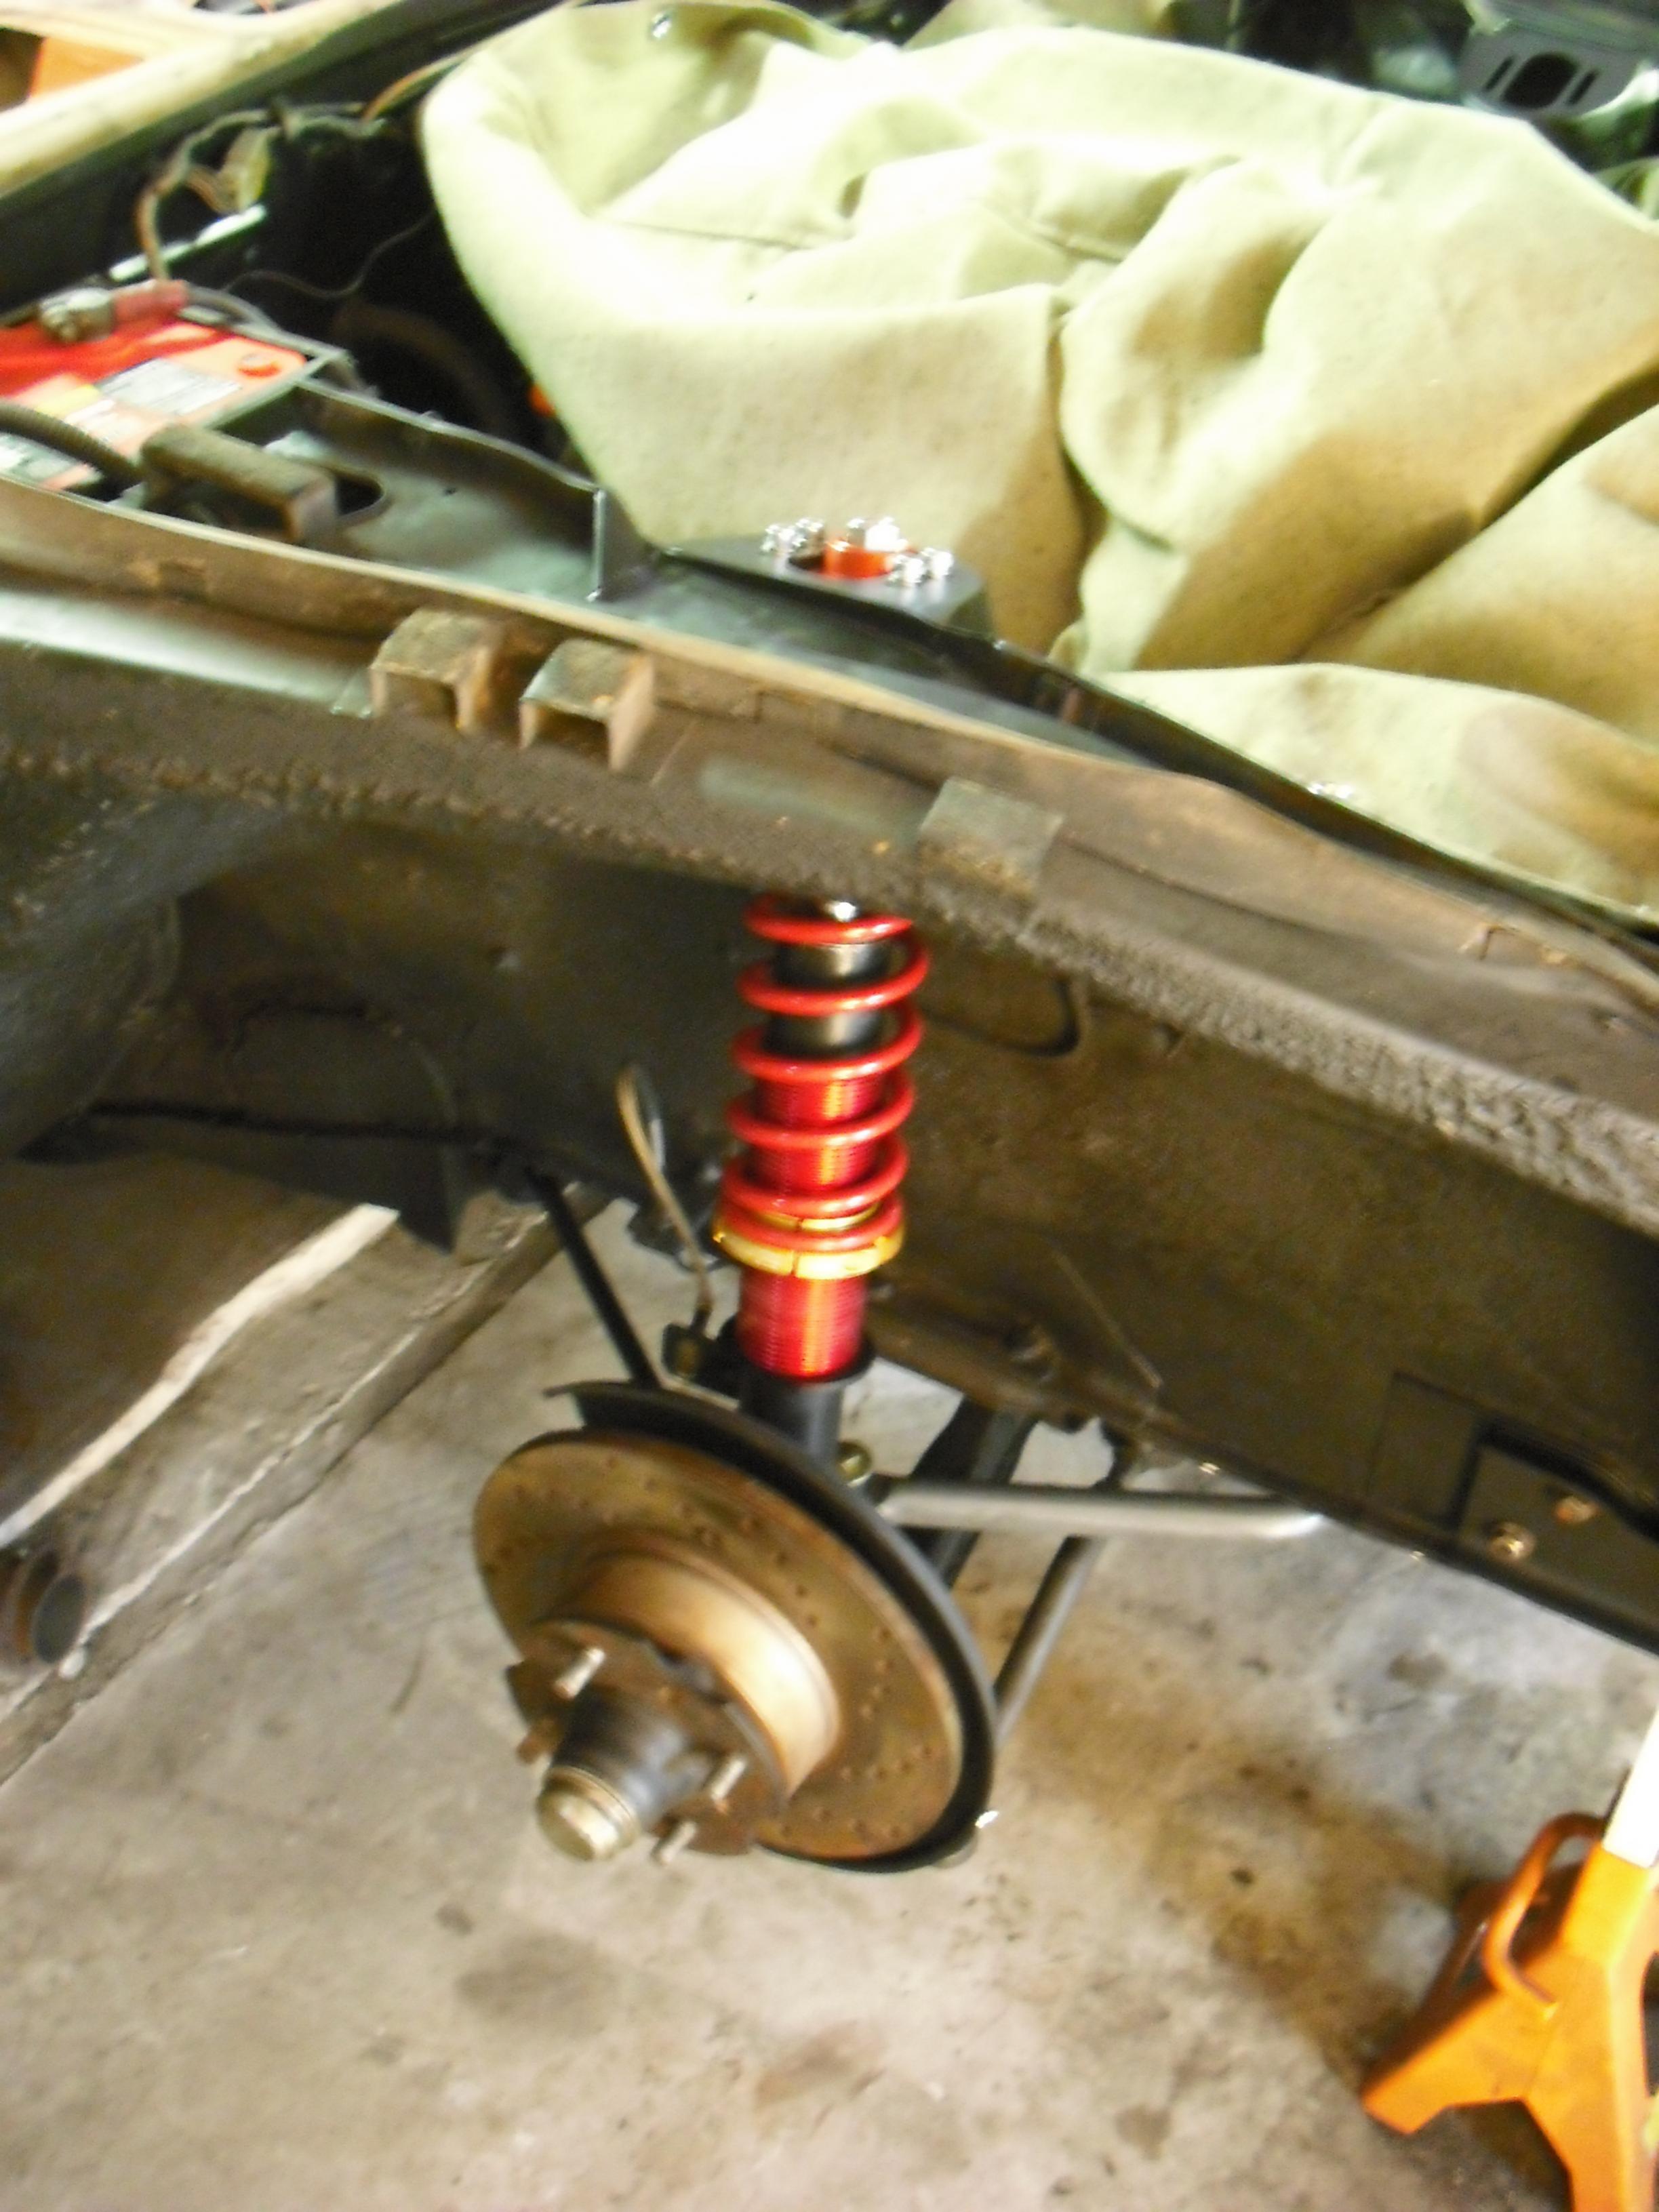
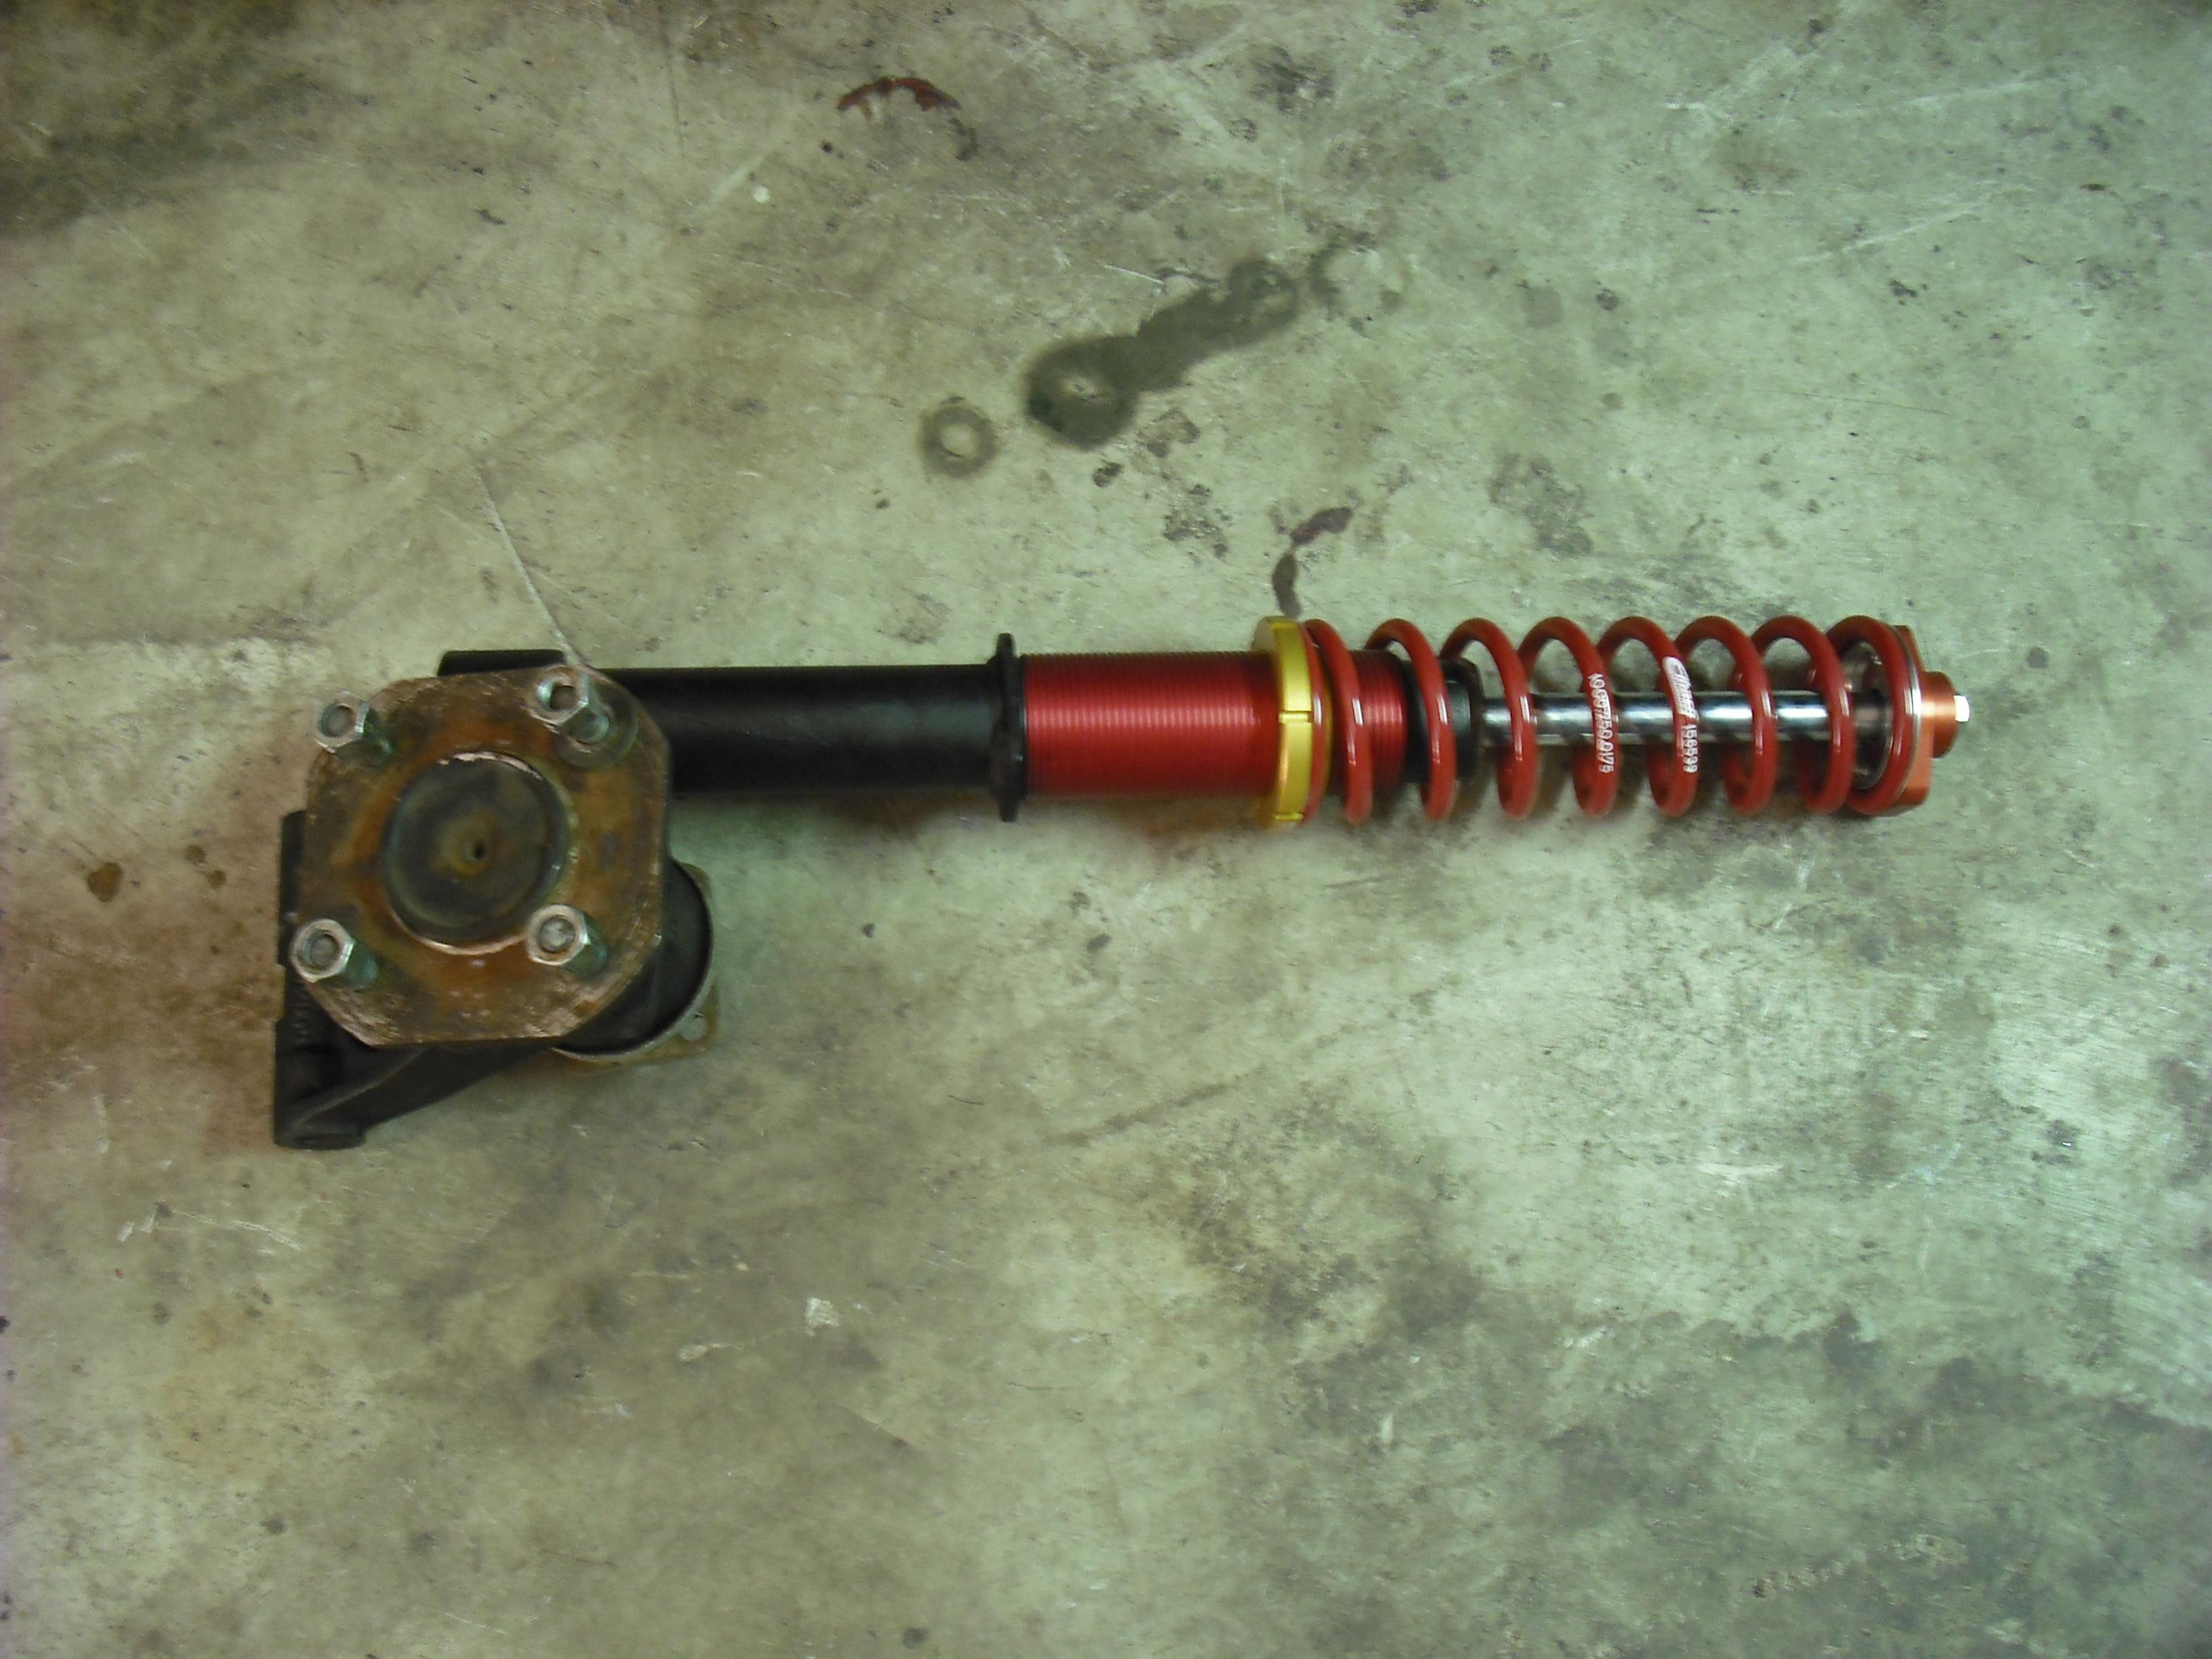
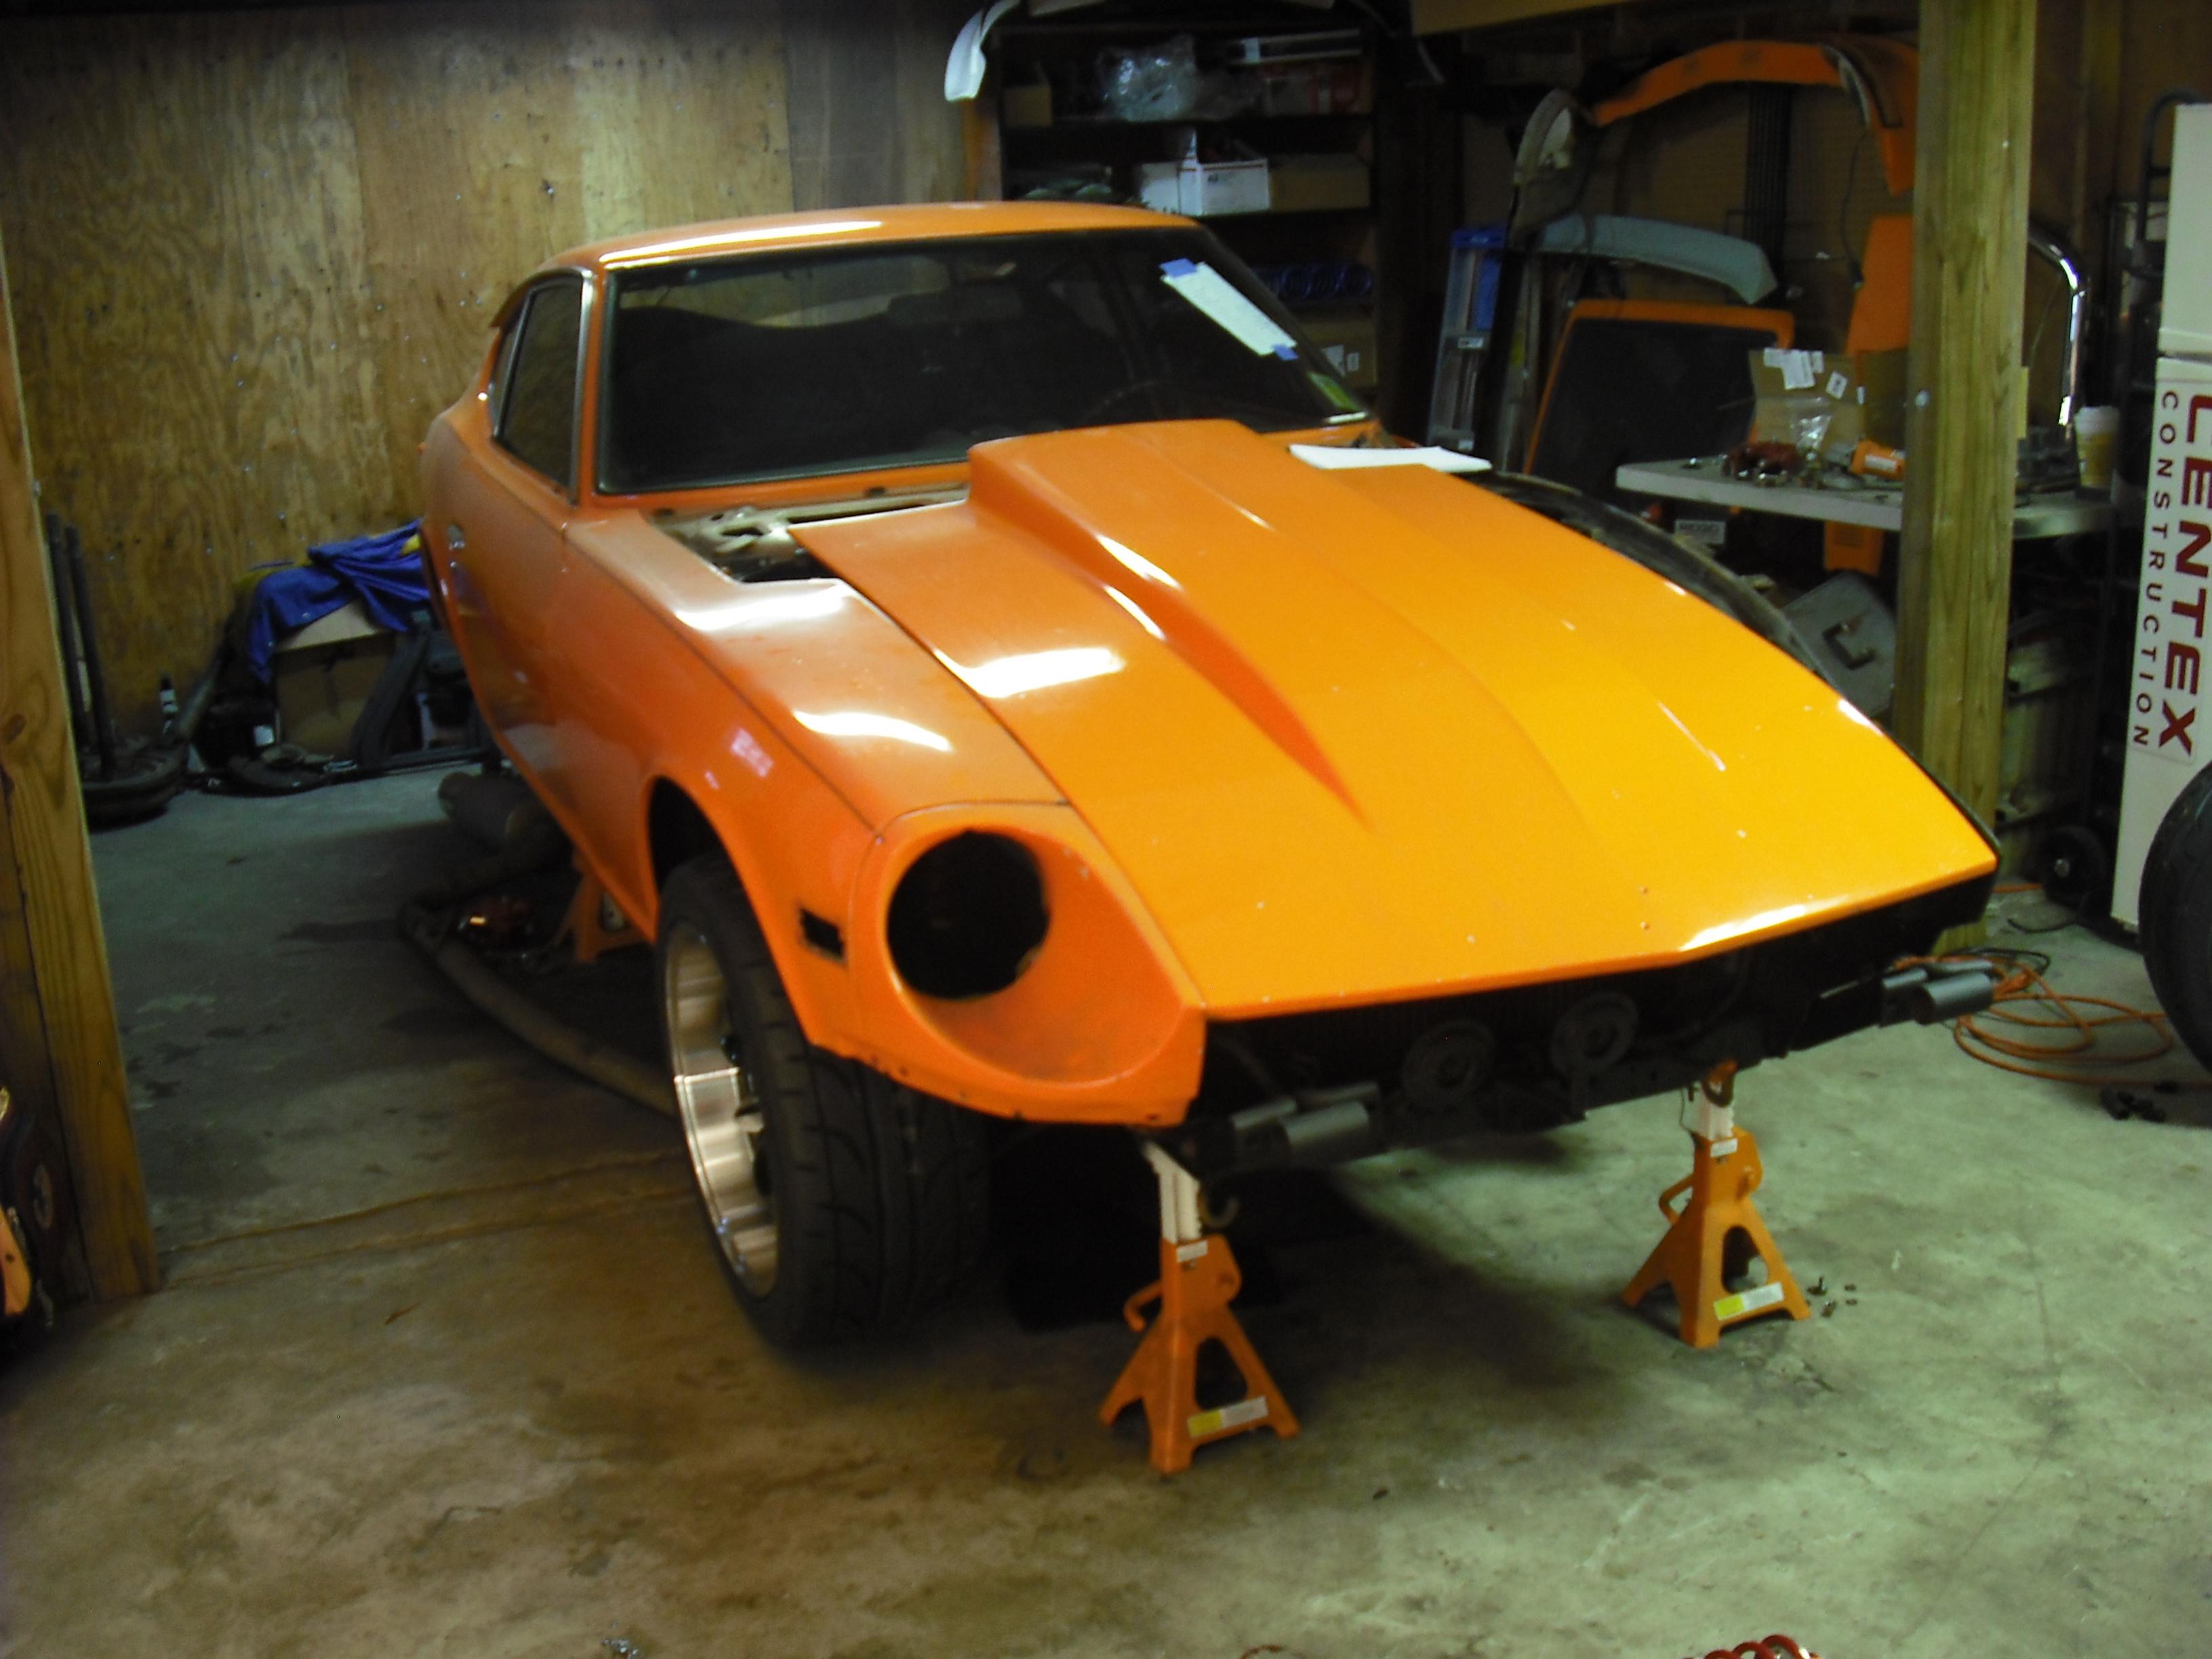
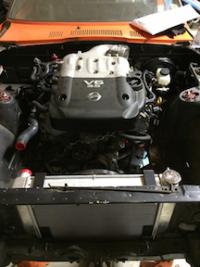
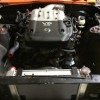
I have finished the suspension project. I sectioned the front strut housings for the BZ3099 and have 225lb springs installed. I also finished the brakes. I ended up putting the proportioning valve on the firewall in the location of the stock unit for the time being. Everything works fantastic except for my e-brake, it needs some work. In image 005 you can see clearly where I notched backing plate to clear the steering knuckle. Image 014 shows the modification to the bumper mount for the tow hook. On to body work!
-
A typical HybridZ S30 suspension/brake build
Tank replied to Tank's topic in S30 Series - 240z, 260z, 280z
Just ordered the MR2 BZ3099 struts and they are on back order so it will be a few weeks. I also ordered 225lb front springs. I will be selling the Tokico BZ3015 struts(2)if anyone is interested, they were installed but I never drove it with them. I will also be selling other odds and ends as well. Check the classifieds shortly. -
A typical HybridZ S30 suspension/brake build
Tank replied to Tank's topic in S30 Series - 240z, 260z, 280z
Got it, here is a thread on the '73 240 prop valve. My link I will update when I drive mine to see if there are any rattling problems. Like I said, it will be a few weeks. It would be great if it stopped raining and snowing every other day. -
A typical HybridZ S30 suspension/brake build
Tank replied to Tank's topic in S30 Series - 240z, 260z, 280z
I haven't driven mine yet, I am still ironing out the braking system. I expect it to make lots of noise and rattle. Keep in mind that where there once was rubber to insulate road "noise" at the upper mounts is now metal on metal. So all the vibrations are transmitted to the chassis. I don't know of a way to dampen this. Could also be the threaded sleeve vibrating on the strut housing, I have rubber o rings at the bottom and top of my threaded sleeves to try and alleviate vibration. I'll know more about mine when I test drive it, which should within a few weeks. Hopefully that helps a little. -
A typical HybridZ S30 suspension/brake build
Tank replied to Tank's topic in S30 Series - 240z, 260z, 280z
I read the thread you speak of and didn't fully understand how I could use the information to better my setup. It's just a simple weekend autox/track day setup. Nevertheless I want it to be right. I have seen "porpoising" before and didn't know the cause. Thank you for the information. And johnc, thanks for bringing it up. Thoughts on the proportioning valve? -
A typical HybridZ S30 suspension/brake build
Tank replied to Tank's topic in S30 Series - 240z, 260z, 280z
On another note, the stock proportioning valve in my 240 is on the firewall. The right front line goes through the top of it and the rear line through the bottom. My question is, can I loop the front line together and take out the factory PV to run the rear line into the car for the new PV? Would that effect the right front? I don't see how it would since the factory valve is only supposed limit the pressure the rear, not the front. -
A typical HybridZ S30 suspension/brake build
Tank replied to Tank's topic in S30 Series - 240z, 260z, 280z
I'll admit I don't know what porpoising is but it sounds like I need to avoid it, so would you recommend 225 or maybe 250 in the front? Also, do you know the part number of adjustable struts for the front? Koni or Tokico, I would prefer to have tokico because they are 1/16th smaller than the koni and fit easily into the strut housing. Thanks for the input, I appreciate it! -
A typical HybridZ S30 suspension/brake build
Tank replied to Tank's topic in S30 Series - 240z, 260z, 280z
I did get down to the thicker metal on the front, it scared me at first until I got to it. The rear had no problem whatsoever. As far as the knuckles, I cut the dust plate, I will take the hub off so I can get a better picture of it. I was stuck on keeping the dust plates but without the notch, they rubbed the rotors. -
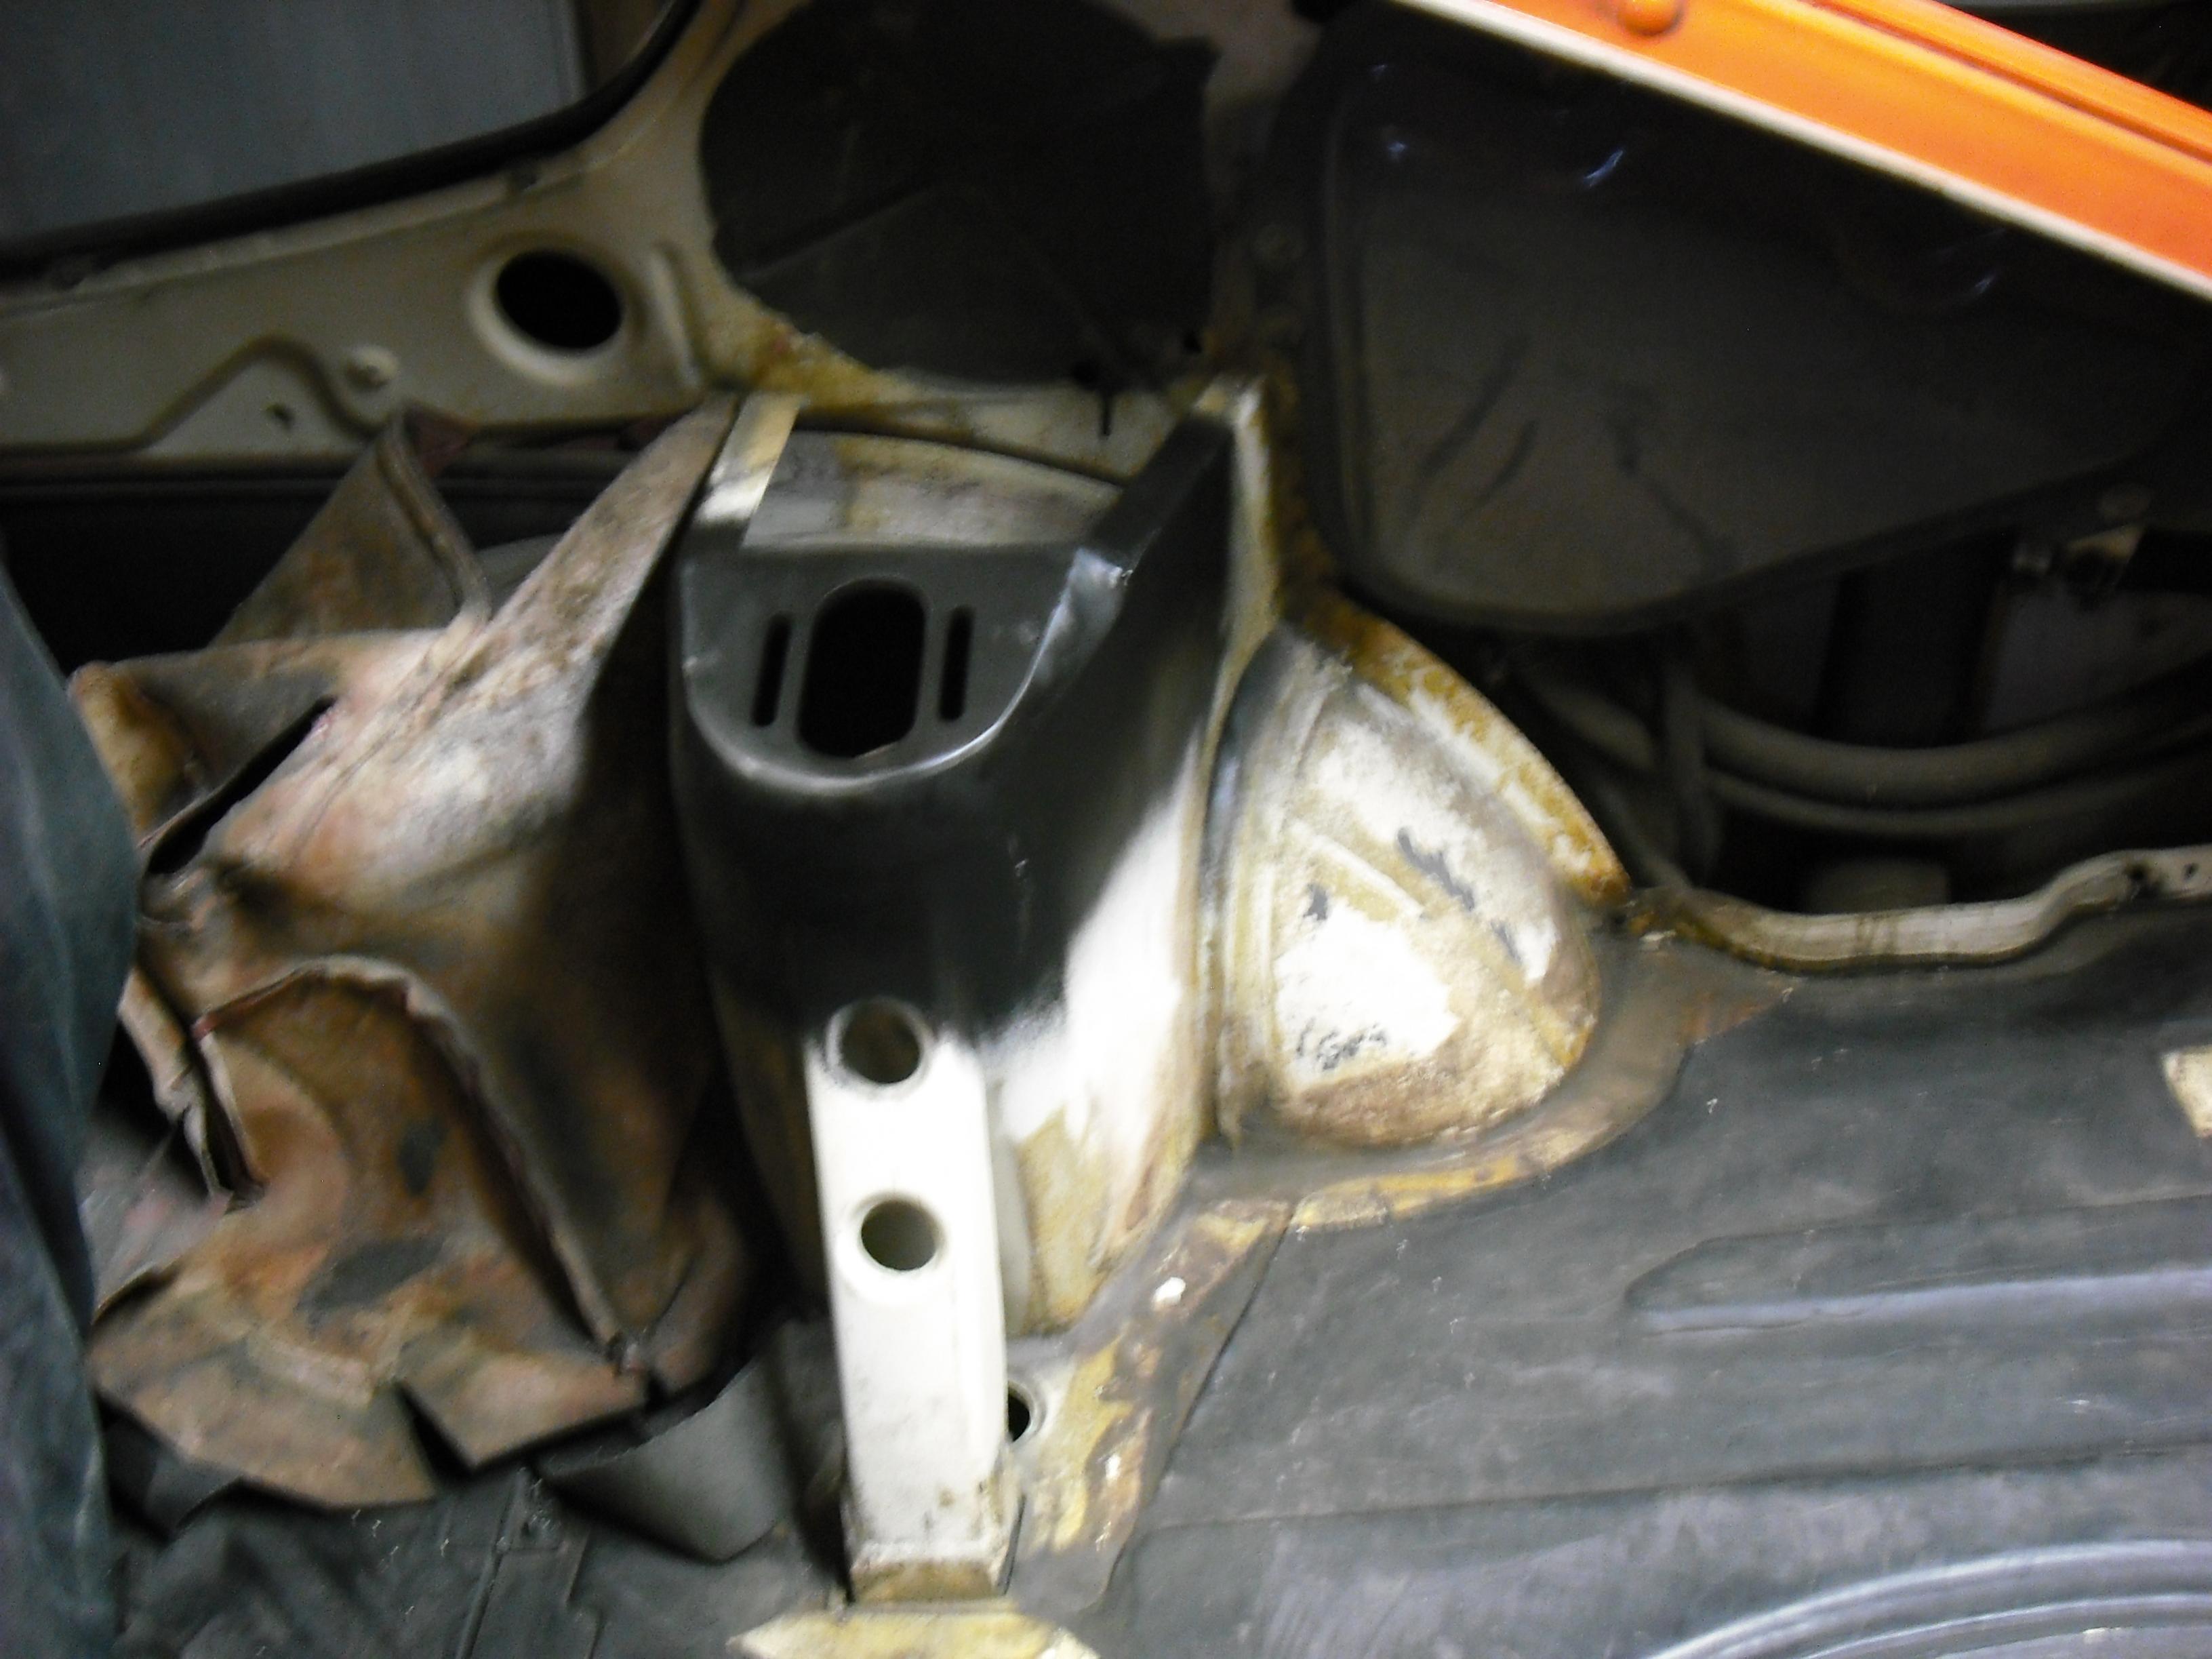
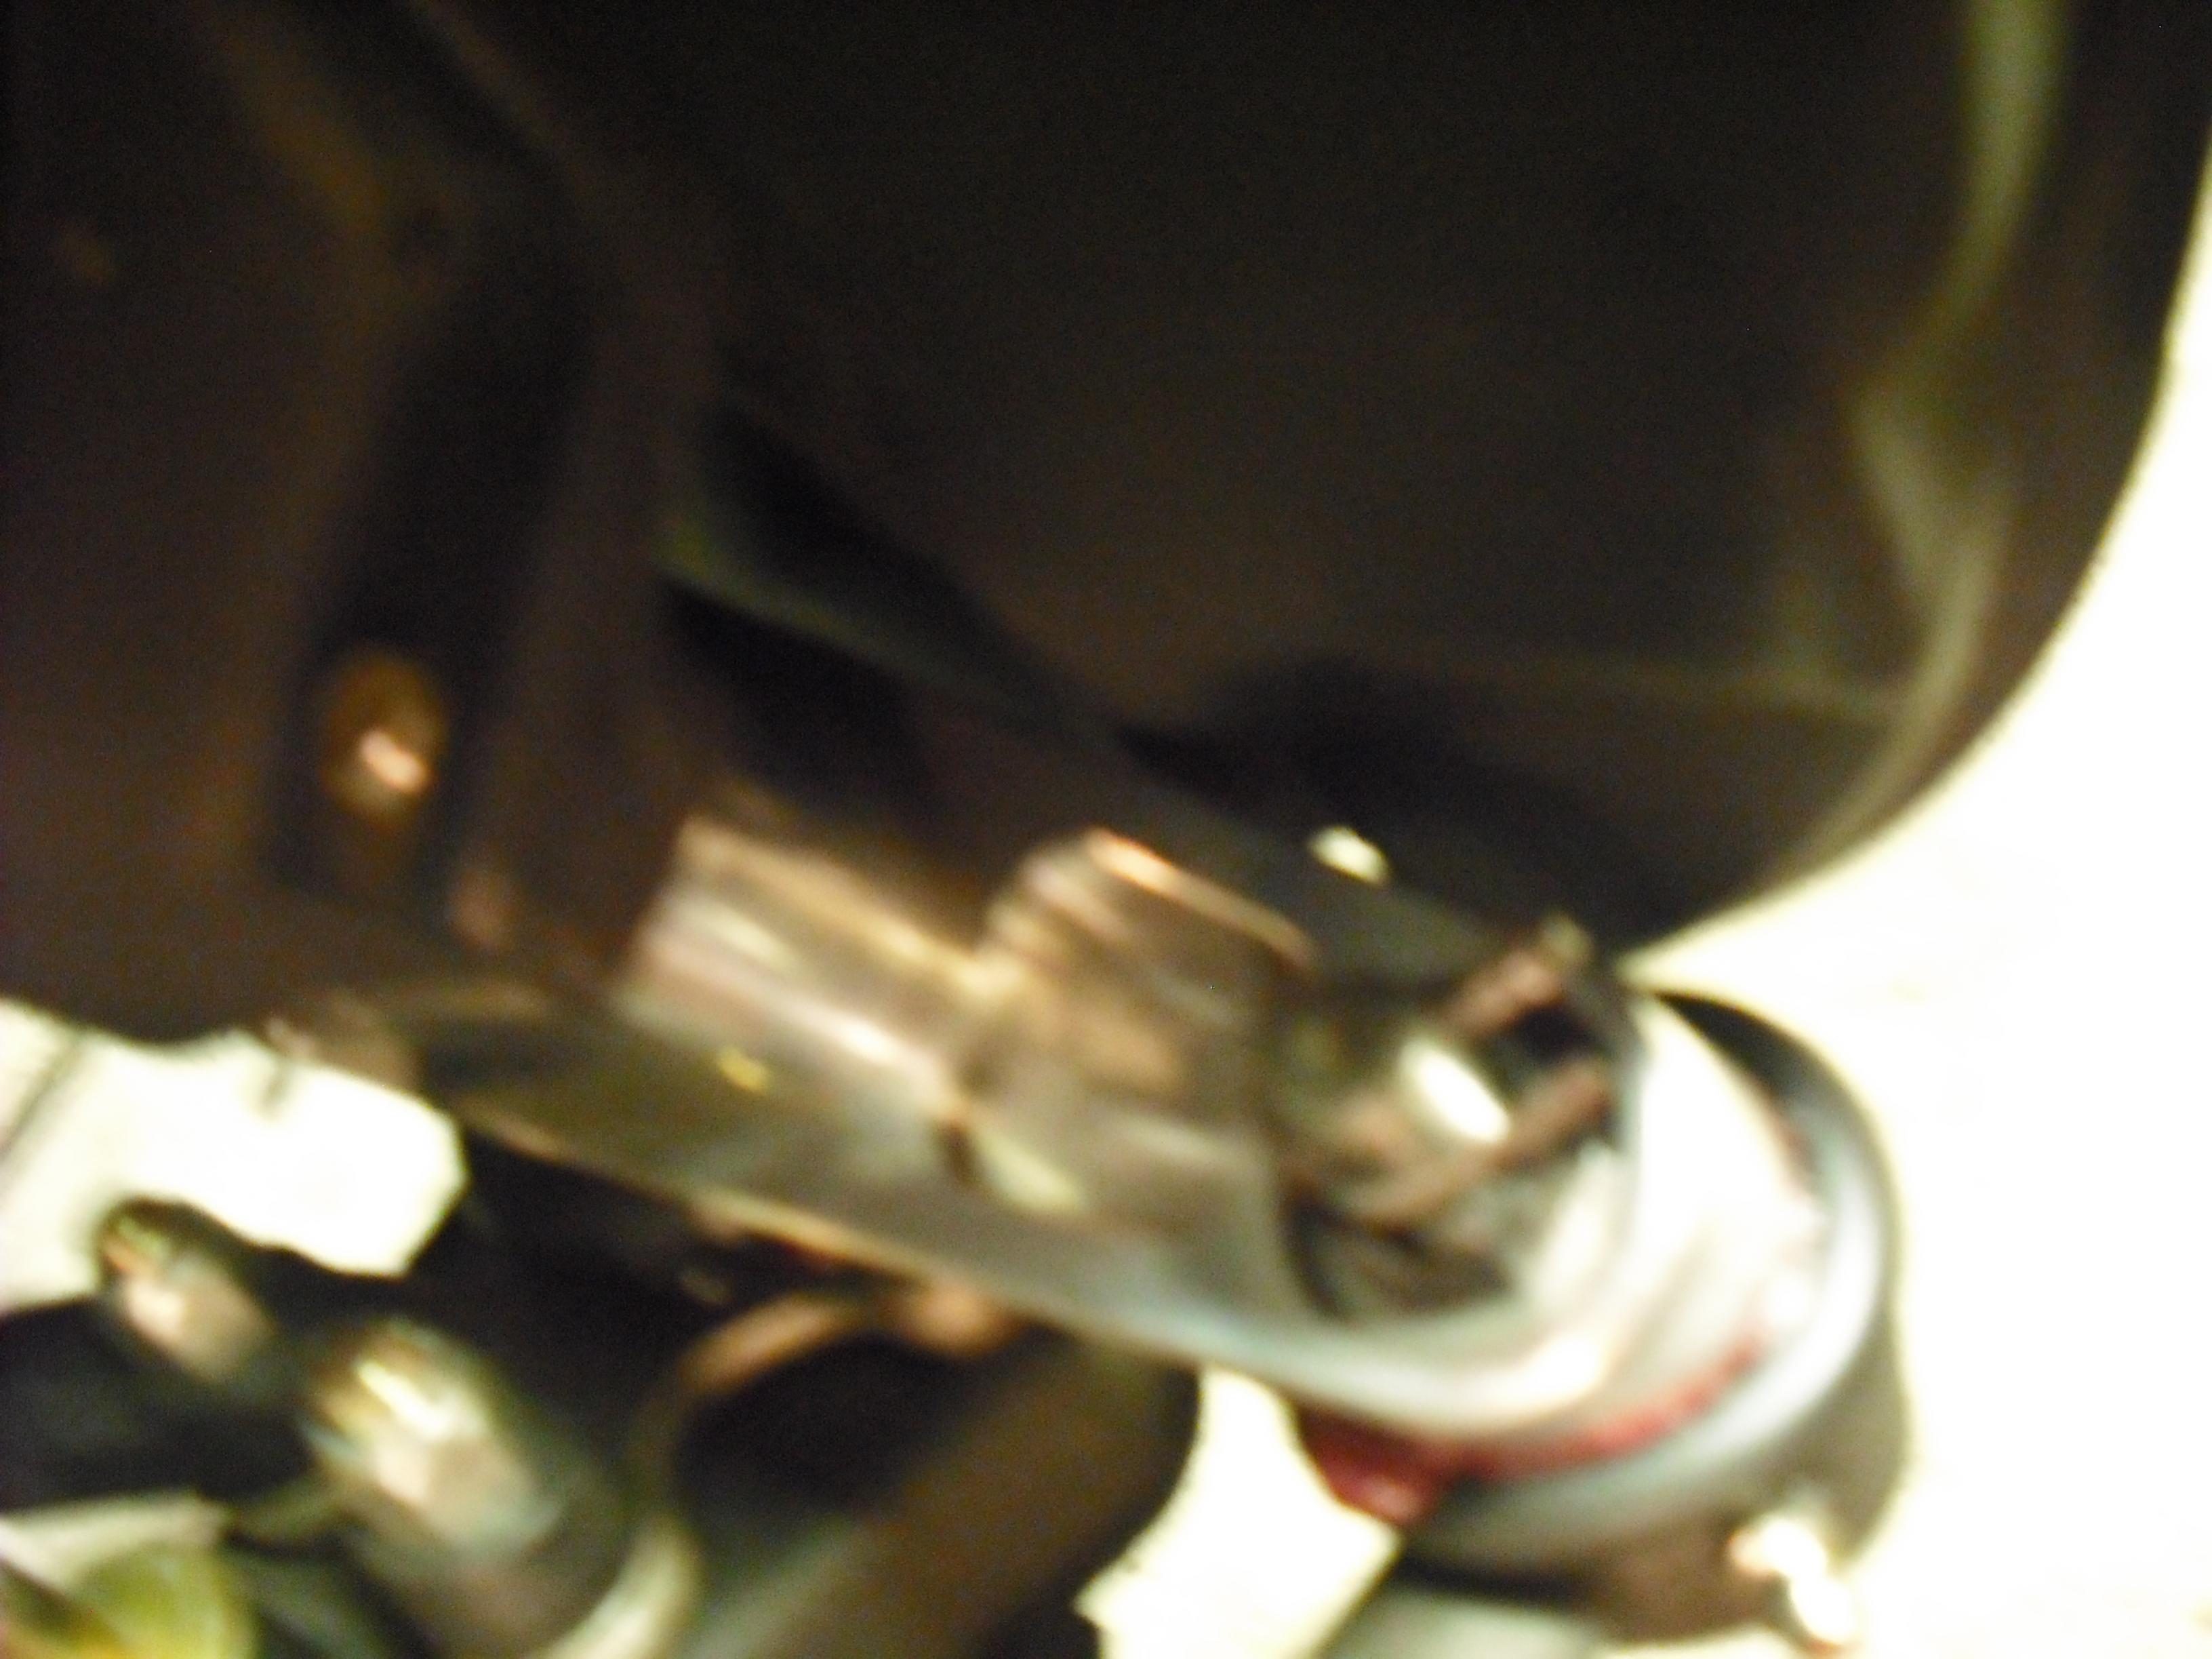
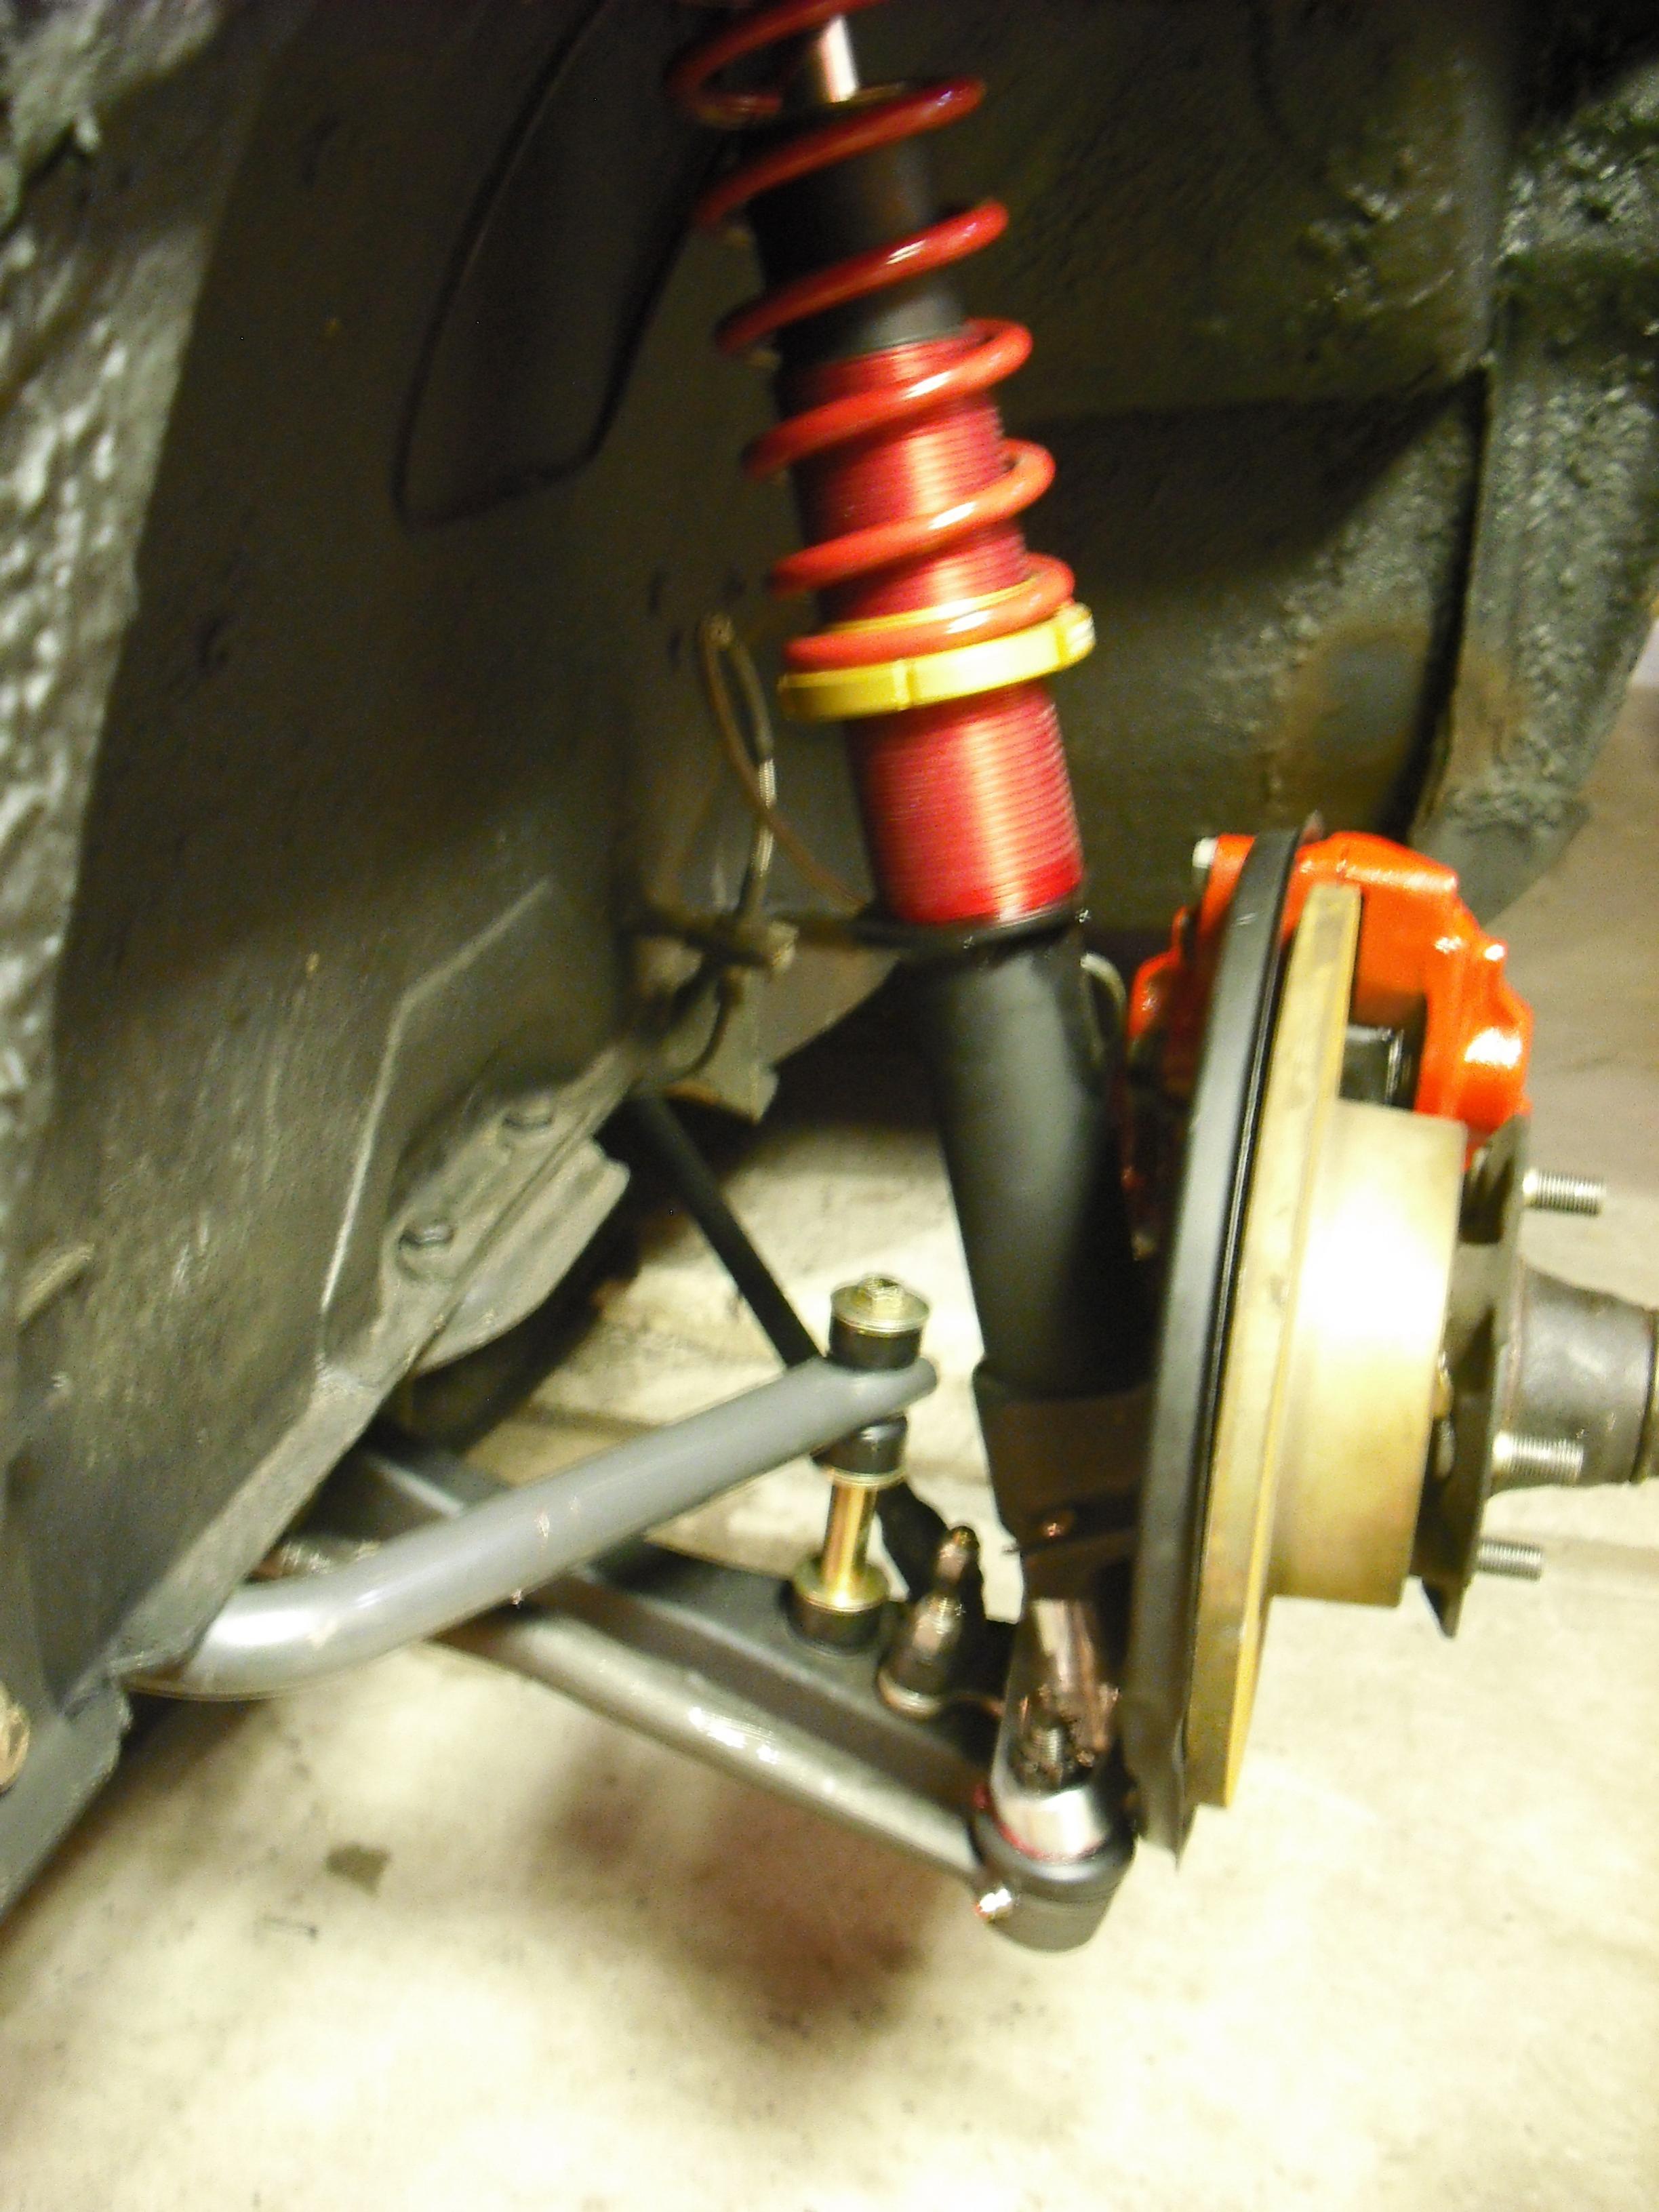
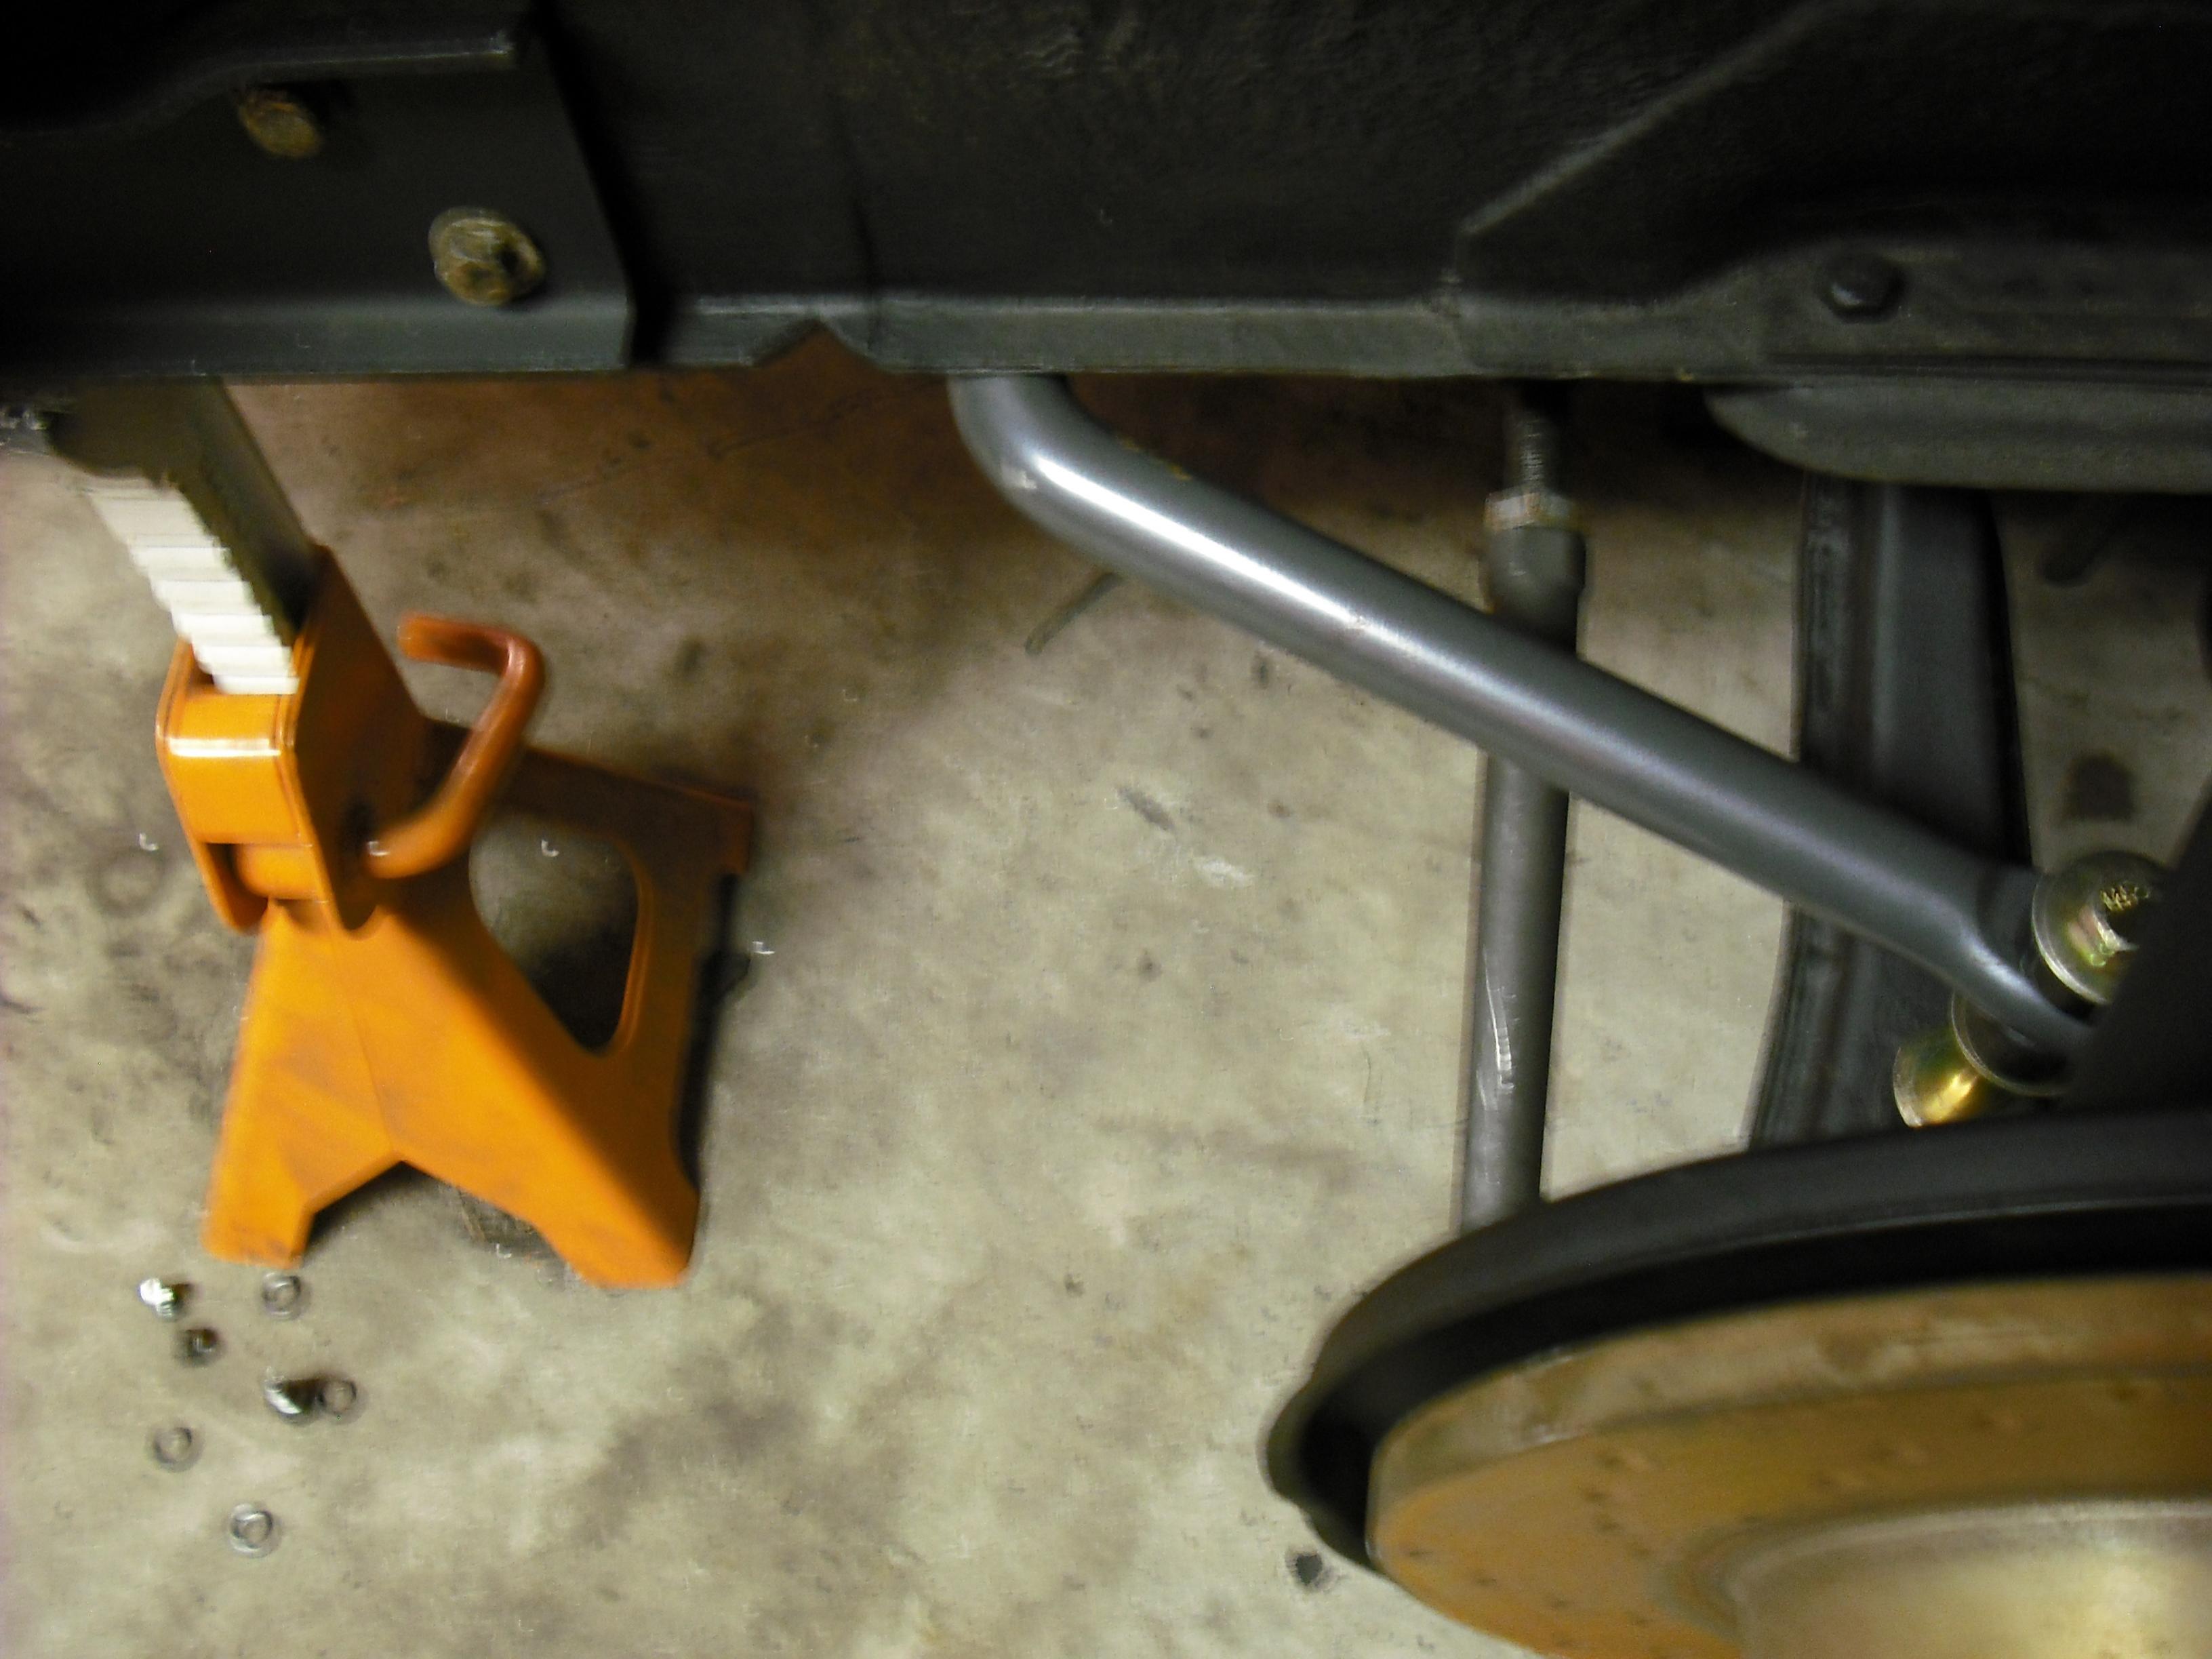
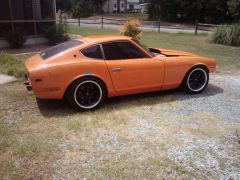
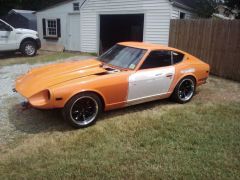
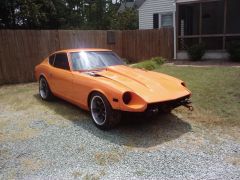
So I am nearing the completion of a full suspension and brake over haul/modification. Thought others tackling this might find this useful. Here are the specs. Suspension: Ground Control coilovers Eibach springs (250lb f & R) Tokico Illumina BZ3015 F BZ3016 R Techno Toy Tuning camber plates Techno Toy Tuning upper hats Arizona Z Car steering knuckles Urethane bushings everywhere MSA sway bars New tie rods New ball joints Brakes: (wince) MSA rear disk conversion stage 3 In my defense I bought it many many years ago before my "do it myself, do it cheap" ways, don't hate. 1980 Toyota pickup 4 piston calipers for the front 1980 280ZX master cylinder Proportioning valve Tech: Welding in the camber plates wasn't that easy. The front metal was so thin I was burning it and chasing it. It looked ugly as hell so I smoothed it out with some JB Weld, great stuff. Also in the front I cut the lip that the fender mounts to so I could get a good bead along that side, then added a small gusset (see image 142). The rear was very simple in comparison with the front (see image 184). The steering knuckles interfere with the dust plates, so I notched a square in them so the knuckles would clear. I also trimmed them so the larger calipers would fit. I tried to take a picture of this so if you look hard enough, you can see it. (image 179) The wheels are Rota RBR 17x8.5 +4 and the tires are Dunlap Direzza Z1 Star Spec 245/40/17. They fit but I had to notch the lip of the frame just a little bit because it was to close for comfort at full lock. (see image 189) I sectioned the rear strut housing 1 1/4". Using the Tokico BZ3016, I cut 1 1/4" off of the bottom spacer. It's a good fit (see image 169) . I will probably end up taking out the front and sectioning them as well with the MR2 struts. I'll let you know how it works out as it sits now. I tackled the spindle pins so I am officially a Z nut. Getting those out is story of its own so I will spare you. I will be going with the 5/8" bolts instead of the pins now. Worth mentioning, I replaced the bushings on the steering rack. Easy to get out but hard to get back in. I ended up loosening the engine mounts and jacking the engine about 1/2" to get enough clearance to re-install. As far as the bushings in the control arms, I don't have the equipment or the patience, so I paid to have them taken out and pressed in. Worth it! At this point, the rear is ready to be reinstalled but I am holding off so I can run a new brake line to the rear with the line going somewhere within an arms length of the driver's seat for the proportioning valve. Questions? Comments? Concerns?
-
wow, i can't help but hate you . I have already ruined one pin and still don't have it out. And haven't attempted the other yet. But on another note the front coilover swap is almost complete!
-
So after reading this wealth of knowledge, I know that an 84 turbo does NOT have an LSD. Good to know since there is a guy locally selling a diff out of an 84 turbo that he claims is an LSD (go figure, it's craigslist). Thanks HybridZ!
-
I had a similar handling issue with my mostly stock suspension (loose weaving feeling). It turned out to be a broken left rear control arm bolt. Very dangerous condition I might add. Might be worth taking a look at. But it sounds like your handling issues may be a bit more complicated.