A to Z
-
Posts
1071 -
Joined
-
Last visited
-
Days Won
32
Content Type
Profiles
Forums
Blogs
Events
Gallery
Downloads
Store
Everything posted by A to Z
-
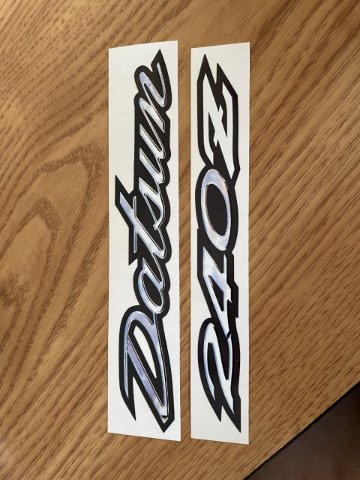
 Thanks. I am trying. I picked these stickers up on eBay:
-
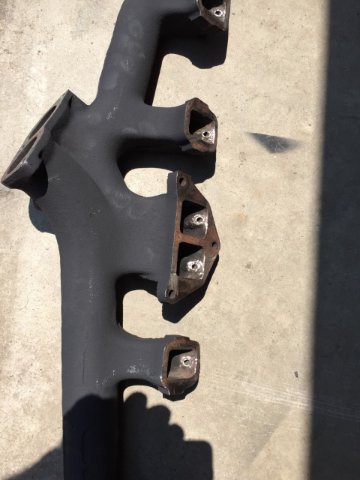
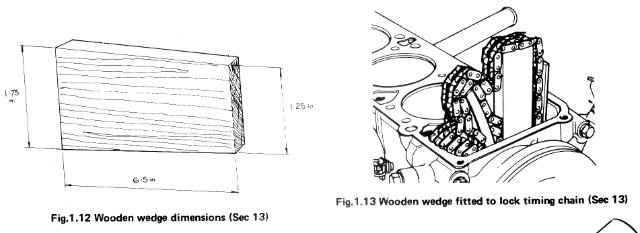
In the old days, you used to make a block out of a piece of wood to certain dimensions and stuff it under the upper timing chain gear to keep everything from moving when removing the head. I would recommend doing that. Free horsepower is to be gained by removing those probes from that exhaust manifold. Mine wouldn't come out, so with a Dremel I cleaned off the outside and make it flush like a bolt, and had them welded shut and ground down again.....now they just look like plugs. On the inside I again used my dremel and made what was left of the probes flush with the port. Below is some pics of what I did. The bottom 3 bolts where the mid pipe connects.....mine snapped off and after so many years, it necessitated having them redrilled and heli-coiled. A local machine shop did for me for $75 bucks U.S. Buy the best head gasket you can. Let's do this once. Do you have the funds and time to have the head worked by a Machine shop? Valve stem seals should be done, the old ones are bound to be cracked up. Minimum, a lapping of the valves is a good idea, but of course, hardened seats are what is really needed....no lead in the fuel starves the factory valve seats from the lubricant that leaded fuel was designed to offer. These engines are tough as nails, but the head is where wear can occur, especially if it never received regular valve lash adjustments. These old girls also need Zinc/ZDDP engine oil. Cheers!
-
Really enjoying your build. Keep up the good work. I really hope you don't find a cracked head or block. Wow....:( Joe
-
Cheers on the workman ship Noll...... absolutely impressive. Good show! THANK YOU so much for sharing this. Always nice to see this sort of thing.
-
Interesting. Is that a VW dash?
-
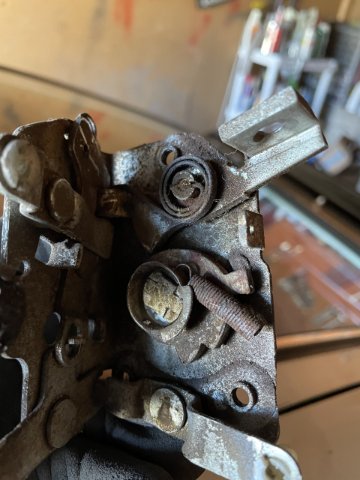
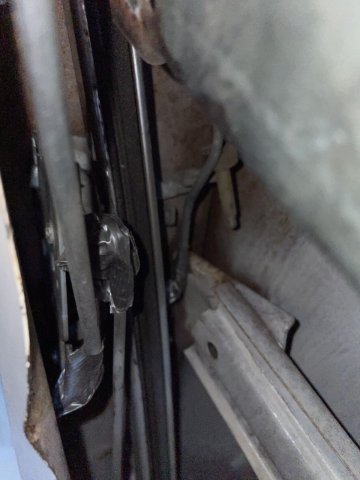
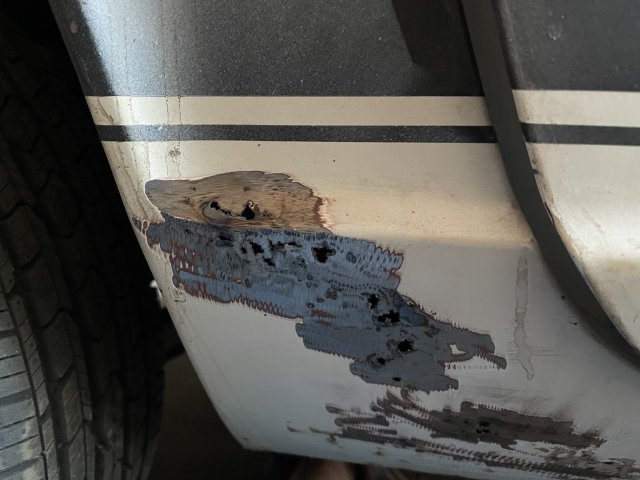
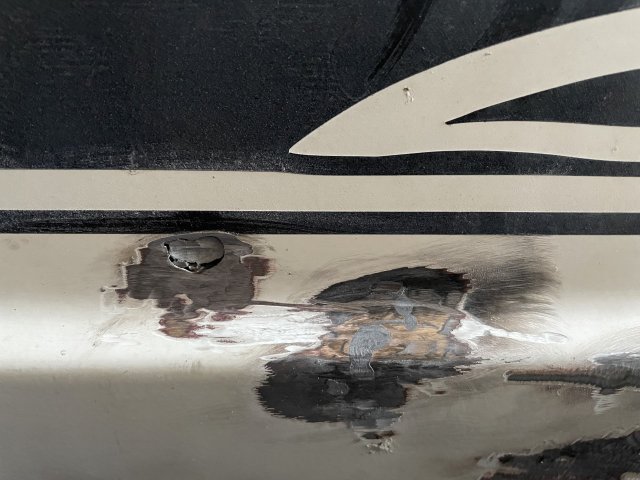
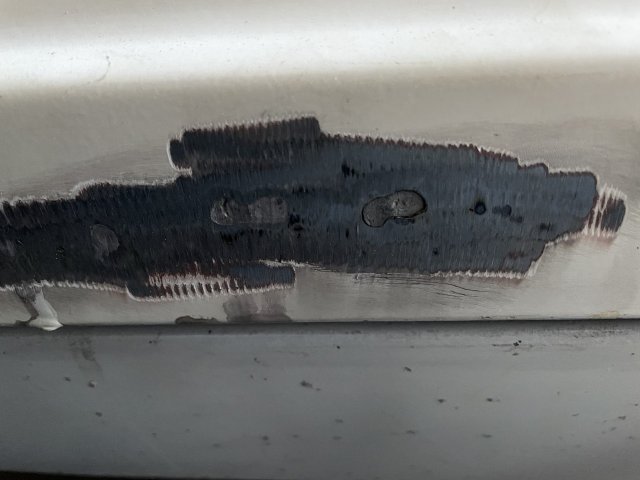
1-4-2022 UPDATE. First update of the new year. I had a few hours and it wasn't TOO cold, so I went out and tackled the driver's door latch. For me at least, there was no way to get it out without removing the door frame, so out it went! At that point I was able to see it, but the guy that said there is plenty of room, must have hands the size of an 8 year old girl, or was kidding, because it is a tight working space! I had to grab each rod (3 in total) with needle nose pliers and push HARD to get them to come off the latch! I put a piece of cardboard behind so as to not slip and dent the door from the inside. After I got them off, I found that the latch I have is not at all like the ones I bought.......it seems the ones on my car were either the older version or the newer.....at any rate, the one I bought went on. I was unable to get the factory plastic pieces to work, and so I resorted to using 2 layers of duct tape to keep the rods from coming out ot the holes. I thought the door handle one wouldn't need it, but yes it came out, so that will be a quick fix and I will duct tape it in place. Then I put the door frame back in. NOT EASY. But I got it all back together. Weird the window is now hard to roll down, but goes up easy and fine. The latch will be lubricated up before I put the inner panel back on, as well as the window rollers....maybe that is why they roll down hard. Any ideas? I then still had some time, so I went over them with the die grainder and decided to see how the JB Weld SteelStick worked in the small holes at the bottom of the right side (passenger) door bottom. Resuls are hit or miss, I also hit the area with some little bumps and I found holes! In the quarter right in front of the rear wheels! Look at the pics and you will see what I mean. Well, back to All-Metal filler. I also went ahead and ground the one big door ding on that door down to bare metal and covered it with glaze. Next time I come out, it will be cured and I can block it smooth. Lastly, I found when doing the door frames, a spot that was RUSTY....when I lifted the rubber flap over the door frames at the front, BINGO rust! Driver's (left) side was worse than the right hand side. I took both down to bare metal and sprayed both with rust converter. Later I will address these areas further. So, the louvers....ok, so I cleaned up the patch I made and the rubber trim fits right over.....so it is ready for sanding and paint. Thing about winter is it's not just the cold, but the days are shorter, so you can't get as much done....but every step froward is progress I suppose. Here are some pics.
-
In a day or two I will tackle fixing the driver's side door on my 1972 240Z. The latch needs to be replaced, as the spring is broken and hence the door won't close. From what I have gathered there are 3 rods attached to it. Can any of you give me any tips on geting it out?
-
Outstanding work!
-
Early / Late Wheel Cylinders? - Wheels & Brakes - The Classic Zcar Club (classiczcars.com)
-
Really wanted help, not a hard time......Just saying. A google search brought up posts on different pages over 10 years old.
-
Well, my 240Z, dated 04/72 now has a rear wheel cylinder that is shot. I have read online that you can simply bend the line to make it work on a 1973 up cylinder. Is this the best option? A replacement early one is easily 5 times the price. Please advise. Joe
-
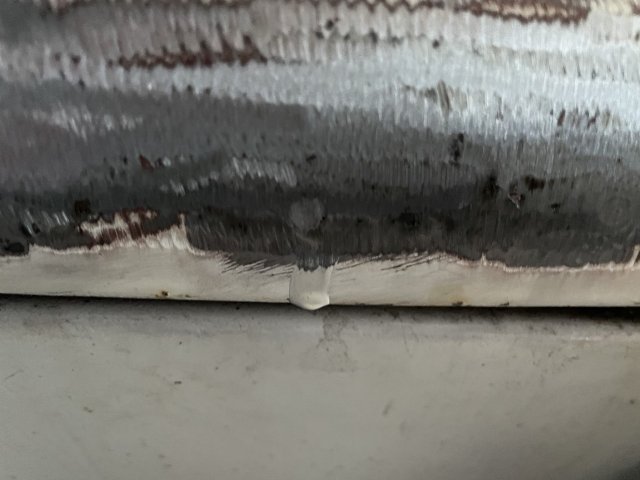
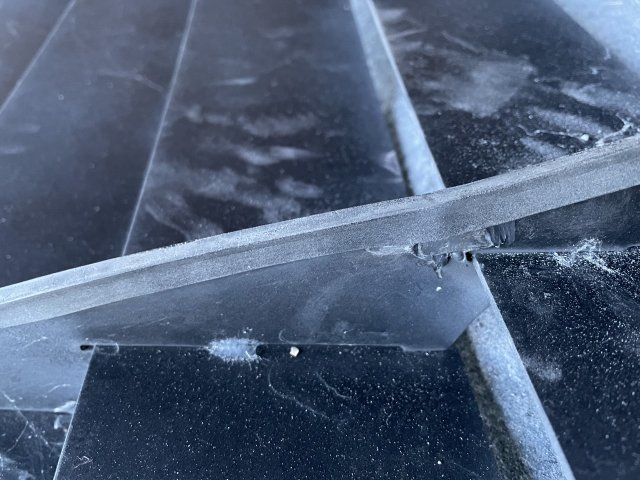
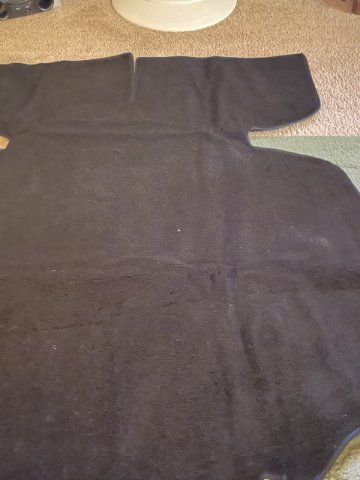
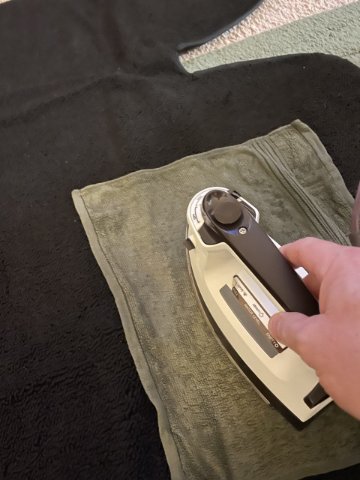
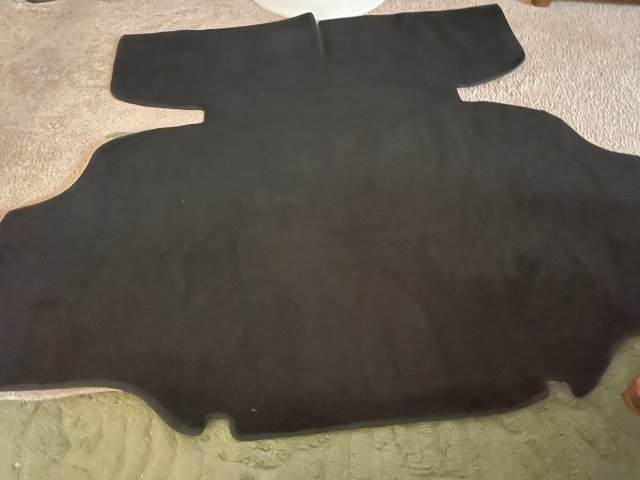
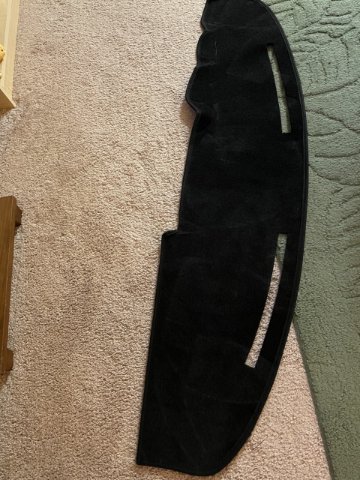
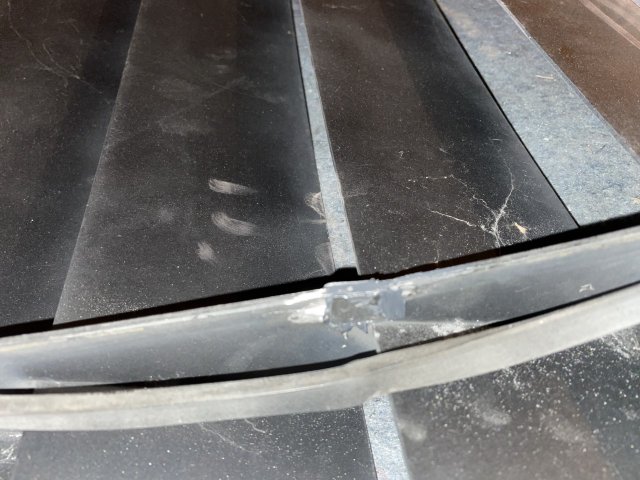
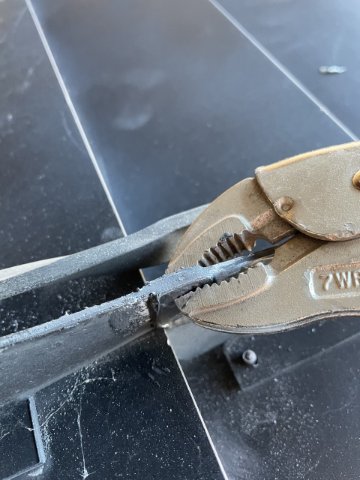
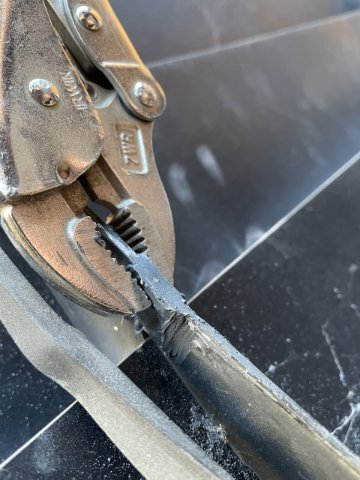
12-26-2021 UPDATE: Ok, so following advice I got, I went ahead and used a steam iron and a wet towel over the rear deck carpet and dash carpet cover. I had to keep getting the towel wet for maximum steam effect. The wrinkles came out! I also went ahead and took the vise grips off the repaired area on the louvers...it worked! Thanks for the help guys. Here are some pics:
-
Thanks a lot, Ken.
-
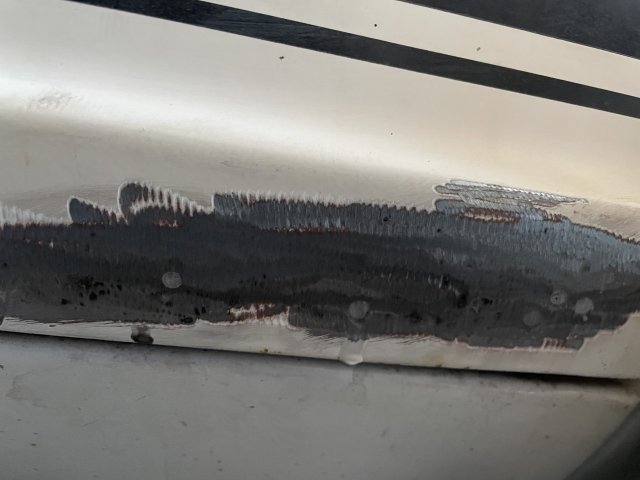
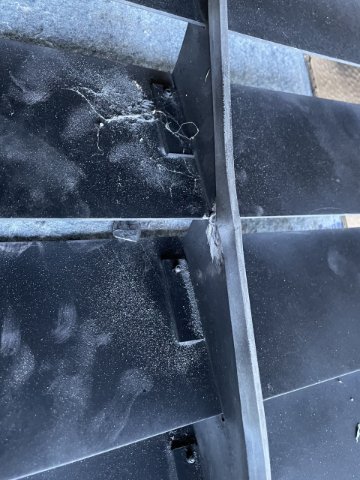
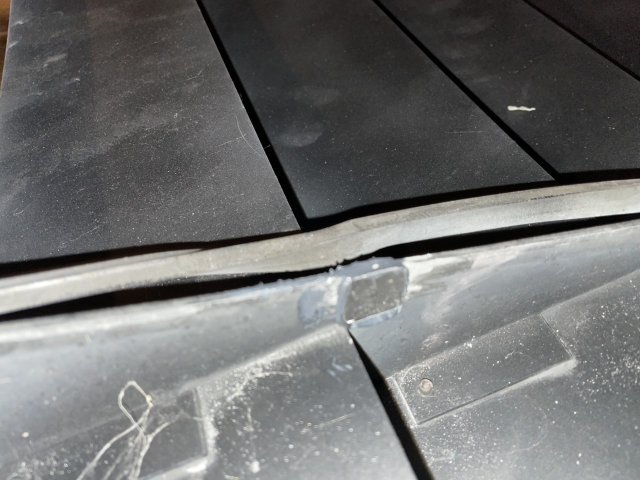
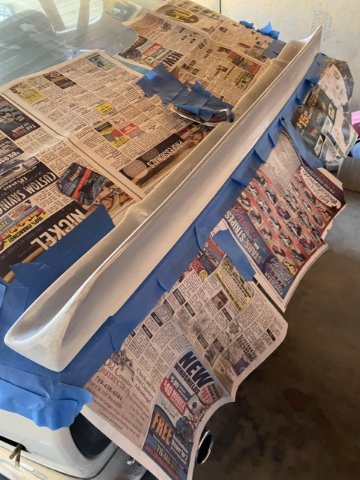
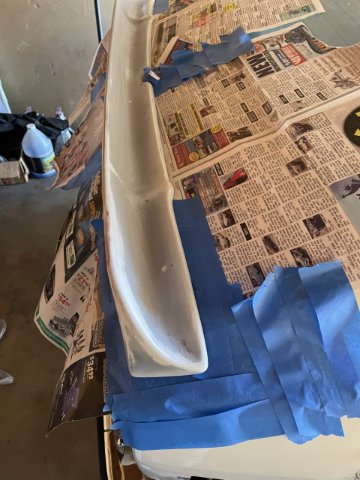
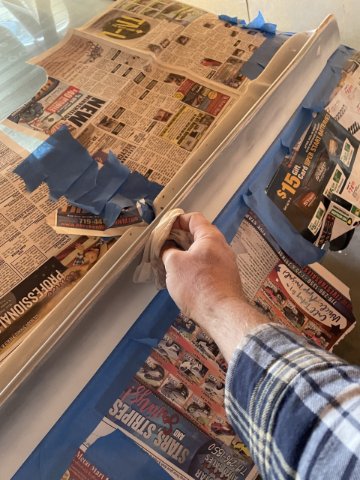
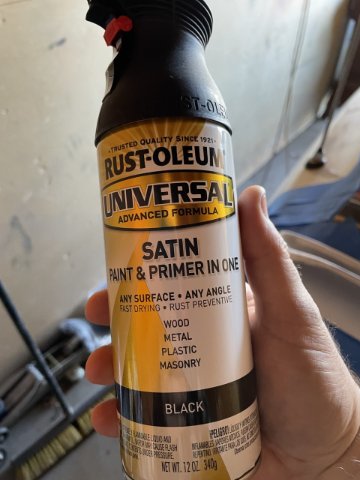
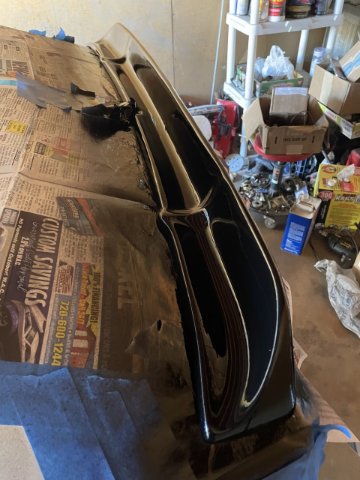
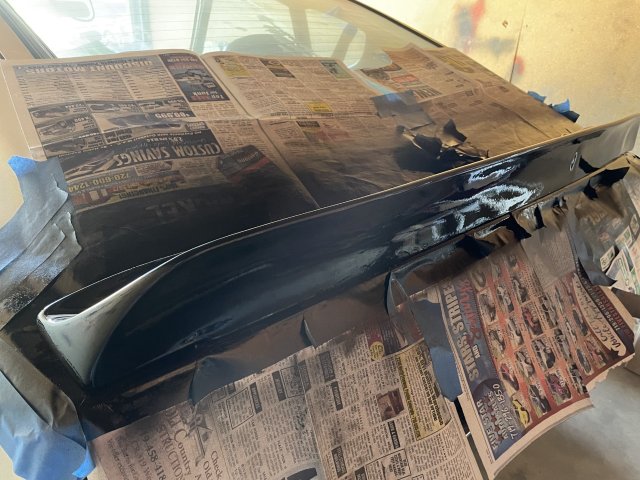
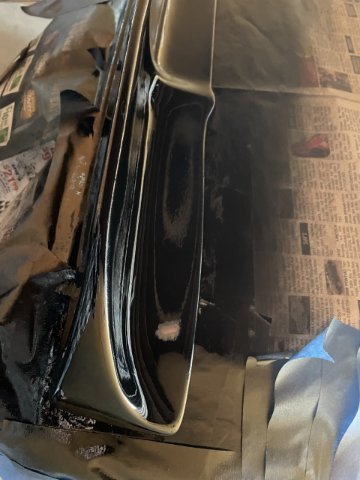
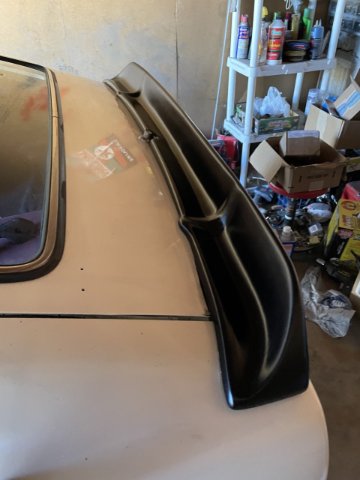
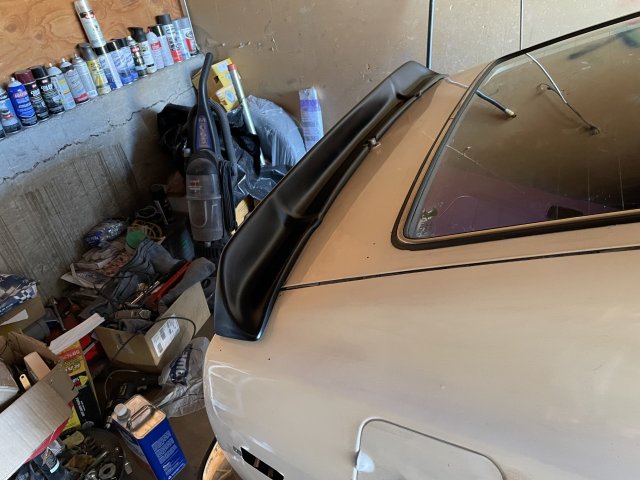
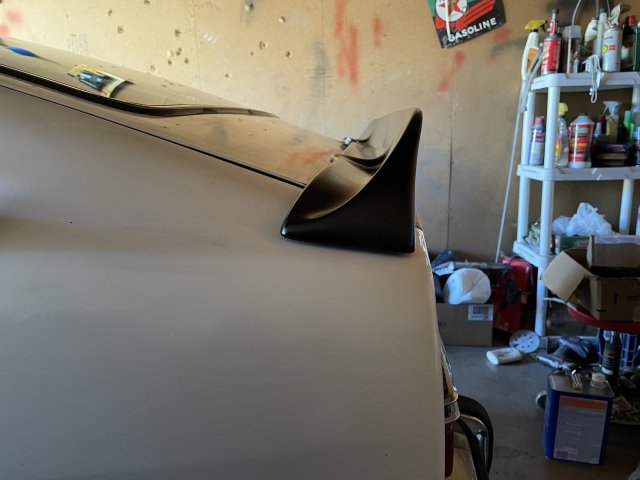
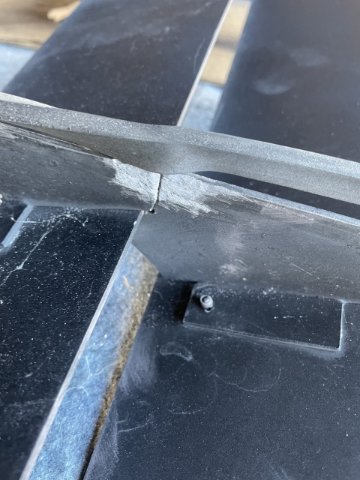
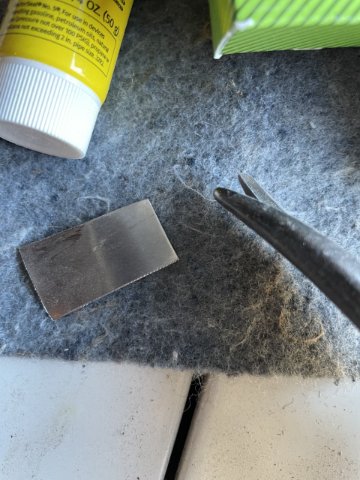
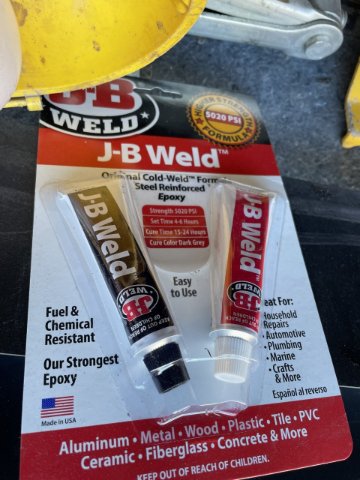
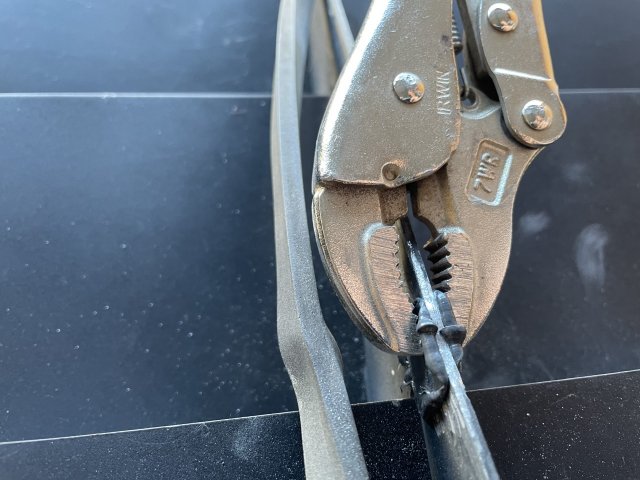
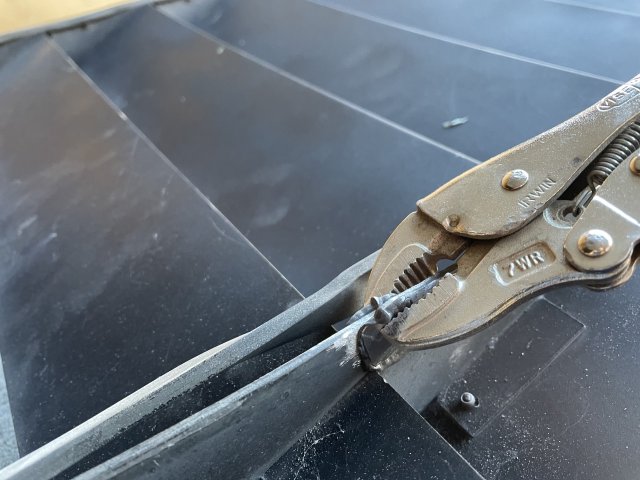
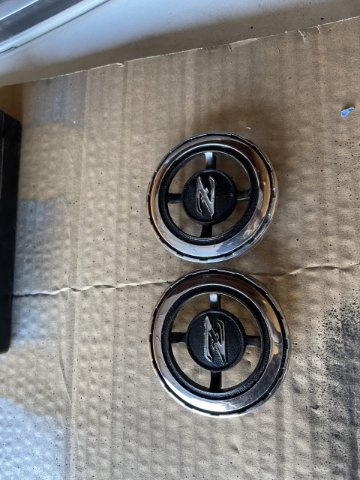
12-25-2021 UPDATE: Merry Christmas to all, and May the Lord Jesus Christ bless you all. I had a couple hours today, so I went to the garage, and prepped my rear spoiler, and then Wiped it down with Denatured Alcohol and sprayed it satin black. My masking worked real well....any overspray spots will come right off, as the clear is still to be sanded with 2000 grit paper and buffed. I painted the "Datsun" and "240Z" emblems, but the paint didn't adhere properly, so I will have to re-prep them once again, and give it another go! The pillar emblems just need the "z"' areas to be painted white (testers model paint??) I then took my louvers, which when I bought them had a crack...the seller DID tell me....I went ahead and lined up the crack, used the dremel to rough up both sides of the crack, and then cut 2 sheet metal pieces, dremeled them up nicely, and bonded the sheet metal pices to both sides of the crack with JB Weld, and used some vise grips to hold it together. I wiped the JB weld that came out so it will be easier to finish up later when I prep the louvers and paint them Semi Gloss black to match the rear spoiler. At any rate, here are some pics.
-
Thanks.
-
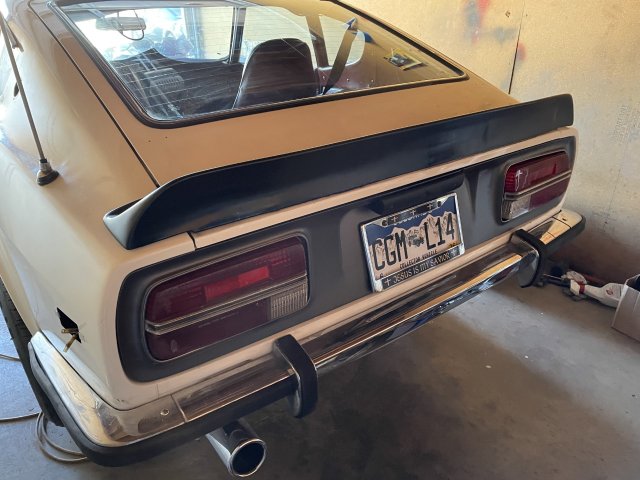
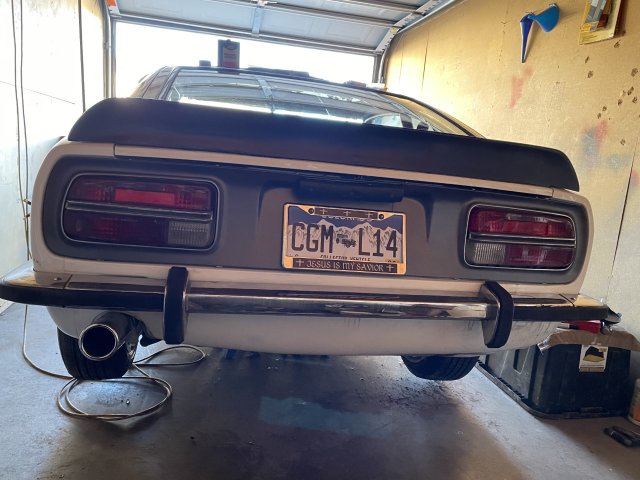
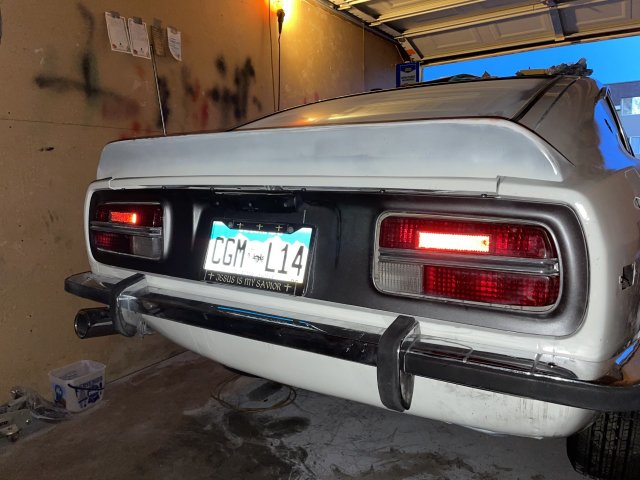
The streaks under the bumper are from me spraying the dusty bumper to wipe it off! Like I said, still needs more detailing and work. Thanks guys. Its a lot of work.....things are rusted on, don't want to come off, and so sometimes you have to bend, cut, etc to get it off, clean it up and then get it back on.....and thigns no longer line up.....for the pics it LOOKS like easy peasy 1-2 hours, but it was NOT. On a 49 year old car.....every time you work on a new area, you find old stuff that has to be replaced/fixed, even when it isn't a high mileage car. Now I will restore my factory asscessory louvers and re-insall. They will be semi-gloss black, just like the spoiler......these black pieces will match my rally stripe down the sides!
-
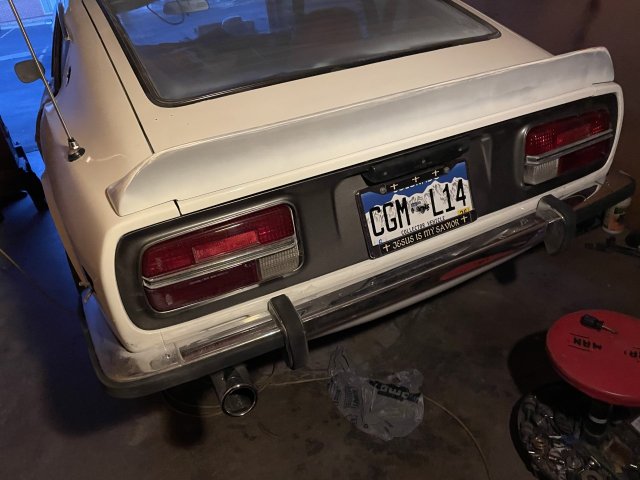
12/21/2021Update: I have most of the tail back together....still some more polishing to do and I need to paint the spoiler semi gloss black. The sides of the back bumper were HELL. The bolts on both sides were broken off from when I took it off, and the brackets were bent.....so I had to get inventive to get it mounted back on. The passenger side is the worst...again, because the gas tank is right in the way. Anyhow, still more to do on it, but so far doesn't look too bad.
-
ISOCYANATES! BAD BAD to breathe, this aserosol has it, read and heed
A to Z replied to A to Z's topic in Body Kits & Paint
they are the canisters......soemthing like OG/AV/P100 -
I purchased a 3M P100 respirator at Lowes Today for 40 bucks. Going to use non Iso paints from now on.
-
ISOCYANATES! BAD BAD to breathe, this aserosol has it, read and heed
A to Z replied to A to Z's topic in Body Kits & Paint
Thanks. Yeah, real scare. I purchased a 3M P100 respirator at Lowe's today. -
SPRAY MAX 2K Gloss Clear....****DO NOT USE THIS!!! IT HAS ISOCYANATES IT IN, IT IS VERY POISIOUS, IF YOU BREATHE IT, IT CAN KILL YOU. **** I used it today and it screwed me up a tad even just a hour maybe 2 with a mask on (dental mask). VERY bad stuff. Please read and heed. It is the same as some of the professional body work and paint stuff. Those guys wear respirators to protect them. A shade tree guy can try to use it like KRYLON and hurt themselves BAD. Please avoid this and stay away from paint with Isocyanates in it. Like I said, just a tad exposure and I can feel it.
-
SPRAY MAX 2K Gloss Clear....****DO NOT USE THIS!!! IT HAS ISOCYANATES IT IN, IT IS VERY POISIOUS, IF YOU BREATHE IT, IT CAN KILL YOU. **** I used it today and it screwed me up a tad even just a hour maybe 2 with a mask on (dental mask). VERY bad stuff. Please read and heed.
-
SPRAY MAX 2K Gloss Clear....****DO NOT USE THIS!!! IT HAS ISOCYANATES IT IN, IT IS VERY POISIOUS, IF YOU BREATHE IT, IT CAN KILL YOU. **** I used it today and it screwed me up a tad even just a hour maybe 2 with a mask on (dental mask). VERY bad stuff. Please read and heed.
-
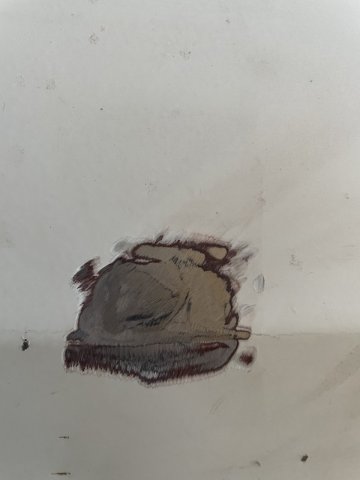
I then went ahead and painted inside the rear bumper. The rust converter was dry. The pic is terrible, but it at least gives an idea of what it looks like in there. That's Sunday, Cheers!
-
the spots I have to re-shoot. Prep is key! I thought it was good, it wasn't.