A to Z
-
Posts
1110 -
Joined
-
Last visited
-
Days Won
43
Content Type
Profiles
Forums
Blogs
Events
Gallery
Downloads
Store
Everything posted by A to Z
-
 Thanks. I was thinking about it. Since I have brand new tires on my Appliance mags, I really need to just restore the finish and see I think. I have always liked the gold mesh wheels with the polished lip on these cars, but I like these also. The flares can be mounted such, that the 1.5-2 inch gap I have after my Eibach springs, can be taken up with these....
 -
I have been contemplating for some time now, getting these headlight covers. They are on the jdm-car-parts.com website. I would like to know if anyone on here has any experience with them? Is the rubber seal effective? Please respond if you have Real experience with them. Thanks! https://jdm-car-parts.com/.../datsun-240z-1965-prototype...

-
5-23-2022 UPDATE: Well, my phone crashed on me, so no pics tody. I put a wheel back on and took some measurements, and I found I have between 1 inch and 1.5 inches of clearance from the tire to the lower spring perch. I then measured the wheel WITHOUT spacers, the sidewall sticks out 3/8's of an inch from the lip. It is the EXACT same distance in the rear! I didn't measure the inside clearance on the back though, I guess I forgot. I then put the 1.5 inch spacer on front and rear, since it cleared the front hub.....pushed the wheel out 2 inches from lip and REALLY looked bad, the wheel is too narrow. So I packed up the spacers and will be returning them. They are a nice quality piece from the Z Car Depot" except that the studs are the wrong thread pitch the car is 12x1.25 and these are 12x1.5. So, anyone using these will have to buy new lugs or re-tap these studs to work. With the wheel on the rear, I took a FRONT flare and held it up there, and to my surprise IT WORKS! You can mount it at the lowest possible point, and it will stick out jsut over the tire AND hang down 1 inch and get rid of most of the gap between the tire and wheel well! So, I just need 2 more front flares, and all 4 corners will have the same. After all of this, I spent the rest of the day sanding the drips off the driver's (left) side of the car and prepping it for paint, I color sanded the hood, and found that the part I didn't paint this last time needs more white to match, so another coat of white and clear on the back part of the top of the hood. I then sanded out the front spoiler etc., now I just have to polish it out, and I got the headlight buckets all polished and done! Just need a coat of pure Caranauba wax!
-
thanks.
-
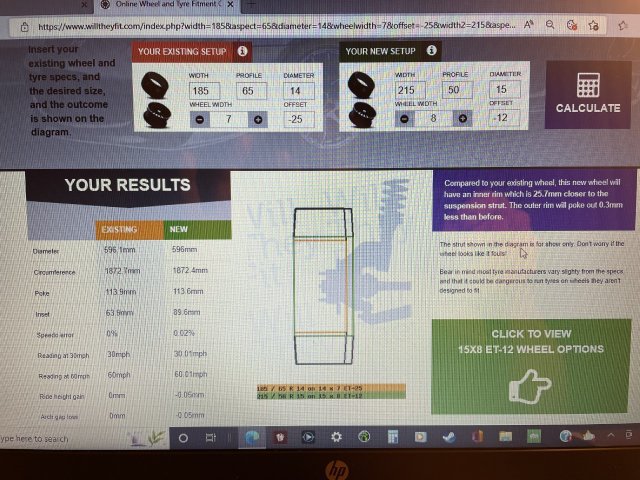
Ok, and here are my results for my front wheels. Again, the original is orange using where they will sit with the spacers, to then play with rim width and tire sizes, and offsets to get the inside wheel edge same as stock, and the outside edge where the old wheel sits at when spaced out. 2 pics for reference. Again, the site is www.willtheyfit.com. Cheers
-
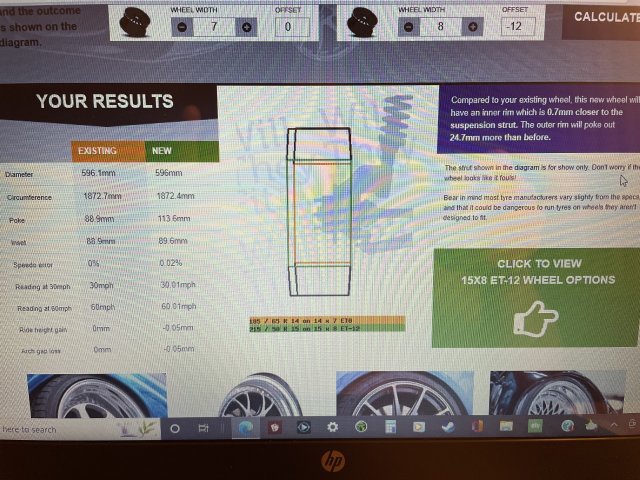
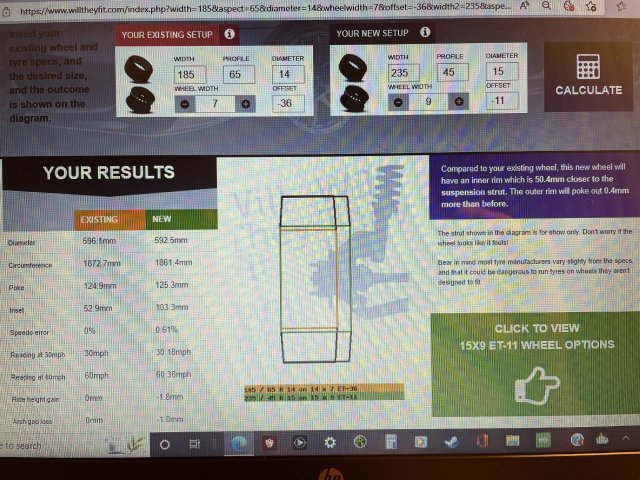
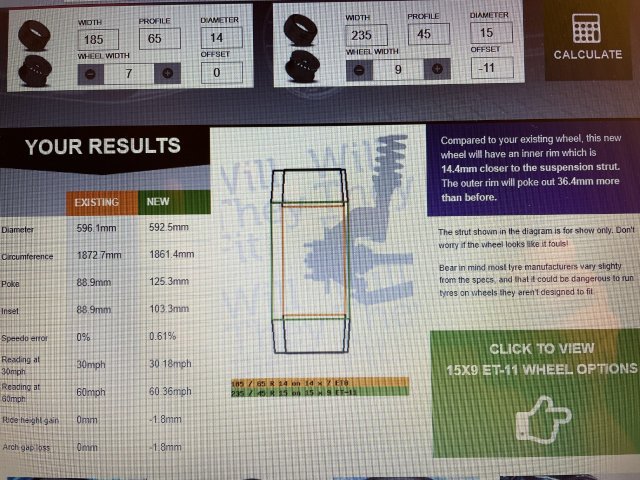
here you can see my current wheel and where it will sit with it's spacers in the rear. The green is the new measurement which will be the same, but wider on the inside back to it's original spot before I spaced it out. These are for the rear, the front still have to be figured. In my case I am looking at a 15X9 with -11 offset . You play with the tire sizing as well....in my case, the rear will need a 235/45/15 to maintain close to the same outside diameter size. I just need to do the fronts now. Even if it is some time before I do it, I will know what I need should I decide to get different wheels down the road.
-
www.willtheyfit.com An invaluable tool that can help you figure out what to do with wheel sizing for your Z car. You will have to get under there and measure some distances, but this will help you in figuring out what to get to achieve the look you want. I attached a couple screenshots of me working on finding out what wheel and tire I will need to replace my current wheels with my spacers at some point. The goal is to get the wheel that will sit at the edge just like my spaced-out ones will.....but no spacers. Go check it out! The first one is the end result of putting my spaced wheel on their building the new one in green to match, and then I moved the original orange back to where it is now to see the difference. the next page shows my wheel spaced out in orange with the green overlaid over it.
-
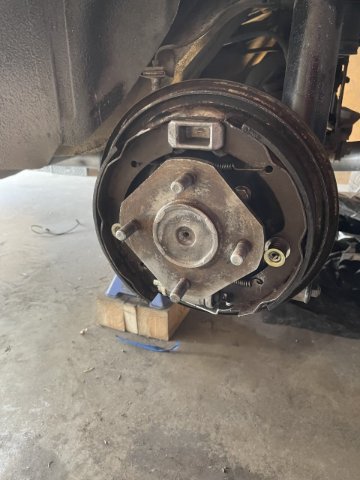
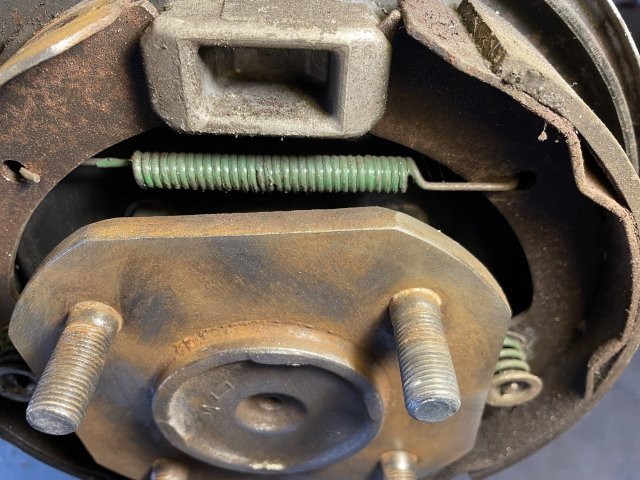
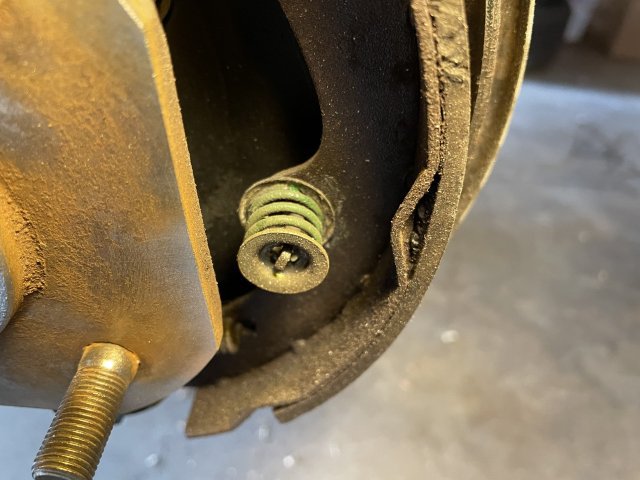
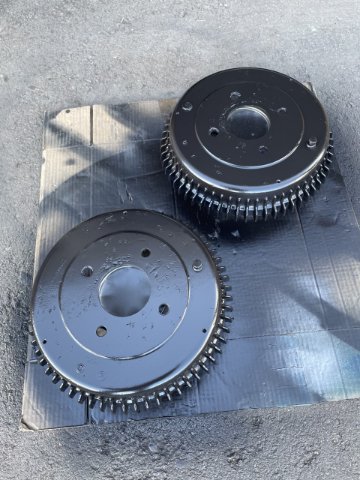
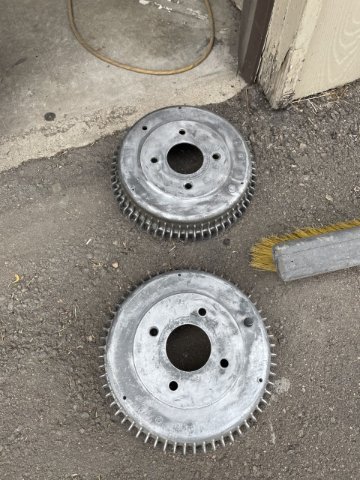
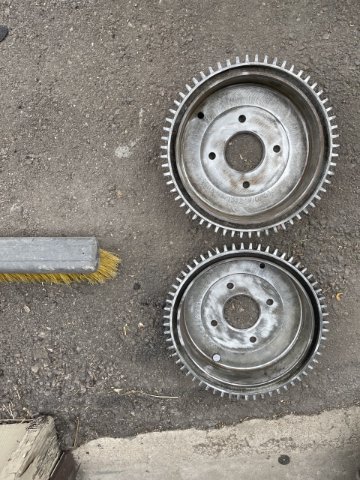
5-19-2022 UPDATE: Ok, more brakes. I pulled the drums, took them down to O'Reilly's, and had them turned....2 passes. They normally turn them 2 mils down, I requested 4 mils. And....a day or two ago, I went ahead and decided to replace the cheapo pads, with Centric Semi metallic pads front and rear....as well as a new Drum spring kit for both sides. More to follow.
-
hehe, yeah!
-
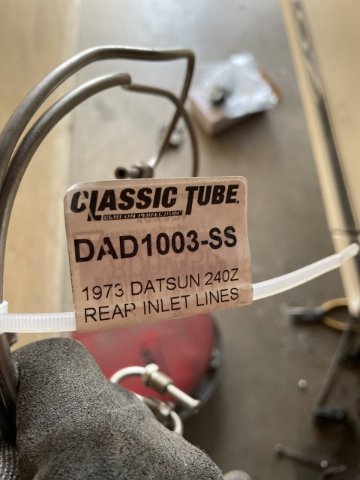
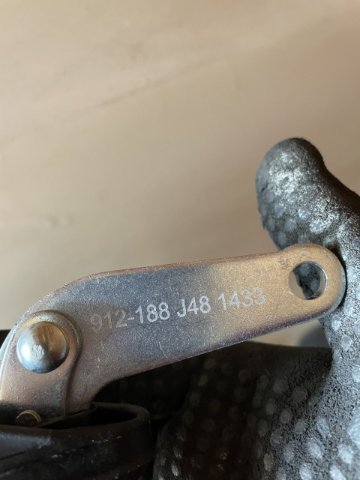
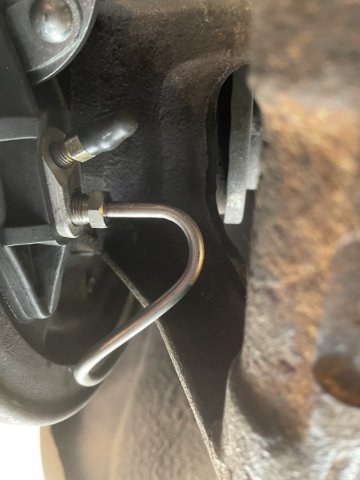
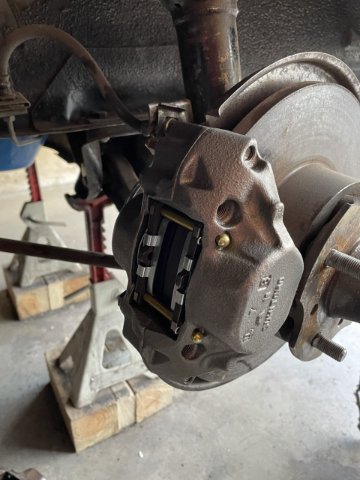
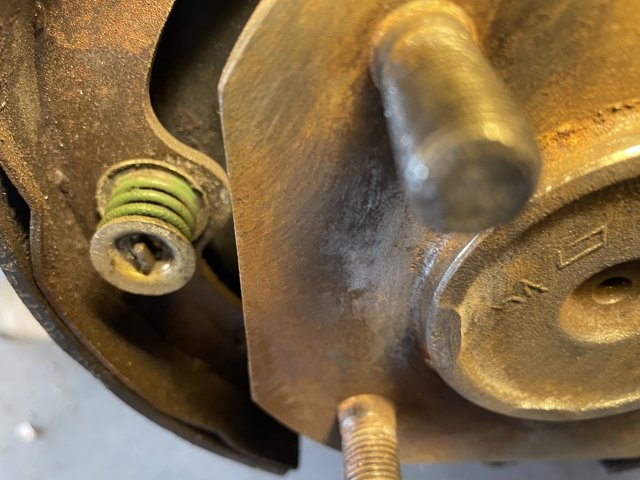
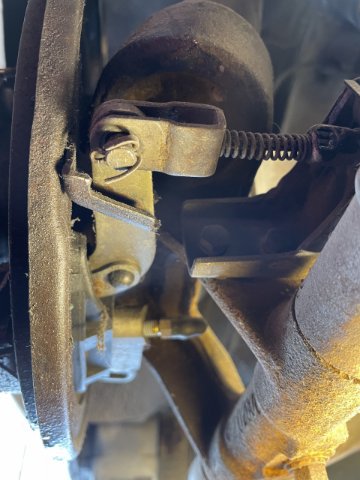
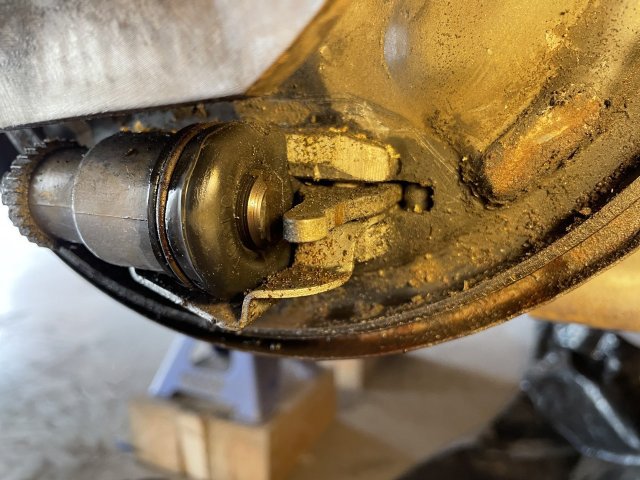
5-16-2022 UPDATE: So I went ahead and disassembled both rear drums, and installed a new wheel cylinder on each side, along with the new lines I got from the Z Depot. My originals were the high dollar, first generation wheel cylinders that cost a fortune, so I bought the lines for a later Z car and bought the wheel cylinders to match. Everything seemed fine, but the drums won't turn, even with the adjusters backed all the way off, nothing. I had to pound the drums on....that should have been my clue, but I for some reason thought once they were on, they would then work.....stupid me. I will have to pull the drums later and possibly sand down the brake shoes a tad to get it to spin. I haven't bled the brakes yet, so they cylinders are still dry. I am using the exact same shoes, everything....they were HARD to get off, but they spun freely.....Anyway, I then went ahead and changed out my front calipers. Dirty job today. PICS BELOW:
-
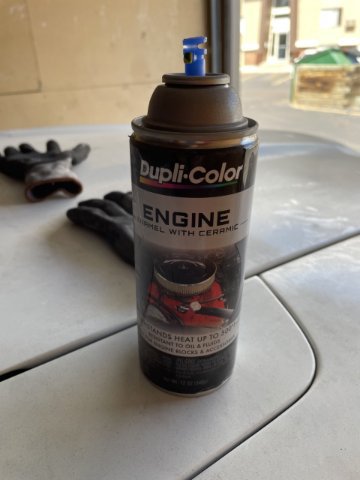
5-15-2022 UPDATE: After work, I took the time to paint my drums with some 1200 degree high temp paint. Should be ready to go for tomorrow!
-
I have a 1 to 1.5 inch gap, so no worries.....it will be cosmetic.
-
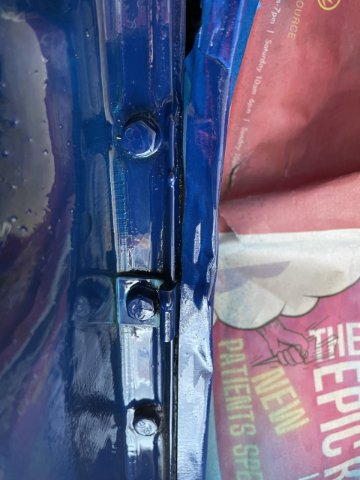
Interesting info to put on here for future use by someone searching for it. Wheel spacers on a 240Z. Spacers for the 240Z have a bore hole diameter equal to the raised portion on the rear axle when the drum is removed, which is 2 5/8" in diameter or 66.675 mm. The front hub is 2 7/8" or 73mm in diameter. To put a front spacer on, the bore hole in the center of the spacer has to be milled out to clear the snout and sit flush on the hub surface. So, we are 6.325 mm or 1/4" of difference in bore diameter. This means that the outer diameter of the bore will go outward 1/8" all the way around. This is important, in determining if the hole can be bored out to work with the metal between the spacer hole and the holes for the studs not being too thin to be safely used. Click on link below first drawing to see and think about.
-
yes.
-
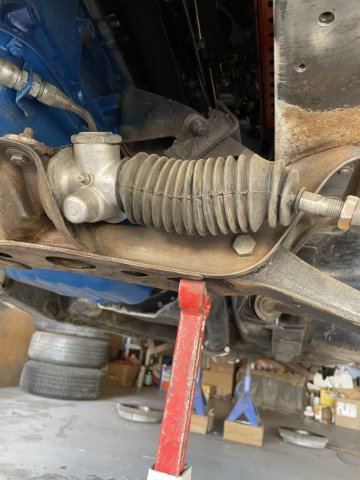
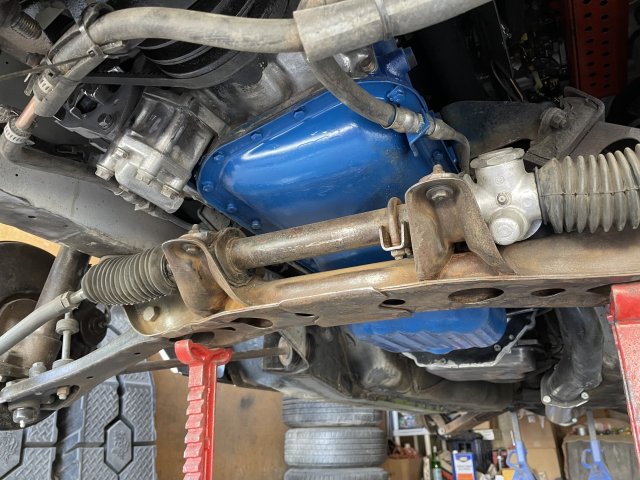
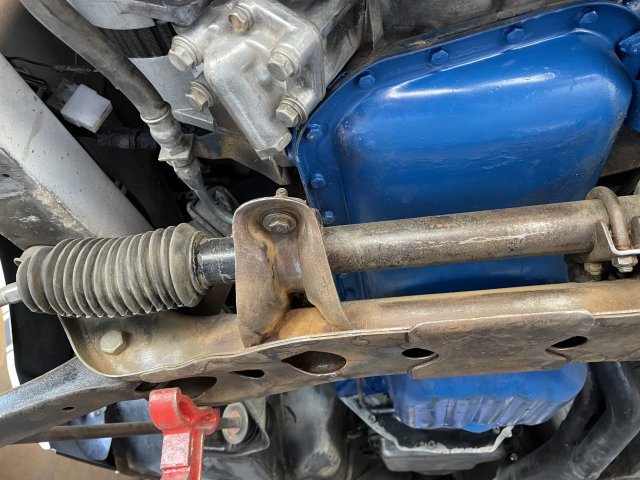
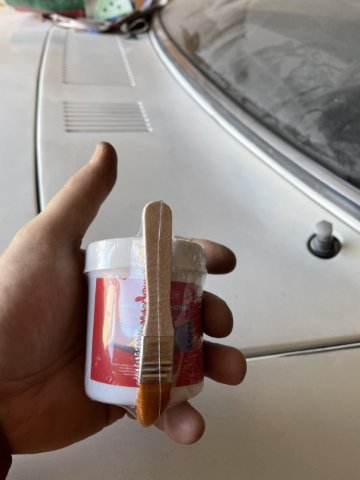
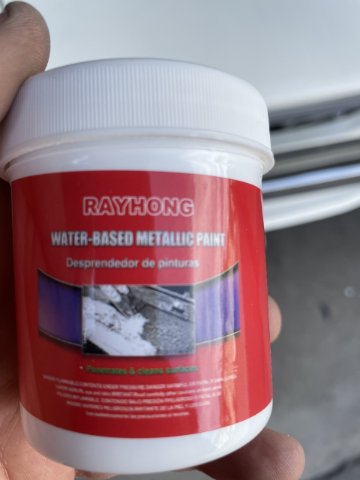
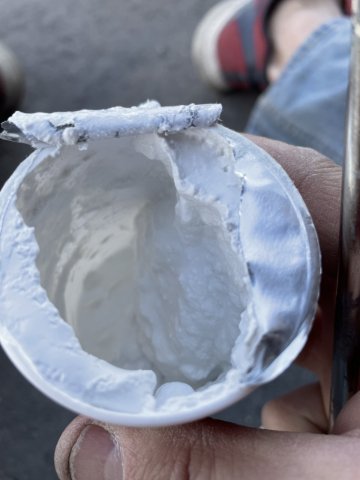
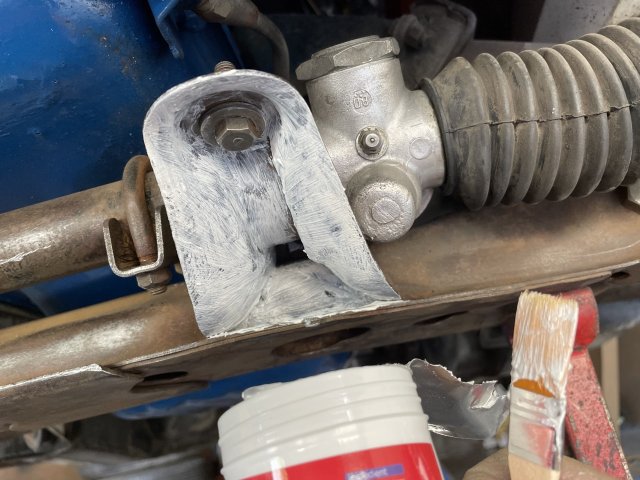
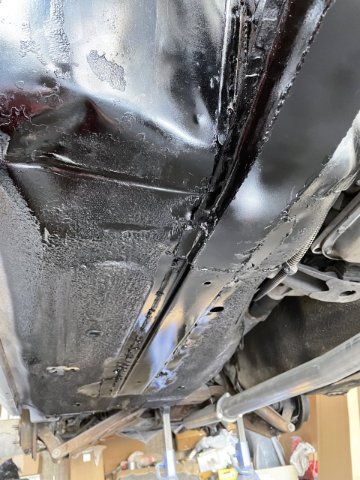
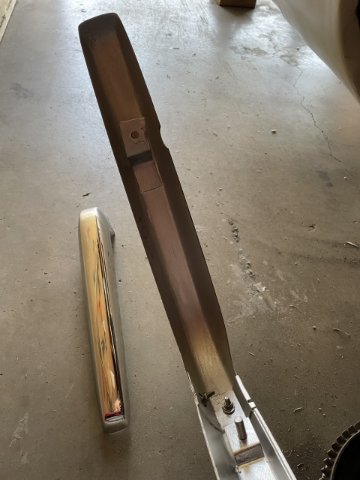
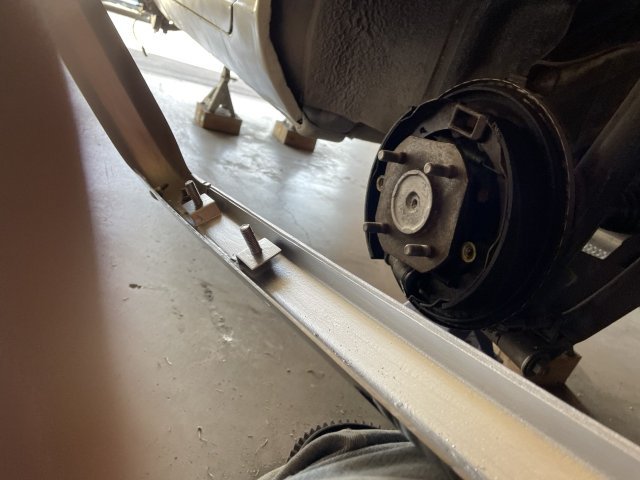
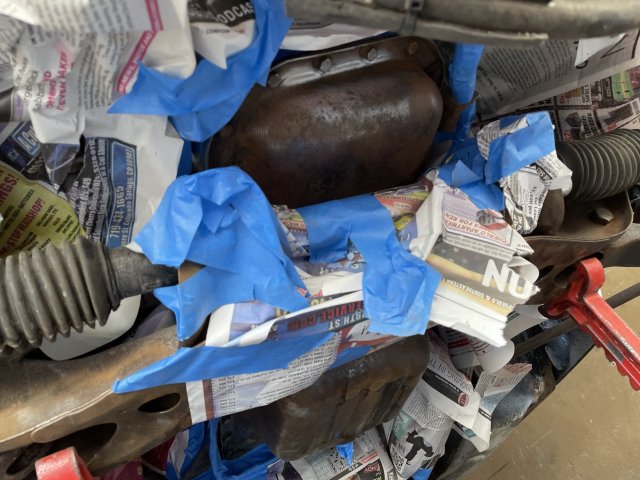
5-13-2022 UPDATE: I went out for a few hours today, and steel wool 'ed and scrubbed the K member and steering rack area with some brake cleaner. I then tried the RAYHONG paint I decided to try. Well, I was expecting a decent size can, and I got a can that is small, just fits in the palm of my hand. You buy 2 and get 3.....good thing. I tried brushing it on in a couple spots.....it is SUPPOSED to turn to a black coating in about 20 minutes.....an hour later it was still white (see pics). After that, I went ahead and took a wire wheel in my drill to the rear drums, and removed the paint on them. Since they are aluminum, there is no need to paint them is there? If I do, it would have to be a high heat paint I think. I also painted the rails and floorboards black. I also ordered some fender flares....they came in and I held them up there and it looks like I will be able to put them on low enough to take up the gap between the top of the tire and fender lips....and I won't have to cut the stock lips off! I will have to get some wheel spacers to push the wheels out a little bit to make it look right (I sure hope it doesn't look weird from the rear with them out about 1.5" on each wheel. 1" in the front. Here are a couple pics. Click on this link: Universal Fender Flares Flexible/Durable Black Fenders Polyurethane For Auto Car | eBay
-
Thanks. EVERYTHING is subject to change I think.
-
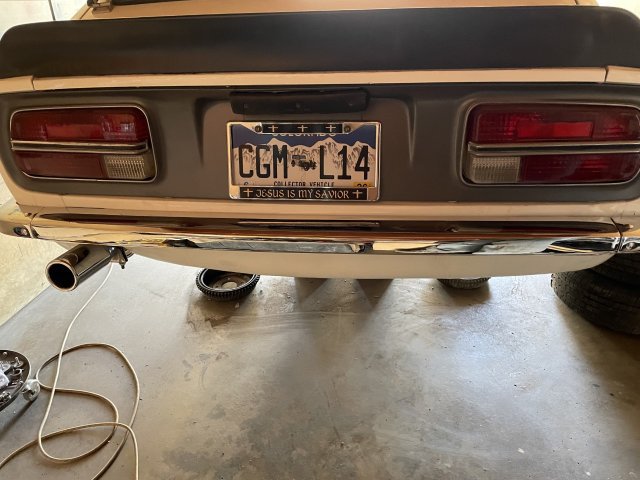
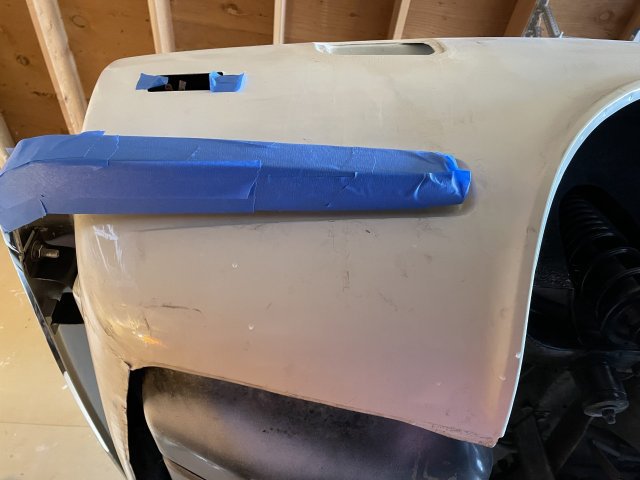
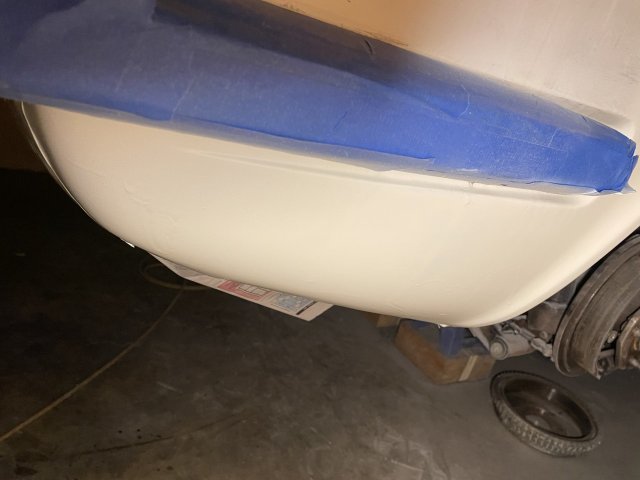
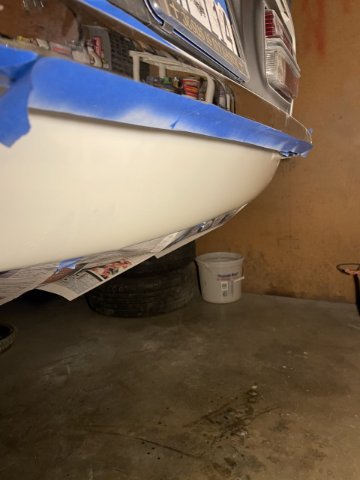
5-9-2022 UPDATE. Ok, so I assembled the rear bumper and installed it. I then laid down and sanded up the area under the bumper, The "rear valence" ?....at any rate, it just needed to be redone, so I sanded it all up, and then masked it off, wiped it down with denatured alcohol, and touched up the areas needed with White, and then several coats of clear enamel. Here are some pics.
-
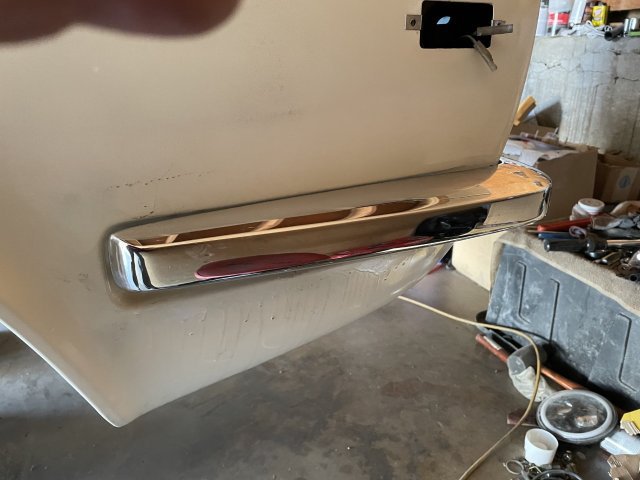
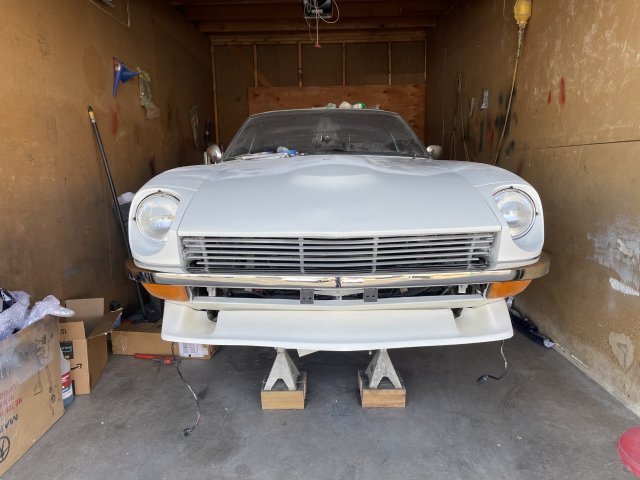
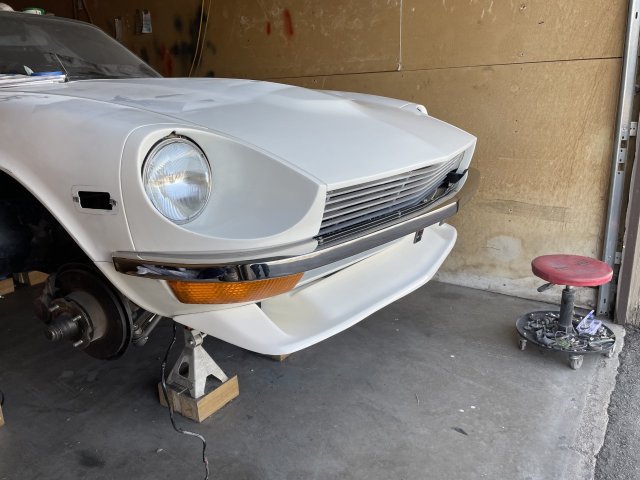
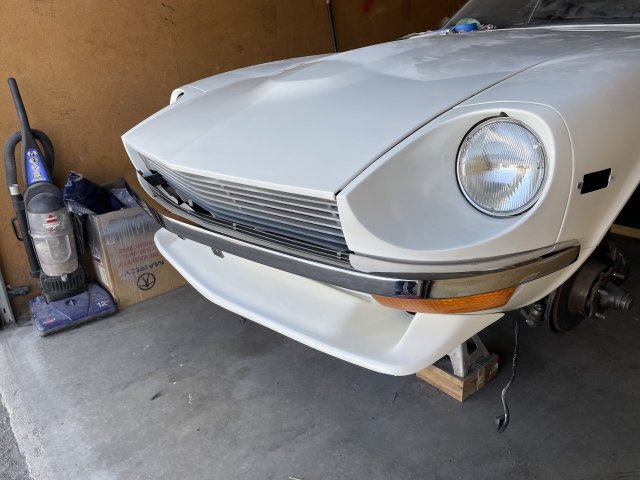
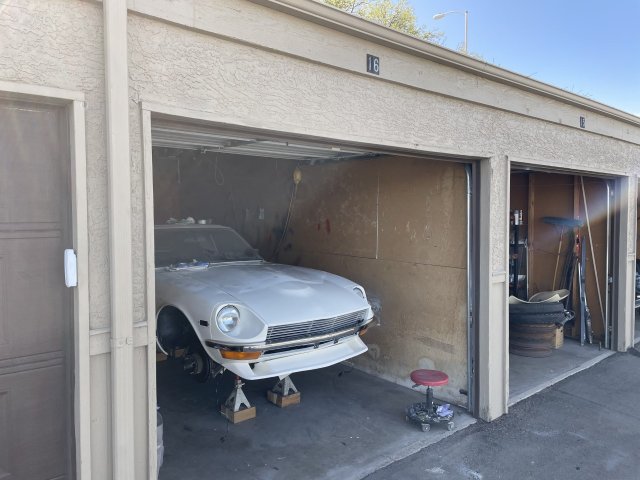
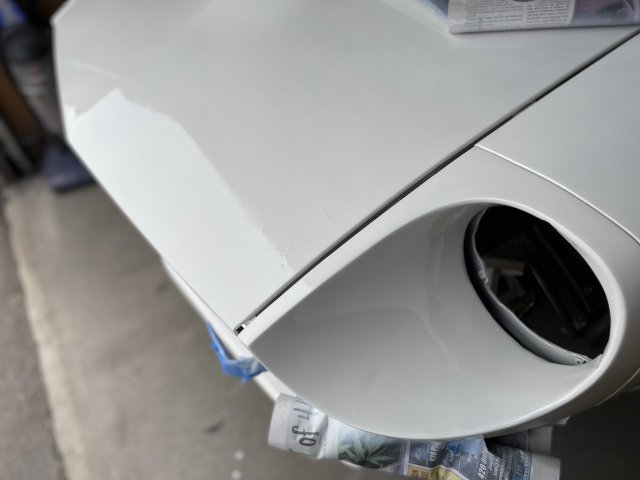
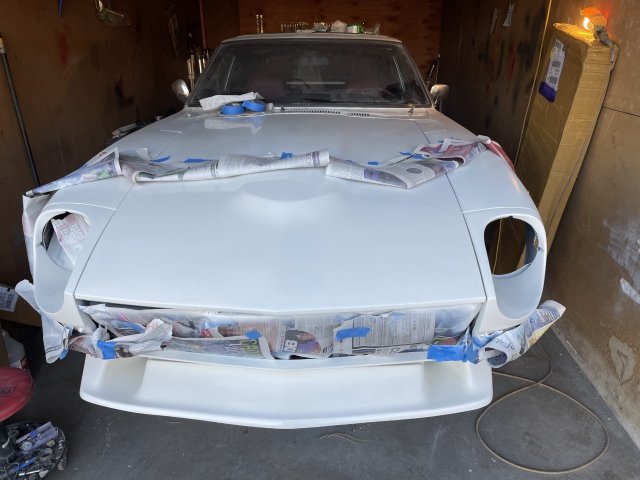
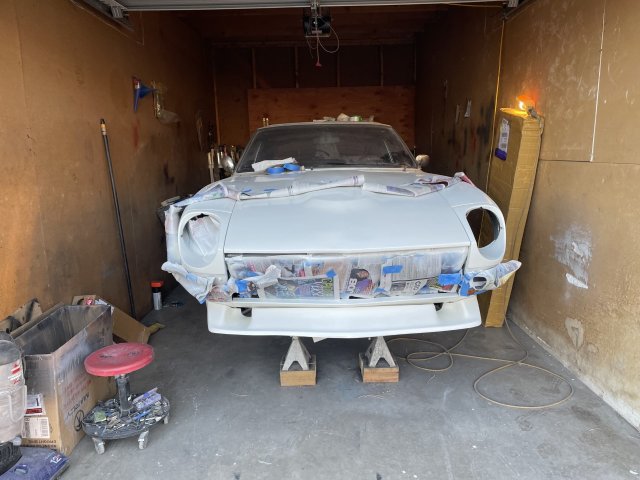
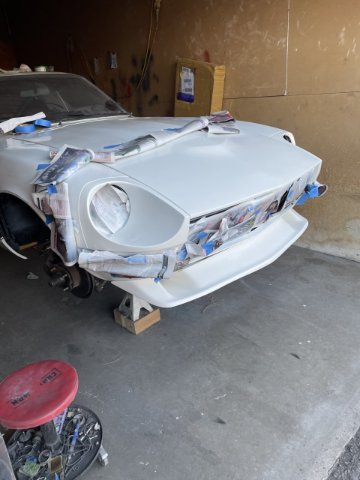
5-8-2022 UPDATE: I got the headlights back in and put on my new front bumper. I bought a new front and rear bumper from "Hung Vu". Starting to come around, huh?
-
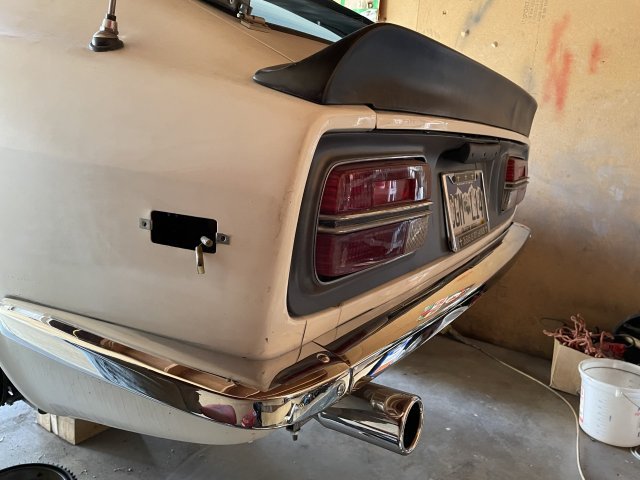
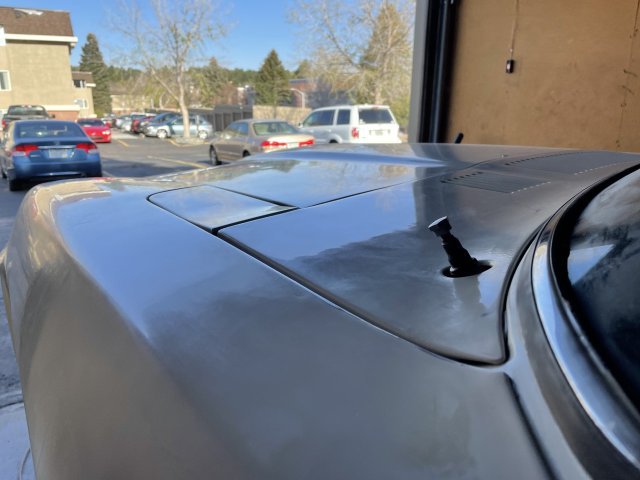
5-6-2022 UPDATE: I got the clear on the nose today. 2 weeks to harden, then color sand and buff.
-
Thanks. Wow, I hope so!
-
Thanks. Good to hear for you.
-
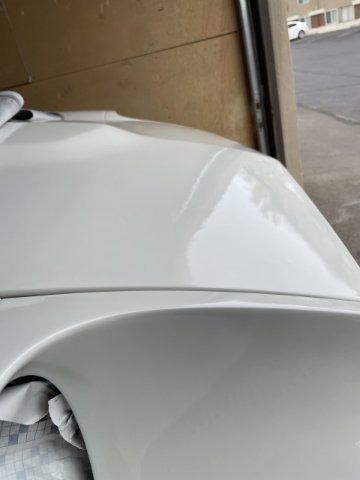
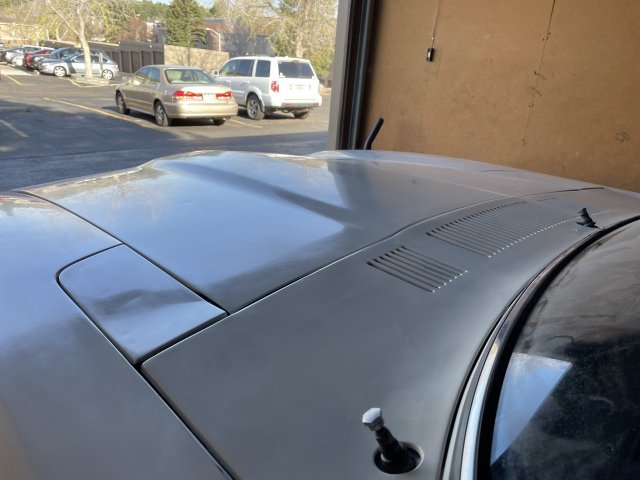
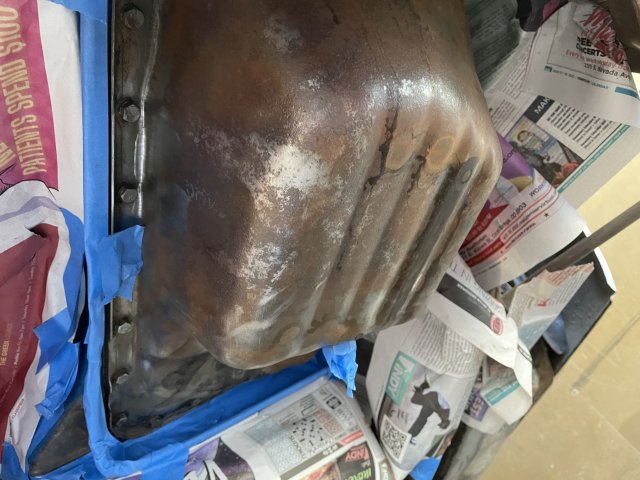
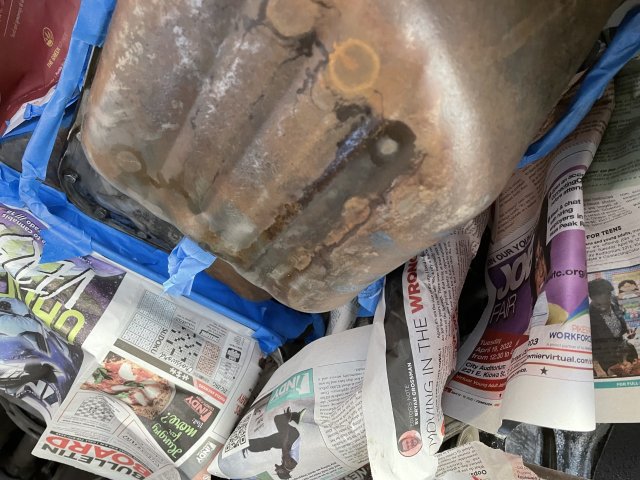
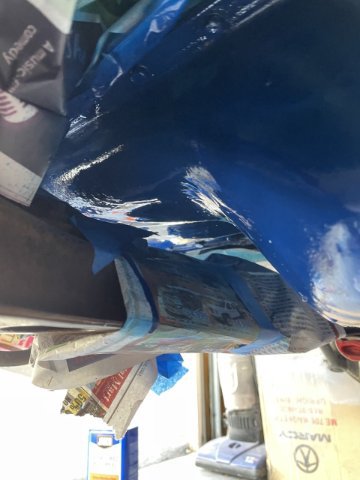
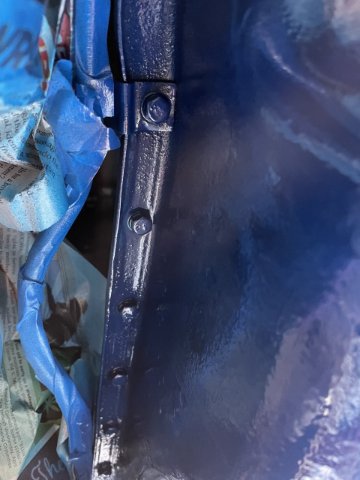
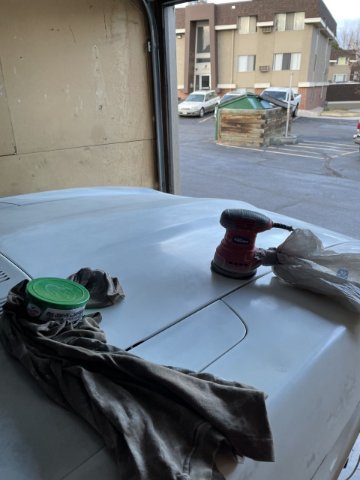
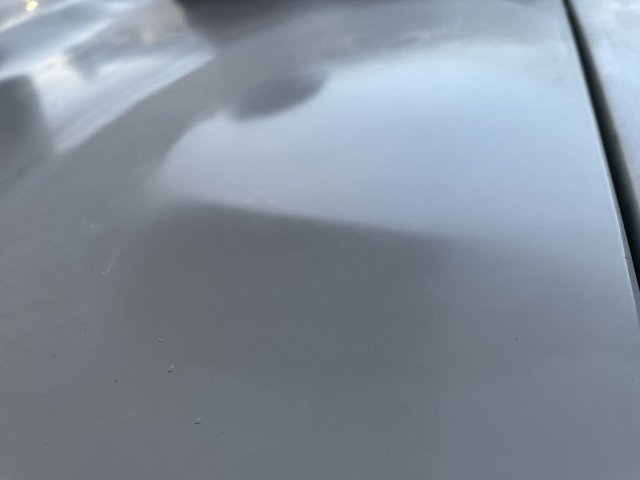
5-2-2022 UPDATE: Ok, so I continued the work on the paintjob, sanding the dirt and orange peel out of the clear coat using my orbital sander and 2000 grit sandpaper. I worked on finishing the hood, the cowl panel, and the tops of both fenders. Some spots I went through trying to sand out all those runs. I worked and worked on it until I got it smooth, but decided to go ahead and mask off the nose of the hood and the headlight buckets, and the front spoiler and re-shoot them. Lessons are being learned the hard way....but persistence pays off. The clear I shot turned yellow from being so thick. You will see that I folded the newspapers over where I re-shot the paint. This avoids there being a line that you have to try and sand out. I will have to do a final buff on the clear, but I am getting the shine I was hoping for. I also went back and sanded out the drips on the oil pan and re painted it. It looks better in person than the pics, but it is now good. Once dry I will move on under there, and finish getting everything painted and cleaned up. With this project it appears to be 2 steps forward and one step back. I hope you like the pictures.
-
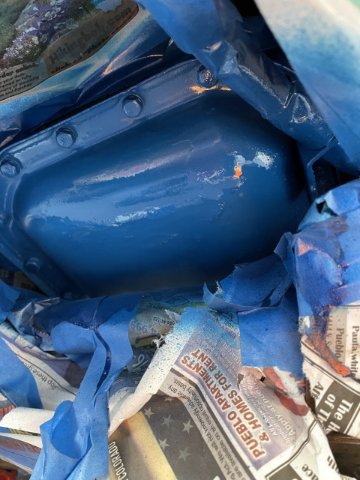
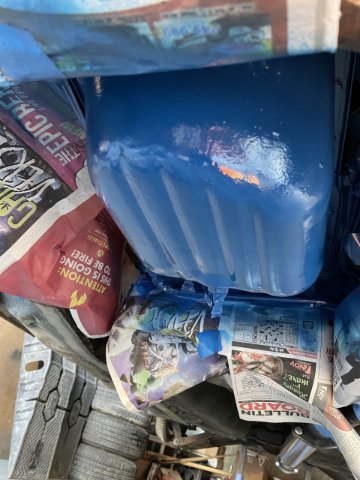
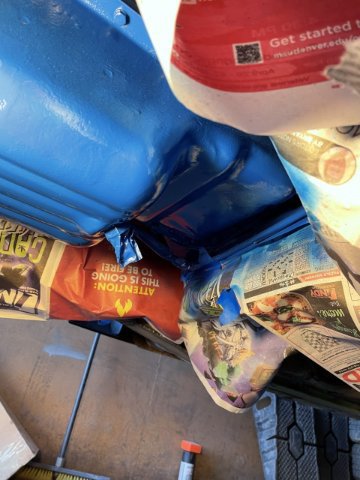
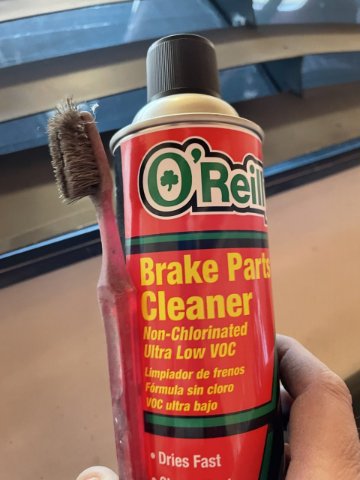
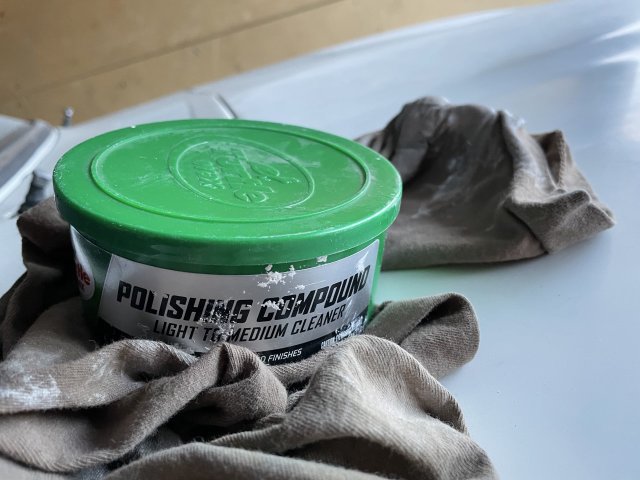
4-25-2022 UPDATE: I went ahead and used an old toothbrush and some cans of brake cleaner to get the oil pan area cleaned off, and then masked off the area, and painted the oil pan area with the Duplicolor "Old Ford Blue" I used on the block. Painting upside down brought a lot of drips....so once dry I will scuff the drip areas and touch that up. I then took the sealer I bought that is made by Loctite and sealed the rails, and the other spots I found in the subframe. a small screwdriver to clean them out and then fill the void with the sealer. After that, I started doing a bit more color sanding on the body, this time the headlight buckets and hood. Yep....there will be spots I have to spot paint, but the majority is coming out pretty good. The last pic is a circle area, that I put some pure carnauba wax on (Meguires Gold Paste). It is so smooth! Here are some pics and a video! 10.MOV