A to Z
-
Posts
1072 -
Joined
-
Last visited
-
Days Won
32
Content Type
Profiles
Forums
Blogs
Events
Gallery
Downloads
Store
Everything posted by A to Z
-
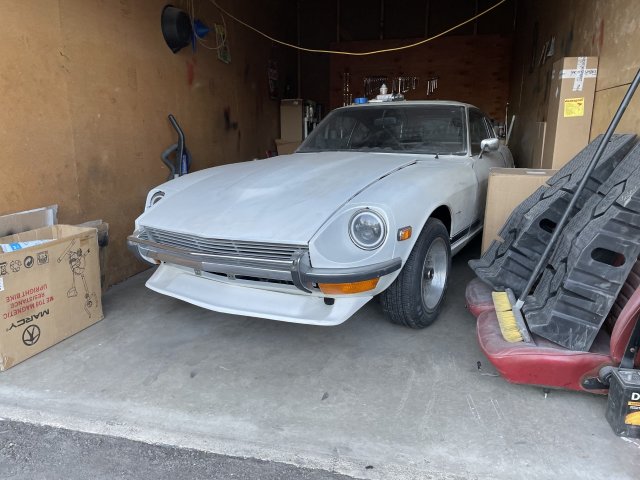
 Yeah thanks. I sure hope those smells are gone. It was worth it just to get all of the dirt out. The dash cap turned out just like I hoped. Now I will do a clean up, treat some of the rust, and the LED lights for the dash arrived. I need to knock out the heater box and fan, and then put it all back in! Then the stereo!
 -
otice how gray the dash looks? Denatured Alcohol takes all oils out of it!
-
apply the glue to the cap and install. I used clamps, but found that I didn't have enough....I was able to use duct tape wrapped and pulled tight to get it down as tight as I could. 24 hs. and it will be dry.

-
wipe down everything with denatured alcohol
-
sand up the surfaces where the glue will be applied
-
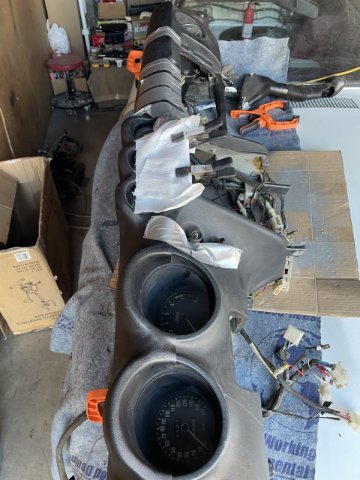
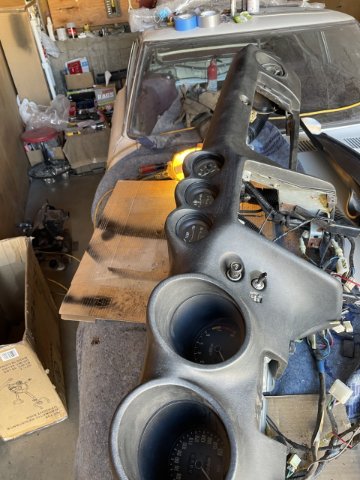
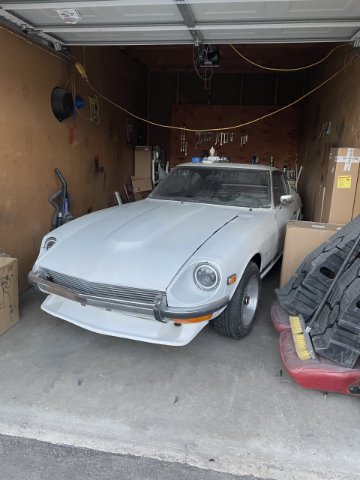
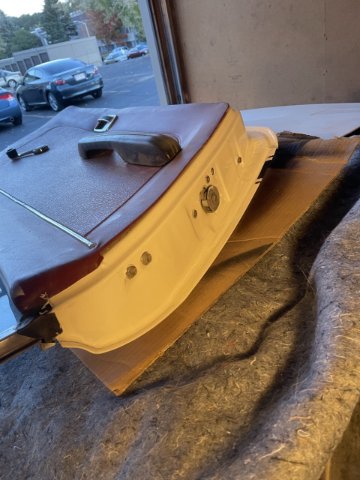
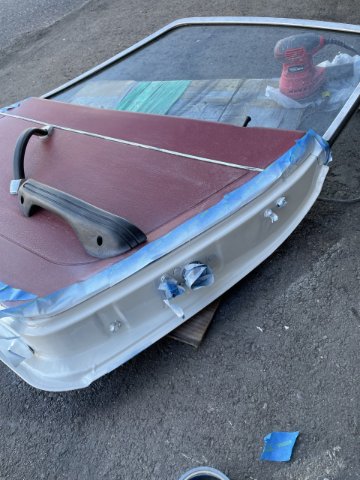
Oct 29 2021 update. I went ahead and put the clock in my dash and put the dash 1/2 cap on. Jury is still out on if it will look okay. One more step towards putting all of it back in. Here are a couple pics.
-
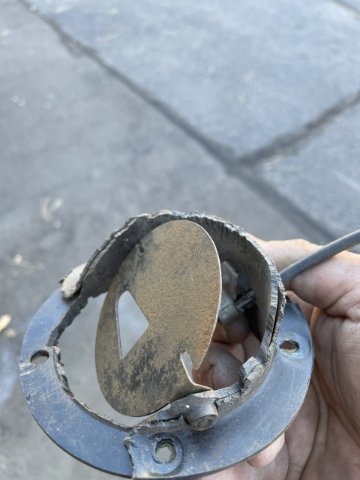
Oh, I found another pic of the dirt and junk from the fresh air vent. This is just the driver's side....the passnger side was the same. Glad it is done.
-
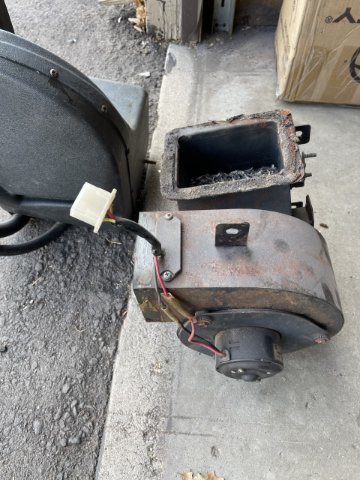
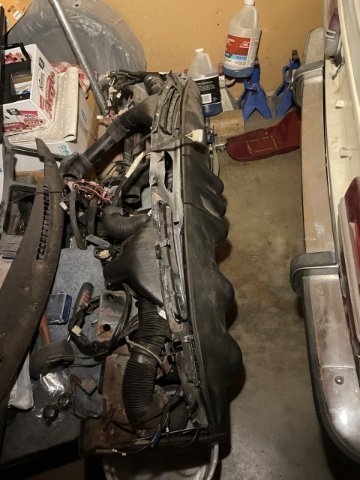
Ready to go back together. Now to get the stuff restored, and then go back in! Contortionist days are over for a little bit.
-
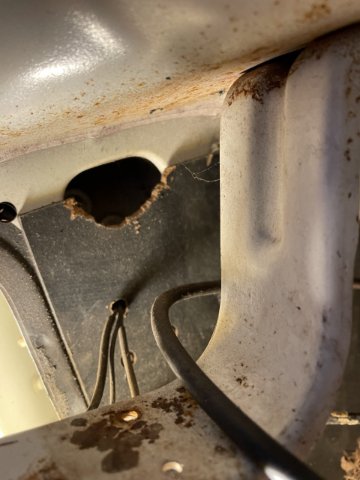
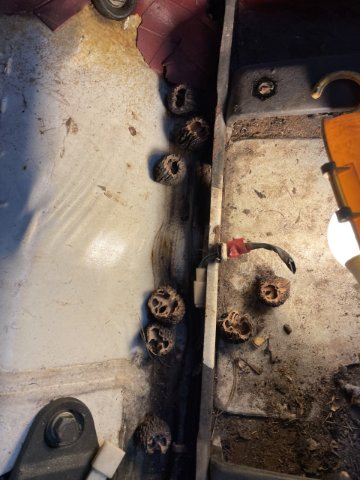
mice.....
-
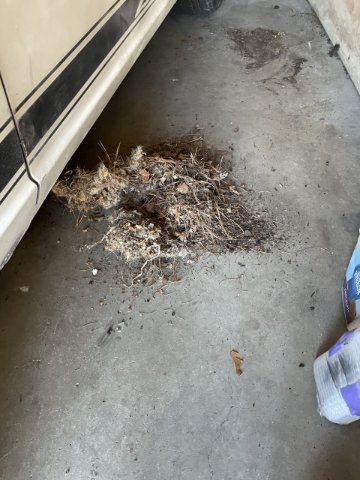
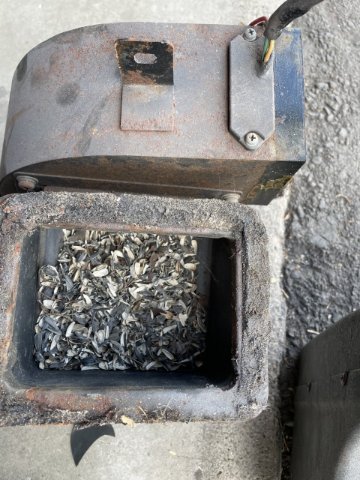
this is just some of what I pulled out....on just this side. The other side was the same. Those fresh air vents haven't seen fresh air in a LONG time!
-
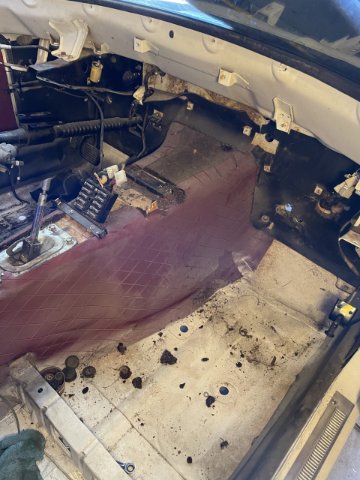
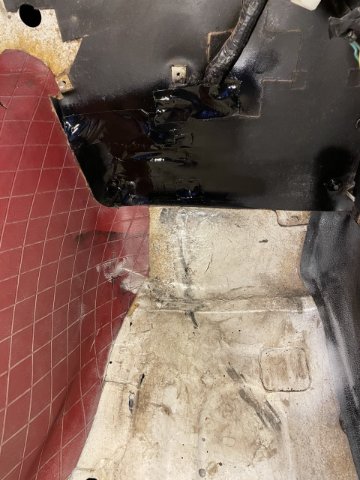
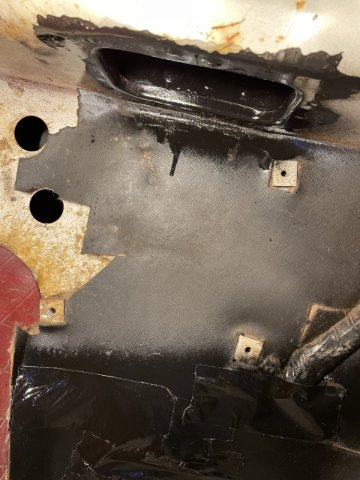
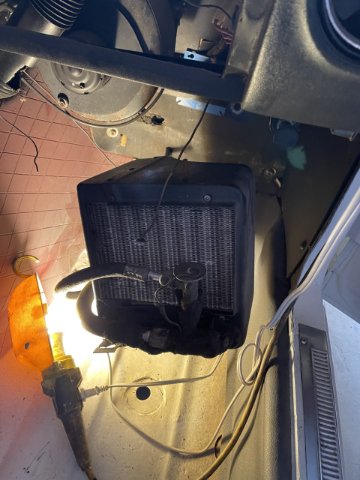
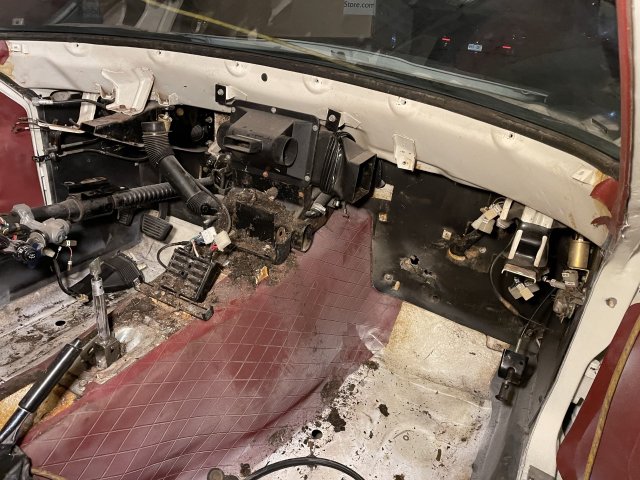
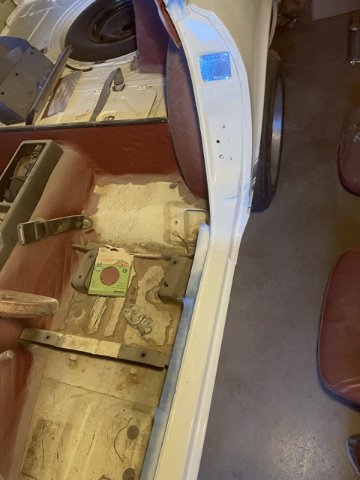
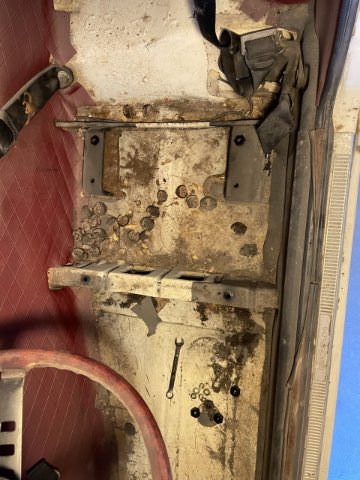
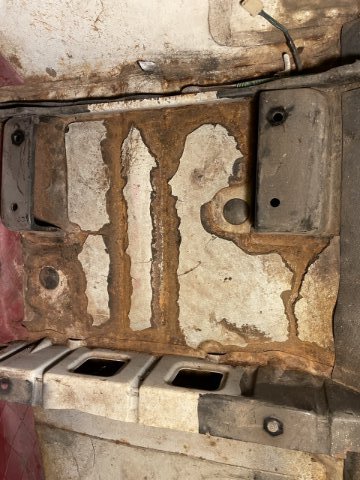
10-28-2021 UPDATE. Today was the day to pull the heater box and clean up the entire inside to get ready to put things back in when they are done. The fresh air vents on both sides were incredible. Absolutely STUFFED with dirt, pine needles, and mouse house stuff. the pic of the pile of stuff is just one side, NOT both! I also found more evidence that the little buggers were in there, the pics will show some of it. The before and after don't look like much, but it was a LONG day cleaning and cleaning. Oh yeah, the top vent for the heater intake in the cowl was rusty but no holes, I cleaned it up and painted it with some black I had. I could have masked it off I guess, but it is completely out of sight when the dash is back on. The portion in front of the passenger footwell, is where I used duct tape to fix the cracked and split insulation. By painting it back, it actually looks okay now. Here are some pics. First the beginning:
-
I have a half dash cap I am going to use.
-
LED Dash lights. Easy on the original wiring, less heat....AND much brighter? Jim Jeffers told me where he got his and gave me the part numbers. So I went and got some! You need: 7 of the BA9S-W-120-12VAC for the gauge lights (substitute the W with WW if you want warm white), 2 of the BA9S-G4-90-12 VAC for the turn signal sights in the dash, 1 of the BA9S-R-90-12VAC for the red BRAKE light in the dash, and 1 of the BA9S-B4-90-12VAC for the blue light in the dash for high beams on. THANKS AGAIN to Jim Jeffers for all the great info! Now to figure out the dome light, map light, tail lights, parking lamps, etc! As a retired electrician, I LOVE the idea of less heat on those vintage wires. LED Lights, Bulbs & LED Lighting Accessories | superbrightleds.com
-
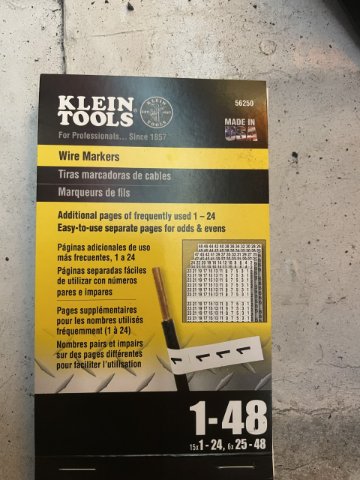
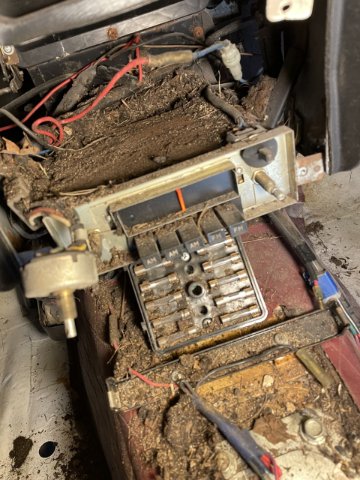
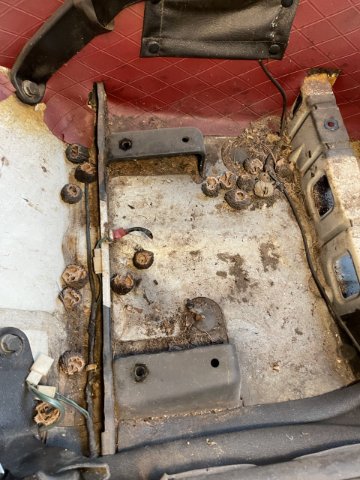
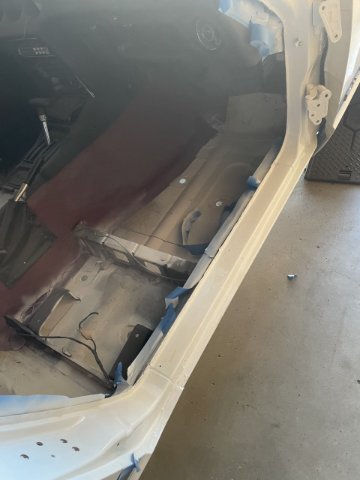
10-26-2021 UPDATE: Ok, I decided to heck with it and pull the whole dash! As I started I kept trying to talk myself out of it, but persistence pays off. As I am an old guy, and 6'2 and 250 LBS. there is no room.....it took me 4-5 hours, cut the hands up a bit but it is out! SO GLAD!!!! let me add a few..!!! I found a TON of dirt and crud in there.....I used the Klein Tools wire numbering kit to number everything. When you run out of numbers then you double up the numbers. The idea is that you don't spend the next 6 months un-crossing wires to get things working again. I want to say....there are a lot of guys giving absolutely GREAT info on doing this (google search), But I will add a few things to keep in mind. 1. It is NOT as easy as it sounds....2. You MUST mark everything. wait....I am being serious, mark it!..... And the best thing to do is, when it is 99% done....sit on the trans tunnel, and pull the dash out 8-10 inches and set it on your leg, and then mark and unplug the last stuff.....knowing, that you will, of course, put a blanket over the steering column and put it back together in reverse of this. NOW....you HAVE to , yes HAVE TO drop the steering column...at least on a 1972....the dash is bolted to it. Those bolts are 12mm.....everything else is 10mm....and THANK GOD there are no Torx bolts....all are Phillips or 10mm. You just have to be patient and mark every darn thing. WHEW!!!!! Well, I took SOME pics, hope they entertain. I tell you there was at least 2 inches of dirt and crap on top of the radio....the pic is AFTER I moved some of it. I had no idea....thus I am SUPER glad I pull the whole shebang. Now, I can address things such as .....LED gauge lights? (easier on the factory wiring) Heater hoses and valves? Eliminate ANY rust in the heater box AND blower assembly..any questions, PLEASE ask....I was SO hesitant to do this. IF A/C is on your mind AT ALL.....NOW is the time to make that decision. Let's do this ONE time, and do it correctly gents.
-
Thanks! I sure hope so.
-
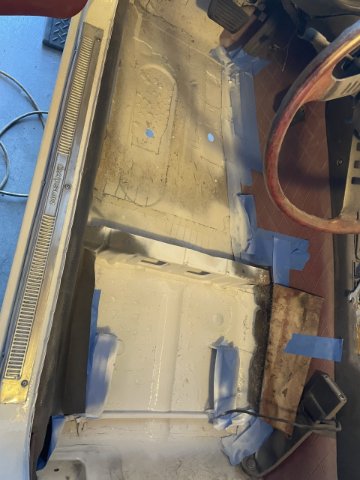
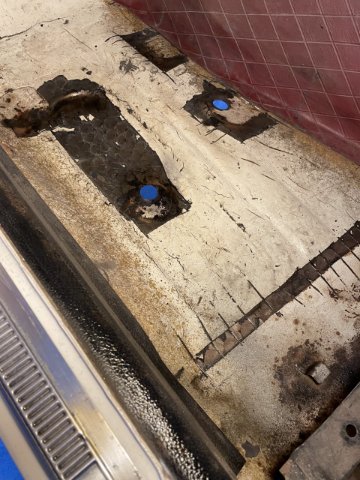
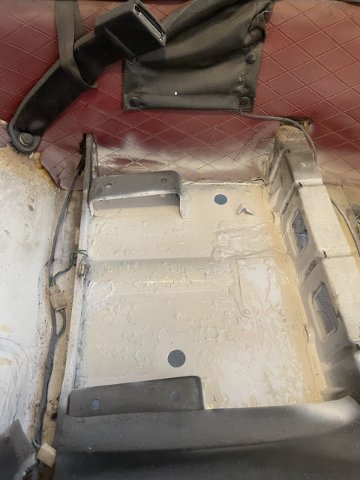
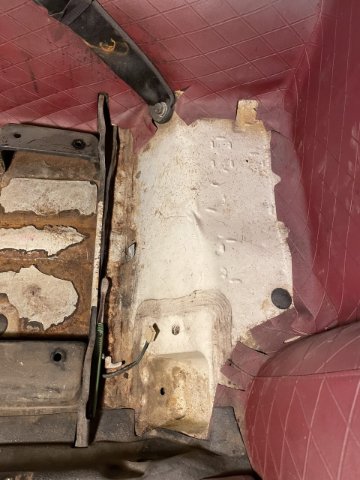
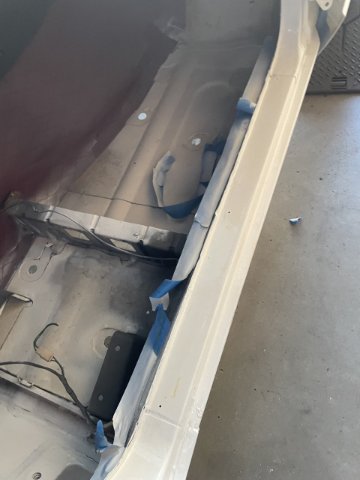
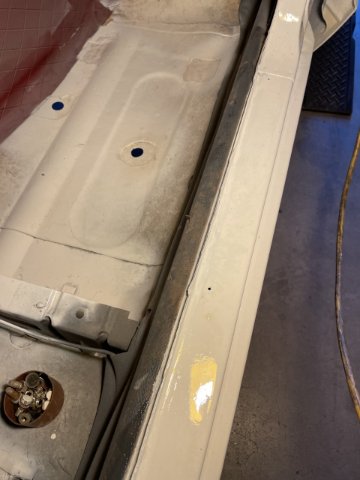
here is a pic of the drivers floor area after paint:
-
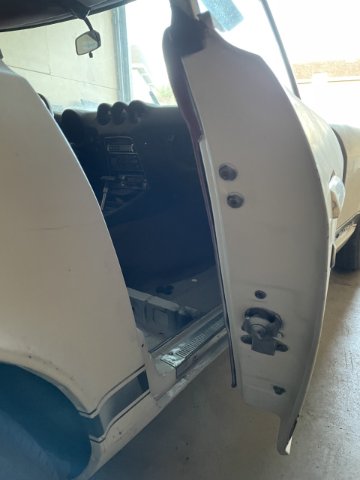
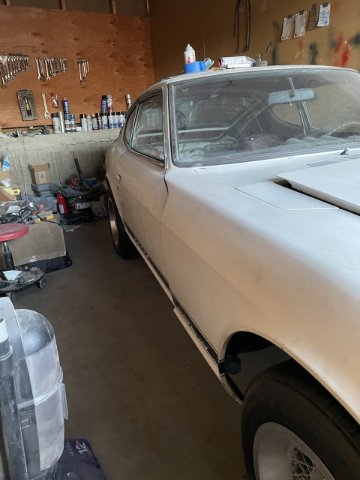
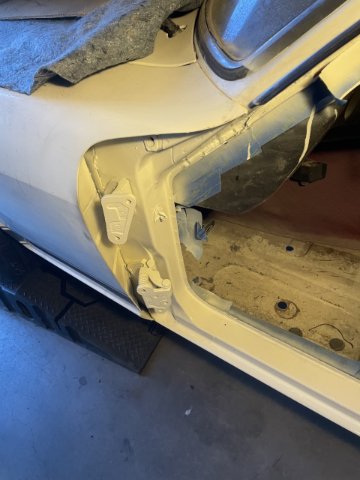
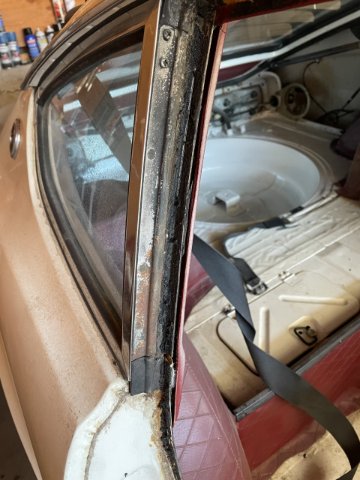
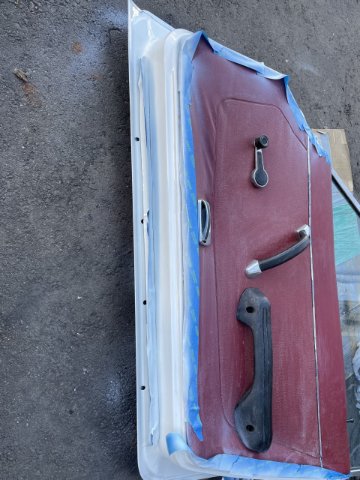
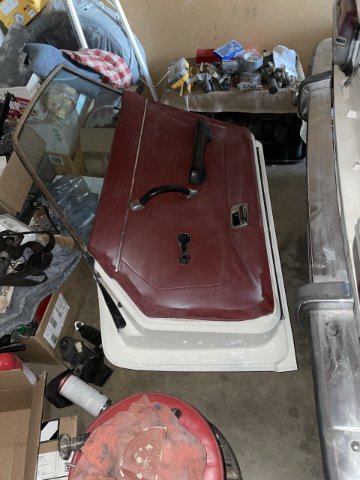
10-18-2021 update. Well my "goal" for today was to get the inner door and door jamb on the driver's side in paint, and get both doors back on the car. I was successful. I posted last night, that I was able to get the door jamb and inner door in paint last night, which was great, as the paint was cured just enough for me to be able to re-install. In addition to the doors and jambs, I was able to finish up the floors on the driver's side and got it in paint. I then slid the car in the garage over to where I could work on the passenger side. It is currently off the jack stands. Next, it's time to work on the dash and console. Then some interior vinyl painting on the faded sections of red, get the stereo and speakers in, then install the new interior panels and carpet after a through clean up. Plenty of work to do. After done I took some pics and the car looked grey for the dust from using the orbital sander on all metal filler around the gas filler door! Anyway, here are some pics
-
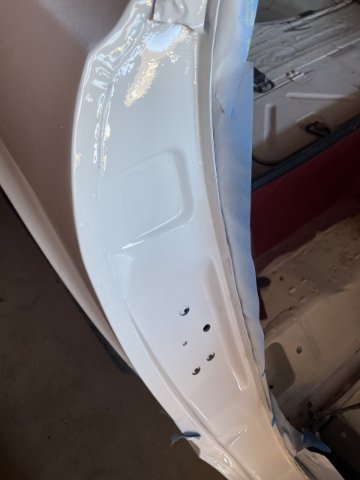
After work I got a head start on tomorrows work on the Z car. I went ahead and sanded up and prepped the driver's door and door jamb and painted it with the new clear which works SO well. I want to try and get both doors back on tomorrow, so I can finish the dirty work inside....then mop it out top to bottom, and start getting all my new interior pieces in. Here are a couple pics from tonight.
-
Thanks!
-
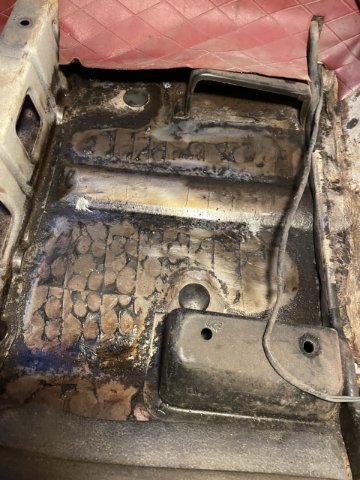
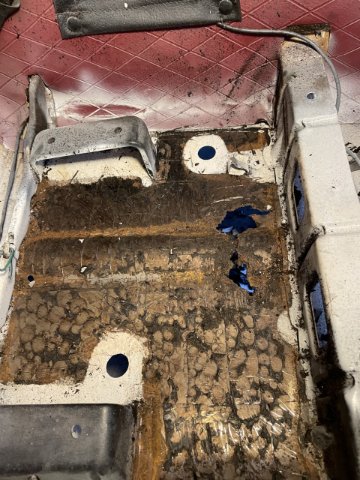
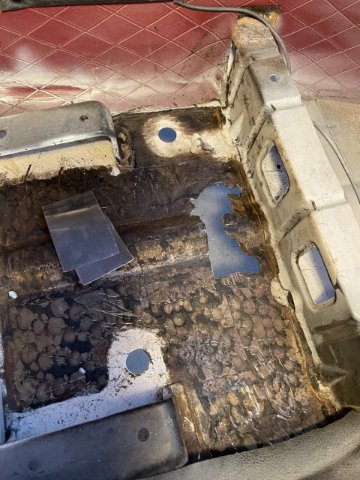
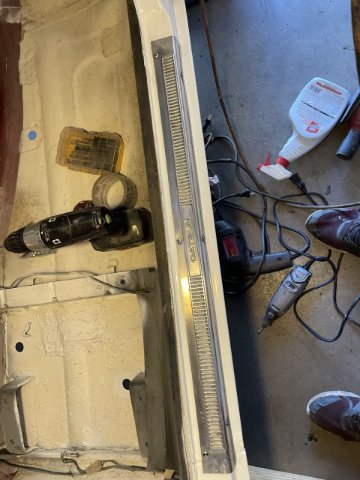
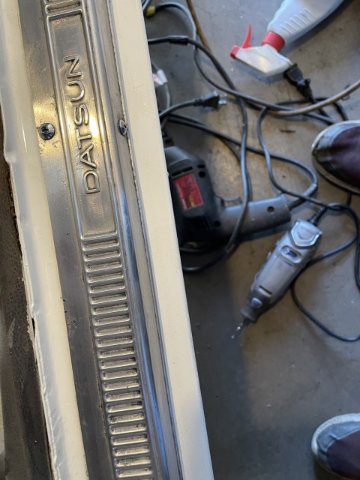
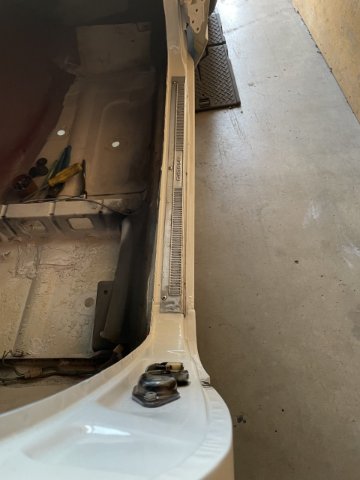
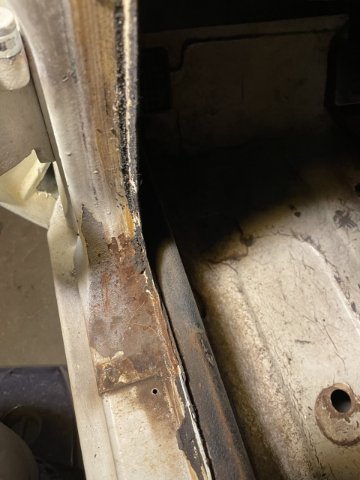
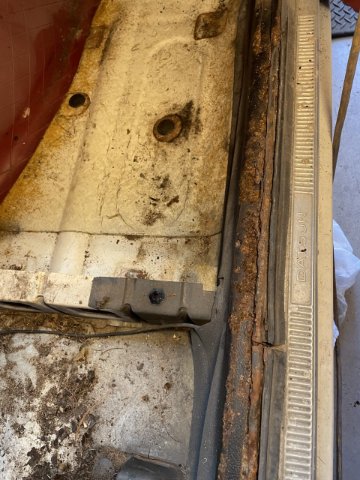
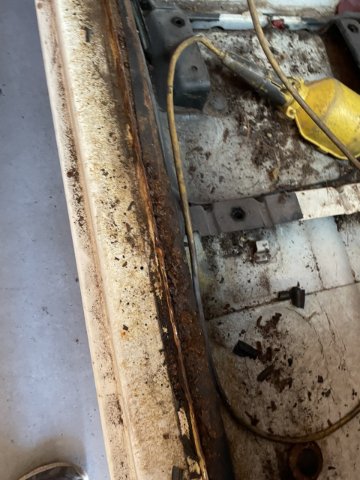
10-6-2021. Continued work on the floor and door jambs, doors, etc. Did rust repair on the passenger floor under the seat, cleaned and polished up the passenger side door sill, clear coated it and moved on to the driver's side. I got the door and seat pulled.....more mice residue. I got started on the floor, but it started getting dark, so I cleaned it up and now I will have a head start next time. tight single car garage. Here are some more pics:
-
This is the new clear I used. I love this stuff.....but at 20 bucks a can......and once it is activated it is only good for I think 36 hours max, you have to be ready to go with a lot of work when you go to use it! SPRAY MAX 2K Gloss Clear....****DO NOT USE THIS!!! IT HAS ISOCYANATES IT IN, IT IS VERY POISIOUS, IF YOU BREATHE IT, IT CAN KILL YOU. **** I used it today and it screwed me up a tad even just a hour maybe 2 with a mask on (dental mask). VERY bad stuff. Please read and heed. Amazon.com: USC Spray Max 2k High Gloss Clearcoat Aerosol (4 PACK) : Automotive
-
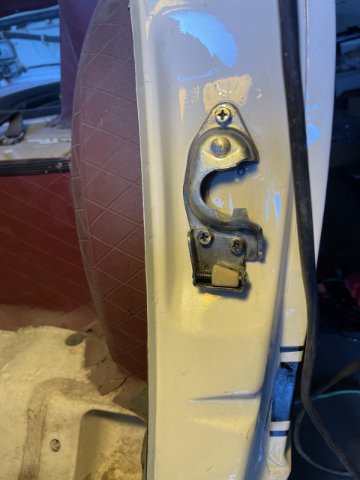
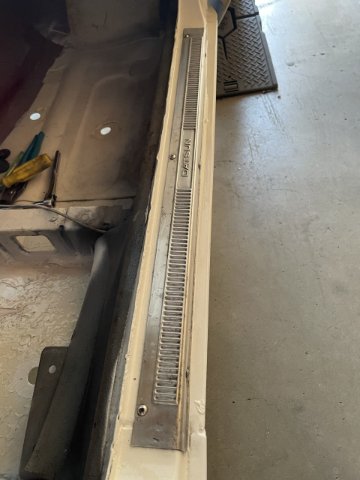
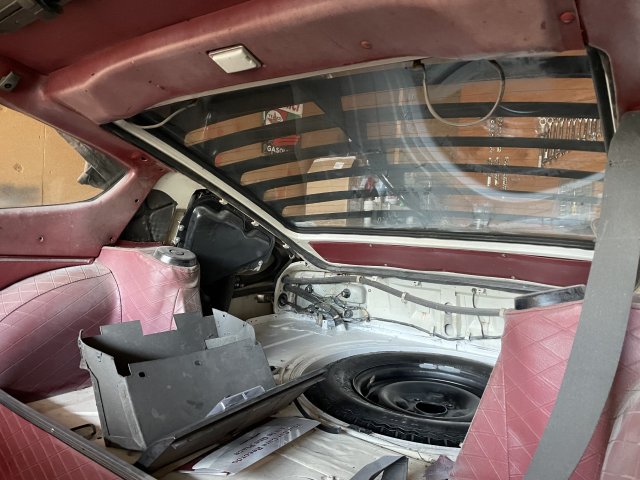
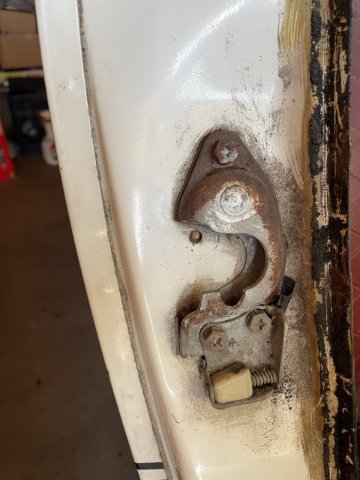
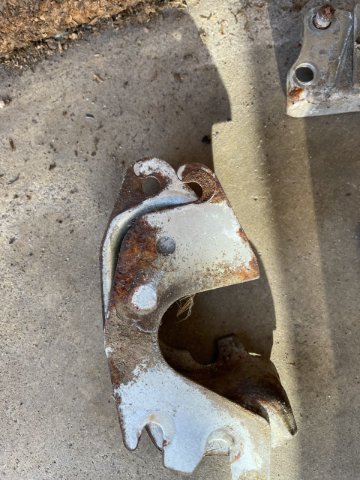
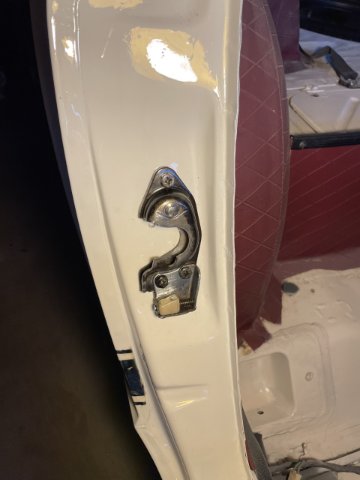
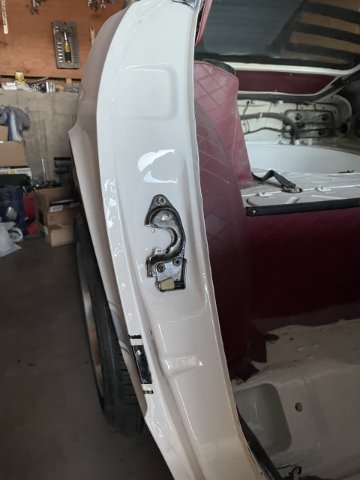
10-4-2021. Productive day on the Z car today. Pulled the passenger door, pulled the seat, floormat remnants, and cleaned and cleaned it. Mice??? 3 rust spots I had to repair. Removing the door seal was a dirty crumbly experience. A little painting on the floor to cover some bare spots, and then I concentrated on the door sill and door jam. This was a chance to try out the new clear coat I got from Amazon. 2 part clear, you push the bottom button to release an activator into the clear, I assume it is the catalyst, as it is 100 times better than the ExpressPaint non catalyst clear. VERY glossy shine. After I got the door latch cleaned up, I remounted it and gave it a coat of clear too! I love the look it gave it. As you can see from the pics, I masked and painted the inner door areas. Oh, and the spare tire. Never used original spare. But VERY rusty on the inside. So, I wire wheeled it out, and got the whole deal painted up and ready to go back in it's hole. Also painted up the carpet retention clips, and took a pic of the rust on the sill cover piece. Here are some pics to go with your coffee.
-
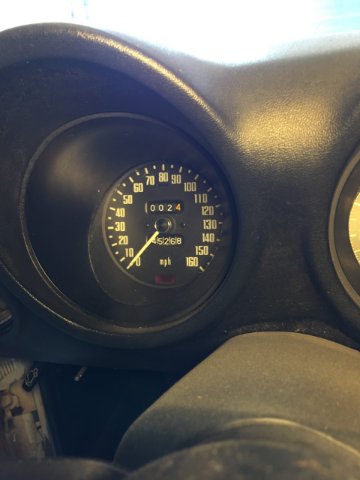
Ah......that feeling when you verify it is original miles:
-
Thanks. Progress is being made.