-
Member Statistics
33181
Total Members5167
Most Online
All Activity
- Today
-
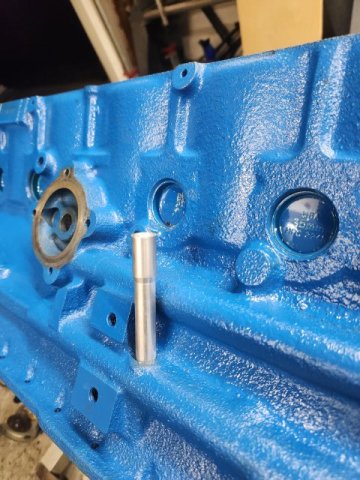
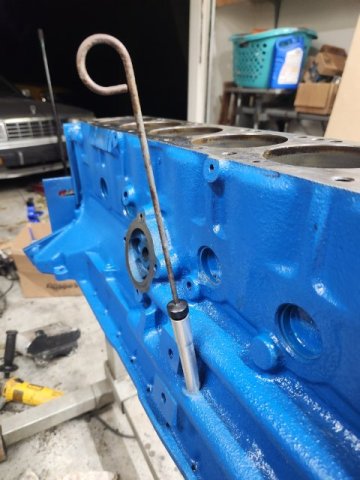
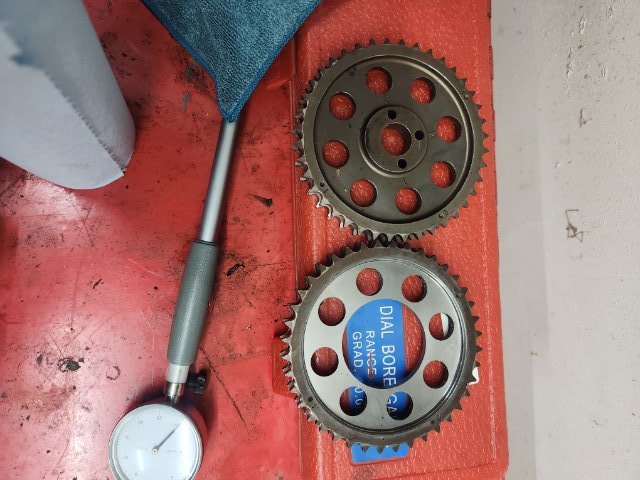
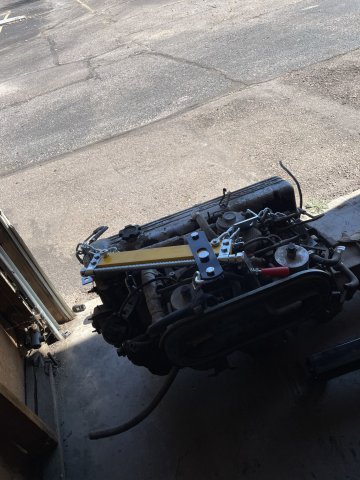
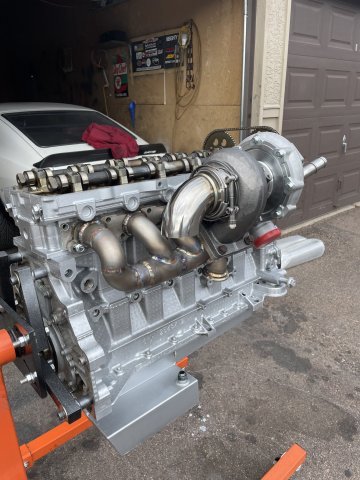
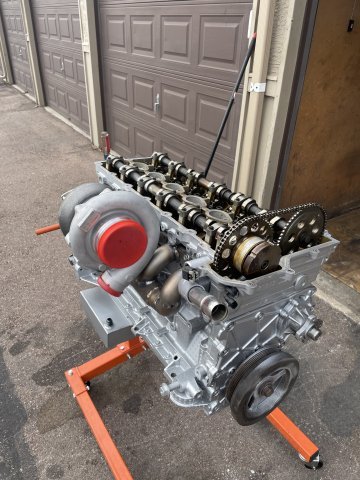
Well. The above mod worked and its now front jumped. Had to make a new dip stick tube and then I started on making an adjustable cam gear. Turned the inner bore out and faced the rest so ill have a good flat surface for the aluminum inner hub to bolt to. I realizing noone answers questions on here anymore and people just use it for documenting their builds. Its really sad.

-

A musician's therapist (The $300 Z)
Zetsaz replied to Zetsaz's topic in S30 Series - 240z, 260z, 280z
Feels like the options for smaller wheels are just becoming impossible to find, at least in the US. Europe and Japan still have lots of small new cars, so I think they have a couple more options. Even the more popular size Miatas use in 225/45/15 I can only find in 200tw, but they're so much shorter than stock, I think they always look terrible and out of proportion on the Z Potenza sport looks okay. I think the 052 is out of the question as a 200tw, but moreso because of the cost. I'm trying to keep it under $200 per tire so I can spare some change for the wheels. Right now I'm thinking of the Continental Extreme Contact Sport 02. They're 340tw, but supposedly slightly better on the comfort than most other options, which I have started to care more about now that the car is much nicer haha. Know the Toyo Proxes R1R are popular for some guys running 16s, but they're only in a 225/45 profile. I appreciate the support! I know many posts have nothing people can really respond to, so sometimes it feels like you're just typing into the wind, so I appreciate that people have been enjoying the build all these years. -
All my wheels are 15" and 16", so I can definitely feel your pain. Have you looked at the Yoko Advan 052? They make it in a 245/45-16 size, and it's pretty high performance. I'll probably get myself a set, once I talk myself into the that high pricetag. 😜 I've been running the Bridgestone Potenza Sports (300tw) in that same size the last couple years; and have been fairly impressed with them. Great street tire, wear like iron, and can even put in decent trackday lap times with them once they've got some heat in them. Your car's looking great....I love seeing the updates!
-
A musician's therapist (The $300 Z)
Zetsaz replied to Zetsaz's topic in S30 Series - 240z, 260z, 280z
Update - The Kumho tires I was using as a street option are no longer available. It looks like the only tire options in 225/50 are all 200 treadwear or under, so basically track only. I'd be interested in a couple of the 200tw options, but it seems like a lot of wear and expensive for a cruiser, so it looks like moving up to 16" wheels is the only option now - Yesterday
-

Fast Floridian's 240Z Track Build
FastFloridian replied to FastFloridian's topic in S30 Series - 240z, 260z, 280z
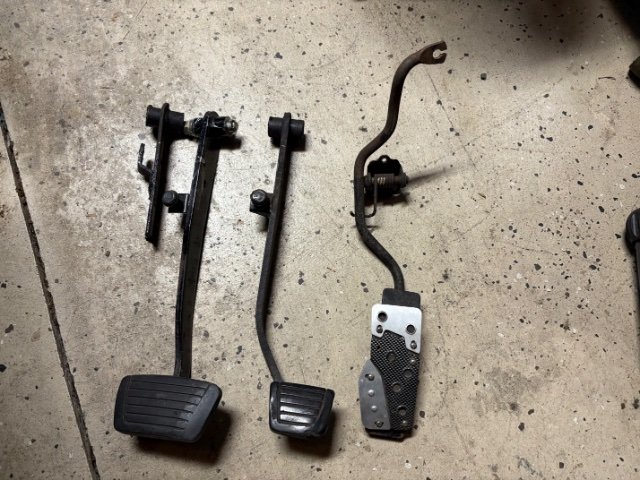
Got a few small projects done. Got rid of the weird clutch pedal contraction. Ordered a brake pedal to be my clutch pedal. Had to trim it down as it was for an automatic. Welded on the side clip for the clutch slave cylinder and took all the pedals out and painted. Also cleaned the underside some more, I want to get that painted soon.
-
awoodward3d joined the community
-
A musician's therapist (The $300 Z)
Zetsaz replied to Zetsaz's topic in S30 Series - 240z, 260z, 280z
Not much to update on the car. Slowly thinking of the next batch of improvements. The struggle now is it's mostly in a really good place, so short of spending huge money on something like a change over to a Haltech R3 to control everything there's not too much. Current "smaller" considerations are the following: -Cam swap to a "small" Steve Bonk turbo cam - the lobe center/lobe separation on mine is just too wide for what I want. Bonk cam would get me more responsive in the low to mid range, with probably only a small sacrifice at higher rpm where I spend almost no time anyway. -Swap to my 3.57 r200 and rebuild with the OEM kit and OS Giken LSD I have waiting. Should give me better cruising rpm and supposedly better loading on the turbo for improved boost -New tires (and new wheels?) My tire options are just so limited for tires or something a bit more street friendly than 200tw that moving to 16" wheels might be the best solution. I'm now thinking that most of my road noise complaints are actually the current tires being near the end of their life. They've been on for years now and I think it's time to finally switch them out no matter what. -Switching back to the OEM style front diff mount with a Kameari piece, and possibly even the OEM mustache bar. There's a small chance the T3 bar is fouling against the spare tire compartment and adding to drivetrain noise, but it also just feels like unnecessary bling. Looks great from underneath, but might be wasted money. -
A Chinese Metal Fabrication Company is planning to unveil a Brand New complete Early Model 240Z body at the 2025 SEMA SHOW in Las Vegas on Nov 4-7. They are looking for Distributors in North America. https://www.instagram.com/reel/DOxdQynjijn/?igsh=MWk4N280Nm1zOXI= I will be attending the SEMA SHOW and will post pictures and more information when I return from the show. Please watch for my post show postings- Tool Man
-
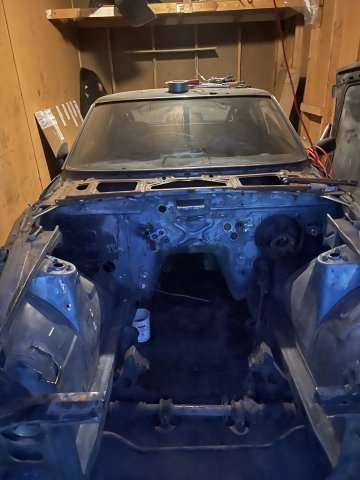
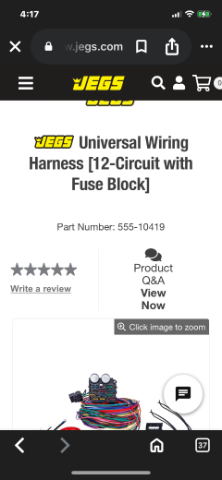
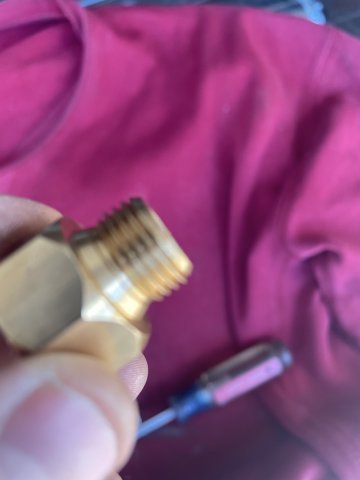
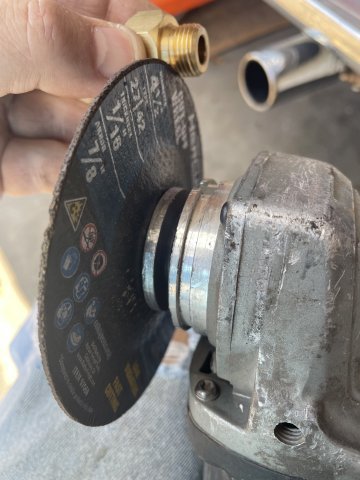
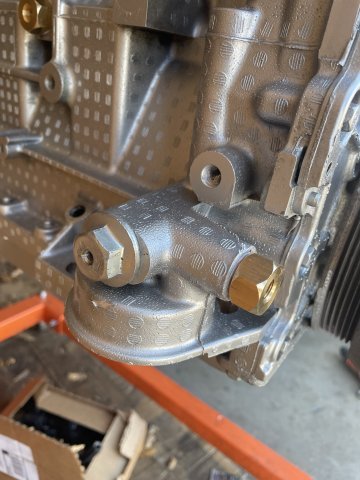
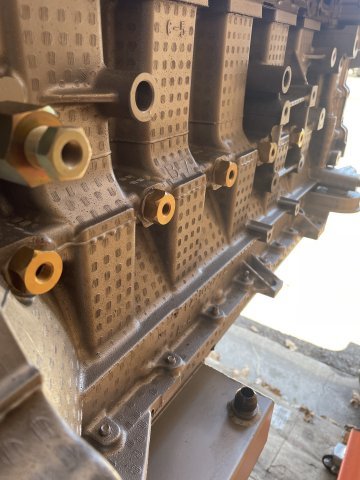
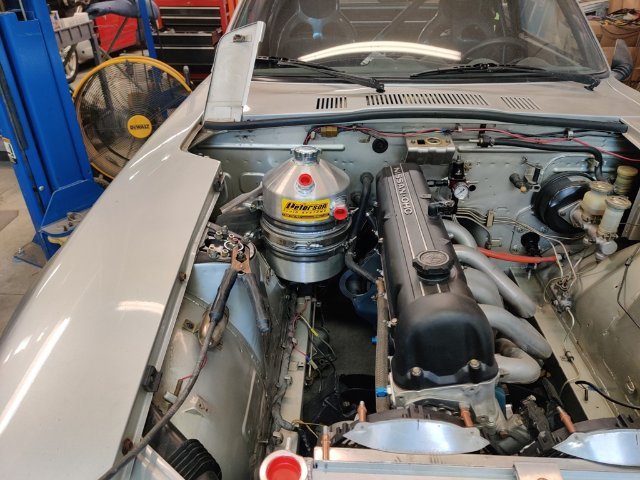
Today I got a good start on the engine compartment, and also fitted the brass oil port screws to the 4200 block. The engine compartment will be factory color, with clear coats, and the engine compartment will be shaved, I also went ahead and bought a rewiring kit for the car form Jeg's.
-
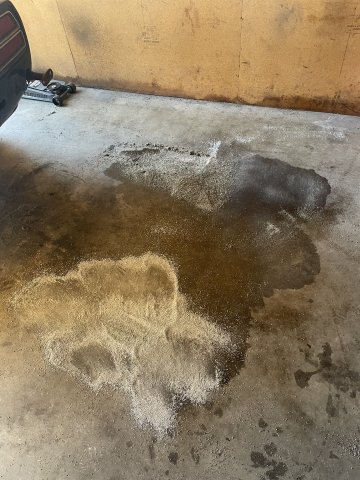
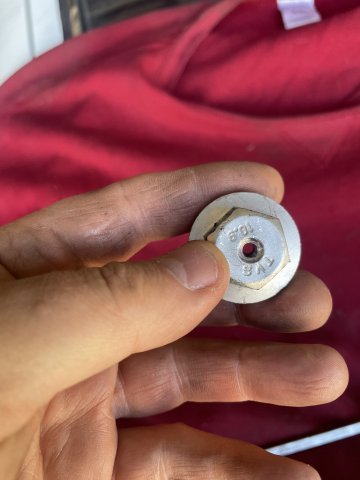
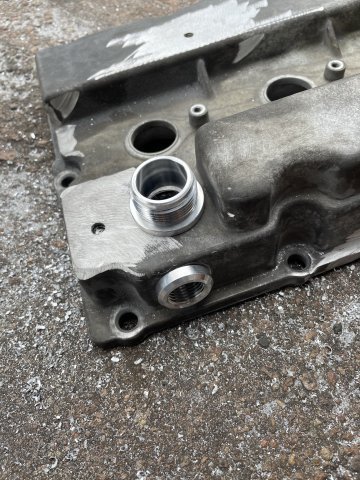
I started the day with some kitty litter and cleaned up a big oil spot from the gear oil int he transmission when I pulled her out....yeah I didn't drain it. So, the brass fittings I bought to go into the side of my 4200 block for the oil ports I bought from Auto Meter. They were almost long enough to thread in. Then I noticed there is a stepped portion at the base of the threads. I used my die grinder carefully and ground that down, then I was able to get them in and gooped them up with pipe thread sealant to make it worry free. Then I was able to locate a bolt that would thread into the port on the side of the oil filter boss. I cut it down so it would tighten up flush, then drilled the center out. Once I get my 1/8" NPT tap I will tap it and it will become the supply for an oil pressure gauge.
-
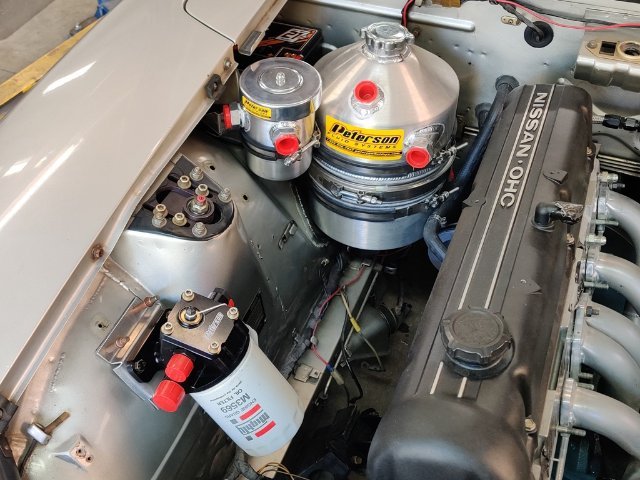
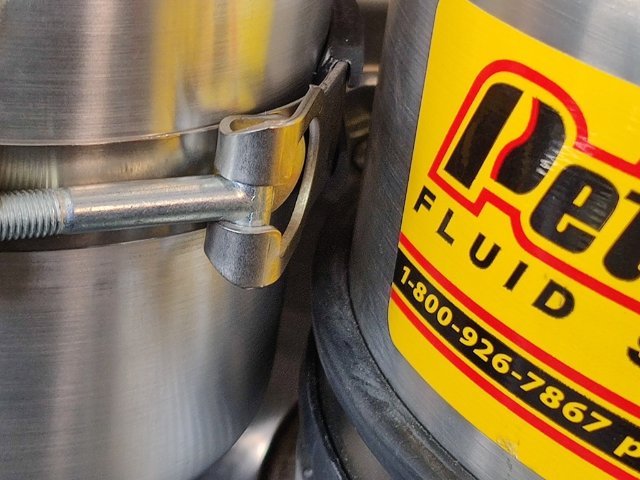
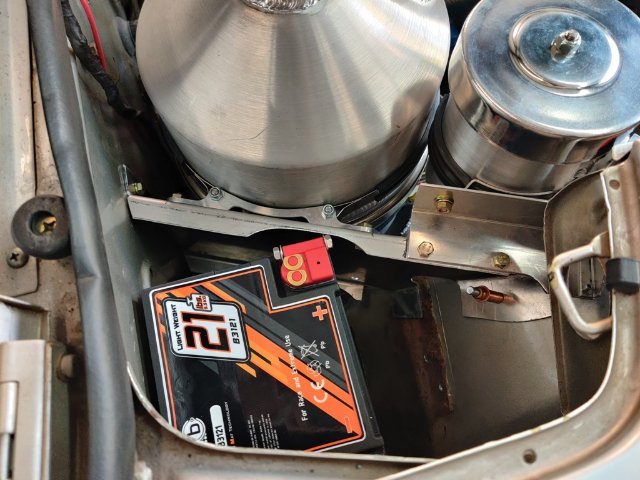
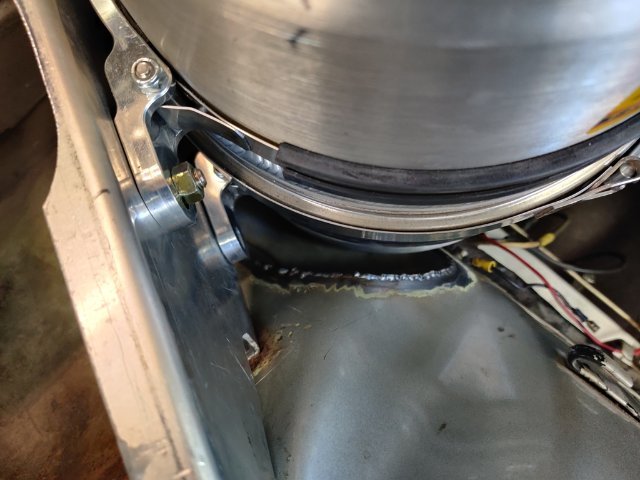
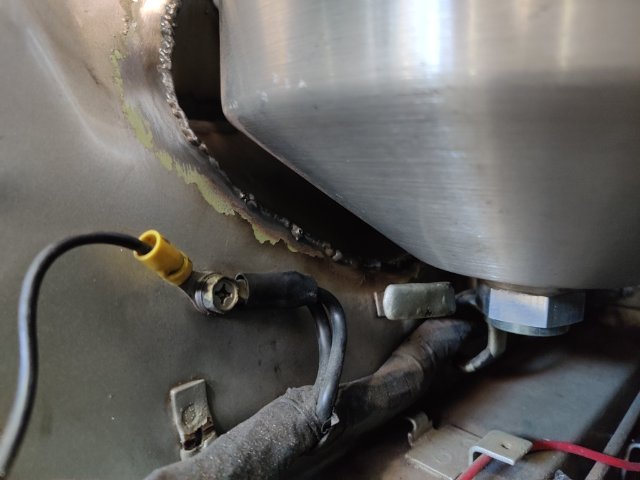
Next up, is mounting the the breather reservoir. Things are tight... very tight. But I think this location will work. I was able to use a simple "L" shaped bracket, bolted to the top flange of the bracket I used to mount the tank. It wasn't very rigid... until I tied it into the vertical steel panel that drops down from the inner fender support. Now, the main panel (and breather tank bracket) is secured on three of the four sides. I am pleased with the result. I just need to tweak the mounting tab locations every so slightly to get everything vertically set at the proper angle - it is a shade off at the moment. Though a pain, I can remove the battery without disturbing any of the oil system. This was one of my requirements when coming up with mounting the brackets. Now, it is time to finalize the order for the fittings.
- Last week
-
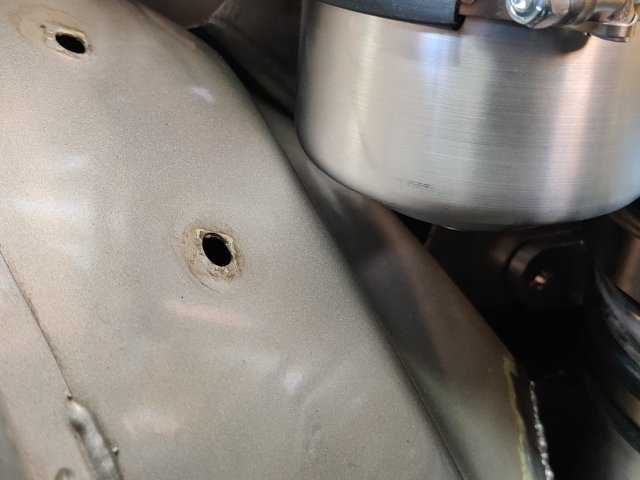
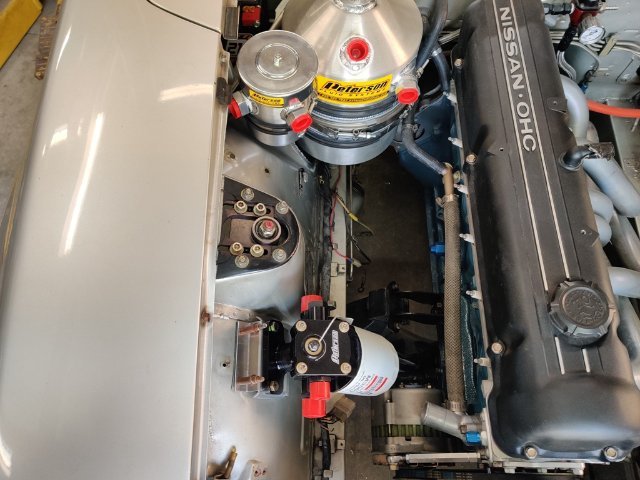
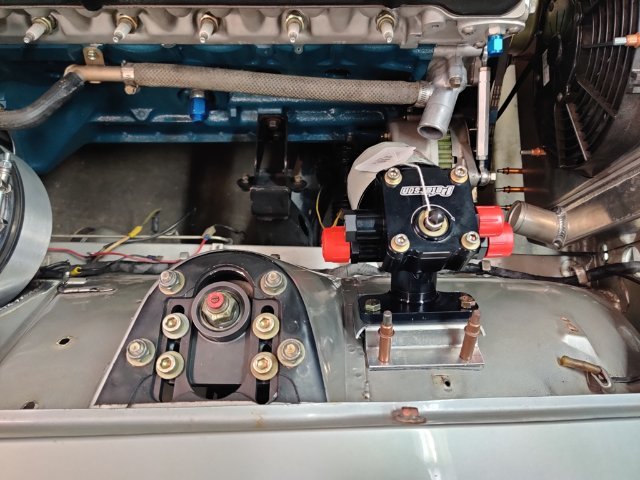
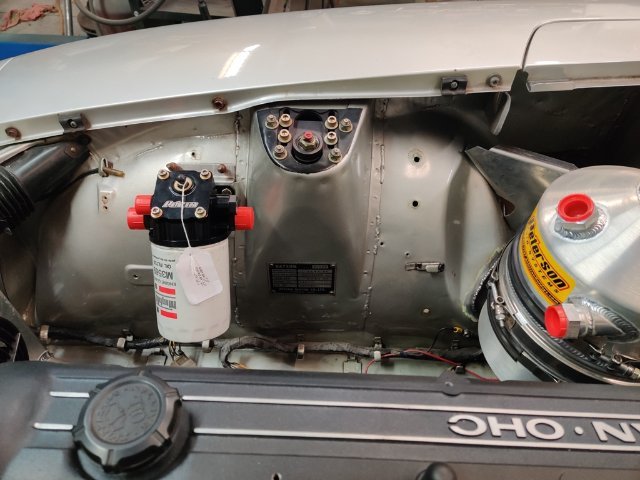
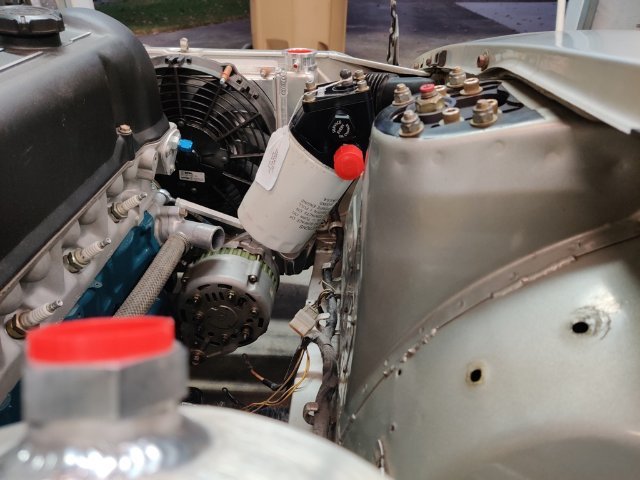
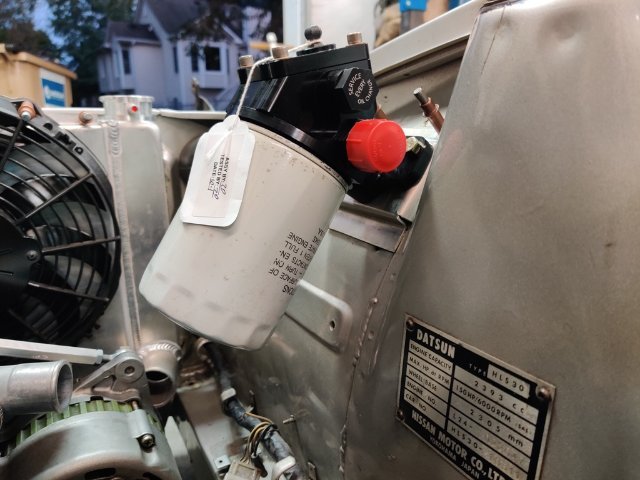
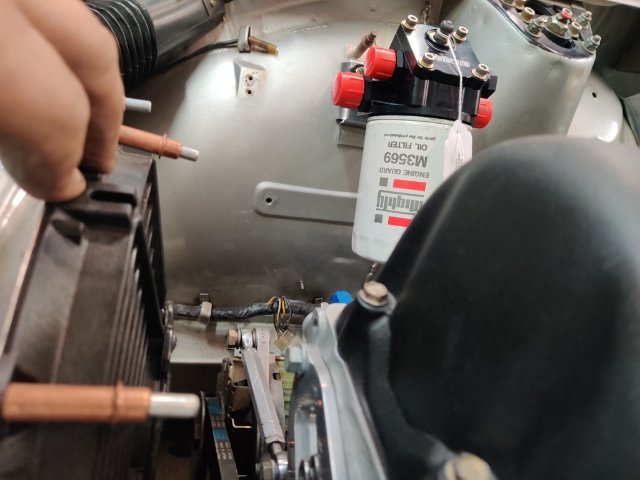
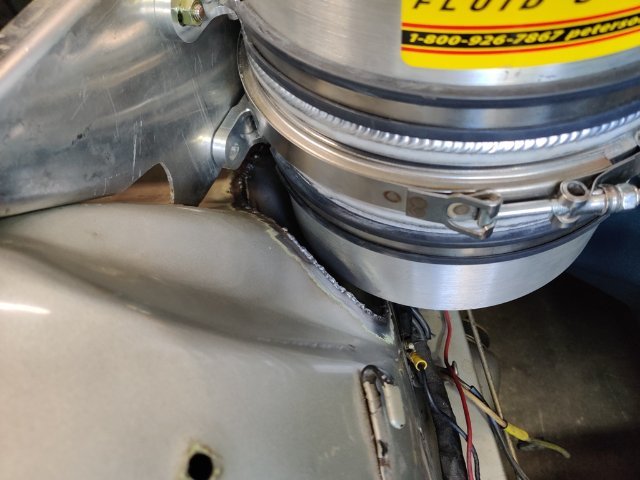
Next up is the oil filter remote mount. I fabricated an aluminum bracket to attach the mount to the right inner wheel house. On the 46 BRE Z, the mount is on the inside of the strut tower. I wanted it to be a bit more forward in the engine compartment, as I think that facilitates a slightly better routing of the line from the "out" of the remote mount to the input on the engine block. Essentially the line just needs to turn 90 degrees to go into the block, plus some angle to handle the height difference. Here are some pics from various angles. I am planning on running the supply and scavenge lines across the front of the engine at the front "cover plate" location, where I am running a Kaminari timing chain tensioner. I could fabricate a bracket to mount the oil filter more vertical than I have done here, but I chose this angle to keep the outlet tangential to the shock tower innermost surface. I plan to secure the hose with a rubber lined "P clamp" at the shock tower and then bend the hose for a straight (ish) run to the block. I also am thinking that angling the oil filter out like this will allow me to run the scavenge line between the wheel house and the filter (in the gap that exists) and secure the scavenge line also to the shock tower with a P clamp. If the oil filter was vertical instead, the scavenge line would have to pass by the filter on the other side, where it would be free floating - not as easily secured. That is my thinking anyway. I have never run lines like this for a dry sump system. So, doing what I think is best.
-
This video shows how Japan handles Automobile Recycling. They are very thorough at recycling. the video shows how effective recycling can be instead filling up land fills with waste materials.
-
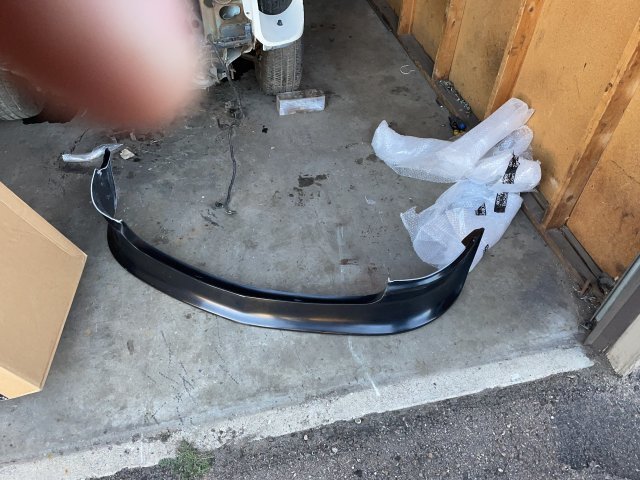
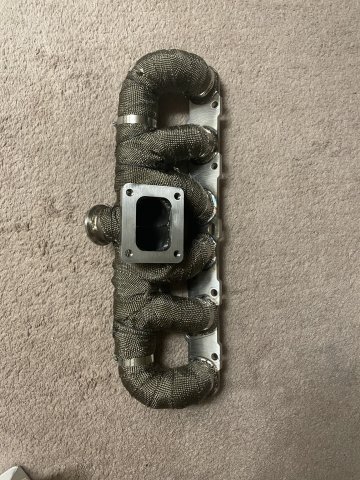
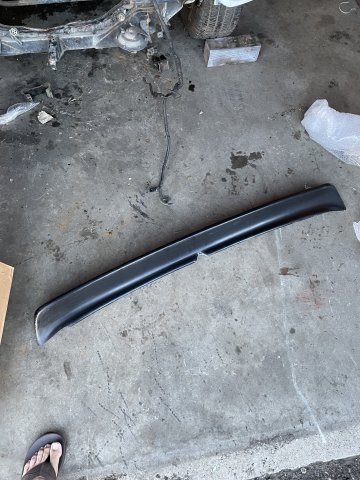
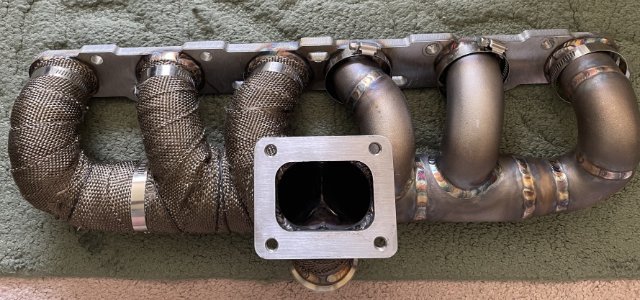
Well my air dam and rear spoiler for my 260Z came in from Motorsport Auto (MSA) today! Replaced my new engine hoist that bent under weight at Harbor Freight, and finished up the turbo manifold header wrap for the 4200. Pretty cool day!
-

My Z car log....small jobs done and fun things
A to Z replied to A to Z's topic in S30 Series - 240z, 260z, 280z
Well my air dam and rear spoiler for my 260Z came in from Motorsport Auto (MSA) today! Replaced my new engine hoist that bent under weight at Harbor Freight, and finished up the turbo manifold header wrap for the 4200. Pretty cool day!
-
 Low Zee En joined the community
 -
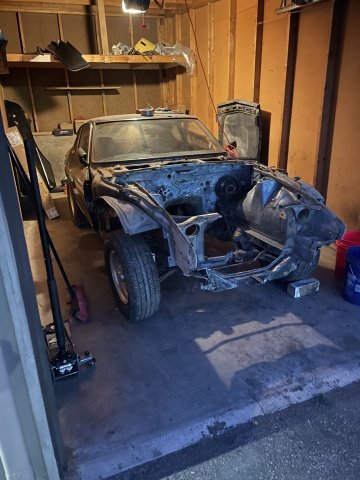
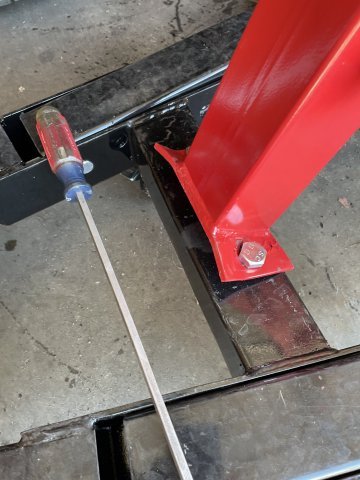
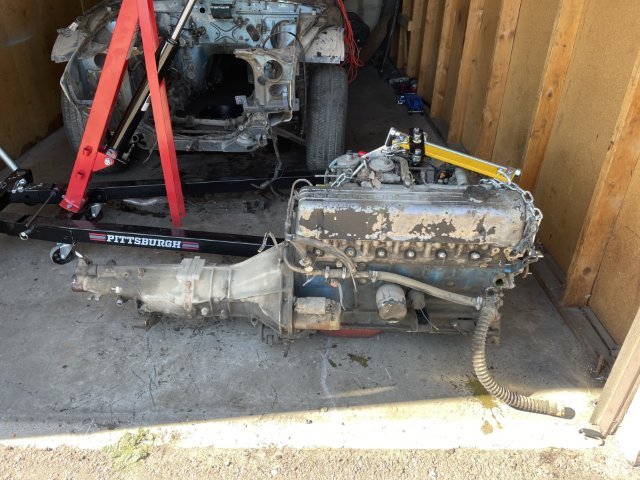
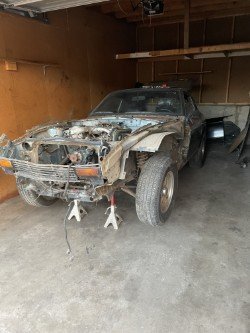
10-15-2025. Busy morning in the garage. My 260Z gave up its engine and trans to make way for a future ATLAS install. And yes, it fought me A LOT. My new Harbor Freight hoist gave out midway through, but I got it to limp along with 2 floor jacks and a neighbor guy to basically wrestle it out. From now on, engine only....no more transmission attached for me. Yep....I cut the firewall bracing. It was my plan to do so anyway, and to reinforce and make it removable. I measured before cutting it and sure enough it widened 1/4 inch after cut. After I have made the brackets for re-installing the piece, I will simply use a ratchet strap to pull it back to the correct distance and bolt it in with grade 8 bolts. All nice and pretty. reinforced with thick plate steel. Inside the tubing I will put a spacer for the bolt to go through so when tightened it will keep the tubing from buckling. We move forward!
-
Thanks jhm. Probably get a lot of mean looks taking such a clean shell and making a hot rod out of it.
-
 Mike_LA joined the community
 -
Nice find! I really lucked out with my late-model 260 as well (similar vintage and condition as yours), and was super happy with the condition of the shell. My current car (early-model 260)....not so much. 🤣 Looking forward to seeing your progress -- best of luck with the build!! 👍👍
-
That's Merle. He still has it. He got it running, and all is well. In the 6 cylinder portion of this webpage is the build of my 4.2. got a good start on the header wrap for the 4200 today. ran out so waiting for more.
-
got a good start on the header wrap for the 4200 today. ran out so waiting for more.
-
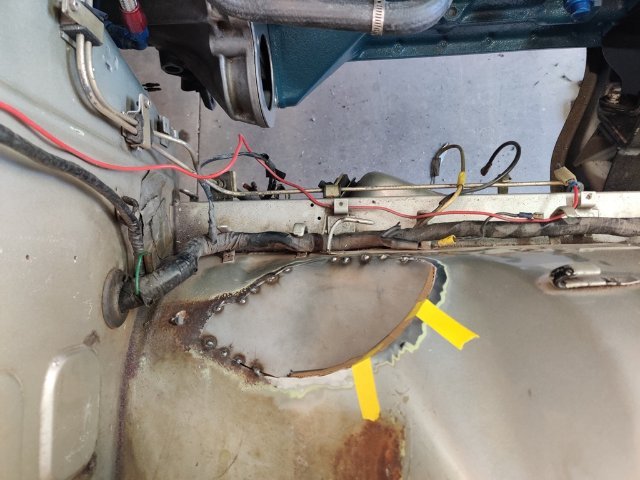
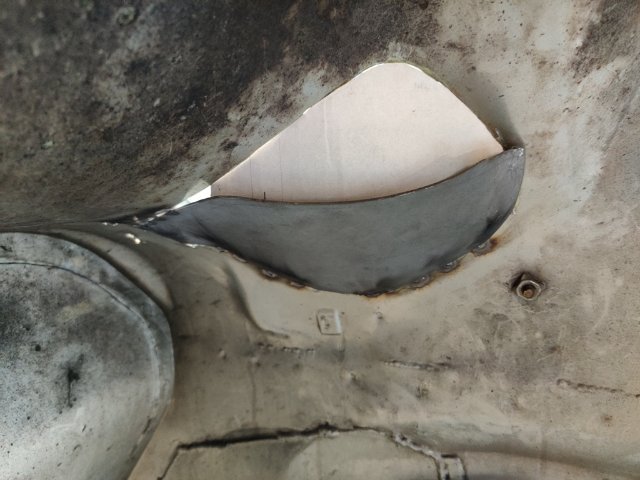
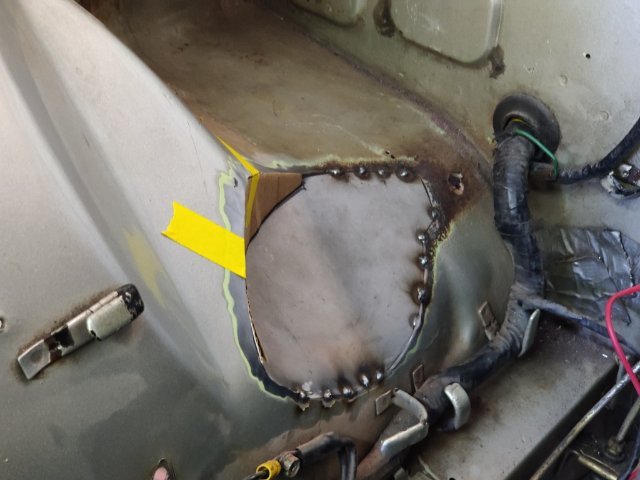
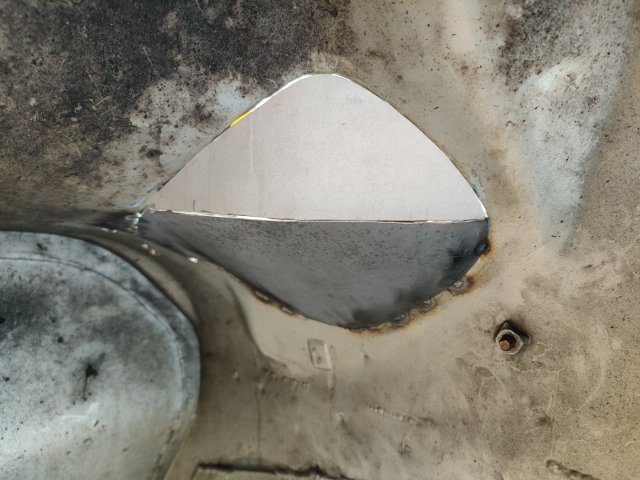
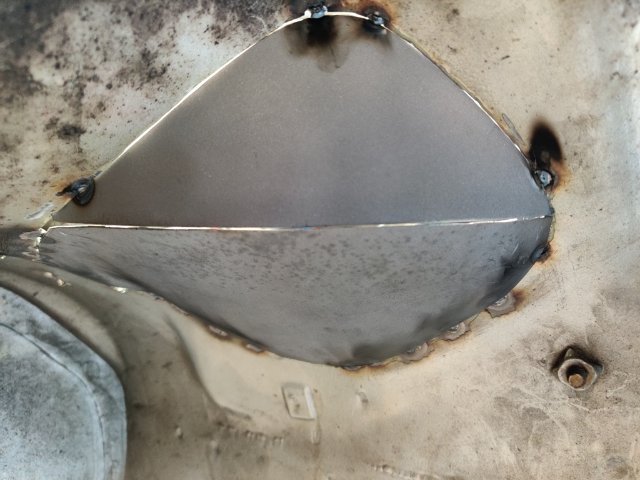
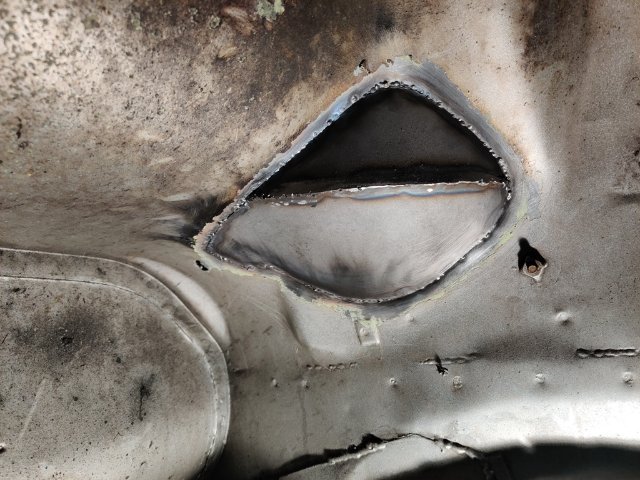
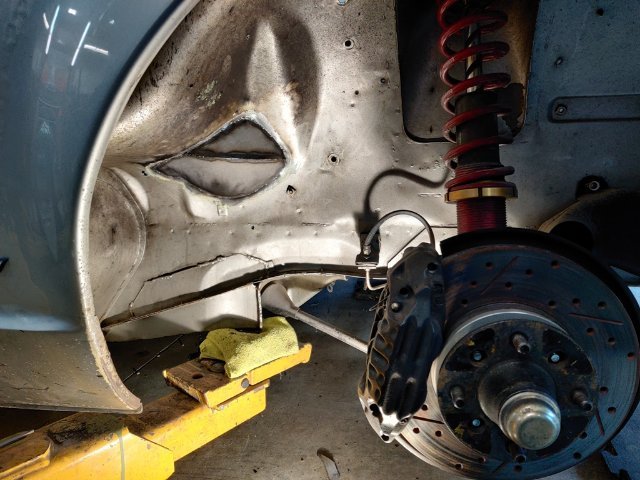
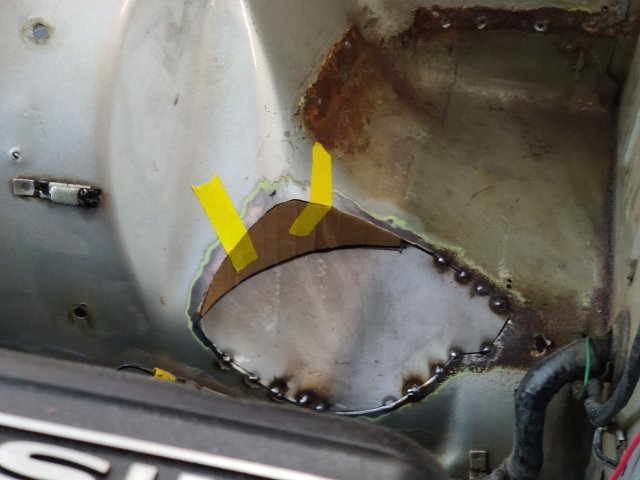
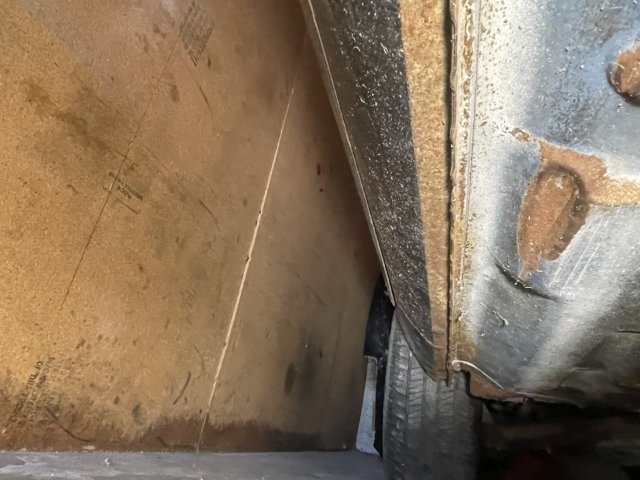
This past weekend I made some more progress. I worked on cutting the right inner wheel house, made two new panels, and welded them into place. I used thin cardboard to make templates for the two replacement panels. After tack welding the lower panel in place, I made the second, upper panel. I checked tire clearance, and then finished welding them in. I think my welding regulator is inaccurate. I was getting some contaminated welds until I bumped the gauge up to 27 psi (I have always used 20). Once I bumped the pressure up, the welds got a lot better. Metal fabrication like this always takes me a long time to do. I am glad this part of the work behind me now. I ordered a remote filter assembly and mount, and a breather tank this week end. They should be here in a few days. Then I should be able to finish up my order for XRP fittings for the entire oil system. I plan to buy the fittings and install them all so I can check/set orientation. Then I will buy some corrugated pool hose for the purposes of mocking up the lines. I will cut it to fit for each hose assembly, and then mark the hose and fittings to "clock" them in the correct orientation. Finally, I will box all of them up and ship them off to have an XRP distributor install Pro Plus Xtreme hoses with crimp on fittings.
- Earlier
-
I've been considering the 4200 as well. I'm glad to see another build. I youtuber got all the way to tuning his but gave up after he couldn't get it to idle. It looked sweet though.
-

Ls1 swapped 280zx exhaust issues
nismoluv replied to bajajoas's topic in Gen III & IV Chevy V8Z Tech Board
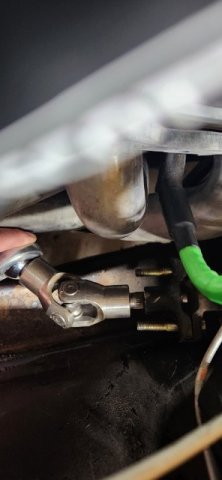
Today I made more progress. To improve the angle I had to chop off more than I wanted too, and remove the rag joint to get that extra inch. Here is a photo of the unfinished angles.
-
-
-
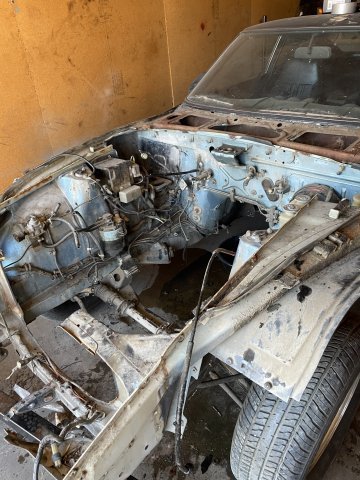
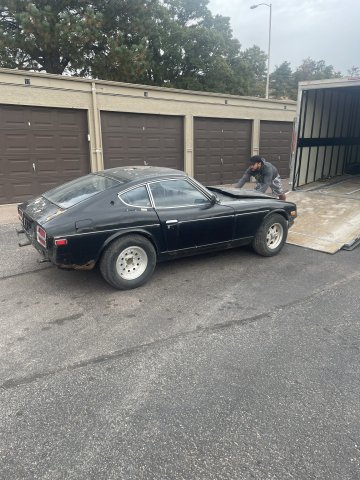
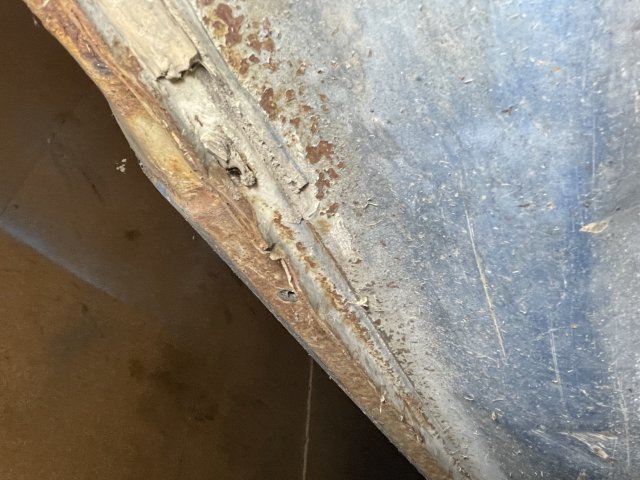
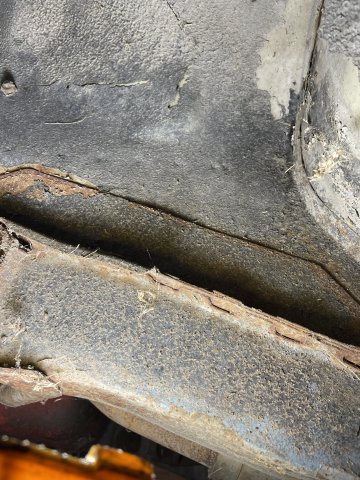
I have been building my ATLAS 4.2 for a little while now, and I have an AR5 transmission from a 2WD Chevy Colorado truck for it. I found a good deal on this Z car online. 1974.5 260Z. The "Big Bumper" 260Z car. Build date of 10/74.....so it's really a 280Z to me as the drivetrain is going away pronto. I love that it has the thicker sheet metal in the subframe and all those extra bends in the floor, that is more rigidity, and it already has the R200 rear end with the 3:54 gears I wanted to offset my transmission gears and work better with my engines power band. Yesterday I took the front panels off of it, looked the whole car over and I am amazed. No rust in rails, no rust in doors, no rust in fenders, no rust in rear hatch panel. 5 rust locations and somehow the hatch itself on one side is completely missing from rust. I ordered the patch panels needed from KF Vintage JDM except the under battery tray rounded piece, which I got form Z Car Depot. Also ordered a new hatch from Resurrected Classics. So soon, the shell will be completely done. This is a long term project, but at least I have a home for the ATLAS, and finding this Z so rust free has made it an absolute keeper. I am thinking about the Rocket Bunny knockoff kit. 1400 bucks delivered is a good deal. Opinions on that? here are a few pics:


-
Who's Online 0 Members, 0 Anonymous, 867 Guests (See full list)
- There are no registered users currently online