Leaderboard


Popular Content
Showing content with the highest reputation on 07/17/24 in all areas
-
So far so good! I have 80 miles on the rebuild, and nothing too concerning yet other than a bit of valvetrain noise I'm hoping is resolved by a hot adjustment when I hit 100 miles. Currently the car is at the tint/PPF shop, so I'll get some "complete" pictures in the next week or two after I pick it up. It's been fun getting back into MS tuning after so long, and I'm finding a LOT of areas I needed to improve. So far I've: Upgraded from MS2/E 3.3.2 to 3.4.4. Swapped from don't include to include AFR (used a spreadsheet to convert VE). Swapped from the old to new baro mode (had to retune most of my VE). Dialed back and smoothed my timing, primarily in the idle and cruise areas. Increased my tps, rpm, and CLT/MAT lag factors. I must have had the scale backward in my head originally, as they were in the 90's and barely filtering. Leaned out my idle and cruise areas significantly. Started dialing in my MAT correction, based on Gollum's findings. With all of these changes the car is running better than ever. I've always had issues with low rpm and cruise throttle transition jerkiness, no matter what I did with AE. I suspect I was way to aggressive with my timing, and had some drastic transitions causing the behavior.1 point
-
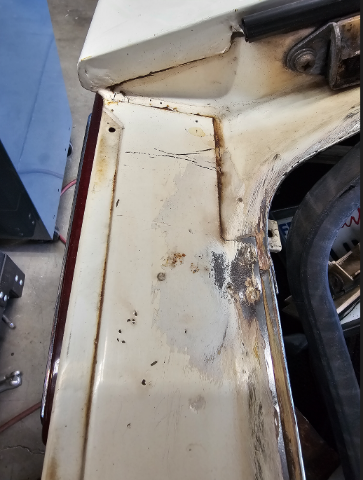
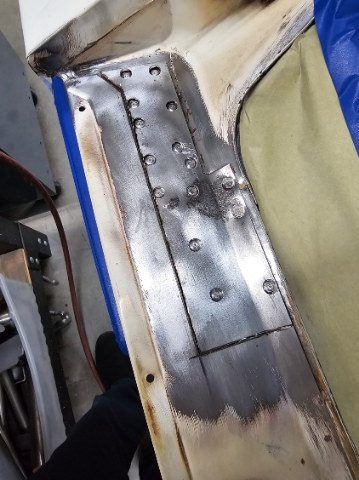
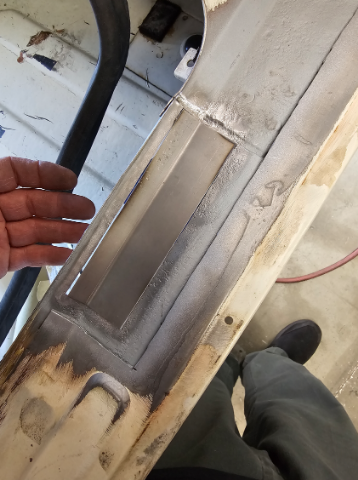
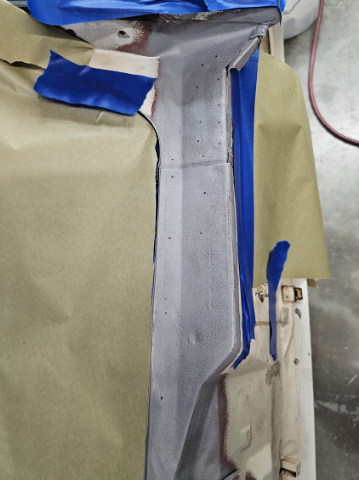
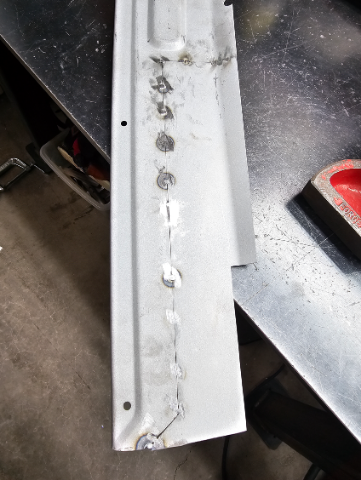
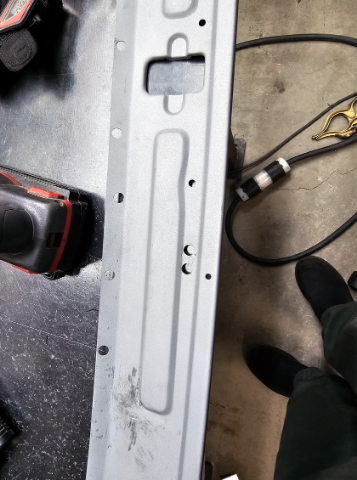
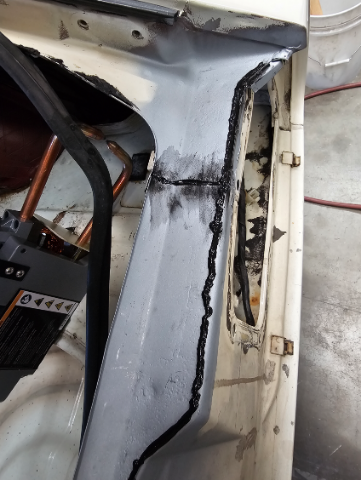
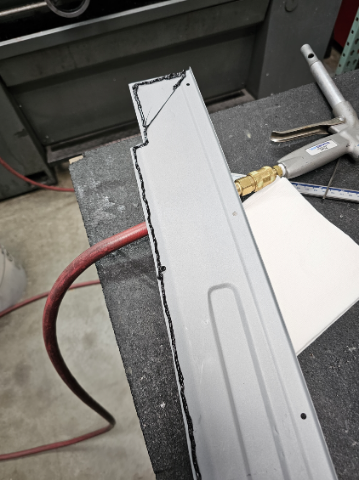
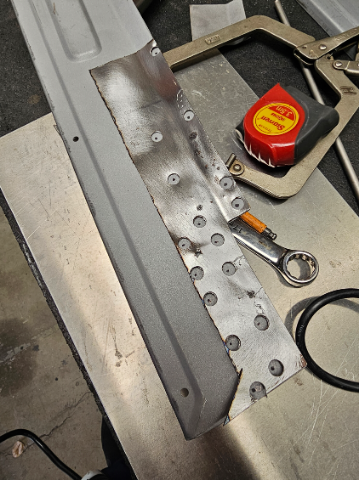
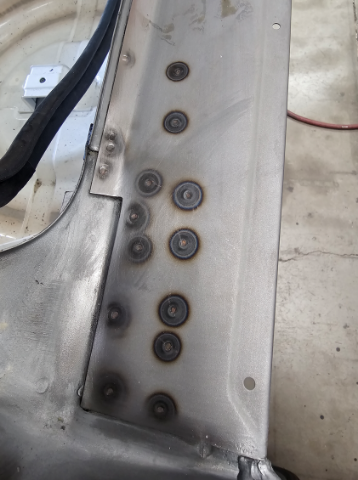
Last bit of body work was the hatch slam. I did not replace it entirely. After getting a Tabco replacement and then a classic fab replacement, I decided mine was not bad enough to justify changing the entire part out and reducing the originality as the replacement parts are not a 100% The original paint Drilling out the tack welds After drilling out the spot welds and cutting part of it away, I blasted the undelay of framing. There was some corrosion deepen than I liked so I cut it out and patched it. Then ground it back and sprayed it with a weld through primer Next I removed the rest of the panel, blasted it and replaced the little bit of rusted metal. Tig welded it and ground it flat along with some dolly work to make it flat after welding I then tig welded the old spot weld location and ground them flat so it looked like a new panel again. All the underserface of the rebuilt hatch slam got coated in weldthrough primer. I then applied a weld through seam sealer. I used the old pc of metal to mark the exact location of the original tack welds Final to tack weld it in. Looks great and factory original in my opinion
 1 point